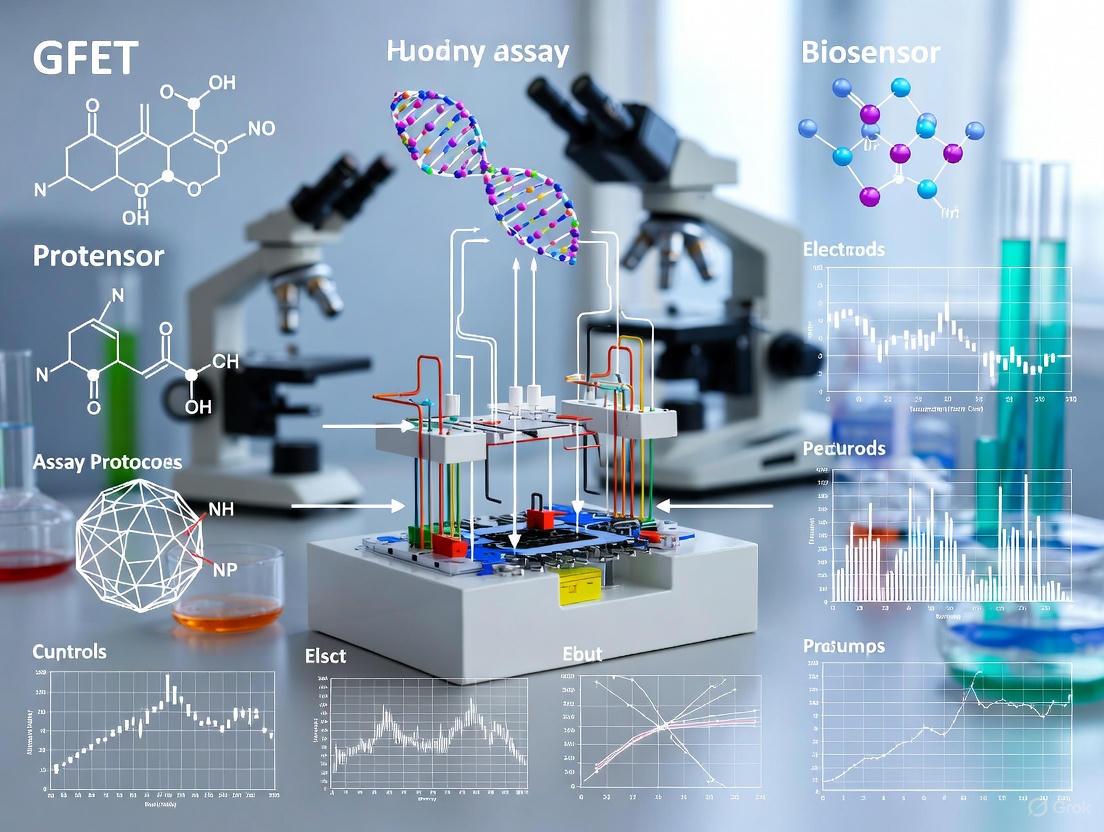
A Complete Guide to GFET Biosensor Assay Protocol: From Fundamental Principles to Clinical Translation
This article provides a comprehensive guide to Graphene Field-Effect Transistor (GFET) biosensor assays, tailored for researchers and drug development professionals.
A Complete Guide to GFET Biosensor Assay Protocol: From Fundamental Principles to Clinical Translation
Abstract
This article provides a comprehensive guide to Graphene Field-Effect Transistor (GFET) biosensor assays, tailored for researchers and drug development professionals. It covers the foundational principles of GFET operation, including charge transfer and electrostatic induction mechanisms. A detailed, step-by-step methodological protocol is presented, encompassing device fabrication, surface functionalization, and assay execution for detecting targets like nucleic acids, proteins, and viruses. The guide also addresses critical troubleshooting and optimization strategies for challenges such as Debye screening and non-specific binding. Finally, it outlines rigorous validation frameworks and performance benchmarking against established methods, positioning GFET biosensors as powerful tools for point-of-care diagnostics and personalized medicine.
Understanding GFET Biosensors: Principles, Structure, and Sensing Mechanisms
Graphene Field-Effect Transistors (GFETs) represent a revolutionary class of biosensors that leverage the exceptional electrical and structural properties of graphene for detecting biological molecules. A GFET functions as a three-terminal device where a graphene channel connects the source and drain electrodes, and its electrical conductance is modulated by a gate electrode [1]. The atomically thin nature of graphene makes its electrical properties exquisitely sensitive to surface binding events, allowing for label-free, real-time detection of analytes with high sensitivity and selectivity [2] [3]. This architecture is particularly suited for point-of-care (POC) diagnostics and healthcare monitoring, as it can be integrated into compact, portable, and potentially wearable devices [1].
Core Architectural Components and Operational Principles
Fundamental Device Structure
The fundamental architecture of a GFET biosensor consists of several key components working in concert. The source and drain electrodes are typically fabricated from metals like gold (Cr/Au) and are used to apply a source-drain voltage ((V{DS})) and measure the resulting current ((I{DS})) [1] [3]. The graphene channel, a single layer of carbon atoms in a hexagonal lattice, bridges the gap between these electrodes. This channel serves as the primary transduction element, where biorecognition events occur. The electrical properties of this graphene channel are controlled by a third terminal, the gate electrode, which can be configured in different ways (back-gate, top-gate, or liquid-gate) to apply a gate voltage ((V_G)) [3].
The Dirac Point and Electrical Modulation
A defining characteristic of the graphene channel in a GFET is its unique band structure, which features a point where the valence and conduction bands touch, known as the Dirac point [4]. The conductance of graphene is at its minimum at this point. Applying a gate voltage shifts the Fermi level, increasing the population of either holes (p-doping, for (VG < V{Dirac})) or electrons (n-doping, for (VG > V{Dirac})), thereby modulating the channel's conductivity [3]. The relationship between the drain-source current and the gate voltage is given by: [ I{DS} = gm (VG - V{Dirac}) ] where ( gm ) is the transconductance, a measure of the device's sensitivity [3]. When a target biomolecule binds to a receptor on the functionalized graphene surface, it alters the local electrostatic environment, effectively doping the graphene. This causes a measurable shift in the Dirac point ((V{Dirac})) and a change in (I_{DS}), which serves as the primary detection signal [4] [3].
Gating Configurations
The performance and applicability of a GFET biosensor are heavily influenced by its gating configuration. The table below compares the three primary architectures.
Table 1: Comparison of GFET Gating Configurations
| Gating Configuration | Description | Advantages | Disadvantages | Typical Applications |
|---|---|---|---|---|
| Back-Gated [3] | Gate electrode is beneath the substrate (e.g., heavily doped silicon). Insulating layer (e.g., SiO₂, Al₂O₃) separates gate from channel. | Simple fabrication, well-established with Si/SiO₂ substrates. | Requires high gate voltages; susceptible to Debye length screening in high ionic strength solutions. | Proof-of-concept sensing in low ionic strength buffers [3]. |
| Liquid-Gated [4] [3] | A reference electrode immersed in the analyte solution acts as the gate. | Superior electrostatic control, operates at low voltages, ideal for biological fluids. | Requires integration of a reference electrode and fluidic containment. | Primary choice for biosensing in physiological-like conditions [4]. |
| Top-Gated [3] | A gate dielectric and electrode are deposited on top of the graphene channel. | Can offer enhanced performance and stability. | Complex fabrication; can interfere with functionalization and analyte access. | Used in specialized, high-performance electronic devices. |
The following diagram illustrates the logical relationships and operational workflow in a standard liquid-gated GFET biosensor.
Quantitative Performance Data of GFET Biosensors
The sensitivity of GFET biosensors is quantified by their performance in detecting various analytes. The following table summarizes key metrics from recent research.
Table 2: Performance Metrics of GFET Biosensors for Various Analytes
| Target Analyte | Bioreceptor | Detection Mechanism | Limit of Detection (LoD) | Dynamic Range | Reference / Configuration |
|---|---|---|---|---|---|
| Streptavidin [4] | Biotin (on amine-functionalized graphene) | Dirac point shift | 0.1 nM | 0.1 nM - 1000 nM | Liquid-gate GFET |
| μ-opioid Ligand [3] | μ-opioid Receptor protein | Dirac point shift (conformational gating) | 10 pg/mL | Not specified | Back-gated GFET |
| Exosomes [3] | Antibodies | Charge accumulation on graphene | 0.1 μg/mL | 0.1 - 10 μg/mL | Back-gated GFET (in 0.001x PBS) |
| Interleukin-6 (IL-6) [3] | Antibodies | Wireless signal transmission | 12 pM | Not specified | Buried-gate GFET (in saliva) |
| Single-Stranded DNA [1] | Complementary DNA | Increased conductance (p-doping from negative charge) | Not specified | Not specified | GFET |
Experimental Protocol: Fabrication and Biofunctionalization of a Liquid-Gated GFET
This protocol details the steps for creating a functional GFET biosensor, from substrate preparation to measurement, with a focus on the liquid-gated configuration which is predominant in biological sensing [4] [3].
Materials and Reagents
Table 3: Research Reagent Solutions and Essential Materials
| Item Name | Function / Explanation | Example Specifications |
|---|---|---|
| CVD Graphene [2] [3] | The active sensing channel material. Provides high carrier mobility and large surface area. | Grown on copper foil, single-layer. |
| SiO₂/Si Substrate [1] [3] | Common support substrate; heavily doped Si can serve as a back-gate. | SiO₂ thickness: 90-300 nm. |
| Gold/Cr Electrodes [3] | Source and Drain contacts. Gold provides good conductivity and stability. | Cr (2-5 nm adhesion layer), Au (30-50 nm). |
| Cyclopropylamine (CPA) [4] | Precursor for plasma polymerization to create an amine-rich coating on graphene for biomolecule immobilization. | 99% purity. |
| Phosphate Buffered Saline (PBS) [2] | Washing buffer and medium for biological reactions. Maintains pH and ionic strength. | 0.01 M, pH 7.4. |
| 1-Ethyl-3-(3-dimethylaminopropyl)carbodiimide (EDC) and N-Hydroxysuccinimide (NHS) [3] | Crosslinking agents for activating carboxyl groups to form stable amide bonds with amine-containing bioreceptors. | Common surface chemistry reagents. |
| Specific Bioreceptors (e.g., Antibodies, DNA aptamers) [3] | Provides selectivity by binding specifically to the target analyte. | Immobilized on the functionalized graphene surface. |
Step-by-Step Methodology
Step 1: Substrate Preparation and Graphene Transfer
- Clean a SiO₂/Si substrate using acetone and isopropanol in an ultrasonic bath to remove organic contaminants, followed by oxygen plasma treatment to ensure a hydrophilic surface [2].
- Transfer a monolayer of Chemical Vapor Deposition (CVD) graphene onto the substrate using a standard wet-transfer process (e.g., with PMMA support).
- Pattern source and drain electrodes (e.g., Cr/Au) onto the graphene channel using photolithography or electron-beam lithography, followed by metal deposition and lift-off [3].
Step 2: Surface Functionalization of Graphene Channel
- Amine-functionalization via Plasma Polymerization: Place the GFET device in a plasma polymerization chamber. Introduce cyclopropylamine (CPA) vapor and initiate plasma to deposit a thin, amine-rich polymer coating onto the graphene surface. This coating provides reactive primary amine groups for subsequent bioconjugation [4].
- Alternative Functionalization with 4-Carboxybenzenediazonium: To create carboxyl groups, treat the graphene surface with 4-carboxybenzenediazonium tetrafluoroborate. This diazonium salt forms covalent bonds with the graphene lattice, presenting carboxylic acid sites [3].
Step 3: Immobilization of Bioreceptors
- If using a carboxyl-functionalized surface, activate the carboxyl groups with a fresh mixture of EDC and NHS (e.g., EDC/sNHS) in PBS for 30-60 minutes. This forms an active ester intermediate [3].
- Incubate the sensor with a solution containing the specific bioreceptor (e.g., antibody, receptor protein, or DNA aptamer). The amine groups on the bioreceptor will form stable amide bonds with the activated surface. A typical incubation is 1-2 hours at room temperature or overnight at 4°C.
- Rinse thoroughly with PBS to remove unbound receptors.
Step 4: Surface Blocking
- To minimize non-specific binding, incubate the functionalized GFET with a blocking agent. A common choice is 1% Bovine Serum Albumin (BSA) in PBS for 1 hour.
- Wash the device with PBS or deionized water to remove excess blocking agent, thereby reducing background noise [2].
Step 5: Electrical Measurement and Biosensing
- Setup: Mount the GFET in a measurement cell. For liquid-gating, insert a reference electrode (e.g., Ag/AgCl) into the analyte solution covering the channel. Connect the source, drain, and gate (reference electrode) to a parameter analyzer or a custom-built readout system [4].
- Baseline Measurement: Add a buffer solution (e.g., 0.01x PBS) to the cell. Sweep the liquid-gate voltage ((VG)) while measuring the drain-source current ((I{DS})) to obtain the initial transfer characteristic curve. Record the Dirac point voltage ((V_{Dirac, initial})).
- Sensing Experiment: Introduce the target analyte at a specific concentration into the measurement cell.
- Real-time Monitoring: Monitor the shift in the transfer curve or the change in (I{DS}) at a fixed (VG) over time. For quantitative analysis, obtain a new transfer curve after a stable signal is reached and record the new Dirac point ((V_{Dirac, final})).
- Calibration: Repeat steps 3-4 with varying concentrations of the analyte to build a calibration curve of Dirac point shift ((\Delta V_{Dirac})) versus analyte concentration.
The workflow for the fabrication and sensing protocol is summarized in the following diagram.
Graphene Field-Effect Transistor (GFET) biosensors represent a transformative class of analytical devices that leverage the exceptional electronic properties of graphene for label-free detection of biological molecules. The core operating principle hinges on the modulation of the Dirac point and channel conductance in response to biological binding events at the graphene surface. As a two-dimensional material composed of a single layer of sp²-hybridized carbon atoms, graphene exhibits a unique band structure where the valence and conduction bands connect at a single point known as the Dirac point. This distinctive electronic characteristic makes graphene extremely sensitive to its immediate surroundings, including changes in surface charge, external electric fields, and molecular adsorption [4] [5].
In a standard GFET configuration, the device consists of three terminals: source, drain, and gate electrodes, with graphene serving as the semiconducting channel material. When a constant voltage (V~DS~) is applied between the source and drain electrodes, the current flowing through the graphene channel (I~DS~) can be precisely modulated by applying a gate voltage (V~GS~) through a reference electrode in contact with an electrolyte solution. The resulting transfer characteristic curve typically exhibits a V-shape due to the ambipolar nature of graphene, with the Dirac point representing the minimum conductance point where the numbers of electrons and holes are equal [5]. The position of this Dirac point along the voltage axis is exceptionally responsive to surface potential changes, serving as the primary transduction mechanism for biosensing applications.
Theoretical Framework of Dirac Point Modulation
Electronic Properties of Graphene
Graphene's exceptional sensitivity stems from its linear dispersion relation and zero-bandgap semiconductor structure. The charge carriers in graphene behave as massless Dirac fermions, resulting in extraordinarily high carrier mobility that can exceed 200,000 cm²/V·s in pristine samples. This high mobility translates to high transconductance, making graphene a superior transducer compared to conventional semiconductor materials. The Fermi level (E~F~) of graphene can be readily shifted by applying a gate voltage (V~GS~) via a reference electrode or through the adsorption of charged biomolecules, thereby altering the conductance of the GFET device [1].
The conductance of the graphene channel follows the relationship:
[ G = \frac{W}{L} \cdot e \cdot n \cdot \mu ]
Where W and L represent the width and length of the channel, e is the electron charge, n is the charge carrier density, and μ is the carrier mobility. Biomolecular binding events effectively modulate the local carrier density n, producing measurable changes in channel conductance [1].
Dirac Point Shift Mechanism
When biomolecules bind to the functionalized graphene surface, they introduce surface charges that electrostatically dope the graphene channel, shifting the Fermi level and consequently altering the gate voltage required to reach the charge neutrality point (Dirac point). For instance, the binding of negatively charged single-stranded DNA (ssDNA) to the surface of a p-type graphene channel increases electron concentration, thereby increasing channel conductance and producing a measurable shift in the Dirac point voltage [1].
The magnitude of the Dirac point shift (ΔV~Dirac~) relates directly to the surface potential change (Δψ) according to:
[ \Delta V{Dirac} = \frac{C{q}}{C{q} + C{dl}} \cdot \Delta \psi ]
Where C~q~ represents the quantum capacitance of graphene and C~dl~ is the double-layer capacitance at the electrolyte-graphene interface [5]. This relationship forms the fundamental basis for quantitative biosensing using GFET platforms.
Experimental Protocols for GFET Biosensing
Protocol 1: Functionalization for Protein Detection (Streptavidin-Biotin Model)
Principle: This protocol details the amine-functionalization of graphene surfaces via plasma polymerization for the specific detection of streptavidin-biotin binding interactions, serving as a model protein detection system [4].
Materials:
- CVD-grown graphene on appropriate substrate
- Cyclopropylamine monomer for plasma polymerization
- Biotin solution (prepared in suitable buffer)
- Streptavidin solutions of varying concentrations (0.1 nM to 1000 nM)
- Phosphate Buffered Saline (PBS) for washing and dilution
- Liquid-gate field-effect transistor setup with reference electrode
Procedure:
- Graphene Surface Activation: Transfer CVD graphene onto SiO~2~/Si substrate with pre-patterned source/drain electrodes (Ti/Au: 5 nm/150 nm).
- Amine Functionalization: Introduce graphene device into plasma polymerization chamber with cyclopropylamine monomer. Apply RF power (e.g., 20-50 W) for specified duration (typically 2-5 minutes) to create amine-rich polymer coatings on graphene surface.
- Biotin Conjugation: Immerse functionalized device in biotin solution (1 mM in PBS, pH 7.4) for 2 hours at room temperature to facilitate covalent attachment through amine-reactive chemistry.
- Blocking: Treat device with ethanolamine solution (1 M, pH 8.5) for 30 minutes to quench unreacted active sites.
- Measurement Setup: Install functionalized GFET in liquid measurement cell with Ag/AgCl reference electrode. Apply constant V~DS~ (typically 10-100 mV) while sweeping V~GS~ from -0.6 V to 0.9 V with slow sweeping speed (20 mV/s) to minimize hysteresis.
- Baseline Measurement: Record transfer characteristics (I~DS~ vs V~GS~) in pure PBS buffer to establish baseline Dirac point position.
- Analyte Exposure: Introduce streptavidin solutions of increasing concentration (0.1 nM, 1 nM, 10 nM, 100 nM, 1000 nM) sequentially into measurement cell.
- Data Acquisition: After 15-minute incubation for each concentration, measure transfer characteristics and record corresponding Dirac point shifts.
- Data Analysis: Plot Dirac point voltage shift versus streptavidin concentration to establish calibration curve [4].
Troubleshooting Notes:
- Ensure slow gate voltage sweep rates (20 mV/s) to minimize hysteresis effects
- Maintain consistent incubation times between measurements
- Verify functionalization success through Raman spectroscopy or XPS analysis
Protocol 2: Cytokine Detection in Physiological Media
Principle: This protocol describes aptamer-functionalized GFET biosensors with polyethylene glycol (PEG) isolation layers for specific detection of cytokines (TNF-α, IL-6) in undiluted physiological media, enabling direct biomarker detection in clinically relevant samples [6].
Materials:
- CVD graphene on SiO~2~/Si substrate with Ti/Au electrodes (2 nm/38 nm)
- 1-Pyrenebutyric acid N-hydroxysuccinimide ester (PASE)
- NH~2~-PEG-COOH (1000 Da and 2000 Da)
- EDC•HCl and NHS for carboxyl group activation
- Ethanolamine for blocking
- TNF-α and IL-6 specific aptamers
- Artificial sweat and lavage fluid as physiological media
- Cytokine standards (TNF-α, IL-6) for calibration
Procedure:
- Device Fabrication: Pattern drain-source and on-chip gate electrodes onto SiO~2~ wafers using Ti/Au deposition (2 nm/38 nm). Transfer monolayer CVD graphene onto drain-source electrode to create conducting channel (50 μm width).
- PASE Modification: Incubate graphene channel with 5 mM PASE solution in ethanol for 2 hours at room temperature to create π-π stacking interaction.
- PEG Immobilization: Treat PASE-functionalized device with NH~2~-PEG-COOH solution (10 mM in PBS) for 4 hours to create amide bonds with PASE NHS esters.
- Aptamer Conjugation:
- Activate terminal carboxyl groups of PEG with EDC/NHS mixture (100 mM/50 mM in MES buffer, pH 6.0) for 30 minutes
- Incubate with aptamer solution (1 μM in PBS, pH 7.4) for 12 hours at 4°C
- Block unreacted sites with ethanolamine (1 M, pH 8.5) for 1 hour
- Validation Measurements:
- Confirm PASE functionalization via Raman spectroscopy (appearance of D band at ~1350 cm⁻¹)
- Verify aptamer immobilization using energy dispersive spectroscopy (detection of phosphorus and nitrogen)
- Record transfer characteristics after each modification step to monitor Dirac point evolution
- Biosensor Measurement:
- Setup GFET in undiluted physiological media (artificial sweat or lavage fluid)
- Apply constant V~DS~ (50 mV) and sweep V~GS~ from -0.5 V to 0.5 V (20 mV/s)
- Establish baseline in target-free media
- Introduce cytokine standards of increasing concentration (0.1 pM to 100 pM)
- Record Dirac point shifts after 10-minute incubation for each concentration
- Data Analysis: Construct dose-response curves for TNF-α and IL-6 detection, determining limit of detection (LOD) from 3σ of baseline noise [6].
Critical Considerations:
- The PEG layer is essential for reducing nonspecific adsorption in complex media
- Higher molecular weight PEG (2000 Da) provides better screening than 1000 Da PEG
- Functionalization success is confirmed by progressive Dirac point shifts during modification
Protocol 3: Multiplexed Ion Sensing Platform
Principle: This protocol outlines the implementation of a high-density graphene sensor array (16×16 devices) functionalized with different ion-selective membranes (ISMs) for simultaneous detection of multiple ions (K⁺, Na⁺, Ca²⁺) in complex solutions, leveraging statistical analysis to overcome device-to-device variation [7].
Materials:
- Graphene sensor array chip on glass wafer (4-inch, 200 μm thick)
- Ion-selective membranes (ISMs) for K⁺, Na⁺, and Ca²⁺
- Material jetting printer for precise membrane deposition
- Custom-built PCB with microcontroller for high-speed readout
- Low-profile Ag/AgCl reference electrode
- Standard solutions of KCl, NaCl, and CaCl₂
- SU-8 passivation material
Procedure:
- Array Fabrication: Fabricate 256 sensing units (16×16 array) with each unit containing 30 × 30 μm graphene channel with Ti/Au source/drain electrodes (5 nm/150 nm).
- Device Passivation: Spin-coat 500 nm SU-8 passivation layer and pattern to create openings only at graphene channel sensing areas.
- Membrane Deposition: Using material jetting printer, deposit different ISMs onto specific sensor subsets:
- Sodium ionophore for Na⁺ sensors
- Valinomycin-based membranes for K⁺ sensors
- Calcium ionophore for Ca²⁺ sensors
- System Integration: Mount sensor chip on custom PCB with microcontroller for automated measurement of all 256 devices.
- Measurement Configuration:
- Dip sensor array into 10 ml testing solution with reference electrode
- Set V~DS~ to constant value (typically 50-100 mV)
- Sweep V~GS~ from -0.6 V to 0.9 V (20 mV/s) for all devices
- Measure complete I-V characteristics for all working sensors
- Data Processing:
- Filter non-functional pixels using predefined criteria (yield typically >80%)
- Extract Dirac point position for each sensor from transfer characteristics
- Apply profile-matching calibration to leverage sensor redundancy
- Implement Random Forest algorithm for ion classification and concentration quantification
- Performance Validation:
- Test sensors in standard solutions with varying ion concentrations
- Assess sensitivity, reversibility, and detection range for each ion type
- Evaluate classification accuracy in mixed-ion solutions [7].
Advantages:
- Device-to-device variation is leveraged through statistical analysis
- Sensor redundancy improves measurement reliability
- Machine learning enhances classification accuracy in complex solutions
Performance Data and Comparative Analysis
Quantitative Biosensing Performance
Table 1: Performance Summary of GFET Biosensors for Different Target Analytes
| Target Analyte | Functionalization Method | Detection Limit | Dynamic Range | Detection Mechanism | Reference |
|---|---|---|---|---|---|
| Streptavidin | Plasma polymerization with cyclopropylamine | 0.1 nM | 0.1-1000 nM | Dirac point shift | [4] |
| TNF-α | Aptamer with PEG isolation layer | 0.13 pM | 0.1-100 pM | Dirac point shift | [6] |
| IL-6 | Aptamer with PEG isolation layer | 0.20 pM | 0.1-100 pM | Dirac point shift | [6] |
| Sodium ions (Na⁺) | Ion-selective membranes | Picomolar range | 1 μM - 100 mM | Leftward I-V shift | [7] [8] |
| Potassium ions (K⁺) | Ion-selective membranes | Picomolar range | 1 μM - 100 mM | Leftward I-V shift | [7] |
| Calcium ions (Ca²⁺) | Ion-selective membranes | Picomolar range | 1 μM - 100 mM | Leftward I-V shift | [7] |
| Single-stranded DNA | Not specified | Picomolar range | Not specified | Conductance change | [8] |
Dirac Point Shift Measurements
Table 2: Experimental Dirac Point Shifts Under Various Conditions
| Experimental Condition | Functionalization | Average Dirac Point Shift | Measurement Environment | Significance | |
|---|---|---|---|---|---|
| PASE modification | 1-pyrenebutyric acid N-hydroxysuccinimide ester | Increase from 24 mV to 153 mV | Air/PBS | Confirms successful graphene functionalization | [6] |
| PEG immobilization | NH₂-PEG-COOH on PASE | Decrease by 57 mV (from 153 mV to 96 mV) | Air/PBS | Verifies PEG layer attachment | [6] |
| Aptamer conjugation | TNF-α specific aptamer | Decrease from 96 mV to 76 mV | Air/PBS | Confirms aptamer immobilization | [6] |
| Streptavidin (100 nM) | Aminated surface with biotin | Significant positive shift | PBS buffer | Demonstrates protein detection capability | [4] |
| pH variation | Bare graphene | Minimal shift | Electrolyte solutions | Confirms pH insensitivity of graphene | [5] |
Signaling Pathways and Experimental Workflows
GFET Biosensing Mechanism Diagram
Title: GFET Biosensing Signal Transduction Pathway
Aptamer-Based GFET Functionalization Workflow
Title: Surface Functionalization Process for Aptamer-Based GFET Biosensors
Research Reagent Solutions
Table 3: Essential Research Reagents for GFET Biosensor Development
| Reagent/Material | Function | Application Examples | Key Considerations | |
|---|---|---|---|---|
| CVD Graphene | Conducting channel material | All GFET biosensors | Quality affects carrier mobility and device uniformity | [7] [6] |
| Cyclopropylamine | Plasma polymerization monomer | Amine-rich surface functionalization | Enables subsequent biomolecule conjugation | [4] |
| PASE (1-Pyrenebutyric acid N-hydroxysuccinimide ester) | Pyrene-based linker | Aptamer-based biosensors | Provides π-π stacking with graphene surface | [6] |
| Polyethylene Glycol (PEG) | Anti-fouling isolation layer | Detection in physiological media | Reduces nonspecific adsorption; enhances Debye length | [6] |
| Ion-Selective Membranes (ISMs) | Ion recognition layer | Multiplexed ion sensing | Provides selectivity for target ions (Na⁺, K⁺, Ca²⁺) | [7] |
| Specific Aptamers | Biomolecular recognition elements | Cytokine detection | Provides high specificity for target biomarkers | [6] |
| EDC/NHS | Carboxyl group activation | Covalent immobilization | Facilitates amide bond formation with biomolecules | [6] |
Graphene Field-Effect Transistor (GFET) biosensors represent a cutting-edge technology for the label-free, highly sensitive detection of biological molecules. Their operation hinges on two fundamental physical mechanisms: charge transfer and electrostatic induction [3]. The ability of a biosensor to transduce a biological binding event, such as an antibody capturing a specific virus, into a measurable electrical signal is the cornerstone of its functionality. In GFETs, this transduction is achieved by modulating the charge carrier density within the graphene channel. Charge transfer involves the direct donation or acceptance of electrons between the captured analyte and the graphene, effectively doping the material [3]. In contrast, electrostatic induction operates through the gating effect of charged molecules, which create an electric field that rearranges charge carriers in the graphene without a permanent exchange of electrons [1]. Distinguishing between these mechanisms is critical for researchers and drug development professionals, as it influences sensor design, surface functionalization, data interpretation, and the ultimate performance metrics of the biosensor, including its sensitivity and limit of detection. This document details the experimental protocols for differentiating these mechanisms and their application in a standardized GFET biosensor assay.
Core Sensing Mechanisms and Experimental Differentiation
The electrical conductance in a GFET follows a characteristic "V"-shaped curve when the drain-source current ((I{DS})) is plotted against the gate voltage ((VG)). The minimum of this curve is known as the Dirac or Charge Neutrality Point (CNP), and its shift along the voltage axis is the primary signal indicating a binding event [3] [1]. The direction and nature of this shift can be used to identify the dominant sensing mechanism.
Charge Transfer occurs when there is a direct physical exchange of electrons between the captured analyte and the graphene lattice. This results in a permanent, stable change in the charge carrier density of graphene. If the analyte donates electrons to graphene (n-doping), the Dirac point shifts negatively. Conversely, if the analyte accepts electrons from graphene (p-doping), the Dirac point shifts positively [3]. This mechanism is akin to chemical doping and the signal is less susceptible to screening in high ionic strength solutions once the charge has transferred.
Electrostatic Induction, also referred to as gating effect, does not involve a permanent electron transfer. Instead, a charged analyte bound to the surface acts like a local gate terminal, creating an electric field that electrostatically influences the graphene channel [3] [1]. A positively charged analyte will attract electrons to the channel, causing a negative Dirac point shift indicative of electron accumulation. A negatively charged analyte will repel electrons, causing a positive Dirac point shift indicative of hole accumulation. The signal from this mechanism can be significantly screened by ions in the buffer solution, particularly at high concentrations, due to the formation of an Electric Double Layer (EDL) [9].
Table 1: Differentiating Charge Transfer and Electrostatic Induction in GFETs.
| Feature | Charge Transfer | Electrostatic Induction |
|---|---|---|
| Fundamental Interaction | Direct electron donation/acceptance (chemical doping) | Coulombic interaction via electric field (gating) |
| Dirac Point Shift (Positive Analyte) | Negative (n-doping) | Negative (electron accumulation) |
| Dirac Point Shift (Negative Analyte) | Positive (p-doping) | Positive (hole accumulation) |
| Signal Stability | Permanent and stable after binding | Reversible; depends on continued presence of charged analyte |
| Influence of Ionic Strength | Lower influence post-binding | High influence; signal screened at high ionic strength |
| Effective Debye Length | Less critical | Critical; detection must occur within this distance [9] |
The following diagram illustrates the workflow for differentiating these two core mechanisms in a GFET biosensor experiment.
Detailed Experimental Protocol: GFET Biosensor Fabrication and Measurement
GFET Biosensor Fabrication and Functionalization
This protocol outlines the steps for creating a functional GFET biosensor, from substrate preparation to bioreceptor immobilization, adapted from multiple studies [3] [10].
Materials:
- Substrate: Heavily doped p-type Silicon wafer with a thermally grown 285 nm SiO₂ layer.
- Graphene: Monolayer graphene film grown by Chemical Vapor Deposition (CVD) on a copper foil.
- Electrodes: Photolithographically patterned source/drain electrodes (e.g., 10 nm Ti / 50 nm Au).
- Linker Molecule: 1-pyrenebutyric acid N-hydroxysuccinimide ester (PBASE) in dimethylformamide (DMF).
- Bioreceptor: Target-specific antibodies (e.g., anti-CD63 for exosomes) in phosphate-buffered saline (PBS).
- Blocking Agent: 1M Glycine or Bovine Serum Albumin (BSA) solution in PBS.
- Buffers: PBS (pH 7.4), deionized (DI) water.
Procedure:
- Substrate Preparation: Clean the Si/SiO₂ substrate in an oxygen plasma cleaner for 5-10 minutes to create a hydrophilic surface and remove organic contaminants.
- Graphene Transfer: Transfer the CVD-grown graphene onto the prepared substrate using a wet transfer process (e.g., using poly(methyl methacrylate) (PMMA) as a support layer and etching the copper foil with ammonium persulfate). Subsequently, remove the PMMA layer by soaking in acetone and critical point dry to avoid cracking [9].
- Electrode Patterning: Define the source and drain electrode regions using standard photolithography. Deposit the metal layers (e.g., Ti/Au) via electron-beam evaporation and lift-off in acetone.
- Channel Patterning: Use photolithography to define the graphene channel and remove excess graphene with an oxygen plasma etch.
- Surface Functionalization (Non-covalent): a. PBASE Attachment: Pipette a 10 mM solution of PBASE in DMF onto the graphene channel and incubate for 1-2 hours at room temperature. This allows the pyrene group to π-π stack onto the graphene surface [10]. b. Washing: Rinse the device thoroughly with DMF followed by DI water to remove any unbound PBASE.
- Bioreceptor Immobilization: a. Antibody Conjugation: Apply a solution of the specific antibody (e.g., 10 µg/mL in PBS) to the PBASE-functionalized channel. The NHS ester group of PBASE will react with primary amines on the antibody. Incubate for 1 hour. b. Washing: Rinse with PBS to remove unbound antibodies.
- Surface Blocking: Incubate the sensor with a 1M glycine or 1% BSA solution for 1 hour to passivate any remaining reactive NHS ester sites, thereby minimizing non-specific binding. Perform a final wash with PBS [10].
Quality Control:
- Raman Spectroscopy: Confirm the quality of the transferred graphene and the success of functionalization. The presence of a D peak after PBASE attachment indicates successful functionalization without excessive defect creation [10].
- Electrical Characterization: Verify the transistor operation by measuring the transfer curve ((I{DS}) vs. (VG)) in a dry state or in PBS, confirming the characteristic ambipolar Dirac curve.
Liquid-Gated GFET Measurement and Data Analysis
This protocol describes the electrical measurement of the functionalized GFET in a liquid environment, which is essential for biosensing applications [4] [1].
Materials:
- Functionalized GFET Device: From the previous protocol.
- Liquid Cell/Probe Station: A setup that allows precise electrical contact and containment of liquid analyte on the channel.
- Gate Electrode: Ag/AgCl reference electrode inserted into the solution.
- Buffer Solution: Phosphate Buffered Saline (PBS), 1x concentration.
- Analyte Solutions: Serial dilutions of the target molecule (e.g., exosomes, streptavidin) in PBS.
- Source Meter/Parameter Analyzer: Semiconductor parameter analyzer or a combination of source meters to apply and measure voltages and currents.
Procedure:
- Setup: Mount the GFET device in the liquid cell. Connect the source and drain electrodes to the parameter analyzer. Place the Ag/AgCl reference electrode in the cell, which will serve as the liquid gate.
- Baseline Measurement: a. Fill the microfluidic chamber with the running buffer (e.g., 1x PBS). b. Set the drain-source voltage ((V{DS})) to a constant value (e.g., 10-100 mV). c. Sweep the liquid-gate voltage ((V{LG})) applied to the reference electrode across a range that captures the Dirac point (e.g., from -0.5 V to +0.5 V vs. Ag/AgCl for PBS) [4]. d. Record the resulting drain-source current ((I{DS})) to obtain the baseline transfer curve. Note the Dirac point voltage ((V{Dirac, baseline})).
- Analyte Introduction and Measurement: a. Introduce the lowest concentration of the target analyte solution into the microfluidic chamber. b. Allow the solution to incubate for a defined period (e.g., 30 minutes) to enable specific binding to the immobilized bioreceptors [10]. c. Without washing, perform the transfer curve sweep again under identical conditions ((V{DS}), (V{LG}) sweep range). d. Record the new Dirac point voltage ((V_{Dirac, analyte})). e. Repeat steps a-d for increasing concentrations of the analyte.
Data Analysis:
- Dirac Point Tracking: For each concentration, calculate the Dirac point shift: ΔVDirac = VDirac, analyte - V_Dirac, baseline.
- Mechanism Identification:
- Refer to Table 1. Correlate the sign of the ΔV_Dirac with the known charge or doping character of the analyte.
- Perform experiments at different buffer ionic strengths. A signal that diminishes significantly with increasing ionic strength suggests a strong electrostatic induction component [9].
- Calibration Curve: Plot the ΔV_Dirac against the logarithm of the analyte concentration. This curve can be used to determine the sensor's limit of detection (LoD), dynamic range, and sensitivity for quantitative analysis.
Table 2: Exemplary Quantitative Data from GFET Biosensing Studies.
| Target Analyte | Bioreceptor | Reported LoD | Dirac Point Shift (ΔV_Dirac) | Dominant Mechanism Inferred |
|---|---|---|---|---|
| Streptavidin [4] | Biotin (via amine-rich coating) | 0.1 nM | Not Specified (Concentration-dependent shift observed) | Electrostatic Induction (Negative charge of streptavidin) |
| Exosomes [10] | Anti-CD63 Antibody | 0.1 μg/mL | Shift to more positive V_G (at low ionic strength) | Electrostatic Induction (Negative charge of exosomes) |
| Naltrexone [3] | μ-opioid Receptor | 10 pg/mL | Shift to more negative V_G | Charge Transfer (Conformational gating effect) |
The Scientist's Toolkit: Essential Research Reagents and Materials
Table 3: Key materials and reagents for GFET biosensor development and their functions.
| Item | Function / Role in Assay |
|---|---|
| CVD Graphene on Cu foil | Provides the high-mobility, atomically thin semiconducting channel material for the FET [9]. |
| Si/SiO₂ Wafer (285 nm oxide) | Serves as the standard substrate; the SiO₂ thickness is optimized for optical visibility and back-gating. |
| 1-pyrenebutyric acid N-hydroxysuccinimide ester (PBASE) | A heterobifunctional linker for non-covalent functionalization; pyrene group π-stacks to graphene, NHS ester reacts with bioreceptors [10]. |
| Target-Specific Antibodies | Biorecognition elements that provide specificity by binding to the target analyte (e.g., anti-CD63 for exosomes) [10]. |
| Phosphate Buffered Saline (PBS) | A standard isotonic buffer solution that maintains pH and ionic strength, preserving biomolecule activity. |
| Ag/AgCl Reference Electrode | Provides a stable and reproducible potential for the liquid gate in electrolyte solutions [4] [1]. |
| Glycine or Bovine Serum Albumin (BSA) | Used as a blocking agent to passivate unreacted sites on the functionalized surface, reducing non-specific binding [10]. |
A rigorous understanding of charge transfer and electrostatic induction is indispensable for the advancement of GFET biosensors. While electrostatic gating is frequently the dominant mechanism for charged biomolecules in buffer, charge transfer can play a significant or even primary role, especially for molecules that interact strongly with the graphene lattice. The experimental and analytical protocols detailed herein provide a framework for researchers to deconvolute these mechanisms, optimize their sensor designs—for instance, by tailoring the Debye length or selecting appropriate linkers—and accurately interpret electrical signals. As the field progresses towards commercial point-of-care diagnostics, mastering these fundamental principles will be key to developing robust, sensitive, and reliable graphene-based biosensing assays.
The Role of the Electric Double Layer (EDL) and Quantum Capacitance in Liquid-Gated Configurations
In the development of graphene field-effect transistor (GFET) biosensors, the liquid-gated configuration has emerged as a dominant design for biological sensing. The exceptional sensitivity of this configuration stems from the intricate interplay of two fundamental interfacial phenomena: the Electric Double Layer (EDL) and Quantum Capacitance. The EDL, a nanometer-thick ion-rich structure, forms at the interface between the graphene surface and the liquid electrolyte when a gate potential is applied. This layer acts as a nanoscale capacitor, transducing biological binding events into electrical signals. Concurrently, the quantum capacitance of graphene, a direct consequence of its low density of states and unique band structure, governs how much the Fermi level shifts for a given surface charge. The combined series capacitance of the EDL and the quantum capacitance ultimately determines the overall transconductance and sensitivity of the GFET biosensor. This application note provides a detailed theoretical framework and practical protocols for researchers investigating and optimizing these critical parameters in liquid-gated GFET biosensors for drug development and diagnostic applications.
Theoretical Foundations
The Electric Double Layer (EDL) at Graphene-Electrolyte Interfaces
The EDL is a nanometer-scale structure that forms at the solid-liquid interface in electrochemical systems. When a gate voltage is applied to a liquid-gated GFET, ions in the electrolyte solution reorganize to screen the electric field, creating the EDL [11]. Classical models describe its evolution:
- Helmholtz Model (1879): Conceptualizes the EDL as a rigid, molecular capacitor with a single layer of counterions.
- Gouy-Chapman Model: Introduces a diffuse layer of ions governed by Poisson-Boltzmann statistics.
- Gouy-Chapman-Stern (GCS) Model: Integrates both a compact Stern layer (Helmholtz-like) and a diffuse layer (Gouy-Chapman-like), providing the most realistic representation [11].
In GFET biosensors, the EDL's extreme thinness (on the order of nanometers) means that biological binding events occurring within this region induce a significant change in the local electrostatic potential, effectively gating the graphene channel. Recent research using 3D atomic force microscopy has revealed that EDLs are not uniform over flat surfaces but dynamically reconfigure around nanoscale surface features like adsorbed clusters or biomolecules, exhibiting patterns such as "bending," "breaking," and "reconnecting" around these nucleation sites [12]. This nonuniformity is critical for understanding the sensitivity of biosensors where target biomarkers bind to functionalized surfaces.
Quantum Capacitance in Graphene
Quantum capacitance (CQ) is a fundamental property of low-dimensional materials like graphene, arising from the finite density of electronic states near the Fermi level. It is defined as CQ = e² * D(E), where e is the electron charge and D(E) is the density of states at energy E. Unlike conventional 3D semiconductors, graphene's linear dispersion relation near the Dirac point results in a low and voltage-dependent density of states. Consequently, its quantum capacitance is relatively small and varies linearly with the applied gate voltage: CQ ∝ |VG - VDirac|. In a liquid-gated GFET, the total gate capacitance (Ctotal) is a series combination of the EDL capacitance (CEDL) and the graphene quantum capacitance (CQ):
1/Ctotal = 1/CEDL + 1/CQ
Because CQ is finite and small in graphene, it does not dominate the series capacitance. This means that changes in the surface potential induced by biomarker binding are not perfectly screened, leading to a significant shift in the Dirac point and a measurable change in the channel conductance [3]. This interplay is what makes GFETs exceptionally sensitive biosensing platforms.
The following tables summarize key quantitative data related to EDL capacitance and GFET performance parameters from recent literature.
Table 1: Experimental EDL Capacitance Values from Various Systems
| Material / System | EDL Capacitance (μF/cm²) | Measurement Context | Citation |
|---|---|---|---|
| H-diamond / LSZO Li+ solid electrolyte | Up to 14 | EDL Transistor (EDLT), Hole accumulation | [13] |
| H-diamond / Ionic Liquid | ~2.1 | EDL Transistor (EDLT), Reference value | [13] |
| Ionic Liquid Systems | Several µF/cm² | Typical range for liquid electrolytes | [11] |
Table 2: GFET Biosensor Performance with Liquid Gating
| Target Analyte | Gate Configuration | Key Performance Metric | Value | Citation |
|---|---|---|---|---|
| Liquid Conductivity | Liquid Gate (AC) | Dirac Point Shift vs. Conductivity (ΔVGS/ΔS) | -0.00033 V/μS | [14] |
| Liquid Conductivity | Liquid Gate (DC) | Dirac Point Shift vs. Conductivity (ΔVGS/ΔS) | -0.00023 V/μS | [14] |
| μ-opioid receptor ligand (Naltrexone) | Back-Gate | Limit of Detection (LoD) | 10 pg mL⁻¹ | [3] |
| Interleukin-6 (IL-6) in saliva | Planar Buried-Gate | Limit of Detection (LoD) | 12 pM | [3] |
| Small Rho GTPases (in cell lysate) | AuNis-modified HEMT | Limit of Detection (LoD) | 3 × 10⁻¹⁶ g/mL | [15] |
Experimental Protocols
Protocol: Characterizing EDL and Quantum Capacitance in Liquid-Gated GFETs
This protocol details the steps for electrically characterizing a fabricated GFET biosensor to extract parameters related to the EDL and quantum capacitance.
I. Research Reagent Solutions & Materials
Table 3: Essential Materials for GFET Characterization
| Item | Function / Explanation |
|---|---|
| Fabricated GFET Chip | The core sensing element, typically with source/drain electrodes and a graphene channel. |
| Liquid Gate Electrode | An inert reference electrode (e.g., Ag/AgCl or Pt wire) immersed in the electrolyte to apply the gate potential. |
| Phosphate Buffered Saline (PBS) | A standard physiological electrolyte (e.g., 0.01x to 1x concentration) to create the solid-liquid interface. |
| Source-Measure Units (SMUs) | Precision instruments (e.g., Keithley) to apply and measure source-drain voltage/current and gate voltage. |
| Probe Station & Shielded Enclosure | To make electrical contact with the GFET and shield it from ambient electromagnetic noise. |
| Microfluidic Chamber (optional) | To precisely deliver and contain small volumes of electrolyte and analyte solutions over the GFET channel. |
II. Workflow
III. Step-by-Step Procedure
Device Setup & Immersion:
- Mount the fabricated GFET chip onto a probe station and establish electrical connections to the source and drain electrodes using micromanipulated probes.
- Place a liquid gate electrode (e.g., Ag/AgCl wire) into the measurement chamber.
- Carefully introduce a controlled volume of electrolyte solution (e.g., 0.01x PBS) onto the GFET surface, ensuring the graphene channel and gate electrode are fully immersed.
Output Characteristic Measurement:
- Using a source-measure unit, set the liquid gate voltage (VG) to a constant value (e.g., 0 V).
- Sweep the drain-source voltage (VDS) across a small range, typically from -100 mV to +100 mV.
- Record the resulting drain-source current (IDS) at each VDS step. This verifies the ohmic nature of the contacts and the basic functionality of the transistor.
Transfer Characteristic Measurement:
- Set VDS to a constant, low voltage (e.g., 10-100 mV) to operate in the linear regime and minimize Joule heating.
- Sweep the liquid gate voltage (VG) through a range that encompasses the charge neutrality point (e.g., from -0.5 V to +0.5 V, depending on the electrolyte).
- Record the IDS simultaneously at each VG step. This
IDS vs. VGcurve is the transfer characteristic.
Dirac Point and Transconductance Extraction:
- Identify the Dirac point (VDirac) from the transfer characteristic plot, which is the gate voltage corresponding to the minimum IDS.
- Calculate the transconductance,
gm = dIDS/dVG, which represents the amplification gain of the device. The maximum gm is a key figure of merit.
Capacitance-Voltage Profiling:
- Using an impedance analyzer or a capacitance-voltage meter, perform a C-V measurement on the liquid-gated structure.
- With the GFET channel as one terminal and the liquid gate as the other, apply an AC voltage signal superimposed on a DC bias (VG) that is swept.
- Measure the capacitance (Ctotal) as a function of VG. The resulting C-V curve will show a characteristic "V" shape, with a minimum near VDirac, directly reflecting the voltage dependence of the quantum capacitance.
IV. Data Analysis and Interpretation
- The shift in VDirac (ΔVDirac) between measurements in pure buffer and in analyte-spiked buffer is the primary signal for biosensing. A positive ΔVDirac indicates hole doping (e.g., from a negatively charged analyte), while a negative shift indicates electron doping [3] [16].
- From the C-V data, the quantum capacitance CQ can be deconvoluted using the known or independently measured EDL capacitance (CEDL) and the series capacitance formula.
Protocol: Functionalizing GFETs for Biosensing with EDL Optimization
This protocol outlines the surface functionalization of GFETs to ensure biological recognition events occur within the EDL for optimal signal transduction.
I. Workflow
II. Step-by-Step Procedure
Graphene Surface Activation:
- Covalent Functionalization: Incubate the GFET in a solution of 4-carboxybenzenediazonium tetrafluoroborate to create carboxylic acid sites on the graphene lattice. Then, activate these sites with a solution of EDC/sulfo-NHS to form amine-reactive esters [3].
- Non-covalent Functionalization: As a milder alternative, incubate the GFET with pyrene-based linkers (e.g., 1-pyrenebutanoic acid succinimidyl ester) which adsorb onto graphene via π-π stacking. The NHS ester group is then available for bioreceptor coupling [16].
Bioreceptor Immobilization:
- Immediately after activation, incubate the GFET with a solution containing the specific bioreceptor (e.g., antibody, aptamer, or protein domain like GST-PAK1-GBD [15]).
- For amine-containing receptors (like antibodies), the NHS ester on the surface will form a stable amide bond.
- Optimize the concentration and incubation time to achieve a dense, oriented, and active monolayer of receptors.
Surface Passivation:
- To minimize non-specific binding, incubate the functionalized GFET with a passivating agent such as bovine serum albumin (BSA) or ethanolamine.
- This step blocks any remaining reactive sites on the graphene surface, ensuring that subsequent signal changes are primarily due to specific receptor-analyte binding.
A deep understanding of the electric double layer and quantum capacitance is not merely academic; it is the cornerstone of designing highly sensitive and reliable liquid-gated GFET biosensors. The EDL serves as the primary transducer, while the quantum capacitance of graphene dictates the efficiency of signal conversion. The protocols outlined herein for device characterization and surface functionalization provide a robust framework for researchers in drug development to standardize assays and push the limits of detection for low-abundance biomarkers. By strategically engineering the interface to maximize the coupling between biological events and these electronic phenomena, the full potential of GFETs for point-of-care diagnostics and high-throughput screening can be realized.
Graphene Field-Effect Transistors (GFETs) represent a groundbreaking platform for biosensing, leveraging the exceptional properties of two-dimensional carbon nanomaterials. Their unique combination of high carrier mobility, capability for label-free detection, and superior sensitivity makes them particularly suited for advanced diagnostic and research applications in drug development [2] [17]. The core structure of a GFET typically involves a graphene channel serving as the semiconducting material between source and drain electrodes, with its electrical conductivity modulated by gate voltage [18]. When biomolecules bind to the functionalized graphene surface, they alter the local charge environment, leading to measurable changes in the transistor's electrical characteristics, notably a shift in the Dirac point voltage [4] [17]. This direct, label-free transduction mechanism allows researchers and scientists to detect a wide range of analytes—from proteins and DNA to entire viruses—with exceptional precision and without the need for complex sample labeling [19] [20].
Core Principles and Advantages
High Carrier Mobility
The exceptional electrical properties of graphene are fundamental to the performance of GFET biosensors. Graphene's sp²-hybridized carbon lattice features a delocalized π-electron system that confers extremely high carrier mobility, often exceeding 100,000 cm²V⁻¹s⁻¹ in hBN-encapsulated single-crystal CVD graphene [18]. This high mobility stems from the continuous π-orbital network allowing electrons to travel long distances without scattering [2]. For biosensing applications, this translates to high signal-to-noise ratios and the ability to detect minute electrical changes resulting from biomolecular binding events [2] [18]. The resulting heightened sensitivity enables researchers to detect target analytes at clinically relevant low concentrations, which is crucial for early disease diagnosis and monitoring treatment responses [20].
Label-Free Detection
GFETs operate on label-free detection principles, representing a significant advantage over traditional detection methods that require fluorescent, enzymatic, or radioactive tags [20] [17]. This direct electrical detection approach simplifies assay workflows, reduces costs, and minimizes potential interference from labeling compounds [17]. The detection mechanism relies on monitoring changes in the electrical properties of the graphene channel—typically measured as shifts in the Dirac point (the charge neutrality point) or changes in conductivity—when target analytes bind to recognition elements immobilized on the graphene surface [4] [17]. This real-time, label-free capability enables researchers to monitor binding kinetics and biomolecular interactions directly, providing valuable insights for drug discovery and development [17].
Superior Sensitivity
GFETs achieve exceptional sensitivity due to graphene's atomic thinness and entire surface exposure to the environment [18]. Unlike traditional three-dimensional semiconductor sensors where electrical changes at the surface may not penetrate the bulk material, the two-dimensional nature of graphene ensures that any surface binding event affects the entire conductive channel [18]. This extreme surface-to-volume ratio makes GFETs responsive to even single-molecule binding events [18]. Additionally, graphene's low intrinsic electrical noise enhances the detection of small signals, while its tunable surface chemistry allows for optimal presentation of biorecognition elements toward target analytes [19] [2]. These combined properties enable detection limits down to picomolar and even sub-picomolar concentrations for various biomarkers, surpassing conventional assay techniques [20] [21].
Quantitative Performance Metrics
Table 1: Reported Detection Performance of GFET Biosensors for Various Targets
| Target Analyte | Detection Mechanism | Limit of Detection | Linear Range | Reference |
|---|---|---|---|---|
| Streptavidin-biotin | Dirac point shift monitoring | 0.1 nM | 0.1 - 1000 nM | [4] |
| Human Chorionic Gonadotropin (hCG) | Antibody-antigen binding | <1 pg/mL | Not specified | [20] |
| SARS-CoV-2 virus | Spike protein antibody binding | 2-fold improvement vs non-oriented | Not specified | [19] |
| Vascular Endothelial Growth Factor (VEGF) | RNA aptamer recognition | 100 fM | Not specified | [22] |
| Interferon-gamma (IFN-γ) | DNA aptamer binding | 83 pM | nM to μM | [22] |
| Breast cancer biomarkers | Machine learning-optimized detection | Sensitivity of 1785 nm/RIU | Not specified | [21] |
Table 2: Comparison of GFET Performance Characteristics
| Parameter | GFET Performance | Traditional FET Performance | Impact on Biosensing | |
|---|---|---|---|---|
| Carrier mobility | >100,000 cm²V⁻¹s⁻¹ (hBN-encapsulated) | Varies significantly with material | Higher signal-to-noise ratio, faster response | |
| Molecular defect density | Low dangling bonds | High surface defects in thin silicon | Reduced non-specific binding, fewer false positives | |
| Surface-to-volume ratio | Extremely high (entire channel exposed) | Limited (3D structure) | Enhanced sensitivity to surface binding events | |
| Fabrication uniformity | High (2D lithographic precision) | Lower for 1D materials (nanotubes) | Better reproducibility and device consistency | |
| Debye screening limitation | Managed via receptor size control | Challenging in ionic solutions | Enables detection in physiological buffers | [18] |
Experimental Protocols
GFET Fabrication and Functionalization
Substrate Preparation and Graphene Transfer
Begin with a standard Si/SiO₂ substrate (300 nm oxide thickness). Clean substrates using acetone and isopropanol in an ultrasonic bath for 10 minutes each, followed by oxygen plasma treatment (100 W, 30 s) to ensure a clean, hydrophilic surface [20]. Transfer CVD-grown graphene (commercially available from suppliers like Graphenea) onto the substrate using a polymer-assisted transfer method [22]. Specifically, spin-coat polymethyl methacrylate (PMMA) onto the graphene/copper substrate at 2000 rpm for 60 seconds, then etch the copper using ammonium persulfate solution (0.1 M) for 2 hours. Carefully transfer the PMMA-supported graphene onto the target substrate and remove the PMMA with acetone vapor [20].
Electrode Patterning and Channel Definition
Pattern source and drain electrodes using photolithography. Spin-coat lift-off resist (LoR) at 3000 rpm followed by positive photoresist (PR) at 2000 rpm [20]. Pre-bake at 115°C for 60 seconds, then expose through an electrode-patterned mask using a mask aligner (e.g., OAI J500/VIS) with UV exposure at 15 mW/cm² for 2.5 seconds. Develop in Microposit developer for 60 seconds, then evaporate 5 nm chromium (adhesion layer) followed by 50 nm gold at a rate of 0.5 Å/s [20]. Perform lift-off in acetone with mild sonication. Define the graphene channel through a second photolithography step followed by oxygen plasma etching (50 W, 5 s) to remove unwanted graphene areas [20].
Surface Functionalization for Specificity
For antibody-based detection, functionalize the graphene surface using a two-step process. First, incubate the GFET with 1-pyrenebutanoic acid succinimidyl ester (Pyr-NHS) in dimethylformamide (0.5 mg/mL) for 2 hours [20]. Pyr-NHS interacts with graphene via π-π stacking while providing NHS esters for subsequent bioconjugation. Rinse thoroughly with DMF followed by phosphate-buffered saline (PBS, pH 7.4). Second, incubate with specific antibodies (e.g., anti-hCG for pregnancy and cancer biomarkers, anti-SARS-CoV-2 for virus detection) at 10 μg/mL in PBS for 1 hour [20]. For oriented antibody immobilization (which enhances sensitivity and reproducibility), employ Fc-specific binding proteins or controlled oxidation of antibody glycans followed by hydrazide chemistry [19]. Block non-specific binding sites with 1% bovine serum albumin (BSA) in PBS for 30 minutes [20].
Biosensing Assay Implementation
Electrical Characterization Setup
Configure electrical measurements using a semiconductor parameter analyzer (e.g., Keysight B1500A) interfaced with a probe station (e.g., Cascade Microtech MPS150) [20]. For liquid-gated measurements, use a three-electrode system with the GFET source/drain contacts, and an Ag/AgCl reference electrode as the liquid gate [4] [22]. Use phosphate-buffered saline (PBS, 1×, pH 7.4) as the electrolyte for most biological assays, though note that buffer concentration affects Debye screening length and thus detection sensitivity [18]. Measure transfer characteristics (ID-VG) by sweeping gate voltage (VG) from -100 mV to +100 mV while maintaining a constant drain-source voltage (VDS) of 10-50 mV [4]. Record the Dirac point position (V_Dirac) as the key parameter for sensing, as this voltage at which minimum conductance occurs is highly sensitive to surface charges from biomolecular binding [4] [17].
Analyte Detection and Quantification
Before sample introduction, establish a stable baseline by measuring transfer characteristics in pure buffer solution. Introduce analyte samples in serial dilutions prepared in the same buffer. For each concentration, incubate for 10-15 minutes while continuously monitoring the Dirac point shift [4]. Between measurements, gently rinse the sensor surface with buffer to remove weakly bound molecules. For kinetic studies, measure real-time conductance changes at a fixed gate voltage near the Dirac point [17]. Generate a calibration curve by plotting Dirac point shifts (ΔVDirac) versus analyte concentration. Fit the data with an appropriate binding model (e.g., Langmuir isotherm for monovalent binding) to determine the dissociation constant (KD) and limit of detection [4] [20].
Specific Assay Protocol: SARS-CoV-2 Spike Protein Detection
Functionalize GFETs with oriented anti-SARS-CoV-2 spike antibodies as described in section 4.1.3 [19]. Use simulated clinical samples (nasopharyngeal swabs in viral transport medium) without preprocessing. Dilute samples 1:10 in PBS to reduce ionic strength and mitigate Debye screening effects [19] [18]. Measure Dirac point shifts after 15-minute incubation at room temperature. The oriented GFET biosensor demonstrates more than twofold enhancement in detection sensitivity compared to conventional non-oriented GFETs, with significantly improved reproducibility [19]. Include positive and negative controls in each assay run to validate sensor performance.
Data Analysis and Machine Learning Enhancement
For basic analysis, determine the Dirac point by finding the minimum of the parabolic transfer characteristic curve for each measurement [4]. For enhanced analysis, employ machine learning algorithms (e.g., XGBoost regression) to optimize data interpretation, as demonstrated in breast cancer detection studies achieving 91% predictive accuracy for absorption measurements [21] [23]. Machine learning can compensate for device-to-device variations and improve detection accuracy, especially in complex clinical samples with multiple interfering components [21].
The Scientist's Toolkit: Essential Research Reagents and Materials
Table 3: Key Research Reagent Solutions for GFET Biosensing
| Reagent/Material | Function | Example Application | Considerations | |
|---|---|---|---|---|
| CVD Graphene on Cu foil | Active sensing material | Fundamental GFET fabrication | Quality affects carrier mobility and device performance | |
| 1-pyrenebutanoic acid succinimidyl ester (Pyr-NHS) | Linker molecule for graphene functionalization | Antibody immobilization for protein detection | π-π stacking with graphene surface; NHS ester for amine coupling | |
| Specific antibodies (e.g., anti-hCG, anti-SARS-CoV-2) | Biorecognition elements | Target-specific detection (cancer, viruses) | Orientation during immobilization affects sensitivity | [19] |
| Bovine Serum Albumin (BSA) | Blocking agent | Reduction of non-specific binding | Critical for assay specificity in complex samples | |
| Phosphate-Buffered Saline (PBS) | Electrolyte and dilution buffer | Liquid gating and sample preparation | Concentration affects Debye screening length | [18] |
| DNA/RNA aptamers | Alternative recognition elements | Detection of proteins, small molecules | Shorter aptamers help overcome Debye screening | [17] |
| Photoresist and developers | Photolithography patterning | Electrode and channel definition | Determines feature size and device scalability |
Troubleshooting and Optimization Strategies
Addressing Debye Screening Limitations
The Debye-Hückel screening phenomenon presents a significant challenge for GFET biosensors operating in physiological ionic strength solutions [18]. This screening effect causes ions in solution to form a double layer that screens the charge of target molecules, limiting detection to binding events occurring within the Debye length (typically <1 nm in physiological buffers) [18] [17]. To overcome this limitation, employ multiple strategies: (1) Use shorter bioreceptors (e.g., aptamers <5 nm) to ensure binding occurs within the Debye length [17]; (2) Dilute samples in low-ionic-strength buffers to increase Debye length; (3) Utilize receptors that undergo conformational changes upon binding, bringing charge closer to the graphene surface [17]; (4) Focus on detection mechanisms relying on charge transfer rather than electrostatic gating when working with high ionic strength samples [17].
Enhancing Reproducibility and Stability
Device-to-device reproducibility can be challenging in GFET biosensors. To enhance reproducibility: (1) Implement controlled functionalization methods that ensure consistent bioreceptor density and orientation across devices [19]; (2) Employ thermal annealing (300-400°C in argon/hydrogen atmosphere) to remove contaminants and improve graphene carrier mobility [20]; (3) Use Raman spectroscopy to verify graphene quality and uniformity before device fabrication [20]; (4) Incorporate reference GFETs on the same chip to account for non-specific signals and environmental variations [17]. For flexible GFETs, ensure mechanical stability through appropriate substrate selection (e.g., polyimide, PET) and encapsulation layers where necessary [22].
GFET biosensors represent a powerful analytical platform that leverages graphene's exceptional electronic properties to achieve remarkable sensitivity in label-free detection. Their high carrier mobility enables low-noise operation, while their two-dimensional nature provides exceptional sensitivity to surface binding events. The protocols outlined herein provide researchers with robust methodologies for fabricating, functionalizing, and implementing GFET biosensors for diverse applications from basic research to clinical diagnostics. As optimization through machine learning advances and fabrication methods improve, GFET biosensors are poised to become increasingly important tools for researchers and drug development professionals seeking rapid, sensitive, and label-free detection of biomolecular interactions.
A Step-by-Step GFET Biosensor Assay Protocol: Fabrication to Detection
The development of Graphene Field-Effect Transistor (GFET) biosensors represents a convergence of advanced materials science and biomedical engineering, offering unprecedented sensitivity for label-free biomarker detection. The unique two-dimensional structure of graphene provides exceptional electrical properties, including high carrier mobility exceeding 100,000 cm²V⁻¹s⁻¹ and ultimate surface sensitivity, as the entire conductive channel is exposed to the environment [24]. These characteristics make GFETs particularly suited for detecting biological molecules with high specificity and low detection limits, in some cases reaching femtomolar concentrations for clinical biomarkers [25] [6].
Fabrication of high-performance GFET biosensors hinges on two critical technological pillars: the synthesis of high-quality graphene through Chemical Vapor Deposition (CVD) and precision patterning methods that define functional device architectures without compromising graphene's intrinsic properties. Recent advances in both domains have accelerated the transition of GFET biosensors from laboratory demonstrations to commercial products, with the market projected to reach $5.5 billion by 2033 [25]. This application note provides detailed protocols and methodologies for fabricating GFET biosensors, framed within the context of assay protocol research for biomedical applications.
CVD Graphene Growth Methods
Fundamental CVD Process for Monolayer Graphene
Chemical Vapor Deposition has emerged as the dominant method for producing high-quality, large-area graphene films suitable for GFET biosensors due to its exceptional controllability, scalability, and relatively low cost [26]. The baseline thermal CVD process for monolayer graphene synthesis involves several critical steps performed under precisely controlled conditions:
Substrate Preparation: High-purity copper foil (25µm thickness, 99.8% purity) serves as the catalytic substrate. The foil is positioned at the center of a quartz tube furnace and annealed at 1000°C under Ar (100 sccm) and H₂ (50 sccm) atmosphere for 20 minutes to remove native oxides and increase grain size [27].
Graphene Growth: Following annealing, methane (CH₄) is introduced as the carbon source with typical flow rates of CH₄:H₂ at 10:50 sccm at 1000°C for 10 minutes. The hydrogen plays a crucial role in controlling graphene nucleation density and etching defective carbon structures [26] [27].
Cooling Phase: After the growth period, the furnace is cooled naturally to room temperature under continuous Ar flow to prevent thermal stress-induced cracking and uncontrolled precipitation of carbon [27].
Table 1: Standard CVD Process Parameters for Monolayer Graphene Growth
| Parameter | Typical Value | Function | Effect of Variation |
|---|---|---|---|
| Temperature | 1000°C | Activates catalytic decomposition of carbon source | Lower temps yield incomplete coverage; higher temps increase defects |
| Pressure | Atmospheric to low-pressure (≤50 mTorr) | Controls nucleation density | Lower pressure yields larger domains but slower growth |
| CH₄:H₂ Ratio | 1:5 to 1:10 | Carbon source vs. etching agent | Higher CH₄ increases multilayer formation; higher H₂ reduces coverage |
| Growth Time | 10-60 minutes | Determines graphene coverage | Shorter times yield incomplete films; longer times increase defects |
| Cooling Rate | 5-10°C/min (controlled) or natural | Affects graphene quality | Rapid cooling induces stress and cracking |
Advanced CVD Techniques
Recent advancements have addressed key challenges in CVD graphene synthesis, particularly for electronic applications:
Single-Crystal Graphene Growth: Strategies employing substrate design, proton-assisted decoupling techniques, and oxygen-assisted methods have enabled wafer-scale synthesis of single-crystal graphene with electrical properties comparable to mechanically exfoliated samples [26]. These approaches utilize pre-patterned single-crystal copper films on sapphire or germanium substrates to template graphene orientation.
Low-Temperature Growth: For compatibility with temperature-sensitive substrates, growth temperatures as low as 300°C have been achieved using multizone furnaces and plasma-enhanced CVD systems, though with some compromise in crystalline quality [25] [26].
Roll-to-Roll Production: Industrial-scale manufacturing utilizes concentric tube CVD reactors for continuous graphene synthesis, enabling high-speed production of graphene on copper enclosures using low-pressure chemical vapor deposition [26].
Graphene Patterning Techniques
Conventional Photolithography and Etching
Traditional photolithographic patterning remains widely used despite significant challenges in preserving graphene quality. The standard process flow involves:
Photoresist Application: Spin-coating of positive or negative photoresist (e.g., SU-8) onto CVD graphene transferred to the target substrate (typically Si/SiO₂) [28].
UV Exposure and Development: Pattern definition through UV exposure using a photomask followed by development in appropriate solvents to create the inverse pattern.
Oxygen Plasma Etching: Removal of unprotected graphene regions using O₂ plasma (typical conditions: 50-100 W, 10-100 mTorr, 10-60 seconds) [28].
Photoresist Stripping: Removal of residual photoresist using organic solvents (acetone, PG Remover) or plasma aching.
This conventional approach inevitably introduces contamination, defect formation, and delamination issues, particularly for sub-5µm features [28] [27]. Residual photoresist contamination remains a primary challenge, significantly degrading electrical performance through increased charge scattering and altered doping levels.
Advanced Patterning Methodologies
SU-8 Peel-Off Patterning
This resist-based method eliminates plasma etching by leveraging the adhesion between cross-linked SU-8 and graphene [28]:
Process Flow:
- SU-8 photolithography in the inverse form of the final pattern on graphene/SiO₂/Si
- Post-exposure bake at 95°C to enhance cross-linking and adhesion
- Mechanical peel-off using Scotch tape to remove both SU-8 and adherent graphene
- Optional: Wet etching using PG Remover for delicate structures
Critical Parameters:
- SU-8 thickness: ≤5µm for optimal results
- UV exposure energy: ≥70 mJ/cm² for sufficient graphene adhesion
- Development time: Minimized to prevent graphene damage
Performance: This method achieves feature sizes of 6-7µm with complete avoidance of plasma-induced damage, though residue transfer remains a concern [28].
One-Step Free Patterning of Graphene (OFP-G)
The OFP-G method enables direct patterning without photoresists, etchants, or sacrificial layers through selective bond conversion [27]:
Mechanism: Controlled conversion of sp² C=C/C-C bonds to C-O bonds in designated regions using anodic bonding with Na₂O/K₂O-rich glass substrates under specific temperature, pressure, and electric field conditions.
Process Parameters:
- Temperature: 380°C
- Pressure: 12.5 N/cm²
- Voltage: 1000 V
- Environment: 50 mTorr vacuum
- Duration: 15 minutes
Performance Metrics:
- Minimum feature size: 5µm
- Pattern resistance: 11.5 ± 2.8 Ω for 5µm patterns
- Excellent pattern fidelity without delamination or contamination
Table 2: Comparison of Graphene Patterning Techniques for GFET Fabrication
| Method | Resolution | Key Advantages | Limitations | GFET Mobility (cm²V⁻¹s⁻¹) |
|---|---|---|---|---|
| Conventional Photolithography + O₂ Plasma | <1µm | High resolution, established infrastructure | Resist contamination, lattice damage, delamination | 1,000-5,000 |
| SU-8 Peel-Off Patterning | 6-7µm | No plasma damage, simple implementation | Limited resolution, potential residue transfer | 5,000-10,000 |
| OFP-G Method | 5µm | No contaminants, excellent electrical properties | Requires specialized equipment, high voltage | 10,000-14,700 |
| Thermal Scanning Probe Lithography | <100nm | Nanoscale resolution, real-time inspection | Low throughput, specialized equipment | >10,000 (estimated) |
GFET Biosensor Fabrication Protocol
Complete Device Fabrication Workflow
The following integrated protocol details the complete process for fabricating functional GFET biosensors, from substrate preparation to final characterization:
Diagram 1: Comprehensive GFET biosensor fabrication workflow showing critical steps from graphene synthesis to functionalization.
Surface Functionalization for Biosensing
Biofunctionalization represents a critical step in transforming GFETs into specific biosensors. The following protocol enables specific biomarker detection in undiluted physiological media [6]:
PASE Modification: Incubate graphene channel with 1-pyrenebutyric acid N-hydroxysuccinimide ester (PASE) solution (5mM in DMSO) for 2 hours at room temperature. PASE anchors via π-π stacking to graphene, providing reactive NHS esters for subsequent conjugation [6].
PEG Immobilization: React PASE-functionalized graphene with NH₂-PEG-COOH (1000-2000 Da, 10mM in PBS) for 4 hours. PEG creates a biomolecule-permeable isolation layer that reduces nonspecific adsorption and enhances effective Debye screening length [6].
Aptamer Conjugation: Activate PEG carboxyl groups with EDC•HCl/NHS mixture (50mM/25mM in MES buffer, pH 6) for 30 minutes, then incubate with amino-modified aptamers (1µM in PBS) overnight at 4°C. Block remaining active sites with ethanolamine (100mM, 1 hour) [6].
Validation Techniques:
- Raman spectroscopy: Verify PASE modification through D band emergence and G band splitting
- Energy dispersive spectroscopy: Confirm aptamer immobilization through phosphorus detection
- Electrical characterization: Monitor Dirac point shifts after each functionalization step
The Scientist's Toolkit: Essential Research Reagents and Materials
Table 3: Essential Research Reagents for GFET Biosensor Fabrication and Functionalization
| Category/Item | Specification | Function in GFET Fabrication | Representative Examples |
|---|---|---|---|
| CVD Substrates | High-purity copper foil (25µm, 99.8%) | Catalytic substrate for graphene growth | Alfa Aesar uncoated annealed copper foil [27] |
| Carbon Source | CH₄ (99.99%) | Graphene precursor | Research-grade methane with precise flow control [27] |
| Transfer Media | Poly(methyl methacrylate) (PMMA) | Mechanical support during transfer | 495 PMMA A4-1% in anisole [27] |
| Etching Solutions | Ammonium persulfate (0.1M) | Copper foil etching | 0.1M APS solution for graphene transfer [27] |
| Linker Chemistry | 1-pyrenebutyric acid N-hydroxysuccinimide ester (PASE) | Graphene functionalization anchor | Sigma-Aldrich PASE for π-π stacking [6] |
| Anti-fouling Layer | NH₂-PEG-COOH (1000-2000 Da) | Reduce nonspecific binding, enhance Debye length | Creative PEGWorks various molecular weights [6] |
| Crosslinking Agents | EDC•HCl and NHS | Carboxyl-amine conjugation | Sigma-Aldrich EDC/NHS for aptamer immobilization [6] |
| Biorecognition Elements | Amino-modified aptamers | Target-specific molecular recognition | Custom synthesized sequences for cytokines [6] |
Performance Characterization and Optimization
Electrical Characterization Protocols
Comprehensive electrical characterization validates GFET performance and biosensing capability:
Transfer Curve Measurement: Sweep gate voltage (typically -1V to +1V for liquid-gated devices) while monitoring drain-source current (IDS) at constant drain-source voltage (VDS = 10-100mV). Extract key parameters including charge neutrality point (Dirac point), carrier mobility, and on/off ratio [1] [6].
Stability Assessment: Monitor Dirac point stability over multiple measurement cycles and time periods (typically 24-72 hours) to assess device degradation and signal drift.
Biosensing Response: Measure transfer curve shifts before and after exposure to target analytes. Quantify sensitivity through Dirac point shift versus analyte concentration [6].
Troubleshooting Common Fabrication Issues
Diagram 2: Troubleshooting guide for common GFET fabrication challenges with recommended solutions.
The fabrication of high-performance GFET biosensors requires meticulous attention to both graphene synthesis and patterning methodologies. Recent advances in CVD growth enable wafer-scale production of high-mobility graphene, while novel patterning techniques like OFP-G and SU-8 peel-off overcome traditional limitations of photolithography. The integration of sophisticated surface functionalization protocols further transforms these electronic devices into specific biosensing platforms capable of detecting clinically relevant biomarkers at ultralow concentrations in undiluted physiological media. As these fabrication methodologies continue to mature, GFET biosensors are poised to make significant impacts in personalized medicine, point-of-care diagnostics, and fundamental biological research.
Surface Pre-Treatment and Cleaning for Optimal Performance
The performance of graphene field-effect transistor (GFET) biosensors is profoundly influenced by the condition of the graphene surface. Contaminants, residues, and impurities can mask graphene's exceptional electrical and physicochemical properties, leading to compromised sensor sensitivity, specificity, and reliability. A meticulously controlled pre-treatment and cleaning protocol is therefore a critical prerequisite for functionalizing the surface with biorecognition elements and achieving optimal biosensor performance. This application note details standardized methodologies for preparing the graphene surface to ensure consistent and high-quality results in GFET biosensor assays, framed within the broader context of a complete assay protocol for research and drug development.
The Critical Role of Surface Preparation
The primary objective of surface pre-treatment and cleaning is to create a pristine, reproducible, and reactive graphene interface. A clean surface is essential for several reasons:
- Enhanced Bioreceptor Immobilization: A contaminant-free surface ensures uniform and efficient immobilization of probes like antibodies or DNA, which is fundamental for specific analyte capture [2].
- Reduced Non-Specific Adsorption: Proper cleaning and subsequent blocking minimize the non-specific binding of non-target molecules, a significant source of false positives and signal-to-noise ratio degradation [29].
- Reproducible Electrical Characteristics: Residues can dope the graphene or act as charge traps, altering its Dirac point and charge carrier mobility. Cleaning restores the intrinsic electronic properties of graphene, leading to consistent and interpretable electrical responses [2] [30].
- Improved Sensor Stability: A well-prepared surface contributes to the long-term stability of the immobilized bioreceptor layer and the overall sensor performance.
Pre-Treatment and Cleaning Protocols
The following protocol outlines a sequential procedure for preparing GFET surfaces prior to biofunctionalization. The process is summarized in Table 1.
Table 1: Standardized Pre-Treatment and Cleaning Protocol for GFET Biosensors
| Step | Purpose | Reagents & Methods | Key Parameters & Considerations |
|---|---|---|---|
| 1. Initial Solvent Cleaning | Removal of organic contaminants and photoresist residues from fabrication. | Acetone immersion, followed by isopropanol (IPA) immersion [2]. | Gentle agitation is recommended. Use high-purity, analytical-grade solvents. |
| 2. Oxidative Plasma Treatment | Introduction of controlled oxygen-containing functional groups; enhances hydrophilicity and provides sites for covalent functionalization. | Oxygen (O₂) or air plasma [29]. | Critical to optimize plasma power, exposure time, and pressure to avoid excessive damage to the graphene lattice. |
| 3. Electrochemical Activation | Further cleaning and potential functionalization via application of electrical potentials in a controlled environment. | Cyclic voltammetry (CV) in a mild electrolyte (e.g., 0.1 M PBS or KCl) [30]. | Parameters such as voltage window and scan rate must be tailored to avoid irreversible graphene oxidation. |
| 4. Surface Characterization | Verification of cleaning efficacy and surface quality. | Electrical characterization (transfer curve measurement); Raman spectroscopy. | The Dirac point voltage and charge carrier mobility from transfer curves are key metrics [31]. The D/G band ratio in Raman indicates defect density. |
Detailed Methodologies
3.1.1 Initial Solvent Cleaning
- Place the GFET chip in a glass Petri dish.
- Submerge the chip in high-purity acetone for 5-10 minutes with gentle agitation.
- Carefully transfer the chip to a fresh bath of high-purity isopropanol (IPA) for another 5-10 minutes.
- Remove the chip and rinse thoroughly with copious amounts of deionized water (dH₂O, 18.2 MΩ·cm resistivity) to remove all solvent traces.
- Dry the chip under a gentle stream of inert gas (e.g., nitrogen or argon).
3.1.2 Electrochemical Activation
- Assemble a standard three-electrode electrochemical cell with the GFET as the working electrode, a platinum wire as the counter electrode, and an Ag/AgCl reference electrode.
- Submerge the electrodes in a deaerated 0.1 M phosphate-buffered saline (PBS) solution, pH 7.4.
- Perform cyclic voltammetry by sweeping the potential between a predefined window (e.g., -0.5 V to +0.5 V vs. Ag/AgCl) for 10-20 cycles at a scan rate of 50-100 mV/s.
- After cycling, rinse the GFET thoroughly with dH₂O and dry with an inert gas.
Verification of Pre-Treatment Efficacy
The success of the cleaning procedure must be verified before proceeding to biofunctionalization. Two primary characterization techniques are employed:
- Electrical Characterization: Transfer characteristics (drain current IDS vs. liquid-gate voltage VLG) should be measured in a buffer solution. A clean, high-quality GFET will exhibit a sharp, well-defined Dirac point (minimum conductance point) and high charge carrier mobility. A shifted, broadened, or poorly defined Dirac point suggests residual contamination or surface defects [31] [30].
- Raman Spectroscopy: This technique provides information on the structural quality of graphene. The intensity ratio of the D band (~1350 cm⁻¹) to the G band (~1580 cm⁻¹) is a sensitive indicator of defect density. A low D/G ratio indicates a clean, low-defect graphene surface, while a high ratio suggests significant disorder introduced during fabrication or cleaning.
The Scientist's Toolkit: Key Research Reagent Solutions
Table 2: Essential Materials for GFET Surface Pre-Treatment
| Item | Function/Description |
|---|---|
| Acetone (ACS Grade) | Polar solvent for dissolving organic contaminants and fabrication residues. |
| Isopropanol (ACS Grade) | Intermediate polar solvent used for rinsing after acetone and for final cleaning steps. |
| Phosphate-Buffered Saline (PBS) | A buffered salt solution used for rinsing and as an electrolyte for electrochemical characterization and activation. |
| Oxygen / Air Plasma System | A low-power plasma generator used for gentle surface oxidation and activation of graphene. |
| Electrochemical Workstation | A potentiostat for performing electrochemical cleaning and characterization via cyclic voltammetry. |
| Raman Spectrometer | A critical instrument for non-destructive characterization of graphene quality and defect density. |
Integrated Workflow from Pre-Treatment to Biosensing
The pre-treatment process is the foundational first step in a multi-stage GFET biosensor assay protocol. The following workflow diagram illustrates the logical sequence from initial cleaning to final detection, situating the pre-treatment steps within the complete operational context.
Diagram 1: Integrated GFET biosensor preparation workflow, highlighting the pre-treatment and cleaning sequence.
In the development of high-performance graphene field-effect transistor (GFET) biosensors, the strategy employed for immobilizing bioreceptors onto the graphene surface is a critical determinant of overall assay performance. GFETs leverage the exceptional electrical properties of graphene, including its high carrier mobility and sensitivity to surface perturbations, for label-free detection of biomolecular interactions [2]. However, the inherent inertness of pristine graphene's surface poses a significant challenge for the direct and stable attachment of biorecognition elements [4]. Therefore, functionalization strategies that introduce specific chemical groups without compromising graphene's advantageous electronic characteristics are essential. These strategies are broadly classified into covalent and non-covalent methods, each offering distinct trade-offs in terms of immobilization stability, receptor orientation, and preservation of graphene's electronic properties. This Application Note details standardized protocols for both approaches, providing a framework for researchers to develop robust and sensitive GFET biosensor assays.
Covalent Functionalization Strategy
Covalent functionalization creates strong, irreversible chemical bonds between functional groups on the graphene surface and the bioreceptors. This method yields a stable and durable biosensing interface, advantageous for assays requiring rigorous washing steps or long-term stability.
Protocol: Plasma Polymerization for Amine-Functionalization
This protocol describes the functionalization of a graphene channel with amine-rich coatings via plasma polymerization, using cyclopropylamine (CPA) as a precursor, adapted from a study demonstrating successful biotin-streptavidin detection [4].
Principle: A low-pressure plasma is used to create reactive species from CPA vapor, which deposit as a thin, amine-functionalized polymer film on the graphene surface. These amine groups then serve as anchor points for covalent attachment of bioreceptors.
Step 1: Surface Pre-treatment
- Objective: To clean and activate the graphene surface.
- Procedure: Rinse the GFET substrate with acetone or phosphate-buffered saline (PBS), followed by deionized water, to remove organic contaminants and residues [2]. Dry under a stream of inert gas (e.g., N₂).
Step 2: Plasma Polymerization
- Objective: To create an amine-rich coating on the graphene surface.
- Materials: Cyclopropylamine (CPA), plasma reactor.
- Procedure:
- Place the pre-treated GFET in the plasma reaction chamber.
- Introduce CPA vapor into the chamber at a controlled flow rate.
- Initiate the plasma under the following optimized conditions:
- Power: 20 W
- Pressure: 0.2 mbar
- Time: 10-15 minutes
- Upon completion, vent the chamber and retrieve the functionalized GFET. The surface should now be rich in primary amine (-NH₂) groups.
Step 3: Bioreceptor Immobilization (Amide Bond Formation)
- Objective: To covalently link bioreceptor molecules to the amine-functionalized surface.
- Materials: Biotin-NHS ester (or other NHS-ester functionalized receptor), dimethylformamide (DMF) or PBS, ethanolamine.
- Procedure:
- Prepare a 1-10 mM solution of biotin-NHS ester in a suitable solvent (e.g., DMF or PBS).
- Incubate the amine-functionalized GFET with the biotin solution for 2-4 hours at room temperature. The NHS ester will react with surface amines to form stable amide bonds.
- Rinse thoroughly with PBS to remove unbound biotin.
Step 4: Surface Blocking
- Objective: To passivate unreacted sites and minimize non-specific binding.
- Materials: 1M Ethanolamine solution or Bovine Serum Albumin (BSA).
- Procedure: Incubate the sensor with a 1M ethanolamine solution (or 1% w/v BSA) for 30-60 minutes. This step deactivates any remaining NHS esters [2].
Step 5: Final Washing
- Objective: To remove loosely adsorbed molecules.
- Procedure: Perform a final wash with PBS or deionized water [2]. The GFET is now ready for assay.
The experimental workflow for this covalent functionalization is outlined in the diagram below.
Performance Data
GFETs functionalized with the above protocol demonstrated high sensitivity in detecting the model streptavidin-biotin interaction.
Table 1: Performance metrics of amine-functionalized GFET for streptavidin detection [4].
| Streptavidin Concentration Range | Lowest Detection Limit | Key Observation |
|---|---|---|
| 0.1 nM to 1000 nM | 0.1 nM | Concentration-dependent shift in the Dirac point voltage |
Non-Covalent Functionalization Strategy
Non-covalent functionalization relies on physicochemical interactions such as π-π stacking, van der Waals forces, or electrostatic adsorption. This approach helps preserve graphene's native sp² hybridized structure and excellent electronic properties but may result in a less stable interface compared to covalent binding [2].
Protocol: Physical Adsorption and Hydrogel Entrapment
This protocol outlines two non-covalent methods: physical adsorption and hydrogel entrapment, with the latter generally providing superior stability and sensitivity [32].
Principle A (Physical Adsorption): Bioreceptors are directly adsorbed onto the graphene surface through hydrophobic or electrostatic interactions. Principle B (Hydrogel Entrapment): Bioreceptors are physically entrapped within a porous polymer hydrogel matrix (e.g., PVA) coated on the sensor, which stabilizes the receptor and can be tailored for specific analyte concentration ranges [32].
Step 1: Surface Pre-treatment
- Objective: To ensure a clean, contaminant-free graphene surface.
- Procedure: Identical to the covalent protocol (acetone/PBS rinse and drying).
Step 2A: Physical Adsorption Immobilization
- Objective: To adsorb bioreceptors directly onto graphene.
- Materials: Glucose Oxidase (GOx) or other receptor protein, PBS buffer.
- Procedure: Incubate the GFET with a solution of the receptor (e.g., GOx in PBS) for 1-2 hours. Rinse gently with PBS to remove unbound molecules. Note: This method can yield biosensors with poor sensitivity and unstable performance [32].
Step 2B: Hydrogel Entrapment Immobilization
- Objective: To entrap bioreceptors within a stable hydrogel matrix.
- Materials: Glucose Oxidase (GOx), Poly(Vinyl Alcohol) - PVA hydrogel precursor.
- Procedure:
- Mix the bioreceptor (e.g., GOx) into the PVA hydrogel precursor solution.
- Deposit a small volume of the receptor-hydrogel mixture onto the active channel of the GFET.
- Allow the hydrogel to cross-link and solidify, thereby entrapping the receptor. This creates a stable, biocompatible environment for the receptor.
Step 3: Surface Blocking (For Physical Adsorption)
- Objective: To reduce non-specific binding.
- Procedure: If using physical adsorption, a blocking step with BSA or ethanolamine is recommended.
Step 4: Final Washing
- Objective: To remove excess reagents.
- Procedure: Rinse the sensor with PBS or a suitable buffer. The GFET is now ready for use.
The decision pathway for selecting a non-covalent strategy is illustrated below.
Performance Data
A comparative study of these non-covalent methods for glucose biosensing revealed significant differences in performance.
Table 2: Quantitative comparison of non-covalent enzyme immobilization strategies [32].
| Immobilization Strategy | Sensitivity | Stability | Linear Range | Recommended Use Case |
|---|---|---|---|---|
| Physical Adsorption | Poor | Unstable | Not specified | Preliminary testing; low priority |
| Hydrogel Entrapment | High | Stable | Broad, up to 3+ mM | Measurements in complex media like blood; requires high stability |
The Scientist's Toolkit: Research Reagent Solutions
The following table lists key materials essential for implementing the functionalization strategies described in this note.
Table 3: Essential reagents and materials for GFET bioreceptor immobilization.
| Item | Function / Application |
|---|---|
| Cyclopropylamine (CPA) | Precursor for plasma polymerization to create amine-rich coatings on graphene [4]. |
| N-hydroxysuccinimide (NHS) Ester | Common chemistry for covalent coupling of proteins/ligands to amine-functionalized surfaces [4] [2]. |
| Poly(Vinyl Alcohol) Hydrogel | Polymer matrix for non-covalent entrapment of bioreceptors, enhancing stability and performance [32]. |
| Ethanolamine / Bovine Serum Albumin (BSA) | Blocking agents used to passivate unreacted binding sites on the functionalized surface, minimizing non-specific adsorption [2]. |
| Phosphate-Buffered Saline (PBS) | Universal buffer for washing steps, dilution, and as a reaction medium in immobilization protocols [2]. |
Protocol for Blocking and Passivation to Minimize Non-Specific Binding
In the development of graphene field-effect transistor (GFET) biosensors, the precision of the assay is paramount. The intrinsic sensitivity of graphene, while advantageous for detecting target analytes, also makes these devices susceptible to signal interference from non-specific binding (NSB) of proteins, ions, and other biomolecules present in complex samples. Furthermore, when operating in ionic solutions, inadequate passivation of electronic components can lead to significant gate leakage currents, causing signal drift and obscuring genuine biological signals [33] [29]. This protocol details a consolidated methodology for the effective passivation of GFET components and the functional blocking of the graphene surface. The goal is to enhance biosensor reliability by achieving two key objectives: stabilizing the electrical baseline by minimizing parasitic leakage currents and ensuring assay specificity by reducing NSB, thereby improving the signal-to-noise ratio for accurate target detection.
Research Reagent Solutions
The following table catalogues essential materials and their specific functions for the passivation and blocking procedures outlined in this protocol.
Table 1: Key Research Reagents and Materials
| Reagent/Material | Function/Explanation in the Protocol |
|---|---|
| SU-8 Photoresist | A polymer used for the primary passivation layer, particularly over metal electrodes and interconnects, to prevent leakage currents in ionic solutions [33]. |
| HfO₂ (Hafnium Dioxide) | A high-k dielectric material deposited via atomic layer deposition (ALD) to form a conformal, pinhole-free passivation layer over the entire device, including the graphene channel [33]. |
| Polyethylene Glycol (PEG) | A biocompatible polymer that forms a dense, biomolecule-permeable isolation layer on the graphene surface. It reduces NSB and can enhance the effective Debye screening length [6]. |
| PBS (Phosphate Buffered Saline) | A standard buffer used for washing steps to remove unbound molecules and for diluting biomolecules, helping to maintain a stable pH and ionic strength [2]. |
| Ethanolamine | A small molecule used as a blocking agent to quench unreacted succinimidyl ester groups on the surface functionalization linker (e.g., PASE), preventing non-specific conjugation in subsequent steps [6]. |
| PASE (1-Pyrenebutyric Acid N-hydroxysuccinimide Ester) | A heterobifunctional linker that anchors to the graphene surface via π-π stacking, providing NHS-ester groups for covalent immobilization of amine-functionalized receptors or PEG layers [6]. |
| BSA (Bovine Serum Albumin) | A common protein used in blocking buffers to passivate uncoated surface areas and minimize non-specific protein adsorption [29]. |
Workflow and Signaling Pathways
The following diagram illustrates the comprehensive workflow for GFET fabrication, passivation, functionalization, and blocking, culminating in a stabilized and specific biosensor ready for analyte detection.
Detailed Experimental Protocols
Device Passivation for Leakage Current Mitigation
Electrical instability in solution-gated GFETs, often manifested as gate leakage current (I~G~), is a critical issue that can be addressed with a robust, multi-layered passivation strategy. The following protocol describes a method proven to achieve high-yield, stable device performance [33].
Table 2: Passivation Performance Comparison in PBS
| Passivation Strategy | Average Leakage Current (I~G~) | Device Yield | Long-Term Stability (On-current change over 400 cycles) |
|---|---|---|---|
| Non-passivated | High (>> 2 nA) | Low | Poor (Significant drift) |
| SU-8 Photoresist Only | Reduced | Moderate | Moderate |
| HfO₂ Dielectric Only | Reduced | Moderate | Moderate |
| SU-8 + HfO₂ | ~2 nA | ~90% | < 0.01% |
Procedure:
- SU-8 Photoresist Passivation of Contacts:
- Spin-coat SU-8 TF 6000.5 photoresist onto the fabricated GFET substrate at 500 rpm for 5 seconds, followed by 3000 rpm for 30 seconds [33].
- Soft-bake the substrate as required for the specific SU-8 formulation.
- Perform UV exposure through a photomask designed to leave the graphene channel area and bonding pads exposed while covering all metallic electrodes and interconnects. A typical exposure dose is 120 mJ/cm² for 9 seconds [33].
- Perform a post-exposure bake on a hot-plate for 1 minute.
- Develop the substrate in SU-8 developer to remove unexposed resist, followed by rinsing with isopropyl alcohol and deionized (DI) water, then drying with N~2~ gas [33].
- Atomic Layer Deposition (ALD) of HfO~2~ Dielectric:
- Place the SU-8 patterned substrate into an ALD system.
- Deposit a conformal HfO~2~ layer over the entire device, including the exposed graphene channel and the SU-8 layer. The HfO~2~ layer serves as a pinhole-free barrier, with a typical thickness in the range of tens of nanometers [33].
- This combined SU-8 + HfO~2~ strategy has been shown to provide the lowest leakage current and highest stability in ionic solutions like phosphate-buffered saline (PBS) [33].
Surface Blocking for Minimizing Non-Specific Binding
After passivation and surface functionalization, a critical blocking step is required to passivate any remaining reactive sites on the sensor surface. The following protocol utilizes a PEG-based blocking layer, which is highly effective for assays in complex, undiluted physiological media [6].
Procedure:
- Surface Functionalization:
- Prepare a 1 mM solution of 1-pyrenebutyric acid N-hydroxysuccinimide ester (PASE) in dimethylformamide (DMF) or ethanol.
- Incubate the GFET chip with the PASE solution for 1-2 hours at room temperature. PASE anchors to the graphene surface via π-π stacking, presenting reactive NHS-ester groups [6].
- Rinse thoroughly with ethanol and DI water to remove unbound PASE.
PEG Layer Immobilization:
- Prepare a solution of NH~2~-PEG-COOH (e.g., 1000-2000 Da) in a suitable buffer.
- Incubate the PASE-functionalized sensor with the PEG solution for several hours. The amine group of the PEG reacts with the NHS-ester on PASE, forming a covalent amide bond and creating a dense, non-fouling polymer brush [6].
- Rinse with buffer to remove excess PEG.
Quenching and Final Blocking:
- Prepare a 1 M ethanolamine solution in buffer (pH ~8.5).
- Incubate the sensor with the ethanolamine solution for 20-30 minutes. This step quenches any remaining unreacted NHS-ester groups on the PASE linker [6].
- Rinse thoroughly with assay buffer or PBS. The sensor is now ready for bioreceptor (e.g., aptamer, antibody) immobilization or can be used directly if the PEG layer is the final blocking barrier.
Troubleshooting Guide
Table 3: Common Issues and Proposed Solutions
| Problem | Potential Cause | Suggested Solution |
|---|---|---|
| High gate leakage current and signal drift in solution. | Incomplete or defective passivation layer; pinholes in dielectric. | Implement the combined SU-8 + HfO~2~ passivation strategy. Verify ALD process for conformal, pinhole-free deposition [33]. |
| High non-specific adsorption in complex samples (e.g., serum, sweat). | Ineffective blocking layer; insufficient density of PEG. | Use a combination of a dense, high-molecular-weight PEG brush and a final ethanolamine quenching step [6]. |
| Reduced sensitivity to target analyte. | The passivation/blocking layer is too thick, attenuating the biological signal. | Optimize the thickness of the HfO~2~ and PEG layers. Ensure the blocking layer is biomolecule-permeable [6]. |
| Inconsistent device performance across an array. | Non-uniform passivation or functionalization. | Standardize spin-coating and ALD conditions. Use precision printing (e.g., aerosol jet) for functionalization to ensure uniformity [7]. |
Graphene Field-Effect Transistor (GFET) biosensors have emerged as a powerful platform for label-free, real-time detection of biomolecules, offering exceptional sensitivity, rapid response times, and potential for miniaturization [2] [1]. The core principle of GFET biosensing involves functionalizing the graphene surface with specific biorecognition elements (e.g., aptamers, antibodies). The subsequent binding of a target analyte alters the local electrostatic environment, modulating the charge carrier density in the graphene channel and producing a measurable change in electrical conductance [1] [6]. The successful execution of a GFET-based assay, from sample introduction to signal acquisition, is critical for achieving reliable and quantitative results. This protocol details the standardized procedures for conducting assays using GFET biosensors, framed within the context of developing robust biosensing protocols for clinical and research applications. The methodologies described herein are designed to ensure high sensitivity, specificity, and reproducibility, enabling researchers and drug development professionals to effectively leverage GFET technology for diagnostic and monitoring purposes.
GFET Biosensor Operating Principle and Key Performance Metrics
Fundamental Sensing Mechanism
The GFET biosensor operates as an electrolyte-gated transistor. The graphene channel connects the source and drain electrodes, and its conductance is modulated by both a gate voltage applied via a reference electrode and the charge distribution at its surface [1] [7]. When target biomolecules bind to the functionalized surface, they act as charged dopants, shifting the Dirac point (the voltage at which the minimum conductance occurs) and altering the source-drain current ((I_{DS})) at a fixed gate bias [1] [6]. This real-time, label-free transduction mechanism allows for the direct monitoring of binding events.
A significant challenge in physiological sensing is the Debye screening effect, where ions in the solution shield the charge of the target analyte, limiting the sensing range to approximately one Debye length (less than 1 nm in high ionic strength media) [34]. Strategies to overcome this include using deformed graphene channels, where nanoscale concave regions can form 'electrical hot spots' with locally extended Debye screening, and incorporating polymer layers like polyethylene glycol (PEG) that increase the effective screening length adjacent to the graphene surface [34] [6].
Representative Performance Metrics of GFET Biosensors
The following table summarizes the performance of various GFET biosensors as reported in recent literature, demonstrating the platform's versatility and high sensitivity.
Table 1: Performance Metrics of GFET Biosensors for Different Target Analytes
| Target Analyte | Functionalization | Sample Matrix | Limit of Detection (LOD) | Key Performance Features | Source |
|---|---|---|---|---|---|
| Nucleic Acids (e.g., DNA/RNA) | Probe DNA/PNA | Buffer & Undiluted Human Serum | 600 zM (buffer), 20 aM (serum) | Ultrasensitive, ~18 molecules in buffer, overcomes Debye screening | [34] |
| Cytokines (TNF-α, IL-6) | Aptamer with PEG layer | Undiluted Physiological Media (sweat, lavage fluid) | 0.13 pM (TNF-α), 0.20 pM (IL-6) | High specificity in complex media, reduced non-specific adsorption | [6] |
| Ions (K+, Na+, Ca²⁺) | Ion-Selective Membranes (ISMs) | Complex Solutions | Nernstian response (Theoretical: ~59 mV/dec for monovalent ions) | Real-time, reversible, multi-plexed sensing with machine learning | [7] |
| Strain | Intrinsic graphene on flexible substrate | N/A | Minimum detectable strain: 0.005% | Gauge factor of 430, mechanical robustness | [35] |
Diagram 1: GFET biosensor operational schematic. Target binding modulates channel conductance, measured via I_DS.
The Scientist's Toolkit: Essential Research Reagents and Materials
The successful implementation of a GFET biosensor assay requires careful selection and preparation of various reagents and materials. The following table outlines the key components and their functions.
Table 2: Essential Research Reagent Solutions and Materials for GFET Biosensor Assays
| Category | Item | Specification / Example | Primary Function in the Assay |
|---|---|---|---|
| Core Sensor Component | Graphene Channel | CVD-grown monolayer graphene [6] | High-mobility semiconducting material that transduces binding events into electrical signals. |
| Electrodes & Substrate | Ti/Au (2/38 nm) on SiO₂ or flexible polyimide [35] [6] | Provides electrical contacts and mechanical support. Flexible substrates enable wearable applications. | |
| Biorecognition Elements | Aptamers | e.g., 5'-NH₂-TGG TGG ATG GCG CAG TCG GCG ACA A-3' for TNF-α [6] | Synthetic DNA/RNA strands that bind specific targets with high affinity; confer selectivity. |
| Probes (DNA/PNA) | Peptide Nucleic Acid (PNA) for nucleic acid detection [34] | Recognizes complementary DNA/RNA sequences; PNA offers superior stability and affinity. | |
| Ion-Selective Membranes (ISMs) | e.g., Membranes with ionophores for K⁺, Na⁺, Ca²⁺ [7] | Lipophilic membranes that selectively allow specific ions to interact with the graphene surface. | |
| Surface Chemistry | Linker Molecules | 1-Pyrenebutyric acid N-hydroxysuccinimide ester (PASE) [6] | Anchors functionalization layers to graphene via π-π stacking; provides groups for bioconjugation. |
| Passivation Layer | Polyethylene Glycol (PEG, 1000-2000 Da) [6] | Reduces non-specific adsorption of molecules and enhances the effective Debye screening length. | |
| Activation Agents | EDC•HCl and NHS mixture [6] | Activates carboxyl groups for covalent coupling to amine-modified bioreceptors (e.g., aptamers). | |
| Buffers & Solutions | Washing Solutions | Phosphate-Buffered Saline (PBS), Deionized Water [2] | Removes unbound molecules after each functionalization step and between measurements. |
| Blocking Agents | Ethanolamine, Bovine Serum Albumin (BSA) [2] [6] | Passivates unreacted sites on the sensor surface to minimize background noise from non-specific binding. | |
| Measurement Buffer | PBS or specific ionic solutions [7] | Provides a stable ionic environment for electrochemical measurements and analyte dilution. |
Experimental Protocol: A Step-by-Step Workflow
This section provides a detailed methodology for executing a standard GFET biosensor assay, from sensor preparation to data analysis, with a focus on aptamer-based cytokine detection as a representative example [6].
Sensor Preparation and Functionalization
Objective: To prepare and functionalize the GFET biosensor with biorecognition elements (e.g., aptamers) while minimizing non-specific binding. Materials: GFET chips, PASE, NH₂-PEG-COOH, EDC•HCl, NHS, ethanolamine, aptamer solution, PBS buffer. Procedure:
- Sensor Mounting: Secure the GFET chip onto a custom PCB or measurement jig. Ensure robust electrical connection to the source, drain, and gate electrodes.
- Baseline Characterization: Immerse the sensor in a standard buffer (e.g., 1x PBS) and acquire the transfer characteristic curve ((I{DS}) vs. (V{GS})) to determine the initial Dirac point position ((V_{Dirac})) and device performance [7].
- PASE Deposition: Introduce a 10 mM solution of PASE in dimethylformamide (DMF) or ethanol to the graphene channel. Incubate for 1 hour at room temperature. PASE attaches to graphene via π-π stacking, providing reactive NHS ester groups.
- Washing: Rinse the sensor thoroughly with PBS and deionized water to remove any physisorbed PASE molecules.
- PEG Grafting: Immerse the sensor in a 1 mM solution of NH₂-PEG-COOH for 2 hours. The amine terminal of the PEG reacts with the NHS ester on PASE, creating an amide bond and forming a dense, biomolecule-permeable brush layer.
- Washing and Quenching: Wash with PBS and then incubate with ethanolamine (1 M, pH 8.5) for 20 minutes to quench any remaining unreacted NHS esters on PASE.
- Carboxyl Group Activation: Prepare a fresh mixture of EDC (400 mM) and NHS (100 mM) in MES buffer. Apply this solution to the sensor for 30 minutes to activate the terminal carboxyl groups of the immobilized PEG.
- Aptamer Immobilization: Incubate the sensor with the amine-modified aptamer solution (e.g., 1 µM in PBS) for 2 hours. The activated carboxyl groups on the PEG will covalently couple with the amine groups on the aptamers.
- Final Quenching and Blocking: Wash the sensor and perform a final quenching step with ethanolamine to block any remaining activated sites.
- Post-Functionalization Characterization: Acquire the transfer characteristic curve in PBS again. A stable shift in (V_{Dirac}) confirms successful surface modification [6]. The sensor is now ready for assay execution.
Diagram 2: GFET biosensor assay workflow from preparation to analysis.
Objective: To introduce the sample containing the target analyte and allow specific binding to occur under controlled conditions. Materials: Sample (e.g., diluted serum, buffer spiked with analyte), measurement buffer, temperature-controlled station. Procedure:
- Buffer Equilibration: Replace the functionalization buffer with a clean measurement buffer. Allow the sensor signal ((I{DS}) at a fixed (V{GS})) to stabilize for 5-10 minutes to establish a stable baseline.
- Sample Introduction: Carefully introduce the sample solution containing the target analyte to the sensor chamber. For quantitative analysis, a series of measurements with increasing analyte concentrations is performed.
- Incubation: Maintain the sensor in the sample solution for a defined incubation period (e.g., 15-60 minutes) at a constant temperature (e.g., 22°C to 37°C). Temperature control is critical as it can significantly influence binding kinetics and signal stability [36]. The incubation can be performed under static conditions or with gentle agitation to promote mixing.
Real-Time Signal Acquisition and Data Processing
Objective: To continuously monitor the electrical response of the GFET during the assay and extract quantitative information. Materials: Data acquisition system (Source Measure Units or custom electronics [7]), computer with analysis software. Procedure:
- Signal Acquisition Configuration:
- Method A (Transient Response): Apply a constant (V{GS}) (typically chosen at the linear region of the transfer curve, away from (V{Dirac})) and a constant (V{DS}) (e.g., 10-100 mV). Continuously monitor and record the (I{DS}) over time throughout the incubation period [7].
- Method B (Full Sweep): At specific time points, pause the transient recording and perform a full (V{GS}) sweep to capture the entire transfer characteristic and track the shift in (V{Dirac}) [6]. This is more informative but slower.
- Data Recording: Record the temporal response of (I_{DS}) for the entire duration of the experiment, including the initial baseline, during sample introduction, and throughout the incubation.
- Signal Processing:
- Normalization: Normalize the recorded (I{DS}(t)) to the baseline current ((I{baseline})): (\Delta I/I{baseline} = (I{DS}(t) - I{baseline}) / I{baseline}).
- Calibration: For quantitative analysis, plot the normalized steady-state response (or the Dirac point shift) against the logarithm of the analyte concentration. Fit the data with an appropriate model (e.g., Langmuir isotherm) to create a calibration curve.
- Advanced Data Handling (for sensor arrays): When using multiplexed GFET arrays, employ machine learning algorithms (e.g., Random Forest classifiers) to process the multi-dimensional data from hundreds of sensors, which can improve quantification accuracy and classify analytes despite device-to-device variations [7].
Troubleshooting and Optimization Guidelines
Table 3: Common Assay Challenges and Proposed Solutions
| Assay Challenge | Potential Cause | Recommended Solution |
|---|---|---|
| High Signal Noise/Drift | Unstable electrical contacts; fluctuating temperature; electrochemical reactions at electrodes. | Use shielded cables and a Faraday cage; ensure precise temperature control; use low-noise source measure units. |
| Low Signal-to-Noise Ratio | Inefficient surface functionalization; high non-specific binding; suboptimal gate bias. | Verify functionalization chemistry with characterization tools (Raman, EDS); optimize PEG density and type; tune (V_{GS}) to the steepest slope of the I-V curve. |
| Poor Reproducibility | Inconsistent sensor fabrication; variations in functionalization protocol; evaporation of sample. | Use highly uniform, wafer-scale fabricated sensor arrays [7]; automate liquid handling steps; use sealed measurement chambers. |
| Slow Response Kinetics | Diffusion-limited transport of analyte to the sensor surface; dense passivation layer. | Implement microfluidic flow cells to enhance mass transport; optimize the molecular weight and density of the PEG layer. |
| Limited Dynamic Range | Saturation of biorecognition sites on the sensor surface. | Dilute samples to fall within the linear range of the calibration curve; use sensors with different bioreceptor densities. |
Graphene Field-Effect Transistor (GFET) biosensors have emerged as a powerful platform for the detection of a wide range of biomolecules, offering label-free operation, high sensitivity, and the potential for miniaturization and point-of-care diagnostics [37]. Their operational principle hinges on the exceptional properties of graphene, including its high carrier mobility, large surface-to-volume ratio, and biocompatibility [1]. When target biomolecules such as nucleic acids, proteins, or viral particles bind to the biorecognition elements on the graphene surface, they induce changes in the local electrostatic environment, leading to a measurable shift in the transistor's electrical transfer characteristics (e.g., the Dirac point voltage, V_CNP) or a change in the drain-source current (I_DS) [1] [4]. This article provides detailed application notes and experimental protocols for deploying GFET biosensors in the detection of key analyte classes, supported by quantitative data and standardized methodologies for the research community.
Nucleic Acid Detection
The detection of nucleic acids (DNA and RNA) with high sensitivity and specificity is crucial for genetic disease diagnosis, pathogen identification, and biomedical research. GFET biosensors excel in this domain by enabling direct, label-free, and ultrasensitive detection.
Table 1: Performance of GFET Biosensors in Nucleic Acid Detection
| Target Molecule | Probe Type | Limit of Detection (LOD) | Sample Matrix | Key Feature | Reference |
|---|---|---|---|---|---|
| miRNA (let-7b) | DNA | 20 aM (≈600 molecules) | Human Serum | Deformed graphene channel | [34] |
| miRNA (let-7b) | PNA | 600 zM (≈18 molecules) | Buffer | Deformed graphene channel | [34] |
| RNA | PNA | 0.1 aM | Buffer / Serum | Neutral PNA backbone | [38] |
| RNA | DNA | 100 aM | Buffer / Serum | Standard DNA probe | [38] |
| ssDNA | DNA | 10 fM | Buffer | Modular microfluidic GFET | [39] |
| SARS-CoV-2 RNA (via CRISPR/Cas12a) | CRISPR/Cas12a | 1 fM | Buffer | Amplification-free | [39] |
Detailed Protocol: Ultrasensitive RNA Detection Using a PNA-Modified GFET
This protocol achieves attomolar (aM) sensitivity for RNA detection by leveraging peptide nucleic acid (PNA) probes, which offer superior hybridization properties and faster detection compared to DNA probes [38].
I. Materials and Reagents
- Graphene Channel: CVD-grown single-layer graphene on a suitable substrate (e.g., SiO₂/Si or glass with pre-patterned ITO source/drain electrodes) [38].
- Linker Molecule: 1-pyrenebutanoic acid succinimidyl ester (PBASE) solution in dimethylformamide (DMF).
- Probe Molecule: Custom-synthesized PNA probe, complementary to the target RNA sequence.
- Washing Buffers: Phosphate Buffered Saline (PBS), 1X.
- Blocking Agent: Ethanolamine solution (e.g., 1 mM).
- Target RNA: Synthetic or purified RNA sequence of interest.
- Measurement Buffer: A low-ionic-strength buffer (e.g., 0.01X PBS) is recommended to mitigate charge screening (Debye shielding) and enhance sensitivity [34].
II. Experimental Workflow
III. Step-by-Step Procedure
GFET Fabrication and Baseline Characterization
- Fabricate a GFET device with a defined channel geometry. Pre-patterned ITO electrodes with a 4 mm channel length have been used successfully [38].
- Connect the device to a source measure unit (e.g., a parameter analyzer).
- Place a solution reservoir on the device and fill it with measurement buffer. Insert a gate electrode (e.g., Ag/AgCl).
- Measure the initial transfer characteristics (
I_DSvs.V_GS) by sweeping the liquid-gate voltage (V_GS) at a fixed drain-source voltage (V_DS, e.g., 0.1 V). Record the charge neutrality point voltage (V_CNP), which serves as the baseline [39].
Surface Functionalization with PBASE
- Incubate the graphene channel with a 1-5 mM PBASE solution in DMF for 1-2 hours at room temperature.
- Pyrene groups in PBASE non-covalently anchor to the graphene surface via π-π stacking.
- Rinse the channel thoroughly with DMF and methanol to remove any unbound PBASE, followed by drying under a gentle nitrogen stream.
PNA Probe Immobilization
- Prepare a solution of the PNA probe (e.g., 1 µM) in a suitable buffer (e.g., 1X PBS).
- Drop-cast the PNA solution onto the PBASE-functionalized graphene channel and incubate for 2 hours.
- The N-hydroxysuccinimide (NHS) ester group of PBASE reacts with the primary amine terminus of the PNA probe, forming a stable amide bond.
- Rinse the device extensively with 1X PBS and deionized water to remove physically adsorbed probes.
Surface Passivation
- To minimize non-specific binding, incubate the sensor with a 1 mM ethanolamine solution for 30-60 minutes. This step deactivates any remaining unreacted NHS ester groups on the surface.
- Rinse the device with 1X PBS and deionized water.
Target RNA Hybridization and Measurement
- Introduce the target RNA solution (in a low-ionic-strength measurement buffer) to the sensor surface.
- Allow the RNA to hybridize with the surface-bound PNA probes. Note that PNA-RNA hybridization is significantly faster than DNA-RNA hybridization, often requiring only minutes [38].
- After a defined incubation period (e.g., 30-60 minutes), measure the transfer characteristics of the GFET again under the same conditions as the baseline measurement.
- The specific binding of negatively charged RNA molecules to the sensor surface will induce a shift in the
V_CNPand a change inI_DSdue to gating effects.
IV. Data Analysis
- The primary sensing signal is the shift in the Dirac point voltage (
ΔV_CNP) before and after RNA hybridization. - Plot
ΔV_CNPas a function of the logarithm of RNA concentration to generate a calibration curve. This relationship is typically linear across a broad dynamic range (e.g., from 0.1 aM to 1 pM) [38]. - The limit of detection (LOD) can be determined as the concentration corresponding to a signal-to-noise ratio of 3.
Protein Detection
GFET biosensors can be functionalized with antibodies, peptides, or other capture molecules for the highly sensitive and selective detection of proteins, including disease biomarkers and viral antigens.
Table 2: Performance of GFET Biosensors in Protein Detection
| Target Protein | Recognition Element | Limit of Detection (LOD) | Sample Matrix | Key Feature | Reference |
|---|---|---|---|---|---|
| Streptavidin | Biotin | 0.1 nM | Liquid | Amine-rich plasma coating | [4] |
| Streptavidin | Peptide | < 50 ng/mL | Background of serum | Peptide-enabled sensor | [40] |
| Hepatitis B Surface Antigen | Antibody | 0.25 fM (≈0.02 fM in buffer) | Serum | Graphene nanogrid FET | [41] |
Detailed Protocol: Selective Protein Detection Using a Peptide-Functionalized GFET
This protocol outlines a method for creating a selective GFET biosensor using self-assembling multifunctional short peptides, which functionalize the surface and prevent non-specific protein adsorption [40].
I. Materials and Reagents
- Graphene Channel: CVD-grown or exfoliated graphene.
- Functionalization Peptides:
- Probe Peptide: Engineered to bind graphene and display a bioactive moiety (e.g., a biotin-mimetic sequence for streptavidin detection).
- Passivating Peptide: Engineered to bind graphene and prevent non-specific protein adsorption.
- Target Protein: Protein of interest (e.g., Streptavidin).
- Control Protein: A non-target protein to test specificity (e.g., Bovine Serum Albumin).
- Measurement Buffer: PBS or other suitable physiological buffer.
II. Experimental Workflow
III. Step-by-Step Procedure
GFET Fabrication and Baseline Characterization
- Follow a similar procedure as described in Section 2.2, Step 1, to prepare the GFET and establish baseline electrical characteristics.
Co-assembly of Peptide Monolayer
- Prepare a co-assembly solution containing both the probe peptide and the passivating peptide in a molar ratio optimized for maximum bioactive display and surface passivation (e.g., 1:4) [40].
- Incubate the graphene channel with the peptide co-assembly solution for a defined period (e.g., 1-2 hours) to allow for the formation of an ordered monomolecular film on the graphene surface.
- Rinse the device thoroughly with measurement buffer to remove excess peptides.
Exposure to Sample and Measurement
- Introduce the sample solution containing the target protein (potentially in a background of interfering proteins like serum) to the functionalized sensor.
- Incubate to allow for specific binding between the target protein and the bioactive moiety on the probe peptide.
- Rinse the device with measurement buffer to remove unbound proteins.
- Measure the transfer characteristics of the GFET. The specific binding of the target protein will cause a measurable shift in the
V_CNP.
Sensor Regeneration (Optional)
- A key advantage of this peptide-based approach is the potential for sensor regeneration. The protein-bound surface can be restored using a gentle regeneration agent (e.g., low-pH glycine buffer) that dissociates the captured protein without damaging the peptide monolayer [40].
- After regeneration and a buffer rinse, the sensor can be reused for subsequent experiments.
IV. Data Analysis
- The selectivity of the sensor can be quantified by comparing the
ΔV_CNPresponse to the target protein versus the response to a high concentration of a non-target control protein. - The calibration curve is generated by plotting
ΔV_CNPagainst the logarithm of the target protein concentration.
Viral Detection (SARS-CoV-2)
The COVID-19 pandemic highlighted the urgent need for rapid, sensitive, and portable diagnostic tools. GFET biosensors have been successfully developed for the direct detection of SARS-CoV-2 viruses and their components.
Table 3: Performance of GFET Biosensors in SARS-CoV-2 Detection
| Target | Recognition Element | Limit of Detection (LOD) | Sample Matrix | Key Feature | Reference |
|---|---|---|---|---|---|
| SARS-CoV-2 Spike Protein | Anti-Spike Antibody | 2.42 fg/mL (in PBS) 0.63 fg/mL (in clinical transport medium) | Buffer & Clinical Medium | rGO-FET | [42] |
| SARS-CoV-2 Viral Particles | Anti-Spike Antibody | 1 fg/mL (for whole virus) | Clinical Samples | rGO-FET | [42] |
Detailed Protocol: Detection of SARS-CoV-2 using an rGO-FET Biosensor
This protocol details the use of a reduced Graphene Oxide (rGO) based FET for the ultrasensitive detection of the SARS-CoV-2 spike protein and whole viral particles [42].
I. Materials and Reagents
- rGO Channel: The rGO layer serves as the semiconducting channel material. It can be synthesized and deposited via methods such as drop-casting or spin-coating onto a pre-patterned substrate.
- Capture Agent: SARS-CoV-2 monoclonal antibodies (mAbs), specifically targeting the spike protein.
- Linker Chemistry: A suitable cross-linker (e.g., PBASE) for antibody immobilization.
- Blocking Buffer: BSA solution (1% w/v) in PBS.
- Sample: Inactivated viral lysate or clinical samples in transport medium.
- Washing and Measurement Buffer: PBS.
II. Experimental Workflow
III. Step-by-Step Procedure
rGO-FET Fabrication and Characterization
- Fabricate the FET device with an rGO channel. Pre-patterned source/drain electrodes (e.g., gold or ITO) are commonly used.
- Characterize the device electrically in a buffer solution to determine the baseline
I_DS-V_GScharacteristics and the initialV_CNP.
Antibody Immobilization
- Functionalize the rGO surface with a linker molecule. PBASE can be used as described in Section 2.2.
- Incubate the functionalized surface with a solution of anti-SARS-CoV-2 monoclonal antibodies. The antibodies covalently bind to the activated linker.
- Rinse the device with PBS to remove unbound antibodies.
Surface Blocking
- Incubate the sensor with a 1% BSA solution for at least 1 hour to block any remaining non-specific binding sites on the rGO surface and minimize false-positive signals.
- Rinse with PBS.
Viral Detection and Real-time Monitoring
- Introduce the clinical sample (e.g., nasopharyngeal swab in transport medium) to the sensor.
- The SARS-CoV-2 viral particles bind specifically to the immobilized antibodies on the rGO surface.
- Monitor the electrical response of the rGO-FET in real-time. The binding event can be observed as a rapid change in the source-drain current (
I_DS) at a fixed gate voltage or as a shift in theV_CNPin subsequent transfer curve measurements. - The sensor response is proportional to the viral load in the sample.
IV. Data Analysis
- The change in current (
ΔI_DS) or shift in voltage (ΔV_CNP) is the primary analytical signal. - A calibration curve is constructed by plotting the sensor response against known concentrations of the SARS-CoV-2 spike protein or inactivated virus.
- The LOD can be calculated based on the signal from negative controls, demonstrating the sensor's capability to detect viral antigens at concentrations as low as the femto-gram per milliliter level [42].
The Scientist's Toolkit: Essential Research Reagent Solutions
Table 4: Key Reagents and Materials for GFET Biosensor Development
| Reagent/Material | Function / Role in Assay | Examples / Notes |
|---|---|---|
| CVD Graphene | The core sensing channel material. High-quality, monolayer graphene provides the best electrical properties and sensitivity. | Grown on copper foils and transferred to the target substrate (SiO₂/Si, flexible polymers) [34] [38]. |
| Reduced Graphene Oxide (rGO) | An alternative, often more cost-effective, channel material. | Used in SARS-CoV-2 sensors; sensitivity can be comparable to pristine graphene [42]. |
| PBASE (Linker) | A pyrene-NHS linker for non-covalent functionalization of graphene. Pyrene anchors to graphene, NHS ester reacts with amine groups on probes. | Standard for immobilizing amine-terminated DNA, PNA, and antibody probes [38]. |
| PNA Probes | Peptide Nucleic Acid probes for nucleic acid detection. Neutral backbone reduces electrostatic repulsion, improves specificity and hybridization kinetics. | Superior to DNA probes for RNA detection, enabling LOD down to 0.1 aM [38]. |
| CRISPR/Cas System | For highly specific nucleic acid detection. Upon binding to target DNA/RNA, Cas proteins (e.g., Cas12a) exhibit collateral cleavage activity. | Can be integrated with GFETs; Cas12a cleavage of a reporter molecule induces a charge change detectable by the GFET [39]. |
| Functionalization Peptides | Short, engineered peptides for specific surface modification. | Can be designed to bind graphene and display bioactive motifs for protein capture while passivating the surface [40]. |
| Plasma Polymerization Coatings | Creates a stable, functional polymer layer (e.g., amine-rich) on the inert graphene surface for subsequent biomolecule conjugation. | Used for creating amine-functionalized graphene for biotin-streptavidin detection [4]. |
Troubleshooting GFET Assays: Overcoming Debye Screening and Enhancing Performance
Addressing the Debye Screening Challenge in High-Ionic-Strength Solutions
Graphene field-effect transistor (GFET) biosensors hold significant promise for label-free, real-time detection of biomolecules, ranging from proteins and nucleic acids to entire viral particles [1] [29]. Their high sensitivity stems from graphene's exceptional electronic properties, including high carrier mobility and a large surface-to-volume ratio, which allows minute biomolecular interactions at the sensor surface to be translated into measurable electrical signals [1]. A central challenge, however, has been the severe charge-screening effect in high ionic strength solutions, such as phosphate-buffered saline (PBS), serum, or blood [43] [29]. In these physiological environments, the Debye screening length is reduced to less than 1 nanometer, effectively shielding the charge of target biomolecules and preventing their detection by conventional FET sensing mechanisms [43] [44]. This application note, framed within broader thesis research on GFET biosensor assays, details practical strategies and protocols to overcome this limitation, enabling reliable biomarker detection in physiologically relevant conditions.
Technological Approaches and Performance Comparison
Several innovative strategies have been developed to circumvent the Debye screening effect. The following table summarizes the principle, key performance metrics, and advantages of each major approach.
Table 1: Comparison of Strategies for Overcoming Debye Screening in GFET Biosensors
| Strategy | Operating Principle | Reported Performance | Key Advantages |
|---|---|---|---|
| Electric-Double-Layer (EDL) FETs [43] [45] | Uses a separated gate electrode to create an enhanced EDL capacitance in high ionic strength solutions, amplifying the signal beyond the Debye length. | Detection of proteins (CRP, NT-proBNP) in 1X PBS and human serum in 5 minutes. | No sample dilution/washing; no reference electrode needed; detects charged/uncharged targets. |
| Epitaxial Graphene FETs [46] | Utilizes single-crystal epitaxial graphene on SiC, whose electrical characteristics are independent of solution ionic strength due to a small quantum capacitance. | Successful antigen detection in buffer solutions of varying concentrations without sensitivity loss. | Inherent independence from Debye screening; simple fabrication; high reproducibility. |
| Deformed Graphene Channels [34] | Nanoscale deformations (crumples) create "electrical hot spots" where the local Debye length is increased, and strain can induce a bandgap. | Ultrasensitive nucleic acid detection down to 600 zM in buffer and 20 aM in human serum. | Extreme sensitivity; applicable to direct serum detection; does not require nanoscale lithography. |
| Polymer-Modified Surfaces [44] | A porous polymer layer (e.g., PEG) grafted onto the FET surface increases the effective local Debye length. | Detection of Prostate Specific Antigen (PSA) in 150 mM phosphate buffer. | Effective in physiological ionic strength; can be applied to various FET materials like SiNWs. |
| Capacitive Sensing (EIS) [47] | Monitors changes in double-layer capacitance ((C_{dl})) instead of Faradaic current, which is less susceptible to high ionic strength screening. | Label-free, real-time detection in bodily fluids using non-Faradaic electrochemical impedance spectroscopy. | Reagent-free; uses low, non-perturbing voltages; suitable for miniaturized, point-of-care systems. |
Detailed Experimental Protocols
Protocol 1: EDL-FET Biosensor for Protein Detection in Serum
This protocol is adapted from studies demonstrating direct protein detection in 1X PBS and human serum using AlGaN/GaN HEMT structures, a principle directly applicable to GFET design [43] [45].
Materials and Reagents
- Sensor Chip: EDL-FET with an extended, separated gate electrode (e.g., Gold or Pt) and a graphene channel.
- Biological Receptors: Target-specific antibodies or aptamers.
- Coupling Reagents: EDC/NHS chemistry for antibody immobilization.
- Blocking Buffer: 1X PBS containing 1% Bovine Serum Albumin (BSA).
- Wash Buffer: 1X Phosphate Buffered Saline (PBS), pH 7.4.
- Analyte: Target protein in 1X PBS or undiluted, filtered human serum.
Experimental Workflow
Key Steps and Parameters
- Sensor Functionalization: After cleaning, immobilize the capture antibody or aptamer specifically on the separated gate electrode, not the graphene channel. Use standard EDC/NHS chemistry to covalently link antibodies to a pre-formed self-assembled monolayer (SAM) on the gate metal.
- Blocking: Incubate the entire sensor surface with 1% BSA in PBS for 1 hour to minimize non-specific adsorption. Rinse thoroughly with PBS.
- Electrical Measurement:
- Apply a 5 µL droplet of the sample (in PBS or serum) to cover both the gate electrode and the channel.
- Bias the drain-source voltage ((V{ds})) at a constant 2 V.
- Apply a single, short positive gate pulse ((Vg = 0.5 V)) for 50 µs.
- Measure the transient drain current ((I_d)) with a high sampling rate (e.g., 10 ns).
- Signal Quantification: Integrate the drain current over the 50 µs pulse duration. The signal is defined as the current gain, calculated as ((\Delta Id / I{d, initial})), which correlates with the target protein concentration. This method leverages the enhanced EDL capacitance, which is strengthened by high ionic strength, to achieve sensitivity [43] [45].
Protocol 2: Deformed Graphene GFET for Ultrasensitive Nucleic Acid Detection
This protocol outlines the procedure for creating and using crumpled graphene GFETs to achieve ultralow detection of nucleic acids in raw serum, overcoming Debye screening through nanoscale morphology control [34].
Materials and Reagents
- Substrate: Pre-strained polystyrene (PS) sheets.
- Graphene: Large-area CVD graphene.
- Probe Molecules: Peptide Nucleic Acid (PNA) or DNA probes with a pyrene-based linker (e.g., 1-pyrenebutanoic acid succinimidyl ester).
- Analyte: Target miRNA or DNA in buffer or pure human serum.
- Buffer: 1X PBS or similar physiological-strength buffer.
Experimental Workflow
Key Steps and Parameters
- Crumpled Graphene Fabrication: Transfer a sheet of CVD graphene onto a pre-strained polystyrene substrate. Anneal the structure at 110°C for 4 hours. The thermal relaxation of the PS induces controlled, nanoscale crumples and wrinkles in the graphene layer. Verify the morphology using SEM/AFM and the electrical integrity via Raman spectroscopy and I-V characterization [34].
- Surface Functionalization: Functionalize the crumpled graphene channel by incubating with PNA probes conjugated to a pyrene linker. The pyrene group adsorbs onto the graphene surface via π-π stacking, orienting the PNA probes for target binding. Using PNA instead of DNA is recommended due to its neutral backbone, which reduces nonspecific electrostatic interactions and improves hybridization efficiency in high ionic strength solutions [34].
- Liquid-Gate Measurement:
- Assemble the device with a liquid gate (e.g., Ag/AgCl reference electrode).
- Continuously monitor the transfer characteristics ((Id) vs. (Vg)) of the GFET.
- Introduce the target nucleic acid in buffer or serum and monitor the shift in the Dirac point voltage ((\Delta V_{Dirac})) over time (typically up to 60 minutes).
- Data Analysis: The (\Delta V{Dirac}) is directly related to the concentration of the captured target. A calibration curve of (\Delta V{Dirac}) versus the logarithm of the target concentration allows for quantification with a limit of detection (LOD) in the zeptomolar (zM) range [34].
The Scientist's Toolkit: Essential Research Reagents and Materials
Table 2: Key Reagents and Materials for Debye Screening Research
| Item | Function/Application | Specific Examples |
|---|---|---|
| Epitaxial Graphene on SiC | Provides a pristine, single-crystal graphene surface with inherent properties that minimize Debye screening effects. | 4H-SiC or 6H-SiC substrates annealed at high temperature (>1500°C) [46]. |
| Peptide Nucleic Acid (PNA) | An uncharged DNA analog used as a probe; reduces charge screening and improves hybridization in high salt. | Custom PNA sequences targeting specific miRNA (e.g., let-7b) [34]. |
| Silane-PEG Linkers | Creates a porous, biomolecule-permeable polymer layer on the sensor surface to increase the effective Debye length. | (3-aminopropyl)triethoxysilane (APTES) mixed with silane-PEG (10 kD) [44]. |
| Pyrene-Based Linkers | Enables non-covalent, oriented immobilization of biorecognition elements on the graphene surface via π-π stacking. | 1-Pyrenebutanoic acid succinimidyl ester [34]. |
| High-Stability Reference Electrodes | Provides a stable gate potential in high ionic strength solutions during liquid-gate measurements. | Ag/AgCl reference electrodes or Au/Pt pseudo-reference electrodes [1]. |
The Debye screening challenge in physiological solutions is a significant but surmountable obstacle for GFET biosensors. The strategies and detailed protocols outlined herein—ranging from novel device structures like EDL-FETs and engineered materials like epitaxial and deformed graphene to surface modification with polymers—provide a robust toolkit for researchers. By adopting these approaches, scientists and drug development professionals can advance the development of robust, sensitive, and label-free GFET biosensors capable of operating directly in complex, high-ionic-strength biological fluids, thereby accelerating diagnostics and biomedical research.
Optimizing Bioreceptor Design (e.g., Short Aptamers) for Binding Within the Debye Length
A fundamental constraint in the performance of graphene field-effect transistor (GFET) biosensors is the Debye screening length (λD). In physiological solutions, ions form an electric double layer (EDL) at the graphene-solution interface, within which the electric potential from charged analytes is effectively screened. The thickness of this layer, the Debye length, is typically less than 1 nm in conventional phosphate-buffered saline (1x PBS) [46]. This creates a significant hurdle, as many relevant bioreceptors, such as antibodies, are larger than 10 nm, placing their target binding sites outside the region where the resulting charge perturbation can be detected by the graphene channel [46].
This application note details strategies to overcome this limitation by optimizing bioreceptor design. The core principle is to employ compact, short-chain receptors, such as aptamers, and to implement surface modification strategies that maximize the probability that biomarker binding occurs within the critically sensitive Debye length. Proper optimization is critical for developing GFET biosensors capable of highly sensitive, label-free detection of biomarkers in physiologically relevant media.
Core Principles and Strategic Framework
Overcoming the Debye screening effect requires a multi-faceted approach that integrates receptor selection, surface chemistry, and material science. The following diagram illustrates the core strategic framework for optimizing GFET biosensor performance.
Strategic Framework for Debye Length Optimization
The framework is built upon three pillars: selecting compact bioreceptors, engineering the sensor surface to extend the sensing zone, and utilizing advanced graphene substrates with inherent advantages.
The Role of Compact Bioreceptors
Short single-stranded DNA (ssDNA) aptamers are the quintessential bioreceptors for this application. Their length can be tailored during the SELEX (Systematic Evolution of Ligands by EXponential enrichment) process to be as short as 3-5 nm, enabling them to fit entirely within the Debye screening length when optimally immobilized [46]. Furthermore, their small size and synthetic nature facilitate high-density packing on the graphene surface, increasing the likelihood of capturing target analytes.
Surface Modification to Modulate the Sensing Environment
Surface passivation with a biomolecule-permeable polyethylene glycol (PEG) layer serves a dual purpose. First, it reduces non-specific adsorption of non-target molecules from complex solutions like serum or blood. Second, and more critically, studies have shown that a PEG layer can effectively increase the effective Debye screening length in the region directly adjacent to the graphene surface, thereby enhancing the sensitivity for detecting larger biomolecules [48].
Substrate Engineering
Recent research indicates that the type of graphene used significantly impacts Debye screening. Epitaxial graphene on SiC substrates demonstrates electrical characteristics that are nearly independent of the buffer solution concentration. This is attributed to its single-crystal structure and small quantum capacitance, which effectively results in a larger effective Debye screening length, facilitating the detection of targets beyond the classical λD limit [46].
Quantitative Comparison of Bioreceptor Strategies
The choice of bioreceptor and sensor configuration directly influences key performance metrics. The table below summarizes the characteristics and performance of different optimization strategies.
Table 1: Performance Comparison of GFET Bioreceptor Optimization Strategies
| Optimization Strategy | Typical Bioreceptor Size | Key Performance Metrics | Advantages | Limitations |
|---|---|---|---|---|
| Short DNA Aptamers [48] [46] | 3-5 nm | LOD for IL-6: 0.20 pM in undiluted media [48] | Small size, synthetic, re-usable, stable | Requires in vitro selection (SELEX) |
| PEG Surface Passivation [48] | N/A (Hydrogel layer) | Enables specific detection in undiluted physiological media [48] | Reduces non-specific binding, extends effective λD | Can reduce binding kinetics if too dense |
| Epitaxial Graphene on SiC [46] | N/A (Substrate) | Independent of buffer concentration; detects antibodies (>10 nm) [46] | Overcomes classical λD limit; high reproducibility | Higher substrate cost, specialized fabrication |
| Antibody with Diluted Buffer [46] | >10 nm | Varies with dilution factor | Uses well-established reagents | Not physiologically relevant; dilutes analyte |
Detailed Experimental Protocols
Protocol 1: Functionalization of GFET with Aptamers and PEG Layer
This protocol details the process of immobilizing short DNA aptamers on a GFET surface and subsequently passivating it with a PEG layer to minimize non-specific binding and enhance effective Debye length [48].
Research Reagent Solutions:
- GFET Chips: Commercially available or in-house fabricated graphene field-effect transistors.
- Aptamer Solution: Short, amine-terminated ssDNA aptamer (e.g., 20-40 nucleotides) specific to the target biomarker (e.g., IL-6, TNF-α), dissolved in nuclease-free water or appropriate buffer (0.25 mg/mL minimum) [49].
- Crosslinker: Bissulfosuccinimidyl suberate (BS3), 5 mM in 2 mM acetic acid [49].
- PEG Solution: Heterobifunctional PEG (e.g., NHS-PEG-MAL) in dimethyl sulfoxide (DMSO) or buffer.
- Blocking Buffer: Phosphate-buffered saline (PBS) with 0.5% Bovine Serum Albumin (BSA) or commercial blocking buffers (e.g., StartingBlock) [49].
- Wash Buffers: Acetone, isopropanol, and PBS or deionized water [49].
Workflow:
- Surface Cleaning: Clean the GFET chips using sequential rinses in acetone and isopropanol to remove organic contaminants. Use clean tweezers and perform a final rinse in clean solvent [49].
- Silanization: Silanize the graphene surface by soaking the chip in a 1% (v/v) solution of (3-Aminopropyl)triethoxysilane (APTES) in acetone for 4 minutes with mild agitation. Rinse thoroughly with acetone and then isopropanol for 2 minutes each to remove unbound silane [49].
- Crosslinking: React the aminated surface with a 5 mM solution of the homobifunctional crosslinker BS3 to create an amine-reactive NHS ester surface.
- Aptamer Immobilization: Spot or incubate the amine-terminated aptamer solution onto the activated sensor surface. The aptamers will covalently bind via the formation of amide bonds. Incubate in a humidified chamber to prevent evaporation.
- PEG Passivation: Incubate the sensor with the heterobifunctional PEG solution. The NHS end will react with remaining amine groups on the graphene surface, creating a dense, biomolecule-permeable layer.
- Blocking: To passivate any remaining reactive sites, incubate the functionalized sensor with a blocking buffer (e.g., PBS with 0.5% BSA) for at least 1 hour.
- Washing and Storage: Rinse the prepared biosensor with PBS or deionized water and store in a dry state or in buffer at 4°C until use.
The following workflow diagram provides a visual summary of the key chemical modification steps.
GFET Surface Functionalization Workflow
Protocol 2: Quantitative Detection Assay in Physiological Media
This protocol describes how to use the functionalized GFET for the specific detection of a target protein, such as a cytokine, in undiluted physiological media [48] [49].
Research Reagent Solutions:
- Assay Buffer: A suitable buffer for maintaining biomarker stability (e.g., PBS).
- Target Analyte: Purified protein standard (e.g., TNF-α, IL-6) for calibration, or the clinical sample (e.g., serum, plasma).
- Detection Antibody (Optional): Biotinylated tracer antibody for sandwich assays [49].
- Signal Enhancement Reagents (Optional): Streptavidin-Horseradish Peroxidase (SA-HRP) and precipitating substrate (e.g., 4-Chloro-1-naphthol) for enzymatic enhancement [49].
Workflow:
- Baseline Measurement: Place the functionalized GFET in a measurement cell with a liquid gate configuration (e.g., using a Ag/AgCl reference electrode). Introduce the assay buffer and record the stable electrical baseline (e.g., drain current (ID) or Dirac point voltage (V{Dirac})).
- Sample Introduction: Replace the buffer with the undiluted sample (e.g., serum, plasma spiked with or containing the target biomarker). Incubate for a predetermined time (e.g., 15-30 minutes) to allow for specific binding to the surface aptamers.
- Washing: Gently rinse the sensor surface with assay buffer to remove unbound molecules and non-specifically adsorbed materials from the complex matrix. This step is crucial for reducing noise.
- Signal Measurement: Measure the electrical signal ((ID) or (V{Dirac})) again. The specific binding of the charged target biomarker will induce a measurable shift in the GFET transfer characteristics.
- Calibration and Quantification: Construct a calibration curve by repeating steps 1-4 with known concentrations of the purified protein standard. Use this curve to interpolate the concentration of the target in unknown samples.
The Scientist's Toolkit: Essential Research Reagents
Table 2: Key Reagents for GFET Bioreceptor Optimization
| Reagent / Material | Function / Role | Example Specifications / Notes |
|---|---|---|
| Amine-Terminated DNA Aptamer [48] [46] | Primary bioreceptor; provides specificity and fits within Debye length. | 20-40 nt length; HPLC purified; reconstituted in nuclease-free water. |
| Heterobifunctional PEG [48] | Surface passivation; reduces non-specific binding and modulates local dielectric environment. | NHS-PEG-MAL (e.g., 5kDa); creates a non-fouling, biomolecule-permeable layer. |
| Bissulfosuccinimidyl suberate (BS3) [49] | Homobifunctional crosslinker; covalently links surface amines to aptamer amines. | Water-soluble, amine-to-amine crosslinker; prepare fresh in 2 mM acetic acid. |
| (3-Aminopropyl)triethoxysilane (APTES) [49] | Silanizing agent; introduces primary amine groups onto the graphene oxide or sensor surface for subsequent conjugation. | Use 1% solution in fresh, dry acetone for consistent results. |
| Epitaxial Graphene on SiC [46] | Sensor substrate; offers superior electrical characteristics that can mitigate Debye screening. | Single-crystal film; provides high reproducibility and potential for operation beyond classical λD. |
| Phosphate-Buffered Saline (PBS) with BSA [49] | Blocking buffer; passivates unreacted sites on the sensor surface to minimize non-specific adsorption. | 10 mM PBS, pH 7.4, with 0.5% (w/v) Bovine Serum Albumin. |
Strategies for Improving Signal-to-Noise Ratio and Reproducibility in GFET Biosensors
Graphene Field-Effect Transistor (GFET) biosensors represent a cutting-edge technology for label-free, real-time detection of biomolecules, with applications ranging from clinical diagnostics to drug development. Their operation hinges on monitoring changes in the electrical characteristics of graphene—such as its Dirac point or conductivity—as target analytes bind to its functionalized surface. However, the journey from a research prototype to a reliable analytical tool is fraught with challenges, primarily concerning the Signal-to-Noise Ratio (SNR) and reproducibility of the measurements. Noise, often dominated by low-frequency flicker noise, can obscure the detection of low-abundance targets, while variability in sensor fabrication and biofunctionalization can lead to inconsistent results. This Application Note details targeted strategies and standardized protocols to overcome these hurdles, enabling researchers to harness the full potential of GFET biosensors for robust and sensitive bioassays. The following diagram outlines the core workflow for developing a high-performance GFET biosensor, integrating the key strategies discussed in this note.
Key Optimization Strategies and Quantitative Outcomes
The following table summarizes the core strategies explored in this note and the quantitative performance enhancements they deliver.
Table 1: Summary of Key Optimization Strategies and Their Demonstrated Outcomes
| Strategy Category | Specific Method | Key Performance Outcome | Quantitative Improvement |
|---|---|---|---|
| Substrate Engineering | Fabrication of smooth graphene nanogrids [50] [41] | Enhanced sensitivity and reduced edge-defect noise | Enabled attomolar (aM) to sub-femtomolar (fM) detection limits [50] [41] |
| Biofunctionalization Control | Optimization of glutaraldehyde cross-linker concentration and incubation time [50] | Maximized Signal-to-Noise Ratio (SNR) | 50% increase in SNR, achieving detection of 0.05 fM Hep-B [50] |
| Oriented Antibody Immobilization | Site-specific binding of anti-SARS-CoV-2 spike protein antibody [19] | Improved reproducibility and responsiveness | >2x enhancement in detection sensitivity compared to random immobilization [19] |
| Noumeasurement & Data Processing | Use of a probabilistic neural network (PNN) [41] | Mitigated Debye screening and quantification uncertainty | 70% increase in SNR, detection of 0.20 fM viral protein [41] |
| Nonspecific Binding Control | Implementation of a matched-isotype negative control probe [51] | Accurate subtraction of nonspecific binding signals | Improved assay linearity, accuracy, and selectivity (e.g., control score up to 95%) [51] |
Detailed Experimental Protocols
Protocol 1: Optimized Fabrication of Graphene Nanogrids for Enhanced Sensitivity
Objective: To create a graphene FET substrate with high surface-area-to-volume ratio and smooth edges to maximize sensitivity and minimize noise from defects [50] [41].
Materials:
- Substrate: P-type <100> silicon wafers (resistivity 8-20 Ω·cm).
- Electrolyte: Hydrofluoric acid (HF, 48-55 wt%) and Dimethyl Sulfoxide (DMSO) in a 1:9 volume ratio.
- Graphene Source: Colloidal solution of bilayer graphene.
- Electrodes: High-temperature silver paste, gold for evaporation.
Procedure:
- Nanoporous Silicon Oxide (NPSO) Substrate Preparation:
- Place the silicon wafer in a double-pond electrochemical bath.
- Anodically etch the wafer for 30 minutes under a constant current source using the HF:DMSO electrolyte [50] [41].
- Thermally oxidize the resulting structure in a dry-wet-dry sequence for 1 hour at 900°C to obtain pores with a target diameter of ~20 nm and length of ~120 nm [41].
Electrophoretic Deposition (EPD) of Graphene:
- Fabricate interdigitated electrodes on the NPSO substrate using screen-printed silver paste, cured at 750°C for 1 minute, followed by gold evaporation [50].
- Pipette the colloidal graphene solution onto the prepared substrate.
- Connect the electrodes to a function generator and apply a sinusoidal voltage (e.g., 19.5 V peak-to-peak) for 60 seconds to facilitate graphene deposition [50].
- Heat the deposited substrate at 75°C for 2 minutes to improve adhesion.
Characterization:
- Use techniques such as Transmission Electron Microscopy (TEM) and X-ray Photoelectron Spectroscopy (XPS) to verify pore morphology, distribution, and graphene quality [41].
Protocol 2: Controlled Surface Biofunctionalization for SNR Enhancement
Objective: To immobilize bioreceptors (e.g., antibodies) on the graphene surface in a controlled manner that maximizes specific binding signals and minimizes nonspecific noise [50] [19].
Materials:
- Cross-linker: Glutaraldehyde aqueous solution (e.g., 2.5%, 10%, 25%).
- Bioreceptor: Target-specific antibody (e.g., anti-Hep-B, anti-SARS-CoV-2).
- Buffers: Phosphate Buffered Saline (PBS), de-ionized (DI) water.
Procedure:
- Surface Activation:
- Treat the graphene nanogrid FET sensor with a glutaraldehyde solution. Critical: Test a range of concentrations (e.g., 2.5%, 10%, 25%) and incubation times (e.g., 2 h, 4 h, 24 h) to find the optimal parameter set for your specific system [50].
Receptor Immobilization:
- For Random Immobilization: Incubate the activated sensor directly with the antibody solution (e.g., 1 hour), followed by washing with PBS to remove unbound molecules [50].
- For Oriented Immobilization: Utilize a strategy that promotes site-specific binding, such as employing Fc-specific ligands or engineered antibody tags, to ensure the antigen-binding domains are uniformly exposed to the solution. This has been shown to more than double sensitivity compared to random immobilization [19].
Surface Blocking:
- Incubate the functionalized sensor with a blocking agent (e.g., 1% BSA) to passivate any remaining reactive surfaces and minimize nonspecific adsorption.
Protocol 3: Assay Execution with Reference Control and Data Processing
Objective: To perform the target analyte detection while correcting for nonspecific binding and signal drift using a dual-channel setup and advanced data analysis.
Materials:
- GFET Setup: Probe station, liquid-gate setup with a Pt or Ag/AgCl gate electrode, source-meter unit.
- Sample: Target analyte in relevant buffer or diluted serum.
- Negative Control: Matched-isotype control antibody, BSA, or other optimized negative control protein [51].
Procedure:
- Sensor Calibration:
- Place the functionalized GFET in a measurement chamber with a running buffer (e.g., 20 mM PBS).
- Apply a fixed drain-source voltage (VDS) while sweeping the liquid-gate voltage (VGS) to obtain the transfer characteristics (IDS vs. VGS). Identify the Dirac point (charge neutrality point) for each sensor.
Dual-Channel Measurement:
- Test Channel: Functionalized with the specific capture antibody.
- Reference Channel: Functionalized with a negative control probe (e.g., an isotype-matched non-functional antibody). The optimal control should be determined empirically for each assay [51].
- Simultaneously monitor the real-time drain current (I_DS) at a fixed gate voltage for both channels upon injection of the sample solution.
Signal Processing:
- Reference Subtraction: Subtract the signal from the reference channel from the test channel signal to correct for nonspecific binding and bulk refractive index shifts [51].
- Advanced Analysis: Apply a Probabilistic Neural Network (PNN) or similar algorithm to the transconductance data to quantify analyte concentration, especially at ultra-low concentrations where signals overlap. This helps mitigate uncertainties from manufacturing variations and complex sample matrices [41].
The Scientist's Toolkit: Essential Research Reagents and Materials
Table 2: Key Reagents and Materials for GFET Biosensor Optimization
| Item | Function / Role in Optimization | Example & Notes |
|---|---|---|
| Glutaraldehyde | A homobifunctional cross-linker for covalently immobilizing antibodies on amine-functionalized surfaces. | Used at varying concentrations (2.5-25%) and incubation times to find the SNR maximum [50]. |
| Isotype-Matched Control Antibody | A negative control probe immobilized on a reference channel to correct for nonspecific binding. | Essential for accurate signal subtraction in complex media like serum; must be optimized per assay [51]. |
| Bovine Serum Albumin (BSA) | A common blocking agent and potential negative control protein. | Used to passivate unreacted sites on the sensor surface, reducing nonspecific adsorption [51]. |
| Probabilistic Neural Network (PNN) | A signal processing algorithm for precise quantification at ultra-low concentrations. | Overlaps uncertainty in electrical outputs from sensor-to-sensor variation and complex samples [41]. |
| Graphene Nanogrid Substrate | The core sensing element with a high surface-area-to-volume ratio and smooth edges. | Superior to planar graphene or rough nanoribbons for attomolar sensitivity [50] [41]. |
Achieving high signal-to-noise ratio and reproducibility in GFET biosensors is contingent upon a holistic approach that integrates advanced substrate engineering, meticulous control over surface biofunctionalization, and the implementation of robust measurement and data analysis protocols. By adopting the strategies and detailed protocols outlined in this document—such as using optimized nanogrid structures, oriented antibody immobilization, and reference-controlled assays with probabilistic data analysis—researchers can significantly enhance the performance and reliability of their GFET biosensing platforms, pushing the boundaries of detection into the sub-femtomolar regime.
Machine Learning for Parametric Optimization and Data Analysis
Graphene field-effect transistor (GFET) biosensors have emerged as powerful tools for label-free, highly sensitive detection of biomolecules, enabling advancements in disease diagnostics, healthcare monitoring, and drug development [1] [17]. The performance of these biosensors depends critically on multiple parameters, including material properties, device architecture, and operational conditions. Machine learning (ML) has recently become an indispensable approach for optimizing these complex parameters systematically, enhancing detection accuracy, sensitivity, and reproducibility while reducing development time and experimental costs [21] [52]. This Application Note provides detailed protocols and methodologies for implementing ML-driven parametric optimization and data analysis within GFET biosensor research, serving as a practical resource for scientists and engineers in the field.
Machine Learning Approaches for GFET Optimization
Various machine learning algorithms have demonstrated effectiveness in optimizing biosensor parameters and analyzing complex data. The selection of an appropriate algorithm depends on the specific optimization goal, dataset characteristics, and computational resources available.
Table 1: Machine Learning Algorithms for GFET Biosensor Optimization
| Algorithm Category | Specific Methods | Optimization Applications | Key Advantages |
|---|---|---|---|
| Regression Models | Least Squares (LS), LASSO, Elastic-Net (ENet), Bayesian Ridge Regression (BRR) [53] | Predicting optical parameters (effective indices, core power), sensitivity analysis [53] | High prediction accuracy (>0.99 R²), handles continuous variables, provides uncertainty estimates |
| Clustering Algorithms | k-means [52] | Experimental parameter grouping, design of experiments | Identifies inherent patterns in data, reduces experimental trials |
| Classification Algorithms | Support Vector Machines (SVM) [52] | Categorizing optimal parameter sets, quality control | Effective for binary classification, works well with high-dimensional data |
| Regularization Techniques | L1 (LASSO), L2 (Ridge), Combined (ENet) [53] | Feature selection, preventing overfitting, parameter optimization | Selects most influential parameters, improves model generalization |
Key Parameters for ML-Driven Optimization in GFET Biosensors
Machine learning optimization of GFET biosensors typically focuses on several critical parameters that significantly impact device performance:
- Structural Parameters: ML models can optimize multilayer architectures (e.g., Ag-SiO₂-Ag configurations) to enhance plasmonic interaction and sensitivity, achieving performance metrics up to 1785 nm/RIU in refractive index sensitivity [21].
- Electrical Parameters: Optimization of gate voltage sweeps, Dirac point positioning, and charge carrier mobility through ML analysis of transfer characteristic curves [17] [6].
- Material Properties: Graphene functionalization parameters, layer thickness, and interface properties that influence biomolecule binding and signal transduction [4] [2].
- Experimental Conditions: Buffer ionic strength, pH, temperature, and flow rates that affect biomarker binding kinetics and detection limits [6].
Experimental Protocols
Protocol 1: ML-Optimized GFET Biosensor Fabrication and Functionalization
This protocol details the fabrication of GFET biosensors with surface functionalization optimized through machine learning approaches for enhanced biomarker detection.
Materials and Reagents
- Chemical vapor deposition (CVD) graphene on appropriate substrate [6]
- Photoresist and developer for electrode patterning
- Titanium/Gold (Ti/Au) target for thermal evaporation (2 nm/38 nm) [6]
- 1-Pyrenebutyric acid N-hydroxysuccinimide ester (PASE) in ethanol [6]
- Amine-functionalized polyethylene glycol (NH₂-PEG-COOH, 1000-2000 Da) [6]
- EDC•HCl and NHS in MES buffer
- Ethanolamine solution (1M, pH 8.5)
- Target-specific aptamers with amino modification [6]
- Phosphate-buffered saline (PBS), pH 7.4
Equipment
- Plasma cleaner with oxygen and argon gases
- Thermal evaporator for electrode deposition
- Photolithography system or mask aligner
- Raman spectrometer with 532 nm laser [6]
- Energy dispersive spectroscopy (EDS) system [6]
- Semiconductor parameter analyzer with probe station
- Microfluidic flow system (optional)
Procedure
GFET Fabrication
- Pattern drain-source and on-chip gate electrodes onto SiO₂/Si wafers using standard photolithography techniques.
- Deposit Ti/Au (2 nm/38 nm) using thermal evaporation followed by lift-off process [6].
- Transfer CVD graphene onto the electrode pattern to form the conducting channel (typical dimensions: 50 μm) [6].
- Anneal the device at 300°C in argon/hydrogen atmosphere to remove residues and improve graphene-electrode contacts.
Surface Functionalization
- Incubate the GFET with PASE solution (5 mM in ethanol) for 1 hour at room temperature to form π-π stacking with graphene surface [6].
- Rinse thoroughly with ethanol and deionized water to remove unbound PASE.
- Quench unreacted PASE sites with ethanolamine solution for 30 minutes.
- Incubate with NH₂-PEG-COOH solution (10 mM in PBS) for 2 hours to form amide bonds with PASE [6].
- Activate terminal carboxyl groups of PEG using EDC/NHS mixture (50 mM/25 mM in MES buffer) for 30 minutes.
- Immobilize amino-modified aptamers (1 μM in PBS) overnight at 4°C [6].
- Block remaining activated sites with ethanolamine for 1 hour.
- Rinse with PBS and store in nitrogen atmosphere until use.
Quality Control and Characterization
Protocol 2: ML-Enhanced Experimental Parameter Optimization
This protocol employs machine learning to systematically optimize measurement parameters for GFET biosensors, significantly improving detection limits while reducing experimental overhead.
Materials and Reagents
- Functionalized GFET biosensors (from Protocol 1)
- Target biomarkers at various concentrations
- Appropriate buffer solutions (PBS, physiological media)
- Glycerol solutions for calibration [52]
- Impedance spectroscopy equipment
Equipment
- Impedance analyzer with frequency sweep capability [52]
- Data acquisition system with high-resolution analog-to-digital conversion
- Computer with ML software environment (Python with scikit-learn, TensorFlow, or PyTorch)
- Microfluidic perfusion system for solution exchange
- Temperature-controlled probe station
Procedure
Initial Data Collection
- Design a fractional factorial experiment varying critical parameters: frequency range, sampling rate, signal amplitude, temperature, and buffer ionic strength.
- For each parameter combination, perform impedance measurements across a range of biomarker concentrations [52].
- Record transfer characteristic curves (I-V measurements) for each experimental condition.
- Capture key performance metrics: Dirac point shift, carrier mobility changes, conductance variations, and signal-to-noise ratios.
Machine Learning Model Implementation
- Preprocess data by normalizing parameters and applying feature scaling.
- Apply k-means clustering (unsupervised learning) to identify natural groupings in parameter-performance relationships [52].
- Implement Support Vector Machine (SVM) classification (supervised learning) to categorize parameter sets as "optimal" or "suboptimal" based on detection sensitivity [52].
- Train regression models (Least Squares, LASSO, Elastic-Net, or Bayesian Ridge) to predict sensor performance based on input parameters [53].
- Validate models using k-fold cross-validation to prevent overfitting.
Parameter Optimization and Validation
- Use trained ML models to identify parameter combinations that maximize detection sensitivity and minimize limit of detection (LOD).
- Apply regularization techniques (LASSO, Elastic-Net) to select the most influential parameters, eliminating redundant experimental variables [53].
- Validate optimized parameters through experimental testing with known biomarker concentrations.
- Compare performance metrics (sensitivity, LOD, reproducibility) between ML-optimized and conventional parameter sets.
The Scientist's Toolkit: Essential Research Reagents and Materials
Table 2: Key Research Reagent Solutions for GFET Biosensor Development
| Reagent/Material | Function | Application Notes | References |
|---|---|---|---|
| CVD Graphene | Conducting channel material | High carrier mobility, low intrinsic noise, sensitive to surface charge distribution | [6] |
| PASE (1-Pyrenebutyric acid N-hydroxysuccinimide ester) | Molecular linker | Forms π-π stacking with graphene surface, provides NHS esters for amine coupling | [6] |
| NH₂-PEG-COOH (1000-2000 Da) | Anti-fouling layer | Reduces non-specific adsorption, enhances Debye screening length in high ionic strength media | [6] |
| Amino-modified Aptamers | Biorecognition elements | Target-specific probes, conformational changes upon binding induce electrical signals | [6] |
| EDC/NHS Chemistry | Carboxyl group activation | Forms amide bonds between PEG and aptamers, critical for stable immobilization | [6] |
| Cyclopropylamine | Plasma polymerization precursor | Amine-rich coating for graphene functionalization, enhances biomolecule binding | [4] |
| Biomolecule-Permeable PEG Layer | Isolation membrane | Allows biomarker penetration while blocking interferents, enables detection in undiluted media | [6] |
Data Analysis and Interpretation
Performance Metrics and Validation
When implementing ML-optimized parameters for GFET biosensors, several key performance metrics should be evaluated to validate improvements:
- Detection Sensitivity: Quantify the shift in Dirac point voltage or change in conductance per unit concentration of target biomarker. ML optimization has demonstrated sensitivity improvements enabling detection of cytokines at sub-picomolar levels (0.13 pM for TNF-α, 0.20 pM for IL-6) [6].
- Limit of Detection (LOD): Determine the lowest detectable biomarker concentration with signal-to-noise ratio >3. ML approaches have achieved up to 12-fold improvement in LOD for some biosensing platforms [52].
- Reproducibility: Calculate coefficient of variation across multiple devices and measurements. ML-optimized parameters typically show enhanced reproducibility due to systematic parameter selection.
- Selectivity: Evaluate response to target biomarker versus interferents. PEG-functionalized surfaces optimized through ML show significantly reduced non-specific binding in undiluted physiological media [6].
Troubleshooting Common Issues
- High Background Noise: Implement ML feature selection to identify and optimize parameters that maximize signal-to-noise ratio. Consider additional PEG layers or alternative blocking agents.
- Poor Reproducibility: Apply more stringent clustering criteria in ML analysis to identify parameter outliers. Verify graphene quality and functionalization consistency.
- Low Sensitivity: Use regression models to identify parameters most strongly correlated with sensitivity metrics. Optimize Debye length considerations through PEG molecular weight adjustments [6].
- Model Overfitting: Employ regularization techniques (LASSO, Elastic-Net) that penalize model complexity and maintain generalization capability [53].
The integration of machine learning methodologies into GFET biosensor development provides a systematic framework for optimizing complex parameters that govern device performance. The protocols outlined in this Application Note demonstrate how ML algorithms can significantly enhance detection capabilities, reduce experimental overhead, and accelerate the development of highly sensitive biosensing platforms. As GFET technology continues to advance toward clinical applications and point-of-care diagnostics, ML-driven optimization will play an increasingly crucial role in bridging the gap between laboratory research and real-world implementation.
Critical Pitfalls in Fabrication and Functionalization and How to Avoid Them
Graphene Field-Effect Transistor (GFET) biosensors represent a transformative technology for label-free, real-time biomolecular detection, with applications ranging from point-of-care diagnostics to drug development [1] [54]. Their exceptional sensitivity stems from graphene's high carrier mobility and its atomically thin, large surface area, which translates subtle surface binding events into measurable electrical signals [29] [55]. However, the journey from a laboratory prototype to a reliable, reproducible biosensor is fraught with challenges related to material synthesis, device fabrication, and surface functionalization. This document outlines the most critical pitfalls encountered in GFET biosensor development and provides detailed, actionable protocols to overcome them, framed within the context of a robust biosensor assay protocol research thesis.
Critical Pitfalls and Mitigation Strategies in GFET Biosensing
The path to a successful GFET biosensor involves multiple intricate steps, each with its own failure modes. The table below summarizes the primary challenges and their corresponding solutions.
Table 1: Critical Pitfalls and Mitigation Strategies in GFET Biosensor Development
| Pitfall Category | Specific Pitfall | Impact on Performance | Proven Mitigation Strategy |
|---|---|---|---|
| Fundamental Sensing | Debye Screening [29] | Severely reduced sensitivity in physiological ionic strength solutions; inability to detect charged biomolecules beyond ~1 nm. | Use small-molecule receptors [29]; Employ enzyme-linked reactions that generate local pH changes or ionic products [29]; Leverage the Donnan potential in ion-permeable immobilized layers (e.g., PEG, proteins) to sense beyond the Debye length [30]. |
| Surface Functionalization | Surface Inertness of Pristine Graphene [4] | Poor biomolecule immobilization; low density of biorecognition elements; inconsistent sensor response. | Plasma polymerization for amine-rich surface coatings [4]; Non-covalent functionalization via π-π stacking (e.g., using 1-pyrene derivatives) [56] [54]; Use of graphene oxide (GO) or reduced GO (rGO) for covalent chemistry [57] [55]. |
| Non-Specific Adsorption [29] | High background noise; false positives; reduced signal-to-noise ratio to undetectable levels. | Passivation with bovine serum albumin (BSA) [29] [56]; Surface coating with polyethylene glycol (PEG) or its derivatives (e.g., Py-PEG) [56] [30]; Use of blocking agents like casein. | |
| Device Fabrication & Stability | Poor Reproducibility & Device-to-Device Variation [1] [56] | Inconsistent data; hinders mass production and commercialization. | Standardized, foundry-based fabrication [30] [58]; Implementation of sensor arrays (e.g., 1024 sensors/chip) for redundancy and statistical validation [58]; Rigorous quality control using Raman spectroscopy and electrical characterization [55]. |
| Integration with Readout Electronics [58] | Signal interference; high noise; impractical for portable devices. | Direct integration of GFETs with CMOS readout circuitry on a single chip [58]; Use of multi-project wafer (MPW) runs for prototype testing [58]. |
Experimental Protocol: Amine-Functionalization via Plasma Polymerization for Enhanced Immobilization
This protocol details a method to overcome graphene's surface inertness, based on the work demonstrating Dirac point shifts with streptavidin concentration as low as 0.1 nM [4].
Materials:
- GFET chips on a substrate (e.g., SiO₂/Si).
- Cyclopropylamine (CPA) or other amine-containing precursor.
- Plasma cleaner/reactor with controlled gas flow and RF power.
- Nitrogen or argon gas.
- Phosphate Buffered Saline (PBS), pH 7.4.
- Biotin-NHS ester.
- Target analyte (e.g., Streptavidin).
Procedure:
- GFET Pre-treatment: Clean GFET chips in an acetone bath for 10 minutes, followed by isopropanol for 5 minutes. Rinse with deionized water and dry under a stream of N₂ gas.
- Plasma Reactor Setup: Place the clean, dry GFET chips inside the plasma reaction chamber. Evacuate the chamber to a base pressure (<10⁻² mbar).
- Vapor Introduction: Introduce cyclopropylamine (CPA) vapor into the chamber until a stable working pressure is achieved (e.g., 0.1-0.5 mbar).
- Plasma Polymerization: Initiate the plasma discharge using an RF power source (e.g., 10-50 W) for a short duration (e.g., 5-60 seconds). Optimization Note: Power and time must be titrated to create a uniform amine-rich layer without damaging the graphene's electronic properties.
- Post-processing: Purge the chamber with inert gas and vent to atmosphere. The GFET chips now have an amine-functionalized surface.
- Bioreceptor Immobilization: Activate the amine groups by incubating the chips with a solution of biotin-NHS ester (e.g., 1 mM in PBS) for 1 hour. Rinse thoroughly with PBS to remove unbound biotin.
- Validation: The functionalized surface is now ready for sensing. Expose the chip to varying concentrations of streptavidin (0.1 nM - 1000 nM) while monitoring the Dirac point shift in a liquid-gate configuration [4].
Experimental Protocol: Combatting Debye Screening via Donnan Potential
This protocol leverages the Donnan potential effect to enable sensing in physiologically relevant buffers, a key challenge highlighted in research [29] [30].
Materials:
- Functionalized GFET (e.g., with immobilized antibodies or aptamers).
- Assay Buffer (e.g., 1X PBS, pH 7.4).
- Polyethylene Glycol (PEG)-based blocking solution.
- Target protein or nucleic acid.
Procedure:
- GFET Baseline Measurement: Place the functionalized GFET in a measurement chamber and introduce the assay buffer. Using a source-drain voltage (V~sd~) of <100 mV and a liquid gate, record the transfer characteristic (I~ds~ vs. V~lg~) to identify the Dirac point (V~Dirac~) [30].
- Formation of Ion-Permeable Layer: Incubate the GFET with a PEG-based blocking solution for 30-60 minutes. This step serves a dual purpose: passivating the surface against non-specific adsorption and forming an ion-permeable layer around the immobilized bioreceptors.
- Analyte Introduction: Introduce the target analyte dissolved in the assay buffer. Allow binding to proceed for a predetermined time (e.g., 15-30 minutes).
- Signal Measurement and Interpretation: Monitor the shift in the Dirac point (ΔV~Dirac~). The binding of charged biomolecules within the ion-permeable PEG layer creates a Donnan potential (Δφ~D~), which acts as an effective gate potential, modulating the channel conductance. This effect allows for detection even when the analyte's intrinsic charge is screened by ions in the bulk solution [30]. The resulting change in current can be modeled and quantified.
The Scientist's Toolkit: Essential Research Reagents
Table 2: Key Research Reagents for GFET Biofunctionalization
| Reagent | Function & Mechanism | Application Example |
|---|---|---|
| 1-Pyrenebutyric Acid (PCA) [56] | A linker molecule that adsorbs non-covalently onto the graphene surface via strong π-π stacking. The carboxylic acid group allows for subsequent covalent immobilization of bioreceptors. | Immobilization of amine-terminated DNA aptamers or antibodies via EDC/NHS chemistry. |
| Polyethylene Glycol (PEG/Py-PEG) [56] [30] | A polymer used for surface passivation to minimize non-specific adsorption. Py-PEG (pyrene-PEG) anchors via π-π stacking. PEG creates a hydrophilic, neutral barrier and contributes to the Donnan effect. | Mixed layers with Pyrene-PEG and Pyrene-biotin for creating a bio-inert surface with specific biotin-streptavidin binding sites. |
| EDC / NHS [56] | Crosslinking agents (1-Ethyl-3-(3-dimethylaminopropyl)carbodiimide / N-Hydroxysuccinimide) that catalyze the formation of amide bonds between carboxylic acids and amines. | Activating carboxylic groups on GO, rGO, or pyrene linkers for covalent attachment of antibodies or proteins. |
| Bovine Serum Albumin (BSA) [29] [56] | A common blocking agent used to cover residual reactive surfaces on the sensor, thereby reducing non-specific binding of analytes. | A 1-5% BSA solution is applied after bioreceptor immobilization to block uncovered graphene or substrate areas. |
| Cyclopropylamine (CPA) [4] | A precursor for plasma polymerization, used to create a stable, amine-rich polymer coating on the graphene surface for biomolecule conjugation. | Creating a uniform functional layer on pristine graphene for covalent bioconjugation, as described in the protocol above. |
Visualizing the GFET Biosensing Workflow
The following diagram illustrates the critical steps and decision points in developing a robust GFET biosensor assay, integrating the mitigation strategies for the primary pitfalls.
GFET Biosensor Development Workflow
The successful implementation of GFET biosensors hinges on a meticulous approach to overcoming critical fabrication and functionalization hurdles. By understanding the physics of Debye screening and leveraging the Donnan potential, employing robust functionalization chemistries like plasma polymerization, rigorously passivating surfaces against fouling, and adopting industrially scalable manufacturing and integration practices, researchers can unlock the full potential of this sensitive and versatile biosensing platform. The protocols and strategies outlined herein provide a concrete foundation for developing reliable, reproducible, and clinically relevant GFET-based diagnostic and drug development tools.
Validating GFET Performance: Benchmarking Sensitivity, Specificity, and Clinical Potential
For researchers developing graphene field-effect transistor (GFET) biosensors, the precise quantification of analytical performance parameters is critical for validating method capability, ensuring reliability, and enabling meaningful comparison with existing technologies. These parameters define the operational boundaries of the biosensor and its fitness for purpose in applications ranging from fundamental biomedical research to point-of-care diagnostics and therapeutic drug monitoring [1] [59]. This document provides a detailed framework for the experimental determination and calculation of three fundamental figures of merit: the Limit of Detection (LOD), Sensitivity, and Dynamic Range, with specific application to GFET biosensing platforms.
The exceptional electrical properties of graphene, including its high carrier mobility and tunable surface potential, make it an ideal transducer material for label-free, real-time detection of biomolecules [1] [2]. However, to fully characterize and benchmark these devices, a rigorous and standardized approach to performance quantification is essential. The protocols outlined herein are adapted from established clinical and analytical chemistry guidelines and tailored to the specific context and challenges of GFET-based assays [60] [61].
Theoretical Foundations of Key Performance Metrics
Limit of Detection (LOD) and Limit of Quantification (LOQ)
The Limit of Detection (LOD) is the lowest analyte concentration that can be reliably distinguished from a blank sample (containing no analyte) but not necessarily quantified as an exact value. Closely related is the Limit of Quantification (LOQ), the lowest concentration at which the analyte can not only be detected but also quantified with acceptable precision and accuracy (bias) [60] [61]. These are distinct concepts, and the LOQ is always greater than or equal to the LOD.
The statistical foundation for these limits accounts for the distribution of signals from both blank and low-concentration samples. The calculation involves two key steps [60]:
- Limit of Blank (LoB): The highest apparent analyte concentration expected from repeated testing of a blank sample.
- Formula:
LoB = mean_blank + 1.645 * (SD_blank). This defines the threshold at which a false-positive rate (α error) is 5%.
- Formula:
- Limit of Detection (LOD): The lowest concentration where detection is feasible, considering both the LoB and the variability of a low-concentration sample.
- Formula:
LOD = LoB + 1.645 * (SD_low concentration sample). This ensures a false-negative rate (β error) of no more than 5% at the LOD [60].
- Formula:
An alternative, widely accepted method recommended by the International Council for Harmonisation (ICH) uses the calibration curve's slope (S) and standard deviation of the response (σ) [61] [62]. The standard deviation can be derived from the standard error of the regression or the standard deviation of the y-intercept.
- LOD Formula (ICH):
LOD = 3.3 * σ / S - LOQ Formula (ICH):
LOQ = 10 * σ / S[62]
Sensitivity
In the context of GFET biosensors, Sensitivity refers to the smallest change in analyte concentration that produces a detectable change in the sensor's output signal. It is quantitatively represented by the slope of the calibration curve within the linear dynamic range [1] [61]. A steeper slope indicates a higher sensitivity, meaning a smaller concentration change produces a larger, more easily measurable signal shift. For GFETs, the output signal is typically the Dirac point voltage shift (∆VDirac) or the relative change in drain current (∆IDS/I_DS), while the input is the analyte concentration [4] [1].
Dynamic Range
The Dynamic Range is the interval between the lowest and highest analyte concentrations for which the biosensor provides a measurable and reliable response. The lower end is typically defined by the LOQ, not the LOD, as quantification is required. The upper end is the concentration at which the sensor's response saturates and no longer changes linearly with increasing concentration [63]. This range determines the span of analyte concentrations that can be assessed without sample dilution or pre-concentration.
Experimental Protocols for GFET Performance Characterization
GFET Fabrication and Biofunctionalization
The following protocol outlines a standard workflow for creating a GFET biosensor, from substrate preparation to bioreceptor immobilization, which precedes performance characterization.
Title: GFET Biosensor Fabrication and Functionalization Workflow
Detailed Steps:
- Substrate Preparation: Clean the substrate (e.g., SiO₂/Si wafer or flexible polyimide) with oxygen plasma to remove organic contaminants and enhance hydrophilicity [63].
- Graphene Transfer: Transfer a single layer of CVD-grown graphene onto the prepared substrate. Confirm quality and continuity using techniques like Raman spectroscopy [1] [59].
- Electrode Patterning: Define source and drain (S/D) electrodes (e.g., Au/Cr, 50/5 nm) on the graphene channel using standard photolithography or electron-beam lithography followed by metal deposition and lift-off [1]. A liquid-gate setup requires an external reference electrode (e.g., Ag/AgCl) as the gate terminal [4].
- Surface Pre-treatment: Rinse the fabricated GFET with acetone and phosphate-buffered saline (PBS) to remove fabrication residues [2].
- Channel Functionalization: Modify the graphene surface to enable efficient bioreceptor binding. For example, use plasma polymerization with cyclopropylamine to create an amine-rich surface or employ pyrene-1-boronic acid (PBA) for specific analyte capture [4] [63].
- Bioreceptor Immobilization: Attach the specific recognition element (e.g., antibody, DNA aptamer) to the functionalized surface. The orientation of immobilization is critical for performance; directed immobilization strategies can significantly enhance sensitivity and reproducibility compared to random attachment [19].
- Blocking: Passivate any remaining reactive sites on the graphene surface with a blocking agent like bovine serum albumin (BSA) or ethanolamine to minimize non-specific binding in subsequent sensing steps [2].
Protocol for Generating Calibration Data
This protocol describes how to acquire the experimental data needed to construct a calibration curve and calculate LOD, Sensitivity, and Dynamic Range.
Materials:
- Functionalized GFET biosensor (from Section 3.1)
- Target analyte in pure form
- Appropriate buffer (e.g., 1x PBS)
- Electrical measurement setup: Semiconductor parameter analyzer (or source measure units), probe station, and fluidic cell.
Procedure:
- Baseline Establishment: Place the GFET in the measurement buffer. Using a liquid-gate configuration, sweep the gate voltage (VGS) while monitoring the drain current (IDS) to obtain the initial transfer characteristic (IDS-VGS curve). The minimum of this curve corresponds to the charge neutrality point (Dirac point, V_Dirac). Record this value as the baseline [4] [1].
- Analyte Introduction: Introduce a low concentration of the analyte (e.g., 0.1 nM streptavidin) to the GFET surface and allow the binding reaction to reach equilibrium [4].
- Signal Measurement: After incubation, record a new transfer characteristic curve and determine the shift in the Dirac point (∆V_Dirac). This shift is the primary signal response for many GFET biosensors [4].
- Sensor Regeneration (if applicable): For reusable sensors, regenerate the surface by rinsing with an appropriate solution (e.g., low-pH buffer) to dissociate the analyte-receptor complex [63].
- Repeat for Calibration Points: Repeat steps 2-4 for a series of increasing analyte concentrations spanning several orders of magnitude (e.g., from 0.1 nM to 1000 nM). It is critical to test multiple replicates (n ≥ 3) at each concentration to obtain statistically meaningful data [60] [61].
Data Analysis and Calculation
Constructing the Calibration Curve
- Data Compilation: For each analyte concentration, calculate the mean value of the signal response (e.g., ∆V_Dirac) from the replicates.
- Plotting: Plot the mean signal response (y-axis) against the logarithm of the analyte concentration (x-axis). A sigmoidal relationship is common in biosensing; identify the central linear region for quantitative analysis [61].
- Linear Regression: Perform a linear regression analysis on the data points within the linear range. The output will provide the equation of the line (y = a + bx), where
bis the slope (Sensitivity),ais the y-intercept, and the standard error (SE) of the regression is a key statistic [62].
Calculating Key Parameters
Using the output from the linear regression, the key performance metrics can be calculated as follows:
Table 1: Formulas for Calculating GFET Biosensor Performance Metrics
| Performance Metric | Calculation Formula | Explanation of Terms |
|---|---|---|
| Sensitivity | Slope (b) of the calibration curve | The change in signal (e.g., ∆V_Dirac in mV) per unit change in concentration (e.g., log[nM]). |
| Limit of Detection (LOD) | LOD = 3.3 * σ / S [62] | σ = Standard deviation of the response (can be estimated as the Standard Error from regression).S = Slope of the calibration curve (Sensitivity). |
| Limit of Quantification (LOQ) | LOQ = 10 * σ / S [62] | Same parameters as for LOD. |
| Dynamic Range | From LOQ to the end of the linear range | The range of concentrations between the LOQ and the point where the calibration curve significantly deviates from linearity. |
Worked Example and Data Presentation
Assume a GFET biosensor calibrated for streptavidin detection, with a linear regression yielding a Slope (S) = 25 mV/decade and a Standard Error (σ) = 8.2 mV.
- LOD = (3.3 × 8.2 mV) / 25 mV/decade = 1.08 pM (in concentration units)
- LOQ = (10 × 8.2 mV) / 25 mV/decade = 3.28 pM
- Sensitivity = 25 mV/decade
- Dynamic Range = Experimentally determined to be from 3.28 pM (LOQ) to 10 nM (upper limit of linearity), spanning over 3 orders of magnitude.
Table 2: Exemplary Performance Metrics from Recent GFET Biosensor Studies
| Analyte Target | Reported LOD | Dynamic Range | Key Factor for Performance | Citation (Example) |
|---|---|---|---|---|
| Streptavidin | 0.1 nM | 0.1 - 1000 nM | Amine-rich surface functionalization via plasma polymerization | [4] |
| Glucose | 0.15 μM | 0.05 - 100 mM | PBA functionalization on a flexible GFET | [63] |
| SARS-CoV-2 Spike Protein | ~2x enhancement vs. non-oriented | Not Specified | Oriented antibody immobilization on the GFET surface | [19] |
| ATP | 0.5 pM | 0.5 pM - 50 μM | Use of 3D graphene foam as transducer | [59] |
The Scientist's Toolkit: Research Reagent Solutions
Table 3: Essential Materials and Reagents for GFET Biosensor Characterization
| Item | Function / Application | Examples / Notes |
|---|---|---|
| CVD-Grown Graphene | The core semiconductor channel material. | High carrier mobility is critical for high sensitivity. |
| Photoresist & Developers | For patterning electrodes via photolithography. | Requires high-resolution resists (e.g., PMMA). |
| Metal Evaporation Targets | For fabricating source, drain, and contact electrodes. | Au/Cr, Pd, Ti/Au. |
| Biofunctionalization Reagents | To modify the inert graphene surface for biomolecule attachment. | Cyclopropylamine (for plasma polymerization), Pyrene-1-boronic acid (PBA), 1-Pyrenebutanoic acid succinimidyl ester (PBASE) [4] [63]. |
| Bioreceptors | Provide specificity for the target analyte. | Antibodies, antibody fragments, DNA/RNA aptamers, peptide nucleic acids (PNA) [59]. |
| Blocking Agents | Reduce non-specific binding to improve signal-to-noise ratio. | Bovine Serum Albumin (BSA), casein, ethanolamine [2]. |
| Analytical Buffer Solutions | Provide a stable ionic environment for sensing experiments. | Phosphate Buffered Saline (PBS), Tris-EDTA (TE) buffer. The ionic strength affects Debye screening and must be controlled [64]. |
The rigorous and standardized quantification of LOD, Sensitivity, and Dynamic Range is indispensable for advancing GFET biosensor technology from research laboratories to clinical and commercial applications. By adhering to the detailed experimental protocols and statistical calculations outlined in this document, researchers can consistently generate reliable performance data. This not only allows for the objective optimization of sensor design and biofunctionalization strategies [19] but also ensures that these promising platforms are accurately evaluated for their intended diagnostic and research purposes.
Application Note AN-2025-001
This application note provides a comparative analysis of Graphene Field-Effect Transistor (GFET) biosensors against established diagnostic techniques: Enzyme-Linked Immunosorbent Assay (ELISA), Polymerase Chain Reaction (PCR), and traditional Electrochemical Sensors. The drive for point-of-care (POC) diagnostics demands technologies that are rapid, sensitive, and portable. GFETs, which transduce biomolecular binding events into measurable electrical signals, have emerged as a powerful platform that addresses many limitations of traditional methods [1]. This document details their performance, provides a foundational experimental protocol for a GFET-based immunoassay, and contextualizes their role within the broader scope of biosensor research and drug development.
Technology Comparison and Performance Metrics
The core advantage of GFET biosensors lies in their label-free detection mechanism, high sensitivity, and rapid response. When a target biomarker binds to the biorecognition layer on the graphene surface, it alters the local charge distribution, modulating the channel's electrical conductivity (measured as the drain-source current, IDS). This change can be monitored in real-time, enabling quantitative detection [1] [65].
The table below summarizes a comparative analysis of key performance indicators across the different technologies.
Table 1: Comparative Analysis of Biosensing Platforms
| Feature | GFET Biosensors | Traditional ELISA | PCR | Standard Electrochemical Sensors |
|---|---|---|---|---|
| Limit of Detection (LOD) | Femtomolar (fg/mL) range; e.g., 230 fg/mL for GFAP [66]; ~1.7 fM for microRNA [67]. | Picogram (pg/mL) to nanogram (ng/mL) range [66]. | Varies; highly sensitive for nucleic acids. | Generally higher than GFETs; picomolar (pM) to nanomolar (nM) common [68]. |
| Assay Time | Minutes (e.g., ~50 min for G-ELISA [69]; several minutes for GFAP [66]). | Several hours (3-6 hours typical). | 1 to several hours (including preparation). | Minutes to an hour [70]. |
| Label Requirement | Label-free detection. | Requires enzymatic and secondary antibody labels. | Requires fluorescent probes or intercalating dyes. | Often requires redox labels (e.g., Ferrocene); label-free variants exist (EIS) [70]. |
| Sample Volume | Low (microliters). | Moderate to high (tens to hundreds of microliters). | Low to moderate. | Low (microliters) [70]. |
| Portability & Cost | High potential for portability; low-cost at scale. | Benchtop equipment; low cost per test but requires lab settings. | Requires thermocyclers; less portable. | High portability potential; low-cost [71]. |
| Key Advantage | Ultra-high sensitivity, speed, label-free operation, and miniaturization potential. | Well-established, standardized, and high-throughput. | Gold standard for nucleic acid detection; high specificity. | Proven POC compatibility, cost-effectiveness, and robustness [71]. |
| Key Limitation | Susceptibility to non-specific binding; requires surface passivation [65]. | Lengthy procedure, multiple washing and incubation steps. | Detects genetic material, not necessarily live pathogens; complex sample prep [70]. | Sensitivity can be lower than GFETs; may require sophisticated electrode modification [68]. |
Experimental Protocol: GFET-based Immunoassay for Protein Detection
The following protocol outlines the key steps for configuring a GFET biosensor to detect a protein biomarker, such as Glial Fibrillary Acidic Protein (GFAP) or ferritin.
GFET Working Principle and Assay Workflow
The following diagram illustrates the foundational working principle of a GFET and the subsequent immunoassay workflow.
Step-by-Step Protocol
Part I: Device Fabrication and Biofunctionalization
- GFET Chip Preparation: Use a commercially available or custom-fabricated GFET chip (e.g., Graphenea S20) [66]. The chip consists of a silicon substrate with a SiO₂ dielectric layer, patterned source/drain electrodes (e.g., Cr/Au), and a graphene channel.
- Surface Functionalization:
- Prepare a 5 mM solution of 1-pyrenebutyric acid N-hydroxysuccinimide ester (PBASE) in dimethylformamide (DMF) or ethanol [67] [66].
- Incubate the GFET chip with the PBASE solution for 1-2 hours. Pyrene groups adsorb onto the graphene surface via π-π stacking.
- Rinse thoroughly with DMF and PBS (pH 7.4) to remove unbound PBASE.
- Antibody Immobilization:
- Prepare a solution of the capture antibody (e.g., anti-GFAP or anti-ferritin) in PBS (typical concentration 10-50 µg/mL).
- Incubate the PBASE-modified GFET chip with the antibody solution for 2 hours at room temperature or overnight at 4°C. The NHS ester group of PBASE covalently binds to primary amines on the antibody.
- Rinse with PBS to remove physically adsorbed antibodies.
- Surface Blocking:
Part II: Electrical Measurement and Target Detection
- Electrical Characterization Setup:
- Place the functionalized GFET chip in a measurement cell.
- Connect the source and drain electrodes to a source measure unit (SMU) or a potentiostat.
- Use an Ag/AgCl electrode as a liquid gate (pseudo-reference electrode) in the electrolyte solution (e.g., 0.1x PBS or low ionic strength buffer to enhance Debye length and sensitivity) [22].
- Baseline Transfer Curve:
- With only measurement buffer on the chip, sweep the gate voltage (VGS) while monitoring the drain-source current (IDS).
- Record the transfer curve (IDS vs. VGS) and identify the charge neutrality point (Dirac point), characterized by a minimum in IDS.
- Sample Introduction and Measurement:
- Introduce the sample (e.g., serum, plasma, or buffer spiked with the target antigen) onto the GFET chip.
- Incubate for a defined period (e.g., 10-15 minutes) to allow for specific binding.
- Under a constant drain-source voltage (VDS), measure the real-time change in IDS or record a new transfer curve after incubation.
- Data Analysis:
- The specific binding of the target biomarker will induce a shift in the Dirac point voltage (∆VDirac) and a change in IDS.
- Quantify the target concentration by calibrating the Dirac point shift (or IDS change) against known standard concentrations.
The Scientist's Toolkit: Key Reagents and Materials
Table 2: Essential Research Reagent Solutions for GFET Biosensing
| Reagent/Material | Function | Key Consideration |
|---|---|---|
| GFET Chips | The core transducer platform. | Commercial availability (e.g., Graphenea) allows researchers to focus on assay development rather than fabrication [66]. |
| PBASE Linker | A heterobifunctional crosslinker for antibody immobilization on graphene. | Pyrene moiety provides stable π-π stacking with graphene; NHS ester reacts with antibody amines [67] [66]. |
| Specific Antibodies | Biorecognition element for the target analyte. | High affinity and specificity are critical for sensor performance. Monoclonal antibodies are often preferred. |
| Blocking Agents (BSA, PEG) | Reduces non-specific binding to the graphene surface. | Essential for improving signal-to-noise ratio in complex biological samples like plasma [65] [69]. |
| Low Ionic Strength Buffers | Measurement electrolyte (e.g., 0.1x PBS). | Increases the electrical double layer (Debye length), improving sensitivity for larger biomolecules [1]. |
| Portable Potentiostat/FET Reader | Electronic readout device for electrical measurements. | Enables POC application. Portable readers compatible with GFETs are commercially available [69]. |
GFET biosensors represent a paradigm shift in diagnostic sensing, offering a compelling combination of ultra-high sensitivity, rapid analysis, and label-free operation that surpasses the capabilities of traditional ELISA and standard electrochemical sensors [66]. While challenges such as consistent surface functionalization and managing non-specific binding in ultra-complex matrices remain active areas of research, the experimental protocol and analysis provided here serve as a foundational guide for researchers and drug development professionals. The integration of GFETs with microfluidics for sample handling and advanced data analytics paves the way for their deployment in next-generation POC diagnostics, therapeutic drug monitoring, and personalized medicine.
Multiplexed detection refers to the simultaneous measurement of multiple distinct analytes from a single sample within a single assay run. This capability is crucial for clinical diagnostics, environmental monitoring, and food safety, as it provides comprehensive biomarker profiles without increasing required sample volume or cost per test [72]. Unlike traditional single-analyte tests like ELISA, multiplexed platforms offer significant advantages in throughput, labor efficiency, and operational convenience, making them particularly valuable for point-of-care diagnostics and complex disease characterization [73] [74].
The fundamental approaches to multiplexing fall into two categories: multi-label and multi-electrode strategies. Multi-label approaches utilize a single working electrode that generates distinguishable electrochemical signals for different analytes through various labels such as metal quantum dots, redox agents, or enzymes. In contrast, multi-electrode platforms employ multiple spatially separated sensing areas, each designed to detect a particular analyte [73]. These can be implemented as chip-based arrays, disposable electrodes, or paper-based systems [73].
Within the specific context of graphene field-effect transistor (GFET) biosensors, multiplexing is achieved through arrayed configurations where different biorecognition elements are immobilized on separate GFET devices within a single chip, enabling parallel detection of multiple biomarkers from a minimal sample volume [17].
Fundamental Principles of GFET Biosensors
Working Mechanism
Graphene field-effect transistors (GFETs) function by transducing biochemical interactions at their surface into measurable electrical signals. The core structure consists of a graphene channel connecting source and drain electrodes, with a gate electrode that modulates the channel's conductivity [17].
The operational mechanism can be understood through two primary theoretical frameworks:
Electron Exchange Theory: When target biomolecules bind to receptors on the graphene surface, direct electron transfer can occur if the binding event happens within the Debye length (λD) in an electrolyte. This electron exchange dopes the graphene, shifting the Dirac point and altering channel conductivity [17]. For instance, folded aptamer structures can bring aromatic nucleotide chains containing electrons within the Debye length, resulting in n-type doping of graphene [17].
Electrostatic Induction Theory: Biomolecular binding can also modulate the capacitance of the electric double layer (EDL) at the solution-graphene interface. This capacitance change alters the electrolyte potential, inducing charge accumulation in the graphene channel and changing its carrier density without direct electron transfer [17].
The GFET transfer characteristic curve exhibits a distinctive V-shape, with the left branch representing hole conduction (p-type) and the right branch representing electron conduction (n-type). The point of minimum conductivity, known as the Dirac point, shifts in response to molecular binding events, providing the primary signal transduction mechanism for biosensing [17].
Graphene Properties Advantageous for Multiplexed Biosensing
Graphene's unique material properties make it exceptionally suitable for multiplexed biosensing applications:
Exceptional Electrical Conductivity: Graphene's high carrier mobility and saturation drift velocity enable highly sensitive detection of minute conductivity changes resulting from biomolecular binding [2] [17].
Large Surface-to-Volume Ratio: The two-dimensional structure provides an extensive surface area for functionalization with various biorecognition elements, facilitating simultaneous detection of multiple analytes [2] [75].
Biocompatibility and Functionalization Flexibility: Graphene supports diverse functionalization strategies including π-π stacking, covalent bonding, and van der Waals interactions, allowing immobilization of various receptors like antibodies, aptamers, and DNA sequences [2].
Mechanical Flexibility: This property enables development of flexible, wearable multiplexed sensors that maintain conformal contact with biological surfaces [17].
Multiplexing Strategies and Configurations
Spatial Multiplexing with Arrayed GFETs
Spatial multiplexing involves fabricating multiple GFET devices on a single chip, with each device functionalized with different biorecognition elements. This approach allows parallel detection of different analytes from the same sample solution [17]. For instance, a single chip could contain separate GFETs for cardiac biomarkers (troponin, CRP, BNP), enabling comprehensive cardiovascular risk assessment from a single sample [73].
The implementation typically involves photolithographic patterning of graphene channels and electrodes, followed by selective functionalization of individual devices using inkjet printing or microfluidic patterning [75]. This spatial separation prevents cross-talk between different sensing elements and enables individualized optimization of each detection channel.
Multi-Label Approaches in Single GFET
Multi-label strategies enable detection of multiple analytes using a single GFET device by employing distinguishable labels that generate distinct electrical signals [73]. This approach typically utilizes:
Metal Quantum Dots: Different metal quantum dots (CdS, PbS, ZnS) produce distinct stripping potentials in voltammetric detection, allowing simultaneous quantification of multiple analytes [73].
Enzyme Labels: Various enzymes (horseradish peroxidase, glucose oxidase, alkaline phosphatase) generate different electroactive products with characteristic signatures [73].
Redox Probes: Distinct redox molecules (ferrocene, methylene blue, anthraquinone) exhibit different oxidation-reduction potentials, enabling multiplexing through potential-resolved signals [73].
In GFET platforms, multi-label approaches can be implemented by functionalizing the graphene surface with multiple aptamers or antibodies, each conjugated to a different label. The binding events are then transduced into unique electrical signatures based on the specific label properties.
Signal Transduction and Deconvolution
A critical challenge in multiplexed GFET sensing is deconvoluting combined signals from multiple binding events. Advanced data processing approaches address this challenge:
Machine Learning Algorithms: Feature selection algorithms like Boruta and classification methods such as Support Vector Machines (SVM) can identify patterns in complex sensor response data, enabling accurate identification of individual analytes in mixtures [75].
Deep Learning Models: 1D Convolutional Neural Networks (CNNs) process time-series data from GFET arrays, achieving near-perfect discrimination of mixed chemical compositions under varying humidity conditions [75].
Multiparameter Analysis: Simultaneous monitoring of multiple electrical parameters (Dirac point shift, mobility change, conductivity modulation) provides a distinctive fingerprint for each analyte [17].
Table 1: Comparison of Multiplexing Strategies for GFET Biosensors
| Strategy | Principle | Key Advantages | Limitations | Representative Applications |
|---|---|---|---|---|
| Spatial Multiplexing | Multiple GFETs on single chip, each with different bioreceptors | Minimal cross-talk, independent optimization | Larger chip area, complex fabrication | Cytokine profiling [17], Allergen detection [76] |
| Multi-Label Approach | Single GFET with multiple distinguishable labels | Compact design, minimal sample volume | Potential signal interference, complex chemistry | Small molecule detection [73], Metal ion sensing [73] |
| Hybrid Approaches | Combination of spatial and label-based methods | High multiplexing capacity, redundancy | Very complex design and data analysis | Breath analysis [75], Disease diagnosis panels |
Experimental Protocols
Protocol 1: Fabrication of Multiplexed GFET Array
Objective: Fabricate a 4×4 GFET array for simultaneous detection of four different protein biomarkers.
Materials:
- SiO₂/Si wafers (300 nm thermal oxide)
- CVD-grown monolayer graphene
- Photoresist (AZ5214) and developer
- Gold target for sputtering (99.99%)
- Polymethyl methacrylate (PMMA) for transfer
- Phosphate-buffered saline (PBS, pH 7.4)
- Bovine serum albumin (BSA) for blocking
Equipment:
- Plasma cleaner/etcher
- Electron beam evaporator or sputter coater
- Photolithography mask aligner
- Raman spectrometer
- Atomic force microscope
- Probe station with semiconductor parameter analyzer
Procedure:
Electrode Fabrication:
- Clean SiO₂/Si wafer with oxygen plasma (100 W, 2 min)
- Spin-coat photoresist at 3000 rpm for 45 sec, soft bake at 95°C for 2 min
- Expose through electrode-pattern mask (20 mJ/cm²), develop in AZ726 developer
- Deposit 10 nm Cr adhesion layer followed by 100 nm Au via e-beam evaporation
- Lift-off in acetone with ultrasonication (100 W, 30 sec)
Graphene Patterning:
- Transfer CVD graphene to substrate using PMMA-mediated wet transfer
- Spin-coat photoresist, pattern using graphene channel mask
- Etch exposed graphene regions with O₂ plasma (50 W, 10 sec)
- Remove photoresist with acetone and isopropanol rinses
Device Characterization:
- Confirm graphene quality via Raman spectroscopy (G/D ratio >5, symmetric 2D peak)
- Verify electrode continuity and graphene patterning with optical microscopy
- Measure initial transfer characteristics in PBS using Ag/AgCl reference electrode
Troubleshooting Tips:
- If graphene tears during transfer, optimize PMMA concentration and transfer speed
- If electrode-graphene contact resistance is high, include annealing step (250°C, 2h in Ar/H₂)
- If graphene contamination is observed, implement additional cleaning with thermal annealing
Protocol 2: Surface Functionalization for Multiplexed Detection
Objective: Functionalize a 4-GFET array with different DNA aptamers for simultaneous detection of thrombin, ATP, cocaine, and kanamycin.
Materials:
- Pyrene-linker molecules (1-pyrenebutanoic acid succinimidyl ester)
- DNA aptamers specific to each target:
- Thrombin: 5'-GGTTGGTGTGGTTGG-3'
- ATP: 5'-ACCTGGGGGAGTATTGCGGAGGAAGGT-3'
- Cocaine: 5'-GGGAGACAAGGAAAATCCTTCAATGAAGTGGGTC-3'
- Kanamycin: 5'-TGGGGGTTGAGGCTAAGCCGA-3'
- N-hydroxysuccinimide (NHS) and N-(3-Dimethylaminopropyl)-N'-ethylcarbodiimide (EDC)
- Ethanolamine (1M, pH 8.5) for blocking
- Washing buffer (PBS with 0.05% Tween-20)
Procedure:
Surface Activation:
- Incubate GFET array in pyrene-linker solution (0.5 mM in DMSO) for 2h
- Rinse thoroughly with DMSO and PBS to remove unbound linkers
- Activate carboxyl groups with EDC/NHS (50mM/25mM in MES buffer, pH 6) for 30 min
Aptamer Immobilization:
- Prepare separate aptamer solutions (5 μM in PBS) for each target
- Using non-contact microdispenser, spot each aptamer solution on designated GFETs
- Incubate in humidity chamber (80% RH) for 3h at room temperature
- Rinse with PBS-Tween to remove unbound aptamers
Surface Blocking:
- Treat array with ethanolamine solution (1M, pH 8.5) for 30 min to passivate unreacted sites
- Rinse with PBS and store in PBS at 4°C until use
Quality Control:
- Verify aptamer immobilization via AFM height measurements
- Confirm functionalization specificity using fluorescently-labeled complementary DNA
- Measure transfer characteristics after each functionalization step to monitor Dirac point shifts
Protocol 3: Multiplexed Detection of Protein Biomarkers
Objective: Simultaneously detect thrombin, mucin-1, CEA, and AFP at clinically relevant concentrations using a functionalized GFET array.
Materials:
- Functionalized GFET array from Protocol 2
- Purified target proteins dissolved in PBS
- Human serum samples (healthy and spiked)
- Measurement buffer (0.01× PBS for reduced Debye length)
- Ag/AgCl reference electrode
- Semiconductor parameter analyzer
Procedure:
Measurement Setup:
- Connect GFET array to parameter analyzer via probe station
- Place reference electrode in measurement chamber filled with buffer
- Apply fixed drain-source voltage (Vds = 10 mV) while sweeping gate voltage (Vg ± 0.5V)
Baseline Acquisition:
- Measure transfer characteristics (Id-Vg) of each GFET in pure buffer
- Record Dirac point voltage (VDirac) for each device as baseline
- Repeat measurements until stable baseline established (≤5mV drift in 10 min)
Sample Measurement:
- Replace buffer with sample solution (serum spiked with target proteins)
- Incubate for 15 min with gentle stirring
- Measure transfer characteristics of each GFET
- Calculate VDirac shift relative to baseline for each device
Data Analysis:
- Plot ΔVDirac for each GFET against protein concentration
- Generate calibration curves for each biomarker
- Determine detection limits from signal-to-noise ratio (S/N=3)
Research Reagent Solutions
Table 2: Essential Research Reagents for Multiplexed GFET Biosensors
| Reagent/Chemical | Function | Application Example | Considerations |
|---|---|---|---|
| CVD-Grown Graphene | Sensing channel material | Fundamental transducer in GFET | Quality (G/D ratio in Raman) critical for performance |
| DNA Aptamers | Biorecognition elements | Target capture in aptasensors | Selection of appropriate sequences with high affinity |
| Pyrene-Based Linkers | Graphene functionalization | Anchor for biomolecule immobilization | π-π stacking with graphene preserves electrical properties |
| EDC/NHS Chemistry | Carboxyl group activation | Covalent immobilization of proteins | Fresh preparation required due to hydrolysis |
| Metal Quantum Dots (CdS, PbS) | Electrochemical labels | Multiplexed detection via stripping voltammetry | Distinct redox potentials enable signal discrimination |
| BSA or Ethanolamine | Surface blocking agents | Reduce non-specific binding | Critical for measurements in complex media like serum |
| PBS Buffer (Diluted) | Measurement medium | Reduced ionic strength extends Debye length | Optimize concentration for sensitivity/specificity balance |
Performance Data and Validation
Analytical Performance of Multiplexed GFET Sensors
Multiplexed GFET biosensors have demonstrated exceptional performance in simultaneous detection of multiple analytes. The following table summarizes representative performance metrics from recent studies:
Table 3: Performance Metrics of Multiplexed GFET Biosensors for Various Analytics
| Analytes | Detection Mechanism | Linear Range | Limit of Detection | Assay Time | Reference Application |
|---|---|---|---|---|---|
| Thrombin, Lysozyme | CdS, PbS QD labels | 20-500 ng/L | 20 ng/L (both) | <30 min | Protein biomarker detection [73] |
| Adenosine, Thrombin | CdS, PbS QD labels | 1×10⁻¹¹–2.0×10⁻⁹ M (Ado) 1.0×10⁻¹²–3.0×10⁻¹⁰ M (Thr) | 8.8×10⁻¹² M (Ado) 7.6×10⁻¹³ M (Thr) | <60 min | Small molecule/protein detection [73] |
| CEA, Mucin-1 | Au/BSA nanospheres with Pb²⁺, Cd²⁺ | 0.01 pM-100 nM | 3.3 fM (both) | <45 min | Cancer biomarker detection [73] |
| NH₃, NO, H₂S | DNA-functionalized graphene | 1-100 ppm | ~0.5 ppm | <5 min | Breath analysis [75] |
| Bet v 1 Allergen | Antibody-functionalized GFET | Not specified | 10 pg/mL | <30 min | Environmental allergen monitoring [76] |
Comparison with Conventional Multiplexing Platforms
When compared with established multiplexed detection platforms, GFET-based systems offer distinct advantages:
Wider Dynamic Range: GFET systems typically achieve 10⁵-10⁶ linear signal output range, significantly broader than microbead-based systems (10³-10⁴) [74].
Lower Limits of Detection: GFET aptasensors consistently achieve fM-pM detection limits, surpassing conventional ELISA and matching performance of specialized laboratory equipment [73].
Reduced Sample Volume: Miniaturized GFET arrays enable multiplexed detection from sample volumes as low as 2-10 μL, particularly advantageous for pediatric and small-animal studies [72].
Faster Response Times: Label-free detection mechanisms in GFETs provide real-time monitoring capabilities with response times of seconds to minutes, compared to hours for conventional plate-based assays [76] [17].
Troubleshooting and Optimization Guidelines
Common Technical Issues and Solutions
High Non-Specific Binding:
- Problem: Significant signal in negative controls or inconsistent calibration
- Solutions: Optimize blocking conditions (try BSA, casein, or surfactant-based blockers); increase wash stringency (add tween-20); implement longer blocking times (overnight at 4°C)
Inconsistent Device Performance:
- Problem: Significant variation between identical devices on same chip
- Solutions: Standardize graphene transfer process; implement quality control via Raman mapping; include device selection criteria based on initial electrical characteristics
Signal Drift During Measurements:
- Problem: Baseline instability complicates accurate quantification
- Solutions: Ensure temperature stabilization (±0.5°C); use fresh buffer solutions; implement differential measurements with reference GFET; allow sufficient equilibration time
Poor Reproducibility Between Fabrication Batches:
- Problem: Significant performance variation between different chip batches
- Solutions: Standardize graphene source and transfer protocols; implement rigorous quality control metrics; maintain detailed fabrication records for process correlation
Optimization Strategies for Enhanced Multiplexing
Debye Length Optimization: For charge-based detection mechanisms, use diluted buffers (0.01× PBS) to increase Debye length and improve sensitivity to charged analytes [17].
Surface Chemistry Optimization: Systematically compare different linkers (pyrene-based, silane-based) and immobilization strategies (covalent, π-π stacking) for each bioreceptor type.
Signal Acquisition Parameters: Optimize Vg sweep range and speed to balance measurement resolution with temporal resolution for real-time monitoring applications.
Array Layout Design: Include internal reference GFETs (blocked but not functionalized) for differential measurements to compensate for environmental fluctuations and non-specific binding effects.
Graphene Field-Effect Transistor (GFET) biosensors represent a transformative technology in diagnostic sensing, leveraging the exceptional electrical, mechanical, and biocompatible properties of graphene [55] [1]. Their integration into flexible, wearable, and portable platforms is a critical step toward realizing accessible, real-time, point-of-care (POC) diagnostics [77]. This shift from rigid, laboratory-bound systems to conformable and user-friendly devices enables the non-invasive monitoring of biomarkers in biofluids like sweat, saliva, and interstitial fluid, facilitating proactive health management [78] [79]. This document provides detailed application notes and experimental protocols for the development and implementation of these advanced GFET-based sensing platforms, framed within the context of a broader thesis on GFET biosensor assay protocol research.
Core Technologies and Material Selection
The performance of a flexible GFET biosensor is fundamentally determined by the choice of materials and the underlying sensing mechanism.
Sensing Principle of GFETs
A GFET is a three-terminal device (source, drain, gate) where a graphene channel connects the source and drain electrodes. The conductance of this channel is modulated by changes in the local electric field. In a biosensing context, the binding of a target biomolecule (e.g., an antigen, DNA strand, or hormone) to a biorecognition element (e.g., an antibody or aptamer) immobilized on the graphene surface acts as a "gate" potential. This binding event alters the charge carrier density in the graphene, leading to a measurable shift in the drain-source current (IDS) [1]. This label-free, electronic detection mechanism is the foundation for the high sensitivity and rapid response of GFET biosensors.
Graphene and Flexible Substrate Materials
The selection of graphene type and substrate is crucial for flexibility and performance.
Table 1: Material Options for Flexible GFET Biosensors
| Material Type | Specific Examples | Key Properties/Function | Suitability for Flexible Platforms |
|---|---|---|---|
| Graphene Channel | CVD Graphene [79] | High carrier mobility, low defect density, continuous films | Excellent, when transferred to flexible substrates |
| Reduced Graphene Oxide [55] [77] | Good conductivity, facile synthesis, functionalizable surface | Excellent, can be solution-processed and printed | |
| Laser-Induced Graphene [77] [79] | Porous 3D structure, high surface area, direct writing on polymers | Excellent, in-situ formation on flexible substrates | |
| Flexible Substrate | Polydimethylsiloxane [78] | Biocompatible, stretchable, transparent, insulating | Ideal for epidermal and wearable patches |
| Polyimide [1] | High thermal stability, mechanical strength, insulating | Suitable for robust flexible electronics | |
| Polyethylene Terephthalate [77] | Transparent, lightweight, low-cost | Good for disposable sensor strips and patches |
The Scientist's Toolkit: Research Reagent Solutions
A standardized set of reagents and materials is essential for the functionalization and operation of GFET-based wearable biosensors.
Table 2: Essential Research Reagents for GFET Biosensor Functionalization
| Item | Function/Explanation | Example Application |
|---|---|---|
| 1-(3-Dimethylaminopropyl)-3-ethylcarbodiimide (EDC) | Carboxyl group activator; forms amide bonds between biorecognition elements and graphene surface. | Covalent immobilization of anti-cortisol antibodies on GO-coated electrodes for stress monitoring [79]. |
| N-Hydroxysuccinimide (NHS) | Stabilizes the EDC-activated intermediate, improving the efficiency of amide bond formation. | Used with EDC to functionalize an rGO-FET with DNA aptamers for miRNA detection in cancer diagnostics [77]. |
| Phosphate Buffered Saline (PBS) | Provides a physiologically compatible pH and ionic strength environment for biomolecule stability and binding reactions. | Standard buffer for washing steps and as a baseline electrolyte for electrical measurements in sweat analysis [80]. |
| Poly(ethylene glycol) (PEG) | A passivation layer; reduces non-specific binding of non-target biomolecules, enhancing sensor selectivity. | Backfilling unused graphene surface areas after antibody immobilization to minimize noise in complex biofluids [55] [79]. |
| Toluene / Isopropanol | Solvents for processing and cleaning graphene surfaces, removing polymeric residues from transfer processes. | Cleaning CVD-grown graphene before photolithography to ensure a pristine surface for functionalization [1]. |
| Plasma Cleaner (O2/Ar) | Treats graphene and substrate surfaces to modify hydrophilicity and introduce functional groups for better biomolecule adhesion. | Creating a hydrophilic surface on PDMS to improve the adhesion of a graphene ink prior to printing [78]. |
Detailed Experimental Protocols
Protocol 1: Fabrication of a Laser-Induced Graphene (LIG) GFET on a Polyimide Substrate
This protocol outlines a maskless, scalable method for creating flexible GFET arrays [77].
Workflow Diagram: LIG-GFET Fabrication
Materials:
- Polyimide sheet (125 µm thickness)
- CO2 infrared laser system
- Photoresist (e.g., S1813)
- Gold and Chromium targets for sputtering
- SU-8 or PDMS dielectric
- Developer solution
Procedure:
- Laser Graphitization: Mount the polyimide film on the laser bed. Program the laser path to define the graphene channel areas (typical dimensions: 5 mm x 0.5 mm). Use optimized laser parameters (e.g., power 4.5 W, speed 15 cm/s, 600 DPI) to convert the polymer surface into porous LIG [77].
- Electrode Patterning: Spin-coat photoresist onto the LIG/polyimide surface. Use a photomask to define source/drain contact areas and expose with UV light. Develop the pattern. Deposit a Cr/Au (10/50 nm) layer via sputtering or thermal evaporation. Perform a lift-off process in acetone to reveal the final electrode structure.
- Insulation and Encapsulation: Spin-coat a thin layer of SU-8 photoresist or PDMS over the entire device. Use photolithography (for SU-8) or a physical mask (for PDMS) to open windows exposing only the LIG sensing channel and the contact pads, protecting the rest of the circuitry from the electrolyte environment [1].
Protocol 2: Surface Functionalization for Cortisol Detection in Sweat
This protocol details the bio-functionalization of a GFET for a specific target, relevant for stress monitoring [79] [80].
Workflow Diagram: GFET Functionalization
Materials:
- Fabricated GFET sensor (from Protocol 1)
- EDC and NHS
- Anti-cortisol monoclonal antibody
- PEG-Silane
- PBS buffer (pH 7.4)
- Cortisol standards
Procedure:
- Surface Activation: Place the GFET in a plasma cleaner. Treat with O2 plasma for 1 minute at 50 W to clean the surface and introduce carboxyl groups.
- Linker Chemistry: Prepare a fresh solution of 20 mM EDC and 10 mM NHS in PBS. Pipette 50 µL of this solution onto the GFET channel and incubate for 1 hour at room temperature to activate the carboxyl groups.
- Antibody Immobilization: Rinse the channel with PBS to remove excess EDC/NHS. Immediately apply 50 µL of anti-cortisol antibody solution (10 µg/mL in PBS) and incubate for 2 hours. The activated esters on the surface will covalently bind to amine groups on the antibody.
- Passivation: Rinse with PBS. Apply a 1% (w/v) solution of PEG in PBS and incubate for 30 minutes. This step blocks any remaining activated sites to minimize non-specific binding during sensing. Rinse thoroughly and store in PBS at 4°C until use.
Protocol 3: Electrical Characterization and Calibration
This protocol standardizes the measurement of sensor performance before and after functionalization and against target analytes.
Workflow Diagram: Sensor Characterization
Materials:
- Semiconductor parameter analyzer (e.g., Keithley 4200)
- Electrochemical cell with Ag/AgCl reference gate electrode
- PBS buffer
- Analyte standards (e.g., cortisol at 1 pg/mL, 10 pg/mL, 100 pg/mL, 1 ng/mL, 10 ng/mL)
Procedure:
- Setup: Mount the functionalized GFET in a measurement jig. Connect the source and drain electrodes to the parameter analyzer. Place a drop of PBS on the sensing area and insert the Ag/AgCl reference electrode to complete the liquid gate setup.
- Transfer Curve Measurement: Set a constant drain-source voltage (
VDS= 0.1 V). Sweep the liquid gate voltage (VGS) from -0.5 V to +0.5 V. Record the resulting drain current (IDS) to obtain the transfer characteristic curve. - Data Analysis: For each curve, determine the Dirac point (
V_Dirac), which is the gate voltage corresponding to the minimumIDS. This point indicates where the Fermi level crosses the Dirac point of graphene, and its shift (ΔV_Dirac) is the primary sensing signal. - Calibration: Repeat the transfer curve measurement after exposing the sensor to different concentrations of the target analyte. Plot
ΔV_Diracagainst the logarithm of the analyte concentration. The slope of the linear fit represents the sensitivity, and the limit of detection (LOD) can be calculated as three times the standard deviation of the baseline noise divided by the sensitivity.
Quantitative Performance Data
Performance metrics from recent literature highlight the capabilities of flexible GFET platforms.
Table 3: Performance Metrics of Flexible/Wearable GFET Biosensors
| Target Analyte | Biofluid | Sensing Platform | Linear Range | Limit of Detection (LOD) | Sensitivity | Reference Context |
|---|---|---|---|---|---|---|
| Cortisol | Sweat | rGO-based FET on flexible substrate | 1 pg/mL - 100 ng/mL | 0.1 pg/mL | ~24 mV/decade | [79] |
| Glucose | Sweat | LIG-based electrochemical sensor | 10 µM - 1 mM | 3.7 µM | ~4.5 nA/µM | [77] [80] |
| Dopamine | Saliva | GFET with aptamer probe | 1 fM - 1 µM | 0.1 fM | Not specified | [55] [1] |
| miRNA-21 (Cancer) | Buffer | GFET with PNA probe | 1 aM - 10 pM | 0.8 aM | ~2.5 mV/decade | [77] |
| Hemoglobin | Blood | Graphene SPR Sensor | N/A | Peak Sensitivity: 1785 nm/RIU | [55] |
Application Notes for POC Integration
Successful translation of these protocols into viable POC devices requires addressing key integration challenges.
- Microfluidics for Sweat Sampling: Integrate a soft, silicone-based microfluidic channel directly onto the sensor patch. This channel should guide freshly secreted sweat from the skin to the GFET sensing chamber, preventing evaporation and contamination from the skin surface, which is critical for accurate temporal monitoring [78] [80].
- Power and Data Telemetry: For truly portable operation, integrate an ultra-thin, flexible battery or an energy-harvesting module (e.g., a textile-based triboelectric nanogenerator). Pair the sensor with a low-power Bluetooth module to wirelessly transmit the
ΔV_Diracdata to a smartphone app for real-time visualization and analysis [77] [78]. - Multiplexing for Panel Detection: Fabricate an array of multiple, independent GFET pixels on the same flexible substrate. Each pixel can be functionalized with a different biorecognition element (e.g., for cortisol, glucose, and lactate). This allows for the simultaneous measurement of a biomarker panel from a single sweat sample, providing a more comprehensive health assessment [79] [80].
Assessing Clinical Translation Potential and Pathways to Commercialization
Graphene Field-Effect Transistor (GFET) biosensors represent a transformative technology in medical diagnostics, leveraging graphene's exceptional electrical properties to detect biological molecules with unprecedented sensitivity. These devices function by transducing biomolecular binding events into measurable electrical signals, enabling real-time, label-free detection of disease biomarkers [81] [54]. The global market for graphene in biosensors and medical diagnostics is projected to expand at a remarkable CAGR of 27.5%, potentially exceeding USD 691 million by 2034, underscoring the significant commercial interest in this technology [82]. This application note assesses the clinical translation potential of GFET biosensors and outlines detailed protocols and pathways for their commercialization, providing researchers and developers with a structured framework for advancing these devices from laboratory prototypes to clinical tools.
The core advantage of GFETs lies in their fundamental operating principle. As bioanalytical sensors, GFETs detect biologically-relevant molecules through responsive electrical conductance. Graphene's extreme surface-to-bulk ratio, high charge carrier mobility, and sensitivity to electrostatic changes in its immediate environment make it particularly suited for this application [81]. When target analytes bind to recognition elements functionalized on the graphene surface, they alter the local charge distribution, modulating the electrical conductance of the graphene channel in a quantifiable manner [54] [2]. This mechanism enables detection limits down to the femtomolar and sub-femtomolar range for various biomarkers, significantly surpassing the sensitivity of many conventional diagnostic assays [81].
Performance Metrics and Clinical Potential
GFET biosensors demonstrate performance characteristics that position them favorably for clinical adoption. Their key advantages include easy operation, fast response, real-time monitoring capability, high specificity and sensitivity, and compatibility with microfluidic integration and multiplexing [81]. The following table summarizes the key performance metrics and comparative advantages of GFET biosensors for clinical translation.
Table 1: Key Performance Metrics and Clinical Advantages of GFET Biosensors
| Performance Metric | Clinical Significance | Comparative Advantage |
|---|---|---|
| High Sensitivity (detection limits down to 0.1 femtomolar) [82] | Enables ultra-early disease detection before symptom onset; monitoring of low-abundance biomarkers. | Millions of times higher than conventional sensors [82]. |
| Rapid Response Time (under one second to results) [82] | Facilitates point-of-care testing and immediate clinical decision-making. | Significantly faster than laboratory-based tests like ELISA. |
| Multiplexing Capability (detection of 10+ biomarkers simultaneously) [82] | Allows for comprehensive disease profiling from a single sample. | More efficient than running multiple single-analyte tests. |
| Label-Free, Real-Time Monitoring [81] | Provides kinetic data on biomolecular interactions; simplifies assay procedure. | Eliminates need for complex sample preparation and labeling. |
| Mechanical Flexibility & Biocompatibility [57] | Enables development of wearable and implantable sensors for continuous monitoring. | Superior integration with human body compared to rigid silicon-based devices. |
The commercial and clinical potential of this technology is further evidenced by specific developments. For instance, GFET-based COVID-19 sensors have demonstrated the ability to detect viral RNA without amplification, delivering PCR-level accuracy in as little as two minutes during research trials [82]. Furthermore, high-throughput multiplexing is advancing rapidly, with research institutions integrating 256 GFETs on a single chip to simultaneously monitor biomarkers for cardiac health, Alzheimer’s, and cancer [82]. For breast cancer detection, machine learning-optimized, graphene-based biosensors have achieved peak sensitivities of 1785 nm/RIU, demonstrating superior performance compared to conventional biosensor configurations [21].
Detailed Experimental Protocol for GFET Biosensor Assay
This protocol provides a step-by-step methodology for conducting a biomolecular detection assay using a GFET biosensor, focusing on the detection of protein-protein interactions (PPIs) as a representative example. The procedure can be adapted for other targets, such as DNA, viruses, or small molecules, by modifying the biorecognition elements [83] [81].
Materials and Equipment
- GFET Chip: Comprising a carboxyl-functionalized graphene surface as the semiconductive channel between source and drain electrodes [83].
- Chemical Reagents:
- Carbodiimide (e.g., EDC) and N-hydroxysulfosuccinimide (sulfo-NHS) [83].
- Zwitterionic buffer (e.g., 2-(N-morpholino)ethanesulfonic acid (MES) buffer) [83].
- Phosphate-Buffered Saline (PBS), 1X [83].
- Target protein solution.
- Analyte protein solution series (at least eight different concentrations for reliable dissociation constant (Kd) determination) [83].
- Amine-containing quenching solutions (e.g., Quench 1 and Quench 2 solutions) [83].
- Calibration buffer.
- Regeneration buffer.
- Wash buffer.
- Laboratory Equipment:
- Electronic reader instrument for GFET measurement.
- Glass Petri dish with fitted lid.
- Precision pipettes and tips.
- Automated software-controlled fluidic system (optional but recommended for reproducibility).
Step-by-Step Procedure
Step 1: Chip Activation and Functionalization
- Pre-treatment: Place the biosensor chip in a glass Petri dish. Apply 50 µL of 1 M MES buffer to the biosensor chip and incubate for 1 minute at room temperature [83].
- Aspirate the MES buffer and immediately apply 50 µL of a freshly prepared EDC/sulfo-NHS solution [83].
- Incubate for 15 minutes at room temperature to activate the chip's carboxyl groups, forming amine-reactive esters [83].
- Aspirate the EDC/sulfo-NHS solution and rinse the chip by applying 50 µL of 1 M MES buffer, then aspirate.
- Wash the chip twice with 50 µL of 1X PBS [83].
Step 2: Target Immobilization
- Aspirate PBS from the chip and add 50 µL of the target protein solution (e.g., Hsp90) [83].
- Incubate for 30 minutes at room temperature. The primary amines on the target protein react with the amine-reactive esters, immobilizing the proteins via amide bond formation [83].
- Aspirate the target protein solution and rinse the chip three times with 50 µL of 1X PBS [83].
Step 3: Surface Blocking
- Aspirate PBS and add 50 µL of Quench 1 solution to passivate unbound amine-reactive esters [83].
- Incubate for 15 minutes at room temperature [83].
- Aspirate Quench 1 and add 50 µL of Quench 2 solution [83].
- Incubate for another 15 minutes at room temperature to ensure complete blocking and prevent non-specific binding [83].
- Aspirate the Quench 2 solution and rinse the chip five times with 50 µL of 1X PBS, leaving the last PBS droplet on the sensor [83].
Step 4: Instrument Setup and Calibration
- Insert the functionalized chip into the electronic reader.
- Calibrate the instrument by aspirating the remaining PBS and applying 50 µL of calibration buffer.
- Press 'Continue' on the software interface and wait for 5 minutes for the calibration to complete. The instrument establishes a baseline current (I-base) corresponding to the analyte-unbound condition [83].
Step 5: Analyte Detection and Measurement Cycle For each analyte concentration, execute the following cycle:
- Analyte Association:
- Aspirate the calibration buffer and apply 50 µL of the analyte solution (starting with the lowest concentration) [83].
- Press 'Continue'; the instrument applies a constant voltage and measures the resulting electrical current for 5 minutes [83].
- The interaction between analyte proteins and the immobilized targets alters the local charge distribution on the graphene surface, recorded as a change in current flow (I-response) [83].
- Analyte Dissociation:
- Chip Regeneration:
- Washing:
- Repeat the entire cycle (steps 5.1 to 5.4) for each subsequent analyte concentration. A gradual increase in I-response with increasing analyte concentrations indicates successful detection and strong interaction between the target and analyte [83].
Data Analysis
- Response Quantification: The sensor response is typically quantified as the relative change in current (ΔI/I-base) or shift in Dirac point voltage (for transfer curve measurements) [81].
- Binding Kinetics: Plot the I-response (or ΔI) against analyte concentration. Fit the dose-response curve to an appropriate binding model (e.g., Langmuir isotherm) to determine the equilibrium dissociation constant (Kd), which quantifies binding affinity [83].
- Quality Control: Assess reproducibility by running replicates and calculate the limit of detection (LOD) based on the signal-to-noise ratio.
Visualization of Workflow and Commercial Pathway
The following diagrams illustrate the core experimental workflow and the strategic pathway from research to commercialization for GFET biosensors.
GFET Biosensor Assay Workflow
Pathway from Research to Commercialization
The Scientist's Toolkit: Essential Research Reagents and Materials
Successful development and implementation of GFET biosensors rely on a suite of specialized materials and reagents. The table below details key components and their functions in the biosensing workflow.
Table 2: Essential Research Reagents and Materials for GFET Biosensors
| Item | Function / Description | Examples / Key Characteristics |
|---|---|---|
| GFET Chips | The core sensing element; consists of a graphene channel and electrodes. | Commercial sources (e.g., Graphenea GFET-S20, MGFET) [84]; Can be custom-fabricated via CVD or exfoliation [81]. |
| Crosslinker Chemistry | Activates graphene surface for covalent attachment of biorecognition elements. | EDC (carbodiimide) and Sulfo-NHS; forms amine-reactive esters with carboxyl groups [83]. |
| Biorecognition Elements | Provides specificity by binding the target analyte. | Antibodies, aptamers, enzymes, single-stranded DNA; immobilized on the functionalized surface [81] [54]. |
| Blocking Agents | Passivates unreacted sites on the sensor surface to minimize non-specific binding. | Quench solutions (amine-containing), Bovine Serum Albumin (BSA), casein [83]. |
| Buffer Systems | Maintains stable pH and ionic strength during functionalization and measurement. | MES buffer (for activation), Phosphate-Buffered Saline (PBS) (for rinsing and dilution) [83]. |
| Electronic Readout System | Measures electrical changes in the GFET channel during sensing. | Custom or commercial setups with source-meter units for applying voltage and measuring current [81] [84]. |
| Microfluidic Packaging | Delivers sample and reagents to the sensor surface in a controlled manner. | Integrated flow cells or cartridges (e.g., Graphenea Cartridge S2X) for automation and reproducibility [81] [84]. |
Commercialization Pathways and Strategic Considerations
Translating GFET biosensors from research laboratories to clinical markets requires navigating a multi-faceted pathway involving technology maturation, strategic partnerships, and regulatory compliance. The market is gaining momentum as the healthcare sector seeks ultra-sensitive, rapid, and cost-effective tools for disease detection and health monitoring [82]. Commercial uptake is rising, with CE-marked, FDA-cleared, and clinical-trial graphene biosensor devices now available or in development for applications ranging from wound monitoring to rapid disease detection [82].
Key Commercialization Strategies
Strategic Partnerships and Ecosystem Development: Successful companies are forming strategic partnerships with research institutions, healthcare providers, and established industry players. For example, Cardea Bio's partnership with Illumina signals the convergence of graphene sensing with next-generation sequencing, opening pathways for integrated genomic diagnostics [82]. Collaboration with large-scale initiatives like the Graphene Flagship in Europe can also foster innovation and accelerate development [82].
Focus on Scalability and Cost-Effectiveness: To achieve widespread adoption, production scalability and cost-efficiency are critical. Mass-produced GFET chips could potentially reduce test costs to under $1 each, making the technology highly competitive [82]. Companies like Grolltex are focusing on supplying high-quality, single-layer graphene to enable the development of affordable biosensors and flexible patches [82].
Regulatory Strategy and Clinical Validation: A clear pathway for regulatory approvals (e.g., FDA, CE marking) is essential for clinical applications. This requires investing in comprehensive safety and biocompatibility studies and designing robust clinical trials to validate sensor performance for specific medical indications [82] [85]. The diversity of graphene derivatives (pristine graphene, GO, rGO) necessitates careful consideration of their respective biocompatibility profiles during regulatory submission [57].
Addressing Translation Challenges
Despite the promising outlook, several challenges remain on the path to commercialization. These include ensuring long-term stability and reliability of the sensors in complex biological fluids, achieving high reproducibility in mass manufacturing, and standardizing functionalization and validation protocols across different platforms [81] [86]. Furthermore, the technology must successfully integrate into clinical workflows and demonstrate clear economic value and improved patient outcomes to gain acceptance from healthcare providers and payers. Continued research into advanced materials, such as the integration of GFETs with other 2D nanomaterials like MXenes or silicene, may offer pathways to overcome some of these performance hurdles [57].
Conclusion
GFET biosensors represent a paradigm shift in biomolecular detection, offering a powerful combination of high sensitivity, label-free operation, and potential for miniaturization. This guide has synthesized the journey from fundamental principles through to a robust assay protocol, highlighting critical optimization strategies to overcome inherent challenges like Debye screening. The future of GFET technology is firmly pointed toward integrated, multiplexed, and wearable point-of-care diagnostic systems. For researchers and drug developers, mastering this protocol opens the door to developing next-generation tools for rapid disease diagnosis, real-time health monitoring, and accelerated therapeutic development, ultimately paving the way for their widespread clinical adoption and impact on personalized medicine.
References
- 1. Graphene-Based Field-Effect Transistors in Biosensing and ... [https://pmc.ncbi.nlm.nih.gov/articles/PMC11386440/]
- 2. Graphene-Based Biosensors: Enabling the Next Generation of ... [https://pmc.ncbi.nlm.nih.gov/articles/PMC12467994/]
- 3. Graphene-based field-effect transistors for biosensing [https://pmc.ncbi.nlm.nih.gov/articles/PMC10239049/]
- 4. Field-effect transistor for biosensing applications using a ... [https://www.sciencedirect.com/science/article/pii/S2590137025001001]
- 5. Graphene-based field effect transistors as biosensors [https://www.sciencedirect.com/science/article/abs/pii/S2451910316300217]
- 6. Aptamer-Based Graphene Field-Effect Transistor ... [https://www.mdpi.com/2079-6374/15/3/138]
- 7. Integrated biosensor platform based on graphene ... [https://www.nature.com/articles/s41467-022-32749-4]
- 8. Integration of highly sensitive large-area graphene-based ... [https://www.sciencedirect.com/science/article/pii/S0263224124014775]
- 9. GFET - Graphene Field Effect Transistors [https://www.graphenea.com/pages/what-are-graphene-field-effect-transistors-gfets?srsltid=AfmBOooJY7aOslUAixDYLUaToBysJjFjuO3m9mE1kxMAYMeaPL3JubdI]
- 10. Chemically Functionalised Graphene FET Biosensor for ... [https://www.nature.com/articles/s41598-019-50412-9]
- 11. Iontronic Regulation of Nanoconfined Electrical Double ... [https://pmc.ncbi.nlm.nih.gov/articles/PMC12622535/]
- 12. Electric double layer structure at nucleation sites revealed ... [https://matse.illinois.edu/news/76956]
- 13. The electric double layer effect and its strong suppression ... [https://www.nature.com/articles/s42004-021-00554-7]
- 14. Graphene field-effect transistors array for detection of liquid ... [https://www.sciencedirect.com/science/article/pii/S0008622322002226]
- 15. AuNis modified AlGaN/GaN HEMT biosensor for reliable ... [https://www.nature.com/articles/s41598-025-18072-0]
- 16. Simulation of Graphene Field-Effect Transistor Biosensors ... [https://www.mdpi.com/1424-8220/18/6/1715]
- 17. The development of GFETs for biometric applications [https://pubs.rsc.org/en/content/articlehtml/2025/sd/d4sd00317a]
- 18. GFET - Graphene Field Effect Transistors [https://www.graphenea.com/pages/what-are-graphene-field-effect-transistors-gfets?srsltid=AfmBOopuIJtZcDQ3hORONeg-cFbvrNwVzYs9X82uUJcuwlPXcVZpHKI9]
- 19. High enhancement of sensitivity and reproducibility in label ... [https://www.sciencedirect.com/science/article/pii/S0956566324000435]
- 20. Label-Free Sensors Based on Graphene Field-Effect ... [https://pmc.ncbi.nlm.nih.gov/articles/PMC5871988/]
- 21. Enhancement and optimization of a graphene-based ... [https://www.nature.com/articles/s41598-025-20570-0]
- 22. Advances in flexible graphene field-effect transistors for ... [https://www.frontiersin.org/journals/bioengineering-and-biotechnology/articles/10.3389/fbioe.2023.1218024/full]
- 23. High-Sensitivity Graphene-Metasurface THz Biosensor for ... [https://link.springer.com/article/10.1007/s11468-025-03079-0]
- 24. GFET - Graphene Field Effect Transistors [https://www.graphenea.com/pages/what-are-graphene-field-effect-transistors-gfets?srsltid=AfmBOortvjTZ27Tki0dB3psVgMTUCaH-hgQAoG9D8D9YLu4T8OPfV6aR]
- 25. Graphene Field Effect Transistor 2025: Commercial ... [https://www.grapheneye.com/blog/graphene-field-effect-transistor-2025-commercial/]
- 26. Review Current status and prospect of graphene growth by ... [https://www.sciencedirect.com/science/article/abs/pii/S1872580525609917]
- 27. Direct and residue-free patterning of sub-5 µm CVD ... [https://www.nature.com/articles/s41378-025-01083-2]
- 28. Graphene patterning without plasma etching via SU-8 ... [https://www.nature.com/articles/s41598-025-08895-2]
- 29. Challenges for Field-Effect-Transistor-Based Graphene ... [https://www.mdpi.com/1996-1944/17/2/333]
- 30. Digital Biosensing by Foundry-Fabricated Graphene Sensors [https://www.nature.com/articles/s41598-019-38700-w]
- 31. Flexible Graphene Field-Effect Transistors and Their ... [https://link.springer.com/article/10.1007/s40820-024-01534-x]
- 32. Quantitative Comparison of Enzyme Immobilization ... [https://pubmed.ncbi.nlm.nih.gov/29316144/]
- 33. Passivation Strategies for Enhancing Solution-Gated ... [https://pmc.ncbi.nlm.nih.gov/articles/PMC9943062/]
- 34. Ultrasensitive detection of nucleic acids using deformed ... [https://www.nature.com/articles/s41467-020-15330-9]
- 35. Ultra-thin flexible solid-gated graphene field-effect transistors ... [https://pubs.rsc.org/en/content/articlehtml/2025/nr/d5nr01270h]
- 36. Revealing the impact of temperature on electrochemical ... [https://www.sciencedirect.com/science/article/pii/S092540052501055X]
- 37. A comprehensive review on graphene FET bio-sensors ... [https://www.sciencedirect.com/science/article/abs/pii/S0263224122013987]
- 38. Highly-sensitive graphene field effect transistor biosensor ... [https://www.sciencedirect.com/science/article/abs/pii/S0169433220315968]
- 39. Modular Fabrication of Microfluidic Graphene FET for ... [https://pmc.ncbi.nlm.nih.gov/articles/PMC11497086/]
- 40. Selective detection of target proteins by peptide-enabled ... [https://pubmed.ncbi.nlm.nih.gov/24677773/]
- 41. Scalable graphene nanogrid FET biosensors [https://www.sciencedirect.com/science/article/abs/pii/S1369800124009673]
- 42. Design and Development of Graphene FET Biosensor for the Detection of SARS-CoV-2 - PMC [https://www.ncbi.nlm.nih.gov/pmc/articles/PMC8435128/]
- 43. Beyond the Debye length in high ionic strength solution [https://www.nature.com/articles/s41598-017-05426-6]
- 44. General strategy for biodetection in high ionic strength ... [https://pmc.ncbi.nlm.nih.gov/articles/PMC4594804/]
- 45. Demonstration of the enhancement of gate bias and ionic ... [https://www.sciencedirect.com/science/article/abs/pii/S0925400521001350]
- 46. Biosensing beyond Debye screening length using epitaxial ... [https://www.sciencedirect.com/science/article/abs/pii/S2468023024014354]
- 47. Capacitive Sensors for Label-Free Detection in High-Ionic ... [https://www.mdpi.com/2079-6374/15/8/491]
- 48. Aptamer-Based Graphene Field-Effect Transistor ... [https://pubmed.ncbi.nlm.nih.gov/40136934/]
- 49. A Guide to Quantitative Biomarker Assay Development using ... [https://pmc.ncbi.nlm.nih.gov/articles/PMC5657521/]
- 50. Graphene Nanogrids FET Immunosensor: Signal to Noise ... [https://pmc.ncbi.nlm.nih.gov/articles/PMC5087337/]
- 51. Everything's under Control: Maximizing Biosensor ... [https://pmc.ncbi.nlm.nih.gov/articles/PMC11840803/]
- 52. Machine learning approach to optimization of parameters ... [https://www.sciencedirect.com/science/article/pii/S2590137022000139]
- 53. Machine Learning Algorithms for Prediction of Optical ... [https://pmc.ncbi.nlm.nih.gov/articles/PMC10302917/]
- 54. Graphene-Based Biosensors: Enabling the Next ... [https://www.mdpi.com/2079-6374/15/9/586]
- 55. A comprehensive review of graphene-based biosensors [https://pmc.ncbi.nlm.nih.gov/articles/PMC12448920/]
- 56. Progress in graphene-integrated nanosensors for the ... [https://www.sciencedirect.com/science/article/pii/S1110016825010312]
- 57. A Review of Graphene-Integrated Biosensors for Non-Invasive ... [https://pmc.ncbi.nlm.nih.gov/articles/PMC12608150/]
- 58. Archer Sends New Biochip gFET Design for Manufacture to ... [https://www.semiconductor-digest.com/archer-sends-new-biochip-gfet-design-for-manufacture-to-bolster-functionality/]
- 59. Field-Effect Transistor Biosensors for Biomedical Applications [https://pmc.ncbi.nlm.nih.gov/articles/PMC6806101/]
- 60. Limit of Blank, Limit of Detection and Limit of Quantitation [https://pmc.ncbi.nlm.nih.gov/articles/PMC2556583/]
- 61. A tutorial for computing limits of detection and ... [https://www.sciencedirect.com/science/article/abs/pii/S0003267021011685]
- 62. Determining LOD and LOQ Based on the Calibration Curve [https://www.sepscience.com/hplc-solutions-126-chromatographic-measurements-part-5-determining-lod-and-loq-based-on-the-calibration-curve-6959]
- 63. An integrated flexible and reusable graphene field effect ... [https://www.sciencedirect.com/science/article/pii/S2352847819302266]
- 64. AC-mode Graphene Field-Effect Transistors for Sensing ... [https://ui.adsabs.harvard.edu/abs/2023APS..MARG06001S/abstract]
- 65. Using Graphene Field Effect Transistors in Biosensors [https://www.azonano.com/article.aspx?ArticleID=6750]
- 66. Graphene biosensors outcompete ELISA and Simoa for ... [https://www.graphenea.com/blogs/graphene-news/graphene-biosensors-outcompete-elisa-and-simoa-for-point-of-care-diagnostics?srsltid=AfmBOoqRMc6z7Xv0cfsVcyOvwoLV94fJNi8apyQwmQM8Ei8cd30Su71o]
- 67. Graphene Heterostructure-Based Field-Effect Transistor ... [https://www.mdpi.com/2079-6374/15/6/373]
- 68. Polymer-Based Electrochemical Sensors for the Diagnosis of ... [https://pmc.ncbi.nlm.nih.gov/articles/PMC12106273/]
- 69. Digitalization of Enzyme-Linked Immunosorbent Assay with ... [https://pmc.ncbi.nlm.nih.gov/articles/PMC11352759/]
- 70. Label-Free Electrochemical Biosensor for Real-Time ... [https://www.sciencedirect.com/science/article/abs/pii/S0956566325008371]
- 71. Electrochemical protein biosensors for disease marker ... [https://www.nature.com/articles/s41378-024-00700-w]
- 72. Protocell arrays for simultaneous detection of diverse analytes [https://www.nature.com/articles/s41467-021-25989-3?error=cookies_not_supported&code=583ebe61-9b96-4ba5-8900-0639532d0275]
- 73. Advances in Design Strategies of Multiplex Electrochemical... [https://pmc.ncbi.nlm.nih.gov/articles/PMC8749765/]
- 74. Comparison of Multiplex Immunoassay Platforms - PMC [https://pmc.ncbi.nlm.nih.gov/articles/PMC2905867/]
- 75. Multiplexed DNA-functionalized graphene sensor with ... [https://www.nature.com/articles/s41378-023-00499-y]
- 76. Development of a graphene field effect transistor-based ... [https://www.sciencedirect.com/science/article/pii/S2405844024149535]
- 77. Recent advances in graphene-based biosensors for point-of-care diagnostics - ScienceDirect [https://www.sciencedirect.com/science/article/abs/pii/S2772950825003681]
- 78. Flexible and Wearable Biosensors for Monitoring Health ... [https://pmc.ncbi.nlm.nih.gov/articles/PMC10296135/]
- 79. Graphene-based wearable biosensors for point-of-care diagnostics: From surface functionalization to biomarker detection - PMC [https://pmc.ncbi.nlm.nih.gov/articles/PMC12190207/]
- 80. Wearable and flexible electrochemical sensors for sweat ... [https://www.nature.com/articles/s41378-022-00443-6]
- 81. - Graphene as bioanalytical sensors: design... field effect transistors [https://pubs.rsc.org/en/content/articlehtml/2021/an/d0an01661f]
- 82. Graphene in Biosensors & Medical Diagnostics Market [https://www.usdanalytics.com/industry-reports/graphene-in-biosensors-and-medical-diagnostics-market]
- 83. Video: Graphene -Based Biosensor - Field Biosensing to Detect... Effect [https://www.jove.com/v/30507/graphene-biosensor-based-field-effect-biosensing-to-detect-protein]
- 84. Graphene eases access to biosensing research [https://www.graphenea.com/blogs/graphene-news/graphene-eases-access-to-biosensing-research?srsltid=AfmBOoo9Vonq04YtlsY06Qx1KoSA7Czgd_adrLnWWN-Zmz57pN-nfRGC]
- 85. Graphene-based Biomedical Applications Market Report [https://bisresearch.com/industry-report/graphene-based-biomedical-applications-market.html]
- 86. Graphene nanomaterial-based electrochemical biosensors ... [https://www.sciencedirect.com/science/article/pii/S2790676025000044]