Advanced Strategies to Minimize Non-Specific Adsorption in Biosensing for Blood and Plasma Analysis
Non-specific adsorption (NSA) remains a significant barrier to the widespread adoption of biosensors in clinical diagnostics and drug development, particularly when analyzing complex matrices like blood and plasma.
Advanced Strategies to Minimize Non-Specific Adsorption in Biosensing for Blood and Plasma Analysis
Abstract
Non-specific adsorption (NSA) remains a significant barrier to the widespread adoption of biosensors in clinical diagnostics and drug development, particularly when analyzing complex matrices like blood and plasma. This article provides a comprehensive overview of innovative methods to combat NSA, catering to researchers, scientists, and drug development professionals. It covers the foundational mechanisms of NSA, explores a range of antifouling materials and active removal techniques, discusses optimization and troubleshooting protocols, and offers a comparative analysis of validation methods. By synthesizing the latest research, this review aims to equip professionals with the knowledge to develop robust, reliable biosensors for accurate analysis in biological fluids.
Understanding Non-Specific Adsorption: Mechanisms and Impact on Biosensor Performance
Defining Non-Specific Adsorption (NSA) and Biofouling in Biosensing
FAQs on Core Concepts and Troubleshooting
1. What are Non-Specific Adsorption (NSA) and Biofouling in the context of biosensing?
- Non-Specific Adsorption (NSA) refers to the undesirable adhesion of atoms, ions, or molecules (such as proteins, cells, or other biomolecules) to a biosensor's surface through physisorption. This occurs via weak intermolecular forces like hydrophobic interactions, ionic interactions, van der Waals forces, and hydrogen bonding [1] [2]. It is also commonly known as non-specific binding or biofouling in biosensing literature [1] [2].
- Biofouling is a broader term often used to describe the detrimental deposition and accumulation of biological growth, including both microorganisms and macroorganisms, on surfaces exposed to natural waters [3] [4]. In biosensing, this process typically begins with the formation of a conditioning film of organic macromolecules, followed by the adhesion of pioneering bacteria and other microorganisms, forming a biofilm [3]. For biosensors, the term is often used interchangeably with NSA to describe the fouling by biological species from the sample matrix [1].
2. What are the practical consequences of NSA/Biofouling for my experiments with blood or plasma?
When working with complex biofluids like blood and plasma, NSA/biofouling leads to two primary detrimental effects on your biosensor [5]:
- Increased Background Signal: Molecules that non-specifically adsorb to the sensing surface generate a signal that is indistinguishable from the specific binding of your target analyte. This results in false positives, elevated background noise, and a compromised signal-to-noise ratio [1] [5].
- Reduced Specific Signal: Fouling molecules can physically block your immobilized bioreceptors (e.g., antibodies, aptamers), preventing the target analyte from binding. This causes false negatives and reduces the analytical sensitivity of your biosensor [5]. Specifically, it can restrict the conformational change of structure-switching aptamers or passivate the electrode surface, degrading electron transfer in electrochemical biosensors [5].
3. My electrochemical biosensor shows significant signal drift in serum samples. Is this related to NSA?
Yes, signal drift is a classic symptom of progressing NSA/biofouling [5]. In electrochemical biosensors, non-specifically adsorbed molecules from serum (such as proteins and lipids) can passivate the electrode surface, affecting the electron transfer rate and leading to a continuous change in the baseline signal [5] [6]. Over short time spans, this might be correctable with algorithms, but prolonged exposure leads to irreversible surface degradation and signal drift [5].
4. What are the main strategies to minimize NSA in biosensors?
Strategies can be broadly categorized into two groups [1] [2]:
- Passive Methods (Blocking): These methods aim to prevent undesired adsorption by coating the surface with a physical or chemical barrier. The goal is to create a thin, hydrophilic, and non-charged boundary layer that minimizes intermolecular interactions with foulants [1] [7]. Common examples include:
- Active Methods (Removal): These methods dynamically remove adsorbed molecules after functionalization, typically by generating surface forces to shear away weakly adhered biomolecules [1]. They are often transducer-based (e.g., using electromechanical or acoustic energy) or fluid-based (relying on hydrodynamic flow within microfluidics) [1].
Comparison of Antifouling Strategies for Blood and Plasma
The following table summarizes key antifouling strategies, their mechanisms, and their performance as reported in recent research, particularly for applications in complex media like blood and plasma.
Table 1: Summary of Antifouling Strategies for Biosensing in Complex Biofluids
| Strategy / Material | Type | Mechanism / Key Feature | Reported Performance (Context) |
|---|---|---|---|
| Trifunctional Branched-Cyclopeptide (TBCP) on Pt Nanoparticles [6] | Passive / Chemical | Forms a stable, antifouling layer via strong Pt-S interactions; resistant to displacement by biothiols. | High stability in undiluted human serum; <10% signal degradation over 8 weeks; successfully detected ErbB2 biomarker [6]. |
| Zwitterionic Polymers [5] [6] | Passive / Chemical | Create a superhydrophilic surface tightly bound to water molecules via zwitterions, forming a physical and energetic barrier to protein adsorption. | Excellent antifouling properties; used in OECTs and other biosensors to minimize fouling in biological fluids [5] [6]. |
| PEDOT:PSS [8] [7] | Passive / Chemical | A conductive polymer hydrogel; its hydrophilic and porous structure helps resist protein adsorption. | Used in organic electrochemical transistors (OECTs) and as a modification layer to improve antifouling properties for continuous monitoring [8] [7]. |
| Self-Assembled Monolayers (SAMs) [1] [7] | Passive / Chemical | Form a well-ordered, dense layer on surfaces (e.g., gold) that can be tailored with terminal groups (e.g., oligo(ethylene glycol)) to resist protein adsorption. | A classic and widely used strategy; effectiveness depends on SAM density and terminal group chemistry [1] [7]. |
| Hydrodynamic Flow (Microfluidics) [1] | Active / Removal | Uses pressure-driven flow in microchannels to generate shear forces that physically remove weakly adhered biomolecules from the sensor surface. | Effective for removing physisorbed molecules; often integrated into lab-on-a-chip biosensors [1]. |
Detailed Experimental Protocol: Peptide-Based Antifouling Interface
This protocol details the construction of a highly stable electrochemical biosensor using a trifunctional branched-cyclopeptide (TBCP) assembled on platinum nanoparticles (PtNPs), as presented in recent literature [6]. This method is particularly effective for sensing in undiluted human serum.
Objective: To create a robust antifouling biosensor interface for the detection of the breast cancer biomarker ErbB2 in human serum.
Materials:
- Working Electrode: (e.g., Glassy Carbon Electrode (GCE))
- Platinum Nanoparticles (PtNPs)
- Trifunctional Branched-Cyclopeptide (TBCP): Designed with sequences for antifouling, biomarker recognition, and stable surface anchoring.
- Phosphate Buffered Saline (PBS), pH 7.4
- Human serum samples (from healthy donors and breast cancer patients)
- Electrochemical Cell and workstation for Cyclic Voltammetry (CV) and Electrochemical Impedance Spectroscopy (EIS).
Procedure:
Electrode Pretreatment: Clean and polish the GCE according to standard procedures to ensure a fresh, clean surface [6].
Modification with Platinum Nanoparticles (PtNPs):
- Deposit a suspension of PtNPs onto the surface of the pretreated GCE.
- Allow the electrode to dry, forming a PtNP-modified layer (GCE/PtNP). This layer provides the platform for the strong Pt-S interaction [6].
Self-Assembly of the Antifouling Peptide Layer:
- Incubate the GCE/PtNP electrode in a solution containing the synthesized TBCP peptide for a specified period (e.g., several hours).
- During this step, the thiol groups in the peptide sequence form strong Pt-S bonds with the PtNP surface, creating a self-assembled, oriented peptide layer (GCE/PtNP/TBCP) [6].
- Rinse the electrode thoroughly with PBS to remove any physically adsorbed peptides.
Antifouling Performance Validation:
- Challenge the modified electrode by incubating it in undiluted human serum or other complex biofluids (e.g., plasma, blood).
- Use electrochemical techniques like EIS or CV to monitor the change in electron transfer resistance or current before and after serum incubation. A minimal change indicates excellent antifouling performance [6].
- Compare the stability against a traditional Au-S based interface by exposing both to a solution of glutathione, a common biothiol that can displace Au-S bonds [6].
Biomarker Detection (ErbB2):
- Incubate the GCE/PtNP/TBCP biosensor with serum samples containing the target biomarker ErbB2.
- The recognition element within the TBCP structure will specifically bind to ErbB2.
- Perform electrochemical measurements (e.g., DPV, EIS) to quantify the binding event. The robust antifouling background ensures the signal originates primarily from the specific interaction [6].
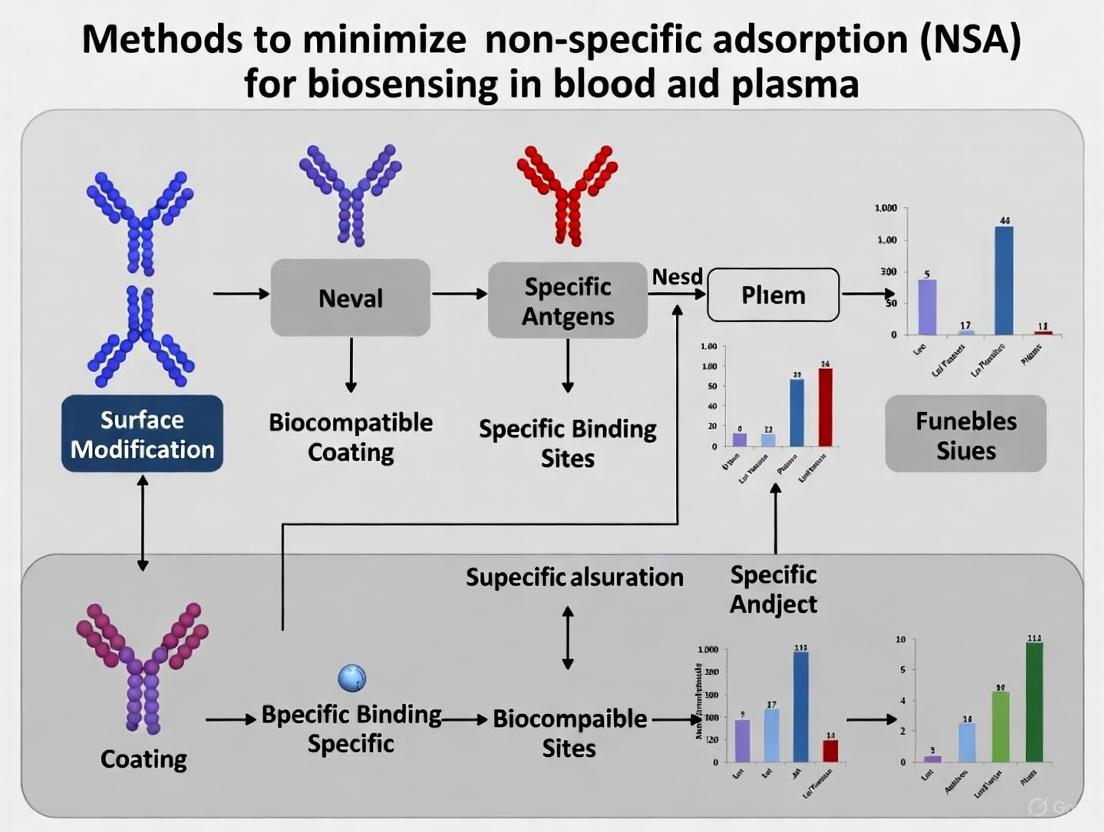
Experimental Workflow and NSA Impact Diagram
The following diagram illustrates the key steps in building the peptide-based antifouling biosensor and contrasts a fouled sensor with a clean one.
The Scientist's Toolkit: Key Research Reagent Solutions
Table 2: Essential Materials for Antifouling Biosensor Development
| Reagent / Material | Function in Antifouling Biosensing |
|---|---|
| Platinum Nanoparticles (PtNPs) | Provide a substrate for forming highly stable Pt-S bonds with thiol-containing ligands, offering superior stability over traditional gold surfaces in complex biological fluids [6]. |
| Antifouling Peptides (e.g., TBCP) | Multifunctional molecules engineered to form a dense, hydrophilic self-assembled layer that resists protein adsorption while providing sites for bioreceptor immobilization [6] [7]. |
| Zwitterionic Polymers | Synthetic or natural polymers that possess both positive and negative charges, creating a strong hydration layer via electrostatic interactions that effectively repel biomolecules [5] [6]. |
| PEDOT:PSS | A commercially available, conductive polymer hydrogel used to modify electrode surfaces, providing both antifouling properties and efficient charge transfer capabilities [8] [7]. |
| Bovine Serum Albumin (BSA) | A classic protein blocker used to passivate vacant surface sites on sensors and in assays (e.g., ELISA) by adsorbing to non-specific areas, reducing background signal [1]. |
| Ethylene Glycol-based SAMs | Thiolated molecules that form dense monolayers on gold surfaces; their terminal oligo(ethylene glycol) groups are highly effective at resisting non-specific protein adsorption [1] [7]. |
FAQ & Troubleshooting Guide: Minimizing Nonspecific Adsorption (NSA) in Blood and Plasma Biosensing
This guide addresses common challenges researchers face with nonspecific adsorption (NSA) when developing biosensors for complex blood-derived media like plasma and serum. The following questions and answers provide targeted solutions based on the fundamental interactions at the sensor-liquid interface.
Frequently Asked Questions
Q1: Why does my biosensor show high background signal in undiluted plasma? This is primarily due to the nonspecific, competitive adsorption of abundant proteins from plasma or serum to your sensor surface, a phenomenon often governed by the hydrophobic effect [9]. In this "Vroman effect," proteins rapidly adsorb to and displace each other on the surface. The interfacial energetics of this process are remarkably similar across many globular blood proteins, leading to a generic, high-background adsorption layer [9] [10]. The complex matrix of blood-derived media contains countless proteins, lipids, and cells that can interfere with your target analyte's ability to bind the sensor specifically [10].
Q2: How can I modify my sensor surface to minimize hydrophobic-driven NSA? Consider creating a superhydrophobic surface. These surfaces are characterized by a high water contact angle (≥150°) and a specific micro/nano-scale roughness that traps air and creates a composite solid-air-liquid interface [11]. This drastically reduces the contact area between the sensor surface and the blood components, thereby resisting the adhesion of proteins and cells [11]. The reduced attainable surface area for protein-water interaction consequently lowers protein adsorption [11].
Q3: What role do low-dimensional van der Waals (vdW) materials play in reducing NSA? Materials like graphene offer two key advantages. First, their reduced dimensionality enables extreme plasmonic field confinement, concentrating the sensing field to a very short decay length (e.g., ~5 nm from the graphene surface), which makes the signal predominantly sensitive to the target analyte bound very close to the surface and less sensitive to interferents in the bulk solution [12]. Second, their well-defined chemical structures (e.g., the basal plane of graphene) can be functionalized with high precision to present a more uniform, non-fouling surface, though careful blocking is still required to prevent nonspecific binding via π-stacking [12].
Troubleshooting Common Experimental Issues
| Problem | Possible Cause | Recommended Solution |
|---|---|---|
| High & variable background noise | Nonspecific protein adsorption (fouling) to the sensor surface [10]. | Implement a superhydrophobic coating to reduce surface-protein contact [11] or use vdW materials for tighter field confinement [12]. |
| Low signal-to-noise ratio in whole blood | Sensor's evanescent field is too long, interacting with cells and non-target molecules [12]. | Switch to a graphene-based sensor to leverage its sub-5nm field decay length for enhanced surface specificity [12]. |
| Inconsistent results between plasma & serum samples | Differences in fibrinogen and other coagulation factor content between plasma and serum [9] [13]. | Standardize sample type; be aware that interfacial energetics are similar, but specific bio-recognition might be affected [9]. |
| Sensor drift in continuous monitoring | Gradual buildup of a protein corona or biofilm on the sensor surface [11] [14]. | Employ an anti-biofouling, superhydrophobic surface to resist the adhesion of organic substances and cells [11]. |
Quantitative Data for Surface and Sensor Characterization
Table 1: Characteristics of Surface Modifications to Minimize NSA
| Surface Modification | Key Parameter | Typical Value/Effect | Impact on NSA |
|---|---|---|---|
| Superhydrophobic Coating [11] | Water Contact Angle | ≥ 150° | Creates a "roll-off" effect for droplets, reducing contact with blood components. |
| Sliding / Rolling Angle | < 10° | Physically resists adhesion of proteins, cells, and microorganisms. | |
| Graphene Plasmonics [12] | Evanescent Field Decay Length | ~5 nm (for a 100nm nanoribbon) | Confines sensing volume to immediate surface, excluding bulk interferents. |
| Field Confinement | ~106 × smaller than diffraction limit | Drastically boosts sensitivity and reduces background from bulk solution. | |
| Hydrophobic SAM (Model Surface) [9] | Max. Spreading Pressure (Πamax) | 17 - 26 mN/m (for blood proteins) | Indicates a generic, high-affinity adsorption of diverse proteins, necessitating blocking. |
Table 2: Comparison of Blood-Derived Media for Biosensing
| Media Type | Key Preparation Step | Compositional Difference from Whole Blood | Consideration for Biosensing |
|---|---|---|---|
| Plasma [13] | Centrifugation of anticoagulated blood. | Contains all proteins, including coagulation factors (e.g., fibrinogen); no cells. | High protein content increases NSA potential [10]. Anticoagulant (e.g., EDTA, citrate) choice is critical. |
| Serum [13] | Centrifugation after blood clots. | Lacks fibrinogen and other clotting factors consumed in the clot; no cells. | Reduced protein complexity vs. plasma, but still a challenging matrix for biosensing [10]. |
| Platelet-Poor Plasma (PPP) [15] | High-speed centrifugation (e.g., 3200g) of plasma. | Further depletion of platelets and associated microparticles. | Essential for applications like plasma DNA analysis to remove cellular contaminants [15]. |
Detailed Experimental Protocols
Protocol 1: Evaluating Surface Hydrophobicity via Contact Angle Goniometry
This protocol is used to characterize the wettability and surface energy of a sensor surface, which are critical factors in predicting its propensity for NSA [11] [9].
Materials:
- Contact angle goniometer
- High-purity deionized water
- Test surfaces (e.g., unmodified sensor, superhydrophobic-coated sensor)
- Micropipette
Procedure:
- Place the sensor surface on the goniometer stage and ensure it is level.
- Using a micropipette, carefully dispense a small, precise volume (e.g., 2-5 µL) of deionized water onto the surface.
- Capture a high-resolution image of the water droplet on the surface.
- Use the goniometer's software to automatically determine the contact angle (θ) by fitting the shape of the droplet. The Young-Laplace equation is typically used for this fitting.
- Repeat the measurement at least five times at different locations on the surface to account for heterogeneity.
- For a more complete analysis, measure the advancing (θa) and receding (θr) contact angles by adding and withdrawing water from the droplet, respectively. The difference (θa - θr) is the contact angle hysteresis (CAH), which is a key metric for superhydrophobicity [11].
Troubleshooting:
- Low Contact Angle (<90°): The surface is hydrophilic and highly susceptible to protein adsorption. A surface modification to introduce low-surface-energy chemistry and roughness is required [11] [9].
- High Hysteresis (>10°): The surface may have heterogeneous chemistry or roughness, causing the droplet to "pin" and not roll off easily. This can lead to inconsistent biosensing results and fouling.
Protocol 2: Functionalizing a Gold SPR Chip with a Low-Dimensional vdW Material
This protocol outlines the procedure for coating a conventional gold Surface Plasmon Resonance (SPR) chip with a 2D material like graphene to enhance its performance and reduce NSA through tighter field confinement [12].
Materials:
- Prism-coupled SPR instrument with a gold sensor chip
- CVD-grown graphene film on a transfer substrate (e.g., Cu foil)
- Chemical etching solution (e.g., ammonium persulfate)
- Deionized water baths
- Plasma cleaner
Procedure:
- Gold Surface Preparation: Clean the gold SPR chip using an oxygen plasma treatment for 1-2 minutes to remove any organic contaminants and ensure a pristine, hydrophilic surface.
- Graphene Transfer: a. Float the graphene/Cu substrate on the surface of the etching solution to dissolve the copper backing. b. Once the copper is fully etched, carefully rinse the floating graphene film by transferring it through a series of clean deionized water baths. c. Scoop the graphene film onto the prepared gold SPR chip and allow it to dry.
- Annealing: Anneal the chip at a moderate temperature (e.g., 200-300°C) in an inert atmosphere to improve adhesion and remove residual water and polymers.
- Surface Blocking: Incubate the graphene-coated chip with a blocking agent (e.g., Tween-20, BSA) to passivate any remaining sites prone to nonspecific binding via π-stacking or other interactions [12].
Troubleshooting:
- Cracks/Wrinkles in Graphene: These can be caused by improper handling during transfer or bubble formation. They may create hotspots for nonspecific adsorption.
- High Nonspecific Binding Post-Coating: The graphene surface may not have been adequately blocked. Optimize the concentration and incubation time of the blocking agent.
Signaling Pathways and Workflow Visualizations
The Scientist's Toolkit: Research Reagent Solutions
Table 3: Essential Materials for Blood Biosensing and NSA Mitigation
| Item / Reagent | Function / Application | Key Consideration |
|---|---|---|
| EDTA-treated Blood Tubes (Lavender Top) [13] | Anticoagulant for plasma preparation; chelates calcium to prevent clotting. | Preferred for many molecular assays. Avoid heparin if testing cytokines, as it can be contaminated with endotoxin [13]. |
| Serum Tubes (Red Top) [13] | Collection tube without anticoagulant for serum preparation. | The clotting process removes fibrinogen and other factors, altering the protein profile vs. plasma [9]. |
| Polydimethylsiloxane (PDMS) [11] | A common biocompatible polymer for fabricating microfluidic devices and superhydrophobic coatings. | Inherently hydrophobic; often requires surface modification to minimize NSA in blood-contacting applications [11]. |
| Graphene Films [12] | A 2D vdW material used as a transducer for highly confined plasmonics or as an electrode material. | Requires specific surface chemistry for functionalization; prone to NSA via π-stacking without proper blocking [12]. |
| Whatman Protein Saver Card (903) [15] | Filter paper for dried blood spot (DBS) collection. | Simplifies sample collection, storage, and shipping, reducing the need for cold chains and complex processing [15]. |
The Critical Impact of NSA on Sensitivity, Specificity, and Reproducibility
Frequently Asked Questions (FAQs)
What is Non-Specific Adsorption (NSA) and why is it a problem in biosensing? Non-specific adsorption (NSA) is the unwanted adhesion of atoms, ions, or molecules (such as proteins, lipids, or other biomolecules) to a biosensor's surface through physisorption [1] [2]. This occurs due to intermolecular forces like hydrophobic interactions, ionic interactions, van der Waals forces, and hydrogen bonding [1] [2]. NSA is a major problem because it leads to elevated background signals that are often indistinguishable from the specific binding signal of the target analyte. This directly compromises a biosensor's sensitivity, specificity, and reproducibility, leading to false-positive results, reduced dynamic range, and an increased limit of detection [1] [2] [5].
How does NSA specifically affect biosensors used in blood and plasma research? Blood and plasma are exceptionally complex matrices containing a high concentration of proteins, cells, saccharides, and lipids that readily interact with sensor surfaces [10]. When analyzing these samples, NSA can cause two primary issues:
- The signal from non-specifically adsorbed molecules can interfere with or completely overshadow the signal from the specific biorecognition event [5].
- The adsorbed foulant molecules can block the bioreceptor, limiting its ability to bind the target analyte and causing false negatives at low concentrations [5]. The high protein content in blood-derived media makes this a significant challenge for achieving selective measurements [10].
What are the main strategies to reduce NSA? Methods to reduce NSA can be broadly categorized into two groups [1] [2] [16]:
- Passive Methods: These aim to prevent NSA by coating the surface with a physical or chemical barrier that makes it less attractive to non-specific molecules. Common examples include blocker proteins like Bovine Serum Albumin (BSA) or casein, and chemical linkers like polyethylene glycol (PEG) [1] [2] [16].
- Active Methods: These involve using external forces to dynamically remove adsorbed molecules after they have attached to the surface. This includes techniques that generate surface shear forces, such as electromechanical transducers, acoustic devices, or hydrodynamic fluid flow [1] [2].
Troubleshooting Guides
Problem: High Background Signal in Blood Plasma Samples
Potential Cause: Accumulation of non-target plasma proteins (e.g., albumin, fibrinogen) on the sensing interface.
Solution: Implement a combined sample preparation and surface functionalization protocol.
- Step 1: Sample Pre-treatment. Centrifuge the blood plasma sample to reduce fat content and remove particulates. Consider dilution with an appropriate buffer enriched with surfactants to disrupt matrix-interface interactions [5].
- Step 2: Surface Coating. Functionalize the biosensor surface with an antifouling coating. For electrochemical biosensors, recent solutions include cross-linked protein films, new peptides, or hybrid materials [5].
- Step 3: Controlled Assay. Under hydrodynamic conditions, introduce the pre-treated sample to the coated sensor. The combination of a cleaner sample and a resistant surface will significantly reduce background signal [5].
Problem: Inconsistent Results Between Sensor Replicates
Potential Cause: Progressive fouling leading to signal drift and degradation of the biosensor surface over time or between production batches [5].
Solution: Standardize surface regeneration and quality control procedures.
- Step 1: Drift Monitoring. For real-time sensors (e.g., Surface Plasmon Resonance - SPR), monitor the signal baseline for continuous drift, which indicates ongoing fouling [5].
- Step 2: Surface Regeneration. Implement a rigorous cleaning protocol between measurements using solutions that remove adsorbed foulants without damaging the bioreceptor layer.
- Step 3: Quality Control. Use a standardized sample (e.g., a control serum) to validate the performance of each sensor batch, ensuring manufacturing reproducibility [17].
The following table summarizes the core impacts of NSA on key biosensor performance parameters and the corresponding efficacy of common mitigation strategies.
Table 1: Impact of NSA and Efficacy of Mitigation Strategies
| Performance Parameter | Impact of NSA | Passive Methods (e.g., BSA, PEG coating) | Active Methods (e.g., Electrochemical, Acoustic) |
|---|---|---|---|
| Sensitivity | Decreased; target analyte signal is masked by background noise [1] [2]. | Moderate improvement by blocking vacant sites [1] [2]. | High improvement; physically removes interferents from the sensing area [1] [2]. |
| Specificity | Reduced; false positives from non-target binding, affecting dynamic range [1] [2] [5]. | High improvement; creates a steric and chemical barrier against non-specific molecules [1] [16]. | High improvement; shears away weakly-bound non-specific molecules [1] [2]. |
| Reproducibility | Poor; fouling is a dynamic and often variable process, leading to signal drift and inconsistent results [5]. | Good; provides a consistent initial surface state, but coatings can degrade [5]. | Very good; can restore surface functionality between measurements, reducing drift [1] [5]. |
Experimental Protocols for NSA Reduction
Protocol 1: Applying a Passive PEG-based Antifouling Coating
This protocol details the creation of a hydrophilic, non-charged boundary layer to minimize protein adsorption via physisorption [1] [2].
- Surface Cleaning: Clean the sensor substrate (e.g., gold chip for SPR) thoroughly with oxygen plasma or piranha solution to remove organic contaminants.
- Linker Immobilization: Incubate the surface with a solution of alkane thiols (for gold) or silanes (for glass/oxide) to form a self-assembled monolayer (SAM).
- PEG Functionalization: React the terminal groups of the SAM with heterobifunctional Polyethylene Glycol (PEG) derivatives (e.g., NHS-PEG-Maleimide).
- Blocking: Incubate with a solution of Bovine Serum Albumin (BSA) to block any remaining reactive sites.
- Validation: Validate the coating's efficacy by exposing it to a complex solution like 100% blood serum and measuring the non-specific signal using a method like SPR or ellipsometry [2].
Protocol 2: Active Removal of NSA using Electrochemical Methods
This protocol uses electrochemical transducers to generate surface forces that shear away weakly adhered biomolecules [1] [2].
- Sensor Setup: Utilize an electrochemical biosensor (e.g., an electrochemical aptamer-based (E-AB) sensor) with an established antifouling layer [5].
- Sample Introduction: Introduce the complex sample (e.g., undiluted plasma) to the sensor under static or low-flow conditions.
- Apply Removal Stimulus: Apply a low-amplitude, high-frequency alternating current (AC) potential or a pulsed amperometric waveform.
- Signal Monitoring: Monitor the sensor's response in real-time. The applied waveform induces surface shear forces that disrupt the weaker physisorption bonds of NSA molecules, leading to a stabilization of the signal and a reduction in drift [5].
- Calibration: Correlate the stabilized signal with analyte concentration.
Experimental Workflow and Signaling Pathways
Biosensor NSA Troubleshooting Workflow
The following diagram illustrates a logical decision-making workflow for diagnosing and addressing common NSA-related problems in biosensing experiments.
The Scientist's Toolkit: Key Research Reagent Solutions
Table 2: Essential Reagents for NSA Reduction in Biosensing
| Reagent/Material | Function | Example Application Context |
|---|---|---|
| Bovine Serum Albumin (BSA) | Blocker protein that adsorbs to vacant sites on the sensor surface, preventing non-specific protein binding [1] [2]. | Commonly used in ELISA and as a component in blocking buffers for immunosensors [1]. |
| Casein | A milk-derived protein mixture used as an effective blocking agent in immunoassays [1] [2]. | Western blotting and other enzyme-based assays [1]. |
| Polyethylene Glycol (PEG) | A polymer that creates a hydrophilic, steric barrier, repelling proteins and other biomolecules via physisorption [1] [16]. | Grafting to sensor surfaces to create non-fouling coatings. |
| Self-Assembled Monolayers (SAMs) | Ordered molecular assemblies that form a well-defined interface for subsequent functionalization with bioreceptors and antifouling layers [2]. | Used on gold and other surfaces to control surface chemistry and reduce NSA [2]. |
| Heterobifunctional Crosslinkers | Molecules (e.g., NHS-PEG-Maleimide) that covalently link the sensor surface to bioreceptors or antifouling polymers like PEG [2]. | Creating stable, oriented immobilization of bioreceptors on biosensor surfaces. |
Frequently Asked Questions (FAQs)
FAQ 1: What are the main components in blood and plasma that cause nonspecific binding (NSA) and interference in biosensing? The primary sources of interference are cellular components, a diverse range of proteins, and other solutes. Red blood cells constitute 35-47% of blood volume and cause significant optical interference due to their pigmentation and concentration [18] [19]. Plasma itself, which makes up about 55% of whole blood, contains coagulants like fibrinogen, plasma proteins (albumin, globulin), immunoglobulins, electrolytes, and numerous other enzymes, hormones, and vitamins [20]. These plasma components can adsorb non-specifically to sensor surfaces.
FAQ 2: What strategies can minimize NSA from complex biological matrices in my biosensor? Effective strategies include using antifouling coatings and selecting appropriate transducer materials. Antifouling coatings based on polyethylene glycol (PEG) or nanocomposites (e.g., BSA/prGOx/GA) can dramatically reduce non-specific adsorption from complex matrices [21]. Alternatively, novel carbon nanomaterials exhibit innate antifouling properties, preventing signal reduction that can occur with applied coatings [21]. For optical biosensors, simple at-home-capable methods like dilution or filtration of blood samples can sufficiently reduce pigment interference to enable colorimetric detection [18].
FAQ 3: Why does my ratiometric biosensor show artifactual signals at cell edges, and how can I correct this? This is a common artifact in ratio imaging, particularly in low-volume regions like cell edges where signal-to-noise is low [22]. Traditional background subtraction can be problematic because dividing two noisy signals after subtraction leads to large errors. A proposed solution is the Noise Correction Factor (NCF) method, which involves subtracting a derived NCF from the numerator channel only, avoiding division by a noisy denominator [22].
FAQ 4: My biosensor works in buffer but fails in plasma. What are the first parameters to check? First, investigate nonspecific protein adsorption and biofouling. The complexity of plasma, with its high concentration and diversity of proteins, means it will rapidly coat untreated surfaces [21] [10]. Ensure your sensor surface employs a robust antifouling strategy. Second, confirm that your sample processing (if any) effectively removes cells and pigments that cause optical or chemical interference. Simple dilution or filtration protocols can be a starting point for validation [18].
Troubleshooting Guides
Problem 1: High Background Signal in Complex Matrices
Potential Cause: Nonspecific adsorption of proteins, lipids, or cells onto the sensor transducer surface.
Solutions:
- Apply Antifouling Coatings: Implement coatings such as polyethylene glycol (PEG) chains or bovine serum albumin (BSA)-based nanocomposites to create a barrier against fouling [21].
- Use Innate Antifouling Materials: Fabricate transducers from novel carbon nanomaterials that possess intrinsic antifouling properties, eliminating the need for coatings that can sometimes reduce signal sensitivity [21].
- Optimize Surface Chemistry: Ensure that the immobilization of your biorecognition element (e.g., antibody, aptamer) does not disrupt the antifouling layer and maintains its functionality.
Problem 2: Optical Interference in Colorimetric Whole-Blood Assays
Potential Cause: The turbidity and strong pigment of whole blood, primarily from red blood cells, obscures the colorimetric response.
Solutions:
- Implement Filtration: Use inexpensive filter paper, Kim wipes, or paper towels to separate red blood cells from plasma. Pre-treating filters with BSA can help prevent hemolysis [18].
- Perform Precise Dilution: Dilute a precise volume of blood (collected using a device like a MICROSAFE pipette) with a diluent to reduce the concentration of red blood cells below the interference threshold [18]. The workflow for this method is detailed in the diagram below.
Problem 3: Low Signal-to-Noise Ratio in Electrochemical Biosensing
Potential Cause: Electronic and environmental noise masking weak biological signals.
Solutions:
- Material Selection: Use high-conductivity, low-impedance electrode materials. Carbon-based nanostructures can reduce thermal (Johnson-Nyquist) and 1/f (flicker) noise due to their high electron mobility and fewer grain boundaries [21].
- Shield from EMI: Protect the sensor system from electromagnetic interference (EMI) from power lines and communication devices through proper circuit board layout and shielding [21].
- Signal Processing: Employ sophisticated signal processing algorithms to distinguish the analyte signal from background noise.
Problem 4: Artifactual Gradients in Ratiometric Biosensor Imaging
Potential Cause: Inaccurate background subtraction and low signal-to-noise ratio, especially in thin cellular regions like the cell edge.
Solutions:
- Adopt the NCF Method: Instead of subtracting background from both numerator and denominator channels, calculate and subtract a single Noise Correction Factor (NCF) from the numerator channel only. This avoids division by a near-zero, noisy denominator [22].
- Validate with Control: Use an "inert biosensor" or a sample with known uniform ratio to confirm that observed gradients are not artifactual [22]. The logic of the NCF correction is shown below.
Table 1: Key Performance Challenges and Material Solutions for Biosensing in Blood and Plasma
| Challenge | Primary Cause | Impact on Biosensing | Quantitative Mitigation Strategy |
|---|---|---|---|
| Optical Interference | Red blood cells (8 µm diameter, 35-47% blood volume) [18] [19] | Obscures colorimetric response; increases background signal [18] | Dilution: 1:10 to 1:20 blood-to-diluent ratio can enable colorimetric detection [18]. Filtration: Paper-based filters can separate ~50 µL blood drops to yield clear plasma [18]. |
| Nonspecific Binding (Biofouling) | Proteins (Albumin, Globulins, Fibrinogen), Lipids [20] [10] | Masks target signal; reduces sensor sensitivity and specificity [21] [10] | Antifouling Coatings: PEG or BSA-based coatings can reduce non-specific adsorption by >90% in complex matrices [21]. Innate Materials: Carbon nanomaterials offer high conductivity & innate antifouling [21]. |
| Electronic Noise | Thermal (Johnson) noise, 1/f flicker noise, EMI [21] | Raises limit of detection (LoD); causes false positives/negatives [21] | Material Engineering: Carbon nanomaterials with high conductivity reduce thermal and flicker noise [21]. |
Experimental Protocols
Protocol 1: At-Home-Capable Blood Filtration for Colorimetric Assays
This protocol describes a low-cost method to separate plasma from whole blood for colorimetric biosensors using readily available materials [18].
Key Research Reagent Solutions:
- Whole Blood Sample: Collected via finger prick with a lancet, stabilized with heparin or EDTA [18].
- Filtration Matrix: VWR quantitative filter paper, Kimberly-Clark Kimwipes, or common paper towels [18].
- Anti-Hemolysis Treatment: Bovine Serum Albumin (BSA), 5% solution [18].
Methodology:
- Prepare Filtration Matrix: Cut the chosen material to a width of ~10 mm and a length of ~30 mm. Optionally, soak the material in a 5% BSA solution and allow it to dry at 37°C for 15 minutes to prevent hemolysis [18].
- Apply Blood: Pipette 20-100 µL of whole blood onto one end of the prepared filtration strip [18].
- Collect Plasma: Allow the blood to move laterally through the matrix. The red blood cells will be retained, while the clear plasma will wick to the other end of the strip [18].
- Interface with Biosensor: The clear plasma extracted can now be applied directly to a paper-based colorimetric biosensor. For integrated devices, the filtration strip can be placed in direct contact with the sensor pad [18].
Protocol 2: Accurate At-Home Blood Dilution for Optical Sensing
This protocol enables an untrained user to perform a precise blood dilution to reduce optical interference, compatible with a colorimetric readout [18].
Key Research Reagent Solutions:
- Blood Collection Device: Disposable 50 µL MICROSAFE pipette (or similar capillary pipe) [18].
- Diluent: Phosphate-buffered saline (PBS) or a specific buffer compatible with the biosensor, pre-measured and provided in a vial [18].
Methodology:
- Collect Blood: Perform a finger prick with a sterile lancet [18].
- Draw Precise Volume: Use the disposable MICROSAFE pipette to collect a precise 50 µL volume of blood directly from the finger prick [18].
- Dispense and Dilute: Immediately dispense the entire contents of the capillary pipe into the vial containing the pre-measured diluent. The typical dilution factor can range from 1:10 to 1:20 [18].
- Mix: Cap the vial and invert it several times to ensure homogeneous mixing.
- Apply to Sensor: The diluted blood sample is now sufficiently clear to be applied to the colorimetric biosensor for analysis [18].
The Scientist's Toolkit
Table 2: Essential Research Reagents and Materials for Blood Biosensing
| Item | Function / Application | Example Products / Components |
|---|---|---|
| Anticoagulants | Prevents blood from clotting during collection and storage. | Sodium Heparin, EDTA [18]. |
| Antifouling Reagents | Reduces nonspecific binding of proteins and other biomolecules to the sensor surface. | Polyethylene Glycol (PEG), Bovine Serum Albumin (BSA) [21]. |
| Novel Nanomaterials | Serves as a transducer material with high conductivity, large surface area, and innate antifouling properties. | Gii carbon nanomaterial, other carbon-based nanostructures [21]. |
| Precision Capillary Pipettes | Enables accurate and user-friendly collection of a precise blood volume from a finger prick. | MICROSAFE pipettes (50 µL) [18]. |
| Filtration Matrices | Separates red blood cells from plasma in a simple, equipment-free process. | VWR Filter Paper, Kimwipes, Paper Towels [18]. |
| Lateral Flow Materials | Creates a sealed chamber for controlled liquid flow in integrated filtration-diagnostic devices. | Transparent tape (e.g., JVCC BOOK-20CC) [18]. |
Distinguishing Between Specific Signal and NSA Interference
Frequently Asked Questions (FAQs)
1. What is Non-Specific Adsorption (NSA) and how does it impact my biosensor's performance? Non-Specific Adsorption (NSA) refers to the unwanted accumulation of molecules (like proteins, lipids, or cells) other than your target analyte onto the biosensor's surface. In the context of blood and plasma research, this fouling negatively impacts key analytical performance characteristics by:
- Reducing Sensitivity: The signal from fouling can mask the specific signal from your target biomarker, raising the detection limit [5] [1].
- Compromising Selectivity: Adsorbed molecules can sterically hinder the bioreceptor (e.g., antibody) from binding its target, potentially leading to false negatives [5].
- Damaging Reproducibility: Uncontrolled fouling leads to variable results between experiments and sensors, affecting data reliability [1].
2. How can I confirm that my signal is specific and not due to NSA? A robust method to distinguish specific signal from NSA involves using a coupled detection approach, such as Electrochemical-Surface Plasmon Resonance (EC-SPR). This technique provides complementary information from the same sensing interface. A specific binding event will typically produce a correlated signal in both the electrochemical and SPR channels, whereas NSA might manifest differently in each, helping to confirm the origin of the signal [5]. For label-free optical techniques like reflective interferometry, using reversible blocking agents can suppress NSA, allowing you to isolate the specific signal [23].
3. What are the most effective surface coatings to prevent NSA in blood-derived samples? Effective antifouling coatings create a thin, hydrophilic, and neutrally charged boundary layer that minimizes interactions with blood components. Promising materials include:
- Polymer-based films: Poly(ethylene glycol) (PEG) derivatives and zwitterionic polymers are highly effective at resisting protein adsorption [1].
- Biomimetic peptides: Newly developed short-chain peptides can mimic natural antifouling properties [5].
- Cross-linked protein films: Layers of albumin (e.g., BSA) can block vacant sites, though their stability can be a limitation [5].
- Amphiphilic sugars: Molecules like n-Dodecyl β-D-maltoside can be reversibly adsorbed to hydrophobic surfaces, providing a simple and effective blocking layer [23]. The best coating depends on your transduction method, as it must meet requirements for conductivity (for EC) and optimal thickness (for SPR) [5].
4. My biosensor works well in buffer but fails in plasma. What steps should I take? This is a common challenge. A systematic troubleshooting approach is recommended:
- Verify Surface Preparation: Ensure your antifouling coating is correctly applied and your bioreceptors are properly oriented.
- Incorporate a Passive Separation Step: Integrate a plasma separation membrane into your microfluidic design to remove cells and reduce sample complexity passively [24].
- Use a Reversible Blocking Agent: Add an amphiphilic sugar like n-Dodecyl β-D-maltoside directly to your sample solution. This provides dynamic blocking during the assay [23].
- Optimize Sample Dilution and Buffer: Diluting your plasma sample in an appropriate buffer containing additives (e.g., surfactants) can help break matrix-interface interactions [5].
Troubleshooting Guide
Use the following table to diagnose and address common NSA-related issues.
| Symptom | Possible Cause | Recommended Solution | Preventive Measure |
|---|---|---|---|
| High background signal in complex samples | NSA of abundant proteins (e.g., albumin) from blood/plasma [5] [1] | Introduce a reversible blocker (e.g., n-Dodecyl β-D-maltoside) to the running buffer [23] | Implement a robust antifouling coating (e.g., zwitterionic polymer) during sensor fabrication [5] [1] |
| Signal drift over time | Progressive fouling and passivation of the sensor surface [5] | Apply correction algorithms for short-term drift; for long-term use, consider active removal methods [5] | Use coatings designed for stability under operational conditions (e.g., cross-linked films) [5] |
| Low signal-to-noise ratio, poor sensitivity | NSA interference masking the specific analyte signal [1] | Employ a dual-transduction system (e.g., EC-SPR) to better differentiate signal from noise [5] | Integrate a passive plasma separation membrane (e.g., Vivid) to pre-filter blood cells [24] |
| Inconsistent results between runs | Variable NSA due to inconsistent surface functionalization or sample composition [1] | Standardize blocking and washing protocols rigorously | Adopt a "systems approach" to design, ensuring consistency between fluidics, surface chemistry, and detection [24] |
Experimental Protocols
Protocol 1: Evaluating NSA using a Coupled EC-SPR Biosensor
This protocol outlines a method to investigate NSA and the efficacy of antifouling coatings by simultaneously acquiring electrochemical and SPR data [5].
Workflow Diagram: NSA Investigation via EC-SPR
Materials:
- EC-SPR instrument
- Gold sensor chip
- Antifouling coating reagents (e.g., PEG-thiol, zwitterionic polymer)
- Bioreceptor (e.g., antibody, aptamer)
- Running buffer (e.g., PBS)
- Complex sample (e.g., diluted blood plasma)
- Regeneration solution (e.g., Glycine-HCl, if applicable)
Step-by-Step Method:
- Sensor Preparation: Clean the gold sensor chip according to the manufacturer's protocol.
- Surface Coating: Functionalize the sensor surface with your chosen antifouling material (e.g., form a self-assembled monolayer of PEG-thiol).
- Bioreceptor Immobilization: Immobilize the specific bioreceptor (e.g., via EDC-NHS chemistry) onto the antifouling layer.
- Baseline Establishment: Flow running buffer over the sensor at a constant rate until a stable baseline is achieved in both the EC and SPR signals.
- Sample Injection: Introduce the complex sample (e.g., 1% serum in buffer) and monitor the real-time response in both detection channels.
- Washing Step: Switch back to running buffer to remove unbound and weakly adsorbed molecules.
- Data Analysis: Correlate the SPR signal (reflectivity change) with the electrochemical signal (e.g., change in electron transfer resistance). A strong correlation suggests specific binding, while a decoupled response may indicate NSA [5].
Protocol 2: Reducing NSA via Reversible Surface Blocking
This protocol describes a simple method to reduce NSA by adding an amphiphilic sugar to the analyte solution, which dynamically blocks free sites on the sensor surface [23].
Materials:
- Label-free biosensor (e.g., Reflective Interferometry, SPR)
- Hydrophobic or hydrophilic sensor surface
- n-Dodecyl β-D-maltoside (DDM)
- Analyte dissolved in buffer (e.g., PBS)
- Target-specific antibody
Step-by-Step Method:
- Surface Preparation: A simple, non-covalent probe attachment (e.g., physical adsorption of antibodies on a hydrophilic surface) is sufficient when using this method.
- Blocker Preparation: Prepare a solution of the analyte containing a low concentration (e.g., 0.05 - 0.1%) of n-Dodecyl β-D-maltoside.
- Assay Execution: Perform the label-free assay (e.g., inject the sample containing the analyte and DDM) and measure the signal.
- Regeneration: The blocking effect is reversible. A simple buffer wash removes the sugar blocker, regenerating the surface for subsequent measurements. This method has been shown to enable specific detection of <10 pg/mm² of target in the presence of a large excess of interferent proteins like BSA [23].
Research Reagent Solutions
The table below lists key reagents for implementing the discussed NSA reduction strategies.
Table: Essential Reagents for NSA Minimization
| Reagent | Function/Benefit | Example Application |
|---|---|---|
| Zwitterionic Polymers | Forms a highly hydrated layer that resists protein adsorption; considered a top-performing antifouling material [5] [1] | Creating a permanent, low-fouling background on SPR or electrochemical sensor chips. |
| PEG-based Thiols | A classic antifouling agent; forms a dense, brush-like monolayer on gold surfaces that sterically hinders NSA [5] [1] | Functionalizing gold electrodes in EC or EC-SPR biosensors. |
| n-Dodecyl β-D-maltoside | An amphiphilic sugar that acts as a reversible blocking agent; allows for simple surface chemistry and easy regeneration [23] | Added to blood/plasma samples during analysis to dynamically suppress NSA in real-time. |
| Plasma Separation Membrane | Passively filters red blood cells from whole blood, reducing sample complexity and fouling potential before analysis [24] | Integrated into a microfluidic cartridge for point-of-care blood testing. |
| Bovine Serum Albumin (BSA) | A traditional protein blocker that adsorbs to vacant surface sites to prevent NSA [1] | Used as a blocking step in ELISA-style or immunosensor protocols after bioreceptor immobilization. |
Antifouling Strategies: From Surface Coatings to Active Removal Technologies
Frequently Asked Questions (FAQs)
1. What are passive antifouling methods and how do they work? Passive antifouling methods work by creating a physical or chemical barrier on the sensor surface to prevent non-specific adsorption (NSA) of molecules. This is achieved by coating the surface with materials that minimize intermolecular forces (like hydrophobic, electrostatic, or van der Waals interactions) between the sensor interface and non-target sample components [1]. The goal is to form a thin, hydrophilic, and non-charged boundary layer that is well-hydrated, which thwart's protein adsorption and allows molecules to be easily detached under low shear stresses [1].
2. Why is surface coating so critical for biosensors analyzing blood and plasma? Blood and plasma are highly complex matrices with a substantial protein load (60–80 mg mL⁻¹), which dramatically increases the risk of non-specific binding to the sensor surface [25] [26]. This fouling effect elevates background signals, causes false positives, reduces sensitivity and selectivity, and compromises the reproducibility and accuracy of biosensor measurements [1] [25] [5]. Effective surface coatings are essential to repel these non-target molecules and ensure the biosensor's performance in real-world clinical applications [25] [27].
3. What are the main types of passive coatings used for biosensing in complex fluids? The main strategies involve chemical surface modifications with various antifouling polymers [1] [25]. These can be broadly categorized into:
- Hydrophilic Polymer Coatings: Such as poly(ethylene glycol) (PEG) and polysaccharide-based hydrogels, which form a hydrated layer that sterically hinders protein approach [28] [25].
- Zwitterionic Polymer Coatings: Materials like poly(carboxybetaine), which contain both positive and negative charges, creating a strong hydration layer via electrostatic interactions that effectively resists protein adsorption [28] [25].
- Superhydrophobic Coatings: These are designed to minimize contact area with aqueous solutions and contaminants, though they are less commonly the primary choice for aqueous biofluids compared to hydrophilic and zwitterionic approaches [28].
- Physical Blockers: Proteins like bovine serum albumin (BSA) or casein can be adsorbed to the surface to block vacant sites from non-specific adsorption [1]. While simple, this method may be less robust than covalently attached polymer layers.
4. I am getting high non-specific background even after applying a blocking agent. What could be wrong? High background after blocking can stem from several issues [1] [5]:
- Incomplete Coverage: The blocking agent may not have fully covered all reactive sites on the sensor surface.
- Coating Degradation: The antifouling layer itself might be degrading or dissolving over time, exposing the underlying sticky surface [5].
- Insufficient Hydration: The effectiveness of many antifouling polymers (especially hydrophilic and zwitterionic ones) relies on forming a strong hydration barrier. Inadequate hydration can compromise this mechanism [1].
- Incorrect Coating for Your Sample: The chosen coating may not be optimal for the specific ionic strength, pH, or composition of your blood or plasma sample [5].
5. How do I choose the right passive coating for my specific electrochemical or SPR biosensor? Selecting a coating requires balancing several factors specific to your sensor platform and application [25] [5]:
- For Electrochemical Biosensors: The coating must be electrochemically inert and should not significantly hinder electron transfer at the electrode surface. Its thickness and conductivity are critical parameters to monitor [5].
- For SPR Biosensors: The thickness of the antifouling layer is a major constraint, as it typically must be kept thin (often cited between 15-70 nm) to remain within the decay length of the evanescent plasmonic wave and avoid significant loss of sensitivity [25] [26].
- Universal Considerations: For both platforms, the coating should provide high binding capacity for your bioreceptor (e.g., antibody, aptamer), be easily functionalizable, and not inhibit the binding of the target analyte [25].
Troubleshooting Guide: Common Issues with Passive Antifouling Coatings
| Problem | Potential Cause | Recommended Solution |
|---|---|---|
| High Background Signal | Incomplete surface coverage by blocking agent [1]. | Optimize blocking concentration and incubation time. Try a different blocking agent (e.g., switch from BSA to casein) [1]. |
| Spontaneous adsorption of foulants from complex sample [25]. | Incorporate a zwitterionic polymer coating, known for its superior hydration and antifouling properties in serum and plasma [28] [25]. | |
| Signal Drift & Loss of Sensitivity | Gradual degradation or passivation of the coating layer over time [5]. | Use a more stable, covalently cross-linked polymer film instead of a physically adsorbed blocker. Ensure the coating is compatible with the sample's pH and ionic strength [5]. |
| Fouling molecules restricting bioreceptor conformation [5]. | Consider a coating that allows for more space or flexibility for the bioreceptor, such as a hydrogel [25]. | |
| Poor Bioreceptor Immobilization | Coating lacks functional groups for bioreceptor attachment [25]. | Select an antifouling polymer with easily functionalizable groups (e.g., carboxyl, amine) for covalent ligand immobilization [25]. |
| Low Sensor Signal (after coating) | Antifouling layer is too thick, moving target out of sensing range [25]. | For SPR biosensors, ensure the coating thickness is optimized (ideally <70 nm) to remain within the evanescent field's decay length [25] [26]. |
| Coating is insulating and hindering electron transfer (for EC sensors) [5]. | For electrochemical biosensors, explore conductive or ultrathin antifouling materials, or hybrid composite coatings [27] [5]. |
Performance Data of Common Antifouling Materials
The following table summarizes key performance metrics of various passive antifouling materials as reported in the literature, providing a basis for initial selection.
| Coating Material | Type | Key Mechanism | Reported Performance (Complex Media) | Key Considerations |
|---|---|---|---|---|
| PEG-based polymers [25] | Hydrophilic | Steric repulsion; formation of a hydrated layer [25]. | Gold standard for decades; effective in reducing NSA in serum [25]. | Can be susceptible to oxidative degradation; performance depends on chain density and molecular weight [25]. |
| Zwitterionic polymers (e.g., PCB, PSB) [28] [25] | Zwitterionic | Electrostatic-induced hydration; forms a very strong water barrier [28]. | Often outperforms PEG; enables detection of biomarkers at fM concentrations in serum/plasma [25]. | Highly effective; requires controlled polymerization for grafting. Considered one of the most promising material classes [28] [25]. |
| Hydrogels (e.g., dextran) [25] | Hydrophilic | High water content within a 3D network creates a physical barrier [25]. | Used successfully in commercial SPR chips; good capacity for bioreceptor immobilization [25]. | Swelling in liquid may affect sensor performance (e.g., SPR signal); thickness must be carefully controlled [25]. |
| Bovine Serum Albumin (BSA) [1] | Protein Blocker | Physical adsorption to block vacant sites on the surface [1]. | Widely used, simple protocol (e.g., in ELISA). Effective for many applications [1]. | Can be unstable and desorb over time; may not be sufficient for highly complex or undiluted samples [1] [25]. |
| Superhydrophobic Coatings [28] | Superhydrophobic | Low surface energy; minimizes contact area with liquids and contaminants [28]. | Used in marine antifouling; less common for aqueous biofluid biosensing [28]. | Can be mechanically fragile and difficult to repair; may not prevent microfouling [28]. |
Experimental Protocol: Evaluating Antifouling Coating Efficiency
This protocol outlines a general workflow for testing and validating the effectiveness of a new passive antifouling coating on a sensor surface, using surface plasmon resonance (SPR) as an example platform.
1. Surface Preparation and Coating Application:
- Clean the sensor chip (e.g., gold film for SPR) thoroughly using standard protocols (e.g., oxygen plasma, piranha solution—handle with extreme care).
- Apply the chosen antifouling coating according to its established methodology. This could involve:
- Chemical Grafting: For polymers like PEG or zwitterions, this may involve synthesizing a self-assembled monolayer (SAM) with the desired functional groups, followed by chemical coupling of the polymer.
- Physical Adsorption: For blockers like BSA, incubate the surface with a 1-5% w/v BSA solution in a suitable buffer (e.g., PBS) for 1 hour at room temperature.
2. Control Experiment with a Standard Protein:
- Use the SPR instrument to establish a stable baseline with a running buffer (e.g., PBS, HBS-EP).
- Inject a solution of a model protein (e.g., fibrinogen, serum albumin) at a known, physiologically relevant concentration (e.g., 1 mg/mL in running buffer) over both the coated sensor surface and an uncoated reference surface.
- Monitor the change in resonance units (RU). A significant signal increase on the uncoated surface indicates heavy fouling, while a minimal signal change on the coated surface indicates good antifouling performance.
3. Validation in Complex Media:
- Once the coating passes the standard protein test, challenge it with the target complex medium, such as 100% blood plasma or serum.
- Diluted samples can be used initially for screening, but ultimate validation requires undiluted or minimally diluted samples [25].
- Inject the complex sample and monitor the SPR response. The stable, low signal after a wash step indicates successful resistance to NSA.
4. Data Analysis:
- Quantify the level of fouling by measuring the absolute change in RU (ΔRU) after exposure to the complex sample and subsequent buffer wash.
- Compare the ΔRU of your new coating to a negative control (bare sensor) and a positive control (a known, effective coating like a dense PEG layer). A >90% reduction in adsorbed mass compared to the bare sensor is typically indicative of a high-quality antifouling surface.
Experimental Workflow for Antifouling Coating Development
The diagram below illustrates the logical workflow for developing and testing a passive antifouling coating, from surface preparation to data analysis.
The Scientist's Toolkit: Key Research Reagent Solutions
This table lists essential materials and reagents commonly used in the development and application of passive antifouling coatings for biosensing research.
| Item | Function in Antifouling Research |
|---|---|
| Zwitterionic Monomers (e.g., carboxybetaine acrylamide, sulfobetaine methacrylate) | Building blocks for synthesizing zwitterionic polymer brushes or hydrogels with superior antifouling properties, especially in blood-contacting applications [28] [25]. |
| PEG-based Thiols (e.g., mPEG-SH, HS-PEG-COOH) | Used to form self-assembled monolayers (SAMs) on gold surfaces, creating a dense, hydrophilic PEG brush that resists protein adsorption [25]. |
| Bovine Serum Albumin (BSA) | A widely used blocking protein to passively adsorb and cover non-specific binding sites on sensor surfaces, preventing subsequent non-specific adsorption [1]. |
| Hydrogel Precursors (e.g., dextran aldehyde, PEG-diacrylate) | Used to form 3D hydrogel networks on sensor chips. These layers provide high hydration and can be functionalized with bioreceptors [25]. |
| Complex Test Media (e.g., pooled human serum, blood plasma) | Essential biological fluids for challenging and validating the real-world performance of antifouling coatings under clinically relevant conditions [25] [5]. |
| Reference Sensor Chips (e.g., bare gold, dextran-coated) | Provide a baseline signal for non-specific adsorption, allowing researchers to quantify the improvement offered by a new antifouling coating [25] [5]. |
Troubleshooting Guides and FAQs
Frequently Asked Questions
Q1: My biosensor's sensitivity drops significantly when testing in undiluted plasma. What could be the cause and how can I address it?
A: This is a classic symptom of non-specific adsorption (NSA) or biofouling, where proteins and other biomolecules in the plasma adhere to your sensor surface, creating a high background signal and masking the specific analyte detection [29] [1]. To address this:
- Verify Coating Integrity: Ensure your antifouling coating (e.g., PEG, zwitterionic polymer) has been applied correctly and uniformly. Inconsistent coating can leave exposed areas prone to fouling.
- Consider a Different Coating Chemistry: If using PEG, explore high-density brush configurations or switch to a zwitterionic coating like poly(carboxybetaine methacrylate) (pCBMA), which provides superior hydration via electrostatic induction and can offer better fouling resistance in complex media like blood plasma [29].
- Optimize Assay Conditions: Introduce additional wash steps with a mild buffer to remove weakly adsorbed molecules before the final measurement.
Q2: The zwitterionic hydrogel coating on my device is mechanically weak and peeling off. How can I improve its stability?
A: The superhydrophilic nature of zwitterionic materials can sometimes result in weak mechanical strength and high swelling, leading to delamination [30]. Solutions include:
- Reinforce the Hydrogel: Incorporate a reinforcing agent. For example, use a microgel-reinforced zwitterionic hydrogel. Research has shown that embedding poly(carboxybetaine) microgels (pCBM) into a poly(sulfobetaine) (pSB) matrix can create a robust, anti-swelling coating that withstands flushing, bending, and abrasion [30].
- Improve Substrate Adhesion: Enhance the bonding between the coating and the substrate. For PVC devices, one effective method is to promote the entanglement and grafting of the polymer network (e.g., pSB) directly onto the substrate's polymer chains during the coating process [30].
Q3: I need an antifouling coating that also allows for easy conjugation of my specific capture probe (e.g., an antibody). What material do you recommend?
A: Zwitterionic carboxybetaine-based polymers (pCBMA) are an excellent choice for this requirement. Unlike some PEG or pSBMA coatings that lack functional groups, pCBMA polymers contain carboxylate groups that can be chemically activated using standard EDC/NHS chemistry. This allows for the facile and covalent immobilization of biomolecules containing amine groups, enabling specific sensing while maintaining a high level of antifouling performance [29] [31].
Troubleshooting Common Experimental Issues
| Problem | Potential Cause | Solution |
|---|---|---|
| High background signal in complex media (serum, plasma). | Inadequate surface passivation; NSA of proteins and biomolecules. | Implement or optimize an antifouling coating. Increase the density of your PEG brush or switch to a zwitterionic polymer coating [29] [1]. |
| Poor conjugation efficiency of biorecognition elements to the coating. | Lack of, or inaccessible, reactive functional groups on the coating. | Use a functionalized coating like pCBMA, which provides carboxyl groups for EDC/NHS coupling [29] [31]. |
| Coating delamination or poor stability under flow. | Weak mechanical strength of the coating; poor adhesion to the substrate. | Adopt a mechanically reinforced hydrogel (e.g., microgel-reinforced) and ensure the coating chemistry promotes strong interfacial bonding with the substrate [30]. |
| Inconsistent sensor results between buffer and plasma tests. | The coating is effective in buffer but fails in high-protein-concentration environments. | Test and optimize your coating protocol directly in the target complex medium (e.g., undiluted plasma) rather than just in buffer [29]. |
Experimental Protocols for Key Coatings
Protocol: Grafting DOPA-pCBMA Zwitterionic Coating to Silicon Oxide Surfaces
This "graft-to" method is used to create an ultralow fouling surface on biosensors for operation in human plasma [29].
Objective: To functionalize a silicon microring resonator (or any silicon oxide surface) with a zwitterionic DOPA-pCBMA (DpC) coating to minimize NSA in undiluted human plasma.
Materials:
- Silicon substrate with native oxide layer.
- DOPA-pCBMA conjugates.
- Piranha solution (3:1 concentrated H₂SO₄:30% H₂O₂) - Handle with extreme caution.
- Tris-HCl buffer (10 mM, pH 8.5).
- Negative-pressure syringe pumps or a manual fluidic system.
Method:
- Surface Cleaning: Clean the sensor chip with piranha solution for 10 minutes with mild agitation to remove all organic residues. Warning: Piranha is highly corrosive and must be used with appropriate personal protective equipment and protocols. Rinse the chip thoroughly with deionized water [29].
- Baseline Establishment: Prime the sensor surface and flow channels with Tris-HCl deposition buffer (10 mM, pH 8.5) to establish a stable signal baseline [29].
- Polymer Deposition: Dilute the DOPA-pCBMA conjugate to a concentration of 1 mg/mL in the Tris-HCl deposition buffer. Sonicate the solution to ensure it is well-dispersed. Expose the sensor array to this solution for 15 minutes [29].
- Washing: Flush the system with fresh deposition buffer for at least 5 minutes to remove any loosely adsorbed polymer chains [29].
- Functionalization (Optional): If the coating is to be used for specific sensing, the pCBMA's carboxyl groups can now be activated with EDC/NHS for the immobilization of amine-containing capture probes like antibodies [29].
Protocol: Preparing a Microgel-Reinforced Zwitterionic Hydrogel Coating (pCBM/pSB)
This protocol creates a mechanically robust, pure zwitterionic hydrogel coating suitable for blood-contacting devices [30].
Objective: To synthesize a poly(carboxybetaine) microgel (pCBM) and use it to reinforce a poly(sulfobetaine) (pSB) hydrogel coating on a substrate like PVC.
Materials:
- Carboxybetaine methacrylate (CBMA) monomer.
- Sulfobetaine methacrylate (SBMA) monomer.
- N,N'-Methylenebis(acrylamide) (MBA) crosslinker.
- Ammonium persulfate (APS) and N,N,N',N'-Tetramethylethylenediamine (TEMED) as initiators.
- Polyvinyl chloride (PVC) substrate.
Method:
- Synthesize pCBM Microgels: Prepare poly(carboxybetaine) microgels via inverse miniemulsion polymerization. Use MBA as a crosslinker (e.g., at 4 mol% relative to CBMA) to achieve optimal mechanical reinforcement [30].
- Prepare Pre-gel Solution: Take the dry pCBM and disperse/swell it in an aqueous solution containing the SBMA monomer. The solution becomes paste-like. This allows the SBMA to infiltrate the microgels [30].
- Coat the Substrate: Apply the pCBM/SBMA pre-gel solution to the PVC substrate.
- Initiate Polymerization: Initiate the free-radical polymerization of SBMA (e.g., using APS/TEMED). During this process, the growing pSB chains form a continuous network that passes through the pCBM microgels. Simultaneously, the pSB chains entangle and potentially graft onto the polymer chains of the PVC substrate, creating a strong bond [30].
- Curing and Washing: Allow the polymerization to complete, then wash the coated device to remove any unreacted monomers.
The resulting pCBM/pSB coating is a pure zwitterionic hydrogel with excellent mechanical robustness, anti-swelling properties, and strong adhesion to the substrate [30].
Workflow for Grafting DOPA-pCBMA Coating
Coating Performance Data
The following table summarizes key performance metrics for the discussed antifouling coatings, based on experimental data from the literature.
Table 1: Comparison of Antifouling Coating Performance
| Coating Material | Key Feature | Fouling Reduction (in complex media) | Key Challenge | Best Use Case |
|---|---|---|---|---|
| PEG [32] | High flexibility; forms hydrated layer via H-bonding. | Good, but can be inadequate in undiluted plasma [29]. | Susceptible to oxidation; complex chemistry for probe immobilization. | General-purpose passivation; drug delivery systems [32] [33]. |
| pSBMA (Zwitterionic) [29] | Ultra-low fouling; hydration via electrostatic induction. | Excellent resistance in serum and plasma [29] [30]. | Can lack functional groups for bioconjugation. | Applications where only fouling resistance is needed. |
| pCBMA (Zwitterionic) [29] | Ultra-low fouling; has carboxyl groups for bioconjugation. | Excellent resistance in undiluted human plasma [29]. | Requires optimization of conjugation chemistry. | Biosensors requiring specific probe immobilization [29]. |
| Microgel-reinforced pCBM/pSB [30] | Pure zwitterionic; high mechanical robustness. | Excellent antithrombogenicity in whole blood [30]. | Multi-step synthesis process. | Blood-contacting devices requiring durable coatings [30]. |
| Antifouling Peptides [31] | High biocompatibility; flexibly tunable structures. | Effective in serum and plasma samples [31]. | Screening for optimal peptide sequence is required. | Biosensors where natural biocompatibility is critical [31]. |
Mechanisms of Antifouling Coatings
The Scientist's Toolkit: Research Reagent Solutions
Table 2: Essential Materials for Antifouling Coatings
| Reagent / Material | Function in Experiment | Key Consideration |
|---|---|---|
| DOPA-pCBMA Conjugate [29] | "Graft-to" zwitterionic polymer for creating non-fouling surfaces on metal oxides. | The DOPA moiety provides strong adhesion to surfaces, while pCBMA provides antifouling and functional groups. |
| SBMA & CBMA Monomers [29] [30] | Building blocks for surface-initiated polymerization of zwitterionic polymer brushes or hydrogels. | Purify monomers before use to prevent uncontrolled termination during polymerization. |
| EDC & NHS [29] | Crosslinking agents for activating carboxyl groups (-COOH) on coatings for biomolecule conjugation. | Freshly prepare solutions in cold buffer for optimal efficiency, as they are hydrolytically unstable. |
| PEG-NHS Ester [32] | Functionalized PEG for covalent "grafting-to" of PEG chains onto amine-coated surfaces. | The molecular weight of PEG affects the density and conformation of the resulting brush layer. |
| N,N'-Methylenebis(acrylamide) (MBA) [30] | Crosslinker used in hydrogel and microgel synthesis to control mesh size and mechanical strength. | Concentration is critical; too little leads to weak gels, too much can make the gel brittle. |
In biosensing research, particularly in complex matrices like blood, serum, and plasma, non-specific adsorption (NSA) presents a significant challenge by causing false-positive signals, reducing sensitivity, and compromising analytical accuracy [5] [10] [1]. Physical blockers form a first line of defense against NSA. This guide details the use of protein-based blockers and hydrogel coatings, providing troubleshooting and protocols to help researchers effectively implement these strategies within their experimental workflows.
FAQ: Fundamentals of Physical Blockers
Q1: What are physical blockers and how do they prevent NSA? Physical blockers are materials that form a protective layer on biosensor surfaces to minimize unwanted molecular interactions. They operate primarily through steric hindrance and creating a hydrophilic, energy-neutral barrier, reducing the hydrophobic and electrostatic interactions that drive the physisorption of interfering proteins and other biomolecules from complex samples [1].
Q2: Why are protein-based blockers and hydrogels often used in biosensing? These materials are favored for their proven effectiveness, ease of use, and biocompatibility. Protein blockers like BSA are widely adopted standards, while hydrogels offer a tunable, tissue-like mechanical property that enhances biocompatibility and can be functionalized for specific sensing applications [34] [1].
Q3: In what types of biosensors are these blockers most commonly applied? They are used across various platforms, including electrochemical biosensors, surface plasmon resonance (SPR), and microfluidic biosensors [5] [1]. Their compatibility is crucial for applications in clinical diagnostics, drug development, and food safety testing.
Troubleshooting Guide: Common Issues and Solutions
| Problem Phenomenon | Potential Root Cause | Recommended Solution |
|---|---|---|
| High Background Signal | Incomplete surface coverage of blocker; insufficient blocking time. | Optimize blocker concentration and incubation duration; include a negative control without analyte [1]. |
| Reduced Specific Signal | Blocker layer is too thick, causing steric hindrance to bioreceptors. | Use a lower molecular weight blocker (e.g., casein instead of BSA) or employ a more porous hydrogel matrix [1]. |
| Signal Drift Over Time | Desorption of the blocker layer or degradation/fouling of the hydrogel. | Ensure the blocker is covalently cross-linked if possible; for hydrogels, consider formulations with higher cross-linking density or self-healing properties [34] [5]. |
| Poor Reproducibility | Inconsistent surface preparation or blocker solution preparation. | Standardize surface cleaning and activation protocols; prepare fresh blocker solutions for each experiment [35]. |
| Hydrogel Dehydration/Instability | Hydrogel loses water content in non-humid environments. | Use hydrogel hybrids (e.g., organohydrogels) that resist dehydration, or conduct measurements in controlled, humid environments [34]. |
Experimental Protocols for NSA Reduction
Protocol 1: Standard Protein Blocker Application
This protocol outlines the procedure for passivating a biosensor surface with Bovine Serum Albumin (BSA), a common protein-based blocker.
Workflow Overview
Materials and Reagents
- Biosensor Chip/Electrode: Gold, glassy carbon, or other relevant substrate.
- Bovine Serum Albumin (BSA): Fraction V or protease-free, prepared as a 1-5% (w/v) solution in an appropriate buffer (e.g., phosphate-buffered saline (PBS)) [1].
- Washing Buffer: PBS or Tris-buffered saline (TBS), often with a low concentration (e.g., 0.05%) of a mild surfactant like Tween 20.
Step-by-Step Procedure
- Surface Preparation: Clean the sensor surface thoroughly according to established protocols (e.g., oxygen plasma for gold SPR chips, polishing for electrodes). Ensure the surface is free of contaminants.
- Bioreceptor Immobilization: First, immobilize your specific bioreceptor (antibody, DNA aptamer, etc.) onto the activated surface. This ensures the binding sites are available before blocking.
- Blocking: Apply the BSA solution to completely cover the sensor surface. Incubate for 30-60 minutes at room temperature.
- Rinsing: Gently rinse the surface three times with washing buffer to remove any unbound or loosely adsorbed BSA.
- Storage/Use: The sensor can now be used immediately for assays or stored short-term in a suitable buffer at 4°C.
Protocol 2: Fabricating a Tunable PVA-GL Hydrogel Coating
This protocol describes the synthesis of a dual-network Polyvinyl Alcohol (PVA) and Glycerol (GL) hydrogel, which offers mechanically tunable and biocompatible antifouling properties [34].
Workflow Overview
Materials and Reagents
- Polyvinyl Alcohol (PVA): High-purity, suitable molecular weight for hydrogel formation.
- Glycerol (GL): Anhydrous.
- Gelatin: From porcine or bovine skin.
- Deionized Water.
- Molds: For shaping the hydrogel (e.g., petri dish, custom chip mold).
Step-by-Step Procedure
- Solution Preparation: Dissolve PVA in a binary solvent of glycerol and water. The GL/water ratio can be adjusted (e.g., 40% GL is often optimal) to tune the mechanical strength of the resulting hydrogel [34].
- Mixing: Add gelatin to the PVA mixture and stir to obtain a homogeneous solution.
- Molding and Gelation: Inject the mixture into a mold. Freeze the mold at -20°C to initiate the formation of a microcrystalline PVA network.
- Thawing: Thaw the frozen gel at 25°C for 2 hours to complete the formation of the hydrogel (termed PG hydrogel) [34].
- Integration: The resulting hydrogel can be integrated with a transducer or used as a coating on biosensor surfaces. Its high water content and tunable modulus provide an effective physical barrier against NSA.
The Scientist's Toolkit: Essential Research Reagents
| Reagent / Material | Function in NSA Prevention | Key Considerations |
|---|---|---|
| Bovine Serum Albumin (BSA) | Fills vacant spaces on the sensor surface with an inert protein layer. | Cost-effective and widely available; can be too large for some nano-sensors, potentially causing steric hindrance [1]. |
| Casein | Effective blocker from milk; often used in commercial immunoassays. | Can outperform BSA in some systems due to its different protein composition [1]. |
| Polyvinyl Alcohol (PVA) | Forms a hydrophilic, cross-linked hydrogel network that resists protein adsorption. | Mechanical properties (elasticity, toughness) can be finely tuned by the freezing-thawing process and additives like glycerol [34]. |
| Glycerol (GL) | Serves as a co-solvent to enhance hydrogel mechanical strength and prevent dehydration. | The GL/water ratio directly impacts tensile strength and flexibility; optimal around 40% [34]. |
| Fe³⁺ Ions | Acts as a dynamic cross-linker in certain hydrogels, enhancing both mechanical toughness and electrical conductivity. | Concentration must be optimized, as it affects both electrochemical and mechanical properties [34]. |
A technical support resource for researchers combating non-specific adsorption in complex biofluids.
Overview Non-specific adsorption (NSA) is a persistent challenge in biosensing that leads to elevated background signals, reduced sensitivity, and false positives, ultimately compromising diagnostic accuracy. This is particularly critical when working with complex matrices like blood and plasma [1]. This guide details active removal methods—electromechanical and acoustic shearing—which use physical forces to dynamically remove non-specifically bound molecules from sensor surfaces.
FAQs: Understanding Active NSA Removal
1. What are active removal methods, and how do they differ from passive blocking? Active removal methods use externally applied physical forces to dynamically shear away weakly adhered biomolecules from a sensor surface after NSA has occurred. This contrasts with passive methods, which rely on pre-coating the surface with blocker proteins (e.g., BSA) or chemical layers to prevent adsorption. Active methods are particularly advantageous in microfluidic biosensors and for applications requiring reusable or regenerable sensing surfaces [1].
2. Why are shear-based methods preferred for blood and plasma research? Blood and plasma are complex fluids containing a high concentration of proteins and other biomolecules that readily foul sensor surfaces. Shear-based active removal can efficiently disrupt the weaker, non-specific physisorption bonds without damaging the stronger, specific covalent bonds of the immobilized bioreceptors. This allows for real-time cleaning and regeneration of the sensor within its fluidic environment [1] [36].
3. My acoustic wave sensor's signal is drifting when testing plasma samples. What could be wrong? Signal drift often indicates progressive biofouling that the applied shear force is insufficient to remove. We recommend you:
- Verify Shear Force Magnitude: Ensure your acoustic transducer is generating adequate power. The viscous coupling between the wave and the liquid can be optimized by adjusting the input signal.
- Check Flow Conditions: In microfluidic setups, confirm that the flow rate is sufficient to generate synergistic shear forces at the liquid-solid interface. A stagnant liquid layer can reduce removal efficiency [1].
- Inspect Bioreceptor Immobilization: Ensure your specific bioreceptors (e.g., antibodies) are properly and stably immobilized. If they are denatured or poorly attached, they might be sheared off along with the non-specifically bound molecules [37].
4. How can I confirm that my active removal system is working? A successful active removal process will show a measurable decrease in the sensor's signal (e.g., frequency, phase, or amplitude) towards the baseline after activation. For instance, with an acoustic biosensor, you should observe a signal shift as the mass and viscosity on the surface decrease due to the removal of fouling agents [37] [36]. You can validate the process by comparing signals from a fouled sensor before and after applying the shear force.
Troubleshooting Guide: Common Experimental Issues
| Problem Phenomenon | Potential Root Cause | Recommended Solution |
|---|---|---|
| High background after shearing | Insufficient shear force to remove strongly adhered biomolecules. | Increase the amplitude of the acoustic wave or the frequency of the electromechanical vibration. Combine with optimized microfluidic flow [1]. |
| Loss of specific signal | Shear force is too strong, damaging the immobilized bioreceptor layer. | Reduce the power of the applied shear force. Verify the stability and covalent bonding of your bioreceptor immobilization chemistry [1] [37]. |
| Inconsistent results between runs | Unstable flow rates in microfluidic channels or fluctuations in transducer power. | Calibrate pumps and flow sensors. Use a stable, regulated power supply for electromechanical or acoustic transducers [38]. |
| Low sensor sensitivity post-cleaning | Residual molecules or degradation of the sensor's active surface after multiple cleaning cycles. | For Film Bulk Acoustic Resonators (FBARs), note that they are often designed as disposable sensors after several uses due to this issue [36]. |
Experimental Protocols for Key Methodologies
Protocol 1: Acoustic Shearing with a Shear Horizontal Surface Acoustic Wave (SH-SAW) Sensor
This protocol outlines the use of a commercial SH-SAW system for real-time NSA removal and detection in blood samples [37].
Principle: SH-SAW biosensors generate shear horizontal waves that propagate along the sensor surface. These waves are minimally attenuated by liquids and create micro-streaming and shear forces that can dislodge non-specifically bound molecules.
Workflow:
Materials:
Step-by-Step Procedure:
- System Setup: Insert the disposable test cartridge with the SH-SAW sensor chip into the reader. The chip should have a reference and a capture channel pre-coated with dried proteins [37].
- Priming: Introduce a PBS buffer to the sensor surface to establish a stable baseline signal for both phase and amplitude.
- Sample Introduction: Apply a small volume (e.g., a single drop) of the whole blood or plasma sample to the sensing area.
- Incubation: Allow a brief period (e.g., 1-5 minutes) for biomolecules to interact with and non-specifically adsorb to the surface.
- Active Removal: Activate the SH-SAW transducer. The generated acoustic waves will create surface forces that shear away weakly bound NSA molecules. Monitor the phase and amplitude signals in real-time; a sharp change indicates the removal event [37].
- Data Acquisition: The reader's custom IC chip calculates the concentration of the specific analyte using a calibration curve, now with a reduced NSA background [37].
Protocol 2: Electromechanical Shearing with a Film Bulk Acoustic Resonator (FBAR)
This protocol uses an FBAR's high-frequency resonance to monitor and mitigate NSA through viscoelastic coupling [36].
Principle: An FBAR is a micro-electromechanical resonator that operates in shear mode (e.g., at ~1.9 GHz). When biomolecules adsorb to its surface, they change the effective viscosity and mass loaded on the resonator, causing a frequency shift. The sensor's own oscillation can contribute to local shear forces.
Workflow:
Materials:
Step-by-Step Procedure:
- Baseline Measurement: Place the FBAR in a flow cell and perfuse with buffer at a constant flow rate. Measure and record the stable resonant frequency.
- Fouling Phase: Introduce a small volume (e.g., 1-10 µL) of plasma or diluted whole blood into the flow stream. A decrease in resonant frequency will occur as proteins adsorb, increasing the viscous load [36].
- Shear Induction: To induce active removal, simultaneously employ two strategies:
- High-Frequency Oscillation: Rely on the FBAR's own high-frequency shear oscillation to generate local forces.
- Enhanced Flow Shear: Increase the flow rate significantly for a short duration (e.g., 30-60 seconds) using the syringe pump to create a high-shear environment at the sensor surface [1].
- Recovery Monitoring: As NSA molecules are removed, the resonant frequency will recover towards its original baseline. The step-ladder curve of the frequency response can be used to quantify the coagulation time or NSA removal efficiency [36].
- Validation: The sensor can now be reused for a subsequent measurement cycle or a specific binding assay.
The Scientist's Toolkit: Key Research Reagent Solutions
| Item | Function & Application | Notes |
|---|---|---|
| SH-SAW Sensor Cartridge | Disposable chip with integrated reference and capture channels for label-free detection in whole blood. | The platform is common for various markers (e.g., CRP, antibodies). Mass production ensures consistency [37]. |
| FBAR Sensor | High-sensitivity, MEMS-based resonator for monitoring viscoelastic changes in tiny sample volumes (µL). | Often used as a disposable sensor due to challenges in completely removing adsorbed material [36]. |
| Parylene-C | A polymer used as a guiding layer on acoustic sensors to significantly enhance mass loading sensitivity. | Optimal configuration for protein layer sensing is Parylene-C on ST-cut quartz [39]. |
| Lateral Field Excited (LFE) FBAR | A sensor design where the electric field is applied laterally, which is beneficial for liquid operation. | Provides stable performance in conductive fluids like blood plasma [36]. |
| Quartz Substrate | A common piezoelectric substrate for SAW sensors due to its low temperature coefficient and stability. | 36° Y-cut 90° X-propagated quartz is a typical choice for SH-SAW devices [37] [39]. |
Non-specific adsorption (NSA) is a fundamental barrier in biosensing, particularly when working with complex matrices like blood and plasma. NSA occurs when molecules such as proteins, lipids, or cells physisorb to a biosensor's surface, leading to elevated background signals, false positives, reduced sensitivity, and compromised analytical accuracy [1] [5]. In the context of your research on blood and plasma, the high concentration and diversity of proteins and other components make this challenge particularly acute [10].
Hydrodynamic removal has emerged as a powerful, active method to combat NSA. Unlike passive methods that rely on coating the surface, hydrodynamic techniques leverage the controlled flow of fluids within microfluidic systems to generate shear forces that physically dislodge and remove weakly adhered molecules from the sensing interface [1]. This approach, intrinsic to many microfluidic biosensors, provides a dynamic means to maintain surface integrity and functionality during assays.
Frequently Asked Questions (FAQs)
1. What is the fundamental mechanism behind hydrodynamic removal? Hydrodynamic removal works by exploiting the flow dynamics of liquids in microchannels. When a fluid is pumped through a microfluidic system, it generates a velocity gradient, known as a shear profile, near the channel walls. This flow exerts a shear force on any molecules adsorbed to the surface. If the adhesive forces holding the molecule (e.g., hydrophobic interactions, van der Waals forces) are weaker than the hydrodynamic shear force, the molecule will be swept away [1] [5]. This principle is harnessed in washing steps and during continuous flow to minimize fouling.
2. How does hydrodynamic removal compare to other NSA reduction methods? The table below summarizes how hydrodynamic removal stacks up against other common techniques.
| Method | Type | Key Principle | Key Advantage | Key Limitation |
|---|---|---|---|---|
| Hydrodynamic Removal | Active | Uses fluid shear forces to remove adsorbed molecules [1]. | Label-free; can be integrated into flow protocols. | May not remove strongly adhered molecules. |
| Surface Passivation (e.g., BSA) | Passive | Coats surface with blocker proteins to prevent adsorption [1]. | Well-established and easy to implement. | Can block bioreceptors; may desorb over time. |
| Antifouling Coatings (e.g., PEG) | Passive | Creates a hydrated, neutral polymer layer to repel adsorption [5]. | Highly effective reduction for many proteins. | Complex surface chemistry; can reduce bioreceptor activity. |
| Acoustofluidics | Active | Uses sound waves to generate microstreaming and shear forces [40]. | Effective for cells and particles; can be highly localized. | Requires external transducers; potential for heating. |
| Electrokinetic Methods | Active | Applies electric fields to move fluids or charged molecules [40]. | Precise control over fluid and particles. | Limited to conductive buffers; can affect analyte. |
3. What are the critical parameters to optimize for effective hydrodynamic removal? Successful implementation depends on several interlinked fluidic parameters, as detailed in the following table.
| Parameter | Description | Impact on NSA Removal | Practical Consideration |
|---|---|---|---|
| Flow Rate | The volume of fluid passing per unit time. | Higher flow rates generate greater shear forces, enhancing removal [1]. | Balance against the risk of damaging surface-bound bioreceptors or the surface coating. |
| Shear Rate | The velocity gradient perpendicular to the flow direction; a function of flow rate and channel geometry. | Directly correlates with the shear force exerted on adsorbed species [1]. | Critical parameter to calculate and control for reproducible results. |
| Channel Geometry | The cross-sectional shape and dimensions (height, width) of the microfluidic channel. | Determines the shear profile at the wall. Lower channel heights increase shear rate for a given flow rate [40]. | Design is crucial for maximizing shear where the sensor is located. |
| Fluid Viscosity | The resistance of the carrier fluid to flow. | Higher viscosity increases the shear stress for a given shear rate. | Typically fixed by the choice of buffer, but can be modulated. |
| Reynolds Number (Re) | A dimensionless number quantifying the ratio of inertial to viscous forces. | Low Re (< 2000) indicates laminar flow, which is predictable and essential for controlled shear [40]. | Ensures flow remains laminar and calculable. |
4. Can hydrodynamic flows be used for more than just removal? Yes, advanced microfluidic phenomena can be harnessed for sophisticated particle and cell manipulation. Inertial focusing is one such technique where, at finite Reynolds numbers, particles in a flow experience lift forces that drive them to specific, predictable equilibrium positions within the channel cross-section [40]. This can be used to focus cells away from the walls, inherently reducing their contact with the sensor surface and thus the potential for adhesion. Furthermore, hydrodynamically confined flows (HCF) use a combination of injection and aspiration flows with a higher aspiration rate to create a tightly confined volume of fluid near a surface without physical contact. This allows for highly localized perfusion of reagents or washing buffers, minimizing both sample consumption and the exposure of the entire sensor surface to potential foulants [41].
Troubleshooting Guide
Problem 1: High Background Signal After Washing Steps
- Potential Cause: Insufficient shear force to remove adsorbed molecules.
- Solution:
- Systematically increase the flow rate or pressure during the wash step while monitoring the signal. Refer to the table above and calculate the wall shear rate to ensure it meets the required threshold for your target analytes.
- Consider using a stepped flow protocol: start with a low shear to remove weakly bound material, then apply a high-shear pulse to remove more tenacious foulants.
- Ensure your buffer composition is optimized. The inclusion of mild surfactants (e.g., Tween 20) can synergize with hydrodynamic forces by reducing the adhesion energy between the foulant and the surface [5].
Problem 2: Loss of Specific Signal or Sensor Regeneration Issues
- Potential Cause: Excessive shear forces are damaging the immobilized bioreceptors (e.g., denaturing antibodies) or stripping them from the surface.
- Solution:
- Reduce the operational flow rate, especially during sensitive incubation steps.
- Investigate the covalent immobilization chemistry used for your bioreceptors. A more robust, multi-point attachment can increase resilience to shear.
- Test the stability of your bioreceptor layer by running repeated measurement cycles with a known standard and monitoring signal decay.
Problem 3: Inconsistent NSA Removal Across the Sensor Surface
- Potential Cause: Non-uniform flow distribution due to channel geometry or clogging.
- Solution:
- Inspect microchannel design. Sudden expansions, contractions, or dead volumes can create zones of low shear where foulants accumulate.
- Flush the system with a cleaning solution (e.g., 1M NaOH, pepsin) to remove any blockages [42].
- Use dyes or tracer particles to visually confirm uniform flow across the entire sensing area. Computational Fluid Dynamics (CFD) modeling can be a powerful tool for identifying problematic geometries before fabrication.
Problem 4: Clogging in Microchannels
- Potential Cause: Aggregation of cells or proteins in the circuit, especially from complex samples.
- Solution:
- Implement a pre-filtering step (e.g., a 0.45 µm or 0.22 µm membrane filter) for your blood or plasma samples before injection.
- Incorporate a "chip-free" pre-incubation step where the sample is mixed with reagents off-chip before being introduced into the microfluidic system, reducing reaction-based aggregation within the channels.
- Design channels with optimized geometries that minimize stagnation points.
Experimental Protocol: Evaluating Antifouling Coatings with Hydrodynamic Shear
This protocol provides a methodology to quantitatively assess the efficacy of a novel antifouling surface coating under dynamic, shear-stress conditions, simulating a realistic biosensing environment.
1. Objective: To determine the stability and NSA resistance of a surface coating when exposed to a complex protein solution under controlled flow.
2. Materials
- The Researcher's Toolkit
- Microfluidic flow cell integrated with your biosensor (e.g., SPR, electrochemical).
- Programmable syringe or pressure-driven pump capable of precise flow control.
- Buffer solutions (e.g., PBS).
- Complex test solution (e.g., 10% Fetal Bovine Serum, undiluted blood plasma).
- Model foulant: Fluorescently labelled protein (e.g., FITC-BSA or Cy5-fibrinogen).
- Detection system (e.g., fluorescence microscope, SPR reader, electrochemical workstation).
3. Procedure
- Step 1: Coating Application. Functionalize the sensor surface with the novel antifouling coating according to your established protocol.
- Step 2: Baseline Establishment. Flush the system with a pure buffer at a low flow rate (e.g., 10 µL/min) until a stable baseline signal is achieved.
- Step 3: Fouling Phase. Introduce the complex test solution spiked with the fluorescently labelled protein. Use a low, physiologically relevant shear rate for a set period (e.g., 30 minutes) to allow for fouling.
- Step 4: Hydrodynamic Removal Phase. Switch back to the pure buffer and initiate a stepped flow protocol. Systematically increase the flow rate in stages (e.g., 50, 100, 200 µL/min), holding each stage for 5-10 minutes while recording the signal.
- Step 5: Data Analysis. Calculate the percentage of signal removed at each shear stage relative to the maximum fouling signal. A robust coating will show a significant signal drop at low-to-moderate shear forces, indicating easy removal of non-specifically bound material.
Flow Dynamics and NSA Removal Workflow
The following diagram visualizes the logical workflow and key decision points for implementing hydrodynamic removal in an experiment, integrating concepts from the FAQs and troubleshooting guide.
Frequently Asked Questions (FAQs)
Q1: What are the primary causes of nonspecific adsorption (NSA) in electrochemical biosensors, and how can material design mitigate it? Nonspecific adsorption occurs when non-target biomolecules from blood or plasma (e.g., proteins, lipids) bind to the sensor surface, causing false signals and reduced accuracy. Material innovations combat this through several strategies:
- Hydrophilic Coatings: Using hydrophilic materials like certain hydrogels or plasma-polymerized polyoxazoline (POx) films creates a hydration barrier that repels proteins, a major source of NSA [43] [44] [45].
- Functional Nanomaterials: Incorporating nanoporous materials or nanoparticles allows for the immobilization of a high density of specific biorecognition elements (e.g., antibodies, aptamers). This creates more specific binding sites for the target analyte, outcompeting non-specific interactions [46] [44].
- Conductive Hydrogels and Composites: Combining the NSA-resistant properties of hydrogels with the electrical conductivity of polymers or nanomaterials enables direct, sensitive electrochemical detection while minimizing fouling. This integration is a promising strategy for real-time monitoring in complex fluids [47] [43].
Q2: Why is conductivity important in biosensing films, and how can it be enhanced in otherwise insulating polymer layers? Conductivity is crucial for efficient electron transfer in electrochemical biosensors, which directly impacts signal strength, sensitivity, and the limit of detection. Many biocompatible polymers are inherently insulating. Conductivity can be enhanced by:
- Incorporating Nanomaterials: Embedding conductive nanomaterials like gold nanoparticles (AuNPs) or carbon nanotubes into the polymer matrix creates electron transport pathways. For instance, layering AuNPs between two insulating polyoxazoline films significantly enhances conductivity by providing channels for current to flow [45].
- Using Redox Mediators: Adding redox-active molecules to conducting polymer films can facilitate electron shuttling between the biorecognition element and the electrode surface, thereby enhancing the electrochemical signal [47] [48].
- Forming Conductive Composites: Developing composites of conducting polymers (e.g., PEDOT, PANI) with materials like graphene or metal nanoparticles synergistically improves both electrical conductivity and structural stability [47] [48].
Q3: Which material properties are most critical for achieving a low limit of detection (LOD) in blood and plasma? Achieving a low LOD in complex media requires a combination of material properties:
- High Sensitivity and Specificity: The material must generate a strong, unambiguous signal for the target analyte. Nanomaterials like graphene and gold nanoparticles enhance electrochemical signals, while molecularly imprinted polymers (MIPs) or immobilized antibodies provide high specificity [47] [46] [49].
- Large Surface Area: Nanoporous materials and nanostructures provide a high surface-to-volume ratio, allowing for greater immobilization of biorecognition elements and increased interaction with the target analyte, which amplifies the signal [50] [44].
- Anti-Fouling Capacity: The material must effectively resist NSA to maintain signal integrity in protein-rich blood and plasma. This is achieved through surface chemistry, hydrophilicity, and careful functionalization [44] [45].
Troubleshooting Guide: Common Experimental Issues
Issue 1: High Background Signal or Low Signal-to-Noise Ratio in Complex Samples
| Potential Cause | Diagnostic Steps | Solution |
|---|---|---|
| Insufficient surface passivation | Measure signal response in blank plasma vs. buffer. A high signal in blank plasma indicates NSA. | Implement a blocking step with inert proteins (e.g., BSA) or incorporate/functionalize with more effective anti-fouling layers like polyethylene glycol (PEG) derivatives or hydrophilic hydrogels [43] [44]. |
| Non-optimized pore size in nanoporous materials | Characterize pore size distribution (e.g., BET analysis) and correlate with target molecule size. | Optimize the nanoporous material synthesis to ensure pore size is tailored to selectively capture the target analyte while excluding larger interferents [44]. |
| Inconsistent nanomaterial synthesis | Analyze nanoparticle size and morphology using TEM/DLS. Inconsistent batches lead to variable sensor performance. | Standardize synthesis protocols (e.g., citrate reduction for AuNPs). Use freshly prepared and characterized nanomaterials for sensor fabrication [46] [45]. |
Issue 2: Poor Electron Transfer and Low Electrochemical Response
| Potential Cause | Diagnostic Steps | Solution |
|---|---|---|
| Insufficient conductivity of the sensing layer | Perform Electrochemical Impedance Spectroscopy (EIS); a high charge transfer resistance (Rct) indicates poor conductivity. | Integrate conductive nanomaterials (e.g., AuNPs, CNTs) into the polymer matrix or switch to more conductive polymers like PEDOT:PSS [47] [45]. |
| Poor integration between biorecognition element and transducer | Check the activity of the immobilized enzyme/antibody in a simple buffer. | Use covalent immobilization strategies (e.g., EDC-NHS chemistry) on functionalized polymers instead of physical adsorption to ensure stable and oriented binding [48] [45]. |
| Use of an overly thick polymer film | Measure film thickness with profilometry or AFM. Thick films can hinder analyte diffusion. | Optimize deposition parameters (e.g., plasma polymerization time, spin-coating speed) to create a thin, uniform film that does not impede mass or charge transport [48] [45]. |
Issue 3: Low Sensor Stability and Reproducibility
| Potential Cause | Diagnostic Steps | Solution |
|---|---|---|
| Leaching of biorecognition elements | Monitor signal degradation over multiple measurements or over time in a flow system. | Ensure robust immobilization via covalent bonding or entrapment within a polymer network (e.g., during electrophysiomerization) [48]. |
| Mechanical degradation of the film | Inspect the electrode surface under a microscope after cycling. | Use cross-linked polymers or composite materials to enhance mechanical stability and adhesion to the electrode substrate [43] [48]. |
| Batch-to-batch variation in material synthesis | Characterize the physicochemical properties of each new batch of synthesized material. | Establish strict quality control protocols and standardize all synthesis and fabrication procedures [51]. |
Experimental Protocols for Key Material Strategies
Protocol 1: Enhancing Conductivity in Insulating Polymer Films with Gold Nanoparticles (AuNPs)
This protocol is adapted from research demonstrating that incorporating AuNPs between insulating plasma polymer layers can significantly enhance electron transport [45].
1. Synthesis of Carboxyl-Functionalized AuNPs:
- Prepare a boiling solution of 50 mL of 0.01% chloroauric acid (HAuCl4) under reflux with vigorous stirring.
- Rapidly add 1 mL of 1% trisodium citrate to synthesize ~16 nm diameter AuNPs.
- Continue boiling and stirring for 20 minutes until the solution develops a deep red color.
- Cool the solution to room temperature. To functionalize with -COOH groups, add 0.02 M sodium hydroxide and 0.01 M mercaptosuccinic acid. Stir the mixture overnight.
2. Functionalization of Electrode with Plasma Polymerized Polyoxazoline (POx):
- Use a plasma reactor with a 13.56 MHz radio frequency generator.
- Clean and prime the gold electrode substrate with an air plasma (e.g., 30 W, 2.0 × 10⁻¹ mbar, 3 minutes).
- Evacuate the reactor to a base pressure of ~2.0 × 10⁻² mbar.
- Introduce the precursor (e.g., 2-Methyl-2-oxazoline) into the reactor at the desired working pressure.
- Ignite the plasma at the optimized power (e.g., 15 W) for 30 seconds to deposit a thin MePOx film.
3. Immobilization of AuNPs:
- Incubate the POx-functionalized electrode in the synthesized COOH-AuNP solution for 24 hours.
- The oxazoline rings on the POx film will react with the COOH groups on the AuNPs, leading to covalent binding.
- Rinse the electrode thoroughly with milliQ water and dry under a gentle stream of nitrogen gas.
4. Application of Top POx Layer and Functionalization:
- Deposit a second, top layer of POx film using the same plasma polymerization process from Step 2.
- This top layer can now be functionalized with your specific biorecognition element (e.g., antibody, aptamer) via its remaining oxazoline rings.
Protocol 2: Developing a Nanoporous Biosensor for Selective Capture
This protocol outlines the general approach for utilizing nanoporous materials to enhance sensitivity and selectivity [44].
1. Selection and Preparation of Nanoporous Material:
- Choose a nanoporous material suited to your target's size and the transduction method (e.g., Mesoporous Silica for large surface area, Nanoporous Gold for conductivity).
- Synthesize or acquire the material with a controlled pore size distribution (characterized by BET analysis).
2. Functionalization of the Nanoporous Surface:
- Activate the surface of the nanoporous material to introduce functional groups (e.g., -COOH, -NH₂).
- Immobilize the biorecognition element (e.g., an antibody specific to your target biomarker) onto the activated surface using a suitable cross-linker like EDC/NHS chemistry.
3. Sensor Fabrication and Integration:
- Deposit the functionalized nanoporous material onto the transducer electrode (e.g., via drop-casting, electrodeposition).
- Use a blocking agent (e.g., BSA, casein) to passivate any remaining active sites on the material and electrode surface to minimize NSA.
4. Detection and Measurement:
- Upon exposure to the sample (blood/plasma), the target analyte is selectively captured within the pores.
- This binding event is transduced into a measurable signal (e.g., change in electrochemical current, impedance, or optical property).
Signaling Pathways and Experimental Workflows
The Scientist's Toolkit: Research Reagent Solutions
| Reagent / Material | Function / Application in Biosensing |
|---|---|
| Poly(3,4-ethylenedioxythiophene):Poly(styrene sulfonate) (PEDOT:PSS) | A stable, commercially available conducting polymer used to modify electrodes, providing high conductivity and biocompatibility for enhanced electrochemical sensing [43] [48]. |
| Gold Nanoparticles (AuNPs) | Used to dramatically enhance the conductivity of insulating polymer films and increase the effective surface area for biomolecule immobilization, leading to higher sensitivity [46] [45]. |
| Molecularly Imprinted Polymers (MIPs) | Synthetic polymer receptors with tailor-made cavities for a specific target. Serve as stable and cost-effective alternatives to biological receptors (e.g., antibodies) for selective recognition [47] [48]. |
| Mesoporous Silica Nanoparticles | Provide an exceptionally high surface area for loading recognition elements or signal probes. Their tunable pore size allows for selective analyte capture, improving specificity [50] [44]. |
| EDC/NHS Cross-linker Kit | A standard chemistry used for the covalent immobilization of biomolecules (with amine or carboxyl groups) onto functionalized sensor surfaces, ensuring stable and oriented binding [44] [45]. |
| Polyoxazoline (POx) Plasma Polymer | A versatile platform for substrate-independent electrode functionalization. Allows for covalent "click-chemistry" type binding of biomolecules via -COOH groups, creating a stable sensing interface [45]. |
Universal Functionalization Strategies for Complex Samples
Technical Support Center
This technical support center provides troubleshooting guides and frequently asked questions for researchers working on universal functionalization strategies to minimize non-specific adsorption (NSA) in biosensing applications, particularly in blood and plasma research.
Troubleshooting Guides
Issue 1: High Non-Specific Adsorption on Universal Substrates
- Problem: High background signal or false positives due to non-specific binding of interfering compounds from plasma to the functionalized sensor surface.
- Cause: Plasma is a complex matrix containing dozens of compounds like proteins, lipids, and salts that can adsorb to sensing interfaces [52]. Incomplete blocking of active sites on the universal substrate is a common cause [53].
- Solution:
- Optimize Blocking Agents: After immobilizing your specific bioreceptor (e.g., an aptamer), incubate the surface with a blocking solution. Common agents include Bovine Serum Albumin (BSA) at 1-5% w/v or casein.
- Include Surfactants: Add low concentrations of non-ionic surfactants (e.g., 0.05% Tween-20) to washing and sample buffers to reduce hydrophobic interactions.
- Validate with Control Channels: Always run control experiments with a non-functionalized but blocked substrate or one immobilized with a scrambled nucleic acid sequence to quantify and subtract background interference [53].
Issue 2: Inconsistent Immobilization of Bioreceptors
- Problem: Low or variable density of aptamers or other capture molecules on the universal substrate, leading to poor sensor sensitivity and reproducibility.
- Cause: The gold nanoparticle (GNP) intermediary bridge on the monolithic column may have inconsistent coverage or stability [53].
- Solution:
- Verify GNP Adsorption: Qualitatively and quantitatively characterize the GNP adsorption capacity of your hybrid monolithic column to ensure a uniform and dense layer [53].
- Standardize Immobilization Protocol:严格控制 immobilization time, temperature, and concentration of the thiol-modified aptamer solution. A typical protocol might involve incubating a 1-10 µM aptamer solution with the GNP-modified substrate for 12-16 hours at room temperature.
- Measure Coverage Density: Use techniques like UV-Vis spectroscopy or elution assays to confirm the coverage density of your bioreceptor. A well-functionalized aptamer on a GNP-modified monolith can achieve coverages up to 2205.8 pmol µL⁻¹ [53].
Issue 3: Poor Plasma Sample Quality Leading to Erratic Results
- Problem: Sensor performance degrades due to variations in plasma sample preparation, compromising the reliability of detection.
- Cause: Improper handling can cause hemolysis, cellular breakdown, or degradation of target analytes [52].
- Solution:
- Standardize Collection: Use consistent collection tubes and anti-coagulants. Avoid tubes that can perturb expression profiles [52].
- Control Temperature: Freeze plasma at -80 °C immediately after low-temperature centrifugation. Never store at -20 °C, as plasma does not fully freeze at this temperature [52].
- Minimize Freeze-Thaw Cycles: Aliquot plasma to avoid repeated thawing and freezing, which can degrade labile components.
- Assess Sample Quality: Implement a quality control assay, such as measuring the relative abundance of S-cysteinylated albumin, to objectively determine a plasma sample's cumulative exposure to thawed conditions and its suitability for analysis [52].
Issue 4: Low Sensitivity and Selectivity in Complex Matrices
- Problem: The functionalized sensor fails to detect low levels of the target analyte or distinguishes poorly against analogs in plasma.
- Cause: The functional groups on the polymer or monolithic substrate may not provide sufficient specificity, or the electrochemical sensor design lacks optimal materials [54] [55].
- Solution:
- Leverage "Click-to-Polymer" (CLIP) Functionalization: Utilize the CLIP strategy to incorporate highly specific bioreceptors (e.g., proteins, enzymes) directly into the side chains of high-performance conjugated polymers, enabling amplified biomolecular sensing [54].
- Utilize Nanomaterial-Based Electrodes: Modify electrode surfaces with hybrid nanomaterials. Carbon-based materials (graphene oxide, carbon nanotubes) and metallic nanomaterials (gold, platinum) can enhance electrocatalytic activity, improve sensitivity, and help discriminate against interfering substances [55].
- Employ Aptamers as Bioreceptors: Use aptamers selected for your specific target. They can be densely immobilized on universal GNP substrates and often show high specificity and stability [53].
Frequently Asked Questions (FAQs)
Q1: What is the core advantage of a universal functionalization strategy? A universal strategy, such as using a gold nanoparticle-modified hybrid monolithic column, provides a flexible substrate that can be easily and rapidly post-functionalized with various bioreceptors (e.g., antibodies, aptamers). This avoids the tremendous time and labor consumption required to optimize the preparation of a new dedicated substrate for every target analyte [53].
Q2: My electrochemical sensor for NSAIDs in plasma has a drifting baseline. What could be wrong? Baseline drift is often a sign of a poorly equilibrated sensor surface or bulk shifts from buffer mismatch. Ensure your flow buffer and analyte buffer are perfectly matched. It may be necessary to run the flow buffer for an extended period (e.g., overnight) to fully equilibrate the surface before starting analyte injections [56].
Q3: How can I create a photopatternable sensor surface using conjugated polymers? The "click-to-polymer" (CLIP) strategy allows for the incorporation of functional units like benzophenone into the polymer side chains. This enables direct photopatterning of the polymer film with high resolution (sub-10-µm), which can be used to create intricate sensor geometries without significantly compromising the material's charge-carrier mobility [54].
Q4: What are the key considerations when choosing an extraction method for microRNA from plasma? The choice of extraction method critically affects your results. Studies comparing five extraction protocols found that column-based methods were highly effective, while phenol extraction followed by column purification resulted in lower yield and quality. The extraction method can influence the selection of potential miRNA markers, so comparisons across studies using different protocols should be done with caution [52].
Q5: Why is color contrast important in schematic diagrams for publications? Sufficient color contrast ensures that all readers, including those with color vision deficiencies, can interpret your data. For graphical abstracts and schematics, use colors with a high contrast ratio (at least 4.5:1 for large text and 7:1 for other elements) between text/shapes and their background. Avoid using color as the sole means to convey information; supplement with shapes or patterns [57].
Experimental Protocols
Protocol 1: Functionalization of a Universal GNP-Modified Monolithic Column with an Aptamer
This protocol details the post-functionalization of a gold nanoparticle (GNP)-modified amine- and thiol-bi-functionalized hybrid monolithic column for specific biosensing applications [53].
- Substrate Preparation: Synthesize the amine- and thiol-bi-functionalized hybrid monolithic column according to established procedures. This material is identified as the most suitable universal substrate.
- GNP Immobilization: Flush the monolithic column with a solution of citrate-capped GNPs (e.g., 15 nm diameter). Monitor the process until the qualitative and quantitative analysis confirms a high GNP adsorption capacity.
- Aptamer Grafting:
- Prepare a 5 µM solution of thiol-modified aptamer in a suitable immobilization buffer (e.g., Tris-EDTA buffer with optional salts like MgCl₂).
- Circulate the aptamer solution through the GNP-modified column for 12-16 hours at room temperature.
- Wash the column extensively with the buffer to remove any physically adsorbed aptamers.
- Surface Blocking: To minimize NSA, passivate the surface by incubating with a 1 mM solution of 6-mercapto-1-hexanol (MCH) for 1 hour to backfill any unoccupied sites on the GNPs.
- Validation: The resulting coverage density of the aptamer should be significantly high (e.g., ~2205.8 pmol µL⁻¹). The functionalized column can now be applied for solid-phase microextraction, demonstrating excellent adsorption selectivity for its target in complex samples [53].
Protocol 2: Direct Photopatterning of a CLIP-Functionalized Conjugated Polymer
This methodology enables the creation of high-resolution patterns on polymer semiconductor films for device integration [54].
- Polymer Synthesis: Synthesize a conjugated polymer precursor designed for the "click-to-polymer" (CLIP) post-functionalization strategy.
- Functionalization: Use a click reaction to attach a benzophenone-containing functional unit to the side chains of the conjugated polymer.
- Film Deposition: Deposit a thin film of the functionalized polymer onto a chosen substrate (e.g., glass, silicon) via solution-processing techniques like spin-coating or blade-coating.
- Photopatterning:
- Place a photomask with the desired pattern directly onto the polymer film.
- Irradiate the film with UV light through the photomask. The benzophenone groups in the exposed regions will cross-link.
- Development: Rinse the film with an appropriate organic solvent (e.g., chlorobenzene). The unexposed, non-cross-linked regions will dissolve away, leaving a negative-tone pattern with sub-10-µm resolution. The patterned film retains good charge-carrier mobility [54].
Research Reagent Solutions
The following table details key materials used in developing universal functionalization strategies and biosensors for complex samples.
Table 1: Essential Research Reagents and Materials
| Item | Function/Benefit |
|---|---|
| Amine/Thiol-functionalized Hybrid Monolith | Serves as a universal substrate with multiple binding sites for intermediary anchors like gold nanoparticles [53]. |
| Gold Nanoparticles (GNPs) | Act as a versatile intermediary bridge on monolithic substrates, enabling facile immobilization of thiol-modified bioreceptors (e.g., aptamers, antibodies) [53]. |
| Thiol-Modified Aptamers | High-affinity, synthetic bioreceptors that can be densely grafted onto GNP surfaces for specific target capture with high coverage density [53]. |
| Click Chemistry Reagents | Enable a universal and facile "click-to-polymer" (CLIP) strategy for attaching diverse functional units (e.g., benzophenone, NHS ester) to pre-synthesized conjugated polymers [54]. |
| Benzophenone Monomer | A functional unit that, when incorporated into a polymer via CLIP, allows for direct UV photopatterning to create high-resolution sensor geometries [54]. |
| N-Hydroxysuccinimide (NHS) Ester Monomer | A functional unit for CLIP that allows for the covalent immobilization of protein-type bioreceptors onto conjugated polymers for biochemical sensing [54]. |
| Carbon-Based Nanomaterials (Graphene Oxide, CNTs) | Used to modify electrochemical electrodes, providing high surface area, excellent conductivity, and enhanced electrocatalytic activity for sensitive NSAID detection [55]. |
| Metallic Nanomaterials (Au, Pt NPs) | Electrode modifiers that enhance signal response and can be functionalized with recognition elements for selective sensing in complex media like plasma [55]. |
Experimental Workflow and Signaling Pathway Diagrams
Diagram 1: Universal Substrate Functionalization Workflow
This diagram illustrates the multi-step process for creating a functionalized biosensing platform using a universal monolithic substrate.
Diagram 2: CLIP Polymer Functionalization Strategy
This diagram outlines the "click-to-polymer" strategy for creating multifunctional conjugated polymers.
Diagram 3: Plasma Sample Prep Troubleshooting
This flowchart guides users through common problems encountered during plasma sample preparation.
Optimizing Biosensor Interfaces: Protocols, Materials, and Machine Learning
Troubleshooting Guides
Centrifugation Troubleshooting
Centrifugation is a critical step for separating plasma from whole blood, and issues can introduce significant variability, potentially impacting subsequent biosensing analysis.
| Problem | Possible Causes | Troubleshooting Steps |
|---|---|---|
| Excessive Vibration [58] [59] | Unbalanced load; Misaligned or damaged rotor; Worn-out bearings [59] | Balance the load using tubes of equal weight [58]; Inspect rotor for damage and ensure it is correctly seated and aligned [58] [59] |
| Lid Won't Close [58] [59] | Obstructions in the chamber; Misaligned door latch; Worn or deformed sealing gasket [59] | Inspect chamber for debris or broken tubes (use PPE) [59]; Check for and remove obstructions; Lubricate locking mechanism per manual [58] |
| Overheating [58] | Extended run times at high speed; Blocked cooling vents or faulty fan [58] | Turn off the machine and allow it to cool without opening the lid immediately [58]; Check and clean vents or fans of the cooling system [58] |
| Abnormal Noises [58] [59] | Foreign objects in chamber; Loose components; Insufficient lubrication [59] | Turn off the centrifuge; Inspect for debris or broken tubes [59]; Check for loose parts and lubricate moving parts per manufacturer guidelines [59] |
Filtration Troubleshooting
Proper filtration is essential for clarifying samples and removing particulates that could interfere with biosensing platforms. Common pitfalls can lead to analyte loss or contamination.
| Problem | Possible Causes | Troubleshooting Steps |
|---|---|---|
| Analyte Adsorption [60] | Incorrect filter membrane material leading to binding of target analytes [60] | Choose low-binding membranes like PVDF or PES for proteins and peptides [60]; Conduct a filter binding investigation during method development [60] |
| High Background/Interference [60] | Leachates from filter membrane incompatible with solvents [60] | Pre-clean the filter by rinsing with ~1 mL of appropriate solvent [60]; Ensure chemical compatibility of filter with your solvent system [60] |
| Filter Clogging [60] | Heavy particulate load in sample [60] | Use a multilayer syringe filter with a prefilter (e.g., PVDF or PES, not glass fiber for proteins) [60] |
| Low Filtrate Volume/Recovery [60] | Excessive hold-up volume in filter device [60] | Select an appropriately sized filter: use 4-mm for samples <1 mL, 13-mm for <10 mL [60] |
Dilution Troubleshooting
Accurate dilution is fundamental for preparing standards and samples within the dynamic range of biosensors. Errors here directly affect quantitative accuracy.
| Problem | Possible Causes | Troubleshooting Steps |
|---|---|---|
| Inaccurate Concentration [61] [62] | Pipetting errors; Incorrect calculations [62] | Double-check all calculations, especially when using the C1V1=C2V2 formula [61]; Ensure proper pipetting technique and use calibrated equipment [62] |
| Poor Reproducibility [62] | Cumulative pipetting errors in serial dilutions [62] | Use a sufficient initial volume to minimize error propagation [62]; For critical applications, use a 2-fold serial dilution for more precision over a 10-fold dilution [62] |
| Incorrect Final Volume [62] | Not accounting for the transfer volume in serial dilutions [62] | In a serial dilution, discard the transfer volume from the last tube to ensure equal volumes in all tubes/wells [62] |
Frequently Asked Questions (FAQs)
1. Why is proper centrifuge balancing so critical in plasma preparation? An unbalanced centrifuge causes excessive vibration, which can lead to damaged equipment, broken sample tubes, and incomplete or inconsistent separation of plasma from blood cells. This introduces pre-analytical variation that compromises the integrity of your sample for downstream biosensing [58] [59].
2. How can I minimize the loss of low-abundance proteins during filtration? Nonspecific binding to the filter membrane is a major cause of loss. To minimize this, select low-binding hydrophilic membranes such as PVDF or PTFE. Always conduct a recovery experiment during method development by comparing the instrument response from filtered and unfiltered (but centrifuged) samples [60].
3. When should I use a serial dilution instead of a single dilution? Serial dilutions are ideal when you need to cover a wide concentration range (e.g., for a standard curve) or when the required dilution factor is so large that the volume of stock solution needed for a single dilution is too small to pipette accurately [61] [62].
4. What is the best way to improve the reproducibility of my serial dilutions? The reproducibility of serial dilutions is often limited by pipetting errors that accumulate with each step. To improve it, use precise, calibrated pipettes, employ reverse pipetting for viscous fluids, and make intermediate dilutions to avoid pipetting very small volumes [62].
Experimental Workflow for Plasma Sample Preparation
The following diagram outlines a generalized workflow for preparing plasma samples, integrating the three techniques, with key checkpoints to minimize non-specific adsorption (NSA) and variability.
Troubleshooting Logic Pathway
When encountering an issue in your prepared sample, follow this logical pathway to identify the most likely source of the problem.
Research Reagent Solutions
The following table lists key materials and their functions for the sample preparation techniques discussed, with an emphasis on minimizing non-specific adsorption.
| Item | Function & Application | Key Consideration for Minimizing NSA |
|---|---|---|
| PVDF Syringe Filter [60] | Clarification of plasma samples prior to LC-MS or biosensor analysis; removal of particulates. | Hydrophilic PVDF membranes exhibit very low nonspecific binding for proteins and peptides, preserving analyte concentration [60]. |
| Low-Protein-Bind Microtubes [62] | Storage and handling of diluted protein samples and standards. | Tubes made from polymers like polypropylene minimize surface adsorption of biomolecules, crucial for low-concentration analytes. |
| Automated Liquid Handler [63] | Performing high-throughput, reproducible serial dilutions and reagent additions in plasma proteomics. | Robotic systems reduce human pipetting error and sample-to-sample variation, a significant source of quantitative inaccuracy [63]. |
| Balanced Centrifuge Tubes [58] | Holding samples during centrifugation to separate plasma from blood cells. | Using tubes of identical mass and type ensures a balanced rotor, preventing vibration that could cause sample resuspension or tube breakage [58]. |
Optimizing Surface Chemistry for Blood and Plasma Compatibility
For biosensors and medical devices operating within the bloodstream, achieving compatibility with blood and plasma is critical for device functionality and patient safety. When a material contacts blood, it instantaneously triggers a complex series of events including protein adsorption, platelet adhesion, and activation of the coagulation cascade, potentially leading to thrombosis (clot formation), inflammation, and device failure [64] [65]. The core challenge lies in the phenomenon of non-specific adsorption (NSA), where blood proteins and cells indiscriminately adhere to foreign surfaces, triggering these adverse reactions [65].
Surface modification techniques aim to engineer material surfaces to minimize NSA by controlling their chemical composition, topography, energy, and wettability [64]. This technical support guide provides researchers with practical methodologies and troubleshooting advice for optimizing surface chemistry to enhance hemocompatibility for blood-contacting biosensors and implants.
Surface Modification Techniques and Data
Comparison of Surface Modification Techniques
The following table summarizes the key surface modification techniques used to enhance hemocompatibility, along with their mechanisms and reported outcomes.
| Technique | Mechanism of Action | Key Parameters | Reported Outcomes | References |
|---|---|---|---|---|
| Oxygen Plasma Immersion Ion Implantation (O-PIII) | Creates a smooth, homogeneous TiO₂ layer on metals; introduces polar functional groups. | Bias voltage (-1 kV to -10 kV), gas type (O₂), treatment time. | • Delayed blood clotting for 15 min.• Hydrophilic surfaces (Contact angle: ~8° to 74°).• 150% increase in surface roughness (Ti-15Mo). | [66] |
| Bio-inert Coatings (e.g., PEG-like, Zwitterionic) | Creates a hydration layer and steric repulsion to prevent protein fouling. | Coating thickness, density, and uniformity. | • Reduces protein adsorption.• Minimizes platelet adhesion.• Creates a "stealth" effect. | [65] |
| Bioactive Heparin Coating | Immobilizes anticoagulant molecules that actively inhibit thrombin. | Heparin bioactivity post-immobilization, coating stability. | • Directly inhibits coagulation cascade.• Prevents thrombus formation. | [65] |
| Biomimetic Endothelial Cell (EC) Coating | Mimics the natural luminal surface of blood vessels to promote harmony with blood. | Type of peptides or extracellular matrix (ECM) proteins used. | • Promotes rapid endothelialization.• Reduces inflammation and thrombosis. | [65] |
Quantitative Data from Plasma Treatment Studies
The table below consolidates specific quantitative data from experimental studies, providing benchmarks for expected results.
| Material | Treatment | Contact Angle (°) | Surface Roughness Change | Hemocompatibility Result | Reference |
|---|---|---|---|---|---|
| Ti-6Al-4V | O-PIII (-1 kV) | ~74 (Hydrophilic) | Not Specified | Significantly delayed coagulation; most promising results. | [66] |
| Ti-15Mo | O-PIII (-10 kV) | Remained Hydrophilic | ~150% rise | Delayed coagulation. | [66] |
| cp-Ti | O-PIII (-10 kV) | Became Hydrophobic | Not Specified | Delayed coagulation. | [66] |
| Various Polymers | Oxygen Plasma | 107° reduced to 8° | Increased nanoscale roughness | Greatly improved wettability and adhesion. | [67] |
Experimental Protocols
Protocol: Oxygen Plasma Immersion Ion Implantation (O-PIII) on Titanium Alloys
This protocol is adapted from research to enhance the hemocompatibility of titanium-based implant surfaces [66].
1. Sample Preparation:
- Materials: Titanium alloy samples (e.g., cp-Ti, Ti-6Al-4V, Ti-15Mo), industrial soap (e.g., Alconox Citranox), deionized water, ethanol.
- Procedure:
- Cut samples to desired dimensions (e.g., 10 mm x 10 mm).
- Wash samples with industrial soap and water in an ultrasonic bath.
- Rinse thoroughly with deionized water.
- Perform a final rinse with absolute ethanol.
- Dry using medical-grade compressed air or nitrogen.
2. Plasma Treatment Setup:
- Equipment: PIII system with a radio frequency (RF) plasma source.
- Parameters:
- Gas: High-purity oxygen.
- Working Pressure: Maintain at ~ 2.0 × 10⁻² mbar.
- RF Power: Set to 350 W.
- Bias Voltage: A key variable. Test a range such as -1 kV and -10 kV with a pulse length of 20 μs.
- Treatment Duration: 60 minutes.
3. Post-Treatment Analysis:
- Surface Characterization: Use High-Resolution Scanning Electron Microscopy (HR-SEM) and Atomic Force Microscopy (AFM) to analyze morphology and roughness.
- Wettability: Perform contact angle measurements with a standard goniometer.
- Hemocompatibility Testing:
- Hemolysis Test: Follow ASTM F756-17 to ensure the material does not cause red blood cell rupture.
- Clotting Time Test: Use a citrated platelet-poor plasma (PPP) recalcitration assay to measure the kinetics of clot formation.
Coagulation Cascade Pathway
The following diagram illustrates the signaling pathways involved in coagulation triggered by blood-contact materials, highlighting key intervention points for surface modifications.
Troubleshooting Guides & FAQs
Frequently Asked Questions
Q1: Our plasma-treated polymer surfaces show good wettability initially, but it degrades over a few days. What is causing this, and how can we prevent it?
A1: This is a common issue known as hydrophobic recovery [64] [67]. The polymer chains are mobile and can reorient over time, burying the newly created polar functional groups beneath the surface.
- Solution: For permanent modification, consider using plasma treatment to enable the grafting of stable functional layers (e.g., PEG, hydrogels) that are covalently bound to the surface. Optimize plasma parameters to create more stable cross-linking on the polymer surface rather than just surface activation.
Q2: After implanting our titanium biosensor, we observe excessive inflammation and fibrotic encapsulation. How can our surface modification strategy address this?
A2: Inflammation is triggered by protein adsorption and activation of immune cells (like monocytes) on the implant surface [65].
- Solution: Move beyond simple bio-inert strategies. Implement a biomimetic coating designed to promote rapid endothelialization. This can be achieved by immobilizing peptides (e.g., RGD) or antibodies that specifically capture circulating endothelial progenitor cells (EPCs). Creating a natural endothelial layer on your device is the most effective way to suppress the foreign body response and achieve long-term compatibility [65].
Q3: We are developing a electrochemical biosensor, but non-specific adsorption of proteins is fouling the electrode and reducing signal accuracy. What coating should we use?
A3: The primary goal is to create a non-fouling surface while maintaining the sensor's function.
- Solution: Use ultrathin bio-inert coatings such as:
- Zwitterionic polymers: These contain both positive and negative charges, creating a strong hydration layer that effectively resists protein adsorption.
- Polyethylene glycol (PEG) or PEG-like films: These provide a dense, flexible brush layer that exerts steric repulsion against proteins. These coatings can be applied using techniques like plasma polymerization, which ensures uniform, pinhole-free coverage critical for sensor performance [64] [65].
Troubleshooting Common Experimental Problems
| Problem | Potential Cause | Solution |
|---|---|---|
| Inconsistent clotting time results across samples. | Non-uniform surface treatment or contamination. | Standardize sample cleaning protocol meticulously. Validate treatment uniformity using XPS and contact angle mapping across the sample surface. [66] |
| High hemolysis rate (red blood cell rupture) on a modified surface. | The surface modification has created sharp nanoscale features or toxic chemical residues. | Characterize surface topography with AFM to ensure roughness is not excessive. Use XPS to check for unintended chemical species and ensure all solvents are thoroughly rinsed. [66] |
| Poor adhesion of a bioactive coating (e.g., heparin). | Inadequate surface activation prior to coating. | Employ a plasma activation step (e.g., O₂ or NH₃ plasma) to generate a high density of reactive functional groups (e.g., -OH, -COOH, -NH₂) on the substrate to facilitate covalent immobilization. [64] [67] |
| Low signal-to-noise ratio in a blood-based biosensor. | Non-specific adsorption (NSA) of proteins or cells onto the sensing area. | Incorporate a co-immobilization strategy: surround the specific capture probe (e.g., antibody) with a dense layer of non-fouling molecules like zwitterionic polymers to block NSA. [65] |
The Scientist's Toolkit: Research Reagent Solutions
The following table lists essential materials and their functions for conducting surface modification and hemocompatibility experiments.
| Research Reagent / Material | Function / Explanation |
|---|---|
| Titanium Alloys (cp-Ti, Ti-6Al-4V, Ti-15Mo) | Common substrate materials for blood-contacting implants due to good bulk biocompatibility and mechanical properties; their surfaces require modification for hemocompatibility. [66] |
| High-Purity Oxygen Gas | Process gas for oxygen plasma treatments (like O-PIII) to grow a passivating titanium oxide (TiO₂) layer or introduce polar oxygen-containing groups on polymer surfaces. [66] |
| Polyethylene Glycol (PEG) or Zwitterionic Monomers | Building blocks for creating non-fouling, bio-inert surface coatings that resist non-specific protein adsorption via steric repulsion or a hydration layer. [65] |
| Heparin Sodium Salt | A bioactive anticoagulant molecule that can be immobilized onto surfaces to actively inhibit thrombin and other coagulation factors. [65] |
| Peptide Sequences (e.g., RGD) | Bioactive peptides used in biomimetic coatings to promote specific cell adhesion, such as endothelial cell attachment and spreading, encouraging endothelialization. [65] |
| Citrated Platelet-Poor Plasma (PPP) | Essential reagent for in vitro hemocompatibility testing, used in clotting time assays (e.g., plasma recalcification tests) to evaluate the coagulation kinetics on a material surface. [66] |
Experimental Workflow Visualization
The following diagram outlines a logical, step-by-step workflow for developing and testing a hemocompatible surface, integrating the concepts and methods discussed in this guide.
Balancing Bioreceptor Immobilization with Antifouling Properties
Technical support for biosensing in complex media
This guide provides troubleshooting and best practices for researchers developing biosensors for use in blood and plasma, focusing on the critical balance between effective bioreceptor immobilization and robust antifouling properties.
Frequently Asked Questions
FAQ 1: Why is my biosensor's signal drifting or my background signal too high when I test in blood plasma?
A high or drifting background signal is a classic symptom of non-specific adsorption (NSA). Blood plasma contains a high concentration of proteins (60–80 mg/mL), which can physisorb to your sensor surface. This fouling creates a false positive signal that is indistinguishable from the specific binding of your target analyte [25] [5]. This occurs through physisorption, driven by hydrophobic, electrostatic, and van der Waals interactions between matrix components and your sensor interface [1] [5].
FAQ 2: My sensor works perfectly in buffer but fails in complex samples. What is the root cause?
The failure in complex samples like blood or plasma, despite success in buffer, is almost certainly due to inadequate antifouling protection. Buffer solutions lack the myriad of interfering proteins, lipids, and cells found in real biological matrices. Without a proper antifouling layer, these interferents adsorb to the surface, which can either block your bioreceptors from accessing the target (causing false negatives) or generate a signal of their own (causing false positives) [25] [5].
FAQ 3: After immobilizing my bioreceptor, the antifouling performance of my surface degrades significantly. Why?
This is a common challenge and typically points to one of two issues:
- Incomplete Surface Coverage: The immobilization process may have created defects or gaps in your antifouling layer. Interfering proteins from the sample can adsorb to these exposed areas [68].
- The Bioreceptor Itself is Fouling: The immobilized bioreceptors (e.g., antibodies) can act as new sites for non-specific adsorption if they are not properly oriented or if their surface is sticky to other proteins [1]. Using a compact, stable bioreceptor like a nanobody can help mitigate this [68] [27].
FAQ 4: What are the most effective materials for creating an antifouling surface?
The field has moved beyond simple blocker proteins like BSA. The most effective and versatile strategies involve chemical modification of the surface with dedicated antifouling polymers. The following table summarizes the key materials [25] [69]:
| Material Class | Mechanism of Action | Key Advantages | Key Limitations |
|---|---|---|---|
| PEG-based Polymers | Forms a hydrated layer via hydrogen bonding, causing steric repulsion [69]. | Considered the "gold standard"; commercially available and widely used [69]. | Susceptible to oxidative degradation; can reduce electrochemical sensitivity if layer is too thick [69]. |
| Zwitterionic Polymers | Forms a tightly bound hydration layer via electrostatic interactions [69]. | Often superior antifouling to PEG; more stable against oxidation; low immunogenicity [68] [69]. | Chemistry can be more complex than for PEG. |
| Hydrogels | Creates a highly hydrated, porous physical barrier that repels large biomolecules [25]. | High binding capacity due to 3D structure; effective at repelling large proteins and cells [25]. | Can be too thick for some optical sensors, pushing target beyond the evanescent field [25]. |
Troubleshooting Guides
Issue: Persistent Non-Specific Adsorption in Serum/Plasma
Potential Causes and Solutions:
Cause: Inadequate antifouling layer density or quality.
- Solution: Optimize the formation of your antifouling polymer layer. For self-assembled monolayers (SAMs), ensure proper solvent quality, concentration, and incubation time. Consider using a mixed SAM that includes a fraction of molecules for bioreceptor immobilization and a majority of molecules dedicated to antifouling [68] [69].
Cause: The bioreceptor immobilization strategy is disrupting the antifouling layer.
- Solution: Implement a more controlled immobilization strategy. Move away from simple physical adsorption. Use chemical cross-linking (e.g., EDC/NHS chemistry) to attach bioreceptors specifically to functional groups within a well-formed antifouling layer, preserving its integrity [68].
Cause: The bioreceptor is poorly selected or oriented.
- Solution: Consider using engineered bioreceptors. Nanobodies and engineered antibody fragments are more compact and stable, presenting fewer non-specific interaction sites compared to full-sized antibodies [68] [27]. Use site-specific immobilization techniques (e.g., via engineered cysteine tags or His-tags) to ensure proper orientation and prevent the "sticky" parts of the receptor from facing the solution [68].
Issue: Low Specific Signal or Poor Sensitivity
Potential Causes and Solutions:
Cause: The antifouling layer is too thick for the detection method.
- Solution: Match the layer thickness to your transducer's sensing range. For optical biosensors like Surface Plasmon Resonance (SPR), the evanescent field typically decays within a few hundred nanometers. Keep your functionalized layer thin enough (often less than 70 nm) to ensure your target binding occurs within this sensitive region [25].
Cause: Bioreceptors are denatured or inactivated during immobilization.
- Solution: Avoid harsh conditions during surface chemistry. Use biocompatible cross-linkers and aqueous buffers at neutral pH. After immobilization, test receptor activity in a buffer-based experiment before moving to complex samples [68].
Cause: Steric hindrance from high bioreceptor density.
- Solution: Titrate the density of immobilized bioreceptors. A very high density of capture molecules can lead to steric crowding, making it difficult for the large target analyte to access all binding sites. Find an optimal density that maximizes signal without causing congestion [68].
Experimental Protocols
Protocol 1: Creating a Mixed Antifouling SAM with Antibody Immobilization
This is a common and effective method for creating a low-fouling surface on gold substrates (e.g., for SPR or electrochemical sensors) with capacity for bioreceptor attachment.
Workflow Overview:
Materials:
- Gold sensor chip
- OH-PEG-COOH thiol (e.g., HS-C11-EG6-OCH2-COOH)
- OH-PEG-OH thiol (e.g., HS-C11-EG6-OH)
- EDC (1-Ethyl-3-(3-dimethylaminopropyl)carbodiimide)
- NHS (N-Hydroxysuccinimide)
- Ethanolamine hydrochloride
- PBS (Phosphate Buffered Saline), pH 7.4
Step-by-Step Method:
- SAM Formation: Prepare a 1 mM total thiol solution in ultra-pure water or ethanol with a mixture of OH-PEG-COOH and OH-PEG-OH thiols (a typical molar ratio is 1:9 to 1:20, depending on the desired antibody density). Incubate the clean gold substrate in this solution for 6-24 hours at room temperature to form the self-assembled monolayer [68] [69].
- Rinsing and Drying: Rinse the substrate thoroughly with pure ethanol and water, then dry under a stream of nitrogen or inert gas.
- Activation: Prepare a fresh solution of 0.2 M EDC and 0.05 M NHS in water. Flow this solution over the sensor surface or incubate the chip for 15-30 minutes to activate the terminal carboxylic acid groups of the COOH-PEG thiols, forming NHS esters.
- Immobilization: Rinse with a pH-specific buffer. Introduce a solution of your antibody (typically 10-100 µg/mL in 10 mM sodium acetate buffer, pH 4.5-5.5) for 30-60 minutes. The primary amines on the antibody will covalently couple to the activated NHS esters [68].
- Deactivation/Blocking: Rinse with PBS. Flow through or incubate with 1 M ethanolamine hydrochloride (pH 8.5) for 10-15 minutes to deactivate any remaining activated ester groups, thereby "blocking" the surface and minimizing subsequent non-specific attachment [68].
Protocol 2: Evaluating Antifouling Performance
Materials:
- Your functionalized biosensor
- SPR system, electrochemical station, or other biosensor reader
- Complex test medium (e.g., 100% fetal bovine serum, undiluted human plasma, or 100% blood)
- Running buffer (e.g., PBS or HEPES)
Step-by-Step Method:
- Baseline: Equilibrate the sensor in running buffer until a stable baseline is achieved.
- Sample Exposure: Switch the flow or introduce the complex test medium (e.g., 100% serum) onto the sensor surface for a set period (e.g., 30-60 minutes).
- Signal Monitoring: Record the sensor's response during the exposure. A large, rapid signal increase indicates significant fouling.
- Washing: Switch back to running buffer and wash for 10-15 minutes. The remaining signal after washing is due to irreversibly adsorbed material.
- Quantification: The level of fouling is often quantified as the percentage of signal response from the serum exposure compared to the signal from a known concentration of your target analyte. High-performance coatings show fouling signals equivalent to a very low protein concentration (e.g., < 5 ng/cm² or < 1% of the target signal) [5] [69].
The Scientist's Toolkit
| Research Reagent / Material | Function in Experiment |
|---|---|
| PEG-based Thiols (e.g., HS-C11-EG6-COOH) | Forms the foundational antifouling self-assembled monolayer on gold surfaces and provides functional groups for bioreceptor coupling [69]. |
| Zwitterionic Monomers (e.g., CBMA, SBMA) | Used to polymerize ultra-low fouling polymer brushes on sensor surfaces, often via photopolymerization or surface-initiated ATRP [69]. |
| Cross-linkers (EDC & NHS) | Activates carboxylic acid groups, enabling covalent, oriented immobilization of protein-based bioreceptors via their primary amines [68]. |
| Nanobodies (VHHs) | Engineered, single-domain antibody fragments used as robust, stable, and highly specific bioreceptors that minimize non-specific interactions due to their small size [68] [27]. |
| Ethanolamine Hydrochloride | A small molecule used to "block" or deactivate remaining activated ester groups on the surface after immobilization, reducing a key site for NSA [68]. |
Addressing Sensor Drift and Long-Term Stability Issues
Troubleshooting Guides
FAQ: Sensor Drift and Stability in Biosensing
What is sensor drift and why is it a critical issue for biosensors in blood research? Sensor drift is the gradual change in a sensor's output signal over time while measuring a constant analyte concentration [70] [71]. In biosensing, this is often observed as a slow, consistent deviation from the baseline, compromising the accuracy and reliability of long-term measurements [72] [70]. For research in blood and plasma, this is particularly critical because drift can mimic or mask a true biological signal, leading to false positives or negatives in diagnostic assays and fundamentally undermining the validity of experimental data [5].
What are the primary causes of drift in biosensors? The causes can be categorized into physical, chemical, and biological factors.
- Physical Causes: Temperature fluctuations cause materials within the sensor to expand or contract, altering electrical properties [73] [70]. Mechanical stress or vibration from the environment can also deform sensitive components [70].
- Chemical Causes: Degradation of the sensor's internal components, such as resistors and electrodes, occurs over time [73] [70]. Contamination from sample matrix components (e.g., lipids, other proteins) or the environment (e.g., dust) can foul the sensing surface [70] [71].
- Biological Causes (Specific to Biosensing): Non-Specific Adsorption (NSA) is a major challenge where proteins, cells, or other biomolecules from blood or plasma adsorb onto the sensing interface without a specific biorecognition event [1] [5]. This biofouling can passivate the sensor, change its physicochemical properties, and lead to a continuous drift in signal [72] [5].
How can I distinguish between sensor drift and a true biological signal? Distinguishing between the two requires a controlled experimental design.
- Establish a Baseline: Record a stable baseline with a clean buffer solution or control plasma before introducing your sample.
- Use Control Experiments: Run control samples that are identical to your test samples but lack the specific analyte. Any signal change in the control is likely due to drift or NSA.
- Monitor in Real-Time: Drift often appears as a slow, unidirectional change (either always increasing or always decreasing), whereas a specific binding signal may follow a characteristic saturation curve [5]. Advanced data processing algorithms can sometimes help differentiate these patterns.
My sensor's sensitivity has dropped after exposure to serum. Is this drift? A sudden or significant drop in sensitivity is more likely due to sensor fouling or degradation rather than gradual drift. NSA from serum proteins can block the active sensing sites, reducing the sensor's ability to detect the target analyte [1]. This manifests as a reduced response to the same analyte concentration and is a key failure mode for biosensors in complex matrices.
Diagnostic Checklist for Sensor Drift
Follow this systematic checklist when you suspect drift is affecting your data.
| Step | Action | What to Look For |
|---|---|---|
| 1 | Verify Calibration | Re-calibrate the sensor. A significant shift from the previous calibration curve indicates drift [74]. |
| 2 | Inspect Control Data | Analyze the signal from negative control samples. A non-zero slope or shift in the control baseline confirms drift or NSA [5]. |
| 3 | Check Environmental Logs | Correlate signal changes with recorded variations in temperature, humidity, or other ambient conditions [73] [70]. |
| 4 | Perform a Blank Measurement | Flush the system with a pure buffer. A signal that does not return to the original baseline suggests surface fouling [1]. |
| 5 | Consult Sensor History | Review the sensor's lifetime and prior exposure to harsh chemicals or complex samples. Performance often degrades with age and use [75] [71]. |
Experimental Protocols for Stability Assessment
Protocol 1: Evaluating Non-Specific Adsorption (NSA) from Blood Plasma
This protocol provides a methodology to quantify the extent of biofouling on a biosensor surface, which is a primary cause of signal drift.
Objective: To measure the degree of non-specific adsorption of plasma components onto a functionalized biosensor and its impact on signal stability.
Materials:
- Biosensor platform (e.g., SPR chip, electrochemical cell)
- Blood plasma or serum (pooled human, if possible)
- Phosphate Buffered Saline (PBS), pH 7.4
- Regeneration solution (e.g., 10 mM Glycine-HCl, pH 2.0)
- Flow cell system (if applicable)
Methodology:
- Baseline Acquisition: Place the sensor in a flow cell or static chamber. Introduce PBS and record a stable signal baseline for at least 10-15 minutes.
- Plasma Exposure: Switch the solution to 1-10% (v/v) blood plasma in PBS. Monitor the sensor signal for 30-60 minutes. A large, rapid signal change indicates significant NSA [1] [5].
- Washing: Re-introduce PBS to wash away unbound molecules. The remaining signal shift after washing represents irreversibly adsorbed material.
- Regeneration (Optional): Apply a regeneration solution to strip off adsorbed proteins. Measure the signal recovery to the original baseline. Incomplete recovery suggests permanent fouling.
- Data Analysis: Quantify the signal change attributed to NSA in response units (e.g., RU for SPR, nA for electrochemistry). This value serves as a benchmark for comparing different antifouling coatings.
Protocol 2: Long-Term Stability Testing for Implantable Glucose Sensors
This protocol, adapted from clinical laboratory standards, assesses the operational stability of a biosensor over an extended period [72].
Objective: To determine the stability and functional longevity of a continuous biosensor under simulated physiological conditions.
Materials:
- Functionalized biosensor(s)
- Simulated body fluid or PBS with additives (e.g., 0.1% sodium azide)
- Glucose stock solutions for calibration
- Controlled environment chamber (maintained at 37°C)
Methodology:
- Initial Calibration: Perform a full calibration of the sensor to establish its initial sensitivity and dose-response curve.
- Aging: Immerse the sensor in simulated body fluid maintained at 37°C. The solution should be replaced periodically to prevent microbial growth.
- Periodic Performance Checks: At defined intervals (e.g., daily, then weekly), recalibrate the sensor.
- Data Analysis: Track key performance metrics over time:
- Sensitivity: Change in response per unit concentration of analyte.
- Baseline Signal: Drift of the signal in a zero-analyte solution.
- Response Time: Time to reach 90% of maximum signal upon a concentration change.
- A stable sensor should exhibit minimal change in these parameters for the desired duration (e.g., several days to weeks) [72].
Quantitative Data on Sensor Performance
The following table summarizes stability data from studies on different sensor types, highlighting the challenges and typical performance timelines.
| Sensor Type / Analytic | Test Duration | Key Stability Findings | Reference / Context |
|---|---|---|---|
| Electrochemical (NO₂) | >1 year | Performance (R²) deteriorated from >0.9 to 0.59 after one year without recalibration, indicating significant long-term drift. | [75] |
| Implantable Glucose | 2-3 years | A "good sensor" is defined as one that exhibits a stable and reproducible signal for at least 2-3 years. | [72] |
| General Industrial | N/A | Calibration intervals for pressure sensors recommended at 1-6 years, depending on the harshness of the environment. | [74] |
| Biosensor (General) | Hours - Days | Many biosensors, especially those using antibodies, report stability ranging from a few days to rarely a year, with NSA being a primary limiting factor. | [72] |
Visualizing Drift Causes and Mitigation
The diagram below illustrates the relationship between the primary causes of sensor drift and the corresponding mitigation strategies, with a focus on biosensing applications.
The Scientist's Toolkit: Research Reagent Solutions
This table details key materials and strategies used to combat non-specific adsorption and improve sensor stability in complex biofluids.
| Reagent / Material | Function in Addressing NSA & Drift | Example Applications |
|---|---|---|
| Polyethylene Glycol (PEG) | Forms a hydrated, steric barrier that reduces protein adsorption; a classic antifouling polymer. | Coating for SPR chips, electrochemical electrodes, and nanoparticles [1]. |
| Self-Assembled Monolayers (SAMs) | Creates a dense, ordered, and chemically well-defined surface that can be tailored to resist protein adsorption. | Foundational layer on gold surfaces (e.g., for SPR or EC sensors) for subsequent functionalization [1] [5]. |
| Bovine Serum Albumin (BSA) | Used as a "blocker" protein to passively occupy vacant sites on the sensor surface, preventing later NSA from the sample. | Common blocking agent in ELISA and many immunosensor formats [1]. |
| Zwitterionic Polymers | Possess strong hydration via electrostatic interactions, creating a highly effective antifouling surface superior to PEG in some cases. | Emerging coating for implantable sensors and surfaces requiring extreme fouling resistance [1] [5]. |
| Hydrogel Films | A 3D polymer network that absorbs water, creating a physical and chemical barrier against large fouling agents like cells and proteins. | Used in continuous glucose monitoring sensors to enhance biocompatibility and stability [72]. |
| Metal-Organic Frameworks (MOFs) | Porous structures that can encapsulate and stabilize enzyme bioreceptors, extending their functional lifetime and protecting them from fouling. | Used in enzyme-based electrochemical biosensors to improve operational stability [72]. |
The Role of Machine Learning in Predicting and Optimizing Antifouling Materials
Technical Support Center
Frequently Asked Questions (FAQs)
FAQ 1: What are the most common data-related challenges when using Machine Learning (ML) for antifouling materials, and how can we overcome them? Working with ML in materials science often involves "Small Data" challenges, where each data point can be costly and time-consuming to acquire [76]. Furthermore, data can be noisy, incomplete, or scattered across diverse sources like experiments, simulations, and literature [77].
- Solutions:
- Utilize Domain Knowledge: Use researchers' expertise to guide the AI, enabling transfer learning and integrating scientific understanding to generate more robust models from limited data [76].
- Centralize and Standardize Data: Implement a centralized database with a common, flexible data format (like a graph-based model) to harmonize data from different units and legacy sources [76].
- Employ Feature Selection: Use techniques like "ensemble feature selection" to identify the most critical input parameters (e.g., material composition, surface roughness) and reduce redundancy, improving model performance with small datasets [78].
FAQ 2: Our ML model for predicting antifouling performance seems accurate on training data but fails on new samples. What is happening and how can we fix it? This is a classic sign of improper model evaluation, likely leading to overfitting where the model learns noise instead of underlying patterns [79]. This is especially critical when data is scarce.
- Solutions:
- Rigorous Data Splitting: Always split your data into distinct training, validation, and test sets. Use techniques like k-fold cross-validation to maximize the use of limited data for reliable performance estimation [79].
- Use Appropriate Metrics: Go beyond simple accuracy. For regression tasks (e.g., predicting a fouling rate), use metrics like R² (Coefficient of Determination) and Mean Squared Error (MSE) on the test set [78] [80].
- Prioritize Explainability: Use tools like SHAP (Shapley Additive Explanations) to interpret your model's predictions. This helps identify which features are driving the decisions and can reveal if the model is relying on unrealistic or spurious correlations, building trust and understanding [78] [80].
FAQ 3: How can we integrate biological knowledge, such as the role of blood plasma proteins in fouling, into our ML models? Ignoring fundamental physics and biology is a common pitfall. For antifouling biosensors, ML models must obey the relevant biological and physical principles to make credible predictions [76].
- Solutions:
- Informed Data Representation: Represent your materials in ways that capture biologically relevant features. For instance, use graph-based representations to model atomic interactions or surface charge distributions that influence protein adsorption [77].
- Incorporate Domain Expertise: Work with biologists to identify and encode key parameters, such as the known interactions between specific plasma proteins and material surface chemistries, directly into the model's feature set [76] [77].
- Leverage Biomimetic Strategies: Consider using biologically-inspired data. For example, research on erythrocyte-derived nanovesicles shows that their surface properties (like prolonged circulation and immune evasion) can be a design principle for antifouling coatings. These properties can be used as target outputs or features in your ML model [81].
FAQ 4: We found a promising antifouling material candidate through ML, but how do we address scalability and stability for real-world application? This is a common bottleneck where computational discovery meets practical deployment [77].
- Solutions:
- Include Practicality Features: During the ML feature engineering phase, incorporate parameters related to scalability and stability, such as synthesis temperature, cost of raw materials, and known environmental stability metrics.
- Experimental Validation Loop: The ML process must include a closed feedback loop where predicted materials are synthesized and tested in real-world conditions (e.g., in blood or plasma). This new experimental data is then fed back into the dataset to refine future ML predictions and address the "commercialization gap" [77].
- Prototype and Monitor: Develop small-scale prototypes of the biosensor with the new material and conduct long-term stability studies. Implement monitoring systems to track performance degradation over time [77].
Troubleshooting Guides
Problem: Model predictions for protein adsorption are physically implausible.
- Potential Cause 1: The model is a "black box" and has learned non-causal relationships from the data.
- Action: Apply explainable AI (XAI) techniques like SHAP or LIME (Local Interpretable Model-agnostic Explanations) to interpret predictions. This will show which features are most influential and help domain experts sense-check the model's logic [77].
- Potential Cause 2: The training data lacks information on "failed" experiments (e.g., materials with high fouling), creating a sample bias.
- Action: Actively curate a dataset that includes both high-performing and low-performing materials. If such data is scarce, use data augmentation techniques or incorporate synthetic data based on physical principles to balance the dataset [76].
Problem: The ML model performs well on simulated data but poorly on actual experimental data for biosensor fouling.
- Potential Cause: A significant gap exists between idealized theoretical/simulated data and the complex reality of experimental conditions and material defects [80].
- Action: Prioritize the use of high-quality, experimental data for training and validation. If using simulated data, fine-tune the final model on a smaller set of reliable experimental data to bridge this reality gap [80].
Structured Data and Protocols
Table 1: Key Metrics for Evaluating ML Models in Antifouling Material Research
| Metric | Formula / Description | Ideal Value | Interpretation in Antifouling Context |
|---|---|---|---|
| R² (Coefficient of Determination) | R² = 1 - (SSₜₒₜ / SSᵣₑₛ) | Closer to 1.0 | Measures how well the model explains the variance in fouling data (e.g., protein adsorption amount). An R² > 0.9 is considered excellent [78]. |
| Mean Squared Error (MSE) | MSE = (1/n) * Σ(Actualᵢ - Predictedᵢ)² | Closer to 0 | Measures the average squared difference between predicted and actual fouling rates. A lower MSE indicates higher precision [80]. |
| Mean Relative Error (MRE) | MRE = (1/n) * Σ|(Actualᵢ - Predictedᵢ)/Actualᵢ| | < 20% | Expresses error as a percentage, giving a direct sense of prediction accuracy for values like corrosion or adsorption rates [78]. |
| Feature Importance (via SHAP) | Based on Shapley values from game theory. | N/A | Quantifies the contribution of each input variable (e.g., surface energy, roughness) to the model's prediction of antifouling performance [78] [80]. |
Table 2: Essential Research Reagent Solutions for Antifouling Biosensor Development
| Reagent / Material | Function in Research | Example Application in Context |
|---|---|---|
| Metal-Organic Frameworks (MOFs) | Nanoporous materials with tunable pore size and modifiable surface chemistry for selective adsorption and sensing. | Used as a coating on biosensors; their high surface area and chemical tunability can be optimized to repel non-specific adsorption (NSA) of plasma proteins [80]. |
| Erythrocyte Nanovesicles (ENVs) | Biomimetic nanocarriers derived from red blood cells. Exhibit enhanced biocompatibility, prolonged circulation, and immune evasion. | Can be engineered as coatings or components of biosensors to mimic the "self" surface of blood cells, thereby minimizing NSA and biofouling in blood and plasma [81]. |
| AZ31 Magnesium Alloy | A lightweight material whose corrosion rate (a form of fouling) can be studied and optimized using ML. | Serves as a model substrate to study and predict material degradation. ML models can identify key factors (e.g., surface impurities, roughness) to improve stability [78]. |
| SHAP Analysis Tool | A tool for interpreting ML model outputs by quantifying the impact of each feature on a single prediction. | Critical for understanding which material property (e.g., "material removed" during pickling, "contact time") most significantly influences fouling or corrosion rates, guiding material optimization [78]. |
Experimental Protocol: ML-Guided Optimization of an Antifouling Coating
- Objective: To minimize Non-Specific Adsorption (NSA) of fibrinogen on a novel Zr-based MOF biosensor coating in blood plasma.
- Data Collection & Preprocessing:
- Construct a dataset from literature and in-house experiments. Key features include: MOF properties (BET surface area, Total Pore Volume, Pore Size), process conditions (Oil/Adsorbent ratio, Temperature, Contact Time), and the output variable (Fibrinogen Adsorption Capacity in mg/g) [80].
- Clean the data: handle missing values, remove duplicates, and normalize numerical features.
- Feature Selection & Model Training:
- Apply an "ensemble feature selection" method combining Pearson correlation and Random Forest feature importance to identify the most critical parameters and reduce redundancy [78].
- Split the data into training (e.g., 80%) and test (e.g., 20%) sets.
- Train and compare multiple ML regression models (e.g., XGBoost, Random Forest, MLP Neural Networks) using the training set.
- Model Evaluation & Interpretation:
- Evaluate models on the held-out test set using metrics from Table 1 (R², MSE). Select the best-performing model (e.g., the one with the highest test R²) [78].
- Perform SHAP analysis on the optimal model to reveal the non-linear impact of key features like "BET surface area" and "Contact Time" on fibrinogen adsorption [80].
- Prediction & Validation:
- Use the trained model to predict the optimal set of features that minimizes fibrinogen adsorption.
- Synthesize the new Zr-MOF material with the predicted optimal properties (e.g., BET ~756 m²/g, Pore Size ~5.96 nm) [80].
- Validate the prediction experimentally by testing the new material's antifouling performance in plasma and measuring the actual fibrinogen adsorption. Feed these results back into the dataset to refine the model.
Workflow and Pathway Diagrams
ML Workflow for Antifouling Materials
Key Factors in Biosensor Fouling
High-Throughput Screening of New Antifouling Coatings
Technical Support Center
Frequently Asked Questions (FAQs)
Q: What is the core advantage of using a high-throughput screening (HTS) strategy for antifouling coating development? A: High-throughput screening accelerates the discovery process by synthesizing and evaluating thousands of coating combinations simultaneously. This method is a rapid, cost-effective, and reproducible approach that drastically reduces the time and resources required compared to traditional one-by-one experimentation. It allows researchers to efficiently explore a vast chemical space, establish composition/structure-function relationships, and identify optimal coating parameters much faster [82] [83] [84].
Q: My hydrogel coatings are detaching after immersion in biological fluids. How can I improve their mechanical stability? A: Coatings made solely from zwitterionic polymers are known for high swelling and poor mechanical stability. A common solution is to copolymerize with monomers like 2-hydroxyethyl methacrylate (HEMA), which has been shown to improve toughness and adhesion. Furthermore, optimizing crosslinker content and using lower molecular-weight crosslinkers can significantly enhance stability against immersion, flow, and peeling forces without completely compromising antifouling performance [82].
Q: What are the best methods for initially evaluating the antifouling performance of new coating formulations? A: A tiered approach is recommended:
- Static Efficacy Trials: A great value starting point to quickly understand basic coating performance compared to industry standards under specific environmental conditions [85].
- Biological Settlement Assays: Use targeted bioassays for high-throughput screening. Macrofouling assays test against larger organisms, while microfouling/biofilm assays provide a rapid, cost-effective way to evaluate microbial fouling control [85].
- Protein Adsorption Assays: A key initial screen, as protein adsorption is often the first step in fouling. A static adsorption protocol can effectively characterize protein/surface interactions [84].
Q: How can I ensure my screening results are reliable and reproducible? A: Precise control over the coated surface is critical. Inaccurate coat thickness has been shown to lead to inaccurate toxicity and performance evaluations. Employ techniques that generate completely uniform and smooth coated surfaces. Furthermore, always run experiments in multiple replicates and use statistical tests (like normality tests) to confirm your results are distributed around a reliable average value [86] [84].
Q: My coating resists fouling in simple buffer but fails in complex media like blood plasma. Why? A: This is a common challenge indicating that coating performance is feed-specific. A coating optimized for one challenge (e.g., a single protein) may not work for another (e.g., complex cell suspensions). The HTS approach is powerful because it allows you to develop surfaces optimized for your specific challenge. You should screen your coating library directly against the complex medium of interest, such as blood plasma or serum, to identify the best performer for that specific application [84].
Troubleshooting Guides
Problem: Poor Adhesion of Hydrogel Coatings to Substrate
| Possible Cause | Solution | Relevant Experimental Parameters to Check |
|---|---|---|
| Lack of adhesive motifs. | Introduce adhesion-promoting monomers or polymers (e.g., dopamine-containing compounds, phosphonate/phosphonic motifs) into the coating formulation to create a strong bond with the substrate [82]. | Concentration of adhesive monomer; immersion stability. |
| High swelling ratio. | Adjust the monomer composition (e.g., incorporate HEMA) and increase the crosslinker density to reduce swelling and the resulting mechanical stresses that cause delamination [82]. | Swelling ratio; crosslinker content and molecular weight. |
| Inadequate surface preparation. | Ensure the substrate is thoroughly cleaned and, if applicable, activated (e.g., via UV irradiation) to promote covalent bonding between the coating and the surface [84]. | Surface cleanliness; UV irradiation time and intensity. |
Problem: Inconsistent Results Between Screening Assays
| Possible Cause | Solution | Relevant Experimental Parameters to Check |
|---|---|---|
| Non-uniform coating thickness. | Implement a printing or deposition technique that ensures completely uniform and smooth coated surfaces across all samples. Failure to control thickness is a known source of inaccurate evaluation [86]. | Coating application method; thickness verification. |
| Inadequate mixing of reactants. | For droplet-based microarray synthesis, verify that the dispensing process induces sufficient vortex mixing upon droplet impact to ensure a homogeneous distribution of all components [82]. | Mixing efficiency (can be verified with Raman mapping or fluorescent dyes). |
| Assay conditions not representative. | Ensure that the screening assay (e.g., static vs. dynamic, protein adsorption vs. cell culture) closely mimics the final application environment. A coating that performs well in a simple protein assay may fail in complex blood plasma [84]. | Choice of challenge solution (e.g., PBS, plasma, cell supernatant). |
Experimental Protocols & Data Presentation
Protocol 1: High-Throughput Hydrogel Microarray Synthesis and Stability Screening
This protocol is adapted from research on creating libraries of zwitterion-based hydrogel coatings [82].
1. Materials (Research Reagent Solutions)
| Item | Function |
|---|---|
| SBMA (Sulfobetaine methacrylate) | Zwitterionic monomer providing primary antifouling properties. |
| HEMA (2-hydroxyethyl methacrylate) | Monomer to improve mechanical stability and toughness. |
| PEGDMA (Poly(ethylene glycol) dimethacrylate) | Crosslinker to form the hydrogel network. |
| Photo-initiator | Initiates polymerization upon UV exposure. |
| Automated Non-contact Dispenser | For precise, picoliter-scale deposition of reactant droplets. |
2. Methodology
- Microarray Fabrication: Use an automated non-contact liquid dispenser to deposit droplets of monomer and crosslinker solutions onto substrate surfaces. A library of 315 unique spots can be prepared in about 10 minutes with less than 40 μL of total reagent.
- Polymerization: Initiate polymerization using UV light.
- Stability Screening:
- Immersion Swelling Test: Immerse the entire microarray in PBS (or blood plasma for your specific context) for 72 hours.
- Visual Inspection: Image the microarray and categorize spots based on damage (e.g., intact, slightly damaged, seriously damaged, completely removed).
- Data Representation: Present results in a heat map to visually identify stable coating formulations (e.g., deepest blue for fully intact spots).
3. Quantitative Data from Literature The table below summarizes example stability outcomes based on HEMA content and crosslinker molecular weight after 72h immersion [82].
| HEMA Content | Crosslinker MW | Immersion Stability (72h) | Recommended Use |
|---|---|---|---|
| Low / None | Low | Poor; highly damaged | Not recommended for long-term immersion. |
| Low / None | High | Poor; highly damaged | Not recommended for long-term immersion. |
| Medium | Low | Good; mostly intact | Promising for further testing. |
| High | Low | Excellent; fully intact | Ideal for applications requiring high mechanical stability. |
| High | High | Fair to Good | May require further optimization. |
Protocol 2: High-Throughput Fouling Resistance Screening via Protein Adsorption
This protocol is based on the HTP-PGP (High-Throughput Platform-Photo-induced Graft Polymerization) method for discovering feed-specific, fouling-resistant surfaces [84].
1. Materials (Research Reagent Solutions)
| Item | Function |
|---|---|
| Library of Vinyl Monomers | A diverse set of chemicals (e.g., 66 monomers) to create various polymer surfaces. |
| Poly(ether sulfone) (PES) Membranes | The substrate for graft polymerization. |
| Challenge Solutions | Specific solutions for testing: e.g., Blood plasma, IgG/BSA mixtures, cell culture supernatants. |
| 96-Well Filter Plates | Platform for high-throughput, parallel experimentation. |
2. Methodology
- Surface Modification: Modify PES membranes in a 96-well format using the HTP-PGP method. UV irradiation creates radical sites on the PES, to which the vinyl monomers graft and polymerize.
- Challenge Exposure: Expose each modified membrane to your specific challenge solution (e.g., blood plasma) under static conditions.
- Performance Assay: Measure the hydraulic resistance of the membrane after exposure. A lower change in resistance indicates a superior, fouling-resistant surface.
- Validation: Scale up the most promising candidates for dynamic filtration assays to confirm performance under flow conditions.
High-Throughput Screening Workflow
The Scientist's Toolkit: Essential Materials
| Category | Item | Function in Antifouling Coating Research |
|---|---|---|
| Monomers | SBMA (Sulfobetaine methacrylate) | Provides a zwitterionic, highly hydrophilic surface that strongly binds water, creating a physical and energetic barrier to fouling [82]. |
| Monomers | HEMA (2-hydroxyethyl methacrylate) | Improves the mechanical stability, toughness, and adhesion of hydrogels, preventing detachment from the substrate [82]. |
| Crosslinkers | PEGDMA (Poly(ethylene glycol) dimethacrylate) | Forms the crosslinked network of the hydrogel; its content and molecular weight directly control swelling and mechanical properties [82]. |
| Substrates | Poly(ether sulfone) (PES) Membranes | A common polymer substrate that can be functionally modified via methods like photo-induced graft polymerization (PGP) for HTS [84]. |
| Assay Tools | 96-Well Filter Plates | Enable high-throughput, parallel synthesis and screening of hundreds of coating variants under identical conditions [84]. |
| Challenge Solutions | Blood Plasma / Serum | The most relevant complex biological medium for screening coatings intended for biosensing applications in blood [84]. |
Evaluating Antifouling Efficacy: Validation Methods and Performance Metrics
Quantitative Tools and Protocols for NSA Evaluation
Frequently Asked Questions (FAQs) and Troubleshooting
FAQ: What are the primary quantitative metrics for evaluating NSA, and which tools are best for measuring them? The primary quantitative metrics include signal drift measurement, relative fluorescence intensity, and non-specific adsorption load. Surface Plasmon Resonance (SPR) and SPR imaging (SPRi) are excellent for real-time, label-free measurement of adsorption kinetics and signal drift. Fluorescence microscopy using FITC-labeled proteins like BSA provides a highly sensitive method to quantify NSA load on various materials through relative fluorescence intensity measurements [5] [87]. Electrochemical methods can monitor signal degradation and electron transfer rate changes due to fouling [5].
FAQ: My biosensor shows high background signal in blood plasma. How can I determine if it's due to NSA? A high background in complex media like plasma is likely NSA. To confirm:
- Use a Reference Channel: Employ a reference sensor lacking the specific bioreceptor. Any signal generated on this channel is due to NSA [5] [1].
- Analyze the Signal Kinetics: NSA often causes a slow, continuous signal drift, whereas specific binding shows a more defined saturation curve [5].
- Characterize the Surface: Use techniques like MALDI-TOF mass spectrometry post-experiment to identify the specific proteins and lipids adsorbed onto your sensor surface from the plasma [88].
FAQ: I've applied a PEG coating, but NSA from cell lysate is still high. What could be wrong? Cell lysates are particularly challenging due to their high complexity and lipid content. High NSA on PEG could be due to:
- Lipid Adsorption: PEG is effective against proteins but may be less effective against lipids present in lysates. Consider surface-initiated polymerization (SIP) coatings, which have demonstrated superior resistance to cell lysate adsorption in comparative studies [88].
- Coating Instability: The PEG layer might be degrading or desorbing during the experiment. Ensure the PEG is covalently grafted and check the stability of your coating under experimental conditions (pH, flow) [89].
- Incomplete Coverage: The density of the PEG layer might be insufficient. Optimize your surface grafting protocol to achieve a dense, brush-like conformation [1].
Quantitative Tools for NSA Evaluation
The table below summarizes key quantitative tools and their applications in NSA evaluation.
| Tool / Technique | Measured Parameter | Key Application & Output | Considerations |
|---|---|---|---|
| SPR / SPRi | Resonance angle shift (RU) | Real-time, label-free kinetics of adsorption; quantifies NSA-induced signal drift and adsorption mass [5] [88]. | Requires specialized equipment; signal is an average over the sensing area. |
| Fluorescence Microscopy | Relative Fluorescence Intensity | Directly quantifies NSA load of labeled proteins (e.g., FITC-BSA) on different materials; provides spatial distribution [89] [87]. | Requires protein labeling; potential for photobleaching. |
| Electrochemical (EC) Methods | Signal drift, Electron Transfer Rate | Measures the impact of fouling on electrochemical signal stability and sensor passivation [5]. | Indirect measurement of NSA; signal is convoluted with electrochemical processes. |
| MALDI-TOF Mass Spectrometry | Molecular Weight | Identifies specific proteins and lipids adsorbed onto the sensor surface after exposure to a complex sample [88]. | End-point, destructive analysis; requires surface washing and preparation. |
| Atomic Force Microscopy (AFM) | Surface Roughness, Adhesion Force | Characterizes nanoscale topographical changes and measures interaction forces due to fouling [90]. | Provides surface data but not a direct quantitative measure of NSA in complex samples. |
Standard Experimental Protocols
Protocol 1: Evaluating Antifouling Coatings Using Fluorescence Microscopy
This protocol is adapted from studies investigating NSA on polymer surfaces and is ideal for high-throughput screening of new antifouling materials [89] [87].
1. Sample Preparation:
- Coat your substrate (e.g., gold, SiO₂, PMMA) with the antifouling material (e.g., PEG, BSA, dextran).
- Include a control surface (e.g., bare gold or unmodified polymer).
2. Surface Cleaning:
- Clean all surfaces with isopropanol (IPA) and deionized (DI) water.
- Treat surfaces with UV-Ozone for 20 minutes immediately before the experiment to ensure cleanliness and consistent surface chemistry [87].
3. Protein Exposure:
- Prepare a solution of 100 µg/mL Bovine Serum Albumin (BSA) labeled with Fluorescein Isothiocyanate (FITC) in phosphate-buffered saline (PBS) at pH 7.4 [87].
- Introduce the FITC-BSA solution to the surfaces and incubate for a fixed period (e.g., 1 hour) under static or flow conditions.
4. Washing and Imaging:
- Rinse the surfaces thoroughly with PBS to remove loosely bound proteins.
- Image the surfaces using a fluorescence microscope with consistent exposure settings across all samples.
5. Data Quantification:
- Measure the fluorescence intensity across multiple areas for each sample.
- Subtract the average auto-fluorescence intensity measured from negative-control samples (not exposed to BSA).
- Calculate the Relative Fluorescence Intensity for each coating. A lower intensity indicates superior antifouling performance.
Protocol 2: Real-Time NSA Assessment Using Surface Plasmon Resonance (SPR)
This protocol is used for kinetic evaluation of NSA and the efficacy of antifouling coatings in real-time [5] [88].
1. Sensor Chip Functionalization:
- Functionalize the SPR gold sensor chip with your chosen antifouling coating (e.g., PEG, hydrogel dextran, SIP-based layer).
- Use one flow channel as a reference (e.g., coated but no bioreceptor).
2. System Priming and Baseline:
- Prime the SPR system with running buffer (typically PBS, pH 7.4) at a constant flow rate (e.g., 10-50 µL/min) until a stable baseline is achieved.
3. Sample Injection and Monitoring:
- Inject the complex sample (e.g., 1-10% serum, plasma, or undiluted cell lysate in buffer) over the sensor surface for a fixed period (e.g., 5-10 minutes).
- Monitor the resonance unit (RU) response in real-time. A sharp increase followed by a continuous, slow rise indicates significant NSA.
4. Buffer Rinse and Stability Check:
- Switch back to running buffer and observe the signal for an additional 5-10 minutes. A significant signal drop indicates the removal of weakly adsorbed species, while a stable residual signal indicates strong, irreversible NSA.
5. Data Analysis:
- The total NSA Response is quantified as the net RU change (from baseline before injection to the stabilized signal after buffer rinse).
- Compare the NSA response on your functionalized surface against the reference and a bare gold surface to determine the percentage reduction in fouling.
Research Reagent Solutions
The table below lists key reagents and materials used in developing and evaluating antifouling biosensor surfaces.
| Reagent / Material | Function in NSA Minimization | Example Application / Note |
|---|---|---|
| Polyethylene Glycol (PEG) | Forms a hydrated, steric barrier that repels proteins [1] [88]. | Grafted onto gold or polymer surfaces; performance can vary with molecular weight and density. |
| Bovine Serum Albumin (BSA) | Blocking agent that passively adsorbs to uncovered surfaces to prevent further NSA [1] [89]. | Simple coating for microfluidic devices (e.g., PMMA); can achieve >87% reduction in protein adsorption [89]. |
| Surface-Initiated Polymerization (SIP) | Creates a dense, 3D polymer brush layer with high antifouling properties [88]. | Shows superior performance against complex samples like cell lysate and serum compared to PEG [88]. |
| Hydrogel Dextran | Provides a hydrophilic, 3D matrix that resists protein adsorption and offers high bioreceptor loading [88]. | Commonly used in commercial SPR chips (e.g., Biacore). |
| Zwitterionic Peptides | Creates a super-hydrophilic surface through electrostatically induced hydration [1]. | Used in electrochemical DNA sensors for ultrasensitive detection in complex media [1]. |
| Casein & Milk Proteins | Protein-based blocking mixture used to passivate surfaces and minimize vacant space for NSA [1]. | Common in ELISA and Western blot protocols; effective for preventing methodological NSA [1]. |
Biofouling, the non-specific accumulation of biological materials on surfaces, presents a major challenge in biomedical biosensing. Within blood and plasma, this process begins instantly upon exposure, as proteins, cells, and other biomolecules adsorb onto the sensor surface, forming a conditioning film. This fouling layer can severely compromise analytical performance by masking detection sites, reducing signal-to-noise ratios, altering biorecognition element activity, and leading to inaccurate readings [91]. For reliable biosensing in complex media like blood, effective antifouling strategies are not merely beneficial—they are essential for achieving the specificity, sensitivity, and reproducibility required for clinical and research applications.
This technical support center provides a structured resource to help researchers troubleshoot common experimental issues, understand key material properties, and implement validated protocols for evaluating antifouling materials in blood and plasma research contexts.
Fundamental Antifouling Mechanisms & Material Classes
Antifouling materials operate through distinct physicochemical mechanisms to prevent the non-specific adsorption of biomolecules. The choice of mechanism directly influences the material's performance in complex media.
Primary Antifouling Mechanisms
The table below summarizes the four core mechanisms exploited by antifouling materials.
Table 1: Core Antifouling Mechanisms and Their Principles
| Mechanism | Working Principle | Key Material Characteristics |
|---|---|---|
| Anti-Adhesion | Creates a physical and/or energetic barrier that prevents the initial attachment of biomolecules [92]. | Hydrophilic surfaces; forms a hydrated layer via hydrogen bonding; presents steric hindrance. |
| Fouling-Resistance | Utilizes a tightly bound hydration layer to form a physical and energetic barrier that repels approaching foulants [93]. | Super-hydrophilicity; strong water-binding capacity; often involves neutral charges. |
| Fouling-Release | Does not prevent initial attachment but minimizes adhesion strength, allowing attached foulants to be easily removed by low shear forces [92] [93]. | Low surface energy; slippery, elastic surfaces; weak interfacial adhesion. |
| Cytostatic/Cytocidal | Inhibits the growth (cytostatic) or kills (cytocidal) fouling organisms, primarily relevant for microbial biofouling [92]. | Incorporates biocidal agents or compounds that interfere with cellular metabolism. |
Major Classes of Antifouling Materials
Different material classes are designed to leverage one or more of these mechanisms.
Table 2: Common Antifouling Material Classes and Their Applications
| Material Class | Example Materials | Primary Mechanism(s) | Considerations for Blood/Plasma Biosensing |
|---|---|---|---|
| Polymer Brushes | Polyethylene glycol (PEG), Poly(2-oxazoline)s [92] [91] | Anti-adhesion, Fouling-Resistance | The "gold standard"; PEG's potential oxidation in vivo is a known limitation. |
| Zwitterionic Materials | Poly(sulfobetaine), Poly(carboxybetaine), Phosphorylcholine [92] [91] | Fouling-Resistance | Excellent hydration; considered a next-generation alternative to PEG. |
| Hydrogels | Cross-linked PEG, Polyacrylamide [92] | Anti-adhesion, Fouling-Resistance | High water content; can be mechanically soft, which may limit sensor integration. |
| Low Surface Energy Polymers | Polydimethylsiloxane (PDMS), Silicones [92] [93] | Fouling-Release | Effective against cell adhesion; proteins may still adsorb, requiring synergistic approaches. |
Troubleshooting Common Experimental Issues
FAQ 1: Why is my antifouling coating failing under static (no-flow) blood testing conditions?
Problem: A coating that performs well under dynamic flow fails rapidly in a static incubation, a common scenario for certain biosensor formats.
Solutions:
- Investigate Dynamic Coating Materials: Traditional synergistic coatings combining hydrophilic and low-surface-energy domains often require tangential flow to activate the release mechanism [93]. Consider switching to materials with inherent molecular mobility that function without flow.
- Utilize Supramolecular Chemistry: Incorporate constructs like cyclodextrin/PDMS polyrotaxanes. The sliding and rotation of cyclodextrin rings create dynamic heterogeneous microdomains at the molecular level. This constant motion prevents foulants from forming stable attachments, even in a static environment, by keeping the contact interface in an unstable state [93].
- Increase Coating Hydration: Ensure the coating is fully hydrated by soaking in buffer prior to blood exposure. A pre-hydrated layer is critical for immediate fouling-resistance.
FAQ 2: How can I prevent significant signal loss or baseline drift in my plasma sensor?
Problem: Sensor performance degrades after exposure to plasma, evidenced by a drifting baseline or attenuated signal.
Solutions:
- Analyze the "Biological Identity": Signal loss often stems from the formation of a "protein corona" on the sensor surface. The adsorbed proteins create an insulating layer and/or non-specifically block binding sites [91].
- Optimize Coating Density and Thickness: A sparse or thin coating may not fully shield the underlying sensor surface. Ensure your polymer brush or hydrogel coating is sufficiently dense and thick to prevent proteins from penetrating to the substrate. Characterization with ellipsometry or AFM is recommended.
- Validate with Complex Media: Always test coating efficacy in the actual matrix (e.g., 100% plasma or serum) rather than just with single-protein solutions like BSA. Performance in simple buffers does not predict performance in complex media [91].
FAQ 3: What could cause the delamination or poor adhesion of my coating on the biosensor transducer?
Problem: The antifouling layer peels off, cracks, or detaches from the sensor substrate, leading to failure.
Solutions:
- Review Surface Pre-treatment: Inadequate cleaning and activation of the substrate is a primary cause. For metal or oxide surfaces, use oxygen plasma treatment to create hydroxyl groups. For polymers, use appropriate chemical etching or UV-ozone treatment to improve adhesion.
- Check Coating Formulation and Curing: For epoxy-based coatings (common for incorporating natural extracts), ensure the ratio of resin to hardener is precise and the curing cycle (time, temperature) is strictly followed [94].
- Consider an Adhesion Promoter: Implement a primer layer. For example, a thin layer of (3-aminopropyl)triethoxysilane (APTES) on a silica or metal oxide surface can provide strong covalent anchoring points for subsequent polymer coatings.
Quantitative Performance Data & Selection Guide
Selecting the right material requires a comparative understanding of their documented performance. The following table synthesizes quantitative data from recent studies.
Table 3: Comparative Quantitative Performance of Antifouling Strategies
| Material/Strategy | Test Medium | Key Performance Metric | Result | Reported Mechanism |
|---|---|---|---|---|
| CD/PDMS Polyrotaxane Membrane [93] | BSA Solution | Normalized Flux Decline (after 550 L·m⁻²·h⁻¹ flux, 60 rpm stirring) | 14.2% | Synergistic Resistance-Release (Dynamic) |
| P. crassipes Extract in Epoxy (10 g/L) [94] | Freshwater (Field) | Reduction in Total Bacterial Colonization | 37% | Cytostatic / Anti-adhesion |
| P. crassipes Extract in Epoxy (10 g/L) [94] | Freshwater (Field) | Reduction in Macro-organism Attachment | ~100% (None found) | Cytostatic / Anti-adhesion |
| Plasma Separation Membrane (Passive) [24] | Whole Blood (1:60 dilution) | Reduction in Red Blood Cell Density | 97% | Size Exclusion / Agglutination |
| Zwitterionic Coatings [95] | Marine Environment | Antifouling Efficacy (vs. biocidal coatings) | No significant difference | Fouling-Resistance |
Detailed Experimental Protocols
Protocol: Evaluating Antifouling Performance in Blood Plasma
Objective: To quantitatively assess the ability of a coated surface to resist protein adsorption and cell adhesion from human blood plasma.
Materials:
- Coated and uncoated (control) sensor substrates.
- Fresh human blood plasma (commercial or collected with institutional approval and appropriate anticoagulants like EDTA).
- Phosphate Buffered Saline (PBS), pH 7.4.
- Micro-BCA or ELISA Protein Assay Kit.
- Fluorescence microscope (if using fluorescent tags).
Procedure:
- Baseline Measurement: Characterize the initial state of your sensor (e.g., baseline signal, surface topography).
- Plasma Exposure: Immerse the coated and uncoated substrates in 1 mL of undiluted blood plasma.
- Incubation: Incubate at 37°C under gentle agitation (e.g., 50 rpm on an orbital shaker) for a predetermined time (e.g., 1-2 hours).
- Rinsing: After incubation, gently rinse the substrates three times with copious amounts of PBS to remove loosely attached material.
- Quantification:
- Protein Adsorption: Elute the adsorbed proteins from the surface using a 1% SDS solution. Quantify the total protein content in the eluate using a micro-BCA assay.
- Direct Staining: Fix the samples with 4% paraformaldehyde and stain for actin (e.g., Phalloidin) and DNA (e.g., DAPI) to visualize and count adhered cells via fluorescence microscopy.
- Data Analysis: Compare the amount of adsorbed protein or number of adhered cells on the coated substrate to the uncoated control. Report results as percentage reduction.
Protocol: Incorporating Natural Extracts into Epoxy Coatings
Objective: To formulate an antifouling coating by integrating lyophilized plant extracts into an epoxy paint matrix [94].
Materials:
- Lyophilized macrophyte extract (e.g., P. crassipes).
- Hempadur Base 15579 epoxy paint or equivalent.
- Hardener.
- Solvent (e.g., Xylene) for viscosity adjustment.
- High-speed disperser or ultrasonic probe.
Procedure:
- Dispersion: Weigh out the desired concentration of lyophilized extract (e.g., 5 g/L or 10 g/L relative to the total paint volume). Add the extract powder to the epoxy base resin.
- Mixing: Use a high-speed disperser (≥ 2000 rpm) or an ultrasonic probe to homogenize the mixture for 5-10 minutes until a uniform dispersion is achieved. Place the container in an ice bath to prevent heat buildup.
- Hardener Addition: Add the specified hardener to the mixture according to the manufacturer's ratio. Mix thoroughly but gently to minimize air bubble incorporation.
- Application: Apply the coating to a pre-treated and clean substrate using a draw-down bar, spin coater, or spray gun to achieve a uniform thickness.
- Curing: Allow the coating to cure under controlled conditions (temperature, humidity) as specified by the paint manufacturer, typically for 7 days at room temperature before immersion testing.
The Scientist's Toolkit: Essential Research Reagents
This table lists key materials and their functions for developing and testing antifouling strategies.
Table 4: Essential Reagents for Antifouling Biosensing Research
| Reagent/Material | Function/Description | Example Application |
|---|---|---|
| Polyethylene Glycol (PEG) | Synthetic polymer; forms hydrated brush layer to sterically hinder protein adsorption [92] [91]. | Grafting to sensor surfaces as a non-fouling passivation layer. |
| Zwitterionic Monomers (e.g., SBMA, CBMA) | monomers that form surfaces with a neutral, super-hydrophilic coating that binds water molecules very strongly [92] [91]. | Creating non-fouling hydrogels or polymer brushes via surface-initiated polymerization. |
| Polydimethylsiloxane (PDMS) | Silicone-based polymer with low surface energy, facilitating fouling-release [92] [93]. | Used in microfluidics; can be modified or blended for synergistic antifouling effects. |
| Cyclodextrins (α, β, γ) | Ring-shaped molecules that can be threaded onto polymer chains to create dynamic, mobile surfaces [93]. | Synthesis of polyrotaxanes with PDMS for enhanced antifouling under low flow. |
| Epoxy Resin & Hardener | A durable, chemically resistant matrix for incorporating and slowly releasing bioactive compounds [94]. | Formulating paints containing natural antifouling extracts for field testing. |
| Natural Extracts (e.g., P. crassipes) | Source of bioactive compounds (e.g., phenolic derivatives, alkaloids) that inhibit biofilm formation via cytostatic or quorum-sensing inhibition [94]. | Developing eco-friendly, non-toxic antifouling coatings. |
Experimental Workflow and Material Action Diagrams
The following diagrams visualize the core experimental workflow and the mechanism of a novel dynamic coating.
Antifouling Evaluation Workflow
Dynamic Supramolecular Antifouling Mechanism
Validating Biosensor Performance in Blood, Serum, and Plasma
Frequently Asked Questions (FAQs)
Q1: What is the single biggest challenge when validating a biosensor in blood, serum, or plasma? The most persistent challenge is Non-Specific Adsorption (NSA), also known as biofouling [1]. NSA occurs when proteins or other biomolecules from the complex sample matrix physisorb onto the biosensor's surface, leading to high background signals, false positives, reduced sensitivity, and poor reproducibility [1].
Q2: What are the main strategies to minimize NSA? Strategies can be divided into two categories [1]:
- Passive Methods: These aim to prevent NSA by coating the surface with a physical or chemical barrier. Common examples include using blocker proteins like Bovine Serum Albumin (BSA) or casein, or creating well-hydrated, non-charged chemical layers [1].
- Active Methods: These dynamically remove adsorbed molecules after they have attached to the surface. They typically use transducers (electromechanical or acoustic) or hydrodynamic fluid flow to generate shear forces that shear away weakly adhered biomolecules [1].
Q3: My biosensor shows significant baseline drift. What could be the cause? Baseline drift is often a sign of a poorly equilibrated sensor surface [56]. It can be mitigated by:
- Running the flow buffer over the sensor surface for an extended period (e.g., overnight) before the experiment.
- Performing several buffer injections before the actual analyte injection.
- Ensuring the running buffer and the sample buffer are perfectly matched to avoid bulk shifts [56].
Q4: Why might I get false positive or false negative results? False results can arise from multiple sources, including [96]:
- NSA, as previously described.
- Inadequate Reference Electrodes: In electrochemical biosensors, the use of combined counter/pseudo-reference electrodes can lead to potential shifts, causing significant analytical errors [97].
- Improper Surface Functionalization: Inconsistent or poorly characterized surface activation (e.g., silanization of glass) and bioreceptor immobilization can lead to variable performance [98].
Troubleshooting Guide
This guide helps diagnose and resolve common issues during biosensor validation in complex biofluids.
Table 1: Common Biosensor Issues and Solutions
| Problem Symptom | Potential Cause | Recommended Solution |
|---|---|---|
| High Background Signal | Non-specific adsorption of matrix proteins [1]. | Implement passive blocking (e.g., with BSA) or integrate active removal methods (e.g., acoustic shearing) [1]. |
| Low Signal/Response | Bioreceptor denaturation or incorrect orientation [99]. | Use targeted immobilization strategies (e.g., via antibody fragments or oxidized oligosaccharides) instead of random adsorption [99]. |
| Poor Reproducibility | Inconsistent surface functionalization between batches [98]. | Adopt standardized surface characterization protocols (as in ISO/TR 19693:2018) for quality control during biosensor production [98]. |
| Baseline Drift | Sensor surface not equilibrated; buffer mismatch [56]. | Equilibrate surface with flow buffer for longer; match the composition of running and sample buffers precisely [56]. |
| Analytical Deviation | Use of a combined counter/pseudo-reference electrode [97]. | Use separate counter and reference electrodes to maintain a stable potential [97]. |
Experimental Protocols for Validation
Protocol 1: Validating an SPRi-based Biosensor for Protein Detection in Plasma
This protocol is adapted from a study for detecting erythropoietin (EPO) in blood plasma [100].
- Biosensor Platform: Surface Plasmon Resonance imaging (SPRi) biosensor.
- Key Steps:
- Surface Functionalization: Immobilize the specific capture antibody (anti-EPO) onto the gold chip surface. A common method is using a cysteamine linker and EDC/NHS chemistry to form covalent bonds [99].
- Calibration: Plot a calibration curve using known concentrations of the pure EPO standard in buffer.
- Validation in Plasma: Spike known concentrations of EPO into control plasma samples. Determine the recovery rate to assess accuracy.
- Sample Analysis: Run plasma samples from a control group and a study group (e.g., patients with a specific disease). The biosensor reported a Limit of Detection (LOD) of 0.03 pg/mL and a Limit of Quantification (LOQ) of 0.10 pg/mL for EPO [100].
Protocol 2: Developing a Biosensor for VEGF-R2 in Plasma using a Bimetallic Chip
This protocol outlines the development of a biosensor with enhanced sensitivity [99].
- Biosensor Platform: Array SPRi with silver/gold bimetallic chip.
- Key Steps:
- Chip Preparation: Use a bimetallic chip (e.g., glass/Cr/Ag/Au) to enhance plasmonic properties and sensitivity.
- Linker Immobilization: Coat the sensor with a self-assembled monolayer of cysteamine.
- Antibody Immobilization: Activate the surface with a mixture of EDC and NHS. Incubate with the monoclonal antibody specific for VEGF-R2 to covalently attach it.
- Assay Performance: The biosensor demonstrated linearity between 0.03 and 1 ng/mL, a precision of 2.2%, and recovery between 99% and 103% in plasma samples [99].
Visualization: Strategies to Minimize Non-Specific Adsorption (NSA)
The following diagram illustrates the decision pathway for selecting appropriate NSA reduction methods.
The Scientist's Toolkit: Research Reagent Solutions
Table 2: Essential Materials for Biosensor Development and Validation
| Item | Function/Benefit | Example from Literature |
|---|---|---|
| Cysteamine Linker | Forms a self-assembled monolayer (SAM) on gold surfaces, providing terminal amine groups for subsequent bioreceptor immobilization [99]. | Used for attaching anti-VEGF-R2 antibodies to gold and silver/gold chips [99]. |
| EDC/NHS Chemistry | A common carbodiimide crosslinking chemistry that activates carboxyl groups to form stable amide bonds with amine-containing bioreceptors (like antibodies) [99]. | Used to covalently immobilize monoclonal antibodies onto a cysteamine-modified SPRi chip [99]. |
| Bovine Serum Albumin (BSA) | A common blocker protein used in passive methods to occupy vacant surface sites and reduce NSA [1]. | Widely used in assays like ELISA and Western blotting; applicable to biosensor surface preparation [1]. |
| Bimetallic Chips (Ag/Au) | Enhances the sensitivity of optical biosensors (like SPR) due to superior plasmonic properties compared to pure gold chips [99]. | A silver/gold bimetallic chip was used to develop a more sensitive VEGF-R2 biosensor [99]. |
| Standardized Characterization | Provides guidelines for characterizing surface chemistry (e.g., silanized glass) to ensure consistency and identify sources of poor performance [98]. | ISO/TR 19693:2018 offers guidance for characterizing substrates used in biosensing devices [98]. |
A central challenge in developing reliable biosensors for clinical use is minimizing non-specific adsorption (NSA) when analyzing complex biological fluids like blood and plasma. NSA occurs when non-target molecules indiscriminately bind to the sensor surface, leading to increased background noise, reduced sensitivity, false positives, and inaccurate readings. The high concentration of proteins, lipids, and other biomolecules in these samples exacerbates this problem. This technical support center provides targeted troubleshooting guides and FAQs to help researchers, scientists, and drug development professionals overcome these hurdles, focusing on Electrochemical biosensors, Surface Plasmon Resonance (SPR), and the emerging technique of combined Electrochemical-SPR (EC-SPR). The overarching goal is to provide methodologies that enhance signal fidelity by effectively suppressing NSA within the context of a broader thesis on biosensing in blood and plasma.
SPR Biosensor Troubleshooting & FAQs
Surface Plasmon Resonance (SPR) is a label-free, real-time optical technique used to measure molecular interactions [101] [102]. Its signal is directly dependent on the refractive index changes on the sensor chip surface, making it highly sensitive to both specific binding and unwanted non-specific adsorption [102].
Frequently Asked Questions (FAQs)
Q1: Why is minimizing NSA so critical for SPR assays in blood plasma? NSA is critical because the SPR signal is a mass-based measurement [101]. The adsorption of non-target proteins from plasma (e.g., albumin, immunoglobulins) directly contributes to the signal, obscuring the specific binding event of interest and leading to overestimation of binding affinity and concentration [103] [102].
Q2: What is baseline drift and how is it linked to my sample matrix? Baseline drift is an unstable or slowly shifting signal in the absence of analyte [104] [56]. In blood and plasma research, this can be caused by the slow, continuous non-specific adsorption of matrix components to the sensor surface or by a mismatch between the running buffer and the sample buffer [56]. Ensure the sensor surface is fully equilibrated, sometimes requiring an overnight buffer flow, and always match the buffer composition of your sample to the running buffer [56].
Q3: My analyte shows no binding signal. Is the target inactive? A lack of signal can indeed be due to an inactive target protein [103] [105]. However, it may also be that the binding pocket of your immobilized ligand is sterically hindered or incorrectly oriented. Verify protein activity with an alternative assay and consider changing your immobilization strategy, for example, by using a capture-based method or coupling via different functional groups (e.g., thiols) to improve accessibility [103].
Troubleshooting Guide for Common SPR Issues
Table 1: Troubleshooting common SPR issues related to non-specific adsorption and signal integrity.
| Problem & Symptoms | Potential Causes | Recommended Solutions & Optimization Tips |
|---|---|---|
| High Non-Specific Binding [103] [104] | - Sample matrix effects (e.g., serum, plasma).- Inadequate surface blocking.- Suboptimal surface chemistry. | - Supplement running buffer with additives like 0.05% Tween 20, BSA (0.1-1 mg/mL), or PEG [103] [106].- Use a dedicated reference channel with a non-binding ligand [103].- Choose a sensor chip with a low-fouling surface coating [106]. |
| Baseline Drift & Instability [104] [56] [106] | - Buffer mismatch between sample and running buffer.- Contaminated buffer or sensor surface.- Slow NSA from complex media. | - Degas buffers thoroughly to remove air bubbles [104].- Pre-equilibrate the sensor surface extensively with running buffer [56].- Ensure buffer compatibility and use fresh, filtered buffers [104] [106]. |
| No or Weak Signal Change [104] [105] | - Low ligand activity or incorrect orientation.- Analyte concentration too low.- Ligand immobilization level too low. | - Check ligand functionality and purity [105].- Optimize ligand immobilization density and orientation [106].- Increase analyte concentration if feasible, or extend association time [104]. |
| Regeneration Problems & Carryover [103] [104] | - Bound analyte not fully removed.- Harsh regeneration conditions damage the ligand. | - Systematically test regeneration solutions (e.g., 10 mM Glycine pH 2.0, 10 mM NaOH, 2 M NaCl) [103].- Add 10% glycerol to regeneration buffers to enhance ligand stability [103].- Optimize regeneration contact time and flow rate [104]. |
Standard SPR Experimental Protocol for Complex Fluids
This protocol is designed to minimize NSA when working with complex samples like plasma.
Pre-experimental Considerations:
- Sensor Chip Selection: Choose a sensor chip with a chemistry appropriate for your ligand and known for low fouling, such as carboxymethylated dextran (CM5) or hydrophobic-association-suppressing (C1) chips [106].
- Buffer Selection: Use a running buffer such as HBS-EP (10 mM HEPES, 150 mM NaCl, 3 mM EDTA, 0.05% surfactant P20, pH 7.4) which contains a detergent to reduce NSA [101] [106]. All buffers should be filtered and degassed.
- Sample Preparation: Dilute plasma samples in the running buffer to reduce NSA. If possible, pre-clear the sample by centrifugation or filtration.
Ligand Immobilization:
- Surface Activation: Activate the carboxymethyl groups on the sensor chip surface using a mixture of EDC (N-ethyl-N'-(dimethylaminopropyl)carbodiimide) and NHS (N-hydroxysuccinimide) [105] [106].
- Ligand Coupling: Dilute the ligand in an immobilization buffer (e.g., sodium acetate, pH 4.0-5.5) and inject it over the activated surface to achieve a desired immobilization level [105].
- Surface Blocking: Deactivate any remaining active esters by injecting ethanolamine hydrochloride [106]. This is a critical step to minimize NSA.
Analyte Binding and Regeneration:
- Baseline Stabilization: Flow running buffer over the surface until a stable baseline is achieved.
- Analyte Injection (Association): Inject the analyte (e.g., spiked plasma) over the ligand and reference surfaces. Use a medium flow rate (e.g., 30 μL/min) to balance mass transport and NSA [106].
- Dissociation: Switch back to running buffer to monitor the dissociation of the complex.
- Surface Regeneration: Inject a regeneration solution (e.g., 10 mM Glycine, pH 2.0) to remove bound analyte without damaging the ligand, preparing the surface for the next cycle [103] [104].
Diagram 1: Standard SPR experimental workflow.
Electrochemical Biosensor Troubleshooting & FAQs
Electrochemical biosensors transduce a biological event into an electronic signal (current, potential, impedance) [107] [108]. They are prized for their portability, low cost, and high sensitivity but are also susceptible to NSA, which can foul the electrode surface and impede electron transfer.
Frequently Asked Questions (FAQs)
Q1: How does NSA affect different types of electrochemical biosensors? NSA impacts each type differently. In amperometric/voltammetric sensors, fouling insulates the electrode, reducing the Faradaic current [107]. In impedimetric sensors, NSA directly increases the charge-transfer resistance (Rct), mimicking or masking a specific binding event [108]. For potentiometric sensors, a fouled surface can lead to drift and unstable potential readings [108].
Q2: What are the main strategies to prevent electrode fouling from blood? The primary strategies involve creating a physical and chemical barrier using anti-fouling surface architectures. This includes forming self-assembled monolayers (SAMs) of alkane thiols like PEG, using zwitterionic materials, or coating the electrode with blocking agents like BSA [107]. The precise control over surface nano-architecture is critical for suppressing NSA while maintaining sensor function [107].
Q3: My electrochemical sensor shows high background noise. Is this due to NSA? Potentially. High background noise can be caused by electrical interference, but NSA can contribute significantly. The non-specific adsorption of charged proteins can alter the electrical double layer at the electrode interface, increasing capacitive and resistive noise [107]. Ensure proper instrument grounding and use shielded cables. Also, implement the anti-fouling strategies mentioned above.
Troubleshooting Guide for Common Electrochemical Issues
Table 2: Troubleshooting common Electrochemical biosensor issues in complex media.
| Problem & Symptoms | Potential Causes | Recommended Solutions & Optimization Tips |
|---|---|---|
| Signal Drift & High Background Noise [109] [107] | - Electrode fouling from plasma proteins.- Electrical noise or unstable reference electrode.- Unoptimized buffer ionic strength/pH. | - Implement anti-fouling layers (e.g., PEG-SAMs, zwitterionic polymers) [107].- Ensure proper grounding and instrument calibration [109].- Use a stable reference electrode (e.g., Ag/AgCl) and buffer with physiological ionic strength. |
| Low/No Sensitivity (Current or Rct Change) [109] [107] | - Bioreceptor (enzyme, antibody) denaturation.- Electron-transfer barrier from fouling.- Incorrect applied potential. | - Verify bioreceptor activity and immobilization stability.- Use redox mediators to facilitate electron transfer [107].- Optimize the working electrode potential vs. the reference. |
| Poor Reproducibility [104] | - Inconsistent electrode surface modification.- Variation in sample handling or pre-treatment.- Sensor surface degradation over time. | - Standardize surface cleaning and modification protocols (e.g., SAM formation).- Use consistent sample preparation techniques.- Store and handle sensor chips/cells carefully to avoid damage [104]. |
Combined EC-SPR Biosensors: An Emerging Paradigm
Combined EC-SPR biosensors represent a powerful hybrid approach where electrochemical and SPR measurements are performed simultaneously on the same sensor interface [107]. This combination provides complementary information: SPR optically monitors mass changes and conformational states at the surface, while electrochemistry probes electron-transfer processes and reaction kinetics. This duality is exceptionally valuable for investigating complex interfacial processes and for cross-validating data to minimize false positives caused by NSA.
Application and Advantage for NSA Minimization
In an EC-SPR configuration, the SPR signal can distinguish between a specific binding event (which causes a sustained mass change) and non-specific fouling (which may have different optical properties) [107] [102]. Simultaneously, the electrochemical signal can track the redox activity of an enzyme label or a reporter molecule, confirming a specific biorecognition event. For instance, if NSA occurs, the SPR signal may increase, but the corresponding electrochemical signal (e.g., from glucose oxidase catalysis) would not, clearly indicating a non-specific event. This orthogonal verification is a powerful tool for developing robust biosensors for direct analysis in blood and plasma.
Essential Research Reagent Solutions
The selection of appropriate reagents and materials is fundamental to successful biosensor experiments with minimal NSA. Table 3: Key research reagents and their functions in biosensor development.
| Reagent / Material | Function & Application |
|---|---|
| CM5 Sensor Chip (SPR) [101] [106] | A carboxymethylated dextran matrix that provides a hydrophilic, hydrogel surface for covalent ligand immobilization. Its properties help reduce non-specific binding. |
| PEGylated Alkane Thiols [107] | Used to form self-assembled monolayers (SAMs) on gold electrodes or SPR chips. PEG (polyethylene glycol) creates a highly hydrated, bio-inert brush layer that effectively resists protein adsorption. |
| Bovine Serum Albumin (BSA) [103] [106] | A common blocking agent used to occupy any remaining reactive sites on a sensor surface after ligand immobilization, thereby minimizing non-specific adsorption. |
| Tween 20 [101] [106] | A non-ionic surfactant added to running buffers (typically at 0.05% v/v) to reduce hydrophobic interactions and minimize non-specific binding in both SPR and electrochemical systems. |
| EDC / NHS Chemistry [106] | The standard cross-linking system for activating carboxyl groups on sensor surfaces to enable covalent coupling of ligands containing primary amines. |
| HBS-EP Buffer [101] | A standard SPR running buffer (HEPES, Saline, EDTA, Polysorbate) that provides physiological pH and ionic strength, with a surfactant to minimize NSA. |
Core Experimental Protocols
Protocol: Preparing a Low-Fouling SAM on a Gold Electrode/SPR Chip
This protocol is foundational for both electrochemical and SPR biosensors using gold surfaces.
- Surface Cleaning: Clean the gold substrate in a fresh piranha solution (3:1 H2SO4 : H2O2) CAUTION: Piranha is extremely corrosive and reactive. Alternatively, use oxygen plasma treatment or chemical cleaning with hot Nochromix solution.
- SAM Formation: Immerse the clean gold substrate in a 1 mM ethanolic solution of a PEG-terminated alkane thiol (e.g., HS-C11-EG6) for 12-24 hours at room temperature.
- Rinsing: Thoroughly rinse the substrate with absolute ethanol to remove physically adsorbed thiols.
- Drying: Gently dry the substrate under a stream of nitrogen or argon gas.
- Characterization: Characterize the SAM using techniques like electrochemical impedance spectroscopy (EIS) or contact angle goniometry to verify quality and low fouling.
Protocol: Faradaic Electrochemical Impedance Spectroscopy (EIS)
EIS is a highly sensitive, label-free electrochemical technique ideal for measuring binding events.
- Electrode Setup: Use a three-electrode system: Gold working electrode (modified with bioreceptor), Pt counter electrode, and Ag/AgCl reference electrode.
- Solution Preparation: Prepare an EIS solution containing a redox probe, typically 5 mM [Fe(CN)6]3−/4− in a suitable buffer (e.g., PBS).
- Initial EIS Measurement: Immerse the electrodes in the redox solution and perform an EIS scan. Apply a DC potential equal to the formal potential of the redox couple (often ~0.2 V vs. Ag/AgCl) with a small AC voltage amplitude (e.g., 10 mV) over a frequency range (e.g., 0.1 Hz to 100 kHz). This gives the baseline Rct.
- Sample Incubation: Incubate the modified working electrode with the sample solution (e.g., plasma containing the target) for a set time.
- Post-Binding EIS Measurement: Wash the electrode and perform the EIS measurement again in the fresh redox solution. The binding of the target (and any NSA) will increase the measured Rct.
- Data Analysis: Fit the impedance data to an equivalent electrical circuit model (e.g., the Randles circuit) to extract the Rct value. The change in Rct (ΔRct) is correlated with the target concentration.
Diagram 2: EIS biosensing principle with redox probe [Fe(CN)6]3−/4−.
FAQs and Troubleshooting Guides
This technical support center addresses common challenges researchers face when validating the analytical performance of biosensors in blood and plasma research. The guidance focuses on the critical post-optimization phase, where non-specific adsorption (NSA) remains a significant obstacle to reliable measurement.
How can I verify the claimed Limit of Detection (LOD) for my biosensor in plasma?
Answer: Verifying your LOD in complex matrices like plasma requires a rigorous experimental approach beyond simple buffer testing.
- Prepare Matrix-Matched Calibrators: Use pooled, characterized plasma or serum as your dilution matrix for your standard curve. This accounts for matrix effects that artificially enhance or suppress your signal in buffer-based measurements [110].
- Implement a Standardized Protocol: Follow an established enhancement protocol. A proven method involves using a biotinylated secondary tracer antibody, streptavidin-horseradish peroxidase (SA-HRP) conjugate, and enzymatic signal enhancement with a substrate like 4-chloro-1-naphthol (4-CN) to boost the signal above the background noise [110].
- Calculate LOD Statistically: The LOD is not the lowest point on your standard curve. It must be derived statistically, typically from the mean response of a blank sample (e.g., analyte-free plasma) plus three times its standard deviation [111].
Table 1: Experimental Data for LOD Verification in Complex Matrices
| Matrix | Reported LOD | Key Steps for Verification | Common Pitfalls |
|---|---|---|---|
| Blood Plasma | 0.017 μg L⁻¹ (for aflatoxins in PBS) [111] | Use of immunoaffinity columns for extraction; matrix-matched calibration [111] | Neglecting sample pre-treatment; using buffer for calibration curve |
| Pistachio Matrix | 0.066 μg kg⁻¹ (for aflatoxins) [111] | Standard addition method; cross-validation with LC-MS/MS [111] | Inadequate extraction recovery; matrix interference |
My biosensor's selectivity is compromised by non-specific adsorption in blood plasma. What are my options?
Answer: NSA, where proteins and other molecules physisorb to your sensor surface, is a primary cause of poor selectivity and false positives in blood-derived media [1]. Solutions are categorized as passive (blocking) or active (removal).
- Passive Methods (Surface Coating): These aim to create a hydrophilic, non-charged boundary layer to prevent protein adhesion.
- Physical Blocking: Use blocker proteins like Bovine Serum Albumin (BSA) or casein to occupy vacant sites on the sensor surface [1] [110].
- Chemical Functionalization: Employ linker molecules like self-assembled monolayers (SAMs) or polyethylene glycol (PEG)-based coatings to create an anti-fouling surface [1].
- Active Methods (Dynamic Removal): These are advanced techniques that generate forces to shear away weakly adsorbed molecules.
- Electromechanical: Apply electrical fields to create repulsive forces.
- Acoustic: Use surface acoustic waves to physically dislodge non-specifically bound molecules [1].
Table 2: Troubleshooting Selectivity and NSA Issues
| Problem Symptom | Potential Root Cause | Recommended Solution | Validated Example |
|---|---|---|---|
| High background signal in plasma | Non-specific protein adsorption (NSA) [1] | Implement a BSA blocking step; functionalize surface with PEG [1] | --- |
| Reduced dynamic range | NSA causing elevated background signals [1] | Optimize the concentration/duration of the blocking step; consider active removal methods [1] | --- |
| Poor selectivity against non-target bacteria | Suboptimal antibody immobilization on sensor surface [112] | Optimize crosslinker chemistry (e.g., EDC/NHS ratio); confirm surface functionalization with FTIR [112] | E. coli biosensor with 89.22% fluorescence reduction vs. 26.23% for P. aeruginosa [112] |
How do I validate the accuracy of my biosensor against a reference method?
Answer: A robust validation cross-checks your biosensor's performance against a gold-standard method using statistically relevant sample sets.
- Cross-Validation with Confirmatory Methods: Analyze a statistically significant number of real samples (e.g., spiked plasma, patient samples) with both your biosensor and a reference method like LC-MS/MS or ELISA [111].
- Assess Key Statistical Parameters: Calculate the correlation coefficient (R²), slope, and intercept of the regression line comparing the two methods. Perform a recovery study to assess accuracy [111].
- Demonstrate Recovery: Spike a known amount of analyte into your sample matrix (e.g., plasma) and measure the concentration found. Good accuracy is demonstrated by a recovery percentage close to 100% [111]. A study on an aflatoxin immunosensor demonstrated excellent recovery rates between 87–106% [111].
Experimental Protocols
Protocol 1: Functionalization of a Sensor Surface with Antibody Capture Probes
This protocol, adapted from a established methodology for Whispering Gallery Mode (WGM) sensors, provides a robust foundation for creating a functional biosensor surface [110].
Materials:
- Biosensor substrate (e.g., silicon chip, screen-printed electrode)
- (3-Aminopropyl)triethoxysilane (APTES)
- Acetone, Isopropanol
- Bissulfosuccinimidyl suberate (BS3)
- Capture antibody stock solution (> 0.25 mg/mL)
- Phosphate Buffered Saline (PBS)
- Bovine Serum Albumin (BSA)
Procedure:
- Sensor Cleaning: Clean the sensor substrate thoroughly with organic solvents (acetone, isopropanol) to remove any contaminants [110].
- Silanization: Silanize the chip in a 1% APTES solution in acetone for 4 minutes with mild agitation. This introduces amine groups to the surface [110].
- Rinsing: Rinse the chip sequentially in fresh acetone and isopropanol for 2 minutes each to remove unbound APTES [110].
- Cross-linking: Prepare a 5 mM solution of the homobifunctional cross-linker BS3 in a weak acetic acid solution. React the aminated sensor surface with the BS3 solution to activate it [110].
- Antibody Immobilization: Spot or incubate the activated surface with your capture antibody solution. The NHS ester group of BS3 will covalently bind to primary amines on the antibody [110].
- Blocking: To minimize NSA, block any remaining activated ester groups and non-specific binding sites by treating the sensor with a solution containing BSA (e.g., 0.5% in PBS) [110] [1].
Protocol 2: Enzymatic Signal Enhancement for Improved LOD
This protocol describes a sandwich immunoassay with enzymatic enhancement, suitable for various optical and electrochemical biosensors to significantly lower the detection limit [110].
Materials:
- Functionalized biosensor with captured target analyte
- Biotinylated detection antibody
- Streptavidin-Horseradish Peroxidase (SA-HRP) conjugate
- 4-Chloro-1-Naphthol (4-CN) or similar precipitating HRP substrate
Procedure:
- Target Binding: Incubate the sample with your functionalized biosensor to allow the target analyte to bind to the capture antibody.
- Detection Antibody Binding: Introduce a biotinylated detection antibody that binds to a different epitope on the captured target, forming a "sandwich" [110].
- Enzyme Conjugate Binding: Add SA-HRP conjugate, which will bind tightly to the biotin on the detection antibody [110].
- Signal Enhancement: Introduce the 4-CN substrate. HRP catalyzes its oxidation, leading to the deposition of an insoluble, precipitated product directly onto the sensor surface. This large-scale deposition creates a significant change in the measured signal (e.g., refractive index for optical sensors, mass for acoustic sensors) [110].
- Measurement: Measure the enhanced signal (e.g., resonance wavelength shift, current change). The magnitude of this signal is directly correlated with the target analyte concentration [110].
Experimental Workflow and Signaling Pathways
The following diagram illustrates the key steps and decision points in the post-optimization validation of a biosensor's analytical characteristics.
Biosensor Validation Workflow
This workflow outlines the iterative process of validating a biosensor's key analytical parameters. It begins with sensor preparation and proceeds through critical checks for Limit of Detection (LOD)/Limit of Quantification (LOQ), selectivity, and accuracy. Failure at any check point typically requires returning to optimize the NSA reduction strategy.
The diagram below details the signaling pathway of a catalytic biosensor, a common mechanism for detecting small molecules like glucose, and contrasts it with a method to combat NSA.
Biosensor Mechanisms and NSA
This diagram contrasts the specific signaling pathway in a catalytic biosensor with the principle of reducing Non-Specific Adsorption (NSA). The left pathway shows the desired specific reaction producing a measurable signal, while the right illustrates how blocking agents prevent interferents from causing false signals.
The Scientist's Toolkit
Table 3: Essential Research Reagent Solutions for Biosensor Validation
| Reagent / Material | Function / Application | Key Consideration |
|---|---|---|
| APTES ((3-Aminopropyl)triethoxysilane) | Silane coupling agent to introduce amine groups onto sensor surfaces for biomolecule immobilization [110] [112]. | Solution should be prepared fresh from stocks stored in a desiccator under nitrogen for optimal results [110]. |
| BS3 (Bissulfosuccinimidyl suberate) | Homobifunctional cross-linker for covalently coupling amine-containing biomolecules (e.g., antibodies) to aminated surfaces [110]. | Creates a stable, covalent amide bond between the surface and the biorecognition element. |
| EDC/NHS Chemistry | A common carbodiimide coupling chemistry used to activate carboxyl groups, allowing them to form amide bonds with amine groups on antibodies or other proteins [112]. | The ratio of EDC to NHS (e.g., 4:1) can be optimized for maximum antibody immobilization efficiency [112]. |
| Bovine Serum Albumin (BSA) | A blocker protein used to passivate unused binding sites on the sensor surface to minimize Non-Specific Adsorption (NSA) [1] [110]. | A crucial step in almost all biosensor protocols to improve selectivity and reduce background noise. |
| Streptavidin-Horseradish Peroxidase (SA-HRP) | An enzyme conjugate used in signal enhancement protocols. Streptavidin binds to biotinylated detection antibodies, and HRP catalyzes a signal-generating reaction [110]. | Enables significant signal amplification, thereby lowering the practical Limit of Detection (LOD) for the assay. |
Conclusion
Minimizing non-specific adsorption is a multifaceted challenge critical for the development of reliable biosensors for blood and plasma analysis. A successful strategy requires an integrated approach, combining tailored surface chemistry with optimized operational protocols. The field is moving beyond traditional passive coatings toward dynamic active removal methods and smart materials. Future progress will be driven by interdisciplinary efforts, leveraging machine learning for material discovery and high-throughput screening to accelerate development. The convergence of advanced antifouling materials, sophisticated sensor design, and AI-powered optimization promises a new generation of biosensors capable of precise, reliable operation in the most complex clinical samples, ultimately advancing personalized medicine and global diagnostics.
References
- 1. Non-Specific Adsorption Reduction Methods in Biosensing [https://pmc.ncbi.nlm.nih.gov/articles/PMC6603772/]
- 2. Non-Specific Adsorption Reduction Methods in Biosensing [https://www.mdpi.com/1424-8220/19/11/2488]
- 3. Biofouling - an overview [https://www.sciencedirect.com/topics/chemical-engineering/biofouling]
- 4. Biofouling - an overview | ScienceDirect Topics [https://www.sciencedirect.com/topics/engineering/biofouling]
- 5. Promising Solutions to Address the Non-Specific ... [https://www.mdpi.com/2227-9040/13/3/92]
- 6. An electrochemical biosensor with enhanced antifouling ... [https://www.sciencedirect.com/science/article/abs/pii/S0925400524010517]
- 7. Antifouling (Bio)materials for Electrochemical (Bio)sensing [https://pubmed.ncbi.nlm.nih.gov/30669466/]
- 8. Organic electrochemical transistors as novel biosensing platforms to... [https://pubs.rsc.org/en/content/articlehtml/2022/tb/d1tb01584b]
- 9. Interfacial energetics of blood plasma and serum ... [https://www.sciencedirect.com/science/article/abs/pii/S0142961205011737]
- 10. Biosensing solutions for protein measurement in blood ... [https://www.sciencedirect.com/science/article/pii/S0263224125011157]
- 11. Recent Developments in Blood-Compatible ... [https://pmc.ncbi.nlm.nih.gov/articles/PMC8953528/]
- 12. Nanophotonic biosensors harnessing van der Waals ... [https://www.nature.com/articles/s41467-021-23564-4]
- 13. and Serum Preparation | Thermo Fisher Scientific - US Blood Plasma [https://www.thermofisher.com/us/en/home/references/protocols/cell-and-tissue-analysis/elisa-protocol/elisa-sample-preparation-protocols/blood-plasma-serum-preparation.html]
- 14. Wearable electrochemical biosensors to measure biomarkers ... [https://pmc.ncbi.nlm.nih.gov/articles/PMC8886869/]
- 15. Selected protocols - NCBI - NIH [https://www.ncbi.nlm.nih.gov/books/NBK567243/]
- 16. Innovations in Biosensor Technologies for Healthcare ... [https://www.mdpi.com/1424-8220/24/16/5143]
- 17. Specialty Grand Challenges in Biosensors [https://www.frontiersin.org/journals/sensors/articles/10.3389/fsens.2020.00003/full]
- 18. Engineering At-Home Dilution and Filtration Methods to ... [https://pmc.ncbi.nlm.nih.gov/articles/PMC9855769/]
- 19. Blood Basics [https://www.hematology.org/education/patients/blood-basics]
- 20. Physiology, Blood Plasma - StatPearls - NCBI Bookshelf [https://www.ncbi.nlm.nih.gov/books/NBK531504/]
- 21. A guide to reducing noise and increasing sensitivity in ... [https://blog.igii.uk/a-guide-to-reducing-noise-and-increasing-sensitivity-in-biosensors]
- 22. Correcting Artifacts in Ratiometric Biosensor Imaging [https://pmc.ncbi.nlm.nih.gov/articles/PMC8418531/]
- 23. Reduction of non-specific adsorption in label-free assays ... [https://www.sciencedirect.com/science/article/pii/S0925400522002994]
- 24. A passive blood separation sensing platform for point-of- ... [https://www.nature.com/articles/s44328-025-00038-x]
- 25. Recent Advances in Antifouling Materials for Surface ... [https://pmc.ncbi.nlm.nih.gov/articles/PMC8229487/]
- 26. Recent Advances in Antifouling Materials for Surface ... [https://www.mdpi.com/2073-4360/13/12/1929]
- 27. Recent advances in surface modification and antifouling ... [https://www.sciencedirect.com/science/article/pii/S2451910323001126]
- 28. Anti-fouling coatings for blood-contacting devices [https://www.sciencedirect.com/science/article/pii/S2590183423000431]
- 29. Zwitterionic polymer-modified silicon microring resonators for ... [https://pmc.ncbi.nlm.nih.gov/articles/PMC3832353/]
- 30. Microgel reinforced zwitterionic hydrogel coating for blood- ... [https://www.nature.com/articles/s41467-022-33081-7]
- 31. Antifouling sensors based on peptides for biomarker ... [https://www.sciencedirect.com/science/article/abs/pii/S0165993620301321]
- 32. PEG Hydrophilic Coatings and Their Biomedical Uses - Hydromer [https://hydromer.com/peg-hydrophilic-coatings-biomedical-uses/]
- 33. PEGylation as a strategy for improving nanoparticle-based drug and gene delivery - PMC [https://pmc.ncbi.nlm.nih.gov/articles/PMC4798869/]
- 34. Emerging roles of hydrogels, organogels, and their hybrids ... [https://www.nature.com/articles/s44328-025-00055-w]
- 35. Tutorial: best practices and considerations for mass ... [https://www.nature.com/articles/s41596-021-00566-6]
- 36. Micro-electromechanical film bulk acoustic sensor for ... [https://www.sciencedirect.com/science/article/abs/pii/S0956566316313094]
- 37. Application of Shear Horizontal Surface Acoustic Wave (SH ... [https://pmc.ncbi.nlm.nih.gov/articles/PMC10296254/]
- 38. A Membrane-Bound Biosensor Visualizes Shear Stress- ... [https://pmc.ncbi.nlm.nih.gov/articles/PMC6153118/]
- 39. Investigation of guided surface acoustic wave sensors by ... [https://www.sciencedirect.com/science/article/abs/pii/S0924424713005268]
- 40. Hydrodynamic mechanisms of cell and particle trapping in ... [https://pmc.ncbi.nlm.nih.gov/articles/PMC3631262/]
- 41. Hydrodynamic Flow Confinement Technology in ... [https://www.mdpi.com/2072-666X/3/2/442]
- 42. Microfluidics FAQ and Product Information | AMF [https://amf.ch/faq/]
- 43. Polymer-Based Electrochemical Sensors for the Diagnosis of ... [https://pmc.ncbi.nlm.nih.gov/articles/PMC12106273/]
- 44. Nanoporous structures-based biosensors for ... [https://www.sciencedirect.com/science/article/abs/pii/S0010854524005915]
- 45. Enhancing the conductivity of plasma polymer functionalized ... [https://pubs.rsc.org/en/content/articlehtml/2024/ma/d3ma00641g]
- 46. Highly Sensitive Biosensors Based on Biomolecules and ... [https://pmc.ncbi.nlm.nih.gov/articles/PMC7013709/]
- 47. Conducting polymer-based electrochemical sensors [https://www.sciencedirect.com/science/article/pii/S2666831924001097]
- 48. Conducting Polymers in the Design of Biosensors and ... [https://pmc.ncbi.nlm.nih.gov/articles/PMC7795957/]
- 49. Next-generation nanomaterials-based biosensors: Real- ... [https://www.sciencedirect.com/science/article/pii/S2589234724004044]
- 50. Nanomaterials-based biosensor and their applications [https://www.sciencedirect.com/science/article/pii/S2405844023071372]
- 51. Nanomaterial-Powered Biosensors: A Cutting-Edge ... [https://www.mdpi.com/2072-666X/16/9/1042]
- 52. Overcoming Challenges in Plasma Sample Prep [https://www.labmanager.com/overcoming-challenges-in-plasma-sample-prep-22477]
- 53. Universal gold nanoparticle modified hybrid monolithic ... [https://pubmed.ncbi.nlm.nih.gov/33592740/]
- 54. A universal and facile approach for building multifunctional ... [https://www.sciencedirect.com/science/article/pii/S259023852100360X]
- 55. Recent developments in electrochemical sensors for the ... [https://www.sciencedirect.com/science/article/pii/S0013468625017499]
- 56. Troubleshooting [https://www.sprpages.nl/troubleshooting]
- 57. Text has enhanced contrast | ACT Rule | WAI [https://www.w3.org/WAI/standards-guidelines/act/rules/09o5cg/]
- 58. Common Centrifuge Issues and How to Fix Them [https://newlifescientific.com/blogs/new-life-scientific-blog/centrifuge-troubleshooting?srsltid=AfmBOopUYX9V7-pCUIaPhEXnnpZUcy6Fr9DxXqdabF4_lZZr2AAbGgez]
- 59. A (Mini) Guide to Centrifuge Troubleshooting [https://www.marathonls.com/a-mini-guide-to-centrifuge-troubleshooting/?srsltid=AfmBOorRP_1HP9wuPDEbB26FXq8eFce672tV6NCe-MlTe65EHdi4KjjR]
- 60. Troubleshooting Sample Filtration [https://www.chromatographyonline.com/view/troubleshooting-sample-filtration]
- 61. Dilutions: Explanations and Examples of Common Methods [https://www.quansysbio.com/support/dilutions-explanations-and-examples/]
- 62. How to do serial dilutions (including calculations) | INTEGRA [https://www.integra-biosciences.com/global/en/blog/article/how-do-serial-dilutions-including-calculations]
- 63. Advancements in Automation for Plasma Proteomics ... [https://pmc.ncbi.nlm.nih.gov/articles/PMC9879274/]
- 64. Plasma Surface Modification of Biomedical Implants and ... [https://www.mdpi.com/2673-1592/7/6/143]
- 65. Research and prospects of strategies for surface-modified ... [https://link.springer.com/article/10.1007/s44258-025-00056-4]
- 66. Enhancing Hemocompatibility of Titanium Alloys through ... [https://www.sciencedirect.com/science/article/abs/pii/S0254058425010739]
- 67. The Role of Plasma Treatment in Optimizing Surface ... [https://www.plasmaxtek.com/blog-news-12911/the-role-of-plasma-treatment-in-optimizing-surface-properties-in-2025-11940143.html]
- 68. Biochemistry strategies for label-free optical sensor ... [https://pmc.ncbi.nlm.nih.gov/articles/PMC9242939/]
- 69. Antifouling (Bio)materials for Electrochemical (Bio)sensing [https://www.mdpi.com/1422-0067/20/2/423]
- 70. Drift in Analog Sensors: Why Signal Accuracy Declines ... [https://gesrepair.com/drift-in-analog-sensors-why-signal-accuracy-declines-over-time]
- 71. Fact: sensors do drift [https://infrasensing.com/lab/sensor-drifting.asp]
- 72. Sensor Stability - an overview [https://www.sciencedirect.com/topics/engineering/sensor-stability]
- 73. The reasons for sensor drift and solutions - Just Measure it [https://zeroinstrument.com/the-reasons-for-sensor-drift-and-solutions/]
- 74. Sensor Drift vs. Bad Equipment: A Diagnostic Playbook for ... [https://www.siegepe.com/post/sensor-drift-vs-bad-equipment-a-diagnostic-playbook-for-ops-and-maintenance]
- 75. Long-term behavior and stability of calibration models for NO ... [https://amt.copernicus.org/articles/15/2979/2022/]
- 76. Top 10 Challenges in Artificial Intelligence for Materials ... [https://citrine.io/top-10-challenges-in-artificial-intelligence-for-materials-and-chemicals/]
- 77. How to Overcome Six Challenges in Machine Learning for ... [https://www.linkedin.com/advice/3/what-most-common-challenges-using-machine-cgd6e]
- 78. Utilizing machine learning to predict and interpret corrosion ... [https://www.sciencedirect.com/science/article/abs/pii/S0167577X25016106]
- 79. Avoid These 5 Common Mistakes in AI that Every Novice ... [https://www.analyticsvidhya.com/blog/2024/07/common-mistakes-in-ai/]
- 80. A data driven machine learning approach for predicting ... [https://www.nature.com/articles/s41598-025-86689-2]
- 81. Erythrocyte-Derived Nanosystems for Biosensing: A Green ... [https://www.sciencedirect.com/science/article/pii/S2949771X25000398]
- 82. High-throughput screening of zwitterion-based coatings ... [https://www.nature.com/articles/s41529-023-00362-5]
- 83. Data‐Driven Materials Research and Development for ... [https://pmc.ncbi.nlm.nih.gov/articles/PMC11558159/]
- 84. High throughput discovery of new fouling-resistant surfaces [https://pmc.ncbi.nlm.nih.gov/articles/PMC5308054/]
- 85. Antifouling Coating Research & Development [https://pml-applications.co.uk/services/antifouling-coating-research-development/]
- 86. A new simple method with high precision for determining ... [https://www.sciencedirect.com/science/article/abs/pii/S0045653506016298]
- 87. Non-specific adsorption of protein to microfluidic materials [https://www.sciencedirect.com/science/article/abs/pii/S0927776521005828]
- 88. (PDF) Non - specific of serum and cell lysate on... adsorption [https://www.academia.edu/35758030/Non_specific_adsorption_of_serum_and_cell_lysate_on_3D_biosensor_platforms_A_comparative_study_based_on_SPRi_Production_and_hosting_by_Elsevier]
- 89. Inhibition of non-specific protein adsorption on PMMA surface [https://www.sciencedirect.com/science/article/pii/S131961032300159X]
- 90. Biosensing, Characterization of Biosensors, and Improved ... [https://www.frontiersin.org/journals/nanotechnology/articles/10.3389/fnano.2021.798928/full]
- 91. Impact of Anti-Biofouling Surface Coatings on the ... [https://pmc.ncbi.nlm.nih.gov/articles/PMC5821433/]
- 92. Polymers for anti-fouling applications: a review - RSC Publishing [https://pubs.rsc.org/en/content/articlehtml/2025/va/d5va00034c]
- 93. Supramolecular dynamics-enhanced synergistic ... [https://www.nature.com/articles/s41467-025-62231-w]
- 94. Evaluating macrophyte extracts as eco-friendly antifouling ... [https://www.sciencedirect.com/science/article/abs/pii/S0269749125013259]
- 95. Comparing the Costs, Benefits, and Impacts of Biocidal and ... [https://www.mdpi.com/2079-6412/15/8/931]
- 96. Biosensors, Artificial Intelligence Biosensors, False Results ... [https://pmc.ncbi.nlm.nih.gov/articles/PMC12025796/]
- 97. Analytical errors in biosensors employing combined ... [https://www.sciencedirect.com/science/article/pii/S2211715620300060]
- 98. ISO/TR 19693:2018 - Surface chemical analysis [https://www.iso.org/standard/66037.html]
- 99. Two Biosensors for the Determination of VEGF-R2 in ... [https://pmc.ncbi.nlm.nih.gov/articles/PMC9822109/]
- 100. Detection of erythropoietin in blood through an SPRi-based... plasma [https://pubmed.ncbi.nlm.nih.gov/40393237/]
- 101. Surface Plasmon Resonance (SPR) [https://cmi.hms.harvard.edu/surface-plasmon-resonance]
- 102. Surface Plasmon Resonance: A Versatile Technique for ... [https://pmc.ncbi.nlm.nih.gov/articles/PMC4481982/]
- 103. Surface Plasmon Resonance Troubleshooting - SPR ... [https://bitesizebio.com/31665/spr-instrument-troubleshooting-surface-plasmon-resonance-assay-technology/]
- 104. Surface Plasmon Resonance (SPR) Troubleshooting Guide [https://knowledge.kactusbio.com/trouble-shooting-guide-for-surface-plasmon-resonance-spr]
- 105. Surface Plasmon Resonance Protocol & Troubleshooting [https://www.creativebiolabs.net/surface-plasmon-resonance.htm]
- 106. Troubleshooting and Optimization Tips for SPR Experiments [https://www.creative-proteomics.com/resource/troubleshooting-optimization-tips-for-spr-experiments.htm]
- 107. Electrochemical Biosensors - Sensor Principles and ... [https://pmc.ncbi.nlm.nih.gov/articles/PMC3663003/]
- 108. Electrochemical Biosensors - an overview [https://www.sciencedirect.com/topics/engineering/electrochemical-biosensors]
- 109. A guide to flawless electrochemical measurements [https://www.metrohm.com/en/products/electrochemistry/a-guide-to-flawless-electrochemical-measurements.html]
- 110. A Guide to Quantitative Biomarker Assay Development using ... [https://pmc.ncbi.nlm.nih.gov/articles/PMC5657521/]
- 111. Development, optimization and validation of an ... [https://www.sciencedirect.com/science/article/pii/S0956713523002591]
- 112. antibody immobilization on natural silica-based... Optimized [https://pubs.rsc.org/en/content/articlehtml/2022/ra/d2ra03143d]
- 113. Strategies to Monitor Contaminants and... | Preprints.org Biosensing [https://www.preprints.org/manuscript/202505.1445/v1]