ELISA for Protein Detection: A Comprehensive Guide to Advantages, Limitations, and Best Practices
This article provides a thorough analysis of the Enzyme-Linked Immunosorbent Assay (ELISA), a cornerstone technique for protein detection in biomedical research and clinical diagnostics.
ELISA for Protein Detection: A Comprehensive Guide to Advantages, Limitations, and Best Practices
Abstract
This article provides a thorough analysis of the Enzyme-Linked Immunosorbent Assay (ELISA), a cornerstone technique for protein detection in biomedical research and clinical diagnostics. Tailored for researchers, scientists, and drug development professionals, it explores the foundational principles of ELISA, its various methodological formats, and its extensive applications in disease research and biopharmaceutical quality control. The content delves into practical strategies for troubleshooting and optimizing assay performance, including enhancing sensitivity and specificity. Furthermore, it offers a critical comparative analysis against other protein detection technologies like Western Blot, Mass Spectrometry, and emerging platforms such as Olink and SIMOA, empowering readers to make informed methodological choices for their specific projects.
Understanding ELISA: Core Principles, History, and Key Components
What is ELISA? Defining the Enzyme-Linked Immunosorbent Assay
Enzyme-Linked Immunosorbent Assay (ELISA) is a foundational tool in biomedical research and clinical diagnostics. This in-depth technical guide explores the principles, methodologies, and practical considerations of ELISA, framing its utility within the context of protein detection research.
Core Principles of ELISA
The Enzyme-Linked Immunosorbent Assay (ELISA) is a qualitative or quantitative immunoassay that uses antibodies to specifically bind and measure a target molecule, or analyte, within a sample [1]. The core principle relies on the specific interaction between an antibody and its antigen. An enzyme is linked to one of the components in the assay, and this enzyme, when provided with its substrate, produces a detectable signal such as a color change, fluorescence, or luminescence [1]. The intensity of this signal is proportional to the amount of analyte present in the sample, enabling quantification [1].
ELISA is highly versatile and can be used to detect a wide range of analytes, including peptides, proteins, antibodies, and small molecules [1]. It is considered a gold standard for quantitative detection in biological samples due to the high specificity of antibody-antigen interactions and the relative simplicity of the assay [1].
Major Types of ELISA and Their Methodologies
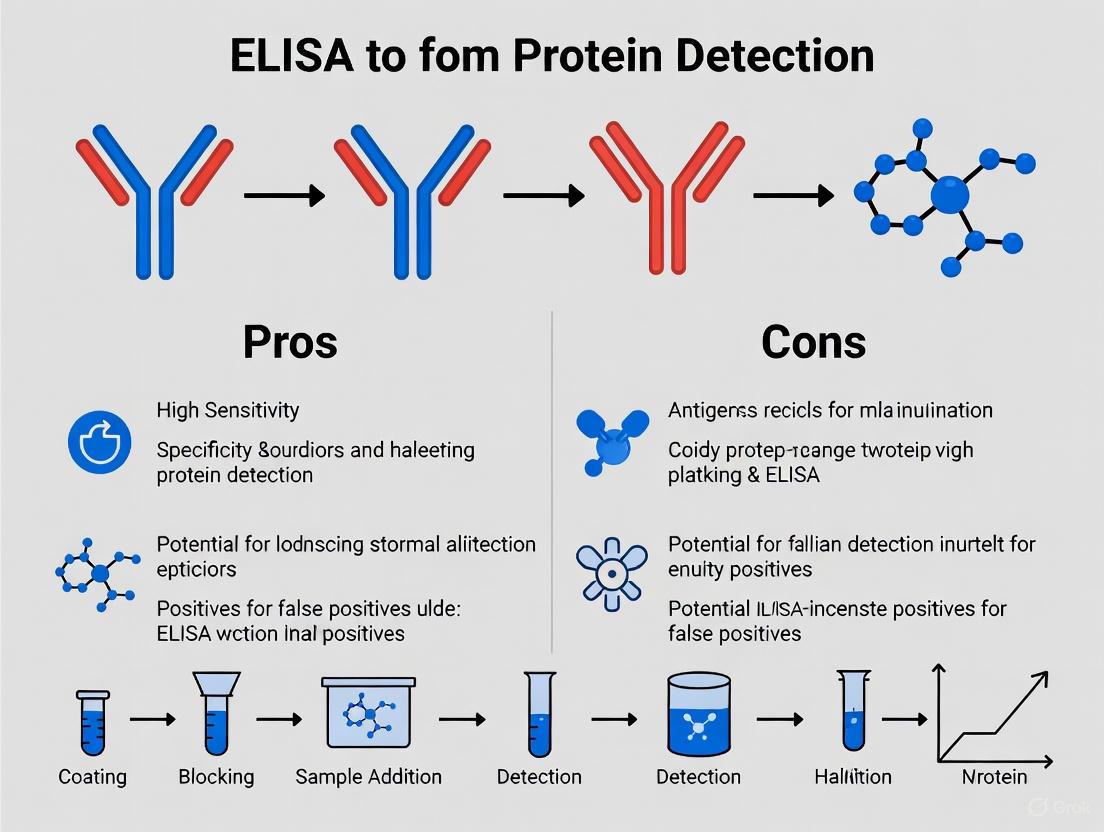
ELISA protocols can be categorized into several main types, each with a unique experimental workflow. The following diagram illustrates the key steps and logical progression for four common ELISA formats.
Direct ELISA
The direct ELISA method begins by immobilizing the antigen directly onto the microplate surface [1]. The plate is then blocked with a reagent like bovine serum albumin (BSA) to prevent any non-specific binding of the detection antibody [1]. The key differentiator of this method is the addition of an enzyme-conjugated primary antibody that binds directly to the immobilized antigen [1]. After washing away unbound antibody, a substrate is added, and the resulting signal is measured [1].
- Advantages: The protocol is short and simple due to fewer steps. It also avoids potential cross-reactivity that can occur with secondary antibodies [2].
- Disadvantages: Every primary antibody required for the assay must be individually conjugated to an enzyme, which is costly and not feasible for all antibodies. Signal amplification is also limited, which can affect sensitivity [1] [2].
Indirect ELISA
The indirect ELISA shares initial steps with the direct method: antigen coating and plate blocking [1]. The critical difference is that the primary antibody added in the next step is not enzyme-conjugated [1]. Instead, an enzyme-conjugated secondary antibody, which is raised against the species of the primary antibody, is used for detection [1].
- Advantages: This method offers significant flexibility and cost-effectiveness, as a single enzyme-conjugated secondary antibody can be used with many different primary antibodies from the same species [2]. The use of multiple secondary antibodies binding to a single primary antibody also provides signal amplification, enhancing sensitivity [1].
- Disadvantages: The additional incubation and wash step lengthens the procedure. There is also a higher chance of cross-reactivity due to the use of a secondary antibody [2].
Sandwich ELISA
In a sandwich ELISA, the antigen is captured between two antibodies. The plate is first coated with a capture antibody [3]. After blocking, the sample containing the antigen is added [3]. A second, enzyme-conjugated detection antibody is then introduced, which binds to a different epitope on the captured antigen, forming the "sandwich" [1] [3].
- Advantages: This format offers high specificity and sensitivity because two antibodies are required for detection [2]. It is particularly suited for complex sample mixtures, as the antigen does not need to be purified prior to the assay [2].
- Disadvantages: It requires a carefully matched pair of antibodies that recognize different epitopes on the same antigen, which can be expensive and time-consuming to develop [1].
Competitive/Inhibition ELISA
Competitive ELISA is based on the principle of competition between the analyte in the sample and a reference analyte for a limited number of antibody-binding sites [1]. In one common format, the plate is coated with a known antigen, and the sample is pre-incubated with a fixed amount of enzyme-conjugated antibody before being added to the well [1]. The more target analyte present in the sample, the less conjugated antibody can bind to the plate, resulting in a weaker signal [1].
- Advantages: This method is highly reproducible and well-suited for detecting small molecules that cannot accommodate two antibodies simultaneously, as in a sandwich ELISA [1] [2].
- Disadvantages: The overall sensitivity and specificity can be lower compared to sandwich ELISA [2].
Detection Methods and Data Analysis
Detection Modalities
The detection method in ELISA depends on the enzyme conjugated to the antibody and the substrate used. The most common enzymes are Horseradish Peroxidase (HRP) and Alkaline Phosphatase (AP) [1].
- Colorimetric Detection: This is the most common method. Substrates like TMB (3,3',5,5'-Tetramethylbenzidine) for HRP are added and converted by the enzyme into a colored product. The optical density (OD) of this product is measured with a plate reader, and the intensity of the color is proportional to the amount of analyte [1].
- Chemiluminescent Detection: In this method, the enzyme converts a substrate into a product that emits light. The signal is measured as Relative Light Units (RLUs) by a luminometer. Chemiluminescence often offers a wider dynamic range and higher sensitivity than colorimetric detection [1].
- Fluorescent Detection: Fluorescent substrates are used which, upon enzymatic conversion, emit light at a specific wavelength when excited by light of another wavelength. Fluorescence can provide a strong signal and a broad dynamic range, though the substrates may have a shorter half-life [1].
Quantitative Data Analysis
For quantitative ELISA, the concentration of antigen in a sample is determined by comparing its signal to a standard curve [4]. The standard curve is prepared by performing serial dilutions of a purified antigen of known concentration and running them alongside the test samples [4].
- Standard Curve Generation: The mean absorbance (or other signal type) for each standard is plotted against its concentration. Software is typically used to fit a curve to these data points. Common curve-fitting models include:
- Linear and Log/Log Plots: Simple but may compress data at the lower end of the curve.
- 4- or 5-Parameter Logistic (4PL/5PL): These are more sophisticated models that account for the sigmoidal shape of typical ELISA standard curves and are often the best fit for immunoassay data [4].
- Calculating Sample Concentration: The average absorbance of the sample is located on the y-axis of the standard curve, and a horizontal line is drawn to the curve. A vertical line is then dropped to the x-axis to determine the corresponding concentration. Samples with values outside the standard curve's range must be diluted and re-assayed [4].
- Assay Validation: To ensure accuracy and precision, samples should be run in duplicate or triplicate. The Coefficient of Variation (CV) should be calculated, and a high CV can indicate issues with pipetting, contamination, or temperature fluctuations [4]. Spike-and-recovery experiments can also be performed to determine if the sample matrix is interfering with analyte detection [4].
The Scientist's Toolkit: Essential Reagents and Equipment
A successful ELISA requires a suite of specific reagents and instruments. The following table details the key components and their functions in the assay.
| Item | Function in the ELISA Workflow |
|---|---|
| Microplate | Serves as the solid phase for immobilizing antigens or antibodies. Typically a 96-well or 384-well plate made of polystyrene [1] [3]. |
| Coating Antibody/Antigen | The initial binding molecule attached to the plate to capture the target analyte (e.g., capture antibody in sandwich ELISA, or pure antigen for competitive ELISA) [1]. |
| Blocking Buffer | Contains proteins (e.g., BSA) or other agents that coat all remaining protein-binding sites on the plate after coating, preventing non-specific binding of other reagents [1] [5]. |
| Detection Antibody | The antibody that specifically binds to the target analyte and is conjugated to an enzyme (e.g., HRP) for signal generation. It can be a primary or secondary antibody [1] [3]. |
| Enzyme Substrate | The chemical compound converted by the conjugated enzyme (HRP/AP) into a measurable colored, fluorescent, or luminescent product [1]. |
| Plate Washer | An automated instrument that performs washing steps to remove unbound reagents and reduce background signal [3]. |
| Plate Reader | A spectrophotometer that measures the absorbance, fluorescence, or luminescence in each well of the plate, providing the raw data for analysis [1] [3]. |
| Analysis Software | Specialized software used to plot standard curves, interpolate sample concentrations, and perform statistical validation of the results [4]. |
Advantages and Limitations in Protein Detection Research
ELISA is a powerful technique, but its pros and cons must be carefully weighed against other methods and the specific research goals.
Advantages of ELISA
- High Throughput and Efficiency: The 96-well or 384-well plate format allows for the simultaneous processing of many samples, making it suitable for screening applications [6]. The procedure, once established, is straightforward and can be automated [1] [3].
- High Specificity and Sensitivity: The use of antibodies confers high specificity for the target analyte. Furthermore, the enzymatic signal amplification allows for the detection of very low analyte levels, often in the picogram per milliliter (pg/mL) range [6].
- Quantitative and Reproducible: When used with a standard curve, ELISA provides robust quantitative data. The assay is highly reproducible across different operators and laboratories, especially when using commercial kits [1] [5].
- Cost-Effectiveness: ELISA is relatively inexpensive compared to other protein quantification techniques like mass spectrometry. The required equipment (plate readers) is commonly available in most research and clinical laboratories [1] [6].
Limitations of ELISA
- Limited Multiplexing: A traditional ELISA is typically designed to detect a single analyte per well. Simultaneous analysis of multiple proteins in a single sample requires running separate assays, which consumes more sample and reagents [6].
- Antigen Dependency and Cross-Reactivity: The quality of the assay is entirely dependent on the specificity of the antibody pair. Antibodies may cross-react with similar proteins or epitopes, leading to potential false positives or false negatives [1] [6].
- Narrow Dynamic Range: The useful range of detection for a standard ELISA is limited. Samples with analyte concentrations outside this range must be diluted and re-run, adding extra steps [6].
- Sample Matrix Interference: Components in complex biological samples (like serum or cell lysates) can sometimes interfere with antibody binding or the enzymatic reaction, leading to inaccurate quantification (a phenomenon known as matrix effect) [6] [4].
Comparison with Western Blot
To contextualize the pros and cons of ELISA, it is useful to compare it with another common protein detection method, Western blot. The table below summarizes their key differences.
| Feature | ELISA | Western Blot |
|---|---|---|
| Detection Object | Liquid samples (e.g., serum, cell culture supernatant) [6] | Cell or tissue extracts [6] |
| Throughput | High (amenable to automation and 96/384-well formats) [6] | Low (typically manual, low-throughput) [6] |
| Information Obtained | Quantitative protein concentration [6] | Protein size and semi-quantitative abundance [6] |
| Multiplexing Potential | Single-analyte per well (with exceptions) [6] | Can detect multiple proteins on one membrane [6] |
| Assay Time | A few hours [6] | One day or longer [6] |
| Cost | Relatively low [6] | Higher (instrumentation and reagents) [6] |
ELISA remains a cornerstone technology for protein detection, offering an unparalleled combination of specificity, sensitivity, and throughput for quantitative analysis. Its limitations, particularly in multiplexing and potential for antibody cross-reactivity, are important considerations for research design. The choice between ELISA and an alternative like Western blot ultimately depends on the research question: ELISA is superior for high-throughput, quantitative measurement of specific analytes in solution, while Western blot provides information on protein size and is better for analyzing complex mixtures of proteins from cell lysates. A comprehensive understanding of ELISA's principles and methodologies empowers researchers to effectively leverage this powerful tool and critically interpret the data it generates.
The Enzyme-Linked Immunosorbent Assay (ELISA) represents a cornerstone technology in biomedical research and clinical diagnostics. As a plate-based assay technique designed for detecting and quantifying soluble substances such as peptides, proteins, antibodies, and hormones, ELISA operates on the principle of antigen-antibody interaction, with detection achieved via an enzyme-linked conjugate that produces a measurable signal [7]. This in-depth technical guide traces the evolution of ELISA from its inception in the 1970s to its current advanced iterations, framing this progression within a broader analysis of its advantages and limitations for protein detection research. For researchers, scientists, and drug development professionals, understanding this evolution is critical for selecting appropriate assay formats and anticipating future technological developments. ELISA's journey from a manual, radioactive procedure to today's automated, high-throughput, and digital platforms exemplifies how core biological principles can be continuously refined to achieve greater sensitivity, specificity, and efficiency in protein detection.
The Founding Era (1970s)
The development of ELISA was catalyzed by the need for a safer alternative to radioimmunoassay (RIA), which utilized radioactive isotopes and posed significant health risks [8] [9]. The foundational breakthrough came in 1971 when Eva Engvall and Peter Perlmann independently developed a method that replaced radioactive labels with enzymes, which produce a detectable color change upon reacting with a substrate [10] [8] [11]. This innovation established the core principle of ELISA: the specific binding of an antibody to its antigen, coupled with an enzymatic signal generation system that allows for quantification.
The latter half of the 1970s witnessed rapid diversification of the assay format, enhancing its versatility for different analytical needs. The competitive ELISA was introduced in 1976 and applied to detect human chorionic gonadotropin (hCG), a hormone critical in pregnancy testing [8] [11]. This was followed in 1977 by the development of the sandwich ELISA, a format that significantly improved specificity by using two antibodies to capture and detect the target antigen [8] [11]. In 1978, the indirect ELISA was created, which incorporated a secondary antibody for detection, thereby amplifying the signal and increasing the assay's overall sensitivity [8] [11]. These foundational formats, established within a single decade, form the basis of nearly all modern immunoassays.
Table 1: Key Methodological Developments in the 1970s
| Year | Development | Key Feature | Application Demonstrated |
|---|---|---|---|
| 1971 | First ELISA (Direct) [9] [11] | Replaced radioactive labels with enzymes | Quantitative assay of immunoglobulin G [8] |
| 1976 | Competitive ELISA [8] [11] | Labeled and sample antigens compete for limited antibody sites | Detection of human choriogonadotropin (hCG) [8] |
| 1977 | Sandwich ELISA [8] [11] | Antigen is bound between capture and detection antibodies | Proof-of-concept on various substrates [8] |
| 1978 | Indirect ELISA [8] [11] | Use of enzyme-labeled secondary antibody for signal amplification | Detection of human serum albumin [8] |
Expansion and Automation (1980s-1990s)
The 1980s marked a critical period of validation and adoption for ELISA in clinical diagnostics. A landmark event occurred in 1985 when an ELISA test was approved for use in screening for the Human Immunodeficiency Virus (HIV), providing a reliable and accessible method for controlling the spread of HIV/AIDS [8] [11]. This application underscored the assay's potential for large-scale public health initiatives and cemented its role in clinical laboratories for diagnosing infectious diseases, autoimmune disorders, and allergies [8].
The 1990s were defined by technological advancements aimed at increasing throughput and efficiency. The introduction of automated ELISA systems, featuring robot-assisted liquid handling and microplate readers, minimized human error and enabled the processing of large numbers of samples [8]. This era also saw the emergence of multiplex ELISA techniques, which allowed for the simultaneous detection of multiple analytes within a single sample [8]. Furthermore, ELISA became integral to high-throughput screening processes in drug discovery, facilitating the evaluation of thousands of compounds for potential interactions with specific target proteins [8].
Technological Diversification (2000s-2010s)
The turn of the millennium ushered in significant improvements in detection sensitivity. Traditional colorimetric detection began to be supplemented or replaced by chemiluminescence and fluorescence-based methods, which offered a broader dynamic range and higher sensitivity [8] [12]. The integration of microfluidics technology began to transform the traditional 96-well format into smaller, portable devices, paving the way for point-of-care testing applications [8].
A revolutionary advancement came in the 2010s with the advent of digital ELISA. This technology enabled single-molecule detection, improving the assay's sensitivity for low-abundance biomarkers by several orders of magnitude [8] [12]. The decade also saw further enhancements in multiplexing technologies, allowing for comprehensive profiling of multiple biomarkers in both research and clinical diagnostics [8]. Additionally, ELISA began to be combined with other powerful analytical techniques like mass spectrometry and next-generation sequencing, facilitating more detailed and high-throughput analyses [8].
Table 2: Evolution of ELISA Performance and Capabilities
| Decade | Primary Innovation | Impact on Sensitivity & Throughput | New Application Areas |
|---|---|---|---|
| 1970s | Basic assay formats | Foundation for specific detection | Hormone measurement, basic serology |
| 1980s | Clinical adoption | Standardized protocols for diagnostics | Infectious disease screening (e.g., HIV) [8] |
| 1990s | Automation & Multiplexing | Increased throughput and efficiency | High-throughput drug discovery [8] |
| 2000s | Advanced detection (CLIA, ELFA) | Higher sensitivity, broader dynamic range | Biomarker research |
| 2010s | Digital ELISA, integration | Single-molecule detection [12] | Ultrasensitive biomarker detection, companion diagnostics |
Current State and Future Directions (2020s and Beyond)
In the 2020s, ELISA technology continues to evolve. It played a crucial role in the COVID-19 pandemic, being extensively used to detect antibodies against SARS-CoV-2, aiding in epidemiological studies and vaccine evaluation [8]. Point-of-care ELISA technologies have advanced, facilitating rapid and on-site detection in diverse healthcare settings [8]. Enhanced automation and the integration of artificial intelligence are now improving data analysis and interpretation, increasing the accuracy and throughput of ELISA assays [8]. The technology is also finding broader applications in environmental monitoring, food safety, and veterinary diagnostics [8] [13].
The market for these next-generation ELISA platforms, often referred to as ELISA 2.0, is experiencing significant growth, with an expected compound annual growth rate (CAGR) of 9.6% from 2025 to 2034 [12]. Key drivers include the transition to more quantitative and sensitive detection methods like electrochemical, fluorescent, and chemiluminescent ELISA, as well as the adoption of advanced formats such as digital ELISA, automation-integrated ELISA, and microfluidic lab-on-chip systems [12].
Diagram 1: ELISA Technology Evolution Timeline
Core Principles and Common ELISA Protocols
Fundamental Principles
The fundamental principle of ELISA is the specific biochemical interaction between an antigen and its homologous antibody [10] [7]. The assay is characterized by several key components: a solid phase (typically a 96-well microplate) to which the analyte is immobilized; a detection antibody specific to the target molecule; an enzyme conjugate (e.g., Horseradish Peroxidase-HRP or Alkaline Phosphatase-AP) linked to the antibody; and a substrate that reacts with the enzyme to produce a measurable colorimetric, fluorescent, or chemiluminescent signal [10] [7]. The intensity of this signal is proportional to the amount of analyte present in the sample, allowing for quantification [10].
Detailed Methodology: Sandwich ELISA Protocol
The sandwich ELISA is widely regarded as one of the most sensitive and specific formats [7]. It is particularly suitable for complex samples, as it requires no prior purification of the antigen [14]. The following is a detailed protocol:
- Coating: Dilute the capture antibody in a coating buffer (e.g., carbonate-bicarbonate buffer, pH 9.4) to a concentration typically between 2–10 μg/mL. Add 100 μL of this solution to each well of a polystyrene microplate. Seal the plate and incubate for several hours to overnight at 4–37°C [7]. The hydrophobic interactions between the plastic and non-polar protein residues facilitate passive adsorption.
- Washing and Blocking: Remove the coating solution and wash the plate 2-3 times with a wash buffer, such as phosphate-buffered saline (PBS) containing a mild detergent (e.g., 0.05% Tween 20). To prevent non-specific binding in subsequent steps, add 200-300 μL of a blocking buffer to each well. Common blocking agents include bovine serum albumin (BSA), gelatin, casein, or skimmed milk [7] [9]. Incubate for 1-2 hours at room temperature.
- Sample and Standard Incubation: Wash the plate as before. Add 100 μL of the sample or the standard (antigen of known concentration) to appropriate wells. Incubate for 1-2 hours at room temperature or 37°C to allow the antigen to bind to the capture antibody.
- Detection Antibody Incubation: Wash the plate thoroughly to remove unbound antigen. Add 100 μL of the enzyme-conjugated detection antibody (specific to a different epitope on the antigen) to each well. Incubate for 1-2 hours at room temperature.
- Substrate Addition and Signal Detection: After a final, thorough wash, add 100 μL of the appropriate substrate to each well. For HRP, common substrates are TMB (3,3',5,5'-Tetramethylbenzidine) or ABTS, which produce a color change. Incubate the plate in the dark for 15-30 minutes.
- Stop the Reaction and Read: Stop the enzyme-substrate reaction by adding 50-100 μL of a stop solution (e.g., 1M H₂SO₄ for TMB, which changes the color from blue to yellow) [10]. Measure the absorbance of the solution in each well immediately using a microplate reader at the appropriate wavelength (e.g., 450 nm for acid-stopped TMB) [10]. The concentration of the antigen in unknown samples is determined by interpolation from the standard curve.
Diagram 2: Sandwich ELISA Workflow
The Scientist's Toolkit: Essential Research Reagent Solutions
Table 3: Key Research Reagent Solutions for ELISA
| Reagent/Component | Function | Key Considerations & Examples |
|---|---|---|
| Solid Phase Microplates | Provides the surface for immobilization of capture protein [10] [7]. | 96- or 384-well polystyrene plates; clear for colorimetry, black/white for fluorescence/chemiluminescence [7]. |
| Capture & Detection Antibodies | Provide specificity by binding to the target antigen. | For sandwich ELISA, a matched antibody pair recognizing different epitopes is critical [7]. Monoclonal antibodies offer high specificity; polyclonals can increase signal [8]. |
| Enzyme Conjugates | Serves as the signal generator. | Horseradish Peroxidase (HRP) and Alkaline Phosphatase (AP) are most common. Choice depends on substrate and required sensitivity [10] [7]. |
| Chromogenic/Detection Substrates | Reacts with the enzyme to produce a measurable signal. | TMB (colorimetric, turns blue/yellow), PNPP (colorimetric, yellow); alternatives include chemiluminescent and fluorescent substrates for higher sensitivity [10] [7] [12]. |
| Buffers (Coating, Wash, Blocking) | Facilitate binding, remove unbound material, and prevent non-specific interactions. | Coating buffer (e.g., carbonate, pH 9.4); Wash buffer (PBS with 0.05% Tween-20); Blocking buffer (1-5% BSA, casein, or skim milk in PBS) [7] [9]. |
Advantages and Disadvantages of ELISA for Protein Detection
Advantages
ELISA remains a dominant technique in research and diagnostics due to a compelling set of advantages:
- High Sensitivity and Specificity: The combination of specific antigen-antibody interactions and enzymatic signal amplification allows ELISA to detect low concentrations of target molecules (picogram to nanogram per milliliter range) with high accuracy [9] [15]. Digital ELISA pushes this further into the femtogram range [12].
- High Throughput and Efficiency: The microplate format enables the simultaneous analysis of dozens of samples without complicated pre-treatment, making it ideal for screening large sample sets [9]. This is further enhanced by automation [8].
- Quantitative Capability: ELISA provides robust quantitative data on analyte concentration, which is essential for biomarker studies, pharmacokinetics, and potency assays [15].
- Relatively Simple and Cost-Effective: The protocol is straightforward, and reagents are relatively low-cost compared to more complex technologies like mass spectrometry. It does not require radioactive materials or large amounts of organic solvents, making it generally safe and eco-friendly [9] [15].
Disadvantages
Despite its strengths, researchers must be aware of several inherent limitations:
- Antibody Dependency and Cost: The requirement for high-quality, specific antibodies is a potential bottleneck. Producing and labeling antibodies is labor-intensive, sophisticated, and expensive [9]. Antibodies are also unstable proteins that require refrigerated transport and storage.
- Limited Dynamic Range: The standard colorimetric ELISA has a relatively narrow quantification range (typically 1.5-2 logs). Samples with analyte concentrations outside this range may require dilution or concentration, risking procedural errors [15].
- Potential for False Results: Non-specific binding due to insufficient blocking or cross-reactivity of antibodies can lead to false positives [9] [15]. Conversely, the "hook effect" in sandwich ELISA, where extremely high antigen concentrations saturate both capture and detection antibodies, can lead to falsely low readings [7].
- Time-Consuming Protocol: While faster than some techniques, a traditional ELISA protocol, including coating and blocking, can take 1-2 days to complete, though many commercial kits have reduced this time significantly [13].
Table 4: Comprehensive Comparison of Common ELISA Formats for Protein Detection
| Format | Principle | Advantages | Disadvantages | Best For |
|---|---|---|---|---|
| Direct ELISA | Antigen is immobilized; detected directly with enzyme-linked primary antibody [14]. | Quick (fewer steps); avoids secondary antibody cross-reactivity [7] [14]. | Potential immunoreactivity loss from labeling; limited signal amplification; fewer commercial options [7] [14]. | Qualitative analysis of macromolecules [9]. |
| Indirect ELISA | Antigen is immobilized; detected with unlabeled primary and enzyme-linked secondary antibody [14]. | High sensitivity (signal amplification); versatile (many labeled secondary antibodies available) [7] [14]. | Potential for cross-reactivity from secondary antibody; extra incubation step required [7] [14]. | Detecting and characterizing antibodies (e.g., serology) [10] [9]. |
| Sandwich ELISA | Antigen is captured between a solid-phase antibody and an enzyme-linked detection antibody [14]. | High sensitivity and specificity; suitable for complex samples (no prior purification needed) [7] [14]. | Requires two antibodies against different epitopes; more optimization needed; not for small antigens (<~50 AA) [7] [14]. | Quantifying proteins and large peptides in complex mixtures (e.g., serum cytokines) [7]. |
| Competitive ELISA | Sample antigen and labeled antigen compete for limited antibody binding sites [14]. | Robust; can be applied to impure samples; highly reproducible data; suitable for small molecules [14]. | Overall lower sensitivity and specificity; signal decreases with increasing analyte [14]. | Measuring small molecules (haptens), hormones, or when only one antibody is available [7] [9]. |
The evolution of ELISA from its inception in the 1970s to today's sophisticated digital and automated platforms demonstrates its enduring value in life sciences. While the core principle of specific antigen-antibody interaction remains unchanged, continuous innovation has systematically addressed many of its initial limitations, enhancing its sensitivity, specificity, speed, and throughput. For the modern researcher, ELISA presents a double-edged sword: it is a powerful, versatile, and generally accessible tool for protein detection and quantification, yet it is constrained by its reliance on sometimes finicky antibody reagents, a limited dynamic range, and the potential for artifactual results. The ongoing development of "ELISA 2.0" technologies promises to further push the boundaries of sensitivity and integration, ensuring that this foundational technique will remain a vital component in the scientist's toolkit for protein research, clinical diagnostics, and therapeutic development for the foreseeable future.
The Enzyme-Linked Immunosorbent Assay (ELISA) operates on two fundamental biochemical principles: the specific molecular recognition of an antigen-antibody interaction and the catalytic power of enzymatic detection. This combination forms the basis for one of the most widely used immunoassay techniques in clinical and research laboratories worldwide. First developed in 1971 as a safer alternative to radioimmunoassays (RIA) by conjugating antigens and antibodies with enzymes instead of radioactive iodine 125, ELISA has since become a routine diagnostic and research method [16]. The assay's versatility allows for detecting and quantifying diverse analytes—including peptides, proteins, antibodies, and hormones—within complex biological mixtures with remarkable sensitivity and specificity [7] [15]. The core strength of ELISA lies in leveraging the immune system's exquisite specificity through antibody-antigen binding, then translating that molecular recognition into a measurable signal via enzyme amplification, enabling precise quantification of target substances even at minimal concentrations.
Detailed Mechanism of Antigen-Antibody Interaction
The antigen-antibody interaction in ELISA represents a specific biochemical binding event where an antibody, a large Y-shaped protein produced by the immune system, recognizes and binds to a precise molecular region (epitope) on a target antigen. This interaction is driven by non-covalent forces—including hydrogen bonding, electrostatic interactions, Van der Waals forces, and hydrophobic effects—that collectively enable high specificity and strong binding affinity between the complementary surfaces of the antibody's paratope and the antigen's epitope [7] [16]. In ELISA, this specific binding event is harnessed by immobilizing one component (either antigen or antibody) to a solid-phase surface, typically a polystyrene microplate well, facilitating separation of bound and unbound materials during washing steps [16]. The solid phase acts as a stable matrix for presenting the capture molecule and enables efficient removal of non-specifically bound materials through washing, thereby reducing background noise and enhancing assay specificity.
The following diagram illustrates the fundamental antigen-antibody binding event that underpins all ELISA formats:
Fundamental Antigen-Antibody Binding
This molecular recognition system provides the foundation for all ELISA formats, with variations arising from how antigens and antibodies are immobilized and detected.
Enzymatic Detection and Signal Generation
The detection component of ELISA employs enzyme conjugates that catalyze the conversion of substrates into measurable products, effectively amplifying the primary antigen-antibody binding event into a detectable signal. Following the specific binding of detection antibodies to the target antigen, enzyme conjugates (typically attached to antibodies) catalyze the conversion of substrates into colored, fluorescent, or luminescent products [7] [16]. The most commonly used enzyme labels include horseradish peroxidase (HRP) and alkaline phosphatase (AP), selected for their high turnover rates and stability [7] [16]. HRP catalyzes the oxidation of substrates using hydrogen peroxide as an electron acceptor, resulting in a color change, while AP removes phosphate groups from substrates, generating detectable products [16].
The signal generation process follows a straightforward proportionality: the intensity of the generated signal directly correlates with the amount of enzyme present, which in turn corresponds to the quantity of detection antibody bound to the target antigen, ultimately reflecting the concentration of the antigen in the sample [16]. This relationship enables precise quantification when compared against standards of known concentration. Detection methods have expanded from basic colorimetric measurements to include fluorogenic, quantitative PCR, and electrochemiluminescent reporters, though enzymatic detection remains the most widespread approach [16]. The enhanced sensitivity of modern ELISA systems can detect target molecules at nanomolar concentrations, making it suitable for measuring even low-abundance proteins in complex biological samples [15].
Principal ELISA Methodologies and Experimental Protocols
While all ELISA formats share the core principles of antigen-antibody interaction and enzymatic detection, they implement these principles through distinct methodological approaches. The four major ELISA types each employ different strategies for immobilizing capture molecules and detecting target analytes, making them suitable for various applications and sample types.
Direct ELISA
The direct ELISA method represents the simplest format, employing a single enzyme-conjugated antibody for both detection and signal generation. The experimental protocol involves: (1) coating the microplate wells with a known antigen by passive adsorption using an alkaline buffer (pH 9.4) and incubating for 1 hour at 37°C or overnight at 4°C; (2) blocking any remaining protein-binding sites with agents like bovine serum albumin (BSA) to prevent nonspecific binding; (3) adding the enzyme-conjugated primary antibody specific to the target antigen; (4) washing with phosphate-buffered saline (PBS) containing a non-ionic detergent to remove unbound antibodies; and (5) adding enzyme substrate to generate a measurable color change proportional to the antigen amount [16]. The major advantage of this format includes procedural simplicity with fewer steps and no risk of cross-reactivity from secondary antibodies [14] [16]. Limitations comprise relatively lower sensitivity compared to other formats and the requirement for specifically labeled primary antibodies, increasing cost and reducing flexibility [16].
Indirect ELISA
Indirect ELISA enhances detection sensitivity through a two-antibody system, utilizing an unlabeled primary antibody followed by an enzyme-conjugated secondary antibody. The protocol shares the initial coating and blocking steps with direct ELISA but diverges in detection: after blocking, the sample containing primary antibody is added and incubated, followed by washing and addition of an enzyme-conjugated secondary antibody that recognizes the primary antibody [16]. After further washing, substrate is added for signal generation. This method provides significant signal amplification since multiple secondary antibodies can bind to each primary antibody, increasing sensitivity [7]. Additional advantages include greater flexibility and cost-effectiveness, as the same labeled secondary antibody can be used with various primary antibodies from the same species [7] [16]. The main disadvantage is potential cross-reactivity from the secondary antibody, which may increase nonspecific signals [7] [16].
Sandwich ELISA
Sandwich ELISA, frequently considered the gold standard for protein quantification, employs two antibodies that bind to different epitopes on the target antigen, effectively "sandwiching" it between capture and detection antibodies [16] [17]. The protocol requires careful selection of matched antibody pairs that recognize distinct epitopes: (1) a capture antibody is coated onto the microplate wells and incubated overnight at 4°C; (2) after washing with PBS, blocking is performed with BSA or other proteins for 1-2 hours at room temperature; (3) the sample containing target antigen is added and incubated for 90 minutes at 37°C; (4) after washing, a primary detection antibody is added and incubated for 1-2 hours; (5) an enzyme-conjugated secondary antibody is added (unless the detection antibody is pre-conjugated); and (6) substrate is added after final washing to generate a signal [16]. This format offers exceptional sensitivity and specificity, and does not require prior antigen purification [14] [17]. Disadvantages include the need for carefully validated antibody pairs and more extensive optimization time [7] [17].
Competitive ELISA
Competitive ELISA operates on the principle of inhibition, where antigens in the sample compete with labeled reference antigens for a limited number of antibody-binding sites. The protocol involves: (1) coating the plate with a known antigen; (2) simultaneously adding the patient sample and a defined amount of enzyme-conjugated antibody, allowing competition for binding sites; (3) washing to remove unbound components; and (4) adding substrate to generate a signal inversely proportional to the antigen concentration in the sample [7] [16]. This format is particularly useful for detecting small antigens with single epitopes and can tolerate relatively impure samples [7] [14]. The main disadvantages include potentially lower overall sensitivity and specificity compared to sandwich ELISA [14].
Table 1: Comparison of Principal ELISA Methodologies
| Format | Sensitivity | Specificity | Steps | Antibody Requirements | Best Applications |
|---|---|---|---|---|---|
| Direct ELISA | Low | High | Fewest | Labeled primary antibody | Quick antigen screening |
| Indirect ELISA | High | Medium | Moderate | Primary + labeled secondary | Flexible antibody detection |
| Sandwich ELISA | Highest | Highest | Most | Matched antibody pair | Quantifying complex samples |
| Competitive ELISA | Medium | Medium | Moderate | Single antibody | Small antigens/impure samples |
The following workflow diagram illustrates the key methodological differences between these four principal ELISA formats:
ELISA Methodology Workflow Comparison
Essential Research Reagents and Materials
Establishing a robust ELISA requires carefully selected and quality-controlled reagents and equipment. Each component plays a critical role in ensuring assay reproducibility, sensitivity, and specificity. The following table details the essential materials required for implementing ELISA methodologies:
Table 2: Essential Research Reagent Solutions for ELISA
| Component | Specification | Function | Examples & Notes |
|---|---|---|---|
| Solid Phase | 96-well polystyrene microplates | Provides surface for immobilization | Minimum binding capacity 400 ng/cm²; clear for colorimetry, opaque for fluorescence [7] |
| Coating Buffer | Carbonate-bicarbonate (pH 9.4) or PBS (pH 7.4) | Optimizes antigen/antibody adsorption | Alkaline buffer enhances protein binding to polystyrene [7] |
| Blocking Buffer | BSA, ovalbumin, or animal sera | Covers unsaturated binding sites | Prevents nonspecific binding; crucial for reducing background [16] |
| Detection Antibodies | Primary and secondary antibodies | Specifically bind target analyte | Secondary antibodies often enzyme-conjugated (HRP, AP) [7] |
| Enzyme Substrates | TMB, PNPP, OPD | Converted to detectable products | TMB (blue→yellow) most common for HRP; PNPP for AP [7] [16] |
| Wash Buffer | PBS with non-ionic detergent | Removes unbound reagents | Critical between each step; typically 2+ washes per step [16] |
| Stop Solution | Acid (H₂SO₄, HCl) or base (NaOH) | Halts enzyme-substrate reaction | Stabilizes signal for measurement [10] [16] |
| Microplate Reader | Spectrophotometer, fluorometer, luminometer | Measures signal intensity | 450nm for TMB with HRP; 405nm for PNPP with AP [10] |
Comparative Analysis with Alternative Protein Detection Technologies
ELISA occupies a distinct position within the landscape of protein detection technologies, offering a balanced combination of sensitivity, throughput, and relative simplicity. When evaluated against other common protein analysis methods, its specific advantages and limitations become apparent, guiding appropriate technological selection for different research scenarios.
Mass spectrometry, particularly when using liquid chromatography with tandem mass spectrometry (LC-MS/MS), provides exceptional capabilities for identifying protein sequences, post-translational modifications, and binding partners without requiring specific antibodies [18] [17]. However, this approach demands extensive sample preparation, sophisticated instrumentation, specialized expertise, and comes with higher per-sample costs, making it less accessible for routine high-throughput screening [18]. While mass spectrometry can cast a wider net for protein discovery, ELISA maintains advantages in quantitative throughput and operational simplicity for targeted protein quantification.
Western blotting serves as a complementary technique that provides additional protein characterization information, including molecular weight determination, post-translational modification detection, and visual confirmation of target identity [19]. This makes it invaluable for confirmatory testing following ELISA screening. However, western blotting is notably lower in throughput, more labor-intensive, less quantitative, and requires significantly more hands-on time compared to ELISA [19]. While western blotting can detect a target protein from thousands in a complex sample like lysates, ELISA outperforms it in quantitative precision, dynamic range, and suitability for analyzing large sample sets [19] [17].
Emerging technologies like Olink's Proximity Extension Assay (PEA) demonstrate how ELISA principles have been adapted for enhanced multiplexing capabilities. This innovative approach uses antibody pairs conjugated to DNA tags that generate amplifiable DNA barcodes upon dual target binding, enabling simultaneous measurement of up to 384 proteins from a minimal sample volume (1μL) [18]. While this and similar multiplexed immunoassays offer superior multiplexing capacity, they currently have more limited sample type validation (primarily serum and plasma) compared to the well-established versatility of ELISA across diverse biological fluids [18].
Table 3: ELISA Comparison with Alternative Protein Detection Methods
| Technology | Sensitivity | Multiplexing Capacity | Throughput | Sample Input | Key Applications |
|---|---|---|---|---|---|
| ELISA | High (nanomolar) | Low (single-plex) | High (96-384 wells) | ~100μL | Targeted protein quantification, clinical diagnostics |
| Mass Spectrometry | Low to moderate | High (depends on abundance) | Low | ~150μL (highly concentrated) | Protein discovery, post-translational modifications |
| Western Blot | Moderate | Low | Low | Varies | Protein size confirmation, modification detection |
| Olink PEA | High | High (up to 384-plex) | Medium (up to 88 samples/plate) | ~1μL | Multiplexed biomarker discovery, clinical trials |
The enduring utility of ELISA in protein detection research stems from its elegant combination of two core principles: highly specific antigen-antibody interactions and amplified enzymatic detection. This powerful partnership enables sensitive, quantitative protein measurement across diverse research and diagnostic applications. While newer technologies offer advantages in multiplexing capacity or additional protein characterization, ELISA maintains its position as a gold standard for targeted protein quantification due to its robust methodology, relatively low cost, and operational simplicity. Recent developments, including automation integration, enhanced detection systems, and miniaturization through microfluidics, continue to expand ELISA's capabilities, ensuring its ongoing relevance in life science research, clinical diagnostics, and drug development [15]. As the ELISA testing platform market continues to grow with a projected CAGR of 10.3% (2025-2032), the technology's adaptation to evolving research needs demonstrates how core biochemical principles, when properly harnessed, can maintain scientific utility across decades of technological advancement [20].
Enzyme-linked immunosorbent assay (ELISA) remains a cornerstone technique for protein detection in biomedical research and drug development. Its value hinges on the specific interaction between antibodies and antigens, but the assay's performance is ultimately determined by the careful selection and optimization of its core reagents. This guide provides an in-depth examination of these essential components—the solid phase, conjugates, substrates, and stop solutions—framed within the broader context of ELISA's advantages and limitations for protein detection research. A meticulous approach to these reagents is critical for achieving the high sensitivity, specificity, and reproducibility that make ELISA a powerful tool for quantifying peptides, proteins, and hormones in complex biological fluids [10] [7].
The Solid Phase: Foundation of the Assay
The solid phase serves as the stable platform for the immobilization of antigens or antibodies, forming the foundation upon which the entire assay is built.
- Material and Configuration: The most common solid phase is the 96-well microplate, fabricated from polystyrene, polyvinyl, or polypropylene [10]. These materials are preferred due to their high protein-binding capacity, which should be a minimum of 400 ng/cm², and their low well-to-well variation, with a coefficient of variation (CV) of less than 5% being ideal [7].
- Coating Principle: Proteins are immobilized through passive adsorption driven by hydrophobic interactions between non-polar protein residues and the plastic surface [7].
- Coating Protocol: For optimal coating, a 2–10 µg/mL solution of the protein (antigen or capture antibody) is dissolved in an alkaline buffer such as phosphate-buffered saline (PBS, pH 7.4) or carbonate-bicarbonate buffer (pH 9.4) and added to the wells. The plate is then incubated for several hours to overnight at temperatures between 4°C and 37°C [7]. Following incubation, the coating solution is removed, and any remaining binding sites on the plastic are "blocked" with an irrelevant protein like BSA or a proprietary blocking buffer to prevent nonspecific binding in subsequent steps [21] [22].
Table 1: Specifications and Properties of ELISA Solid Phases
| Characteristic | Specification | Functional Importance |
|---|---|---|
| Standard Format | 96- or 384-well microplate [23] | Enables high-throughput screening |
| Material | Polystyrene, polyvinyl, polypropylene [10] | High protein-binding capacity |
| Binding Capacity | >400 ng/cm² [7] | Ensures sufficient immobilization of capture molecules |
| Well-to-Well Variation | Coefficient of variation (CV) <5% [7] | Ensures reproducibility and reliability of replicate samples |
Conjugates: The Detection Engine
Conjugates are antibodies, or other binding molecules, that are linked to a reporter enzyme. They are the core of the detection system, providing the signal that is measured to quantify the analyte.
- Common Enzyme Labels: The most frequently used enzymes are Horseradish Peroxidase (HRP) and Alkaline Phosphatase (AP) [10] [7]. Other less common enzymes include β-galactosidase, acetylcholinesterase, and catalase [7].
- Detection Strategies: The choice of conjugate depends on the ELISA format. In a sandwich ELISA, a detection antibody specific to a different epitope of the antigen is used. This antibody can be directly conjugated to an enzyme (direct detection) or it can be detected by an enzyme-conjugated secondary antibody (indirect detection) [7]. Indirect detection provides signal amplification, as multiple secondary antibodies can bind to a single primary antibody [23].
The following diagram illustrates how the solid phase and conjugates integrate within two common ELISA detection workflows.
Substrates and Stop Solutions: Generating and Halting the Signal
The enzyme-substrate reaction generates a measurable signal, and the stop solution abruptly ends this reaction to ensure measurement consistency.
- Substrate Selection: The choice of substrate is dictated by the enzyme conjugate and the desired detection method (colorimetric, chemiluminescent, or fluorescent) [7]. For colorimetric detection, which is the most common, substrates yield a soluble colored product.
- Stop Solutions: These are used to terminate the enzyme-substrate reaction at a defined timepoint, stabilizing the signal for measurement. Acidic solutions like sulfuric acid (H₂SO₄) or hydrochloric acid (HCl) are typically used for HRP and its substrates [10]. For example, adding acid to the blue product of HRP-TMB changes it to yellow and stops the reaction [10].
Table 2: Common Enzyme-Substrate Pairs for Colorimetric ELISA
| Enzyme | Example Substrate | Product Color (Before Stop) | Product Color (After Stop) | Detection Wavelength |
|---|---|---|---|---|
| Horseradish Peroxidase (HRP) | Tetramethylbenzidine (TMB) [10] | Blue [10] | Yellow [10] | 450 nm [10] |
| Horseradish Peroxidase (HRP) | 2,2'-azinobis(3-ethylbenzothiazoline-6-sulfonic acid) (ABTS) [24] | Green | No change required | 410 nm [24] |
| Alkaline Phosphatase (AP) | p-Nitrophenyl phosphate (pNPP) [7] | Yellow | Enhanced Yellow (with NaOH) | 405 nm [7] |
The Researcher's Toolkit: Essential Reagent Solutions
A successful ELISA relies on a suite of carefully selected reagents and equipment beyond the four core components. The following table details these essential materials.
Table 3: Essential Reagents and Equipment for an ELISA Laboratory
| Item | Function | Examples & Specifications |
|---|---|---|
| Microplate Reader (Spectrophotometer) | Measures the optical density (OD) of the colored product in each well [10]. | Reads absorbance at specific wavelengths (e.g., 450 nm for TMB) [10]. |
| Coating Buffer | Provides the optimal chemical environment for protein adsorption to the plastic solid phase [22]. | Carbonate-bicarbonate buffer (pH 9.4) [7] [22]. |
| Wash Buffer | Removes unbound antibodies, antigens, and other reagents during the washing steps between incubations [10]. | Phosphate-buffered saline (PBS) often with a detergent like Tween 20 (PBST) [10] [22]. |
| Blocking Buffer | Covers any remaining protein-binding sites on the plastic well surface after coating to prevent nonspecific binding of detection reagents [7]. | Solutions containing irrelevant proteins like Bovine Serum Albumin (BSA) or casein [7] [22]. |
| Standards and Controls | Enables quantification and validation of assay performance [25]. | Standard: Known concentrations of purified antigen for generating a standard curve [4]. Controls: Positive and negative samples to confirm expected performance [25]. |
Optimizing Reagent Performance
Selecting reagents is only the first step; optimizing their use is critical for a robust assay. Key considerations include:
- Checkerboard Assay: This is a popular optimization method where multiple variables, such as coating antibody concentration and detection antibody concentration, are titrated across the plate in a grid pattern to rapidly determine optimal conditions [25].
- Assay Validation: Techniques like spike and recovery are used to assess whether the sample matrix interferes with antigen detection. A known amount of antigen is spiked into the sample matrix, and the recovery percentage is calculated to evaluate matrix effects [4] [25]. Dilutional linearity experiments ensure that the analyte concentration, when extrapolated from the standard curve, is consistent across a range of sample dilutions [25].
The critical role of these essential reagents directly informs the strengths and weaknesses of ELISA as a method for protein detection. The high sensitivity and specificity of a well-optimized ELISA, capable of detecting picogram levels of protein, are a direct result of specific antibody-antigen interactions and efficient signal generation from the conjugate and substrate [23]. Similarly, the high-throughput quantitative capacity of the technique is enabled by the standardized 96-well microplate format and the reproducible colorimetric readout [19] [23].
However, the limitations of ELISA are also tied to its reagents. The reliance on specific antibody pairs in sandwich ELISA can be a demanding design challenge [23]. Furthermore, the information gained is primarily limited to the presence and quantity of the target protein; ELISA generally cannot provide data on protein size or post-translational modifications, unlike techniques like Western blot [19] [26]. Finally, potential for false positives can arise from cross-reactivity or nonspecific binding, risks that can only be mitigated through rigorous optimization of buffers, blocking agents, and wash steps [19] [26]. Therefore, a deep understanding of the core reagents is not merely a procedural necessity but a fundamental requirement for harnessing the full power of the ELISA technique while intelligently navigating its constraints.
The Enzyme-Linked Immunosorbent Assay (ELISA) is a cornerstone biochemical technique for detecting and quantifying specific proteins, antibodies, or hormones in complex biological samples [7] [10]. Its exceptional sensitivity, specificity, and versatility make it indispensable in both research and diagnostic laboratories [19]. The reliability of this method hinges on a meticulously executed standard workflow, a series of critical steps that ensure the specific capture and accurate measurement of the target analyte. This guide details the core workflow of a sandwich ELISA—often considered the gold standard format for quantitative protein detection—framing it within the broader context of the technique's advantages and limitations in protein detection research [7] [27]. Understanding this workflow is fundamental for researchers and drug development professionals to generate robust, reproducible, and meaningful data.
The Standard Step-by-Step Workflow
The sandwich ELISA workflow, from initial plate preparation to final signal measurement, involves a sequence of interdependent stages. Each step must be carefully optimized and executed to minimize background noise and maximize specific signal detection [7] [28]. The following diagram and table outline the entire process and the purpose behind each critical action.
Figure 1: The core workflow of a sandwich ELISA, illustrating the six major steps from plate coating to final data analysis. Washes between each step remove unbound material to ensure assay specificity.
Table 1: The Standard Sandwich ELISA Workflow Steps and Purpose
| Step | Primary Action | Purpose & Rationale | Key Considerations |
|---|---|---|---|
| 1. Coating [7] [28] | Passive adsorption of the capture antibody to the polystyrene microplate. | To immobilize the target-specific antibody, creating a solid-phase capture system. | Antibody is typically diluted (1-10 µg/mL) in an alkaline coating buffer (e.g., carbonate-bicarbonate, pH 9.4) to enhance hydrophobic binding to the plastic surface [7] [28]. |
| 2. Blocking [7] [28] | Addition of an irrelevant protein solution (e.g., 1-5% BSA). | To cover any remaining unsaturated plastic surface to prevent non-specific binding of reagents in subsequent steps, thereby reducing background noise [7]. | Inadequate blocking is a major source of high background. Bovine Serum Albumin (BSA) or non-fat dry milk are common blocking agents [28]. |
| 3. Sample & Antigen Incubation [28] | Addition of the sample containing the target antigen. | The antigen binds specifically to the immobilized capture antibody. | Sample matrix (e.g., serum, lysate) can interfere; may require dilution or matrix-matched standards for accurate quantification [25] [4]. |
| 4. Detection Antibody Incubation [7] [28] | Addition of an enzyme-conjugated antibody specific to a different epitope on the antigen. | Forms the "sandwich," ensuring high specificity. The enzyme conjugate (e.g., HRP, AP) will later generate the signal. | The detection and capture antibodies must recognize different, non-overlapping epitopes. Incubation time and temperature are critical for optimal binding [29]. |
| 5. Substrate Addition [7] [10] | Addition of a colorless substrate for the conjugated enzyme. | The enzyme catalyzes a reaction that converts the substrate into a colored (chromogenic), fluorescent, or luminescent product. | The choice of substrate (colorimetric, fluorogenic, chemiluminescent) depends on the required sensitivity and available detection instrumentation [7]. |
| 6. Signal Measurement [4] [30] | Measurement of the product's signal intensity with a microplate reader. | The intensity of the signal is proportional to the amount of captured antigen, allowing for quantification. | For colorimetric assays, a stop solution (e.g., acid) is added to halt the reaction, and absorbance is read at a specific wavelength (e.g., 450 nm) [27] [10]. |
Key Research Reagent Solutions
A successful ELISA relies on a suite of well-characterized reagents. The following table details the essential materials and their functions within the assay.
Table 2: Essential Reagents and Materials for an ELISA Laboratory
| Reagent / Material | Function & Description | Common Examples |
|---|---|---|
| Microplate [7] [10] | A solid polystyrene surface with 96 or 384 wells that passively binds proteins (antibodies/antigens). | Clear plates for colorimetry; white for luminescence; black for fluorescence. |
| Capture & Detection Antibodies [27] [28] | High-affinity, specific antibodies that recognize the target antigen. For sandwich ELISA, a matched pair binding distinct epitopes is required. | Monoclonal (high specificity), Polyclonal (high sensitivity), or Recombinant antibodies (high reproducibility). |
| Coating Buffer [28] | An alkaline buffer that optimizes the hydrophobic interaction between the protein and the plastic well surface. | 0.1 M Carbonate-Bicarbonate buffer, pH 9.4. Phosphate-buffered saline (PBS), pH 7.4, can also be used. |
| Blocking Buffer [28] | A solution of irrelevant protein used to saturate any remaining protein-binding sites after coating. | 1-5% BSA, 1-10% Fetal Calf Serum, or 1-5% non-fat dry milk in PBS or Tris buffer. |
| Enzyme Conjugate [7] [10] | The detection antibody (or a secondary antibody) linked to an enzyme that produces a detectable signal. | Horseradish Peroxidase (HRP) or Alkaline Phosphatase (AP). |
| Enzyme Substrate [7] [10] | A chemical converted by the enzyme into a measurable product. The choice dictates the type of detection. | Chromogenic: TMB (turns blue/yellow), Chemiluminescent: Luminol-based, Fluorogenic: 4-MUP. |
| Wash Buffer [28] [10] | A buffered solution used to remove unbound reagents and reduce background between steps. | PBS or Tris-buffered saline (TBS), often with a low concentration of detergent (e.g., 0.05% Tween 20). |
| Stop Solution [27] [10] | A strong acid or base that rapidly terminates the enzyme-substrate reaction, stabilizing the signal for measurement. | 1-2 M Sulfuric Acid (H₂SO₄) or Hydrochloric Acid (HCl). |
Detection Strategies and Data Analysis
The detection step is the culmination of the assay, transforming the molecular binding event into quantifiable data. The choice between direct and indirect detection strategies involves a trade-off between simplicity, cost, and signal amplification, as illustrated below.
Figure 2: A comparison of direct and indirect detection methods. The indirect method is more commonly used due to its significant signal amplification, which enhances assay sensitivity [7].
Following signal measurement, data is transformed into quantitative results. This requires generating a standard curve from serial dilutions of a known antigen concentration. The optical density (OD) of the standards is plotted against their concentration, and a curve is fitted (commonly using a 4- or 5-parameter logistic model) to interpolate the concentration of unknown samples [4] [30]. Key validation steps include:
- Spike and Recovery: Assesses the effect of the sample matrix on detection accuracy [25] [4].
- Dilutional Linearity: Ensures the sample concentration is within the assay's linear range [25].
- Calculating Coefficient of Variation (CV%): Determines the precision of replicate samples, with a CV <10-15% generally considered acceptable [30].
Workflow Optimization and Troubleshooting
A robust ELISA requires careful optimization of each workflow step. A "checkerboard" titration, where the concentrations of both the capture and detection antibodies are varied systematically, is a standard method for identifying optimal reagent concentrations [25]. Including appropriate controls is non-negotiable for data validation. Essential controls include a blank (wells with no antigen), negative controls (no primary antibody or an irrelevant antibody), and a standard curve run on every plate [25] [30].
Table 3: Common ELISA Challenges and Troubleshooting Strategies
| Problem | Potential Causes | Recommended Solutions |
|---|---|---|
| High Background [30] | Inadequate blocking or washing; detection antibody concentration too high. | Increase blocking time or try a different blocking agent; increase number/frequency of washes; titrate down detection antibody. |
| Low or No Signal [30] | Reagents expired or inactive; insufficient incubation times; improper reagent storage. | Check reagent expiration dates; ensure all reagents were added; increase incubation times for antibody binding; verify storage conditions. |
| High Well-to-Well Variation (CV%) [4] [30] | Inconsistent pipetting; plate washing inconsistencies; well evaporation. | Calibrate pipettes and ensure proper technique; use an automated plate washer; cover plate during incubations and avoid placing on heated areas. |
| Poor Standard Curve Fit [30] | Improper standard serial dilution; degradation of standard; insufficient standard points. | Prepare fresh standard dilutions with careful pipetting; aliquot and freeze standards to avoid freeze-thaw cycles; ensure standards cover the expected sample concentration range. |
The standardized workflow of ELISA—from coating and blocking to final signal measurement—makes it a powerful tool for protein detection. Its primary advantages include high sensitivity, capable of detecting proteins at nanomolar concentrations; excellent quantitative capability for precise protein measurement; and high-throughput potential, allowing for the simultaneous analysis of dozens of samples in a relatively short time [19] [27]. These strengths make ELISA ideal for diagnostics, screening large sample sets, and accurately quantifying biomarkers.
However, the technique is not without limitations. A significant drawback is its limited protein characterization; unlike Western blotting, ELISA cannot provide information on the target protein's molecular weight, purity, or potential post-translational modifications [19] [27]. It is also more prone to false positives/negatives due to non-specific antibody cross-reactivity or matrix interference, which is why it is often used alongside confirmatory techniques like Western blot in clinical diagnostics [19]. Finally, developing a new ELISA from scratch requires significant optimization effort to identify matched antibody pairs and establish optimal conditions [27] [25].
In summary, a deep understanding of the core ELISA workflow empowers researchers to execute the technique effectively, troubleshoot issues systematically, and critically interpret the resulting data. When applied appropriately, with a clear understanding of its strengths and weaknesses relative to other immunoassays, ELISA remains an invaluable asset in the scientist's toolkit for protein analysis.
ELISA in Practice: Formats, Applications, and High-Throughput Use
Enzyme-Linked Immunosorbent Assay (ELISA) represents a cornerstone biochemical technique for detecting and quantifying specific molecules such as proteins, peptides, antibodies, and hormones in biological samples [10] [31]. This immunological assay detects antigen-antibody interactions through enzyme-labelled conjugates and substrates that generate measurable color changes [10]. The versatility and reliability of ELISA have cemented its role in research laboratories, clinical diagnostics, and drug development pipelines. Each ELISA format—direct, indirect, sandwich, and competitive—offers distinct methodological approaches tailored to different experimental needs and applications [32]. Understanding the principles, advantages, and limitations of each format is crucial for researchers to select the optimal assay configuration for their specific protein detection requirements, ultimately influencing the accuracy, sensitivity, and efficiency of their scientific investigations.
Core Principles of ELISA
The fundamental principle underlying all ELISA formats involves detecting antigen-antibody interactions through enzymatic reactions that produce measurable signals [10]. In ELISA systems, the target antigen or antibody adheres to plastic surfaces, typically 96-well microplates, referred to as the "sorbent" [10]. The immunological component ("immuno") is recognized by specific antibodies, which may become "enzyme-linked" either directly or through secondary antibodies [10]. This enzyme subsequently reacts with an added substrate, generating a colored product whose intensity is proportional to the amount of analyte present in the sample [10].
Key components essential for any ELISA include:
- Solid phase: Usually 96-well microplates made of rigid polystyrene, polyvinyl, or polypropylene where analytes attach [10]
- Conjugate: Enzyme-labelled antibodies specific to the target molecule [10]
- Substrate: The substance that reacts with the enzyme to produce detectable color change [10]
- Wash buffer: Typically phosphate-buffered solution (PBS) to remove unbound components between steps [10]
- Stop solution: Acidic or basic solutions to terminate the enzyme-substrate reaction [10]
The final signal is measured spectrophotometrically, with optical density values used to quantify analyte concentration against a standard curve [10].
The Four Main ELISA Formats
Direct ELISA
Principle and Workflow: In direct ELISA, the antigen is directly immobilized onto the microtiter plate surface [32]. A labeled enzyme-linked primary antibody specific to the antigen is then added, binding directly to the target [32] [31]. After incubation and washing, substrate is added, producing a signal proportional to the antigen present in the sample [32].
Advantages and Disadvantages:
- Advantages: Simple and straightforward procedure with fewer steps; typically results in lower background noise due to minimal reagent interactions [32] [31]
- Disadvantages: Generally less sensitive than other formats; limited to detecting antigens that can bind directly to antibodies without interference; requires labeling of every primary antibody, which can be time-consuming and costly [32] [31]
Typical Applications: Direct ELISA is commonly used for screening antigens in biological samples, quantifying antigens that can directly bind to antibodies without interference, and rapid diagnostic tests due to its simplicity and quick turnaround time [32].
Indirect ELISA
Principle and Workflow: Indirect ELISA begins similarly to direct ELISA with antigen immobilized directly on the plate [32]. However, instead of a labeled primary antibody, an unlabeled primary antibody specific to the antigen is added first [32] [31]. Following incubation and washing, a labeled secondary antibody that recognizes the primary antibody is introduced [32] [31]. This secondary binding amplifies the signal, as multiple secondary antibodies can bind to a single primary antibody [32].
Advantages and Disadvantages:
- Advantages: Higher sensitivity than direct ELISA due to signal amplification; more flexible as the same labeled secondary antibody can be used with various primary antibodies; eliminates the need to label every primary antibody [32] [31]
- Disadvantages: More complex procedure with additional incubation steps; increased risk of nonspecific binding due to multiple antibody interactions; potential for cross-reactivity caused by secondary antibody [32] [31]
Typical Applications: Indirect ELISA is particularly valuable for detecting and quantifying antibodies in serum or other biological fluids, screening large numbers of samples for antibody responses (e.g., in serological surveys), and determining antibody titers in vaccine development and immune response studies [32]. This format has been effectively used in developing diagnostic tests for various pathogens, including SARS-CoV-2 and bovine coronavirus (BCoV) [33] [34].
Sandwich ELISA
Principle and Workflow: Sandwich ELISA employs two specific antibodies that recognize different epitopes on the target antigen [32] [31]. First, a capture antibody is immobilized on the microtiter plate [32]. The sample containing the antigen of interest is added, allowing the antigen to bind to the capture antibody [32]. After washing, a detection antibody specific to a different epitope on the antigen is added, forming an antibody-antigen-antibody "sandwich" [32]. This detection antibody may be enzyme-linked directly or followed by an enzyme-linked secondary antibody [32] [31]. The resulting signal is proportional to the antigen concentration [32].
Advantages and Disadvantages:
- Advantages: Highest specificity and sensitivity among ELISA formats; less prone to interference from nonspecific binding due to the requirement for two specific binding events; suitable for detecting antigens in complex biological samples [32] [31]
- Disadvantages: More technically demanding and costly due to the need for two specific antibodies that recognize different epitopes; challenging to develop, particularly for small molecules that may not have two distinct epitopes [32] [31]
Typical Applications: Sandwich ELISA is the format of choice for quantifying specific antigens in complex biological samples (e.g., serum, tissue lysates), detecting biomarkers in disease diagnostics (e.g., tumor markers, cytokines), and monitoring protein expression levels in research and clinical settings [32].
Competitive ELISA
Principle and Workflow: Competitive ELISA, also called inhibition ELISA, operates on the principle that the reference antigen and the sample antigen compete for binding to a limited quantity of labeled antibodies [10] [32]. In one common approach, the plate is coated with a known antigen [32]. Meanwhile, the sample containing an unknown amount of antigen is incubated with a known concentration of labeled antibody [32]. This mixture is then added to the wells, where the labeled antibodies bind to either the immobilized antigen or the antigen in the sample [32]. The amount of labeled antibody bound to the plate is inversely proportional to the concentration of antigen in the sample—higher sample antigen concentration results in less antibody available for plate binding and consequently weaker signal [32].
Advantages and Disadvantages:
- Advantages: Particularly useful for quantifying small molecules or inhibitors; provides direct measurement of analyte concentration relative to a standard curve; can be flexibly adapted to use principles from direct, indirect, or sandwich ELISA [32]
- Disadvantages: Typically less sensitive than sandwich or indirect ELISA; requires careful optimization of antigen and antibody concentrations; more susceptible to variations in assay conditions affecting results [32]
Typical Applications: Competitive ELISA is primarily used for detecting and quantifying small molecules or inhibitors (e.g., drugs, hormones), assessing antibody neutralization in virology and vaccine research, and screening for contaminants or residues in food, environmental samples, or pharmaceutical products [32].
Comparative Analysis of ELISA Formats
Table 1: Comprehensive comparison of main ELISA formats
| Parameter | Direct ELISA | Indirect ELISA | Sandwich ELISA | Competitive ELISA |
|---|---|---|---|---|
| Complexity | Low | Moderate | High | Moderate to High |
| Sensitivity | Low | High | Highest | Moderate |
| Specificity | Moderate | High | Highest | High |
| Time Required | Short (fewer steps) | Moderate | Long | Moderate |
| Cost | Low (one antibody) | Moderate | High (two antibodies) | Moderate to High |
| Signal Amplification | No | Yes (multiple secondary antibodies) | Yes | No |
| Primary Antibody Requirement | Must be labeled | Unlabeled | Paired antibodies (capture & detection) | Limited quantity labeled antibody |
| Ideal For | Antigen screening, rapid tests | Antibody detection, serological surveys | Complex samples, low-abundance targets | Small molecules, haptens, competitive inhibitors |
| Sample Compatibility | Pure or semi-pure antigens | Various biological fluids | Complex matrices (serum, lysates) | Various, including inhibitors |
Table 2: Key performance characteristics of ELISA formats
| Format | Detection Range | Inter-assay Precision | Intra-assay Precision | Background Noise |
|---|---|---|---|---|
| Direct ELISA | Moderate | Typically <15% | Typically <10% | Low |
| Indirect ELISA | Wide | Typically <12% | Typically <8% | Moderate |
| Sandwich ELISA | Widest | Typically <10% | Typically <5% | Low to Moderate |
| Competitive ELISA | Narrow to Moderate | Typically <15% | Typically <10% | Moderate |
Detailed Experimental Protocols
Protocol for Indirect ELISA
The indirect ELISA method has been successfully implemented for detecting antibodies against various pathogens, including SARS-CoV-2 and bovine coronavirus (BCoV) [33] [34]. A typical protocol includes:
Plate Coating: Microtiter plates are coated with purified recombinant antigen (e.g., receptor binding domain of SARS-CoV-2 spike protein or BCoV nucleocapsid protein) diluted in phosphate-buffered saline (PBS, pH 7.4) at an optimal concentration (typically 1-2 μg/mL), followed by overnight incubation at 4°C [33] [34].
Blocking: Excess unbound antigen is removed, and plates are blocked with 300 μL/well of blocking buffer (e.g., 4% skimmed milk in PBS with 0.1% Tween-20) for 2 hours at room temperature to prevent nonspecific binding [33].
Sample Incubation: After washing plates 3 times with PBS plus 0.1% Tween-20, diluted serum samples are added and incubated for 1-2 hours at room temperature or 37°C [33] [34].
Secondary Antibody Incubation: Following another wash step, enzyme-conjugated secondary antibody (e.g., horseradish peroxidase- or alkaline phosphatase-conjugated anti-species IgG) is added at optimal dilution and incubated for 1-2 hours [33] [34].
Detection: After final washing, substrate solution (e.g., TMB for HRP) is added and incubated for 15-30 minutes until color develops [10] [33].
Reaction Stopping: The enzyme-substrate reaction is stopped using acidic solution (H₂SO₄ or HCl), which also enhances color intensity [10].
Reading and Analysis: The optical density is measured spectrophotometrically at appropriate wavelength (450 nm for TMB), and results are calculated based on standard curves and established cutoff values [10] [33].
Protocol Development and Optimization
Developing a robust ELISA requires careful optimization at each stage:
Checkerboard Titration: Essential for determining optimal concentrations of coating antigen and primary/secondary antibodies [34]. This involves testing serial dilutions of both coating antigen and antibodies against each other to identify the combination that provides the strongest specific signal with minimal background.
Cutoff Determination: Established by testing known negative samples (typically n ≥ 30) and calculating the mean optical density plus 2 or 3 standard deviations [34]. Samples with values above this cutoff are considered positive.
Validation Parameters: Include sensitivity, specificity, precision (intra- and inter-assay coefficients of variation), and cross-reactivity assessment with related antigens [35] [34]. Well-optimized ELISA tests can achieve intra-assay precision of 7% and inter-assay precision below 20% [35].
The Scientist's Toolkit: Essential Research Reagent Solutions
Table 3: Essential materials and reagents for ELISA development
| Component | Function | Examples & Specifications |
|---|---|---|
| Solid Phase | Provides surface for antigen/antibody immobilization | 96-well microplates (Nunc MaxiSorp); polystyrene, polyvinyl, or polypropylene materials [10] [35] |
| Coating Reagents | Immobilize target molecules to solid phase | Purified recombinant proteins (e.g., RBD of SARS-CoV-2 spike protein, BCoV nucleocapsid protein); concentration typically 1-2 μg/mL in PBS [33] [34] |
| Blocking Buffers | Prevent nonspecific binding | 4% skimmed milk in PBS with 0.1% Tween-20; bovine serum albumin (BSA) solutions; casein-based buffers [33] |
| Detection Antibodies | Bind specifically to target analytes | Enzyme-linked primary antibodies (direct ELISA); unlabeled primary with enzyme-linked secondary (indirect ELISA); matched antibody pairs (sandwich ELISA) [32] [31] |
| Enzyme Substrates | Generate detectable signal | TMB (tetramethylbenzidine) producing blue color; BCIP/NBT for alkaline phosphatase; stop solutions (HCl or H₂SO₄) change color to yellow [10] |
| Wash Buffers | Remove unbound components | PBS or Tris-based buffers with surfactants (0.05-0.1% Tween-20) to reduce nonspecific binding [10] [33] |
| Detection Equipment | Measure assay signals | Microplate readers capable of measuring absorbance at appropriate wavelengths (400-600 nm, most commonly 450 nm) [10] [35] |
The selection of appropriate ELISA format—direct, indirect, sandwich, or competitive—represents a critical decision point in assay design that directly impacts experimental outcomes. Each format offers distinct advantages and limitations in terms of sensitivity, specificity, complexity, and applicability to different research scenarios. Direct ELISA provides simplicity and speed, while indirect ELISA offers enhanced sensitivity through signal amplification. Sandwich ELISA delivers superior specificity and is ideal for complex samples, whereas competitive ELISA excels in detecting small molecules. Understanding these fundamental differences enables researchers to align their format selection with specific experimental requirements, ensuring robust, reliable, and reproducible protein detection across diverse research and diagnostic applications. The continued evolution of ELISA methodologies maintains this versatile technique's position as an indispensable tool in protein detection research and diagnostic development.
The Enzyme-Linked Immunosorbent Assay (ELISA) represents a cornerstone technique in biological research and clinical diagnostics for detecting and quantifying target analytes. As a plate-based assay, ELISA leverages the specificity of antibody-antigen interactions coupled with an enzymatic reaction to generate a measurable signal [31] [7]. The utility of ELISA for protein detection research is underscored by its high sensitivity, ability to provide fully quantitative data, and compatibility with complex sample matrices such as serum, plasma, and cell culture supernatants [31] [10]. This guide provides an in-depth comparative analysis of the major ELISA formats—direct, indirect, sandwich, and competitive—to empower researchers, scientists, and drug development professionals in selecting the optimal format for their specific experimental needs. The choice of format profoundly impacts key performance parameters including sensitivity, specificity, time requirements, and overall assay complexity [31] [36].
Core Principles and Universal Workflow
All ELISA formats share a common foundational principle: the immobilization of an antigen or antibody to a solid phase (typically a polystyrene microplate), followed by a series of binding, washing, and detection steps that ultimately produce a signal proportional to the amount of analyte present [7]. The most common microplate format is the 96-well plate, which facilitates the screening of many samples simultaneously [37] [38]. Plates are available in different colors (clear for colorimetric detection, white for luminescence, black for fluorescence) and well shapes (flat, round, or C-bottom) to suit different detection modalities and applications [37] [38].
The universal ELISA workflow consists of several critical stages, visualized in the diagram below.
Universal ELISA Workflow
- Coating: A capture molecule (antigen or antibody) is adsorbed onto the plastic surface of the microplate wells [7] [27].
- Blocking: The remaining protein-binding sites on the plastic are saturated with an irrelevant protein (e.g., Bovine Serum Albumin or casein) to prevent non-specific binding of reagents in subsequent steps, which is critical for achieving a low background signal [36] [27].
- Sample Incubation: The test sample (serum, lysate, etc.) is added. If the analyte of interest is present, it binds to the immobilized capture molecule [31] [7].
- Detection: An enzyme-linked antibody (or other tagged molecule) is added, which binds specifically to the captured analyte [31] [10].
- Signal Generation: A substrate solution is added. The enzyme conjugated to the detection antibody converts the substrate into a colored (colorimetric), fluorescent, or luminescent product [10] [7].
- Reading & Analysis: The intensity of the signal is measured using a microplate reader. For quantitative analysis, the signal from samples is compared to a standard curve generated with known concentrations of the analyte [10] [36].
Comparative Analysis of ELISA Formats
The fundamental differences between ELISA formats lie in how the antigen is immobilized and detected. The following table provides a high-level comparison of the four main types.
Table 1: Overview of Main ELISA Formats
| Format | Basic Principle | Best For | Key Advantage | Key Disadvantage |
|---|---|---|---|---|
| Direct ELISA [31] [36] | Antigen is directly immobilized and detected with a single conjugated antibody. | Assessing antibody affinity; quick screening. | Fast and simple protocol; minimal steps. | Low specificity; potential for high background. |
| Indirect ELISA [31] [36] | Antigen is immobilized, detected with an unconjugated primary antibody, then a conjugated secondary antibody. | Detecting specific antibodies (e.g., in serology). | High sensitivity due to signal amplification; flexible. | Potential for cross-reactivity; longer protocol. |
| Sandwich ELISA [31] [27] | Antigen is captured between two specific antibodies. | Quantifying specific antigens in complex samples. | High sensitivity and specificity; robust for complex samples. | Requires two matched antibodies; challenging to develop. |
| Competitive ELISA [31] [7] | Sample antigen and labeled reference antigen compete for a limited number of antibody-binding sites. | Measuring small molecules (hormones, drugs). | Effective for small antigens; consistent. | Less specific; signal is inversely proportional to analyte. |
Direct ELISA
The direct ELISA format is the most straightforward, utilizing a single enzyme-conjugated antibody for detection.
Workflow:
- An antigen or a complex sample is immobilized directly onto the microplate.
- An enzyme-conjugated primary antibody specific to the target antigen is added.
- After washing, a substrate is added, and the signal is measured [31] [36].
Pros: The protocol is rapid and involves fewer steps, reducing potential sources of error and reagent requirements [31]. Cons: A major drawback is lower specificity, as only one antibody is used. There is also a higher potential for background signal since all proteins in the sample are immobilized and non-specific binding can occur [31]. Directly labeling every primary antibody is also time-consuming and expensive [7].
Indirect ELISA
The indirect ELISA introduces a signal amplification step by using a secondary antibody, enhancing sensitivity.
Workflow:
- The antigen is immobilized on the plate.
- An unlabeled, antigen-specific primary antibody is added and binds.
- An enzyme-conjugated secondary antibody that recognizes the host species of the primary antibody is added.
- A substrate is added for signal detection [31] [36].
Pros: The use of a secondary antibody provides significant signal amplification, as multiple secondary antibodies can bind to a single primary antibody, making this format more sensitive than the direct ELISA [31] [36]. It is also highly flexible, as the same labeled secondary antibody can be used with various primary antibodies from the same host species [36] [7]. Cons: The additional incubation step lengthens the total assay time. There is also a risk of cross-reactivity if the secondary antibody non-specifically binds to other components [31].
Sandwich ELISA
The sandwich ELISA is the preferred method for quantifying specific analytes in complex biological fluids due to its exceptional specificity and sensitivity.
Workflow:
- A capture antibody specific to the target antigen is immobilized on the plate.
- The sample is added, and the antigen of interest is bound by the capture antibody.
- A detection antibody, recognizing a different epitope on the antigen, is added to form the "sandwich."
- The detection antibody can be enzyme-conjugated (direct detection) or detected via an enzyme-linked secondary antibody (indirect detection).
- A substrate is added, and the signal is read [31] [27].
Pros: The requirement for two distinct antibodies to bind the antigen simultaneously confers high specificity and significantly reduces background interference from complex samples like serum or cell lysates [31] [27]. This format is also extremely sensitive. Cons: Its main limitation is the necessity for a "matched pair" of antibodies that recognize different epitopes on the same antigen without interfering with each other's binding, which can be challenging to obtain and optimize [31] [36].
Competitive ELISA
Competitive ELISAs are primarily used for measuring small molecules, such as hormones and drugs, that are too small to be bound by two antibodies simultaneously.
Workflow (one common variant):
- A capture antibody is immobilized on the plate.
- The sample antigen and a known amount of enzyme-conjugated antigen are added simultaneously. These two compete for binding to the limited number of sites on the capture antibody.
- After washing, a substrate is added.
- The resulting signal is inversely proportional to the amount of antigen in the sample: a high sample antigen concentration leads to a low signal, and vice versa [31] [7].
Pros: This is one of the few reliable immunoassay methods for quantifying small molecules with limited epitopes [31] [39]. Cons: The format is generally less specific than a sandwich ELISA, often relies on a single antibody, and requires a conjugated antigen [31]. The inverse relationship between signal and concentration can sometimes be counter-intuitive during data analysis.
Quantitative Comparison and Selection Guide
To aid in format selection, the following table summarizes the key technical characteristics.
Table 2: Technical Characteristics of ELISA Formats
| Parameter | Direct ELISA | Indirect ELISA | Sandwich ELISA | Competitive ELISA |
|---|---|---|---|---|
| Number of Antibodies | One | Two | Two (matched pair) | One (or two) |
| Assay Time | Short (~ few hours) | Medium | Long | Medium |
| Complexity | Low | Medium | High | Medium |
| Sensitivity | Low | Moderate to High | Very High | High (for small molecules) |
| Specificity | Low | Moderate | Very High | Moderate |
| Signal Amplification | No | Yes (via secondary) | Yes | No |
| Flexibility | Low | High | Moderate | Low |
| Cost | Low | Moderate | High | Moderate |
| Sample Type | Purified or semi-pure antigens | For antibody detection; pure antigens | Complex samples (serum, lysates) | Samples with small molecules |
The decision-making process for selecting the appropriate ELISA format is multi-faceted. The flowchart below provides a strategic pathway for selection based on key experimental questions.
ELISA Format Selection Guide
The Scientist's Toolkit: Essential Reagents and Materials
A successful ELISA relies on a suite of carefully selected reagents and equipment.
Table 3: Essential Materials for ELISA Development
| Item | Function | Examples & Notes |
|---|---|---|
| Microplate [37] [38] | Solid phase for immobilization. | 96-well polystyrene plates are standard. Choose clear (colorimetry), white (luminescence), or black (fluorescence). |
| Coating Buffer [36] | Stabilizes the capture molecule during immobilization. | PBS (pH 7.4) or carbonate-bicarbonate buffer (pH 9.4). |
| Blocking Buffer [36] [27] | Covers unused protein-binding sites to reduce background. | 1-5% BSA, non-fat dry milk, or casein in wash buffer. |
| Wash Buffer [36] | Removes unbound materials between steps. | PBS or Tris-buffered saline with a low concentration of detergent (e.g., 0.05% Tween 20). |
| Antibodies | Provide specificity for capture and detection. | Matched pairs for sandwich ELISA; cross-adsorbed secondary antibodies for indirect formats. |
| Enzyme Conjugate [10] [7] | Generates a detectable signal. | Horseradish Peroxidase (HRP) and Alkaline Phosphatase (AP) are most common. |
| Substrate [10] [7] | Converted by the enzyme to a measurable product. | TMB (colorimetric for HRP), pNPP (colorimetric for AP), or chemiluminescent substrates for higher sensitivity. |
| Stop Solution [10] [27] | Halts the enzyme-substrate reaction. | Acidic solution (e.g., sulfuric acid for TMB). |
| Microplate Reader [10] | Measures the intensity of the signal. | Spectrophotometer (colorimetric), fluorometer, or luminometer. |
Advanced Considerations and Protocol Optimization
Enhancing Sensitivity and Specificity
Sensitivity, defined as the lowest concentration of analyte that can be reliably distinguished from background, can be improved in several ways. Using high-affinity monoclonal antibodies as the capture reagent is fundamental [39]. Signal amplification systems, such as the biotin-streptavidin complex, can significantly boost signal, as a single streptavidin molecule (conjugated to an enzyme) can bind up to four biotin molecules attached to the detection antibody [31] [39]. Furthermore, employing more sensitive detection substrates, such as chemiluminescent or fluorescent substrates, over traditional colorimetric ones can lower the detection limit [7] [39].
Specificity is the assay's ability to exclusively detect the target analyte without cross-reacting with other molecules. It is primarily conferred by the antibodies used [39]. Sandwich ELISAs inherently provide high specificity by requiring two independent antibody-binding events. For indirect formats, using cross-adsorbed secondary antibodies minimizes the risk of non-specific binding to other proteins or to the capture antibody in a sandwich setup [7] [39]. Rigorous validation by testing for cross-reactivity with structurally similar molecules is crucial for developing a robust assay [39].
Troubleshooting Common Issues
- High Background: Ensure complete blocking and optimize the blocking buffer composition. Increase wash stringency (e.g., number of washes, detergent concentration) and check for non-specific binding of secondary antibodies [36] [27].
- Low Signal: Check antibody activity and conjugation efficiency. Ensure the substrate is fresh and active. Optimize incubation times and temperatures for antibody binding. Verify the enzyme conjugate and substrate are compatible [7].
- High Well-to-Well Variation: Pay close attention to consistent pipetting technique. Ensure all reagents are thoroughly mixed before use. Run samples and standards in duplicate or triplicate to account for variability [36].
The selection of an ELISA format is a critical determinant of experimental success. As detailed in this guide, each format offers a distinct balance of speed, complexity, sensitivity, and specificity. Direct ELISA offers simplicity, while indirect ELISA provides flexibility and amplification. The sandwich format delivers superior performance for quantifying proteins in complex mixtures, and the competitive format is indispensable for small molecule analysis. By aligning the strengths of each format with their specific research objectives—whether it's drug discovery, clinical diagnostics, or basic protein research—scientists can harness the full power of ELISA to generate reliable, high-quality data.
The Enzyme-Linked Immunosorbent Assay (ELISA) is a foundational biochemical technique that leverages the specificity of antigen-antibody interactions to detect and quantify soluble substances such as peptides, proteins, antibodies, and hormones within complex biological fluids [10] [40]. Since its development in the 1970s as a safer alternative to radioimmunoassays, ELISA has become a routine laboratory method worldwide due to its sensitivity, specificity, and versatility [10] [16]. The core principle involves immobilizing an antigen or antibody on a solid phase (typically a 96-well microplate), followed by a series of binding and washing steps that culminate in an enzyme-mediated colorimetric reaction, the intensity of which is proportional to the concentration of the target analyte [10] [7].
In the context of evaluating the pros and cons of protein detection methods, ELISA stands out for its high throughput and quantitative capabilities. Its primary advantages include high sensitivity—often detecting proteins at nanomolar to picomolar concentrations—and the ability to analyze many samples simultaneously with minimal sample preparation [19]. However, the technique also has limitations; it can be prone to false positives or negatives if not carefully optimized, and unlike western blotting, it generally cannot provide information about the target protein's molecular weight or post-translational modifications [19]. Despite these constraints, ELISA remains the gold standard for a vast array of applications in research and clinical diagnostics [40].
ELISA in Infectious Disease Diagnostics
The detection and quantification of pathogen-specific antibodies are critical for diagnosing infections, tracking disease outbreaks, and screening donated blood. ELISA is exceptionally well-suited for this purpose, as it can efficiently measure the humoral immune response in patient sera [16] [40].
Key Applications and Methodologies
A common application is the indirect ELISA format for detecting antiviral antibodies, such as those against HIV or Hepatitis A, B, and C [16] [40]. The protocol begins by coating the microplate with a purified viral antigen. The patient's serum sample is then added; if it contains specific antibodies, they will bind to the immobilized antigen. After washing, an enzyme-conjugated secondary antibody (e.g., anti-human IgG) is added, which binds to the patient's antibodies. Finally, a substrate is added, and the resulting color change is measured [10] [16]. This method is highly sensitive because each primary antibody can bind multiple secondary antibodies, resulting in signal amplification [7].
For diseases like Lyme disease (bacterial) and candida (fungal), similar indirect or sandwich ELISA protocols are employed to detect IgM and IgG antibodies, providing serological evidence of current or past exposure [40]. The high throughput of ELISA makes it indispensable for public health efforts, such as tracking cholera or influenza outbreaks in communities [16] [40].
Table 1: ELISA Applications in Infectious Disease Detection
| Infectious Agent Type | Example Targets | Common ELISA Format | Primary Sample Type |
|---|---|---|---|
| Viral | HIV, Hepatitis A/B/C, Influenza | Indirect, for antibody detection [16] [40] | Serum, Plasma [10] |
| Bacterial | Lyme disease, Syphilis, Brucellosis | Indirect or Sandwich [40] | Serum, Whole Blood [16] |
| Fungal | Candida (Yeast) | Indirect [40] | Serum |
Diagram 1: Indirect ELISA for antibody detection.
Experimental Protocol: Indirect ELISA for Serological Testing
The following is a generalized protocol for an indirect ELISA to detect pathogen-specific antibodies, compiled from standard laboratory practices [10] [16]:
- Coating: Coat wells of a polystyrene microplate with 100 µL of a purified viral or bacterial antigen (2-10 µg/mL) in an alkaline coating buffer (e.g., carbonate-bicarbonate buffer, pH 9.4). Seal the plate and incubate overnight at 4°C.
- Washing and Blocking: Discard the coating solution and wash the plate 2-3 times with a wash buffer (e.g., PBS with 0.05% Tween-20). Add 200-300 µL of a blocking buffer (e.g., 1-5% BSA or a commercial protein blocker in PBS) to each well to cover any remaining protein-binding sites. Incubate for 1-2 hours at room temperature.
- Sample Incubation: Wash the plate as before. Add 100 µL of diluted patient serum or plasma (e.g., 1:100 to 1:1000 dilution in sample buffer) to the wells. Incubate for 1-2 hours at 37°C or room temperature to allow specific antibodies to bind.
- Detection Antibody Incubation: Wash the plate thoroughly to remove unbound antibodies. Add 100 µL of an enzyme-conjugated secondary antibody (e.g., Horseradish Peroxidase (HRP)-labeled anti-human IgG) diluted in buffer. Incubate for 1 hour at room temperature.
- Signal Development and Reading: Perform a final, thorough wash. Add 100 µL of a colorimetric substrate for the enzyme (e.g., TMB for HRP). Incubate in the dark for 15-30 minutes. Stop the reaction by adding 50-100 µL of a stop solution (e.g., 0.16 M sulfuric acid for TMB). Immediately measure the absorbance of each well at the appropriate wavelength (e.g., 450 nm for TMB) using a microplate reader.
- Data Analysis: Compare the absorbance of samples to a standard curve of known antibody titers or to positive and negative control samples to determine the presence and concentration of the target antibody.
ELISA in Cancer Research and Diagnostics
In oncology, ELISA is pivotal for discovering and quantifying tumor markers, which are substances often produced by cancer cells or the body in response to cancer. These markers are used for diagnosis, assessing prognosis, and monitoring response to therapy [16] [41].
Detecting Tumor Antigens and Autoantibodies
Traditional approaches involve sandwich ELISA to measure circulating tumor antigens like Prostate-Specific Antigen (PSA) for prostate cancer and Carcinoembryonic Antigen (CEA) for colorectal cancer [16] [41]. In this format, a capture antibody specific to the tumor antigen is first immobilized on the plate. The patient sample (e.g., serum) is added, and the antigen is captured. After washing, a second, enzyme-linked detection antibody that binds a different epitope on the antigen is added, forming an "antibody-antigen-antibody" sandwich. This format is highly specific and sensitive, often not requiring prior purification of the antigen [16] [14].
A more recent and promising application is the detection of autoantibodies against tumor-associated proteins, such as extracellular Protein Kinase A (ecPKA) and Nicotinamide N-Methyltransferase (NNMT) in colorectal cancer [41]. This method uses an indirect ELISA format where the tumor antigen (e.g., recombinant ecPKA) is coated on the plate. Serum from a cancer patient, which may contain autoantibodies generated against the tumor protein, is applied. The presence of these autoantibodies is then detected using an enzyme-labeled anti-human IgG antibody [41]. This autoantibody-based ELISA can exhibit enhanced sensitivity and specificity compared to direct antigen detection and represents a cost-effective screening tool [41].
Table 2: ELISA Applications in Cancer Biomarker Analysis
| Biomarker Category | Example Targets | Common ELISA Format | Application Note |
|---|---|---|---|
| Tumor Antigens | PSA (Prostate), CEA (Colorectal), CA125 (Ovarian) [16] [41] | Sandwich [16] | Quantifies circulating cancer-related proteins. |
| Autoantibodies | Anti-ecPKA, Anti-NNMT (Colorectal) [41] | Indirect [41] | Detects immune response to tumor proteins; can offer superior specificity [41]. |
| Exosomal Proteins | GRP78 [42] | Ultrasensitive Sandwich [42] | Measures trace proteins in exosomes for cancer microenvironment research. |
Advanced Technology: Ultrasensitive ELISA
A significant limitation in cancer research has been the low abundance of many critical protein biomarkers in circulation or within exosomes—small extracellular vesicles that play a key role in cell communication [42]. To address this, ultrasensitive ELISA methods have been developed. One advanced technique combines a standard sandwich ELISA with a signal amplification method called thio-NAD cycling [42].
In this system, the enzyme Alkaline Phosphatase (ALP), linked to the detection antibody, hydrolyzes its substrate, androsterone 3-phosphate. The product, androsterone, then enters a cycling reaction catalyzed by the enzyme 3α-hydroxysteroid dehydrogenase (3α-HSD). This cycle, fueled by excess NADH and thio-NAD, generates a molecule of thio-NADH in each turn. Thio-NADH accumulates in a "triangle number fashion" over time, leading to massive signal amplification. This allows for the detection of proteins at zeptomole (10⁻²¹ mole) levels, enabling the quantification of trace proteins like GRP78 in exosomes from cancer cells, which is crucial for understanding tumor progression and metastasis [42].
Diagram 2: Ultrasensitive ELISA with signal amplification.
ELISA in Endocrinology
Endocrinology relies heavily on the accurate measurement of hormones to diagnose and manage conditions like diabetes, thyroid disorders, and reproductive health issues. ELISA's ability to precisely quantify hormone levels in blood, urine, and saliva makes it an indispensable tool in this field [40] [43].
Quantifying Hormones and Related Biomarkers
Competitive ELISA is frequently used for measuring small molecules like steroid and thyroid hormones, which have a single antigenic epitope [7]. In this format, the patient's sample (containing the target hormone) and a fixed amount of enzyme-labeled hormone compete for binding to a limited number of antibody sites immobilized on the plate. The amount of enzyme-labeled hormone that binds is inversely proportional to the concentration of the target hormone in the sample. A lower signal, therefore, indicates a higher concentration of the target hormone in the sample [10] [7].
For larger protein hormones, sandwich ELISA is the preferred method. A classic example is the detection of human chorionic gonadotropin (hCG) for pregnancy tests [40]. Follicle-stimulating hormone (FSH), luteinizing hormone (LH), and prolactin are also routinely measured using sandwich assays to evaluate reproductive health and pituitary function [16] [43].
Table 3: Common Biomarkers in Endocrinology Detected by ELISA
| Endocrine Function | Key Biomarkers | Role of Biomarker | Typical ELISA Format |
|---|---|---|---|
| Thyroid Function | TSH, T3, T4, Thyroid Autoantibodies [43] | Diagnose hypo-/hyperthyroidism, autoimmune thyroiditis. | Competitive, Sandwich [7] |
| Glucose Metabolism | Insulin, HbA1c (indirect) [43] | Manage and diagnose diabetes. | Sandwich, Competitive |
| Reproductive Health | hCG, FSH, LH, Estrogen, Testosterone, Progesterone [16] [43] | Confirm pregnancy, assess fertility, monitor therapy. | Sandwich, Competitive [40] |
| Adrenal Function | Cortisol, DHEA-S, Aldosterone [43] | Diagnose Cushing's syndrome, Addison's disease. | Competitive |
Experimental Protocol: Competitive ELISA for Hormone Detection
The following protocol outlines the steps for a competitive ELISA, suitable for measuring small molecules like testosterone or cortisol [10] [7]:
- Coating: Coat wells with a known, limited concentration of the specific antibody against the target hormone. Incubate and wash.
- Competition Incubation: Simultaneously add the patient sample (or standard) and a predefined concentration of enzyme-labeled hormone to the wells. The unlabeled hormone (from the sample) and the labeled hormone compete for binding sites on the immobilized antibody. Incubate to reach binding equilibrium.
- Washing: Wash the plate thoroughly. This step removes both the unbound labeled hormone and the unbound unlabeled hormone. The amount of enzyme-labeled hormone retained in the well is inversely proportional to the concentration of the target hormone in the sample.
- Signal Development: Add substrate. The bound enzyme-conjugate reacts with the substrate to produce a colored product.
- Reading and Analysis: Stop the reaction and measure the absorbance. A decrease in signal intensity compared to a control well with no competing hormone (maximum signal) indicates the presence of the target hormone in the sample. The hormone concentration in the sample is calculated by interpolating from a standard curve of known concentrations.
The Scientist's Toolkit: Essential Reagents and Materials
Setting up a robust ELISA laboratory requires specific core reagents and equipment. The following table details the essential components and their functions [10] [7].
Table 4: Essential Research Reagent Solutions for ELISA
| Item | Function / Description | Key Considerations |
|---|---|---|
| Microplate | 96-well polystyrene plates; solid phase for immobilizing capture protein [10] [7]. | High protein-binding capacity; clear for colorimetric, black/white for fluorescent/chemiluminescent detection [7]. |
| Coating Antigen/Antibody | Purified protein or antibody that is immobilized to capture the target [10]. | Purity is critical for specificity; typically used at 2-10 µg/mL in alkaline buffer [7]. |
| Blocking Buffer | Protein solution (e.g., BSA, ovalbumin) used to cover unsaturated binding sites [16] [7]. | Prevents nonspecific binding of other proteins later in the assay, reducing background noise. |
| Detection Antibodies | Enzyme-conjugated primary or secondary antibodies for detecting the immobilized complex [10] [7]. | Specificity is paramount. HRP and Alkaline Phosphatase (AP) are common enzyme labels [10]. |
| Enzyme Substrate | Chromogenic, fluorescent, or chemiluminescent molecule that reacts with the enzyme to produce a signal [10]. | Choice depends on enzyme (e.g., TMB for HRP, pNPP for AP) and desired sensitivity [16] [7]. |
| Wash Buffer | Buffer (e.g., PBS) with a mild detergent (e.g., Tween-20) for removing unbound material between steps [10]. | Critical for reducing background; multiple washes are standard. |
| Stop Solution | Acidic (e.g., H₂SO₄) or basic solution that halts the enzyme-substrate reaction [10]. | Stabilizes the final signal color for measurement at a specific time. |
| Microplate Reader | Spectrophotometer that measures the absorbance (optical density) in each well of the plate [10]. | Must be capable of reading at the specific wavelength of the substrate's product (e.g., 450 nm for TMB). |
Within the broader context of evaluating protein detection methods, the Enzyme-Linked Immunosorbent Assay (ELISA) presents a range of formats, each with distinct advantages and limitations. Among these, the sandwich ELISA has emerged as the gold standard for sensitive and specific protein quantification in complex biological samples. This technical review delves into the principles underpinning its superiority, providing a detailed protocol and a critical analysis of its applications in modern research and drug development.
The Enzyme-Linked Immunosorbent Assay (ELISA) is a plate-based assay technique designed for detecting and quantifying soluble substances such as peptides, proteins, antibodies, and hormones [7]. Since its original description in 1971, ELISA has become a cornerstone of biochemical analysis due to its adaptability and reliability [10]. The fundamental principle of all ELISA formats involves the immobilization of a target molecule (antigen) on a solid surface (typically a microplate) and its subsequent detection using an antibody linked to a reporter enzyme. The detection is accomplished by measuring the activity of this reporter enzyme after incubation with a substrate to produce a measurable product [7].
When assessing the pros and cons of ELISA for protein detection, the choice of format is critical. The four primary types are direct, indirect, sandwich, and competitive ELISA [44]. The sandwich ELISA is distinguished by its use of two antibodies that bind to different epitopes on the target antigen, effectively "sandwiching" it [45]. This format is highly specific and sensitive, making it the preferred method for quantifying proteins, especially those present at low concentrations in complex mixtures like serum or cell lysates [28]. Its design minimizes background noise and is ideal for detecting low-abundance proteins, a common challenge in both research and diagnostic settings [46].
Comparative Advantages of Sandwich ELISA
The design of the sandwich ELISA confers several significant advantages over other formats, which are summarized in the table below.
Table 1: Comparison of Major ELISA Formats for Protein Detection
| Feature | Sandwich ELISA | Direct ELISA | Indirect ELISA | Competitive ELISA |
|---|---|---|---|---|
| Sensitivity | High (due to signal amplification and use of two antibodies) [46] | Low (minimal signal amplification) [7] | Moderate (signal amplification via secondary antibody) [7] | High (useful for low analyte concentration) [44] |
| Specificity | Very High (requires two distinct epitopes) [46] | Moderate (potential for non-specific binding) [44] | Moderate (potential for cross-reactivity) [7] | High [47] |
| Complexity & Time | More complex, longer protocol [46] | Simple and fast [46] | Moderate complexity [44] | Moderate complexity [47] |
| Antibody Requirements | Two specific antibodies (matched pair) [28] | Single conjugated antibody [44] | Two antibodies (non-conjugated primary and conjugated secondary) [7] | Single antibody [47] |
| Sample Type | Ideal for complex samples (e.g., serum, crude lysates) [46] | Best for purified or high-abundance antigens [47] | Suitable for various samples [7] | Useful for small antigens [46] |
| Key Advantage | High specificity and sensitivity; suitable for impure samples [46] | Speed; avoids cross-reactivity from secondary antibody [7] | Signal amplification; versatility [7] | Ideal for small antigens with single epitope [7] |
The core strength of the sandwich format lies in its dual-antibody recognition system. This structure dramatically enhances specificity because for a signal to be generated, the target protein must be bound by two different antibodies, each recognizing a separate epitope. This significantly reduces the chance of cross-reactivity with non-target proteins present in a sample [46]. Furthermore, this format allows for excellent sensitivity, as the detection system can be further amplified, for instance, by using a biotin-streptavidin complex [45].
Table 2: Pros and Cons of Sandwich ELISA
| Advantages | Disadvantages |
|---|---|
| High sensitivity and specificity for the target antigen [7] [46] | Requires a matched pair of antibodies recognizing different epitopes [7] |
| Can be used with crude or impure samples without affecting detection [46] | Development of a matched antibody pair can be costly and time-consuming [44] |
| Different detection methods (colorimetric, chemiluminescent) can be used with the same capture antibody [7] | Requires more optimization to ensure no cross-reactivity between capture and detection antibodies [7] |
| Flexible detection schemes (directly conjugated detection antibody or indirect with secondary) [7] | The process is more complex and labor-intensive compared to direct ELISA [46] |
The Sandwich ELISA Workflow
The following diagram illustrates the core steps of a sandwich ELISA protocol, from plate coating to signal detection.
Diagram 1: Sandwich ELISA Workflow
Detailed Protocol for a Colorimetric Sandwich ELISA
This protocol is adapted from industry-standard methods [28] [45] [48].
Stage 1: Plate Coating and Blocking
- Coat the Plate: Dilute the capture antibody in a coating buffer (e.g., 50 mM carbonate-bicarbonate buffer, pH 9.4) to a concentration of 1–10 µg/mL. Add 100 µL per well to a 96-well microplate. Cover the plate and incubate for 1 hour at room temperature or overnight at 2–8°C [45] [48].
- Wash: Aspirate the coating solution and wash the plate once with >300 µL of wash buffer (e.g., PBS or TBS with 0.05% Tween 20). Following the wash, invert and tap the plate on an absorbent paper to remove excess liquid [45].
- Block: Add 300 µL per well of a blocking buffer (e.g., 1% BSA, 5% non-fat dry milk, or a commercial blocking buffer in PBS) to cover all remaining protein-binding sites. Incubate for 1–2 hours at room temperature [28] [48]. Aspirate and tap the plate to remove excess blocking buffer.
Stage 2: Antigen Incubation and Detection
- Add Sample and Standards: Prepare serial dilutions of your protein standard in blocking buffer. Similarly, prepare your samples (e.g., serum, cell lysate). Add 100 µL of each standard and sample to designated wells in duplicate. Incubate for 1–2 hours at room temperature with gentle shaking [45].
- Wash: Aspirate the contents and wash the wells five times with >300 µL of wash buffer per well, inverting and tapping the plate after each wash [45].
- Add Detection Antibody: Dilute the specific detection antibody in blocking buffer. Add 100 µL per well. Incubate for 2 hours at room temperature with gentle shaking [45]. The detection antibody can be either directly conjugated to an enzyme like Horseradish Peroxidase (HRP) or be biotinylated.
- Wash: Repeat the wash step as in #5 [45].
- Add Enzyme Conjugate (If needed): If using a biotinylated detection antibody, prepare a working solution of Streptavidin-HRP (e.g., 1:5,000 dilution in blocking buffer). Add 100 µL per well and incubate for 1 hour at room temperature [45].
- Wash: Repeat the wash step as in #5 [45].
Stage 3: Signal Development and Analysis
- Add Substrate: Add 100 µL of a suitable substrate solution to each well. For HRP, 3,3',5,5'-Tetramethylbenzidine (TMB) is commonly used. Incubate for 5-30 minutes at room temperature, monitoring for color development [45] [48].
- Stop Reaction: Add 100 µL of stop solution (e.g., 0.16 M sulfuric acid for TMB) to each well. This will change the color from blue to yellow and halt the enzyme reaction [45].
- Read Plate: Measure the absorbance of each well at 450 nm within 30 minutes of stopping the reaction using a microplate reader [45]. The intensity of the signal is proportional to the amount of target antigen in the well.
- Calculate Results: Generate a standard curve by plotting the mean absorbance for each standard against its concentration. Use this curve to determine the concentration of the target antigen in unknown samples [46].
The Scientist's Toolkit: Essential Reagents and Materials
Successful execution of a sandwich ELISA depends on a set of high-quality, well-characterized reagents.
Table 3: Essential Research Reagent Solutions for Sandwich ELISA
| Reagent / Material | Function / Purpose | Examples & Notes |
|---|---|---|
| Microplate | Solid phase for immobilizing biomolecules [7]. | 96-well polystyrene plates; clear for colorimetry, white/black for luminescence/fluorescence [45]. |
| Capture Antibody | Binds and immobilizes the target antigen from the sample [28]. | Monoclonal antibodies provide high specificity; must recognize a different epitope than the detection antibody [28]. |
| Detection Antibody | Binds to a different epitope on the captured antigen for detection [28]. | Can be directly enzyme-conjugated (HRP) or biotinylated for signal amplification [45]. |
| Coating Buffer | Medium for passive adsorption of the capture antibody to the plate [48]. | Carbonate-bicarbonate buffer (pH 9.4) or PBS (pH 7.4) [45]. |
| Blocking Buffer | Saturates unused protein-binding sites to prevent non-specific binding [48]. | 1-5% BSA, non-fat dry milk, or commercial formulations in PBS/TBS [28] [48]. |
| Wash Buffer | Removes unbound reagents and reduces background signal [10]. | PBS or TBS with a detergent (e.g., 0.05% Tween 20) [45]. |
| Enzyme Conjugate | Generates a detectable signal. | Horseradish Peroxidase (HRP) or Alkaline Phosphatase (AP) [7]. Streptavidin-HRP is used with biotinylated detection antibodies [45]. |
| Substrate | Reacts with the enzyme to produce a measurable signal [10]. | TMB (colorimetric) for HRP; PNPP for AP; luminol-based for chemiluminescence [45] [44]. |
| Stop Solution | Halts the enzyme-substrate reaction at a defined time [10]. | Acidic solution (e.g., H₂SO₄ for TMB); basic solution (e.g., NaOH for PNPP) [45]. |
Applications in Research and Drug Development
The sandwich ELISA's robustness makes it indispensable across multiple industries.
- Biotechnology and Basic Research: Used to study protein-protein interactions, hormone behavior, signaling pathways, and immune response functions [46]. It is a key tool for quantifying cytokines, growth factors, and biomarkers in cell lysates and culture supernatants [28] [48].
- Pharmaceutical and Clinical Diagnostics: A crucial tool for diagnosing diseases by detecting specific antigens or antibodies in patient serum, plasma, or other biological fluids [10] [46]. It is widely used for quantifying biomarkers and monitoring therapeutic responses.
- Food and Beverage Industry: Employed to detect and quantify allergens, pathogens, and contaminants to ensure food safety and quality [46].
In the comprehensive evaluation of protein detection methodologies, the sandwich ELISA stands out for its exceptional sensitivity and specificity. While all ELISA formats have their place, the sandwich protocol's requirement for dual antibody recognition makes it uniquely suited for the accurate quantification of proteins in complex biological samples. Despite its more complex setup and the need for a well-characterized antibody pair, its advantages in reliability and performance have solidified its status as the gold standard for researchers and drug development professionals worldwide.
Leveraging High-Throughput Capabilities for Large-Scale Sample Processing
High-throughput technologies have become indispensable in modern laboratories, transforming sample preparation from a major bottleneck into a highly efficient and automated process. Within the context of protein detection, the Enzyme-Linked Immunosorbent Assay (ELISA) is a foundational technique whose value in large-scale studies is profoundly enhanced by high-throughput principles. This guide details the integration of high-throughput methodologies with ELISA workflows, providing a technical framework for researchers and drug development professionals to assess its suitability for their protein detection needs.
High-Throughput Analysis: Core Principles and ELISA Integration
High-throughput (HT) analysis is defined by its ability to process a large number of samples rapidly and in parallel, minimizing manual intervention and maximizing data output. The core approaches to achieving high throughput include parallel sample processing, automation, and improvements in process kinetics [49].
The established foundation for high-throughput sample preparation in bioanalysis is the 96-well microplate format, which has been standardized over two to three decades [49]. This format enables the parallel processing of 96 samples simultaneously and has been adapted for countless applications, including various sample preparation techniques and direct analysis [49]. The integration of ELISA with this platform is a natural fit, as ELISA is inherently a 96-well plate-based assay [10] [50]. The evolution of ancillary devices—such as repeating pipettes, vacuum manifolds, and automated liquid-handling systems—has been key to leveraging the full high-throughput potential of this format [49].
More recently, advanced microextraction techniques have been developed for high-throughput analyses, further reducing solvent consumption and sample preparation time. These methods are designed for seamless integration with automated systems and can process a large number of samples in parallel, significantly accelerating the sample preparation bottleneck that often precedes analytical techniques like mass spectrometry [51].
Table 1: Core High-Throughput Platforms for Protein Detection
| Platform | Key Technology | Throughput Capability | Best Used For |
|---|---|---|---|
| 96-Well Microplate (ELISA) [49] [50] | Antibody-antigen binding in plate wells | 96 samples per plate; highly amenable to automation | Quantitative, specific protein detection in diverse biological fluids. |
| Meso Scale Discovery (MSD) [52] | Electrochemiluminescence | 96-well plate; multiplexing up to 10 analytes | Wide dynamic range, low sample volume, sensitive biomarker profiling. |
| Olink [52] | Proximity Extension Assay (PEA) | 96- or 48-plex per sample; high-throughput profiling | Discovery-phase biomarker profiling with very high multiplexing. |
| Luminex [52] | xMAP Bead-Based Technology | Up to 500 analytes simultaneously in a single run | Highly multiplexed protein quantification in early-stage research. |
ELISA: A Pillar of Protein Detection
Historical Context and Basic Principle
The ELISA was developed in 1971 by Perlmann and Engvall as a safer, non-radioactive alternative to the radioimmunoassay (RIA), replacing the radioactive label with an enzyme [10] [50]. The core principle of ELISA involves detecting an antigen-antibody interaction where one component is immobilized on a solid surface (typically a polystyrene microplate). The binding is quantified using an enzyme-linked conjugate that reacts with a substrate to generate a coloured, fluorescent, or chemiluminescent product [10] [16].
ELISA Formats and Methodologies
The versatility of ELISA is demonstrated through its several formats, each with specific procedures and applications [10] [16] [50].
- Direct ELISA: The simplest format, where a captured antigen is detected directly by an enzyme-labelled primary antibody. It is rapid but less sensitive and flexible [16] [50].
- Indirect ELISA: The captured antigen is detected by an unlabeled primary antibody, which is then bound by an enzyme-labelled secondary antibody. This method offers greater sensitivity and flexibility due to signal amplification [10] [16].
- Sandwich ELISA: The most specific and sensitive format for complex samples. A capture antibody is first immobilized on the plate. The antigen in the sample binds to this antibody, and is subsequently "sandwiched" by a second, enzyme-linked detection antibody. This requires two antibodies that recognize different epitopes on the antigen [16] [50].
- Competitive ELISA: Used for detecting small antigens. The sample antigen and a labelled reference antigen compete for a limited number of antibody-binding sites. The signal produced is inversely proportional to the amount of antigen in the sample [10] [16] [4].
High-Throughput ELISA Workflow: A Detailed Protocol
Implementing a high-throughput ELISA workflow requires meticulous planning and optimization at every stage, from sample preparation to data analysis.
Sample Preparation and Protein Extraction
The accuracy of any ELISA is contingent on the quality of the input sample. Efficient protein extraction is critical, especially for complex food or tissue matrices. A recently developed optimized extraction method demonstrated 80% efficiency across diverse food matrices, which was crucial for accurate allergen quantification and improved reproducibility in protein identification [53]. For high-throughput processing, methods such as positive pressure systems in 96-well plate formats can drastically improve throughput, efficiency, and consistency in peptide cleanup for downstream analysis [54]. Automated systems can process up to 96 samples simultaneously, reducing preparation time from days to a few hours [54].
The Automated ELISA Procedure
The following protocol outlines a high-throughput Sandwich ELISA, which offers high specificity, using automation-friendly steps.
- Coating: Dispense the capture antibody into all wells of a 96-well microplate using an automated liquid handler. Incubate overnight at 4°C or for 1 hour at 37°C [16].
- Washing and Blocking: Wash the plate 2-3 times with a PBS buffer containing a non-ionic detergent (e.g., Tween-20) using an automated plate washer. Then, add a blocking agent like Bovine Serum Albumin (BSA) to cover any remaining protein-binding sites on the plastic. Incubate for at least 1-2 hours at room temperature [16].
- Antigen Incubation: After another wash, add the samples and standards (in duplicate or triplicate) to the plate. The standards should be a serial dilution of a known antigen concentration to create a standard curve. Incubate for 90 minutes at 37°C [16].
- Detection Antibody Incubation: Wash the plate to remove unbound antigen. Add the enzyme-linked detection antibody. Incubate for 1-2 hours at room temperature [16].
- Final Wash and Substrate Addition: Perform a final wash to remove any unbound detection antibody. Add the enzyme substrate (e.g., TMB for HRP). The enzyme will catalyze a reaction, producing a color change [10] [16].
- Stop the Reaction and Read: After a defined incubation (e.g., 30 minutes), add a stop solution (e.g., acidic H₂SO₄ or HCl). This halts the enzyme reaction and, in the case of TMB, changes the color from blue to yellow. Immediately read the absorbance of each well using a microplate reader, typically at 450 nm [10] [4].
Data Analysis and Quality Control
For quantitative ELISA, data from the standard curve are used to calculate the concentration of antigen in the samples.
- Standard Curve: The optical density (OD) of the standards is plotted against their known concentration. Curve-fitting models such as the 4- or 5-parameter logistic (4PL or 5PL) are recommended for the best fit, as they account for the non-linear, sigmoidal nature of ELISA data [4].
- Concentration Calculation: The concentration of an unknown sample is determined by locating its average OD on the standard curve and reading the corresponding concentration on the x-axis [4].
- Quality Controls:
- Replicates: Always run samples in duplicate or triplicate. The duplicates should be within 20% of the mean [4].
- Coefficient of Variation (CV): Calculate the CV (standard deviation/mean) to assess precision. A high CV can indicate pipetting errors, contamination, or temperature variations [4].
- Spike Recovery: To check for matrix interference, a known concentration of antigen is spiked into the sample matrix. The recovery percentage indicates if sample constituents are affecting the detection [4].
Comparative Analysis: ELISA in the Modern Toolbox
While ELISA is a robust and widely accessible technique, several modern platforms offer enhanced capabilities for specific applications. The choice of platform depends on the research question, required sensitivity, multiplexing needs, and budget.
Table 2: Comparative Analysis of Protein Detection Platforms
| Feature | Traditional ELISA [52] [50] | MSD (ECL) [52] | Olink (PEA) [52] | Quanterix (Simoa) [52] | SPR [55] |
|---|---|---|---|---|---|
| Dynamic Range | ~1-2 logs | 3-5 logs | 3-4 logs | >4 logs | N/A (Real-time) |
| Sensitivity | High (pg/mL) | High (pg/mL) | High (fg/mL) | Ultra-High (fg/mL) | High |
| Multiplexing | Low (Single-plex) | Medium (Up to 10-plex) | Very High (48- or 96-plex) | Low (Up to 4-plex) | Low to Medium |
| Sample Volume | High (~100 µL) | Low (≥25 µL) | Very Low (1 µL) | Low | Low |
| Throughput | High | High | Very High | Medium | Medium |
| Key Advantage | Cost-effective, standardized | Wide dynamic range, low matrix effect | Extreme multiplexing, low volume | Single-molecule detection, ultra-sensitivity | Label-free, provides kinetics data |
| Key Limitation | Low-plex, small dynamic range | Proprietary detection label | Not for small panels (<15 targets) | High cost, limited protein menu | High cost for some systems, fluidics maintenance |
The Scientist's Toolkit: Essential Reagents and Equipment
A successful high-throughput ELISA laboratory requires specific materials and equipment to ensure consistent, high-quality results.
Table 3: Essential Research Reagent Solutions for High-Throughput ELISA
| Item | Function | High-Throughput Consideration |
|---|---|---|
| 96-/384-Well Microplates [10] | Solid phase for immobilizing capture antibody or antigen. | Standardized dimensions for automation; material (e.g., polystyrene) chosen for high protein-binding capacity. |
| Coated Capture Antibody [16] [50] | Specifically binds the target antigen in Sandwich ELISA. | Requires "matched pair" with detection antibody; monoclonal antibodies preferred for specificity. |
| Enzyme-Conjugated Detection Antibody [10] [16] | Binds to the captured antigen; enzyme catalyzes color reaction. | Horseradish Peroxidase (HRP) and Alkaline Phosphatase (AP) are common; compatibility with automated dispensers. |
| Chromogenic Substrate (e.g., TMB) [10] [16] | Reacts with the enzyme to produce a measurable color change. | TMB turns blue with HRP and yellow when the reaction is stopped; stable for bulk dispensing. |
| Plate Washer [16] | Automates the washing steps between incubations to remove unbound material. | Critical for reproducibility; programmable for multiple wash cycles, reducing hands-on time and variability. |
| Microplate Reader [10] [4] | Spectrophotometrically measures the absorbance of the colored product in each well. | High-speed reading of 96-well plates in seconds; software for immediate standard curve fitting and data reduction. |
| Automated Liquid Handler [50] | Dispenses reagents, samples, and standards with high precision. | Eliminates pipetting errors, improves speed, and allows for unattended operation of repetitive liquid transfers. |
| Blocking Buffer (e.g., BSA) [16] | Covers any remaining protein-binding sites to prevent non-specific antibody binding. | Ready-to-use solutions ensure consistency; critical for minimizing background noise and false positives. |
Maximizing ELISA Performance: Sensitivity, Specificity, and Troubleshooting
The Enzyme-Linked Immunosorbent Assay (ELISA) has been a workhorse technique in biomedical research and clinical diagnostics since the 1970s, prized for its high throughput, cost-effectiveness, and operational simplicity [10] [56]. This plate-based immunoassay technique detects and quantifies soluble substances such as peptides, proteins, antibodies, and hormones through specific antibody-antigen interactions, with detection achieved via enzyme-mediated signal generation [7]. Despite its widespread adoption, a significant limitation of conventional ELISA is its restricted sensitivity, typically in the picogram per milliliter (pg/mL) to nanogram per milliliter (ng/mL) range [57] [58]. This creates a substantial sensitivity gap compared to nucleic acid-based tests, which can achieve detection limits in the atto- to femtomolar range through intrinsic amplification mechanisms like PCR [58].
Bridging this sensitivity gap is paramount for advancing protein biomarker detection, particularly for low-abundance analytes that are critical for early disease diagnosis, therapeutic monitoring, and fundamental biological research [58]. In diseases such as cancer, cardiovascular disorders, and autoimmune conditions, protein biomarkers often provide more accurate reflections of active disease progression than nucleic acid biomarkers [58]. This technical guide comprehensively addresses two fundamental strategies for enhancing ELISA sensitivity: (1) the development and implementation of high-affinity antibodies, and (2) the application of sophisticated signal amplification systems. By detailing these methodologies within the context of a broader evaluation of ELISA's advantages and limitations for protein detection, this review provides researchers with actionable strategies to push the boundaries of immunoassay performance.
High-Affinity Antibodies: The Foundation of Sensitive Detection
Antibody affinity, defined as the strength with which an antibody binds its specific epitope, fundamentally governs the sensitivity of any immunoassay [59]. High-affinity antibodies exhibit lower dissociation rates, leading to more stable immune complexes, improved retention of target molecules during washing steps, and ultimately, enhanced capacity to detect low-abundance analytes [59].
Antibody Types and Characteristics
Table 1: Comparison of Polyclonal and Monoclonal Antibodies
| Feature | Polyclonal Antibodies | Monoclonal Antibodies |
|---|---|---|
| Epitope Recognition | Multiple epitopes within the same antigen | Single, specific epitope |
| Production | Produced by multiple B-cell clones in immunized animals | Produced by a single B-cell clone (hybridoma) |
| Affinity | Variable affinities across the antibody pool | Uniform, high intrinsic affinity |
| Specificity | Potentially higher cross-reactivity | High specificity to a single epitope |
| Development Time | 3-8 months | 2-4 months for initial development |
| Consistency | Batch-to-batch variability | High consistency between batches |
| Common Applications | Capture antibodies in sandwich ELISA; often used with polyclonal detectors | Ideal for detection in asymmetric sandwich ELISA |
The strategic selection between polyclonal and monoclonal antibodies significantly impacts assay performance. Polyclonal antibodies, comprising a heterogeneous mixture targeting multiple epitopes, often provide increased sensitivity due to their ability to bind various antigenic determinants simultaneously [59] [57]. This multi-epitope recognition can be particularly advantageous for capturing target proteins in sandwich ELISA formats. Conversely, monoclonal antibodies offer exceptional specificity to a single epitope, reducing cross-reactivity and background signal [59]. This characteristic makes them invaluable for detection antibodies in asymmetric sandwich ELISA formats, where their uniform binding characteristics contribute to superior assay reproducibility [59].
Advanced Antibody Engineering Strategies
Nanobodies and Multimerization: Recent advancements have leveraged genetically engineered nanobodies (single-domain antibodies) to create multimeric structures with enhanced functional affinity (avidity) [60]. For instance, one innovative approach involved fusing a nanobody gene (Nb28) against Ochratoxin A (OTA) with a self-assembling peptide (C4) and a streptavidin-binding peptide (SBP) to create a multivalent bifunctional nanobody (Nb28-C4-SBP) that self-assembles into heptamers [60]. This multimerization strategy resulted in a remarkable 175.56-fold improvement in sensitivity compared to monomeric nanobody-based ELISA [60].
Recombinant Antibody Generation: The process for developing high-affinity monoclonal antibodies typically begins with expressing the full-length target protein in eukaryotic systems to ensure proper folding and post-translational modifications [61]. Subsequent conventional antibody engineering techniques involve in vitro cell fusion of immunized spleen cells with myeloma cells, followed by selection of positive hybridoma cell clones using methods like HAT (hypoxanthine-aminopterin-thymidine) selection [61]. Following initial selection, complementarity-determining region (CDR) analysis helps predict antigen-recognition epitopes and guides the selection of optimal antibody pairs for sandwich ELISA configurations [61].
Antibody Orientation Techniques: Proper orientation of capture antibodies on the solid phase significantly improves antigen-binding efficiency by ensuring optimal accessibility of antigen-binding sites [58]. Common strategies include:
- Protein A/G Immobilization: These bacterial proteins bind to the Fc region of antibodies, ensuring uniform orientation [58].
- Biotin-Streptavidin System: Biotinylated antibodies can be precisely oriented using streptavidin-coated plates, though this requires careful biotinylation that preserves antibody functionality [58].
- Covalent Cross-linking: Provides stable, permanent antibody attachment that prevents dissociation during washing steps [58].
Diagram 1: High-Affinity Antibody Development Workflow. This flowchart illustrates the comprehensive process from initial immunization to final oriented immobilization for developing sensitive detection antibodies.
Signal Amplification Systems: Enhancing Detection Limits
While high-affinity antibodies improve target capture, signal amplification strategies directly enhance the detectable output per binding event, dramatically lowering the limit of detection (LOD).
Enzymatic Signal Amplification
Table 2: Comparison of Signal Amplification Strategies
| Amplification Strategy | Mechanism | Sensitivity Improvement | Key Features |
|---|---|---|---|
| Polymerized Enzyme Probes | Streptavidin conjugated to polymers of HRP (SA-PolyHRP) | 141-fold improvement demonstrated in some systems | Multiple enzymes per binding event; compatible with biotinylated antibodies |
| Biotin-Streptavidin Systems | Biotinylated secondary antibodies bind streptavidin-enzyme conjugates | Significant amplification due to 4:1 biotin:streptavidin binding ratio | High affinity interaction; versatile for various detection configurations |
| Enzyme Labels | HRP or AP catalyze substrate conversion to colored/fluorescent products | Fundamental to all ELISA detection | Horseradish peroxidase (HRP) and alkaline phosphatase (AP) most common |
| Fluorescent Microspheres | Time-resolved fluorescent microspheres in immunochromatographic strips | LOD of 1.5 ng/mL for procalcitonin demonstrated | Enables fluorescent detection with improved signal-to-noise ratios |
The streptavidin-biotin system represents one of the most powerful and widely adopted signal amplification strategies [60] [56]. The exceptionally high affinity (K_d ~ 10^(-15) M) between biotin and streptavidin, coupled with the tetravalent nature of streptavidin (capable of binding four biotin molecules), creates a versatile amplification platform [56]. In practice, biotinylated secondary antibodies are detected using streptavidin conjugated to reporter enzymes like horseradish peroxidase (HRP) or alkaline phosphatase (AP) [56]. A particularly effective advancement is the development of streptavidin-conjugated polymerized horseradish peroxidase (SA-PolyHRP), which dramatically increases the enzyme loading per binding event compared to traditional SA-HRP [60]. Research has demonstrated that incorporating SA-PolyHRP can yield a 141-fold improvement in sensitivity compared to conventional systems [60].
Emerging Amplification Technologies
Cell-Free Synthetic Biology Systems: Recent innovations have integrated cell-free synthetic biology with traditional immunoassays to create highly sensitive detection platforms [58]. These include:
- Expression Immunoassays: Where antibody binding triggers in vitro protein synthesis reactions.
- CRISPR-Linked Immunoassays (CLISA): Utilizing CRISPR systems to amplify detection signals.
- T7 RNA Polymerase-Linked Immunosensing Assays (TLISA): Employing bacteriophage RNA polymerase for signal generation.
Fluorescent Microsphere-Based Detection: Fluorescent microsphere immunochromatographic strips (FM-ICS) represent an advanced detection methodology that combines the sensitivity of fluorescent detection with the convenience of immunochromatographic formats [61]. In one developed system for procalcitonin detection, this approach achieved a detection limit of 1.5 ng/mL, demonstrating robust performance in clinical sample testing [61].
Diagram 2: Signal Amplification Pathways. This diagram compares traditional and advanced signal amplification strategies, highlighting pathways to enhanced sensitivity.
Integrated Experimental Protocols
Protocol: Dual Improved ELISA (DI-ELISA) for Ultrasensitive Detection
The following integrated protocol, adapted from recent research, combines multivalent nanobodies with polymerized enzyme probes for ultrasensitive detection [60]:
Reagents and Materials:
- Multivalent bifunctional nanobody (e.g., Nb28-C4-SBP heptamer)
- Streptavidin-conjugated polymerized HRP (SA-PolyHRP)
- Carbonate-bicarbonate coating buffer (pH 9.4)
- Blocking buffer (1% BSA in PBS)
- TMB (3,3',5,5'-tetramethylbenzidine) substrate solution
- Stop solution (1M H₂SO₄)
Procedure:
- Plate Coating: Coat microplate wells with 100 μL/well of antigen-specific capture antibody (2-10 μg/mL) in carbonate-bicarbonate buffer (pH 9.4). Incubate overnight at 4°C or for 2 hours at 37°C.
- Blocking: Remove coating solution and add 200 μL/well of blocking buffer. Incubate for 1-2 hours at 37°C.
- Antigen Incubation: Add 100 μL/well of standard or sample containing target antigen. Incubate for 2 hours at 37°C with gentle shaking.
- Multivalent Nanobody Incubation: Add 100 μL/well of multivalent bifunctional nanobody (e.g., Nb28-C4-SBP heptamer) at optimized concentration. Incubate for 1 hour at 37°C.
- SA-PolyHRP Incubation: Add 100 μL/well of appropriately diluted SA-PolyHRP. Incubate for 30 minutes at 37°C.
- Washing: Perform three wash cycles with PBS containing 0.05% Tween-20 (PBST) between each step.
- Signal Development: Add 100 μL/well of TMB substrate. Incubate for 15-30 minutes in the dark.
- Reaction Termination: Add 50 μL/well of stop solution (1M H₂SO₄).
- Signal Measurement: Measure absorbance at 450 nm using a microplate reader.
Optimization Notes:
- Systematically optimize concentrations of coating antigen/antibody and detection reagents.
- Adjust ionic strength and methanol concentrations in assay buffer to minimize non-specific binding.
- Fine-tune competitive reaction time for competitive ELISA formats.
Research Reagent Solutions
Table 3: Essential Research Reagents for High-Sensitivity ELISA
| Reagent Category | Specific Examples | Function in Assay | Key Characteristics |
|---|---|---|---|
| Solid Phase | 96-well polystyrene microplates | Platform for immobilization | High protein-binding capacity (>400 ng/cm²); low well-to-well variation (CV <5%) |
| Capture Molecules | Protein A/G, biotinylated antibodies, covalently linked antibodies | Target molecule capture | Ensures proper orientation; maximizes binding site availability |
| Detection Antibodies | Monoclonal antibodies, polyclonal antibodies, nanobodies, multivalent nanobodies | Binds captured analyte | High specificity and affinity; minimal cross-reactivity |
| Enzyme Conjugates | SA-PolyHRP, SA-HRP, AP conjugates | Signal generation | High specific activity; minimal non-specific binding |
| Signal Amplifiers | Biotin-streptavidin systems, fluorescent microspheres, synthetic biology components | Enhances detection signal | High amplification efficiency; low background noise |
| Substrates | TMB (colorimetric), ATTOPHOS (fluorescent), ECL (chemiluminescent) | Enzyme substrate | High signal-to-noise ratio; appropriate for detection method |
The strategic integration of high-affinity antibodies with advanced signal amplification systems has dramatically enhanced the sensitivity of ELISA, pushing detection limits to the low picogram per milliliter range and, in some specialized applications, even beyond [60] [57]. The development of multivalent nanobodies, exemplified by the Nb28-C4-SBP heptamer, combined with powerful amplification tools like SA-PolyHRP, has demonstrated that 20-266-fold improvements in sensitivity are achievable compared to conventional approaches [60].
Looking forward, the convergence of immunoassay technology with synthetic biology platforms promises to revolutionize protein detection sensitivity [58]. Emerging techniques such as expression immunoassays, CRISPR-linked immunoassays (CLISA), and T7 RNA polymerase-linked immunosensing assays (TLISA) represent the next frontier in sensitivity enhancement, potentially bridging the current gap between protein and nucleic acid detection limits [58]. Furthermore, advances in surface engineering using nonfouling polymers like PEG, improved antibody orientation strategies, and microfluidic automation of ELISA workflows will contribute to more robust, reproducible, and sensitive assays [58].
For researchers and drug development professionals, these sensitivity enhancement strategies open new possibilities in biomarker discovery, therapeutic monitoring, and diagnostic applications where detecting low-abundance proteins was previously challenging. By systematically implementing the approaches outlined in this technical guide—from careful antibody selection and engineering to strategic signal amplification—scientists can significantly advance their protein detection capabilities within the versatile ELISA platform.
Enzyme-linked immunosorbent assay (ELISA) remains a cornerstone technique for protein detection in research and diagnostics due to its sensitivity, robustness, and adaptability [58] [10]. However, its reliability is fundamentally dependent on specificity. Cross-reactivity and false-positive results pose significant challenges, potentially leading to incorrect data interpretation and diagnostic errors [62]. This guide examines the sources of these issues and provides detailed, actionable strategies to minimize them, ensuring the generation of robust and reliable data.
Understanding the Mechanisms of Cross-Reactivity and False Positives
Cross-reactivity occurs when antibodies used in an ELISA bind to non-target molecules that share structural similarities with the intended antigen [62]. A prominent example was observed during the COVID-19 pandemic, where studies documented a statistically significant increase in false-positive results on fourth-generation HIV Ag/Ab ELISA tests (Bio-Rad) in blood donors [63] [64]. This was strongly correlated (P<0.01) with elevated levels of SARS-CoV-2 antibodies following infection or vaccination [63] [64]. The proposed mechanism involves structural similarities and shared epitopes between the SARS-CoV-2 spike protein and HIV-1 antigens, particularly the p24 antigen [64].
Beyond specific antibody cross-reactivity, several other factors can contribute to false-positive signals:
- Non-Specific Binding: Proteins in the sample or detection reagents can adhere to the plastic plate or capture antibodies through hydrophobic or ionic interactions, especially if blocking is inefficient [58] [62].
- Interfering Substances: Substances present in complex biological samples, such as hemoglobin, lipids, or rheumatoid factors, can interfere with antibody-antigen binding or the enzymatic reaction [16].
- Inadequate Washing: Failure to thoroughly remove unbound antibodies, antigens, or enzymes during wash steps leaves residual components that contribute to high background signal [10] [16].
- Reagent Instability or Degradation: Antibodies or enzyme conjugates that have been improperly stored or handled can lose specificity and generate aberrant signals [62] [19].
Strategic Optimization to Minimize Non-Specificity
A proactive and systematic approach to assay development is crucial for maximizing specificity. The following strategies target key stages of the ELISA workflow.
Surface Engineering and Antibody Orientation
The foundation of a specific ELISA is laid during the coating and blocking steps.
- Advanced Blocking Strategies: While bovine serum albumin (BSA) and skim milk are common blocking agents, they may be insufficient for complex samples [58]. Non-fouling synthetic polymers like polyethylene glycol can create surfaces highly resistant to non-specific protein adsorption [58].
- Controlled Antibody Orientation: Passive adsorption of capture antibodies can lead to random orientation and denaturation, reducing the availability of antigen-binding sites [58]. Employing Protein A, Protein G, or biotin-streptavidin systems ensures a uniform orientation of antibodies via their Fc region, significantly improving antigen-binding capacity and consistency [58].
Assay Condition Optimization
Fine-tuning the physical and chemical parameters of the assay is critical for reducing background noise.
- Comprehensive Buffer Optimization: The sample diluent should closely match the matrix of the test samples to prevent matrix effects [62] [65]. Spike-and-recovery experiments are essential for validating that the sample matrix does not interfere with antigen detection [65].
- Checkerboard Titration: This efficient experimental design is used to optimize the concentrations of the capture antibody, detection antibody, and sample simultaneously [65]. By testing different combinations in a grid pattern, it identifies the concentration pair that delivers the strongest specific signal with the lowest background.
Table 1: Recommended Concentration Ranges for Key Reagents in ELISA Optimization
| Reagent Source | Coating Antibody Range | Detection Antibody Range |
|---|---|---|
| Polyclonal Serum | 5–15 µg/mL | 1–10 µg/mL |
| Crude Ascites | 5–15 µg/mL | 1–10 µg/mL |
| Affinity-Purified Polyclonal | 1–12 µg/mL | 0.5–5 µg/mL |
| Affinity-Purified Monoclonal | 1–12 µg/mL | 0.5–5 µg/mL |
Source: Adapted from Thermo Fisher Scientific ELISA development guide [65].
Advanced Techniques and Confirmatory Strategies
For applications requiring the highest level of confidence, integrating advanced methodologies and orthogonal techniques is recommended.
Enhancing Washing and Signal Detection
- Improving Washing Efficiency: Inconsistent manual washing is a major source of variability [58]. Implementing microfluidic systems or using automated plate washers can standardize this process, drastically improving reproducibility by ensuring complete and uniform removal of unbound material [58].
- High-Sensitivity Substrates: The choice of substrate directly impacts sensitivity and background. While colorimetric substrates (e.g., TMB for HRP) are common, chemiluminescent and chemifluorescent substrates offer a wider dynamic range and lower background, which can improve the signal-to-noise ratio for low-abundance targets [58] [65].
The Role of Confirmatory Assays
ELISA is highly sensitive but can lack absolute specificity. Therefore, positive results, particularly from critical experiments, should be confirmed using a secondary technique [19]. Western blotting is often used for this purpose, as it can provide information on the molecular weight of the detected protein, helping to rule out cross-reactivity with proteins of different sizes [19].
Case Study: Optimizing ELISA for Viral Antigens
Research on the nervous necrosis virus (NNV) highlights technical refinements that minimize non-specificity. Key steps include using highly purified virus particles to avoid interference from free viral coat proteins, and a dry immobilization method where the antigen is dried onto the plate at 37°C, which efficiently stabilizes the antigen and reduces background optical density (OD) [66]. Furthermore, diluting antisera and antigens in a solution like SM-PBS helps maintain consistent physicochemical properties and prevents particle aggregation that can lead to non-specific reactions [66].
The Scientist's Toolkit: Essential Reagents for Specific ELISAs
Table 2: Key Research Reagent Solutions for High-Specificity ELISA
| Reagent / Material | Function & Importance for Specificity |
|---|---|
| Affinity-Purified Antibodies | Antibodies purified against the specific target epitope significantly reduce non-specific binding compared to crude serum [65]. |
| Matched Antibody Pairs | For sandwich ELISA, pre-validated pairs of capture and detection antibodies that bind distinct, non-overlapping epitopes are essential [65]. |
| PEG-based Blocking Buffers | Synthetic polymer buffers provide superior resistance to non-specific protein adsorption compared to traditional protein-based blockers [58]. |
| Orientation-specific Coating Reagents | Protein G, biotin-streptavidin, or other covalent cross-linkers ensure optimal antibody presentation and maximize antigen binding [58]. |
| Automated Microplate Washer | Ensures thorough and consistent washing between steps, a critical factor in minimizing background and variability [58] [62]. |
| Chemiluminescent Substrates | Offer higher sensitivity and a broader dynamic range, allowing for optimal dilution of samples to minimize matrix effects [58] [65]. |
While ELISA is a powerful and versatile tool for protein detection, its value is contingent upon the specificity of the results it generates. The issues of cross-reactivity and false positives, as starkly demonstrated by the HIV/SARS-CoV-2 case study, are significant but manageable. By understanding the underlying mechanisms and implementing a rigorous strategy—encompassing strategic surface engineering, systematic assay optimization, the use of high-quality reagents, and validation with confirmatory techniques—researchers can confidently minimize these risks. Adhering to these best practices ensures that ELISA remains a reliable pillar in protein research and drug development.
The Enzyme-Linked Immunosorbent Assay (ELISA) remains a cornerstone technique for protein detection in research and clinical diagnostics due to its sensitivity, specificity, and adaptability [10] [24]. However, its reliability is heavily dependent on meticulous experimental execution. Among the various challenges researchers face, the Hook Effect and Plate Coating Issues are particularly prevalent and can severely compromise data integrity if not properly understood and addressed. This guide provides an in-depth technical examination of these two pitfalls, offering detailed methodologies for their identification, prevention, and resolution, framed within a broader analysis of the advantages and limitations of ELISA technology.
The Hook Effect: Mechanisms, Consequences, and Solutions
What is the Hook Effect?
The Hook Effect, also known as the prozone or high-dose hook effect, is a phenomenon in one-step sandwich ELISA protocols where excessively high concentrations of the target analyte produce a paradoxically low or false-negative signal [67] [68]. This effect can lead to significant underestimation of analyte concentration and erroneous research conclusions or diagnostic results.
The underlying mechanism involves analyte saturation at extreme concentrations. In a one-step assay, the capture antibody, detection antibody, and sample analyte are incubated simultaneously [68]. When the analyte concentration is too high, it saturates both the capture antibodies immobilized on the plate and the enzyme-labeled detection antibodies in solution. This saturation prevents the formation of the classic "sandwich" complex because the limited number of detection antibodies become bound to free analyte in solution rather than to analyte already captured on the plate [67] [69]. During the subsequent wash step, these detection antibody-analyte complexes in solution are washed away, resulting in a weak signal that falsely suggests a low analyte concentration [68].
Visualizing the Hook Effect
The following diagram illustrates the comparative mechanisms of normal sandwich complex formation versus the Hook Effect in one-step and two-step ELISA protocols:
Experimental Detection and Mitigation Strategies
Identifying and correcting for the Hook Effect requires specific experimental approaches:
Serial Dilution Method: The most practical and widely used technique for detecting the Hook Effect involves testing patient or sample specimens both before and after dilution [68]. If the measured concentration in the diluted sample is significantly higher (typically 2-5 times) than in the undiluted sample, the Hook Effect is likely present [67]. Researchers should prepare a wide range of sample dilutions (e.g., 1:10, 1:100, 1:1000) to determine the point at which the measured concentration plateaus within the assay's linear range [67].
Protocol Modification - Two-Step Assay: Converting from a one-step to a two-step sandwich ELISA protocol fundamentally eliminates the conditions that cause the Hook Effect [67] [68]. In the two-step approach, the sample is first incubated with the immobilized capture antibody, and after a wash step to remove unbound analyte, the detection antibody is added [68]. This sequential process prevents the direct competition between capture and detection antibodies for the analyte.
Alternative Methodologies: Emerging approaches include the use of free antigen (fAg) and free antibody (fAb) in gold nanoparticle (AuNP)-based immunoassays to detect and control the Hook Effect [69]. These methods can improve the detection range and prevent false negatives without requiring sample dilution.
Table 1: Comparison of Hook Effect Mitigation Strategies
| Strategy | Principle | Advantages | Limitations |
|---|---|---|---|
| Serial Dilution | Reduces analyte concentration to within assay's linear range [67] | Simple, requires no protocol modification | Additional time and sample volume; may require optimization |
| Two-Step Assay | Separates capture and detection phases, preventing competition [67] [68] | Eliminates root cause; more reliable results | Longer procedure time; may require protocol redevelopment |
| fAg/fAb with AuNP | Uses free antigen/antibody to control detection range [69] | No sample pretreatment needed; prevents hook effect | Requires specialized reagents; less established protocol |
Plate Coating Issues: Fundamentals and Troubleshooting
Principles and Importance of Proper Plate Coating
Plate coating is the foundational step in ELISA where capture antibodies or antigens are immobilized onto the solid phase of microplate wells [10]. This process is critical because inconsistent or inefficient coating directly translates to poor assay performance, including high background, weak signal, and poor reproducibility [70] [71]. The solid phase typically consists of 96-well microplates made of rigid polystyrene, polyvinyl, or polypropylene, specially treated to enhance protein binding capacity [10].
Common Plate Coating Problems and Solutions
The following workflow outlines a systematic approach to diagnosing and resolving common plate coating issues:
Essential Coating Optimization Techniques
Plate Selection: Use plates specifically designed for ELISA, not tissue culture plates [70] [71] [72]. ELISA plates have higher binding capacities specifically optimized for immunoassays.
Coating Buffer Optimization: Dilute the capture antibody in PBS without additional protein [71] [72]. Avoid using buffers containing fetal calf serum (FCS) or other proteins during the coating step, as they can compete for binding sites [72].
Incubation Parameters: Ensure proper incubation time (typically overnight at 4°C or 1-2 hours at 37°C) and consistent temperature during coating [71]. Seal plates during incubation to prevent evaporation, which can cause uneven coating across wells [70] [73].
Blocking Efficiency: After coating, block remaining protein-binding sites with an appropriate blocking buffer (e.g., BSA, casein, or commercial blocking reagents) [71]. Increase blocking solution concentration or incubation time if background remains high [71].
Table 2: Troubleshooting Guide for Common Plate Coating and Related Issues
| Problem | Possible Causes | Recommended Solutions |
|---|---|---|
| Weak or No Signal | Wrong plate type [70] [72]; Incorrect coating buffer [71] [72]; Antibody degradation [70] | Use ELISA-specific plates [70]; Dilute in PBS only [72]; Check reagent expiration [70] |
| High Background | Insufficient washing [70] [71] [72]; Inadequate blocking [71]; Antibody concentration too high [71] | Increase wash steps/duration [72]; Optimize blocking solution [71]; Titrate antibody [71] |
| Poor Replicate Data | Inconsistent sample addition [74]; Pipette tip reuse [73]; Uneven coating [71] [72] | Standardize timing [74]; Use fresh tips [73]; Ensure thorough mixing [74] |
| Edge Effects | Uneven temperature [70] [72]; Evaporation [71]; Plate stacking [70] [73] | Use plate sealers [70] [72]; Avoid stacking [73]; Pre-warm reagents [70] |
The Researcher's Toolkit: Essential Materials and Reagents
Successful ELISA execution requires careful selection and handling of specific reagents and equipment. The following table details critical components and their optimal handling procedures:
Table 3: Essential ELISA Reagents and Equipment
| Item | Function | Best Practices |
|---|---|---|
| ELISA-Specific Microplates | Solid phase for immobilization [10] | Use high-binding plates; avoid tissue culture plates [70] [72] |
| Coating Buffer (PBS) | Diluent for capture antibody [71] | Use without additional protein during coating [72] |
| Blocking Buffer | Covers unused protein-binding sites [71] | BSA (1-5%) or commercial blockers; optimize concentration [71] |
| Detection Antibodies | Binds to target analyte for detection [10] | Titrate for optimal concentration; avoid azide with HRP [71] |
| Enzyme Substrates (TMB) | Produces measurable color change [10] | Prepare immediately before use; protect from light [70] [71] |
| Plate Sealer | Prevents evaporation and contamination [70] | Use fresh sealer for each incubation step [70] [72] |
| Calibrated Pipettes | Ensures accurate reagent delivery [74] | Regular calibration; use fresh tips between samples [73] |
Within the broader context of protein detection methodologies, ELISA offers significant advantages including high sensitivity, specificity, and adaptability to various research applications [10] [24]. However, as detailed in this guide, technical pitfalls such as the Hook Effect and plate coating issues represent considerable limitations that researchers must actively address.
The Hook Effect poses a particular challenge in research and diagnostic settings where accurate quantification is critical, potentially leading to false-negative results or significant underestimation of analyte concentrations [67] [68]. Similarly, plate coating inconsistencies can undermine the fundamental principle of ELISA—the specific immobilization of capture molecules—leading to unreliable and non-reproducible data [70] [71].
By implementing the systematic troubleshooting approaches, optimized protocols, and rigorous quality control measures outlined in this guide, researchers can mitigate these limitations and harness the full potential of ELISA technology. Awareness of these pitfalls, coupled with appropriate detection and correction strategies, ensures the generation of robust, reliable data that advances scientific understanding and supports accurate diagnostic outcomes.
Best Laboratory Practices for Consistent and Reproducible Results
For researchers, scientists, and drug development professionals, generating consistent and reproducible results is the cornerstone of scientific credibility and therapeutic advancement [75]. This is particularly critical in protein detection research using Enzyme-Linked Immunosorbent Assay (ELISA), where the reliability of quantitative data directly impacts diagnostic and research outcomes. The Good Laboratory Practice (GLP) framework provides a structured approach to ensure data is trustworthy, reproducible, and aligned with global standards [76]. Embedding these principles into laboratory workflows is not merely about compliance; it establishes the foundational rigor required for meaningful innovation, especially when evaluating the pros and cons of sophisticated techniques like ELISA.
Foundational Principles of Good Laboratory Practice (GLP)
Good Laboratory Practices (GLP) are a robust set of internationally recognized principles designed to ensure that laboratory data is accurate, consistent, and reliable [76]. They serve as the foundation for generating high-quality, traceable data that can withstand rigorous scrutiny for regulatory submissions, academic research, and industrial applications.
Core Components of GLP
The GLP framework is built on several key components that create a structured environment for reliable research:
- Data and Workflow Management: This includes having clearly defined study protocols with specific objectives and methodologies, maintaining systems for long-term traceability and archiving of data and records, and implementing Standard Operating Procedures (SOPs) to standardize processes and minimize variability [76].
- Quality Assurance and Compliance: An independent quality assurance (QA) unit conducts reviews and audits to verify adherence to GLP principles. Furthermore, reliance on validated equipment and facilities through regular calibration and maintenance, coupled with comprehensive documentation of all raw data, metadata, and procedures, is essential [76].
- Personnel and Collaboration: Proper training ensures laboratory staff are competent and well-equipped to handle GLP processes, minimizing human error [76].
The Scientist's Toolkit: Essential Research Reagent Solutions for ELISA
For ELISA, a cornerstone of protein detection, the consistency and quality of reagents are paramount for achieving reproducible results. The table below details key materials and their functions.
Table 1: Essential Research Reagent Solutions for ELISA
| Item | Function |
|---|---|
| Solid Phase (Matrix) | 96-well microplates, typically made of polystyrene, polyvinyl, or polypropylene, to which analytes (antigens or antibodies) are attached [10] [9]. |
| Conjugate | Enzyme-labelled antibodies (e.g., Horseradish Peroxidase-HRP or Alkaline Phosphatase-AP) specific to the target molecule. The enzyme reaction enables detection [10] [9]. |
| Substrate | The substance (e.g., TMB for HRP) that reacts with the enzyme in the conjugate to produce a measurable color change [10]. |
| Wash Buffer | A solution (e.g., Phosphate-Buffered Saline) used to rinse wells between steps, removing unbound reagents and reducing background noise [10]. |
| Stop Solution | An acidic (e.g., H₂SO₄) or basic solution that halts the enzyme-substrate reaction at a defined time, stabilizing the final signal for measurement [10]. |
| Reference Standards | Solutions with known concentrations of the analyte used to generate a standard curve, which is essential for quantifying the target protein in unknown samples [77]. |
| Blocking Buffer | A protein solution (e.g., BSA, gelatin, skimmed milk) used to cover any unsaturated binding sites on the microplate well to prevent non-specific binding of antibodies [9]. |
Implementing GLP in the ELISA Workflow
The principles of GLP must be applied throughout the entire ELISA process, from planning to data analysis, to ensure the generated data on protein concentration is both accurate and reproducible.
Pre-Analytical Phase: Planning and Preparation
The foundation of a reproducible ELISA is laid before the first sample is pipetted.
- Standard Operating Procedures (SOPs): Detailed, written instructions are critical for standardizing every aspect of the ELISA protocol, from reagent preparation and pipetting techniques to incubation times and temperatures [76]. For instance, a nanomaterials lab can guarantee consistent properties across batches by implementing standardized deposition procedures through detailed SOPs [76].
- Comprehensive Documentation and Recordkeeping: Meticulous recordkeeping ensures traceability and supports reproducibility. This includes documenting raw data, metadata (e.g., reagent lot numbers, analyst name, date), procedural details, and any deviations from the SOP [76]. A digital recordkeeping system allows researchers to trace unexpected results back to specific processing parameters to quickly identify a root cause [76].
- Personnel Training: Proper training ensures staff are competent in the sophisticated techniques required for ELISA. Ongoing education is crucial as technologies evolve [76] [75]. Effective training should include hands-on, practical activities and be well-documented to demonstrate competency [75].
Analytical Phase: Assay Execution and Quality Control
During the assay itself, several practices safeguard the integrity of the results.
- Validated Equipment and Software: The reliability of research depends on the tools used. Regular maintenance, calibration, and validation of equipment like pipettes, plate washers, and readers are necessary to ensure accurate and consistent results [76]. Furthermore, any software used for data reduction must be validated and appropriate for the analysis [76] [78].
- Automation of Routine Tasks: Repetitive tasks like liquid handling, plate washing, and data transcription are prone to human error and subjective observations [79]. Automating these workflows improves efficiency, ensures consistency, and aligns with GLP's emphasis on accuracy [76] [79].
- Implementing Internal Controls: Including positive and negative controls on every plate is a fundamental GLP practice. These controls serve as constant and unchanging standards of comparison, verifying that the assay is functioning correctly and as intended [80]. A positive control confirms the assay can detect the target, while a negative control helps identify non-specific binding or contamination.
Figure 1: End-to-End ELISA Workflow Under GLP Framework.
ELISA-Specific Validation and Data Analysis for Reproducibility
For ELISA data to be reproducible and reliable for protein detection, the assay itself must be rigorously validated, and the resulting data must be analyzed according to established statistical principles.
Core Validation Parameters for ELISA
Before an ELISA method is put into routine use, it must be proven to be reproducible, precise, and accurate through a formal validation process [77]. Key parameters, often required by regulatory agencies like the FDA and EMA, are characterized in the table below.
Table 2: Core Validation Parameters for Reliable ELISA Methods
| Parameter | Definition | Acceptance Criteria (Example) |
|---|---|---|
| Precision | The degree of scatter from a series of measurements from the same sample. Comprises intra-assay (same plate, same day) and inter-assay (different days, different operators) precision [75] [77]. | Coefficient of Variation (CV) ≤ 15-20% [78] [4]. |
| Accuracy | The closeness of the measured value to the true or nominal concentration [75] [77]. | Typically 80-120% recovery of spiked analyte [77]. |
| Sensitivity (LLOD) | The lowest amount of analyte that can be reliably distinguished from background [75] [77]. | Determined from standard deviation of the blank and the slope of the standard curve [77]. |
| Specificity | The ability of the assay to detect only the target analyte without cross-reactivity from related molecules [75] [77]. | No significant interference or cross-reactivity from a panel of related substances [77]. |
| Linearity & Range | The interval between the upper and lower analyte concentrations where the method provides results that are directly proportional and meet criteria for precision and accuracy [75] [77]. | The standard curve demonstrates a consistent and predictable fit (e.g., R² > 0.99 for linear) [4]. |
| Robustness | The capacity of the assay to remain unaffected by small, deliberate variations in method parameters (e.g., incubation time, temperature) [77]. | The assay performs consistently despite minor, unintentional protocol deviations [77]. |
Data Analysis and Statistical Evaluation
Proper analysis of ELISA data is the final critical step in ensuring results are reliable and reproducible.
- Standard Curve and Quantification: Quantitative ELISA requires comparison with a standard curve prepared from a serial dilution of a reference antigen with known concentration [4]. The optical density (O.D.) of unknown samples is interpolated from this curve. Data reduction can use various models (linear, semi-log, log/log, 4- or 5-parameter logistic), with 4PL or 5PL often providing the best fit for immunoassays [78] [4].
- Replicate Testing and Coefficient of Variation (CV): Always run ELISA samples and standards in duplicate or triplicate [78] [4]. This provides data for statistical validation. The coefficient of variation (CV), calculated as (standard deviation / mean) * 100%, should be ≤ 20% for duplicates [78] [4]. A larger CV indicates greater inconsistency and possible error from sources like inaccurate pipetting, temperature variations, or contamination [4].
- Assessing Matrix Effects with Spike/Recovery: To determine if sample constituents (e.g., other proteins in serum) interfere with analyte detection, spike/recovery experiments are essential [77] [4]. A known concentration of the analyte is spiked into the sample matrix and a standard diluent. The recovery is calculated by comparing the measured concentration to the expected concentration. If recovery is different, it indicates matrix interference, and the standard curve may need to be prepared in the same matrix [4].
Figure 2: ELISA Data Analysis and Validation Workflow.
Adhering to Good Laboratory Practices is not a peripheral administrative task but a central component of rigorous and credible scientific research, particularly in protein detection methodologies like ELISA. By implementing structured frameworks for data and workflow management, quality assurance, and comprehensive documentation, laboratories can systematically reduce variability and error. For ELISA, this translates into a meticulous approach spanning from assay validation and reagent control to statistical data analysis. Ultimately, embedding these practices into the daily routine ensures that research outcomes are reliable, reproducible, and capable of withstanding the scrutiny of the scientific community and regulatory bodies, thereby solidifying the foundation upon which scientific progress and drug development are built.
Enzyme-linked immunosorbent assay (ELISA) is a highly sensitive and versatile technique for identifying, quantifying, and analyzing proteins, capable of detecting targets at nanomolar concentrations even in complex biological samples [19] [81]. The reliability of its quantitative results, however, is entirely dependent on the accurate generation and interpretation of the standard curve. This curve serves as the fundamental reference that links experimental optical density (OD) readings to known concentrations of the target analyte, enabling the quantification of unknown samples [82] [4]. Proper data analysis and rigorous quality controls are therefore critical to transforming raw absorbance data into biologically meaningful and statistically valid results, forming the foundation for confident decision-making in research, diagnostic, and drug development contexts [78].
The ELISA Standard Curve: Foundation of Quantification
Definition and Purpose
A standard curve in ELISA is a graphical representation that illustrates the relationship between known concentrations of an analyte and their corresponding absorbance values [82]. This curve is the cornerstone of quantitative ELISA, allowing researchers to interpolate the concentration of an unknown sample by comparing its measured OD to the curve [82] [4]. The typical shape of an ELISA standard curve is sigmoidal (S-shaped), especially when a wide concentration range is used. However, for the most reliable and accurate measurements, the linear portion of the curve in the mid-range of concentrations should be used for analysis [82].
Generating the Standard Curve: Serial Dilution Best Practices
Creating a reliable standard curve begins with precise preparation of standard dilutions [82]. The following step-by-step protocol ensures accuracy and reproducibility:
- Choose Your Starting Concentration: Begin with a high-concentration stock solution of the analyte (e.g., 1000 pg/mL or 10,000 pg/mL) that falls well above the expected range of your unknown samples to ensure the standard curve fully covers the potential sample concentrations [82].
- Select an Appropriate Dilution Factor: Common dilution series include 2-fold (1:2), 3-fold (1:3), or 10-fold (1:10), depending on the assay's sensitivity requirements. A typical 2-fold dilution series would proceed as follows: 1000 pg/mL → 500 pg/mL → 250 pg/mL → 125 pg/mL, continuing until the lowest detectable level is reached [82].
- Use a Consistent Dilution Buffer: Always dilute standards in the same buffer used for your samples and reagents (usually the ELISA assay buffer) to maintain consistent matrix conditions and reduce variability [82].
- Proper Mixing Technique: After each dilution step, mix the solution thoroughly by pipetting up and down several times or by gentle vortexing. Avoid creating bubbles, which can interfere with accurate pipetting in subsequent steps [82].
- Include a Zero Standard: Always include a standard containing zero concentration of the analyte (the blank) to measure background signal and enable blank correction of all other readings [83].
Curve Fitting Methods
Various mathematical models can be applied to fit the standard curve data. The choice of model significantly impacts the accuracy of concentration determinations, particularly at the upper and lower limits of the curve [78] [4].
Table 1: ELISA Standard Curve Fitting Methods
| Method | Description | Best Use Case | Advantages | Limitations |
|---|---|---|---|---|
| Linear | Plots concentration against OD on linear axes | Quick assessment; high-quality linear data | Simple calculation; easy to implement | Compresses data at lower concentrations; poor fit for sigmoidal data |
| Semi-log | Plots log concentration against linear OD | General purpose; wide concentration ranges | Counters compression at lower end; better distribution of points | May not fit high concentration range well |
| Log/log | Plots log concentration against log OD | Low to medium concentration ranges | Good linearity for low-medium range | Loses linearity at higher concentrations |
| 4-Parameter Logistic (4PL) | Models asymmetry around inflection point | Most immunoassays; standard method | Excellent fit for sigmoidal data; accounts for curve asymptotes | Assumes symmetry; requires specialized software |
| 5-Parameter Logistic (5PL) | Adds parameter for asymmetry | Complex immunoassays; high precision | Accounts for asymmetry; superior fit for most ELISAs | Complex calculation; requires more data points |
To determine the optimal curve fit for your data, the back-fitting method is recommended: after plotting the standard curve, treat the standards as unknowns and interpolate their OD values from the curve. The fitted values should read close to the expected values (typically within ±10%). Use the data reduction method that gives the best correlation value and back-fit [78]. If specialized software is unavailable, the semi-log or log/log methods typically provide adequate though less precise fits compared to the 4PL or 5PL methods [78] [4].
Data Analysis: From Absorbance to Concentration
Step-by-Step Calculation Process
The process of converting raw OD readings to meaningful concentration values involves several critical steps that ensure accuracy and reproducibility [78] [83]:
- Average Replicate Readings: Always run ELISA samples in duplicate or triplicate to provide sufficient data for statistical validation. Calculate the mean absorbance value for each set of standards and samples. The coefficient of variation (CV) between replicates should be ≤20% to be considered acceptable [78] [4].
- Blank Correction: Calculate the average OD of your blank wells (containing everything except the analyte), then subtract this value from all other average OD readings to correct for background noise or nonspecific binding [83].
- Plot the Standard Curve: Create a scatter plot with the blank-corrected OD values of the standards on the y-axis and their known concentrations on the x-axis [83].
- Apply Curve Fit: Add a trendline to the standard curve points using the most appropriate fitting method (see Table 1) and display the equation on the chart [83].
- Interpolate Unknown Samples: For each unknown sample, locate its blank-corrected OD on the y-axis, extend a horizontal line to the standard curve, then a vertical line down to the x-axis to determine the corresponding concentration [78] [4].
- Apply Dilution Factors: If samples were diluted prior to running the assay, multiply the concentration read from the standard curve by the dilution factor to obtain the final concentration [78].
Handling Problematic Data
Samples with absorbance values falling outside the range of the standard curve should not be trusted for accurate quantification [4]. For values above the curve's upper limit, dilute the sample and re-run the assay. For values below the curve's lower limit, either concentrate the sample or prepare a new standard curve with lower concentration standards to extend the measurable range [4]. The precision of duplicate or triplicate measurements is assessed using the coefficient of variation (CV), calculated as CV = (standard deviation / mean) × 100%. A CV ≤ 20% is generally acceptable, while higher values indicate substantial inconsistency and potential error in pipetting, reagent application, or other technical issues [78] [4].
Quality Control in ELISA
Essential Quality Control Measures
Robust quality control is indispensable for generating reliable ELISA data. Key QC parameters include [78] [4]:
- Coefficient of Variation (CV): As previously mentioned, the CV between replicate samples should be ≤20%. Higher CV values indicate technical inconsistencies that undermine result reliability.
- Standard Curve Fit: The R-squared (R²) value for the standard curve should ideally be ≥0.99, indicating an excellent fit of the trendline to the standard data points [83].
- Spike Recovery: This test determines whether sample constituents interfere with antigen detection by the antibodies. Known concentrations of protein are spiked into both the sample matrix and a standard diluent, then quantified using the assay. If results differ significantly, components in the sample matrix are likely interfering with analyte detection [4].
Troubleshooting Common Issues
Several factors can compromise ELISA data quality [4]:
- High CV Causes: Inaccurate pipetting, splashing between wells, bacterial or fungal contamination, temperature variations across the plate, or wells drying out during incubation.
- Poor Spike Recovery: Indicates matrix effects where sample components interfere with antibody binding. To address this, produce the standard curve using standard diluted in the sample matrix itself, or dilute the sample in standard diluent (accounting for the dilution factor in final calculations) [4].
- Inaccurate Standard Curve: Can result from improper serial dilution techniques, degraded standards, or choosing an inappropriate curve-fitting method.
Table 2: ELISA Quality Control Parameters and Standards
| QC Parameter | Calculation Method | Acceptance Criterion | Corrective Action if Failed |
|---|---|---|---|
| Inter-assay Precision | CV of controls across plates | CV ≤ 20% | Check reagent consistency, pipette calibration |
| Intra-assay Precision | CV of sample replicates | CV ≤ 20% | Improve pipetting technique, ensure proper mixing |
| Standard Curve Fit | R-squared value | R² ≥ 0.99 | Check dilution accuracy, try alternative curve fit |
| Spike Recovery | (Measured/Expected) × 100% | 80-120% recovery | Use matrix-matched standards, dilute samples |
| Limit of Detection | Mean blank + 2SD | Signal > LOD | Concentrate sample or extend standard curve lower |
The Scientist's Toolkit: Essential Research Reagent Solutions
Successful ELISA execution requires specific high-quality reagents and materials. The following table outlines essential components and their functions in the assay workflow [82] [4]:
Table 3: Essential Reagents and Materials for ELISA
| Reagent/Material | Function | Critical Considerations |
|---|---|---|
| Coated ELISA Plates | Solid phase for antibody or antigen immobilization | High binding capacity, low non-specific binding, uniform well-to-well coating |
| Capture & Detection Antibodies | Specific recognition of target analyte | High specificity and affinity, validated pair for sandwich ELISA, minimal cross-reactivity |
| Antigen Standards | Quantitative reference for standard curve | Precisely quantified, high purity, identical immunoreactivity to native analyte |
| Enzyme Conjugates | Signal generation linked to detection antibody | High specific activity, minimal background, stable conjugation |
| Chromogenic/Luminescent Substrates | Enzyme substrate producing measurable signal | High sensitivity, wide dynamic range, stable signal duration |
| Assay/Dilution Buffers | Matrix for standards and sample dilution | Maintains antibody-antigen interactions, minimizes non-specific binding, matches sample matrix |
| Blocking Buffers | Prevents non-specific binding to plate | Effective blockage without interfering with specific binding, typically BSA or casein-based |
| Wash Buffers | Removes unbound reagents | Effective washing without disrupting bound complexes, typically PBS or Tris with detergent |
ELISA in Context: Advantages and Limitations for Protein Detection
When evaluating ELISA for protein detection, it's essential to consider its strengths and weaknesses relative to other techniques like western blot [19] [81].
Advantages of ELISA
- High Sensitivity and Throughput: ELISA can detect proteins at picogram levels and is capable of analyzing many samples simultaneously in a 96-well format, making it ideal for screening large sample sets [19] [81].
- Quantitative Precision: Unlike western blot, which is semi-quantitative, ELISA provides true quantitative data on protein concentration, enabling precise monitoring of concentration changes over time [19].
- Efficiency and Simplicity: ELISA protocols are generally faster than western blot, require minimal sample preparation, and can be automated, reducing hands-on time and operator variability [19].
- Cost-Effectiveness: ELISA typically uses lower-cost reagents than western blot or mass spectrometry, making it suitable for budget-conscious environments [19].
Limitations of ELISA
- Limited Specificity Information: ELISA cannot provide information about the target protein's molecular weight or potential modifications, unlike western blot [19] [81].
- Antibody Dependency: The assay is entirely dependent on the quality and specificity of the antibodies used, with poor antibodies leading to false positives or negatives [19].
- Susceptibility to Interference: ELISA is more likely than western blot to generate false results due to technical errors, sample contamination, or matrix effects [19].
- Stability Requirements: ELISA kit antibodies often require refrigerated storage and are susceptible to instability if not handled properly [19].
Within the broader context of protein detection methodologies, ELISA excels as a quantitative, high-throughput tool for detecting specific proteins in complex mixtures when information beyond presence and concentration (such as molecular weight or modifications) is not required [19] [81]. Western blot remains preferable when protein size information is needed or when confirming ELISA results, particularly in clinical diagnostic settings [19].
ELISA in Context: Comparison with Western Blot, MS, and Next-Gen Assays
The Enzyme-Linked Immunosorbent Assay (ELISA) and Western blot are two foundational techniques in the protein researcher's toolkit. Both methods rely on the specific binding of antibodies to their target antigens to detect and analyze proteins within complex biological samples [84] [27]. Despite this shared immunological principle, their underlying methodologies, applications, and the nature of the data they yield differ significantly. The choice between these techniques is not merely a matter of preference but a strategic decision that directly impacts the quality, reliability, and scope of experimental findings. This guide provides an in-depth technical comparison to help researchers and drug development professionals select the optimal method for their specific protein analysis needs, with a particular focus on the inherent trade-offs between the high-throughput quantification offered by ELISA and the detailed protein characterization provided by Western blot.
The ELISA Method: High-Throughput Quantification
Core Principle and Workflow
ELISA is a plate-based assay technique designed for detecting and quantifying soluble substances such as peptides, proteins, antibodies, and hormones [7]. The core principle involves immobilizing an antigen or antibody on a solid surface (typically a polystyrene microplate) and complexing it with a detection antibody linked to a reporter enzyme. Detection is accomplished by measuring the activity of the reporter enzyme via incubation with a substrate to produce a measurable product, such as a color change, fluorescence, or chemiluminescence [7] [10]. The intensity of the signal is directly proportional to the amount of target molecule in the sample, allowing for precise quantification [84].
Key Experimental Protocol and Methodologies
The ELISA procedure, while varying slightly by format, follows a consistent workflow [7] [27] [10]:
- Coating: A capture antibody or antigen is adsorbed onto the surface of the microplate well through passive adsorption via hydrophobic interactions. Coating is typically performed using a 2–10 μg/ml protein solution in an alkaline buffer (e.g., carbonate-bicarbonate buffer, pH 9.4) and incubated for several hours to overnight at 4–37°C.
- Blocking: After removing the coating solution, the plate is treated with a blocking agent such as bovine serum albumin (BSA), non-fat milk, or serum to cover any remaining unsaturated binding sites on the polystyrene surface. This critical step minimizes nonspecific binding in subsequent assay steps.
- Sample and Antibody Incubation: The sample containing the target analyte is added to the coated and blocked wells and allowed to incubate. Following incubation and a washing step to remove unbound material, a detection antibody (conjugated to an enzyme in a direct ELISA, or unlabeled in an indirect or sandwich ELISA) is added.
- Signal Development: For methods requiring a secondary detection step (indirect, sandwich), an enzyme-linked secondary antibody is added. Finally, a substrate specific to the enzyme (e.g., Horseradish Peroxidase (HRP) or Alkaline Phosphatase (AP)) is added. Common substrates include TMB (Tetramethylbenzidine), which produces a blue color that turns yellow when stopped with acid.
- Signal Measurement and Quantification: The enzymatic reaction is stopped, and the signal (absorbance for colorimetric substrates) is measured using a microplate reader. The concentration of the target in unknown samples is determined by interpolation from a standard curve generated with known concentrations of the analyte.
The following diagram illustrates the workflows for the primary ELISA types:
Common ELISA Formats and Their Applications
ELISA can be performed in several formats, each with distinct advantages and ideal use cases [7] [27] [14]:
- Direct ELISA: The antigen is immobilized and detected directly by an enzyme-labeled primary antibody. This method is rapid but generally less sensitive and requires labeled primary antibodies for every target.
- Indirect ELISA: The immobilized antigen is detected by an unlabeled primary antibody, which is then bound by an enzyme-labeled secondary antibody. This offers signal amplification and flexibility but introduces a potential for cross-reactivity.
- Sandwich ELISA: The target antigen is "sandwiched" between a capture antibody immobilized on the plate and a detection antibody. This format requires two antibodies recognizing different epitopes on the antigen, resulting in high sensitivity and specificity, making it the preferred method for quantifying complex samples [7]. It is unsuitable for antigens too small to accommodate two antibodies.
- Competitive ELISA: The sample antigen and a labeled reference antigen compete for a limited number of antibody-binding sites. The signal is inversely proportional to the amount of antigen in the sample. This format is particularly useful for detecting small molecules or antigens with a single epitope [7] [27].
The Western Blot Method: Detailed Protein Characterization
Core Principle and Workflow
Western blot (also known as immunoblotting) is a technique for detecting specific proteins in a complex mixture based on their molecular weight and antibody binding specificity [84] [85]. Unlike ELISA, Western blot includes a protein separation step via gel electrophoresis, which provides information about the protein's size and can reveal the presence of protein isoforms or post-translational modifications [19] [85]. The separated proteins are transferred to a membrane, which is then probed with antibodies for detection.
Key Experimental Protocol and Methodologies
The Western blot protocol is a multi-step process that typically requires 1 to 2 days to complete [85] [86]:
- Sample Preparation and Protein Separation (SDS-PAGE): Proteins are denatured and linearized by heating in a sample buffer containing Sodium Dodecyl Sulfate (SDS) and a reducing agent (e.g., β-mercaptoethanol). This process gives the proteins a uniform negative charge. The samples are then loaded onto a polyacrylamide gel, and an electric current is applied. Proteins migrate through the gel's pores, separating strictly by molecular weight [86].
- Protein Transfer (Blotting): The separated proteins are transferred from the gel onto a stable membrane, typically nitrocellulose or PVDF (Polyvinylidene Difluoride), via electrophoretic transfer. This creates a replica of the gel's protein pattern on the membrane.
- Blocking and Antibody Probing: The membrane is incubated with a blocking solution (e.g., BSA or non-fat milk) to prevent nonspecific antibody binding. The blocked membrane is then incubated with a primary antibody specific to the target protein. After washing, a secondary antibody conjugated to a reporter enzyme (e.g., HRP) and specific to the host species of the primary antibody is applied.
- Detection and Analysis: A substrate is added to produce a detectable signal. Chemiluminescent substrates are most common, producing light that can be captured on X-ray film or by a digital imager [84] [86]. Fluorescent detection is also an option. The resulting bands are analyzed, and their molecular weights are estimated by comparison to a protein ladder (molecular weight marker) run alongside the samples.
The following diagram illustrates the core Western blot workflow:
Direct Comparison: ELISA vs. Western Blot
The following table summarizes the critical differences between ELISA and Western blot to guide method selection.
Table 1: Key Technical Differences Between ELISA and Western Blot
| Feature | ELISA | Western Blot |
|---|---|---|
| Best Application | High-throughput quantification [84] [85] | Protein characterization, validation, and detection of modifications [84] [19] |
| Sensitivity | High (picogram to nanogram per mL range) [84] [85] | Moderate (nanogram per mL range) [84] [85] |
| Specificity | High (especially sandwich ELISA), but prone to false positives/negatives without confirmation [19] [15] | Very high; confirms protein identity by molecular weight [19] [86] |
| Quantification | Fully quantitative [84] [27] | Semi-quantitative [27] [85] |
| Molecular Weight Information | No [19] | Yes, a key feature [84] [85] |
| Detection of Post-Translational Modifications | No (unless modification-specific antibody is used, but no size confirmation) | Yes, possible with specific antibodies and size shifts [19] [85] |
| Multiplexing Capability | Limited (traditionally one target per well) [84] | Good (multiple targets per lane via multiplex fluorescence) [84] [86] |
| Throughput | High (96 or 384 samples processed simultaneously) [84] [27] | Low to moderate (typically 10-15 samples per gel) [27] [85] |
| Speed and Workflow | Rapid (4-6 hours), fewer steps, easier to automate [84] [86] | Slow (1-2 days), multi-step, labor-intensive [84] [85] |
Advantages and Disadvantages of ELISA
Advantages:
- High Sensitivity and Throughput: ELISA is exceptionally sensitive and ideal for rapidly screening large numbers of samples, such as in clinical diagnostics or drug discovery [84] [15].
- Quantification: It provides accurate, absolute quantification of protein concentration when used with a standard curve [84] [19].
- Ease of Use: The protocol is relatively straightforward, requires minimal sample preparation, and is amenable to automation [84] [86].
Disadvantages:
- Limited Protein Information: It cannot provide data on protein size, isoforms, or purity, which can be critical for certain analyses [19] [85].
- Antibody Dependency: Susceptible to false positives/negatives if antibodies have cross-reactivity or if the target conformation in the sample does not match the assay [19] [27].
- Limited Multiplexing: Traditional ELISAs measure only one analyte per well, though multiplexed versions are being developed [84].
Essential Research Reagent Solutions
Successful execution of both ELISA and Western blot relies on high-quality, specific reagents. The following table details the essential materials required for each technique.
Table 2: Essential Research Reagents for ELISA and Western Blot
| Item | Function/Description | ELISA | Western Blot |
|---|---|---|---|
| Solid Support | Surface for immobilization | Polystyrene microplate (96 or 384-well) [7] [10] | Nitrocellulose or PVDF membrane [84] [86] |
| Coating/Capture Reagent | Binds target to the solid phase | Antigen or capture antibody [7] | Not applicable (proteins are transferred) |
| Blocking Agent | Prevents nonspecific antibody binding | BSA, casein, or serum [7] [10] | BSA or non-fat dry milk [86] |
| Primary Antibody | Binds specifically to the target protein | Must be highly specific; type depends on ELISA format [27] | Must be highly specific and validated for blotting |
| Secondary Antibody | Binds to primary antibody; conjugated for detection | Enzyme-conjugated (e.g., HRP, AP) [7] [10] | Enzyme-conjugated (HRP for chemiluminescence) or fluorophore-conjugated [84] [86] |
| Separation Matrix | Separates proteins by size | Not applicable | Polyacrylamide gel [86] |
| Detection Substrate | Generates measurable signal | Colorimetric (e.g., TMB), chemiluminescent, or fluorescent [7] [10] | Primarily chemiluminescent or fluorescent [84] [86] |
| Critical Instrumentation | For signal readout and analysis | Microplate reader (spectrophotometer) [84] [10] | Gel electrophoresis apparatus, transfer system, and digital imager [84] [86] |
Applications and Strategic Selection in Research
When to Use ELISA
ELISA is the preferred method when the primary research goal is the quantification of a specific protein in a large number of samples [84] [19]. Key scenarios include:
- Diagnostic Screening and Clinical Assays: Detecting biomarkers, hormones, or pathogen-specific antibodies in patient serum, plasma, or urine [27] [15].
- Drug Development and Pharmacokinetics: Measuring drug or antibody concentrations in biological fluids and monitoring therapy response [15].
- High-Throughput Applications: Screening thousands of samples in vaccine development, bioprocessing, or functional genomics [84].
- Routine Protein Measurement: When the target protein is well-characterized, and information about its size or modifications is not required for the experiment.
When to Use Western Blot
Western blot is the superior choice when the experiment requires validation of protein identity or characterization beyond mere presence [84] [19]. Key scenarios include:
- Confirming ELISA or Other Screening Results: Used as a confirmatory test to rule out false positives by verifying the target protein's molecular weight [19] [87].
- Analyzing Protein Modifications: Detecting post-translational modifications (e.g., phosphorylation, glycosylation) that alter molecular weight or can be detected with modification-specific antibodies [19] [85].
- Assessing Protein Integrity and Purity: Checking for protein degradation, cleavage, or the presence of isoforms in a sample [84].
- Multiplex Detection: Simultaneously detecting multiple target proteins in a single sample using fluorescently labeled antibodies [84].
ELISA and Western blot are complementary, not competing, techniques in protein analysis. The choice between them hinges on the experimental question: ELISA for throughput and quantification, Western blot for characterization and validation. A robust research strategy often employs both—using ELISA for initial, high-throughput screening of samples, followed by Western blot to confirm key findings and provide deeper insights into protein characteristics. Understanding the strengths and limitations of each method, as outlined in this guide, empowers researchers and drug development professionals to design more effective experiments, generate more reliable data, and accelerate scientific discovery.
In the field of protein detection research, scientists are frequently confronted with a critical technological choice: employing the high-throughput, antibody-based Enzyme-Linked Immunosorbent Assay (ELISA) or opting for the structurally informative, mass-based analysis provided by mass spectrometry (MS). This decision represents a fundamental trade-off between throughput efficiency and analytical depth, with significant implications for research timelines, costs, and data quality. ELISA has established itself as a cornerstone technique in clinical diagnostics and routine protein quantification, prized for its standardized protocols, relatively low cost, and accessibility for most laboratories [15] [10]. In contrast, mass spectrometry offers unparalleled capabilities for structural elucidation, discovery-oriented research, and multiplexed analysis of complex samples without requiring specific antibodies [88] [89]. This technical guide examines the core principles, advantages, limitations, and ideal applications of each method within the context of protein research and drug development, providing a framework for researchers to make informed decisions aligned with their project goals.
Fundamental Principles and Methodologies
The ELISA Framework: Antibody-Mediated Detection
The fundamental principle of ELISA is the specific antigen-antibody interaction, coupled with an enzymatic reaction that generates a measurable signal, typically a color change [15] [10]. The assay is performed in a solid-phase format, usually a 96-well microplate, which facilitates the processing of multiple samples simultaneously. The key components essential for any ELISA protocol include: a solid phase (e.g., polystyrene microplate) to immobilize the analyte; a capture molecule (antigen or antibody); an enzyme-labeled conjugate; a substrate that reacts with the enzyme to produce a detectable signal; and wash buffers to remove unbound materials [10]. The intensity of the final signal is proportional to the amount of analyte present in the sample, allowing for quantification via a standard curve.
Several ELISA formats have been developed to address different analytical needs:
- Direct ELISA: The antigen is immobilized on the solid phase and detected directly by an enzyme-labeled primary antibody. This format is simple and avoids cross-reactivity but requires labeling of every primary antibody, which can be costly [14].
- Indirect ELISA: The immobilized antigen is bound by an unlabeled primary antibody, which is then detected by an enzyme-labeled secondary antibody. This method increases signal amplification and flexibility but may increase the potential for cross-reactivity [14] [10].
- Sandwich ELISA: The analyte is "sandwiched" between a capture antibody immobilized on the plate and a detection antibody. This format requires that the antigen have at least two antibody-binding epitopes, but it offers high sensitivity and specificity and is the preferred method for quantifying proteins in complex mixtures without prior purification [14] [15].
- Competitive ELISA: The analyte in the sample competes with a labeled reference analyte for a limited number of antibody-binding sites. The signal is inversely proportional to the amount of analyte in the sample. This format is well-suited for analyzing small antigens or low-abundance targets [14] [10].
Mass Spectrometry: Mass-Based Structural Analysis
Mass spectrometry identifies and characterizes molecules based on their mass-to-charge ratio (m/z). The fundamental process involves converting sample molecules into gas-phase ions, separating these ions according to their m/z, and detecting them [89]. The resulting mass spectrum provides information on molecular weight and, through fragmentation patterns, detailed structural data.
A typical bottom-up proteomics workflow, the most common MS approach for protein analysis, involves several key steps [88] [18]:
- Protein Digestion: Proteins are enzymatically cleaved (e.g., with trypsin) into smaller peptides.
- Chromatographic Separation: The complex peptide mixture is separated by liquid chromatography (LC), typically reverse-phase, to reduce sample complexity before introduction to the mass spectrometer.
- Ionization: Peptides are ionized, most commonly by Electrospray Ionization (ESI) or Matrix-Assisted Laser Desorption/Ionization (MALDI).
- Mass Analysis: Ions are separated by a mass analyzer (e.g., Quadrupole, Time-of-Flight (TOF), Orbitrap, Ion Trap).
- Fragmentation & Detection: Selected peptides (precursor ions) are fragmented, and the resulting product ions are analyzed to determine the amino acid sequence.
Advanced MS techniques provide deep structural insights:
- Hydrogen-Deuterium Exchange MS (HDX-MS): Probes protein folding, dynamics, and interactions by monitoring the exchange of amide hydrogens with deuterium in the solvent [88].
- Crosslinking MS (XL-MS): Uses chemical crosslinkers to covalently link spatially proximate amino acid residues, providing information on protein-protein interactions and the architecture of protein complexes [88].
- Native MS: Analyzes proteins and protein complexes under non-denaturing conditions, preserving non-covalent interactions to determine stoichiometry and monitor protein-ligand interactions [88].
Comparative Analysis: Technical Specifications and Performance
The choice between ELISA and mass spectrometry is guided by specific project requirements, including the need for throughput, sensitivity, structural information, and budget. The following tables provide a detailed comparison of their core characteristics and performance metrics.
Table 1: Core Characteristics and Typical Applications
| Feature | ELISA | Mass Spectrometry |
|---|---|---|
| Fundamental Principle | Antigen-antibody binding with enzymatic signal detection [15] [10] | Mass-to-charge (m/z) ratio measurement of ionized molecules [89] |
| Throughput | High (96/384-well format, automated systems) [15] | Low to Medium (sequential sample analysis) [18] |
| Multiplexing Capacity | Low (typically single-analyte); Multiplex ELISA is possible but challenging [18] | High (can quantify thousands of proteins in a single run) [88] [18] |
| Sample Input Volume | ~100 µL [18] | ~150 µL (often requiring high concentration) [18] |
| Primary Readout | Protein concentration | Protein identity, sequence, post-translational modifications (PTMs), and quantity |
| Best Suited For | Targeted quantification, clinical diagnostics, high-throughput screening | Discovery proteomics, structural analysis, PTM mapping, complex biomarker profiling |
Table 2: Performance and Practical Considerations
| Parameter | ELISA | Mass Spectrometry |
|---|---|---|
| Sensitivity | High (can detect pg/mL levels) [15] | Variable; generally lower than ELISA for single proteins, but superior for detecting low-abundance proteins in complex samples via deep profiling [90] |
| Specificity | Dependent on antibody quality (risk of cross-reactivity) [15] | High; based on precise mass and unique peptide sequences [18] |
| Dynamic Range | Limited (may require sample dilution) [15] | Wide (4-5 orders of magnitude) |
| Development Time | Long for new assays (can take up to 8 months for antibody generation) [90] | Short method setup; no need for specific reagents for each new protein |
| Consumable Cost per Sample | Low to Medium [15] | High (instrument cost, maintenance, skilled operator) [91] [90] [18] |
| Ability to Detect Novel Analytes | No (requires pre-existing, specific antibodies) | Yes (enables discovery and identification of unknown proteins or PTMs) [89] |
| Structural Information | None (provides quantitative data only) | Comprehensive (primary structure, PTMs, protein-ligand interactions) [88] [89] |
Experimental Protocols for Key Applications
Protocol: Sandwich ELISA for Specific Protein Quantification
The sandwich ELISA is the most common format for quantifying proteins in biological fluids like serum, plasma, or cell culture supernatant [15] [92]. The following protocol, based on the development of an eosinophil peroxidase (EPX) assay, outlines the critical steps [92].
Key Research Reagent Solutions:
- Solid-Phase Plate: 96-well plates with high protein-binding capacity (e.g., Nunc-Immuno Plates with MaxiSorp surface) [92].
- Capture Antibody: A monoclonal antibody specific to the target protein (e.g., clone MM25-429.1.1 for EPX).
- Detection Antibody: A second monoclonal antibody that binds a different epitope on the target protein, biotinylated (e.g., clone MM25-82.2.1 for EPX) [92].
- Coating Buffer: Carbonate-bicarbonate buffer (pH 9.6) or a commercial coating solution concentrate.
- Blocking Buffer: 1-5% Bovine Serum Albumin (BSA) or a commercial protein-based blocking solution to prevent non-specific binding [92] [10].
- Wash Buffer: Phosphate-Buffered Saline (PBS) or Tris-buffered saline with a detergent such as Tween-20 (PBS-T) [10].
- Streptavidin-Conjugate: Streptavidin linked to a reporter enzyme (e.g., Alkaline Phosphatase (AP)) [92].
- Substrate: Enzyme-specific chromogenic substrate (e.g., BluePhos for AP, or TMB for HRP) [92] [10].
- Stop Solution: Acid (e.g., H₂SO₄ for TMB) or base to terminate the enzyme reaction [10].
Detailed Methodology:
- Coating: Dilute the capture antibody in coating buffer and add to each well. Incubate overnight at 4°C or for 1-2 hours at room temperature.
- Washing: Wash the plate multiple times with wash buffer to remove unbound antibody.
- Blocking: Add blocking buffer to each well and incubate for 1-2 hours at room temperature to cover any remaining protein-binding sites. Wash again.
- Sample & Standard Incubation: Add the test samples and a dilution series of the purified protein standard to the wells. Incubate for 1-2 hours to allow the target antigen to bind to the capture antibody. Wash thoroughly.
- Detection Antibody Incubation: Add the biotinylated detection antibody. Incubate to form the "antibody-antigen-antibody" sandwich. Wash.
- Enzyme Conjugate Incubation: Add Streptavidin-Alkaline Phosphatase (Strep-AP). The streptavidin binds tightly to the biotin on the detection antibody. Wash.
- Signal Development: Add the substrate (e.g., BluePhos). The enzyme catalyzes a reaction that produces a colored product. Incubate in the dark for a defined period (e.g., 15-60 minutes).
- Signal Measurement: Stop the reaction with a stop solution if needed. Measure the optical density (OD) of each well using a microplate spectrophotometer at the appropriate wavelength (e.g., 450nm for TMB) [92] [10].
Diagram 1: Sandwich ELISA Workflow
Protocol: LC-MS/MS for Protein Identification and Quantification
Liquid Chromatography Tandem Mass Spectrometry (LC-MS/MS) is the workhorse of bottom-up proteomics, used to identify proteins and measure their abundance in complex samples [88] [18].
Key Research Reagent Solutions:
- Lysis Buffer: A buffer containing denaturants (e.g., Urea, SDS) and protease/phosphatase inhibitors to extract and solubilize proteins.
- Reducing/Alkylating Agents: Dithiothreitol (DTT) or Tris(2-carboxyethyl)phosphine (TCEP) to reduce disulfide bonds; Iodoacetamide to alkylate cysteine residues.
- Protease: Sequencing-grade trypsin, the most common enzyme for digesting proteins into peptides.
- Solid-Phase Extraction Tips: C18 pipette tips (e.g., StageTips) for desalting and concentrating peptide mixtures prior to LC-MS/MS.
- LC Mobile Phases: Solvent A (e.g., water with 0.1% formic acid) and Solvent B (e.g., acetonitrile with 0.1% formic acid) for reverse-phase chromatography.
- Mass Spectrometer: A system typically consisting of a nano-flow LC coupled to a high-resolution tandem mass spectrometer, such as a Q-TOF or Orbitrap instrument [91] [88].
Detailed Methodology:
- Protein Extraction and Denaturation: Lyse cells or tissue in a denaturing lysis buffer to extract the entire proteome.
- Reduction and Alkylation: Add DTT to reduce disulfide bonds and iodoacetamide to cap cysteine thiols, preventing reformation.
- Protein Digestion: Add trypsin and incubate for several hours or overnight to digest proteins into peptides. This step can be performed after or concurrently with protein purification steps (e.g., SDS-PAGE).
- Peptide Clean-up: Desalt and concentrate the peptide mixture using C18 solid-phase extraction to remove salts and other interfering substances.
- LC Separation: Inject the peptide mixture onto a reverse-phase C18 nano-capillary column. Separate the peptides by increasing the percentage of organic solvent (acetonitrile) over time.
- MS1 Survey Scan: As peptides elute from the column, they are ionized by ESI and enter the mass spectrometer. A high-resolution mass spectrum (MS1) is acquired to determine the m/z and intensity of all intact peptide ions.
- Data-Dependent Acquisition (DDA): The most abundant peptide ions from the MS1 scan are sequentially isolated by the instrument and fragmented by collision-induced dissociation (CID) or higher-energy collisional dissociation (HCD).
- MS2 Fragment Ion Scan: A second mass spectrum (MS2) is acquired for each fragmented peptide, capturing the m/z of the resulting fragment ions.
- Data Analysis: The MS2 spectra are searched against a protein sequence database using software algorithms (e.g., MaxQuant, SEQUEST) to identify the peptide sequences and infer the original protein content. Quantification is achieved by comparing MS1 peak intensities (label-free) or using isotopic labels (e.g., TMT, SILAC) [88] [18].
Diagram 2: LC-MS/MS Proteomics Workflow
Case Study: Detection of Host Cell Proteins (HCPs) in Biologics
The detection and quantification of Host Cell Proteins (HCPs)—process-related impurities in biopharmaceuticals derived from the expression system—exemplify the practical trade-offs between ELISA and MS [90].
The ELISA Approach:
- Method: A generic, polyclonal antibody-based sandwich ELISA is typically used. Antibodies are raised against the entire proteome of the null host cell (lacking the therapeutic protein). This "anti-HCP antiserum" is used to capture and detect a wide range of HCPs in the drug substance.
- Advantages: Excellent for lot-release testing due to its high throughput, sensitivity, and low cost per sample. It provides a total HCP quantity, which is critical for regulatory compliance [90].
- Critical Limitation: The coverage and specificity of the ELISA are entirely dependent on the quality of the polyclonal antibody reagent. It cannot identify which specific HCPs are present, and there is a risk that some low-abundance or poorly immunogenic HCPs may go undetected, posing a potential safety risk [90].
The Mass Spectrometry Approach:
- Method: An LC-MS/MS-based proteomics workflow is employed. The therapeutic protein product is digested with trypsin, and the resulting peptides are analyzed to identify and quantify individual HCPs.
- Advantages: Provides detailed characterization of the HCP profile, identifying each species by name. This is invaluable for process development, allowing engineers to track and eliminate problematic HCPs (e.g., immunogenic or enzymatically active ones). It does not rely on antibodies and can detect unexpected impurities [90].
- Critical Limitation: The technique is low-throughput, expensive, and requires significant expertise. The data analysis is complex to standardize, making it less suitable for routine quality control of every product batch [90].
Synergistic Application: In modern biopharmaceutical development, the two techniques are used complementarily. MS is deployed during process development and validation to thoroughly characterize the HCP profile and validate that the ELISA provides adequate coverage. Once validated, the ELISA is used for rapid, routine monitoring of HCP levels throughout GMP manufacturing [90].
The dichotomy between ELISA and mass spectrometry is not a matter of one technology being superior to the other, but rather a strategic choice based on the research or development phase. ELISA remains the undisputed champion for targeted, high-throughput quantification where specific targets are known, and cost-effectiveness is paramount. Its role in clinical diagnostics and quality control is firmly established. Conversely, mass spectrometry is the leading technology for discovery, in-depth characterization, and multiplexed analysis where structural information or a broad, untargeted view of the proteome is required.
Emerging trends point toward a future where this dichotomy is blurred. Techniques like the Olink Proximity Extension Assay (PEA) combine antibody-based specificity with DNA-based amplification and sequencing, allowing for high-throughput, high-multiplexing (up to 384 proteins) from very low sample volumes [18]. Furthermore, the integration of MS data with other structural biology techniques like cryo-electron microscopy (cryo-EM) is creating powerful hybrid approaches for solving complex biological problems [88]. Advances in instrument sensitivity, data analysis software, and automation are steadily increasing the throughput and accessibility of MS. Meanwhile, developments in multiplex ELISA and digital ELISA are pushing the boundaries of sensitivity and multiplexing for immunoassays [15] [10]. For the modern researcher, a deep understanding of the strengths and limitations of both ELISA and mass spectrometry is essential for designing efficient and informative experiments, ultimately accelerating the path from basic research to clinical application.
The enzyme-linked immunosorbent assay (ELISA) has long been the gold standard for protein detection in research and clinical diagnostics [93] [10]. This immunological biochemical assay detects antigen-antibody interactions using enzyme-labelled conjugates and substrates that generate measurable color changes [10]. The four main formats—direct, indirect, sandwich, and competitive ELISA—provide versatility for different applications, with sandwich ELISA offering particularly high specificity since two antibodies are required to bind to the target protein for detection [93] [10].
Despite its widespread use and advantages, including high sensitivity, specificity, and relatively simple protocols, traditional ELISA faces significant limitations in the era of precision medicine and large-scale biomarker discovery [18] [93]. These limitations include low throughput (measuring only one protein at a time), relatively large sample volume requirements (typically 50-100 μL), and insufficient sensitivity for detecting low-abundance biomarkers [18] [93] [94]. These constraints have driven the development of novel technologies that offer superior multiplexing capabilities, sensitivity, and efficiency.
Two platforms that have emerged as significant advances in protein detection are Olink's Proximity Extension Assay (PEA) and Quanterix's Single Molecule Array (SIMOA). This technical guide provides an in-depth comparison of these innovative technologies against traditional ELISA, focusing on their working principles, performance characteristics, and applications in contemporary research and drug development.
Olink Proximity Extension Assay (PEA)
Olink's PEA technology represents a hybrid approach that combines antibody-based immunoassays with nucleic acid amplification [18] [95]. The core principle involves using matched pairs of antibodies, each conjugated to a unique DNA oligonucleotide. When both antibodies bind to their target protein, the DNA tags are brought into proximity, allowing them to hybridize and serve as a template for DNA polymerase-dependent extension [95]. This creates a double-stranded DNA "barcode" that is quantitatively proportional to the initial target protein concentration [95]. The DNA barcode is then amplified and quantified using microfluidic quantitative real-time PCR (qPCR) or next-generation sequencing (NGS) [95] [94].
This dual-recognition mechanism—requiring both antibody binding and DNA hybridization—provides exceptional specificity by minimizing cross-reactivity and background signal [95]. The technology can simultaneously detect up to 92–5400+ protein biomarkers from a single minimal sample volume (as low as 1-8 μL) [95] [94].
SIMOA (Single Molecule Array)
SIMOA is an ultrasensitive digital ELISA technology that enables single-molecule detection [93] [96]. The method uses antibody-coated beads and a fluorescently conjugated detection antibody in a sandwich immunoassay format [93]. After forming immunocomplexes, the solution is applied to a proprietary array containing over 235,000 microwells, each designed to hold only one bead [93]. Oil is then added to push the sample across the surface and form a liquid-tight seal of the wells [93].
The fluorescence is measured using a fully or semi-automated system equipped with a fluorescent microscope [93]. Since each well can contain only one bead, the system can digitally count the number of microwells with fluorescence, which is proportional to the amount of target protein in the sample [93] [97]. This single-molecule approach provides a significant advantage in sensitivity, typically detecting proteins in the femtomolar range (10 fg/ml to 1 pg/ml) [93].
Comparative Performance Analysis
Quantitative Benchmarking Against ELISA
The following table summarizes key performance metrics for ELISA, Olink PEA, and SIMOA based on current literature and technical specifications:
Table 1: Performance comparison of protein detection technologies
| Parameter | Traditional ELISA | Olink PEA | SIMOA |
|---|---|---|---|
| Technology Principle | Antibody-enzyme colorimetric detection [10] | Antibodies + DNA oligonucleotides + qPCR/NGS [18] [95] | Digital bead-based ELISA with single molecule detection [93] [96] |
| Multiplexing Capacity | Single-plex (1 protein/well) [18] [93] | High-plex (92-5400+ proteins simultaneously) [95] [94] | Low-plex (up to 6 proteins simultaneously) [93] |
| Sensitivity | 1-100 pg/mL [93] | Femtogram/mL levels [95] | 10 fg/mL - 1 pg/mL [93] |
| Sample Volume | 50-100 μL [18] [93] | 1-8 μL [18] [95] [94] | ~125 μL [93] |
| Throughput | Medium: up to 96 samples per plate [18] | Medium-high: up to 88 samples per plate [18] | High: ~1,100 samples per shift (HD-X system) [97] |
| Dynamic Range | Limited (typically 3-4 logs) | Wide (up to 10 logs) [95] | Broad [97] |
| Cost Effectiveness | Cost-effective for 96 samples [18] | Cost-effective for ≥88 samples [18] | Higher cost, dedicated instrument [93] [97] |
Key Advantages and Limitations in Research Context
Olink PEA Strengths and Constraints
Olink's primary advantages include its exceptional multiplexing capacity, minimal sample volume requirements, and high specificity due to dual antibody recognition combined with DNA hybridization [18] [95]. The technology provides a wide dynamic range spanning up to 10 logs, covering high, medium, and low-abundance proteins with particular strength in detecting low-abundance targets [95]. The platform is also compatible with diverse sample types, including serum, plasma, tissue lysates, cell culture media, cerebrospinal fluid, and many others [95].
The limitations of Olink include potentially lower absolute sensitivity compared to SIMOA for certain ultra-low abundance targets, and the requirement for careful normalization of data [94]. While compatible with many sample types, the technology is primarily validated with serum and plasma samples [18].
SIMOA Strengths and Constraints
SIMOA's most significant advantage is its exceptional sensitivity, with detection limits in the femtomolar range—an average 465-fold increase in sensitivity compared to traditional ELISA [93]. The platform delivers absolute quantification in pg/mL, enabling threshold-based diagnostics and cross-study comparability [97]. SIMOA also demonstrates high reproducibility, with coefficient of variation (CV) consistently ≤10%, meeting clinical-grade reproducibility standards [97]. The technology supports various matrices, including plasma, CSF, saliva, urine, and dried blood spots [97].
The limitations of SIMOA include relatively limited multiplexing capacity (typically up to 6 proteins), higher costs, and the requirement for specialized, dedicated instrumentation [93] [97]. The platform also has more limited protein panel availability compared to established ELISA targets [93].
Experimental Protocols and Applications
Detailed Methodologies for Key Applications
Protocol for Neurological Biomarker Analysis Using SIMOA
The quantification of neurofilament light chain (sNfL) has emerged as a valuable biomarker for neuro-axonal injury in multiple sclerosis and other neurological disorders [96]. A recent cross-sectional study detailed the following protocol for sNfL analysis:
- Sample Collection and Preparation: Serum samples are collected in tubes containing a clotting activator and centrifuged at 2500 × g for 6 minutes at 4°C [96]. Samples are distributed into aliquots (0.5 mL each), with one aliquot analyzed fresh and others stored at -80°C for batch analysis [96].
- SIMOA Analysis: Frozen samples are thawed simultaneously and analyzed using the Simoa NF-light Advantage PLUS reagent kit on the Simoa HD-X Analyzer [96]. Quality control samples are included to monitor accuracy (CV < 1.46%) [96].
- Data Analysis: The number of fluorescent wells is counted and compared to a standard curve generated from reference standards [96]. Results are reported in absolute concentrations (pg/mL) [97].
This protocol has demonstrated strong correlation with clinical parameters, with sNfL levels showing positive association with age and weak correlation with Expanded Disability Status Scale (EDSS) scores in MS patients [96].
Protocol for Multiplex Cytokine Analysis Using Olink PEA
For comprehensive cytokine profiling in immune response studies, Olink PEA offers simultaneous measurement of multiple inflammatory markers:
- Sample Preparation: As little as 1 μL of sample (serum, plasma, or other biofluid) is allocated for analysis [95] [94]. Samples are typically diluted with a specific buffer solution provided in the kit.
- Assay Procedure: The sample is incubated with the antibody-DNA pair mixture for proximity binding [95] [94]. After hybridization and extension, the resulting DNA barcodes are amplified using microfluidic qPCR [95].
- Data Processing: The amplified products are quantified, and data are normalized using internal controls [95]. Results are typically reported in Normalized Protein eXpression (NPX) units or converted to absolute concentrations using standard curves [94].
In comparative studies, Olink has demonstrated superior detectability for many cytokines compared to traditional Luminex assays, with particularly strong performance for medium-abundance analytes such as IL-1α and IL-6 (Spearman r ≥ 0.7-0.9) [94].
Application-Specific Technology Selection
Table 2: Recommended applications for each technology platform
| Research Application | Recommended Technology | Rationale |
|---|---|---|
| Targeted Biomarker Validation | SIMOA | Superior sensitivity for low-abundance targets; absolute quantification; clinical-grade reproducibility [93] [97] |
| Exploratory Biomarker Discovery | Olink PEA | High-plex capability; minimal sample requirement; comprehensive protein profiling [18] [95] |
| Large-scale Population Studies | Olink PEA | High-throughput multiplexing; cost-effectiveness per data point; compatibility with diverse sample types [95] |
| Clinical Diagnostic Development | SIMOA | Diagnostic-grade precision; regulatory maturity; strong correlation with clinical endpoints [96] [97] |
| Traditional Single-protein Analysis | ELISA | Established protocols; wide availability; cost-effectiveness for small-scale studies [93] [10] |
Research Reagent Solutions and Essential Materials
Successful implementation of these advanced protein detection technologies requires specific reagents and instrumentation. The following table outlines essential materials for each platform:
Table 3: Essential research reagents and materials for protein detection platforms
| Platform | Core Components | Function | Examples/Specifications |
|---|---|---|---|
| Traditional ELISA | Coated microplates | Solid phase for antibody-antigen binding [10] | 96-well polystyrene plates [10] |
| Enzyme-antibody conjugates | Detection through colorimetric reaction [10] | HRP or AP conjugated antibodies [10] | |
| Chromogenic substrates | Signal generation [10] | TMB (color change to blue/yellow) [10] | |
| Plate reader | Signal quantification [10] | Absorbance at 450 nm [10] | |
| Olink PEA | Antibody-DNA pairs | Target recognition and barcode generation [95] | Matched antibody pairs with oligonucleotides [95] |
| Extension and amplification reagents | DNA barcode amplification [95] | Polymerase, nucleotides, buffers [95] | |
| qPCR/NGS instrumentation | Nucleic acid quantification [95] | Microfluidic qPCR systems [95] | |
| Normalization controls | Data standardization [95] | Internal controls for normalization [95] | |
| SIMOA | Antibody-coated beads | Target capture [93] | Paramagnetic beads with specific antibodies [93] |
| Fluorescent detection antibodies | Signal generation [93] | Biotinylated antibodies with streptavidin-fluorophore [93] | |
| SIMOA instrument | Single molecule detection [93] [97] | HD-X analyzer with microwell arrays [97] | |
| Quality control materials | Assay performance monitoring [96] | Control samples with known concentrations [96] |
The protein detection landscape has evolved significantly beyond traditional ELISA, with Olink PEA and SIMOA representing complementary advanced solutions for modern research needs. Olink PEA excels in high-plex discovery applications where comprehensive protein profiling from minimal sample volumes is required, while SIMOA provides unparalleled sensitivity and precision for targeted biomarker validation and clinical translation.
The choice between these technologies ultimately depends on specific research objectives, with Olink offering breadth of coverage and SIMOA providing depth of sensitivity. As both platforms continue to develop and validate new protein panels, their adoption in basic research, drug development, and clinical diagnostics is expected to grow, further establishing their roles as essential tools in the proteomics toolkit.
Researchers should consider factors such as required multiplexing level, target abundance, sample availability, and intended application (discovery vs. validation) when selecting between these platforms. While ELISA remains a valuable tool for routine protein analysis, these novel technologies offer powerful alternatives that can accelerate biomarker discovery and enable new applications in precision medicine.
The Enzyme-Linked Immunosorbent Assay (ELISA) remains a cornerstone technology in biomedical research and clinical diagnostics, particularly for large-scale studies where cost-effectiveness, reliability, and throughput are critical. This technical analysis demonstrates that ELISA's financial advantages are most pronounced in projects requiring processing of thousands of samples, driven by minimal equipment investment, reduced reagent costs, and high-throughput capabilities. While emerging technologies offer superior multiplexing, ELISA maintains a strong position due to its well-established protocols, high specificity, and versatility across diverse applications from clinical diagnostics to pharmaceutical development. Understanding the precise cost-benefit calculus enables researchers to make informed methodological choices aligned with their study objectives and budgetary constraints.
ELISA is a plate-based immunoassay technique renowned for its ability to precisely detect and quantify soluble substances such as peptides, proteins, antibodies, and hormones. The fundamental principle relies on the specificity of antibody-antigen interactions coupled with enzyme-mediated signal amplification to generate a measurable output, typically a colorimetric or chemiluminescent change [98]. For extensive research initiatives—including longitudinal clinical trials, epidemiological surveys, and drug development programs—the technique offers a compelling balance of analytical performance and economic efficiency.
The global ELISA market, valued at approximately USD 2.3-2.4 billion in 2025, continues to experience steady growth, with over 50 million tests performed annually worldwide [99] [100] [101]. This substantial test volume underscores the technique's entrenched position in research and diagnostic ecosystems. The growing prevalence of infectious and chronic diseases, coupled with increasing demands for high-throughput immunoassays, further solidifies ELISA's role in large-scale scientific investigations where budgetary considerations are paramount [101].
Quantitative Cost-Benefit Analysis
Financial Advantages of ELISA Implementation
The economic benefits of ELISA become particularly evident when deployed across extensive sample sets. The methodology offers multiple avenues for cost containment without compromising data quality.
Table 1: Key Financial Advantages of ELISA for Large Studies
| Cost Factor | Economic Impact | Scale Advantage |
|---|---|---|
| Reagent Consumption | Smaller volumes required compared to other methods; bulk purchasing further reduces expenses [102]. | Cost per test decreases significantly at scale (thousands of samples). |
| Equipment Investment | Utilizes standard laboratory equipment (microplate readers, washers) without need for specialized, expensive instrumentation [102]. | Minimal capital outlay; existing lab infrastructure often sufficient. |
| Labor Efficiency | High-throughput automation possible; 96-well and 384-well formats process hundreds of samples simultaneously [102] [103]. | Reduces personnel costs per data point; automated systems can run unattended. |
| Waste Management | Smaller reagent volumes generate less chemical and biohazard waste, reducing disposal costs [102]. | Environmental compliance costs remain manageable at scale. |
Comparative Cost Analysis with Alternative Technologies
When positioned against competing proteomic technologies, ELISA's economic profile is distinctly favorable for targeted protein quantification, though its limitations in multiplexing must be acknowledged.
Table 2: Technology Comparison for Protein Detection Applications
| Parameter | ELISA | Mass Spectrometry | Olink PEA |
|---|---|---|---|
| Technology Principle | Antibody-based detection in plate format [18] | Mass-to-charge analysis of peptide fragments [18] | Antibodies coupled to oligonucleotides [18] |
| Multiplexing Capacity | Low (one protein at a time) [18] | High (depends on protein abundance) [18] | High (up to 384 proteins simultaneously) [18] |
| Throughput | Medium to High (up to 96+ samples per plate) [102] [18] | Low (one sample at a time) [18] | Medium (up to 88 samples per plate) [18] |
| Sensitivity | High [18] | Low [18] | High [18] |
| Sample Input Required | ~100 µL [18] | ~150 µL (highly concentrated) [18] | ~1 µL [18] |
| Cost-Effectiveness | High for 96 samples [18] | Cost-effective for a few samples [18] | Cost-effective for ≥88 samples [18] |
| Best Application Fit | Targeted protein quantification in large sample cohorts | Protein discovery, structural analysis, post-translational modifications | Discovery-phase biomarker studies with limited sample volume |
Technical Protocols for Large-Scale Implementation
High-Throughput Workflow Optimization
Implementing ELISA at scale requires meticulous workflow design to maximize efficiency and maintain data integrity. The Sandwich ELISA protocol, representing over 36% of the market share in 2025 [101], is particularly suited for large studies due to its enhanced sensitivity and specificity.
Diagram 1: High-throughput ELISA workflow.
Essential Research Reagent Solutions
The reliability of large-scale ELISA studies depends on consistent reagent quality. Key materials form the foundation of robust assay performance.
Table 3: Essential Research Reagent Solutions for Large-Scale ELISA
| Reagent/Material | Function | Considerations for Large Studies |
|---|---|---|
| Coated Microplates | Solid phase for antibody immobilization [104] | Pre-coated plates save time; 96-well and 384-well formats enable high throughput [102]. |
| Capture/Detection Antibodies | Specifically bind target antigen [104] | Require rigorous validation; matched pairs needed for sandwich ELISA; batch-to-batch consistency critical. |
| Enzyme Conjugates | Signal generation through enzyme-substrate reaction [104] | Horseradish peroxidase (HRP) and alkaline phosphatase (AP) most common; stable conjugates reduce variability. |
| Chromogenic Substrates | Produce measurable color change upon enzyme action [104] | TMB (3,3',5,5'-Tetramethylbenzidine) common for HRP; cost-effective bulk purchasing available. |
| Blocking Buffers | Prevent non-specific binding [104] | BSA, non-fat milk, or commercial formulations; optimization required for each target. |
| Wash Buffers | Remove unbound reagents [104] | Automated plate washers ensure consistency; concentrated stocks reduce preparation time. |
| Reference Standards | Generate quantification curve [104] | Highly purified antigen; critical for inter-assay comparison; requires proper aliquoting and storage. |
Performance Benchmarking and Validation
Diagnostic Accuracy in Clinical Applications
ELISA demonstrates robust diagnostic performance across various clinical contexts. A systematic review of ELISA tests for bullous pemphigoid diagnosis revealed pooled sensitivity of 82.0% and specificity of 94.1% for BP180 autoantibody detection, confirming its reliability as a primary diagnostic tool [105]. The BP230 ELISA showed lower sensitivity (58.6%) but maintained high specificity (94.8%), supporting its use as a confirmatory assay [105]. These performance characteristics, coupled with standardized protocols, make ELISA particularly valuable for multi-center studies requiring consistent implementation across sites.
Comparative Methodological Assessment
Understanding ELISA's position relative to other immunoassays provides context for its cost-benefit advantages.
Diagram 2: Method comparison: ELISA, RIA, and CLIA.
Technological Advancements and Automation
The ELISA landscape is evolving with significant innovations enhancing its applicability to large studies. Automated ELISA systems represent a transformative advancement, with the global market projected to grow from $2.5 billion in 2025 to $4.2 billion by 2033, exhibiting a compound annual growth rate of 7% [103]. These systems minimize human error, increase throughput, and improve reproducibility—particularly valuable attributes in extensive research projects.
Emerging trends include the integration of artificial intelligence for data analysis, development of point-of-care ELISA devices, and implementation of microfluidics for miniaturization [103]. Additionally, nanoparticle-based ELISA and smartphone-based detection platforms are pushing the boundaries of sensitivity and accessibility [100]. These innovations promise to further enhance ELISA's cost-benefit profile while addressing traditional limitations related to multiplexing and technical expertise requirements.
Limitations and Strategic Considerations
Despite its numerous advantages, ELISA presents specific limitations that researchers must factor into study design. The technology's low multiplexing capacity remains its primary constraint, detecting only one protein per assay well [18]. This limitation becomes increasingly consequential in studies where sample volume is restricted or when numerous analytes require measurement.
Strategic implementation approaches can mitigate these constraints:
- Hybrid Methodologies: Employ ELISA for high-volume targets in large cohorts while reserving multiplex platforms (Olink, mass spectrometry) for discovery-phase experiments with smaller sample sizes [18].
- Automated Systems: Invest in automated ELISA platforms for laboratories processing >10,000 samples annually; these systems reduce hands-on time by approximately 70% while improving data consistency [103].
- Reagent Validation: Establish rigorous quality control protocols for antibody reagents, as batch-to-batch variability represents a significant risk to data quality in extended studies.
ELISA maintains a definitive position as a cost-effective solution for large-scale studies, particularly those requiring quantitative analysis of specific protein targets across thousands of samples. The technique's economic advantages—driven by minimal equipment investment, reduced reagent consumption, and high-throughput capabilities—deliver substantial value without compromising data quality or reliability. While emerging technologies offer superior multiplexing, ELISA's established protocols, standardized reagents, and extensive validation history ensure its continued relevance in research and diagnostic paradigms. Strategic implementation, potentially incorporating automated systems and hybrid methodological approaches, will further optimize the cost-benefit ratio for extensive research initiatives.
Next-Generation ELISA (ELISA 2.0) represents a significant evolution from conventional enzyme-linked immunosorbent assays, overcoming traditional limitations in multiplexing, sensitivity, and specificity [12]. By incorporating technologies such as digital detection, single-molecule sensing, and nanomaterials, these contemporary platforms provide highly accurate and reliable biomolecule analysis, revolutionizing diagnostics and research [12]. This overview details the core technologies, experimental protocols, and key reagents that define ELISA 2.0, contextualizing its advancements within the broader evaluation of immunoassay pros and cons for protein detection research.
Core Technology Platforms in ELISA 2.0
The transition from traditional ELISA is driven by innovations across several key technological fronts, moving beyond simple colorimetric detection.
Advanced Detection Methods
A critical driver of ELISA 2.0 is the shift from fundamental colorimetric detection to advanced techniques that offer superior quantitative precision and ultra-sensitive detection [12].
- Chemiluminescence and Electrochemiluminescence: These methods provide a highly sensitive, quantitative signal readout, facilitating the detection of low-abundance biomarkers essential for early disease diagnosis [12] [100].
- Fluorescence: Fluorogenic reporters are central to multiplexing capabilities, allowing simultaneous analysis of multiple analytes from a single sample, thereby enhancing efficiency [12].
- Nano-ELISA: The use of nanomaterials like nano-carriers and nano-coloring agents improves selectivity, sensitivity, and adaptability. Nanoparticles can also serve as chromogenic reporters, generating signals visible to the naked eye [100].
Advanced Assay Formats
- Digital ELISA: This format enables ultra-sensitive, single-molecule detection by segregating individual molecules into microscopic droplets or wells, dramatically lowering detection limits compared to conventional ELISA [12] [10].
- Microfluidic & Lab-on-Chip ELISA: These systems reduce reagent costs and sample volumes, paving the way for portable, point-of-care diagnostic devices [12] [106].
- Paper-Based ELISA: Using filter paper as a portable, affordable substrate provides a practical solution for resource-limited settings [12].
- Cell-Based and Organoid-Embedded ELISA: Integrating miniaturized organoid cultures within microplates simulates tissue-level responses, moving beyond static biomarker presence to functional response analysis [106].
Table 1: Quantitative Comparison of ELISA 2.0 Detection Technologies
| Technology | Key Principle | Advantages | Sensitivity | Compatibility |
|---|---|---|---|---|
| Chemiluminescence | Light emission from chemical reaction | High sensitivity, broad dynamic range | High (sub-femtomolar) | Automated systems [12] |
| Electrochemiluminescence | Light emission triggered by electrochemical reaction | Exceptional sensitivity, reduced background | Ultra-high | Multiplexing platforms [12] |
| Fluorescence | Emission of light at specific wavelength | Enables multiplexing, quantitative | High | Standard microplate readers [12] [107] |
| Digital ELISA | Single-molecule detection in microwells | Extreme sensitivity, absolute quantification | Single-molecule level | Specialized instruments [12] |
Experimental Protocols for Key ELISA 2.0 Platforms
Protocol 1: Standard Sandwich Chemiluminescent ELISA
This protocol is a foundational high-sensitivity method, representative of modern automated workflows [12] [10] [107].
- Coating: Coat a 96-well polystyrene microplate with a capture antibody specific to the target protein. Dilute the antibody in a coating buffer. Incubate overnight at 4°C [10] [16].
- Blocking: Aspirate the coating solution and wash the plate 2-3 times with a wash buffer (e.g., PBS with 0.05% Tween-20). Block remaining protein-binding sites by adding a blocking buffer (e.g., 1% BSA or 5% non-fat dry milk in PBS). Incubate at room temperature for 1-2 hours [10] [16].
- Antigen Incubation: Wash the plate. Add samples and standards (calibrators) diluted in an appropriate buffer to the wells. Incubate for 90 minutes at 37°C to form the capture antibody-antigen complex [10] [16].
- Detection Antibody Incubation: Wash the plate to remove unbound antigen. Add a specific detection antibody conjugated to an enzyme (e.g., Horseradish Peroxidase - HRP). Incubate for 1-2 hours at room temperature [10] [16].
- Signal Detection: Wash the plate thoroughly to remove unbound detection antibody. Add a chemiluminescent substrate (e.g., luminol-based for HRP). Incubate in the dark for 5-30 minutes [12] [107].
- Reading: Measure the emitted light (Relative Light Units - RLU) using a luminometer or compatible microplate reader. The signal intensity is proportional to the amount of target antigen in the sample [107].
Protocol 2: CRISPR-Enhanced ELISA for Nucleic Acid and Protein Co-Detection
This protocol illustrates a cutting-edge integration that expands analyte specificity [106].
- Standard Sandwich ELISA Steps: Begin by performing steps 1 through 4 of the standard sandwich ELISA protocol above.
- CRISPR Complex Formation: Simultaneously, form a complex by pre-incubating a CRISPR RNA (crRNA) designed to recognize a specific nucleic acid sequence (e.g., viral RNA or mRNA biomarker) with a Cas enzyme (e.g., Cas12a or Cas13).
- CRISPR Reaction Integration: After the final wash step (Step 4 of the standard protocol), add the pre-formed CRISPR-crRNA complex to the well. If the target nucleic acid is present, the Cas enzyme becomes activated.
- Signal Amplification: Activated Cas enzymes exhibit "collateral cleavage" activity, non-specifically degrading a quenched fluorescent or colorimetric reporter added to the reaction mix. This degradation generates a highly amplified signal.
- Dual Readout: The plate is read using a fluorescence or absorbance microplate reader. The signal is a composite of the immunocomplex (protein detection) and the CRISPR collateral cleavage (nucleic acid detection), providing high specificity for both analyte types [106].
The Scientist's Toolkit: Key Research Reagent Solutions
Successful implementation of Next-Generation ELISA requires carefully selected reagents and instruments. The following table details essential materials and their functions in advanced assays.
Table 2: Essential Reagents and Instruments for Next-Generation ELISA
| Item | Function/Description | Example Applications |
|---|---|---|
| Pre-coated Microplates | Plates pre-coated with capture antibodies; save time and reduce handling variability [108]. | High-throughput screening; standardized quantitation [108]. |
| CRISPR-Cas Reagents | Lyophilized Cas enzymes and crRNAs for nucleic acid detection with high specificity [106]. | Multiplexed detection of proteins and nucleic acids; pathogen identification [106]. |
| Chemiluminescent Substrates | Luminol-based substrates for HRP; generate light signal for high-sensitivity detection [12] [107]. | Low-abundance biomarker detection; automated immunoassays [12] [107]. |
| Magnetic Nanoparticles | Antibody-coated particles used as a solid phase for improved kinetics and ease of separation [100]. | Automated sample preparation; rapid, sensitive assays [100]. |
| Automated ELISA Analyzers | Instruments for fully automated processing, from reagent addition to final readout [109]. | High-volume diagnostic labs; drug development quality control [109]. |
| Multiplex Array Scanners | Imaging systems for detecting signals from multi-analyte arrays in a single well [12]. | Cytokine profiling; biomarker discovery panels [12]. |
ELISA in Context: Pros and Cons for Protein Detection Research
The advancements of ELISA 2.0 are best understood by contrasting them with traditional ELISA and other common protein analysis methods like Western blot.
Table 3: Comparative Analysis of Protein Detection Techniques
| Feature | Traditional ELISA | Next-Generation ELISA | Western Blot |
|---|---|---|---|
| Throughput | High (96-well format) [19] | Very High (automation & multiplexing) [12] | Low (manual, gel-based) [19] |
| Sensitivity | Moderate (nanogram-picogram) [19] | Very High (femtomolar to single-molecule) [12] | Moderate (picogram) [19] |
| Specificity | High (antibody-dependent) | Very High (CRISPR, digital resolution) [12] [106] | High (separation + antibody) [19] |
| Quantification | Excellent (precise and absolute) [19] | Superior (broad dynamic range) [12] | Semi-Quantitative (relative abundance) [19] |
| Protein Information | Presence/Concentration only [19] | Presence/Concentration + functional data (organoids) [106] | Molecular weight, post-translational modifications [19] |
| Ease of Automation | Excellent [19] | Excellent (integrated systems) [12] [109] | Poor (manual workflow) [19] |
The progression towards integrated systems combining organoids, CRISPR, and AI signifies a future where ELISA transitions from a simple measuring tool to a dynamic, interpretative biosensing platform [106]. These innovations solidify the role of Next-Generation ELISA as an indispensable technology in modern protein research and diagnostic development.
Conclusion
ELISA remains an indispensable, cost-effective, and highly reliable tool for protein quantification, particularly suited for high-throughput screening and large-scale studies in both research and diagnostic settings. Its primary strengths lie in its robust protocols, high sensitivity, and specificity when optimized correctly. However, researchers must also acknowledge its limitations, including limited multiplexing capabilities and the inability to provide information on protein size or modifications. The future of protein detection is being shaped by next-generation ELISA technologies and novel platforms that offer superior multiplexing and single-molecule sensitivity. The key to success lies in a critical understanding of ELISA's pros and cons, enabling scientists to strategically deploy it as a standalone tool or as part of a complementary workflow with techniques like Western Blot for validation, thereby driving accurate and impactful discoveries in biomedical science.
References
- 1. 酶联免疫吸附实验(ELISA) 概述 [https://www.cellsignal.cn/applications/elisa/elisa-educational]
- 2. 几种ELISA检测类型的优缺点比较 [http://m.ctestingbio.com/article/d30.html]
- 3. 酶联免疫吸附实验(ELISA) [https://www.moleculardevices.com.cn/applications/enzyme-linked-immunosorbent-assay-elisa]
- 4. Data analysis for ELISA [https://www.abcam.com/en-us/technical-resources/guides/elisa-guide/calculating-elisa-data]
- 5. Development of an ELISA for Quantitative Detection ... [https://pmc.ncbi.nlm.nih.gov/articles/PMC3724032/]
- 6. ELISA 与蛋白质印迹:两种常见免疫测定法的比较 [https://www.tw-reagent.com/article.php?id=453]
- 7. ELISA Assay Technique | Thermo Fisher Scientific - US [https://www.thermofisher.com/us/en/home/life-science/protein-biology/protein-biology-learning-center/protein-biology-resource-library/pierce-protein-methods/overview-elisa.html]
- 8. ELISA Evolution | MyBioSource Learning Center [https://www.mybiosource.com/learn/elisa-evolution/]
- 9. Enzyme-linked immunosorbent assay for the quantitative ... [https://pmc.ncbi.nlm.nih.gov/articles/PMC5775980/]
- 10. An overview of ELISA: a review and update on best laboratory ... [https://pmc.ncbi.nlm.nih.gov/articles/PMC11808753/]
- 11. Exploring the history behind ELISA [https://www.news-medical.net/whitepaper/20231211/Exploring-the-history-behind-ELISA.aspx]
- 12. Next-Generation ELISA (ELISA 2.0) Market Research ... [https://www.insightaceanalytic.com/report/next-generation-elisa-market/3241]
- 13. Enzyme-Linked Immunosorbent Assay Testing Market Size ... [https://www.precedenceresearch.com/enzyme-linked-immunosorbent-assay-testing-market]
- 14. ELISA Advantages and Disadvantages [https://www.creative-diagnostics.com/ivd-materials/support/elisa-advantages-and-disadvantages.html]
- 15. What is ELISA? - Principles, Applications & Advantages [https://lifesciences.danaher.com/us/en/library/elisa-overview.html]
- 16. Enzyme Linked Immunosorbent Assay - StatPearls - NCBI - NIH [https://www.ncbi.nlm.nih.gov/books/NBK555922/]
- 17. ELISA vs Mass Spectrometry: Choosing a Protein Quantitation ... [https://blog.cellsignal.com/tools-for-screening-and-quantifying-proteins]
- 18. Comparing Mass Spectrometry, ELISA, and Olink for ... [https://blog.genewiz.com/comparing-mass-spectrometry-elisa-and-olink-for-proteomics]
- 19. ELISA vs Western Blot: When to Use Each Immunoassay ... [https://www.thermofisher.com/blog/life-in-the-lab/western-blot-or-elisa/]
- 20. ELISA Testing Platform Market Outlook 2025-2032 [https://www.linkedin.com/pulse/elisa-testing-platform-market-outlook-2025-2032-trends-size-yzxhf]
- 21. Types of ELISA (Enzyme-linked Immunosorbent Assay) Tests [https://www.cellsignal.com/applications/elisa/types-of-elisa-tests?srsltid=AfmBOootGUqla2eLBuIKqjwNlh0szsBcP2f16-cCAmPBGIcrPc4WB3N6]
- 22. Indirect and Direct ELISA [https://www.abcam.com/en-us/technical-resources/protocols/indirect-and-direct-elisa]
- 23. What is an ELISA? | Abcam [https://www.abcam.com/en-us/technical-resources/guides/elisa-guide/what-is-an-elisa]
- 24. Optimizing your ELISA Assays [https://www.bmglabtech.com/en/blog/optimizing-your-elisa-assays/]
- 25. ELISA Guide; Part 3: ELISA Optimization [https://www.jacksonimmuno.com/secondary-antibody-resource/immuno-techniques/elisa-guide-part-3-elisa-optimization/]
- 26. ELISA vs. Western Blot: Which Is Better for Protein Detection? [https://synapse.patsnap.com/article/elisa-vs-western-blot-which-is-better-for-protein-detection]
- 27. Western blotting vs. ELISA [https://www.abcam.com/en-us/knowledge-center/western-blot/elisa-vs-western-blot]
- 28. Sandwich ELISA protocol [https://www.abcam.com/en-us/technical-resources/protocols/sandwich-elisa]
- 29. The Strategic Role of Secondary Antibody Incubation ... [https://www.assaygenie.com/blog/secondary-antibody-incubation-times?srsltid=AfmBOorAuAr1PG0h2qFQ4hvnfT_6EvGtwiNu3fRDbW7KTWfXjw-uP20W]
- 30. How to Analyze ELISA Data and Calculate Results [https://www.bosterbio.com/blog/post/how-to-analyze-elisa-data-and-calculate-results-step-by-step-guide-with-troubleshooting-tips?srsltid=AfmBOopJPDLw9jn7qZlNDgL1Kwn-QWfl0_WxcFzBL1_fSjf3ihOZo5vA]
- 31. What is an ELISA & Types of ELISA Tests [https://www.rndsystems.com/resources/what-is-an-elisa-and-elisa-types]
- 32. Explore ELISA Types: Direct, Indirect, Sandwich, and More [https://www.bosterbio.com/blog/post/elisa-types-indirect-direct-sandwich-competitive-multiplex-elisa?srsltid=AfmBOoqY5MYIDysLuTzBzoIfZt_5bLr75t8oN9MyELjsprFAfM_x9t29]
- 33. Comparative evaluation of in-house ELISA and two ... [https://www.nature.com/articles/s41598-025-97050-y]
- 34. Establishment of an indirect ELISA method for detecting ... [https://www.frontiersin.org/journals/veterinary-science/articles/10.3389/fvets.2025.1530870/full]
- 35. Development of an enzyme-linked immunosorbent assay ... [https://www.frontiersin.org/journals/molecular-biosciences/articles/10.3389/fmolb.2025.1542898/full]
- 36. An introduction to the different types of ELISA tests | INTEGRA [https://www.integra-biosciences.com/united-states/en/blog/article/types-of-elisa-tests]
- 37. Guide to Microplate Formats and Well Designs [https://www.thermofisher.com/us/en/home/life-science/protein-biology/protein-assays-analysis/elisa/elisa-microplates-plasticware/guide-microplate-formats-well-designs.html]
- 38. The microplate: utility in practice [https://www.bmglabtech.com/en/the-microplate-utility-in-practice/]
- 39. Why are Sensitivity and Specificity Important Parameters ... [https://www.enzo.com/note/why-are-sensitivity-and-specificity-important-parameters-for-an-elisa/]
- 40. ELISA: What It Is, Purpose, Procedure & Results [https://my.clevelandclinic.org/health/articles/24990-elisa]
- 41. OPTIMIZATION OF DIAGNOSTIC ELISA - BASED TESTS ... [https://pmc.ncbi.nlm.nih.gov/articles/PMC5694676/]
- 42. Importance of Ultrasensitive ELISA in Cancer Research [https://www.scientificarchives.com/article/importance-of-ultrasensitive-elisa-in-cancer-research]
- 43. Endocrinology and most common biomarkers [https://www.elisakits.co.uk/blog/endocrinology-and-most-common-biomarkers/]
- 44. Types of ELISA (Enzyme-linked Immunosorbent Assay) Tests [https://www.cellsignal.com/applications/elisa/types-of-elisa-tests?srsltid=AfmBOooh_WpZ_EuL9RqfuR3HMzAPjh3m3mON5AW2NNbo7_BFKisat7Ke]
- 45. Basic Sandwich ELISA Protocols [https://www.thermofisher.com/us/en/home/references/protocols/cell-and-tissue-analysis/elisa-protocol/general-elisa-protocol/basic-sandwich-elisa-protocol.html]
- 46. Sandwich ELISA: Overview & Applications [https://www.excedr.com/resources/sandwich-elisa]
- 47. ELISA Kit Selection Guide: Sandwich vs Competitive ... [https://synapse.patsnap.com/article/elisa-kit-selection-guide-sandwich-vs-competitive-vs-direct-methods]
- 48. A Guide to Building a Direct Sandwich ELISA [https://www.ptglab.com/news/blog/a-guide-to-building-a-direct-sandwich-elisa/?srsltid=AfmBOooVgX3xdvWzOqB81uDAd7De5RBY1ky4iaMojxU3mRKsaJMgQKhi]
- 49. Exploring the Possibilities of High-Throughput Sample ... [https://www.chromatographyonline.com/view/exploring-possibilities-high-throughput-sample-preparation]
- 50. ELISA: The Complete Guide [https://www.antibodies.com/applications/elisa]
- 51. High-throughput analytical methods employing ... [https://www.sciencedirect.com/science/article/pii/S2772582023000451]
- 52. Protein Assays: Choosing the Most Effective Method ... [https://www.precisionformedicine.com/blog/protein-assays-choosing-the-most-effective-method-for-biopharmaceutical-development]
- 53. Efficient protein extraction for assessing food allergy risk in ... [https://www.sciencedirect.com/science/article/pii/S0308814624028711]
- 54. Enhancing High Throughput Sample Preparation in Bottom ... [https://www.preomics.com/blog/enhancing-high-throughput-sample-preparation-bottom-up-proteomics]
- 55. SPR vs ELISA | Comparing techniques for biomolecular ... [https://nicoyalife.com/blog/spr-vs-elisa-comparing-techniques-for-biomolecular-detection/]
- 56. Introduction to ELISA, Formats and Signal Amplification [https://www.jacksonimmuno.com/secondary-antibody-resource/immuno-techniques/elisa-guide-part-1/]
- 57. Advanced ELISA Techniques for High-Sensitivity Protein ... [https://www.marinbio.com/elisa-ultra-sensitive-detector-of-proteins/]
- 58. Enhancing ELISA Sensitivity: From Surface Engineering to ... [https://pmc.ncbi.nlm.nih.gov/articles/PMC12293621/]
- 59. Analysis of proteins and antibodies - Autoimmunity - NCBI - NIH [https://www.ncbi.nlm.nih.gov/books/NBK459443/]
- 60. Dual improved enzyme-linked immunosorbent assay ... [https://www.sciencedirect.com/science/article/abs/pii/S0889157524008226]
- 61. The quantitative detection method employing a ... [https://www.sciencedirect.com/science/article/pii/S2405580825001785]
- 62. ELISA Assay Challenges | MyBioSource Learning Center [https://www.mybiosource.com/learn/troubleshooting-elisa-assay-challenges]
- 63. Cross-reactivity mediated by SARS-CoV-2 antibodies [https://pubmed.ncbi.nlm.nih.gov/40912140/]
- 64. Cross-reactivity mediated by SARS-CoV-2 antibodies: ... [https://www.sciencedirect.com/science/article/abs/pii/S0732889325004110]
- 65. ELISA Development and Optimization [https://www.thermofisher.com/us/en/home/life-science/protein-biology/protein-biology-learning-center/protein-biology-resource-library/pierce-protein-methods/overview-elisa/elisa-development-optimization.html]
- 66. Optimization of enzyme-linked immunosorbent assay for ... [https://www.sciencedirect.com/science/article/abs/pii/S0166093425001831]
- 67. Understanding the Hook Effect in a One-Step Sandwich ... [https://www.chondrex.com/scientific-articles/understanding-the-hook-effect-in-a-one-step-sandwich-elisa]
- 68. The Hook Effect [https://myadlm.org/science-and-research/clinical-chemistry/clinical-chemistry-trainee-council/pearls-of-laboratory-medicine-in-english/2014/the-hook-effect]
- 69. Hook effect detection and detection-range-controllable one ... [https://www.sciencedirect.com/science/article/abs/pii/S0925400519316077]
- 70. ELISA Troubleshooting Guide [https://www.thermofisher.com/us/en/home/life-science/protein-biology/protein-biology-learning-center/protein-biology-resource-library/pierce-protein-methods/overview-elisa/elisa-troubleshooting-guide.html]
- 71. ELISA Guide; Part 4: Troubleshooting [https://www.jacksonimmuno.com/secondary-antibody-resource/immuno-techniques/elisa-guide-part-4-troubleshooting/]
- 72. Troubleshooting Guide: ELISA [https://www.rndsystems.com/resources/troubleshooting-guide-elisa-development]
- 73. 5 Common Pitfalls to Avoid in ELISA Experiments | Boster Bio [https://www.bosterbio.com/blog/post/5-pitfalls-to-avoid-for-elisa?srsltid=AfmBOoprXft8ZmwS9UHIhE4JqKcj0_OKIXBvbsaUwJc73SkTNfgVWwhb]
- 74. Common problems in ELISA experiments [https://www.dldevelop.com/protein-information/Common%20problems%20in%20ELISA%20experiments.html]
- 75. Ensuring Reproducible Data in the Laboratory [https://www.labmanager.com/ensuring-reproducible-data-in-the-laboratory-23958]
- 76. 10 Examples of Good Laboratory Practice (GLP) [https://www.materials.zone/blog/examples-of-good-laboratory-practice-glp]
- 77. ELISA Assay Validation: Best Practices, Methods, and Key ... [https://www.nebiolab.com/elisa-assay-validation-guide/]
- 78. How to Read and Analyze ELISA Data [https://www.rndsystems.com/resources/how-to-analyze-elisa-data]
- 79. How to ensure quality control in a lab [https://automata.tech/blog/quality-control-in-a-lab/]
- 80. Good Laboratory Practices (GLP) [https://www.isu.edu/biology/biolab/instructor-training/technology/good-laboratory-practices-glp/]
- 81. How to Choose the Right Protein Detection Method? 6 ... [https://www.uprtek.com/en/blogs/protein-detection-methods]
- 82. How to Generate an ELISA Standard Curve? [https://www.betalifesci.com/blogs/news/elisa-standard-curve?srsltid=AfmBOoqmBQ9yUekY7fIe58UO6sVGL0KSobrlnrfJ3_9aoFPeq4IHcYuT]
- 83. How to Analyze Elisa Data in Excel [https://www.thebricks.com/resources/guide-how-to-analyze-elisa-data-in-excel]
- 84. When to use ELISA vs Western blot - Azure Biosystems [https://azurebiosystems.com/blog/elisa-vs-western-blot/]
- 85. ELISA vs. Western Blot: Choosing the Best Immunoassay for Your Research - MetwareBio [https://www.metwarebio.com/elisa-vs-western-blot-comparison/]
- 86. ELISA vs western blot | INTEGRA [https://www.integra-biosciences.com/united-states/en/blog/article/elisa-vs-western-blot]
- 87. Comparison of Enzyme-Linked Immunosorbent Assay ... [https://pmc.ncbi.nlm.nih.gov/articles/PMC524736/]
- 88. Protein Structure Analysis with Mass Spectrometry [https://www.thermofisher.com/us/en/home/industrial/mass-spectrometry/proteomics-mass-spectrometry/protein-structure-analysis-mass-spectrometry.html]
- 89. Recent Advances in Mass Spectrometry-Based Structural ... [https://pmc.ncbi.nlm.nih.gov/articles/PMC9572214/]
- 90. ELISA versus Mass Spectrometry for the Detection of HCPs [https://www.news-medical.net/life-sciences/ELISA-versus-Mass-Spectrometry-for-the-Detection-of-HCPs.aspx]
- 91. Advantages vs Disadvantages of Mass Analyzers [https://americanlaboratorytrading.com/a-buyers-guide-to-mass-spectrometry-platforms-pros-and-considerations/?srsltid=AfmBOoq8w4PRN9KjTJom9vpi11T7as7UmabEUOvRozLncl5Cc-vqmt6B]
- 92. A Sensitive High Throughput ELISA for Human Eosinophil ... [https://pmc.ncbi.nlm.nih.gov/articles/PMC3432656/]
- 93. ELISA vs. Immuno-PCR vs. SIMOA: Comparison of Protein ... [https://www.raybiotech.com/elisa-immunopcr-simoa]
- 94. Olink cytokine panel comparison: ELISA, Luminex, MSD ... [https://olinkpanel.creative-proteomics.com/knowledge/olink-cytokine-panel-vs-other-methods.html]
- 95. Olink Proteomics Explained: Principles, Advantages, and ... [https://www.metwarebio.com/olink-proteomics-explained-advantages-vs-ms-methods/]
- 96. Comparison of Simoa, high‑sensitivity ELISA, and CLIA for ... [https://www.nature.com/articles/s41598-025-25926-0]
- 97. Built for Translation: Why Simoa Stands Alone in Clinical- ... [https://www.quanterix.com/built-for-translation-why-simoa-stands-alone-in-clinical-grade-biomarker-measurement/]
- 98. Enzyme-Linked Immunosorbent Assay (ELISA) Market ... [https://www.intelmarketresearch.com/enzyme-linked-immunosorbent-assay-market-16914]
- 99. Enzyme-Linked Immunosorbent Assay (ELISA) Market to ... [https://www.globenewswire.com/news-release/2025/10/24/3172862/0/en/Enzyme-Linked-Immunosorbent-Assay-ELISA-Market-to-Reach-USD-3-63-Billion-by-2033-Driven-by-Expanding-Diagnostic-Applications-and-Advancements-in-High-Throughput-Testing-SNS-Insider.html]
- 100. Enzyme-Linked Immunosorbent Assay (ELISA) Testing ... [https://www.biospace.com/press-releases/enzyme-linked-immunosorbent-assay-elisa-testing-market-to-hit-usd-4-19-bn-by-2034]
- 101. Enzyme-Linked Immunosorbent Assay (ELISA) Market Size ... [https://www.snsinsider.com/reports/enzyme-linked-immunosorbent-assay-market-8558]
- 102. Why ELISAs Are Cost-Effective for Large-Scale Sample ... [https://www.arborassays.com/cost-effective-elisa-processing/?srsltid=AfmBOop360HR7y1HR15hp4XvK7-zdoASDyOovXDXv26fYxFltKwU3HQJ]
- 103. Automated ELISA System 2025 to Grow at XX CAGR with ... [https://www.archivemarketresearch.com/reports/automated-elisa-system-541639]
- 104. Comparing Other Immunoassay with Elisa [https://www.mybiosource.com/learn/comparing-other-immunoassay-with-elisa/]
- 105. Sensitivity and Specificity of ELISA Tests Detecting BP180 ... [https://pubmed.ncbi.nlm.nih.gov/41222109/]
- 106. - Next Kits: Integrating... | Gentaur Scientific Blog Generation ELISA [https://gentaur.com/blogs/next-generation-elisa-kits-integrating-organoids-crispr-biosensors-and-ai-for-real-time-molecular-diagnostics]
- 107. Complete ELISA Guide: Get Reliable Results Every Time [https://www.assaygenie.com/complete-elisa-guide-get-reliable-results-every-time-expert-protocols/?srsltid=AfmBOoodw2poE2PJcq2HBZYcEZyXMC4mfTbv9CAcPpci5KiXjmeCdPcx]
- 108. EasyAna dsRNA (Modified) Quantitative Detection Kit ( ELISA ) 2 . 0 [https://vazymebiotech.hu/en/products/easyana-dsrna-modified-quantitative-detection-kit-elisa-2-0]
- 109. ELISA Analyzers Market Set to Reach USD 877.75 Million ... [https://finance.yahoo.com/news/elisa-analyzers-market-set-reach-133000919.html]