Managing Signal Drift in Undiluted Whole Blood: Mechanisms, Mitigation, and Validation for Biomedical Sensors
This article provides a comprehensive guide for researchers and drug development professionals on managing signal drift in electrochemical and transistor-based biosensors deployed in undiluted whole blood.
Managing Signal Drift in Undiluted Whole Blood: Mechanisms, Mitigation, and Validation for Biomedical Sensors
Abstract
This article provides a comprehensive guide for researchers and drug development professionals on managing signal drift in electrochemical and transistor-based biosensors deployed in undiluted whole blood. Covering the foundational mechanisms of drift—including electrochemical desorption, biofouling, and environmental factors—we detail methodological advances in calibration, sensor design, and drift correction. The content further explores troubleshooting and optimization strategies for enhanced stability, and concludes with rigorous validation frameworks and comparative analysis of different sensing platforms. The goal is to equip scientists with the knowledge to achieve reliable, long-term molecular measurements in complex, in-vivo-like environments.
Unraveling the Core Mechanisms of Signal Drift in Complex Biological Fluids
Understanding Signal Drift: Core Concepts and Mechanisms
What is signal drift and why is it a critical issue in real-time biomarker monitoring?
Signal drift refers to the gradual change in a sensor's output over time, which is unrelated to the presence or concentration of the target analyte. In the context of real-time, in-situ biomarker monitoring in undiluted whole blood, signal drift presents a fundamental challenge to measurement accuracy and reliability. This phenomenon can obscure actual biomarker detection, convolute results, and adversely affect device performance, potentially leading to false conclusions in research and drug development [1] [2].
What are the primary mechanisms causing signal drift in complex biological fluids like whole blood?
Research indicates that signal drift in whole blood originates from multiple, simultaneous mechanisms. Electrochemical Aptamer-Based (EAB) sensor studies have identified a biphasic drift pattern consisting of a rapid initial exponential phase followed by a slower linear phase, each driven by distinct processes [2].
- Exponential Drift Phase: This initial rapid signal loss is predominantly caused by blood-specific biological mechanisms. The primary contributors are:
- Biofouling: Proteins and other blood components with molecular weights >100 kDa adsorb to the sensor surface, forming a barrier that hinders electron transfer and reduces signal [3] [2].
- (To a lesser extent) Enzymatic Degradation: Nucleases in blood can slowly degrade DNA-based recognition elements (like aptamers) [2].
- Linear Drift Phase: This subsequent, slower signal decay is primarily driven by electrochemical mechanisms, specifically the electrochemically-driven desorption of the self-assembled monolayer (SAM) from the electrode surface due to the applied potential during sensor interrogation [2].
The table below summarizes these core mechanisms and their characteristics.
Table 1: Primary Mechanisms of Signal Drift in Whole Blood
| Drift Phase | Primary Cause | Underlying Process | Key Characteristic |
|---|---|---|---|
| Exponential (Initial) | Biofouling [3] [2] | Adsorption of blood proteins (>100 kDa) to the sensor surface [3]. | Rapid initial signal loss; at least partially reversible with denaturants like urea [2]. |
| Linear (Long-term) | Electrochemical Desorption [2] | Breakage of gold-thiol bonds in the self-assembled monolayer (SAM) due to applied potential [2]. | Slow, persistent signal loss; strongly dependent on the electrochemical potential window used [2]. |
Troubleshooting Guides & FAQs
Frequently Asked Questions (FAQs)
1. My sensor signal decreases rapidly upon exposure to whole blood. Is this drift or a real signal change? A rapid initial decrease is highly characteristic of the exponential drift phase, most likely caused by biofouling [2]. To confirm, run a control experiment with a target-free blood sample. If a similar rapid decay pattern is observed, it is likely drift. Techniques like washing with concentrated urea can help confirm fouling, as this can partially recover the signal by solubilizing adsorbed biomolecules [2].
2. Can I eliminate drift entirely, or can I only manage it? Currently, the goal is effective drift management rather than complete elimination. The focus should be on mitigation strategies to reduce the rate of drift and implementing robust drift-correction algorithms during data processing to extend the functional lifespan and accuracy of your sensors [2].
3. Does diluting the blood sample help reduce drift? While dilution may reduce the rate of biofouling and enzymatic degradation, it compromises the "real-world" relevance of your data. A key objective of current research is to achieve stable performance in undiluted whole blood or other biologically relevant ionic strength solutions (e.g., 1X PBS) to enhance the clinical and practical utility of the sensors [1].
4. What is the role of the electrochemical potential window in controlling drift? The potential window is critical for managing the linear drift caused by SAM desorption. Studies show that confining the square-wave voltammetry scan to a narrow window (e.g., -0.4 V to -0.2 V) can drastically reduce the rate of signal loss by avoiding potentials that trigger reductive or oxidative desorption of the monolayer [2].
Step-by-Step Troubleshooting Guide for Signal Drift
Problem: Significant signal degradation during real-time biomarker monitoring in undiluted whole blood.
Step 1: Characterize the Drift Pattern
- Action: Plot your sensor's signal (e.g., peak current) against time in a control experiment without the target analyte.
- Interpretation: Determine if the signal loss follows a biphasic pattern (sharp initial drop followed by a steady decline). This will help you identify the dominant drift mechanism at play [2].
Step 2: Isolate the Drift Mechanism
- Action A (Test for Fouling): After signal decay, wash the sensor with a solution of concentrated urea (e.g., 6-8 M) and re-measure the signal in a clean buffer.
- Outcome: A significant recovery of the initial signal (e.g., >80%) strongly implicates biofouling as a major contributor [2].
- Action B (Test for Electrochemical Desorption): Repeat the experiment in a simple buffer like PBS at 37°C. Use a narrow electrochemical potential window (e.g., -0.4 V to -0.2 V).
- Outcome: If the rapid exponential phase disappears and the linear drift is significantly reduced, it confirms that the drift is driven by blood components and aggressive electrochemical scanning, respectively [2].
Step 3: Implement Targeted Mitigation Strategies Based on your findings from Step 2, proceed with the following interventions:
If Biofouling is Dominant:
- Surface Modification: Implement anti-fouling coatings. Promising solutions include:
- Physical Barriers: Integrate molecular-weight-selective films or hydrogels that block large fouling proteins (>100 kDa) while allowing the target analyte to pass through [3].
If Electrochemical Desorption is Dominant:
- Optimize Electrochemistry: Narrow the potential window of your square-wave voltammetry or other interrogation techniques to stay within the stable window for your SAM (e.g., avoid potentials below -0.5 V or above 0.0 V vs. a relevant reference) [2].
- Explore Robust SAMs: Investigate the use of alternative SAM chemistries that offer greater stability against reductive/oxidative desorption.
If Enzymatic Degradation is a Concern:
- Use Enzyme-Resistant Oligonucleotides: Replace DNA aptamers with 2'-O-methyl RNA analogs or spiegelmers (L-RNA), which are highly resistant to nucleases [2].
Step 4: Validate with Controlled Experiments
- Action: Always include control sensors (e.g., without capture antibodies or with scrambled aptamer sequences) within the same experimental run. This allows you to distinguish true biomarker-binding signals from non-specific drift [1].
Experimental Protocols & Data Presentation
Detailed Protocol: Mitigating Drift in a CNT-Based BioFET
This protocol is adapted from research on the "D4-TFT," a carbon nanotube-based BioFET designed for stable operation in high ionic strength solutions [1].
Objective: To fabricate and operate a BioFET sensor that minimizes signal drift and Debye screening for biomarker detection in 1X PBS.
Materials: See "The Scientist's Toolkit" section below for a detailed list.
Methodology:
- Device Fabrication:
- Fabricate a thin-film transistor (TFT) using semiconducting carbon nanotubes (CNTs) as the channel material.
- Passivation: Apply a passivation layer to protect the electrical contacts and define the active sensing area, which is critical for maximizing sensitivity and stability [1].
- Surface Functionalization:
- Grow a poly(oligo(ethylene glycol) methyl ether methacrylate) (POEGMA) polymer brush layer on the CNT channel dielectric. This layer serves two purposes: it acts as an anti-fouling barrier and extends the effective Debye length via the Donnan potential effect, enabling antibody-based detection in high ionic strength buffer [1].
- Print Capture Antibodies: Immobilize specific capture antibodies into the POEGMA matrix above the CNT channel.
- Electrical Measurement Configuration:
- Use a stable electrical testing configuration. This includes a palladium (Pd) pseudo-reference electrode to avoid the need for a bulky Ag/AgCl electrode, enhancing point-of-care compatibility [1].
- Mitigate Drift via Measurement Scheme: Enforce a rigorous testing methodology that relies on infrequent DC sweeps rather than continuous static measurements or high-frequency AC measurements. This reduces the total charge passed through the system, minimizing electrochemical stress and ion migration that contribute to drift [1].
- Validation with Controls:
- Include on-chip control devices where no antibodies are printed over the CNT channel. This confirms that the measured signal shift is due to specific antibody-analyte sandwich formation and not non-specific drift or environmental effects [1].
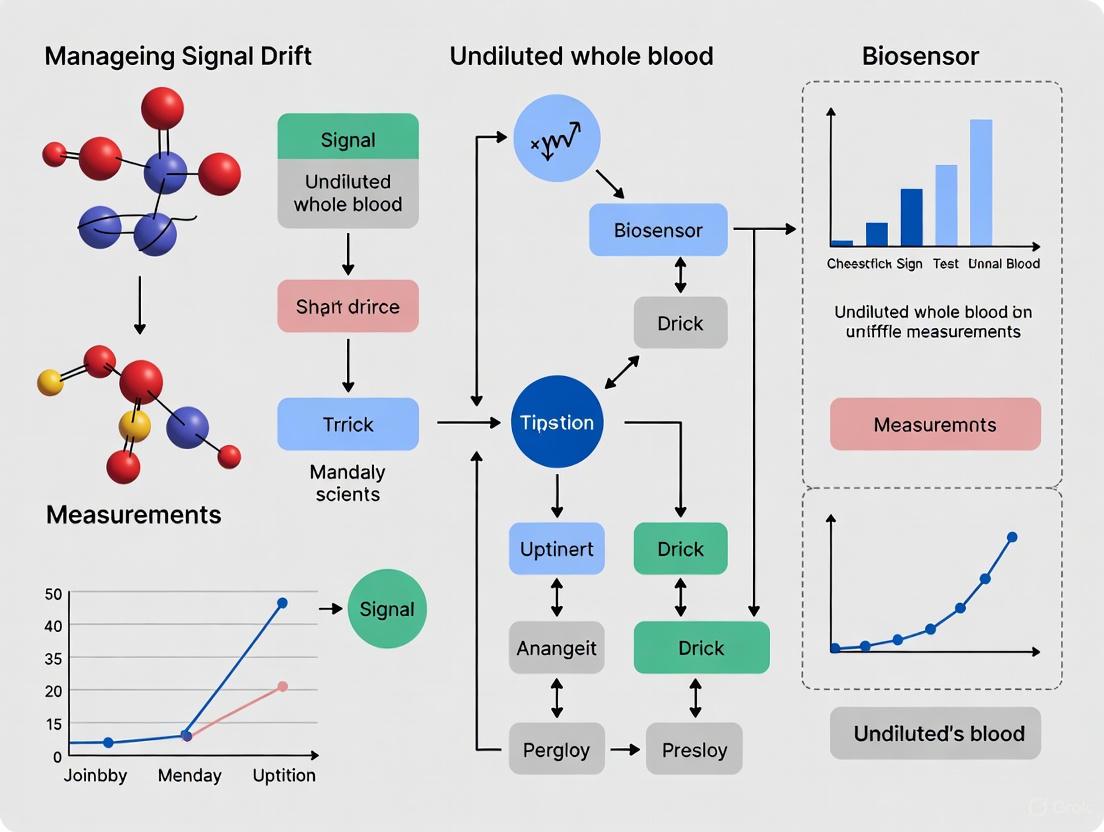
The following diagram illustrates the core experimental workflow and the parallel mechanisms of signal drift.
Quantitative Data on Sensor Drift
The following tables consolidate quantitative findings from the research literature to aid in experimental planning and benchmarking.
Table 2: Impact of Experimental Parameters on Drift Rate
| Parameter | Condition | Impact on Signal Drift | Experimental Evidence |
|---|---|---|---|
| Electrochemical Potential Window | Wide window (e.g., -0.4 V to +0.2 V) | High drift rate (>50% signal loss in hours) [2] | Strong dependence of degradation rate on scan window observed [2]. |
| Narrow window (e.g., -0.4 V to -0.2 V) | Low drift rate (~5% signal loss after 1500 scans) [2] | Limiting potential to a stable range minimizes SAM desorption [2]. | |
| Biological Matrix | Phosphate Buffered Saline (PBS) | Linear drift phase only; no rapid exponential phase [2] | Absence of blood components eliminates fouling-driven drift. |
| Undiluted Whole Blood | Biphasic drift (exponential + linear phases) [2] | Combined effect of biofouling and electrochemistry. | |
| Oligonucleotide Backbone | DNA | Susceptible to enzymatic degradation (nucleases) [2] | Signal loss from both fouling and enzymatic cleavage. |
| 2'-O-methyl RNA / Spiegelmers | Resistant to enzymatic degradation [2] | Reduced contribution from enzymatic degradation; fouling remains primary issue. |
Table 3: Efficacy of Different Drift Mitigation Strategies
| Mitigation Strategy | Targeted Drift Mechanism | Reported Efficacy / Outcome | Key Reference |
|---|---|---|---|
| POEGMA Polymer Brush | Biofouling & Debye Screening | Enabled sub-femtomolar detection in 1X PBS; reduced fouling. | [1] |
| Phosphatidylcholine (PC) Monolayer | Biofouling | Reduced baseline drift from ~70% to a few percent after several hours in flowing whole blood. | [4] |
| Molecular-Weight-Selective Film | Biofouling | Mitigated drift by blocking proteins >100 kDa. | [3] |
| Narrow Potential Window | Electrochemical Desorption | ~5% signal loss after 1500 scans (vs. high loss in wider windows). | [2] |
| Urea Wash | Biofouling (Reversibility Test) | Recovered >80% of initial signal after 2.5h in blood. | [2] |
The Scientist's Toolkit: Essential Research Reagents & Materials
This table lists key materials and their functions for developing drift-resistant biosensors, as identified in the search results.
Table 4: Key Reagents and Materials for Drift Mitigation Research
| Item | Function / Application | Specific Example |
|---|---|---|
| Poly(oligo(ethylene glycol) methacrylate) (POEGMA) | Polymer brush interface that resists biofouling and extends the Debye length via the Donnan potential for detection in physiological solutions [1]. | Coating for CNT-based BioFETs (e.g., D4-TFT) [1]. |
| Phosphatidylcholine (PC)-terminated Monolayer | Biomimetic monolayer that improves biocompatibility and reduces signal drift in complex biological fluids [4]. | Surface modification for gold electrode-based EAB sensors [4]. |
| 2'-O-methyl RNA / Spiegelmers | Nuclease-resistant oligonucleotide backbones for aptamers, reducing signal loss from enzymatic degradation [2]. | Recognition element in EAB sensors for prolonged stability in blood [2]. |
| Palladium (Pd) Pseudo-Reference Electrode | A stable, miniaturized reference electrode that eliminates the need for bulky Ag/AgCl references, facilitating point-of-care device design [1]. | Reference electrode in D4-TFT and other miniaturized biosensing platforms [1]. |
| Gold Nanoparticles (AuNPs) | Nanomaterial used to increase the electroactive surface area, improve electron transfer, and immobilize biomolecules via thiol chemistry, enhancing sensitivity [5]. | Electrode modification in electrochemical microneedle sensors [5]. |
| Urea (High Concentration) | A denaturant used in diagnostic experiments to solubilize adsorbed proteins and confirm the role of biofouling in signal drift [2]. | Experimental reagent for washing sensors to recover signal post-fouling [2]. |
| Methylene Blue Redox Reporter | A redox tag with a favorable potential that falls within the stable window of thiol-on-gold monolayers, minimizing electrochemical desorption [2]. | Reporter for EAB sensors; shown to be more stable than many other redox reporters [2]. |
Primary Drift Mechanisms in Electrochemical Aptamer-Based (EAB) Sensors
Electrochemical aptamer-based (EAB) sensors are a powerful platform technology capable of performing real-time, in-situ monitoring of specific molecules, including drugs, metabolites, and biomarkers, directly in the living body [2] [6]. A significant obstacle to their long-term deployment in challenging in vivo environments is signal drift, characterized by a progressive decrease in sensor signal over time [2]. This drift ultimately limits measurement duration and precision. Understanding the underlying mechanisms is therefore crucial for developing effective remediation strategies and advancing the use of EAB sensors in both biomedical research and clinical applications, particularly for measurements in undiluted whole blood [2] [7].
Core Drift Mechanisms: FAQs and Troubleshooting
FAQ 1: What are the primary mechanisms causing signal drift in EAB sensors in whole blood?
Research has identified two dominant mechanisms responsible for signal loss when EAB sensors are deployed in whole blood at body temperature (37°C):
- Biological Fouling: The rapid, exponential phase of signal loss (occurring over ~1.5 hours) is primarily driven by the adsorption of blood components, such as proteins and cells, onto the sensor surface [2] [4]. This fouling layer reduces the electron transfer rate by physically impeding the redox reporter's approach to the electrode surface [2].
- Electrochemical Desorption: A slower, linear phase of signal loss is caused by the electrochemically driven desorption of the self-assembled monolayer (SAM) from the gold electrode surface [2] [4]. This desorption is strongly dependent on the applied potential window during electrochemical interrogation [2].
FAQ 2: How can I experimentally distinguish between fouling and SAM desorption?
You can isolate these mechanisms by comparing sensor performance in different media and under different electrochemical parameters, as outlined in the experimental workflow below.
FAQ 3: Does enzymatic degradation of the DNA aptamer contribute significantly to drift?
Under typical in vivo deployment durations, enzymatic degradation (e.g., by nucleases) is not the dominant cause of signal loss [2] [8]. Evidence supporting this includes:
- Sensors fabricated with enzyme-resistant 2'-O-methyl-RNA analogs still exhibit a significant exponential drift phase in whole blood, implicating fouling as the primary culprit [2].
- Washing a drifted sensor with urea, which solubilizes biomolecules, recovers at least 80% of the initial signal, indicating the signal loss is largely reversible and not due to permanent DNA cleavage [2].
FAQ 4: How does the sensor's design, like redox reporter position, affect drift?
The sensor's physical design directly impacts its susceptibility to fouling. Studies using equal-length DNA strands with the methylene blue (MB) reporter at different internal positions show that the rate and magnitude of the exponential drift phase are strongly dependent on the reporter's position [2]. The drift is more rapid and severe when the reporter is located farther from the electrode surface, as fouling components more effectively impede the motion of a more distally placed reporter.
Table 1: Impact of Experimental Parameters on Signal Drift
| Parameter | Impact on Fouling (Exponential Phase) | Impact on SAM Desorption (Linear Phase) | Key Experimental Evidence |
|---|---|---|---|
| Media | Dominant in whole blood; minimal in PBS [2] | Present in both whole blood and PBS [2] | Exponential phase abolished in PBS buffer. |
| Potential Window | Minimal direct impact | Strong dependency; rate increases as window exceeds stability threshold (~ -0.4 V to 0.0 V) [2] | Signal loss <5% after 1500 scans in a narrow window (-0.4 V to -0.2 V). |
| Redox Reporter Position | Strongly monotonic dependency; worse when reporter is farther from electrode [2] | Not reported to be position-dependent | Systematic study of internal MB placement. |
| Oligonucleotide Backbone | Significant drift even with nuclease-resistant backbones (2'OMe) [2] | Not applicable | Similar exponential phase in DNA and 2'OMe-RNA constructs. |
Experimental Protocols for Drift Characterization
Protocol 1: Quantifying Drift in Whole Blood
This protocol characterizes the total signal drift of an EAB sensor under biologically relevant conditions.
- Sensor Fabrication: Thiol-modified DNA or XNA aptamers are co-immobilized on a gold electrode with a passivating alkanethiol SAM. The aptamer is modified with a redox reporter (e.g., Methylene Blue) [2] [6].
- Experimental Setup: Place the fabricated sensor in undiluted, freshly collected whole blood maintained at 37°C [2] [7].
- Interrogation: Interrogate the sensor continuously using Square Wave Voltammetry (SWV). A common approach is to use a specific potential window (e.g., -0.4 V to -0.2 V vs. Ag/AgCl) to minimize the contribution from SAM desorption during this phase of the experiment [2].
- Data Analysis: Plot the peak SWV current versus time. The resulting plot will typically show a biphasic decay: an initial exponential decay over approximately 1.5 hours, followed by a slower, linear decay [2].
Protocol 2: Isolating SAM Desorption Contribution
This protocol assesses the contribution of electrochemical desorption in a simplified, non-fouling environment.
- Sensor Fabrication: Use sensors fabricated as in Protocol 1.
- Experimental Setup: Place the sensor in phosphate buffered saline (PBS) at 37°C [2].
- Interrogation: Interrogate the sensor continuously with SWV while systematically varying the positive and negative limits of the potential window [2].
- Data Analysis:
- The absence of a rapid exponential phase confirms the biological nature of that drift component.
- The rate of the linear signal loss in PBS is quantified for each potential window. A strong dependence of this rate on the applied potential (particularly when scanning to excessively negative or positive potentials) confirms electrochemically driven SAM desorption as the mechanism [2].
Table 2: Key Reagents and Materials for Drift Studies
| Research Reagent | Function in Experiment | Specific Example / Note |
|---|---|---|
| Gold Electrode | Sensor substrate for thiol-on-gold SAM formation. | Wire, disk, or patterned thin-film electrodes [2] [6]. |
| Thiol-Modified Aptamer | Molecular recognition element. | Can be DNA, or nuclease-resistant variants like 2'-O-methyl-RNA [2] [8]. |
| Alkanethiol SAM | Passivates electrode and controls aptamer spacing. | Often a C6 alkane thiol; can be mixed with aptamer [2]. |
| Methylene Blue (MB) | Redox reporter for signal transduction. | Attached to the 3' or internal position of the aptamer [2]. |
| Fresh Whole Blood | Biologically relevant, complex test medium. | Species and age (time since draw) affect sensor response [2] [7]. |
| Urea Solution (Concentrated) | Washing agent to remove non-covalent fouling. | Used to demonstrate recoverable signal loss from fouling [2]. |
The Scientist's Toolkit: Key Reagent Solutions
The following table details essential materials and their functions for researching and mitigating EAB sensor drift.
| Tool / Strategy | Purpose / Mechanism | Reference / Evidence |
|---|---|---|
| Narrow Potential Window | Minimizes electrochemical desorption of SAM by avoiding reductive (< -0.5 V) and oxidative (> ~1 V) potentials [2]. | Limiting window to -0.4 V to -0.2 V reduced signal loss to 5% after 1500 scans [2]. |
| 2'-O-Methyl RNA (2'OMe) Aptamers | Reduces susceptibility to nuclease degradation, improving in vivo signal stability and signal-to-noise ratio [8]. | 2'OMe-based sensors demonstrated reduced signal loss in live rats compared to DNA-based sensors [8]. |
| Urea Wash | Diagnostic tool to confirm fouling; solubilizes adsorbed proteins to recover signal [2]. | Washing after 2.5h in blood recovered >80% of initial signal [2]. |
| Phosphatidylcholine-Terminated Monolayer | Biomimetic surface that reduces nonspecific adsorption (fouling) from blood components. | Improved in vivo performance, reducing baseline drift in flowing whole blood [4]. |
| Kinetic Differential Measurement (KDM) | Drift correction algorithm that uses signals from two SWV frequencies to normalize data, improving precision [2] [7]. | Enables good measurement accuracy over multi-hour deployments in live animals [2] [7]. |
Managing signal drift is fundamental to advancing the application of EAB sensors for long-term, in vivo monitoring. The primary mechanisms—biological fouling and electrochemical desorption—operate on different timescales and through distinct physical processes. Researchers can effectively diagnose and mitigate these issues through careful experimental design, including media selection, control of electrochemical parameters, and the use of specialized reagents and materials. By systematically addressing these drift mechanisms, the field moves closer to achieving stable, calibration-free molecular measurements directly in the bloodstream.
Frequently Asked Questions (FAQs)
What is biofouling and how does it cause signal drift in my biosensor? Biofouling is the spontaneous, uncontrolled accumulation of biological materials (proteins, cells, bacteria) on your sensor's surface [9]. In undiluted whole blood, this process begins instantly with the adsorption of proteins like serum albumin, IgG, and fibrinogen, forming a conditioning film [10] [11]. This fouling layer causes signal drift by two primary mechanisms: first, it can physically block the diffusion of your target analyte to the biorecognition element, reducing the signal [9]. Second, the adsorbed proteins can trigger a foreign body response, leading to the encapsulation of the sensor and further analyte blockage, which degrades performance and ultimately causes sensor failure [9].
Why does my sensor perform well in buffer solutions but fail in undiluted whole blood? This common issue occurs because simplified buffer solutions lack the complex matrix of fouling agents present in whole blood. Blood is a complex biofluid containing plasma, red and white blood cells, platelets, and proteins like human serum albumin (35–50 mg mL⁻¹) and IgG (6–16 mg mL⁻¹), which are primarily responsible for surface fouling [11]. When you test in buffer, you avoid these interferents. Testing in undiluted whole blood or plasma is essential, as dilution alters the ionic strength and protein concentration, which dramatically influences protein adsorption and fouling behavior [10] [1].
What are the most effective surface modifications to prevent biofouling on electrodes? The most effective strategies involve creating a hydrated, hydrophilic physical barrier that prevents fouling agents from reaching the electrode surface. The table below summarizes the most prominent anti-fouling materials.
| Material Class | Key Examples | Mechanism of Action | Reported Effectiveness |
|---|---|---|---|
| Polymer Brushes | Poly(oligo(ethylene glycol) methyl ether methacrylate) (POEGMA), Poly(ethylene glycol) (PEG) | Forms a hydrated brush-like layer that sterically hinders protein adsorption; POEGMA can also extend the Debye length for better sensing in ionic solutions [1]. | Enables attomolar-level detection in 1X PBS; creates a "non-fouling" interface [1]. |
| Zwitterionic Materials | Polycarboxybetaine | Creates a superhydrophilic surface with a tight bound water layer, resisting protein adsorption through electrostatically-induced hydration [11]. | Surfaces exhibit superlow protein adsorption and improved blood compatibility [11]. |
| Hydrogels | Hyaluronic acid | Provides a highly hydrated, hydrogel matrix that reduces non-specific adsorption [11]. | Effectively inhibits protein adsorption and cell adhesion. |
| Nanostructured Surfaces | Nanoporous gold | Acts as a physical diffusion filter, blocking large proteins while allowing smaller analytes to reach the sensing surface [11]. | Demonstrated reduced fouling from proteins and improved sensing in complex media. |
How can I experimentally confirm that my anti-fouling strategy is working? You need to combine direct surface characterization with functional sensor testing. First, use techniques like Quartz Crystal Microbalance (QCM) or Surface Plasmon Resonance (SPR) to directly quantify the mass of proteins adsorbed onto your modified surface versus a control when exposed to blood plasma or serum [10]. Second, perform cell adhesion assays by incubating the surface with whole blood or specific cell types (e.g., monocytes, fibroblasts) and quantify the number of adhered cells [10]. Finally, the most critical test is to validate your sensor's performance in undiluted whole blood over an extended period, monitoring for signal drift and a declining sensitivity, which are key indicators of biofouling [9].
Troubleshooting Guides
Problem: Rapid Signal Drift in Whole Blood Measurements
Symptoms: Signal continuously decreases (or increases) over time shortly after exposure to whole blood. Sensor calibration fails after blood contact.
Possible Causes and Solutions:
| Root Cause | Diagnostic Checks | Corrective Actions |
|---|---|---|
| Protein Adsorption | Quantify non-specific adsorption using a QCM or SPR. Test sensor in diluted vs. undiluted serum [10]. | Implement a robust anti-fouling coating. See Table 1 for material options like POEGMA or zwitterionic polymers [1] [11]. |
| Inadequate Debye Length | Test sensor in buffers of different ionic strengths. If signal improves in diluted buffer, charge screening is an issue [1]. | Integrate a polymer brush (e.g., POEGMA) to leverage the Donnan potential and extend the sensing distance [1]. |
| Platelet Adhesion | Inspect surface post-experiment with microscopy (SEM/fluorescence) for adhered cells or platelets [11]. | Improve surface hydrophilicity. Low platelet adhesion is essential for accurate blood analysis [11]. |
Problem: Inconsistent Sensor Performance Between Buffer and Complex Media
Symptoms: Sensor shows high sensitivity and low detection limits in buffer, but these metrics drastically worsen in blood. High signal noise and poor reproducibility in biological fluids.
Possible Causes and Solutions:
| Root Cause | Diagnostic Checks | Corrective Actions |
|---|---|---|
| Non-specific Binding | Perform a control experiment with a non-complementary analyte or inactivated serum to measure false-positive signals [9]. | Incorporate a physical barrier like a nanostructured electrode (e.g., nanoporous gold) to filter large proteins [11]. |
| Biorecognition Element Inactivation | Test the activity of your immobilized enzyme or antibody in a simple kinetic assay after exposure to blood components [9]. | Optimize the immobilization chemistry to stabilize the biorecognition element. Use cross-linkers or different substrate attachment strategies. |
| Hydrophobic Sensor Surface | Measure the water contact angle of your sensor surface. Highly hydrophobic surfaces strongly promote irreversible protein adsorption [11]. | Modify the surface to be highly hydrophilic. Strategies include PEGylation or coating with hydrogels to create an entropically unfavorable surface for proteins [11]. |
Experimental Protocols
Protocol 1: Coating a Sensor Surface with POEGMA for Enhanced Debye Length and Fouling Resistance
This protocol is adapted from research demonstrating attomolar-level detection in 1X PBS using a carbon nanotube-based BioFET [1].
Objective: To grow a poly(oligo(ethylene glycol) methyl ether methacrylate) (POEGMA) brush on a sensor surface to mitigate biofouling and overcome charge screening in high ionic strength solutions.
Materials:
- Sensor substrate (e.g., CNT thin-film, gold electrode)
- Oligo(ethylene glycol) methyl ether methacrylate (OEGMA) monomer
- Initiator for surface-initiated atom transfer radical polymerization (SI-ATRP) (e.g., ATRP initiator silane)
- Catalyst (e.g., CuBr) and ligand (e.g., PMDETA)
- Deoxygenated solvent (e.g., methanol/water mixture)
Procedure:
- Substrate Preparation: Clean and dry the sensor substrate thoroughly.
- Initiator Immobilization: Functionalize the sensor surface with the ATRP initiator molecule according to standard silanization procedures. Ensure a uniform monolayer forms.
- Polymerization Solution Preparation: In a Schlenk flask, dissolve the OEGMA monomer in the deoxygenated solvent. Add the catalyst (CuBr) and ligand to the solution.
- Deoxygenation: Seal the flask and perform several freeze-pump-thaw cycles to remove all oxygen from the solution.
- Polymerization: Under an inert atmosphere, transfer the polymerization solution to a reaction vessel containing the initiator-functionalized sensor. Allow the reaction to proceed for a predetermined time (e.g., 1-2 hours) at room temperature to control polymer brush length.
- Termination and Cleaning: Stop the reaction by exposing the solution to air. Remove the sensor and rinse it extensively with the solvent and ethanol to remove any unreacted monomer and catalyst residues.
Validation:
- Confirm polymer growth using techniques like Ellipsometry or X-ray Photoelectron Spectroscopy (XPS).
- Functionally validate the coating by measuring the sensor's performance in 1X PBS against a known analyte and comparing the signal drift and sensitivity to an uncoated device [1].
Protocol 2: Quantitative Protein Adsorption Assay using a Quartz Crystal Microbalance (QCM)
Objective: To directly measure the mass of protein adsorbed onto a test surface, providing a quantitative metric for evaluating anti-fouling coatings [10].
Materials:
- QCM with gold-coated sensors
- Test coatings (e.g., PEG, POEGMA, Zwitterionic polymer)
- Protein solution (e.g., 1-5 mg mL⁻¹ Fibrinogen or undiluted blood serum)
- Phosphate Buffered Saline (PBS), pH 7.4
Procedure:
- Baseline Establishment: Mount the coated QCM sensor in the flow cell. Begin flowing PBS at a constant rate until a stable frequency (Δf) and dissipation (ΔD) baseline is achieved.
- Protein Exposure: Switch the flow to the protein solution and monitor the Δf and ΔD in real-time for at least 30-60 minutes to allow adsorption to reach saturation.
- Rinsing: Switch the flow back to PBS to rinse away any loosely bound proteins. The change in frequency after rinsing corresponds to the mass of irreversibly adsorbed protein.
- Data Analysis: Use the Sauerbrey equation (for rigid, thin films) or a more complex viscoelastic model (if ΔD is significant) to convert the frequency shift (Δf) to an adsorbed mass per unit area (ng cm⁻²).
Interpretation:
- Surfaces with low fouling will show a very small negative frequency shift (small mass adsorption). For example, a high-quality POEGMA coating might adsorb < 5 ng cm⁻² of protein, whereas a bare gold surface may adsorb ten to a hundred times more [10] [11].
Research Reagent Solutions
The following table lists key materials essential for developing biofouling-resistant sensors.
| Reagent/Material | Function | Key Considerations |
|---|---|---|
| POEGMA | Polymer brush coating for anti-fouling and Debye length extension [1]. | The brush density and length are critical for performance. Synthesized via surface-initiated ATRP. |
| Zwitterionic Monomers (e.g., carboxybetaine) | Forms ultra-low fouling surfaces via strong electrostatic hydration [11]. | Can be polymerized into brushes or hydrogels. Offers excellent stability. |
| Nanoporous Gold | Nanostructured electrode that acts as a physical diffusion filter [11]. | Pore size must be optimized to exclude large fouling proteins while permitting analyte access. |
| Poly(ethylene glycol) (PEG) | Traditional hydrophilic polymer for resisting protein adsorption [11]. | Can be susceptible to oxidative degradation in vivo. Shorter chains (OEG) are also effective. |
| Hyaluronic Acid | Natural polysaccharide used to form hydrated hydrogel coatings [11]. | Biocompatible and can be chemically modified for cross-linking and stability on surfaces. |
Visual Guide: Biofouling Mechanism and Signal Drift
The diagram below illustrates the core problem: how biofouling leads to signal drift in sensors.
Troubleshooting Guide: Resolving Signal Instability in Complex Media
This guide addresses the most common causes of signal drift in electrochemical biosensors deployed in undiluted whole blood, helping researchers identify specific issues and implement targeted solutions.
Problem 1: Rapid Signal Loss in Whole Blood (First 1-2 Hours)
Problem Description: Your sensor experiences a sharp, exponential signal decrease (~60-80% loss) within the first 1.5 hours of deployment in undiluted whole blood at 37°C.
Underlying Mechanism: This rapid initial drift is primarily caused by biofouling, where blood components (proteins, cells) adsorb to the sensor surface, creating a physical barrier that hinders electron transfer from the redox reporter to the electrode [2].
Diagnostic Experiments:
- Test in PBS vs. Blood: Deploy identical sensors in phosphate buffered saline (PBS) at 37°C and undiluted whole blood. A significant rapid drift phase occurring only in blood confirms fouling is the dominant issue [2].
- Urea Wash Test: After 2.5 hours in blood, wash the sensor with a concentrated urea solution. Recovery of ≥80% of the initial signal strongly indicates reversible biofouling rather than permanent sensor degradation [2].
- Electron Transfer Rate Analysis: Monitor the square-wave voltammetry frequency for maximum charge transfer. A decrease by a factor of ~3 during the exponential phase confirms that fouling is impinging on the reporter's ability to reach the electrode surface [2].
Solutions:
- Optimize SAM Packing and Chemistry:
- Use a co-adsorbed blocking thiol (e.g., 6-mercapto-1-hexanol, MCH) at an optimal ratio with the probe strand to create a dense, well-ordered monolayer that resists non-specific adsorption [12].
- Consider zwitterionic or phosphatidylcholine-terminated thiols as blocking agents, which have demonstrated superior anti-fouling properties [12].
- Employ Alternative Surface Chemistry: Explore attachment via gold-alkyne bonds instead of gold-thiol, which has been shown to enhance stability against oxidation at ambient temperature [12].
Problem 2: Gradual Long-Term Signal Decrease (Over Many Hours/Days)
Problem Description: After the initial rapid decrease, your sensor exhibits a slow, near-linear signal decline over an extended period, even when deployed in buffer solutions like PBS.
Underlying Mechanism: This gradual drift is primarily due to electrochemically-driven desorption of the thiol-based SAM from the gold electrode surface. Repeated potential scanning, particularly into oxidative or reductive regions, breaks the gold-thiol bonds, leading to a progressive loss of probe molecules [2].
Diagnostic Experiments:
- Pause Interrogation Test: In PBS, continuously interrogate the sensor with square-wave voltammetry, then pause scanning for several hours. A halt in signal decline when scanning is paused confirms an electrochemical mechanism [2].
- Potential Window Test: Characterize the degradation rate while systematically varying the positive and negative limits of the applied potential window. A strong dependence of drift rate on the window width confirms SAM desorption as the key mechanism [2].
Solutions:
- Narrow the Electrochemical Potential Window: Confine voltammetric scans to the narrowest possible window that still captures the redox reporter's peak. For methylene blue, a window of -0.4 V to -0.2 V (vs. Ag/AgCl) resulted in only 5% signal loss after 1500 scans [2].
- Select an Optimal Redox Reporter: Choose a reporter with a formal potential that falls within the stable window of the thiol-on-gold monolayer. Methylene blue (E⁰ ≈ -0.25 V) is exceptionally stable because it operates within this window, unlike many other reporters [13] [2].
- Improve SAM Stability: Use dithiol or trithiol anchoring groups, or investigate crosslinking strategies within the SAM to enhance its cohesion and adhesion to the gold surface [12].
Problem 3: Inconsistent Performance Between Sensor Batches
Problem Description: Sensors fabricated with the same protocol exhibit varying signal magnitudes and drift profiles, making reliable quantification difficult.
Underlying Mechanism: Inconsistent SAM formation due to variations in gold surface roughness, pre-treatment, incubation times, or probe-to-blocking-agent ratios [12].
Solutions:
- Standardize Gold Surface Pre-treatment: Implement a rigorous and reproducible electrochemical or plasma cleaning protocol before SAM formation [12].
- Optimize and Control Immobilization Parameters:
- Use a Co-deposition Protocol: Instead of the conventional sequential adsorption, try co-adsorbing the probe and blocking thiol simultaneously, which can lead to more homogeneous films and improved signal stability [12].
Frequently Asked Questions (FAQs)
Q1: Which redox reporter is most stable for long-term measurements in biological fluids?
A: Methylene blue (MB) is currently the best-in-class redox reporter for thiol-on-gold sensors. A comprehensive survey of over a dozen reporters found that MB-based sensors demonstrate "near-quantitative stability" against repeated scanning in complex matrices like blood serum. This is because its formal potential lies within the narrow voltage window where thiol-on-gold monolayers are most stable, minimizing SAM desorption during interrogation [13] [2]. While anthraquinone, Nile blue, and ferrocene show reasonable stability, they are outperformed by MB [13].
Q2: Can I simply recalibrate my sensor to correct for signal drift in the field?
A: Frequent manual recalibration is often impractical for deployed sensors. However, advanced algorithmic approaches can correct drift. One method uses Maximum Likelihood Estimation (MLE) with data from multiple redundant sensors. This "truth discovery" algorithm estimates the true analyte concentration and a credibility index for each sensor, enabling on-the-fly drift correction without needing a ground truth reference for every measurement [14]. This approach has successfully maintained the accuracy of nitrate and pH sensors over several months in field conditions [14].
Q3: My sensor surface is fouled/desorbed. Can the electrode be regenerated for re-use?
A: Yes, electrochemical reductive desorption is a proven method to regenerate gold electrodes. Applying a negative potential (e.g., -0.5 V to -1.5 V) in a suitable electrolyte like KCl or NaOH can desorb the thiol SAM, along with any attached biomolecules and foulants [15] [16]. One study showed that a simple chemical treatment with sodium borohydride could recover ~90% of the original electrode's electrochemical characteristics [16]. This allows for the same electrode to be stripped and re-functionalized with a fresh SAM, saving cost and reducing waste [15] [16].
Q4: Besides the redox reporter and SAM, what other experimental factors critically impact stability?
A: Two key factors are:
- The Electroanalytical Method: Techniques that apply smaller potential windows (e.g., certain square-wave voltammetry parameters) cause less SAM desorption than those using wider windows (e.g., some cyclic voltammetry setups) [2] [12].
- Oligonucleotide Backbone: For aptamer-based sensors, using nuclease-resistant backbones like 2'O-methyl RNA can mitigate signal loss from enzymatic degradation in biological fluids, allowing you to isolate and address fouling and desorption mechanisms more effectively [2].
Comparative Data Tables
Table 1: Redox Reporter Performance and Stability Comparison
Data compiled from a systematic survey of reporters conjugated to DNA and deployed on thiol-on-gold SAMs [13].
| Redox Reporter | Formal Potential (Approx., V vs. Ag/AgCl) | Stability in Repeated Scans | Stability in Blood Serum | Key Findings |
|---|---|---|---|---|
| Methylene Blue | ~ -0.25 V | Excellent | Excellent | Unmatched stability; operational in a safe potential window for SAMs. |
| Anthraquinone | N/A | Good | Good | Reasonable performance, suitable for multiplexing. |
| Nile Blue | N/A | Good | Good | Reasonable performance, suitable for multiplexing. |
| Ferrocene | ~ +0.3 V | Moderate | Moderate | Suffers from instability due to operation at more positive potentials that accelerate SAM desorption. |
| Thionine | N/A | Poor | Poor | Low synthesis yield and inadequate stability. |
| Neutral Red | N/A | Poor | Poor | Inadequate stability for reliable sensing. |
Based on controlled studies in whole blood and buffer solutions [2].
| Drift Mechanism | Primary Cause | Time Scale | Diagnostic Test | Key Evidence |
|---|---|---|---|---|
| Biofouling | Adsorption of proteins/cells from blood | Initial 1.5 hrs (Exponential) | - Test in PBS vs. Blood- Urea Wash | - Drift occurs only in blood- ~80% signal recovery after wash |
| SAM Desorption | Electrochemical breakage of Au-S bonds | Long-term (Linear) | - Pause Interrogation- Vary Potential Window | - Drift stops when scanning pauses- Rate increases with wider window |
| Reporter Degradation | Irreversible redox reactions of the reporter | Long-term (Linear) | - Compare different reporters | - Methylene blue is vastly more stable than other reporters [13] |
| Enzymatic Degradation | Nucleases cleaving DNA probe | Contributes to long-term drift | - Use nuclease-resistant backbone (e.g., 2'O-methyl RNA) | - Significant drift persists even with resistant backbone |
Experimental Protocols
Protocol 1: Testing Sensor Stability in Undiluted Whole Blood
Objective: To characterize the stability and identify the dominant drift mechanisms of an electrochemical biosensor under physiologically relevant conditions [2].
Materials:
- Functionalized biosensors (e.g., E-AB sensor with MB reporter on thiol-on-gold SAM).
- Fresh, undiluted whole blood (or fetal calf serum as a model matrix), maintained at 37°C.
- Phosphate Buffered Saline (PBS), pH 7.4, at 37°C.
- Electrochemical workstation (e.g., potentiostat for Square-Wave Voltammetry).
- Concentrated urea solution (e.g., 6-8 M).
Method:
- Baseline Measurement: Record SWV scans of the sensor in PBS at 37°C to establish a stable initial signal.
- Blood Deployment: Transfer the sensor to undiluted whole blood at 37°C.
- Continuous Interrogation: Run successive SWV scans over a period of 2-8 hours. Use a narrow potential window (e.g., -0.4 V to -0.2 V) to minimize SAM-desorption-related drift during the test.
- Control in PBS: Run a parallel, identical sensor in PBS at 37°C with the same interrogation parameters.
- (Optional) Fouling Recovery: After ~2.5 hours in blood, wash the sensor with the concentrated urea solution for a short period (e.g., 10-15 minutes). Then, rinse with PBS and resume SWV measurements in PBS to assess signal recovery.
Data Analysis:
- Plot normalized signal (peak current) vs. time for both blood and PBS.
- Fit the drift curve in blood. A biphasic profile with a fast exponential decay followed by a slow linear decrease indicates concurrent fouling and SAM desorption.
- Compare the drift rate in blood versus PBS. A much larger exponential phase in blood confirms biofouling.
- Significant signal recovery after the urea wash provides direct evidence of reversible fouling.
Protocol 2: Optimizing SAM Formation for Enhanced Stability
Objective: To form a dense and stable mixed self-assembled monolayer (SAM) of thiolated DNA and mercaptohexanol (MCH) on a gold electrode to minimize non-specific adsorption and maximize signal stability [12].
Materials:
- Gold working electrodes (e.g., disk electrodes or gold nanoparticle-modified screen-printed electrodes).
- Thiol-modified DNA or aptamer probe sequence.
- 6-Mercapto-1-hexanol (MCH) solution (e.g., 1-10 mM in buffer or water).
- Tris-EDTA or phosphate buffer.
- Electrochemical reagents: Potassium ferricyanide/ferrocyanide ([Fe(CN)₆]³⁻/⁴⁻).
Method:
- Electrode Cleaning: Clean the gold electrode electrochemically (e.g., by cycling in sulfuric acid) or via oxygen plasma treatment.
- Probe Immobilization: Incubate the clean electrode in a solution of thiolated DNA (e.g., 0.1-1 µM in low-ionic-strength buffer like Tris-EDTA) for a defined period (e.g., 1-18 hours) to allow covalent Au-S bond formation.
- Blocking Step: Rinse the electrode and incubate it in a fresh mM solution of MCH for 30-60 minutes. This step displaces non-specifically adsorbed DNA and creates a denser, better-ordered monolayer.
- Alternative: Co-deposition: As an alternative to steps 2 and 3, experiment with co-adsorption by incubating the electrode in a mixture of the thiolated DNA and MCH. This can sometimes yield more homogeneous films [12].
- Characterization: Use Electrochemical Impedance Spectroscopy (EIS) and Cyclic Voltammetry (CV) in a solution containing [Fe(CN)₆]³⁻/⁴⁻ to characterize the SAM's quality. A well-formed SAM will show high charge-transfer resistance (Rₑₜ) in EIS and suppressed current in CV.
Data Analysis:
- Monitor the Rₑₜ from EIS over time in buffer. A stable Rₑₜ indicates a stable SAM. A gradual decrease suggests reorganization or desorption of the monolayer.
- Test sensor performance and stability in complex media before and after optimization to confirm improvement.
Research Reagent Solutions
Table 3: Essential Materials for Stable Electrochemical Biosensors
| Reagent / Material | Function / Role | Key Considerations for Stability |
|---|---|---|
| Methylene Blue (MB)-NHS Ester | Redox Reporter | Superior stability; conjugates to amine-modified DNA; operates in a safe potential window [13]. |
| 6-Mercapto-1-hexanol (MCH) | SAM Blocking Agent | Dilutes probe strands, improves SAM packing and order, reduces non-specific adsorption [12]. |
| Gold Electrodes (e.g., disk, SPE/AuNPs) | Sensor Transducer | Surface crystallinity and pre-treatment are critical for forming a uniform, stable SAM [12]. |
| Thiol-modified Oligonucleotides | Molecular Recognition Probe | A C6-thiol linker is a good compromise between stability and accessibility [13] [12]. |
| 2'O-methyl RNA Oligonucleotides | Nuclease-resistant Probe | Use in place of DNA to mitigate enzymatic degradation as a source of drift in biological fluids [2]. |
| Zwitterionic Thiols (e.g., PC-thiols) | Advanced Blocking Agent | Can be used as co-adsorbates to significantly improve biofouling resistance due to their hydrophilic nature [12]. |
| Urea Solution | Denaturant / Cleaning Agent | Used diagnostically to remove reversibly adsorbed proteins (fouling) from the sensor surface [2]. |
Signaling Pathways and Workflows
Troubleshooting Guides
FAQ 1: How do physiological temperature variations affect my EAB sensor's accuracy, and how can I correct for this?
Physiologically plausible temperature variations induce more substantial errors in EAB sensor readings compared to changes in ionic composition or pH [17]. The sensor's response is sensitive to temperature because it affects both the binding equilibrium of the aptamer and the electron transfer kinetics of the redox reporter [7].
- Problem: Using a calibration curve generated at room temperature (e.g., ~25 °C) for measurements taken at body temperature (37 °C) leads to significant inaccuracies. The direction and magnitude of the error depend on the specific square-wave frequencies used for interrogation, but inaccuracies of ~10% or more in the clinical concentration range are typical [7].
- Solution:
- Calibrate at Measurement Temperature: Always collect calibration curves at the same temperature used during your experiments (ideally 37 °C for in vivo or body-fluid simulations) [7].
- Monitor Temperature: When performing in vivo or complex in vitro measurements, record the temperature concurrently with sensor measurements [17].
- Correct with Temperature Data: If the measurement temperature deviates from the calibration temperature, use the known temperature to apply corrective algorithms, which can easily ameliorate the error [17].
- Select Frequencies for Temperature: Be aware that the optimal "signal-on" and "signal-off" square-wave frequencies can change with temperature. A frequency that is signal-on at room temperature can become signal-off at body temperature. Characterize your sensor's frequency response at your intended measurement temperature [7].
Experimental Protocol: Characterizing Temperature Dependence
- Prepare Sensors: Use your standard EAB sensor fabrication protocol.
- Set Up Temperature Control: Use a temperature-controlled electrochemical cell.
- Acquire Data: For a set of target concentrations (e.g., a titration series), collect square-wave voltammograms at multiple temperatures (e.g., 25°C, 33°C, 37°C, 41°C) to cover the physiologically relevant range [17] [7].
- Generate Calibration Curves: Convert voltammograms to Kinetic Differential Measurement (KDM) values and fit to a binding isotherm (e.g., Hill-Langmuir) at each temperature [7].
- Analyze Shifts: Document the changes in the calibration curve parameters (
K1/2,KDMmax) and the peak charge transfer frequency across temperatures.
FAQ 2: Why does the age of the blood sample I use for calibration matter?
The age of the whole blood used for calibration significantly impacts the EAB sensor's response, primarily due to time-dependent biochemical changes [7].
- Problem: Calibrating with commercially sourced or old blood (e.g., more than one day old) can lead to a lower signal gain compared to calibration in fresh blood. This results in an overestimation of target concentrations during actual measurements [7].
- Solution:
- Use Fresh Blood: For the most accurate calibration, use freshly collected whole blood. This is the gold standard for calibrating sensors intended for in vivo deployments [7].
- Understand the Limitation: If fresh blood is unavailable, be aware that using older blood introduces a known variable error. Data calibrated with old blood should be interpreted with caution.
- Explore Proxy Media: Some studies are exploring the use of consistent, non-blood proxy media for calibration to avoid the variability associated with blood age and sourcing. However, fresh whole blood remains the most accurate matrix for in vivo sensor calibration [7].
Experimental Protocol: Assessing Blood Age Effects
- Blood Collection: Draw fresh whole blood (e.g., from a rat).
- Split Sample: Divide the blood into aliquots.
- Time-Pointed Titration: Perform a full target titration (e.g., for vancomycin) with EAB sensors in fresh blood (e.g., within hours). Repeat the identical titration procedure using aliquots of the same blood sample after storage for 1, 7, and 14 days.
- Compare Curves: Plot the KDM-based calibration curves for each blood age. The difference in
KDMmaxand the curve shape, especially at high target concentrations, will reveal the effect of blood age [7].
FAQ 3: To what extent do changes in ionic strength and pH impact my sensor's reading?
For EAB sensors, physiologically relevant fluctuations in ionic strength, cation composition (Na+, K+, Mg2+, Ca2+), and pH have a minimal impact on accuracy and are not a major impediment to clinical application [17].
- Evidence: Studies testing EAB sensors for vancomycin, phenylalanine, and tryptophan in buffers simulating the upper and lower physiological limits of cations and pH found that all sensors maintained a clinically acceptable mean relative error (better than 20%) over the relevant concentration ranges [17].
- Solution: While tight homeostatic control of these parameters in vivo means they vary little, for the most precise in vitro work, it is still good practice to match the ionic composition and pH of your calibration medium to your measurement medium (e.g., use a buffer that mimics the average ionic composition of plasma) [17].
The tables below consolidate key quantitative findings on environmental effects on EAB sensors.
Table 1: Impact of Physiological-Scale Environmental Variation on Sensor Accuracy
| Environmental Factor | Tested Physiological Range | Impact on EAB Sensor Accuracy | Key Finding |
|---|---|---|---|
| Cation Composition & Ionic Strength | Low (152 mM) to High (167 mM) ionic strength [17] | Minimal | Mean relative errors indistinguishable from those under ideal calibration conditions [17] |
| pH | pH 7.35 to 7.45 [17] | Minimal | No significant reduction in accuracy; mean relative errors remain clinically acceptable [17] |
| Temperature | 33 °C to 41 °C [17] | Substantial | Induces significant errors; requires knowledge of temperature for easy correction [17] |
| Blood Age | 1 day vs. 14 days old [7] | Significant | Older blood shows lower signal gain, leading to concentration overestimation [7] |
Table 2: Performance of Vancomycin EAB Sensor Under Optimal Calibration
| Calibration Condition | Measurement Condition | Mean Accuracy (Clinical Range) | Key Requirement |
|---|---|---|---|
| Fresh whole blood, 37 °C [7] | Fresh whole blood, 37 °C [7] | Better than ±1.2% [7] | Matching temperature and media freshness |
| Out-of-set calibration [7] | Fresh whole blood, 37 °C [7] | No significant accuracy change [7] | Demonstrates robust sensor-to-sensor reproducibility |
| Room Temperature [7] | Body Temperature (37 °C) [7] | Substantial underestimation (~10%) [7] | Highlights critical need for matched temperature |
Signaling Pathways & Experimental Workflows
EAB Sensor Signaling and Drift Mechanisms
This diagram illustrates the working principle of an Electrochemical Aptamer-Based (EAB) sensor and the two primary mechanisms that cause signal drift in biological fluids like whole blood.
Experimental Workflow for Managing Environmental Influences
This workflow outlines the key steps for characterizing and controlling environmental variables to ensure accurate EAB sensor measurements.
Research Reagent Solutions
The following table details key reagents and materials used in EAB sensor research for managing environmental influences and drift.
| Research Reagent / Material | Function in Experimentation | Key Insight / Rationale |
|---|---|---|
| HEPES-buffered Saline with Cations [17] | Provides a physiologically relevant ionic background (matching plasma Na+, K+, Mg2+, Ca2+) for controlled calibration and testing. | Tightly regulated in vivo, so physiological fluctuations cause minimal accuracy loss [17]. |
| Fresh Whole Blood (Rat/Bovine) [7] | The gold-standard matrix for calibrating sensors intended for in vivo measurements. | Using fresh blood is critical; blood age reduces signal gain and causes overestimation [7]. |
| Methylene Blue (MB) Redox Reporter [2] | The redox tag whose electron transfer kinetics are modulated by aptamer folding. | Its redox potential falls within a narrow window where thiol-on-gold monolayers are stable, minimizing electrochemical drift [2]. |
| 6-Mercapto-1-hexanol (MCH) SAM [18] | A common self-assembled monolayer used to passivate the gold electrode and orient DNA aptamers. | Provides a baseline for performance but is susceptible to fouling and drift. Often used as a comparator for new chemistries [18]. |
| Oligoethylene Glycol (OEG) SAMs [18] | Alternative anti-fouling self-assembled monolayers (e.g., OEG acid, LAO2A, LAO3A). | Resists protein adsorption via binding to interfacial water and steric repulsion, potentially reducing biofouling drift [18]. |
| 2'O-Methyl RNA Aptamers [2] | Nuclease-resistant non-natural oligonucleotides used in place of DNA aptamers. | Used to isolate the mechanism of drift; studies show significant drift persists, implicating fouling as a dominant factor over enzymatic degradation in vitro [2]. |
Definitions and Core Concepts
What are the fundamental differences between Data, Concept, and Model Drift?
In the context of managing signal drift for measurements in undiluted whole blood, understanding the precise nature of drift is the first step toward mitigation. The following table outlines the core distinctions.
| Drift Type | Core Definition | Primary Cause in Blood Measurements | Impact on Model |
|---|---|---|---|
| Data Drift [19] [20] | A change in the statistical distribution of the model's input data. | Changes in the blood matrix itself, such as variations in user demographics, sample age, or upstream data collection processes [19] [7]. | The model receives input data it wasn't trained on, leading to inaccurate predictions. |
| Concept Drift [19] [21] | A change in the fundamental relationship between the input data and the target output variable. | The underlying physiological relationship between a sensor's signal and the target analyte concentration shifts due to factors like temperature or biofouling [2] [7]. | The model's learned rules become obsolete and invalid, even if the input data looks similar. |
| Model Drift [19] [22] | The overarching degradation of a model's predictive performance over time. This is often the result of unchecked Data or Concept Drift. | The combined effect of all degradation mechanisms, leading to a gradual decay in sensor accuracy and signal-to-noise ratio [2] [23]. | The model's outputs become less reliable and more erroneous, compromising decision-making. |
How do these drifts manifest in electrochemical biosensor research?
The following diagram illustrates the logical relationship between the different drift types and their specific manifestations in an undiluted whole blood environment.
Detection and Diagnosis Methodologies
What are the primary statistical methods to detect data drift?
When ground truth labels are unavailable, data drift detection serves as a crucial proxy for model health. The following table summarizes standard statistical tests used to compare new production data against a reference training baseline [19] [20].
| Method | Application Context | Interpretation | Key Advantage |
|---|---|---|---|
| Kolmogorov-Smirnov (K-S) Test [19] | Non-parametric test to determine if two datasets originate from the same distribution. | A low p-value (e.g., <0.05) suggests a significant difference, indicating drift. | Makes no assumptions about the underlying data distribution. |
| Population Stability Index (PSI) [19] | Compares the distribution of a categorical feature across two datasets (e.g., training vs. current). | A higher PSI value indicates a larger distribution shift. A common threshold for action is >0.2. | Directly evaluates the stability of population features over time. |
| Wasserstein Distance (Earth Mover's Distance) [19] | Measures the minimum "work" required to transform one distribution into another. | A larger distance indicates a greater magnitude of drift. | Intuitive and effective at identifying complex relationships and navigating outliers. |
What does a standard experimental workflow for characterizing drift look like?
A systematic approach is required to isolate and identify the mechanisms of drift in a complex medium like whole blood. The workflow below, based on research into Electrochemical Aptamer-Based (EAB) sensors, provides a robust methodology [2].
Troubleshooting and FAQs
Frequently Asked Questions from the Research Frontline
Q1: Our sensor signal in whole blood drops rapidly within the first few hours. What is the most likely cause and how can we confirm it? A: A rapid, exponential signal loss phase is strongly indicative of biofouling, where blood components (cells, proteins) adsorb to the sensor surface, physically blocking electron transfer [2]. To confirm, try washing the sensor with a solubilizing agent like concentrated urea. A significant recovery of the signal (e.g., >80%) confirms that fouling is a primary contributor [2].
Q2: We observe a slow, linear signal decline over many hours in a controlled buffer. What mechanism should we investigate? A: A slow, linear decline that stops when you pause electrochemical interrogation points to an electrochemically driven mechanism. The most common culprit is the desorption of the self-assembled monolayer (SAM) from the electrode surface, which is accelerated by applying potentials outside a narrow, stable window [2]. Testing sensor stability across different potential windows can pinpoint this issue.
Q3: How critical is calibration media for accurate quantification in blood, and why? A: It is critically important. Research on EAB sensors shows that the temperature, age, and species source of blood used for calibration significantly impact the sensor's calibration curve (affecting gain and binding midpoint) [7]. For the most accurate in-vivo measurements, you should calibrate using freshly collected, body temperature (37°C) blood from the same species, as this most closely mimics the deployment environment [7].
Q4: Can we use machine learning to compensate for sensor drift? A: Yes. Machine learning models, such as Random Forest and Support Vector Regressors, are being actively explored to compensate for complex, multi-factor drift. These models can be trained on synthetic datasets that incorporate various drift mechanisms, and they have shown promise in being deployed on low-power microcontrollers (Tiny ML) for real-time correction [24].
Experimental Protocols and Reagents
Detailed Protocol: Isolating Drift Mechanisms
This protocol is adapted from systematic studies on EAB sensor degradation [2].
Objective: To determine the relative contributions of biological (fouling, enzymatic) vs. electrochemical (SAM desorption, reporter degradation) mechanisms to overall signal drift.
Materials:
- Gold electrode with immobilized thiolated DNA or RNA probe and redox reporter (e.g., Methylene Blue).
- Potentiostat for electrochemical interrogation.
- Fresh, undiluted whole blood (maintained at 37°C).
- Phosphate Buffered Saline (PBS), sterile.
- Concentrated urea solution (e.g., 6-8 M).
Procedure:
- Baseline Measurement: In PBS, perform square-wave voltammetry (SWV) scans over a defined potential window to establish a stable baseline signal.
- Blood Challenge: Transfer the sensor to freshly collected, undiluted whole blood at 37°C. Continuously interrogate using SWV at a set interval (e.g., every 2 minutes) for several hours.
- Data Analysis: Plot peak SWV current versus time. Observe the characteristic biphasic decay (exponential followed by linear).
- Control in PBS: Repeat the experiment entirely in PBS at 37°C. The absence of the rapid exponential phase confirms it is blood-specific.
- Interrogation Pause: In a separate PBS experiment, pause the electrochemical scanning for a period (e.g., 30 min). If the signal loss also pauses, it confirms an electrochemical (scan-dependent) mechanism.
- Fouling Recovery Test: After a sensor shows exponential decay in blood, wash it with a concentrated urea solution. A significant signal recovery implicates biofouling as the dominant mechanism for the exponential phase.
- Potential Window Test: In PBS, systematically vary the positive and negative limits of the SWV potential window. A strong dependence of the degradation rate on the window size, especially near the extremes, confirms SAM desorption is a key driver of the linear phase.
The Scientist's Toolkit: Essential Research Reagents and Materials
| Item | Function in Drift Research | Key Consideration |
|---|---|---|
| Electrochemical Workstation | To perform precise voltammetric interrogations (e.g., SWV) and monitor signal stability over time. | Ensure software allows for automated, long-term measurement cycles. |
| Self-Assembled Monolayer (SAM) | A layer of molecules (e.g., alkane thiolates) that forms on a gold electrode, providing a stable foundation for probe attachment. | Susceptible to reductive/oxidative desorption; stability is highly dependent on applied potential [2]. |
| Enzyme-Resistant Oligonucleotides | Probes made from non-natural backbones (e.g., 2'O-methyl RNA) to isolate the impact of fouling from enzymatic degradation [2]. | Useful for controlled studies to rule out nuclease activity as a major drift source. |
| Fresh Whole Blood | The most accurate calibration and testing matrix for in-vivo sensor development [7]. | Blood age and species source significantly impact sensor response; use freshly collected where possible [7]. |
| Potentiostat with Temperature Control | A vital tool for all electrochemical measurements. | Temperature control is non-negotiable, as electron transfer rates and binding equilibria are highly temperature-sensitive [7]. |
Advanced Methodologies for Drift Correction and Sensor Calibration
Frequently Asked Questions
Q1: Why is it critical to use fresh, body-temperature blood for calibrating EAB sensors? Using freshly collected whole blood at body temperature (37°C) for calibration is critical because it directly matches the conditions encountered during in-vivo measurements. Research demonstrates that this practice achieves a measurement accuracy of better than ±10% for targets like vancomycin. Using blood that does not match the age or temperature of the measurement sample can lead to significant signal differences and concentration overestimation or underestimation [7].
Q2: What are the consequences of using room temperature blood for calibration? Calibrating at room temperature when measurements are taken at body temperature leads to substantial quantification errors. Studies show differences in both sensor gain and binding curve midpoint, which can result in concentration underestimates of 10% or more over the clinical range of a drug. The electron transfer rate of the sensor itself increases with temperature, fundamentally altering its response [7].
Q3: How does the age of a blood sample affect sensor calibration? Blood age significantly impacts the sensor's response. Commercially sourced blood, which is at least a day old, produces calibration curves with lower signal gain compared to freshly collected blood. This leads to an overestimation of target concentrations. For the most accurate calibration of in-vivo measurements, the freshest possible blood should be used [7].
Q4: Can I use a proxy medium instead of fresh whole blood for calibration? Yes, it is possible to use non-blood proxy media to achieve calibration without the need to collect fresh whole blood. This can offer convenience, though the performance must be validated against the gold standard of fresh, body-temperature blood to ensure measurement accuracy [7].
Q5: How often should I perform a new calibration? The required frequency depends on the stability of your measurement system and environmental conditions. In harsh conditions, calibration intervals may need to be shortened from annually to semi-annually or quarterly. For sensors subject to drift, an annual recalibration is often recommended to maintain accuracy [25] [26].
Troubleshooting Guides
Problem: Inaccurate concentration estimates during in-vivo measurements.
| Potential Cause | Diagnostic Steps | Corrective Action |
|---|---|---|
| Temperature Mismatch | Compare calibration temperature with measurement temperature. | Collect all calibration curves at body temperature (37°C) [7]. |
| Blood Sample Age | Note the time between blood collection and calibration use. | Calibrate using blood collected as freshly as possible before the experiment [7]. |
| Sensor-to-Sensor Variation | Calibrate individual sensors and check for significant differences from the common curve. | For the vancomycin sensor, a common, averaged calibration curve can be used across sensors without significant performance loss [7]. |
| Improper Storage | Check records for how calibration blood was stored before use. | Store blood samples in temperature and humidity-controlled environments if not used immediately [25]. |
Problem: Observed signal drift over time.
| Potential Cause | Diagnostic Steps | Corrective Action |
|---|---|---|
| Environmental Drift | Monitor lab conditions for temperature fluctuations and vibrations. | Control the laboratory environment for temperature and humidity. Isolate equipment from vibration sources [25]. |
| Component Aging | Review calibration records and maintenance history of the sensor. | Implement a schedule for regular sensor servicing and recalibration, typically annually [26]. |
| Contamination | Physically inspect the sensor and sample pathway for dust or debris. | Implement a regular cleaning schedule and use protective enclosures for equipment [25]. |
Experimental Data & Protocols
Quantitative Impact of Calibration Conditions
The following table summarizes key quantitative findings on how calibration conditions affect measurement accuracy in EAB sensors [7].
| Condition | Observed Effect on Calibration | Impact on Measurement Accuracy |
|---|---|---|
| Body Temperature (37°C) | Properly matched midpoint (K1/2) and gain (KDMmax). | Best performance: Mean accuracy of 1.2% or better in the clinical range. |
| Room Temperature | Differing sensor gain and binding curve midpoint. | Underestimation of concentrations by ≥10% in the clinical range. |
| Fresh Whole Blood | Correct, high signal gain. | Accurate quantification. |
| Aged/Commercial Blood | Lower signal gain. | Overestimation of target concentrations. |
Basic Protocol: EAB Sensor Calibration in Fresh, Body-Temperature Blood
This protocol outlines the steps for generating a reliable calibration curve for in-vivo measurements.
- Blood Collection and Preparation: Draw fresh whole blood from the subject species (e.g., rat). If necessary, use an anticoagulant. Keep the blood at 37°C using a heated bath or block. Do not dilute.
- Sensor Setup: Place the EAB sensor in the measurement chamber and connect to the potentiostat.
- Sample Challenge: For each target concentration, incubate the sensor in a sample of the fresh, warm blood spiked with a known concentration of the target (e.g., vancomycin).
- Signal Measurement: Using square wave voltammetry, collect voltammograms at specified "signal-on" and "signal-off" frequencies. Convert the peak currents into a Kinetic Differential Measurement (KDM) value [7].
- Data Fitting: Plot the averaged KDM values against the target concentration and fit the data to a Hill-Langmuir isotherm to determine the calibration parameters (KDMmin, KDMmax, K1/2, nH) [7].
- Concentration Calculation: Use the fitted parameters to convert future KDM readings from in-vivo measurements into target concentration estimates [7].
Workflow: EAB Sensor Calibration
Mechanism: EAB Sensor Signaling
The Scientist's Toolkit
| Research Reagent / Material | Function in Experiment |
|---|---|
| Fresh Whole Blood | The optimal calibration matrix; provides the physiologically relevant environment for in-vivo sensor calibration [7]. |
| Electrochemical Aptamer-Based (EAB) Sensor | The sensing platform; consists of a target-specific aptamer with a redox reporter immobilized on a gold electrode [7]. |
| Kinetic Differential Measurement (KDM) | A calculation method using signals from two square-wave frequencies to correct for signal drift and enhance gain in real-time [7]. |
| Hill-Langmuir Isotherm | The mathematical model used to fit the concentration-response data and generate the calibration curve [7]. |
| Chromogenic Reagent | A substance that induces a color reaction of known intensity, allowing for the quantification of an analyte (e.g., in protein C activity assays) [27] [28]. |
| Protein C Deficient Plasma | Used as a control matrix in coagulation assays to prepare calibration curves for quantifying protein C activity [28]. |
| Phenylhydrazine (PHZ) | A chemical used in murine models to induce anemia, serving as an experimental control in whole blood aggregometry studies [29]. |
Troubleshooting Guides
FAQ: Common KDM Sensor Issues and Solutions
Q1: My EAB sensor signal is decreasing rapidly during in vivo measurements. What could be causing this? A: Rapid signal loss, especially in whole blood, is typically caused by two main mechanisms [2]:
- Surface Fouling: Proteins and blood cells adsorbing to the sensor surface, reducing electron transfer rates. This often causes an initial exponential signal decay.
- Monolayer Desorption: Electrochemically driven desorption of the thiol-on-gold self-assembled monolayer (SAM), leading to a more linear, long-term signal loss.
Q2: How can I distinguish between signal drift and a true concentration change? A: Use the Kinetic Differential Measurement (KDM) method itself. A true concentration change will produce differential responses at your paired "signal-on" and "signal-off" frequencies. Pure signal drift, in contrast, typically causes the signals at both frequencies to change in concert. The KDM calculation corrects for this coordinated drift [30] [31].
Q3: My sensor-to-sensor baseline current is highly variable. Does this mean my fabrication is inconsistent? A: Not necessarily. Significant variation in raw peak currents between sensors is often due to differences in the microscopic surface area of the electrodes, even for sensors of the same macroscopic dimensions. This is common with handmade devices. The KDM approach, which uses normalized currents, is designed to correct for this variability [30].
Q4: Can I perform a calibration in buffer at room temperature for an experiment in blood at 37°C? A: No. Temperature and media composition significantly impact the sensor's calibration curve. The binding affinity (K~1/2~), signal gain, and even the optimal "signal-on/off" frequencies can change. For accurate quantification, calibration should be performed in freshly collected whole blood at body temperature (37°C) [7].
Troubleshooting Guide: Diagnosing Signal Drift
| Observed Problem | Potential Causes | Recommended Solutions |
|---|---|---|
| Rapid initial signal decay (exponential) | Surface Fouling: Adsorption of blood proteins/cells onto the sensor electrode [2]. | Optimize antifouling monolayers (e.g., use PEG-containing SAMs). Use enzyme-resistant nucleic acid backbones (e.g., 2'O-methyl RNA). |
| Slow, continuous signal loss (linear) | SAM Desorption: Electrochemically driven breakage of the gold-thiol bond [2]. | Narrow the applied potential window to avoid reductive (< -0.5 V) and oxidative (> 1.0 V) desorption thresholds [2]. |
| High sensor-to-sensor variability in baseline signal | Variable Electrode Surface Area: Differences in the microscopic surface area of individual electrodes [30]. | Adopt calibration-free methods like the ratiometric (SR) or ratiometric KDM (rKDM) approaches [30]. |
| Inaccurate concentration estimation in vivo | Incorrect Calibration: Using calibration curves generated in the wrong media or temperature [7]. | Calibrate in freshly collected, body temperature (37°C) whole blood from the relevant species [7]. |
| Poor signal gain (low signal change upon target binding) | Suboptimal SWV Parameters: Using non-ideal square-wave frequency or amplitude [32]. | Systematically optimize the square-wave frequency and amplitude pair for your specific sensor construct [32]. |
Experimental Protocols
Standard Protocol: KDM Interrogation for Drift Correction
This protocol details the standard method for interrogating an EAB sensor using Square Wave Voltammetry (SWV) and applying KDM for drift correction [30] [31].
1. Sensor Interrogation:
- Interrogate the EAB sensor using SWV at two carefully selected frequencies.
- Select one frequency that produces "signal-on" behavior (peak current increases with target binding).
- Select a second frequency that produces "signal-off" behavior (peak current decreases with binding).
- Record the peak currents, i~on~ and i~off~, at these frequencies.
2. Signal Normalization:
- For a standard, pre-deployment calibrated KDM, normalize the measured currents to the baseline currents recorded in a sample of known zero target concentration [30]:
- i~on~(target) / i~on~(0)
- i~off~(target) / i~off~(0)
3. KDM Calculation:
- Calculate the Kinetic Differential Measurement (KDM) value using the formula [30]:
KDM = [ (i_on(target)/i_on(0)) - (i_off(target)/i_off(0)) ] / [ 0.5 * ( (i_on(target)/i_on(0)) + (i_off(target)/i_off(0)) ) ]
4. Concentration Estimation:
- Convert the KDM value to target concentration using a calibration curve (a Hill-Langmuir isotherm) that was generated under matching conditions (media, temperature) [7].
Advanced Protocol: Calibration-Free Ratiometric Operation
This protocol enables drift-corrected measurements without the need to calibrate each individual sensor in a sample of known concentration [30].
1. Sensor Interrogation:
- As in the standard protocol, interrogate the sensor at two paired "signal-on" and "signal-off" SWV frequencies.
2. Ratiometric Calculation (Choose One Method):
- Ratiometric (SR) Method: Simply use the ratio of the two peak currents [30]:
SR = i_on(target) / i_off(target) - Ratiometric KDM (rKDM) Method: This method uses a pre-determined constant, R (R = i~off~(0) / i~on~(0)), which is characteristic for a given class of sensors [30]:
rKDM = [ R * i_on(target) - i_off(target) ] / [ 0.5 * ( R * i_on(target) + i_off(target) ) ]
3. Concentration Estimation:
- The calculated SR or rKDM values are then converted to concentration using a master calibration curve specific to that ratiometric method.
KDM Signaling and Drift Correction Workflow
The following diagram illustrates the core signaling mechanism of an EAB sensor and how the KDM technique leverages dual-frequency measurements to correct for signal drift.
The Scientist's Toolkit: Research Reagent Solutions
The table below lists key materials and reagents essential for the fabrication and operation of EAB sensors, based on the cited research.
| Item | Function / Rationale |
|---|---|
| Gold Electrode | The working electrode; thiol-gold chemistry allows for stable self-assembled monolayer (SAM) formation [2]. |
| Thiol-Modified Aptamer | The recognition element; the DNA or RNA aptamer is modified with a thiol group for covalent attachment to the gold electrode [30] [2]. |
| Methylene Blue (MB) | A commonly used redox reporter; its electron transfer rate is sensitive to the aptamer's conformation. It operates in a potential window that minimizes SAM desorption [2] [32]. |
| Alkane-Thiol (e.g., 6-Mercapto-1-hexanol) | Forms a self-assembled monolayer (SAM) on the gold electrode, helping to passivate the surface and reduce non-specific binding [2]. |
| Fresh Whole Blood | The recommended calibration matrix for in vivo measurements. Using fresh blood at 37°C is critical for accurate quantification, as aged or commercial blood can alter the sensor response [7]. |
| 2'O-Methyl RNA Aptamer | An enzyme-resistant nucleic acid analog used to reduce signal loss from nuclease degradation in biological fluids [2]. |
Troubleshooting Guide: Addressing Signal Drift in Complex Biofluids
| Problem Area | Specific Issue | Possible Cause | Recommended Solution |
|---|---|---|---|
| Surface Fouling | Rapid, exponential signal loss (within 1-2 hours) in blood. [2] | Non-specific adsorption of plasma proteins, blood cells, or other interferents onto the sensor surface. [2] | Implement ultra-low fouling polymer brushes (e.g., polySBMA, polyCBMA) instead of SAMs. [33] [34] |
| Significant signal reduction from blood components. [2] | Fouling layer reduces electron transfer rate by physically impeding the redox reporter from reaching the electrode surface. [2] | Recover signal by washing the sensor with chemicals that solubilize biomolecules (e.g., concentrated urea). [2] | |
| Electrochemical Instability | Slow, linear signal loss over time, also observed in PBS. [2] | Electrochemically driven desorption of the thiol-on-gold monolayer due to applied potential. [2] | Use a narrower electrochemical potential window (e.g., -0.4 V to -0.2 V) to avoid reductive and oxidative desorption. [2] |
| Platelet Adhesion & Thrombosis | Clot formation on sensor surface, leading to failure. [33] [34] | Adsorption of fibrinogen and other adhesion proteins, triggering the coagulation cascade. [34] | Use surfaces that reduce fibrinogen adsorption below 5-10 ng/cm² and exhibit low platelet adhesion, such as polyCBMA brushes. [33] [34] |
| General Surface Performance | SAMs are unstable for long-term in vivo use. [35] | Limited long-term stability of SAMs to various reagents and biological conditions. [36] [35] | Replace SAMs with more robust polymer brush coatings prepared via surface-initiated ATRP. [36] [35] |
Frequently Asked Questions (FAQs)
Q1: What are the primary mechanisms causing signal drift in undiluted whole blood, and how do they manifest? Signal drift in whole blood is biphasic, driven by two distinct mechanisms: [2]
- Exponential Phase (Biology-Driven): A rapid signal decrease over the first ~1.5 hours is primarily caused by surface fouling—the non-specific adsorption of proteins and blood cells. This fouling layer reduces the electron transfer rate of the redox reporter. [2]
- Linear Phase (Electrochemistry-Driven): A slower, steady signal loss is due to the electrochemically driven desorption of the self-assembled monolayer from the electrode surface, which occurs even in buffer solutions like PBS. [2]
Q2: How do polymer brushes outperform self-assembled monolayers (SAMs) for blood-contacting sensors? While both SAMs and polymer brushes can be highly resistant to protein adsorption from simple buffer solutions, polymer brushes are far superior in complex blood plasma. [33] [34] They exhibit much lower total plasma protein adsorption, form more robust and stable coatings for long-term deployments, and offer higher levels of functionality. [33] [36] [37] SAMs, in contrast, can suffer from limited long-term stability. [36] [35]
Q3: My sensor drift is unmanageable. What is the most direct experimental change I can test? The most impactful change is to narrow the electrochemical potential window used for interrogation. If your redox reporter allows, limit the window to -0.4 V to -0.2 V vs. Ag/AgCl. This simple adjustment minimizes electrochemical desorption of thiol-based monolayers, which is a major source of linear drift. [2]
Q4: Are there surface coatings that not only resist fouling but also actively inhibit blood clotting? Yes. While many "nonfouling" surfaces are passive, some zwitterionic polymers have active anticoagulant properties. For example, linear polymers of polyCBMA (carboxybetaine) have been shown to prolong plasma clotting time in a concentration-dependent manner, whereas polySBMA (sulfobetaine) and PEG do not. [33] This makes polyCBMA a candidate for coatings that are both stealthy and anticoagulant. [33]
Experimental Protocols for Key Characterization Assays
Protocol 1: Evaluating Plasma Protein Adsorption via Surface Plasmon Resonance (SPR)
Purpose: To quantitatively compare the resistance of different SAM or polymer brush surfaces to non-specific protein adsorption from human blood plasma. [33] [34]
Materials:
- SPR instrument
- Sensor chips functionalized with SAMs or polymer brushes
- Undiluted human platelet-poor plasma (PPP)
- Phosphate buffered saline (PBS), pH 7.4
- Regeneration solution (e.g., 10 mM glycine, pH 2.0)
Methodology:
- Baseline: Prime the SPR system with PBS at a constant flow rate (e.g., 30 µL/min) until a stable baseline is achieved.
- Sample Injection: Inject undiluted human PPP over the functionalized sensor surface for a defined period (e.g., 10-15 minutes).
- Dissociation: Switch back to PBS flow to monitor the dissociation of loosely bound proteins.
- Regeneration: Inject a regeneration solution to remove all tightly bound proteins from the surface, returning the signal to baseline.
- Data Analysis: The change in SPR signal (response units) during the sample injection phase is directly correlated to the mass of protein adsorbed on the surface. Compare the final adsorption levels for different surfaces. [33] [34]
Protocol 2: Testing Anticoagulant Activity via Plasma Recalcification Time
Purpose: To determine if a surface or soluble polymer actively prolongs the clotting time of blood plasma. [33] [37]
Materials:
- Human platelet-poor plasma (PPP)
- 0.25 M Calcium Chloride (CaCl₂) solution
- Test surfaces (e.g., in a 24-well plate) or soluble polymers
- Water bath at 37°C
- Timer
Methodology:
- Incubation: Add a fixed volume of PPP (e.g., 200 µL) to wells containing the test surfaces or to a solution containing the soluble polymer.
- Equilibration: Incubate the plate for 1-2 minutes in a 37°C water bath to equilibrate.
- Recalcification: Add a predetermined volume of pre-warmed 0.25 M CaCl₂ (e.g., 20 µL) to the plasma to initiate the clotting cascade.
- Timing: Immediately start the timer. Gently tilt the tube or plate periodically and observe for the formation of a fibrin clot.
- Endpoint: Record the time between the addition of CaCl₂ and the first appearance of a visible clot. Compare this time against a negative control (e.g., plasma alone) and a positive control (e.g., plasma with heparin). [33]
Signaling Pathways and Workflows
The Scientist's Toolkit: Essential Research Reagents & Materials
| Item | Function / Description | Key Consideration |
|---|---|---|
| Sulfobetaine Methacrylate (SBMA) | Monomer for creating zwitterionic polySBMA brushes via ATRP. Confers high resistance to plasma protein adsorption. [33] [34] | Excellent non-fouling properties, but may lack inherent anticoagulant activity. [33] |
| Carboxybetaine Methacrylate (CBMA) | Monomer for creating zwitterionic polyCBMA brushes. Also highly protein-resistant, but can actively prolong plasma clotting time. [33] | Unique for combining passive fouling resistance with active anticoagulant properties. [33] |
| ATRP Initiator (e.g., (11-(2-bromo-2-methyl)propionyloxy)undecyltrichlorosilane) | Tethered to a substrate (e.g., silicon oxide) to initiate the "grafting-from" polymerization of brushes. [37] | Forms a more robust foundation compared to typical alkanethiol SAMs on gold for long-term applications. [36] [35] |
| Surface Plasmon Resonance (SPR) | Label-free optical technique to quantify protein adsorption on surfaces in real-time, from buffer or complex plasma. [33] [34] | Critical for validating non-fouling claims in biologically relevant media, not just single-protein solutions. |
| Human Platelet-Poor Plasma (PPP) | Cell-free blood plasma used for clotting time assays and plasma protein adsorption studies. [33] [37] | Must be used fresh or properly frozen to preserve clotting factors. Preferable to single-protein solutions for realistic testing. [34] |
Leveraging Enzyme-Resistant Oligonucleotides to Combat Nuclease Degradation
➤ Troubleshooting Guide: Frequently Asked Questions
FAQ 1: What are the primary causes of signal loss for oligonucleotide-based sensors in whole blood? Research indicates that signal drift in complex biological fluids like whole blood is biphasic, resulting from two distinct mechanisms [2]:
- Exponential Drift Phase (Biology-Driven): This initial, rapid signal loss is dominated by the fouling of the sensor surface by blood components (e.g., proteins, cells), which reduces the electron transfer rate. Evidence shows that up to 80% of this signal loss can be reversed by washing with a solubilizing agent like urea [2].
- Linear Drift Phase (Electrochemistry-Driven): This slower, sustained signal loss is primarily due to the electrochemical desorption of the self-assembled monolayer (SAM) from the electrode surface during sensor interrogation. This mechanism is strongly dependent on the applied potential window [2].
FAQ 2: Besides fouling and SAM desorption, what other factors degrade oligonucleotide performance? The enzymatic degradation of oligonucleotides by endogenous nucleases is a major challenge that limits their stability and half-life [38] [39]. Serum exhibits significant 3′ to 5′ exonucleolytic activity, which is a primary route of oligo decay [38] [39]. Furthermore, within cells, degradation is affected by both 5′ and 3′ exonucleases [39].
FAQ 3: Which chemical modifications best protect oligonucleotides from 3′-exonuclease degradation? Protecting the 3′-end is critical, as it is the primary target for exonuclease activity in serum. Several effective terminal modifications are available [39] [40]:
- Inverted dT: This modification creates a 3′-3′ linkage, physically blocking exonuclease recognition. It is used in FDA-approved aptamer drugs and can extend serum half-life from minutes to over 30 hours [38] [39].
- Phosphorylation: Adding a phosphate group to the 3′ end inhibits exonucleases that require a free 3′ hydroxyl group to initiate digestion [39].
- C3 Spacer: This modifier can be incorporated at the 3′ end to act as a physical blocker against exonucleases [39].
- Threose Nucleic Acid (TNA) and eTNA: These unnatural nucleic acid analogs, used as end-caps, show exceptional nuclease resistance due to their altered sugar-phosphate backbone structure, which is poorly recognized by nucleases [38] [40].
FAQ 4: How can I protect oligonucleotides from both endo- and exonucleases? For comprehensive protection, combine backbone and terminal modifications [39] [40]:
- Phosphorothioate (PS) Bonds: Replacing a non-bridging oxygen with sulfur in the phosphate backbone increases resistance to nucleases. For best results against exonucleases, include at least 3 PS bonds at both the 5′ and 3′ ends. Using PS bonds throughout the oligo also inhibits endonucleases but may increase toxicity [39].
- 2′ Sugar Modifications: Modifications like 2′-O-Methyl (2′-OMe), 2′-Fluoro (2′-F), and Locked Nucleic Acid (LNA) stabilize the oligonucleotide and prevent attack by endonucleases. However, they do not fully block exonuclease digestion, so they must be used in conjunction with end-blocking strategies [39] [40].
Comparison of Nuclease Resistance Modifications
Table 1: Common Oligonucleotide Modifications to Combat Nuclease Degradation
| Modification Type | Example | Primary Mechanism | Key Advantage | Consideration |
|---|---|---|---|---|
| Backbone | Phosphorothioate (PS) | Substitutes sulfur for oxygen, creating nuclease-resistant linkages. | Broad resistance to both endo- and exonucleases. | Can introduce toxicity at higher concentrations [39]. |
| Backbone | Morpholino | Replaces ribose-phosphate with a non-ionic morpholine ring. | Highly resistant to enzymatic degradation [40]. | Does not activate RNase H [41]. |
| Sugar (2′) | 2′-O-Methyl (2′-OMe) | Methyl group sterically hinders nucleases and increases duplex stability. | Increases Tm and prevents endonuclease attack [39]. | Does not block exonuclease digestion; requires end-blocking [39]. |
| Sugar (2′) | 2′-Fluoro (2′-F) | Fluorine atom stabilizes the sugar conformation and blocks the reactive OH. | Increases binding affinity and nuclease resistance [40]. | Often used in conjunction with PS backbones [39]. |
| 3′ End Cap | Inverted dT | Creates a 3′-3′ linkage, blocking exonuclease initiation. | Dramatically extends serum half-life (from minutes to ~30 hours) [38]. | A popular and well-established choice for aptamers [39]. |
| 3′ End Cap | TNA / eTNA | Altered sugar backbone is poorly recognized by nucleases. | Exceptional stability; resists SVPDE for days [38] [40]. | Novel chemistry; synthesis can be more complex [38]. |
Experimental Protocol: Evaluating Oligonucleotide Stability in Biological Fluids
Objective: To assess the nuclease resistance of a modified oligonucleotide in serum or whole blood.
Materials:
- Test oligonucleotides (modified and unmodified control)
- Fresh or commercially sourced whole blood or serum (e.g., bovine or human)
- Phosphate Buffered Saline (PBS)
- Water bath or incubator (37°C)
- Urea solution (for fouling recovery tests, optional) [2]
- Analytical method (e.g., HPLC, gel electrophoresis, or functional sensor assay)
Method:
- Preparation: Dilute the oligonucleotide to a working concentration in PBS.
- Challenge: Spike the oligonucleotide into pre-warmed (37°C) whole blood or serum. For a control, spike an identical sample into PBS.
- Incubation: Incubate the samples at 37°C. Remove aliquots at defined time points (e.g., 0, 15 min, 1 h, 2 h, 4 h, 24 h).
- Termination & Analysis: Halt degradation at each time point (e.g., by freezing or adding a denaturant). Analyze the aliquots using your chosen method to quantify the amount of intact oligonucleotide remaining.
- Fouling Recovery (For Sensors): If testing a sensor, after a period of signal loss in blood, wash the electrode with a concentrated urea solution to remove fouling agents and measure signal recovery [2].
Expected Outcome: The unmodified oligonucleotide will show rapid degradation, while the effectively modified oligonucleotide will demonstrate a significantly extended half-life, maintaining structural integrity and function.
➤ Fundamentals: Mechanisms and Signaling Pathways
Oligonucleotide Mechanisms of Action and Degradation
The following diagram illustrates the core mechanisms of action for antisense oligonucleotides (ASOs) and the primary pathways of their degradation, which the modifications in this guide are designed to combat.
Sensor Signal Drift Mechanisms in Whole Blood
This diagram outlines the identified mechanisms behind the biphasic signal drift experienced by electrochemical oligonucleotide-based sensors in undiluted whole blood.
➤ The Scientist's Toolkit: Research Reagent Solutions
Table 2: Essential Reagents for Developing Nuclease-Resistant Oligonucleotides
| Reagent / Material | Function / Application | Key Insight from Research |
|---|---|---|
| Phosphorothioate (PS) Amidites | Creates nuclease-resistant backbone linkages during oligo synthesis. | ≥3 PS bonds at each terminus are recommended to inhibit exonuclease degradation [39]. |
| 2'-O-Methyl (2'OMe) Amidites | Sugar modification for endonuclease resistance and enhanced binding affinity. | DNA oligos with 2'OMe are 5-10 fold less susceptible to DNases than unmodified DNA [39]. |
| 3' Inverted dT | 3′-end cap to block 3′-exonuclease degradation. | Used in FDA-approved drugs (e.g., Pegaptanib); extends serum half-life from minutes to over 30 hours [38] [39]. |
| Threose Nucleic Acid (TNA) | Unnatural nucleic acid for exceptional nuclease resistance as an end-cap. | Demonstrates stability after 7-day incubation with snake venom phosphodiesterase (SVPDE) [40]. |
| Oligoethylene Glycol (OEG) | Forms anti-fouling self-assembled monolayers (SAMs) on sensor electrodes. | Resists non-specific adsorption of blood components, reducing the biology-driven exponential signal drift [18]. |
| Methylene Blue (MB) | Redox reporter for electrochemical aptamer-based (EAB) sensors. | Its redox potential falls within a narrow window that minimizes damaging reductive/oxidative desorption of thiol-on-gold SAMs [2]. |
| Fresh Whole Blood | Critical matrix for in vitro calibration and stability testing. | Sensor response and calibration differ significantly in fresh vs. aged blood; using fresh blood improves quantification accuracy [7]. |
Troubleshooting Guides and FAQs
Frequently Asked Questions
Q1: Why does my sensor signal continuously decrease when measuring in undiluted whole blood? This signal drift is primarily caused by two concurrent mechanisms: a rapid, biology-driven exponential phase and a slower, electrochemically-driven linear phase. The initial exponential loss is largely due to biofouling, where blood components like proteins and cells adsorb to the sensor surface, hindering electron transfer. The subsequent linear decay is attributed to electrochemically driven desorption of the self-assembled monolayer from the gold electrode surface, accelerated by applied potentials outside a stable window [2].
Q2: How can I minimize electrochemical desorption of my sensor's monolayer? Electrochemical desorption is highly dependent on the applied potential window. The gold-thiol bond is stable only within a specific voltage range. Reductive desorption occurs at potentials below approximately -0.4 V, while oxidative desorption occurs above ~0.0 V (vs a common reference). To maximize stability, confine your electrochemical interrogation to a narrow potential window, ideally between -0.4 V and -0.2 V, which has been shown to reduce signal loss to only 5% after 1500 scans [2].
Q3: My sensor's calibration seems inaccurate when deployed in vivo. What is the critical factor I might be overlooking? Temperature is a critical and often overlooked factor. Calibration curves collected at room temperature can differ significantly from those at body temperature (37°C). This discrepancy arises because temperature affects both the binding affinity (K~1/2~) of the aptamer and the electron transfer rate of the redox reporter. Using a room-temperature calibration for a body-temperature measurement can lead to concentration underestimates of 10% or more. Always calibrate under the same temperature conditions as your measurement [7].
Q4: Does the age of the blood used for calibration matter? Yes, blood age significantly impacts the sensor response. Commercially sourced blood, which is at least a day old, can produce a calibration curve with lower signal gain compared to freshly collected blood. This leads to an overestimation of target concentration. For the most accurate in-vivo measurements, calibrate using the freshest possible blood [7].
Troubleshooting Guide
| Problem | Potential Cause | Recommended Solution |
|---|---|---|
| High signal drift in blood | Biofouling from proteins/cells | Use narrow potential windows; post-measurement wash with urea to recover signal [2]. |
| Continuous signal decay in buffer | Electrochemical monolayer desorption | Restrict potential window to -0.4 V to -0.2 V to preserve gold-thiol bonds [2]. |
| Inaccurate concentration readings | Mismatch between calibration and measurement temperature | Perform all calibrations at body temperature (37°C) for in vivo applications [7]. |
| Poor signal gain | Calibration in old/commercial blood | Use freshly collected whole blood for generating calibration curves [7]. |
| Low electron transfer rate | Fouling-induced steric hindrance | Optimize the position of the redox reporter along the DNA chain to mitigate fouling effects [2]. |
Experimental Protocols
Protocol 1: Quantifying and Mitigating Drift Mechanisms in Whole Blood
This protocol systematically identifies the sources of signal loss for electrochemical biosensors in whole blood.
Key Materials:
- Electrochemical biosensor proxies (e.g., MB-modified single-stranded DNA on gold electrodes).
- Undiluted whole blood, freshly collected and maintained at 37°C.
- Phosphate Buffered Saline (PBS).
- Potentiostat for electrochemical interrogation.
Methodology:
- Biphasic Drift Characterization: Challenge the sensor in undiluted whole blood at 37°C, collecting square-wave voltammetry data over several hours. Observe the characteristic biphasic signal loss: an initial exponential decay over ~1.5 hours, followed by a slower, linear decrease [2].
- Mechanism Isolation: Repeat the interrogation in PBS at 37°C. The abolition of the exponential phase indicates it is blood-specific (biological), while the persistence of the linear phase confirms an electrochemical mechanism [2].
- Fouling Verification (Recovery Test): After 2.5 hours in blood (using a narrow potential window to minimize electrochemical desorption), wash the electrode with a concentrated urea solution. Recovery of >80% of the initial signal confirms that fouling is a major contributor to the exponential phase [2].
- Electrochemical Desorption Testing: In PBS, test different potential windows. Significantly increased degradation rates when the positive limit exceeds 0.0 V or the negative limit falls below -0.4 V confirm redox-driven monolayer desorption as the source of the linear drift [2].
Protocol 2: Temperature-Matched Calibration for Accurate In-Vivo Quantification
This protocol ensures high measurement accuracy for in-vivo applications by calibrating under physiologically relevant conditions.
Key Materials:
- Functional EAB sensor (e.g., vancomycin-detecting aptasensor).
- Freshly collected whole blood (rat or bovine).
- Thermostated electrochemical cell.
- Target analyte (e.g., vancomycin) for titration.
Methodology:
- Preparation: Place freshly collected whole blood in a thermostated electrochemical cell and maintain at 37°C [7].
- Data Collection: Using square-wave voltammetry, titrate the target analyte into the blood. Collect voltammograms at multiple concentrations. Employ the Kinetic Differential Measurement (KDM) method by collecting data at both "signal-on" and "signal-off" frequencies to correct for drift and enhance gain [7].
- Curve Fitting: Fit the averaged KDM values vs. concentration to a Hill-Langmuir isotherm to generate the calibration curve, determining the parameters KDM~min~, KDM~max~, K~1/2~, and n~H~ [7].
- Validation: Apply this calibration curve to measurements performed in freshly collected, body-temperature blood dosed with known concentrations of the target. This method has been shown to achieve accuracy better than ±10% over the clinical range [7].
Data Presentation
Table 1: Impact of Experimental Conditions on Sensor Calibration and Stability
| Condition / Parameter | Effect on Sensor Performance | Quantitative Impact / Optimal Range |
|---|---|---|
| Potential Window | Determines rate of monolayer desorption [2]. | Confine to -0.4 V to -0.2 V for stability (<5% loss after 1500 scans) [2]. |
| Temperature | Shifts binding curve midpoint (K~1/2~) and electron transfer rate [7]. | Calibrating at 37°C vs. RT can cause >10% concentration underestimation [7]. |
| Blood Age | Alters signal gain, leading to quantification errors [7]. | Fresh blood is critical; 1-day-old blood can reduce gain vs. fresh blood [7]. |
| Redox Reporter Position | Influences sensitivity to fouling [2]. | Rate of exponential drift phase is strongly and monotonically dependent on the reporter's position along the DNA chain [2]. |
Signaling Pathways and Workflows
Diagram: Strategic Interrogation Workflow for Drift Management
The Scientist's Toolkit: Research Reagent Solutions
Table 2: Essential Materials for Electrochemical Biosensor Development and Interrogation
| Item | Function / Application |
|---|---|
| Gold Electrodes | Standard substrate for thiol-based self-assembled monolayers; provides a stable, conductive surface for DNA probe immobilization [2] [42]. |
| Thiol-Modified DNA Probes | Covalently attach to gold electrodes via Au-S bonds, forming the foundational self-assembled monolayer for EAB and DNA sensors [2]. |
| Methylene Blue (MB) | A commonly used redox reporter; its favorable potential (-0.25 V) falls within the stable window of the gold-thiol monolayer, enhancing sensor longevity [2]. |
| 6-Mercapto-1-hexanol | A blocking agent used in self-assembled monolayers to passivate the electrode surface, minimizing non-specific binding and improving hybridization efficiency [2]. |
| Fresh Whole Blood | The essential calibration matrix for achieving accurate quantification in in-vivo or complex media measurements; must be fresh and maintained at 37°C [7]. |
| Loop-Mediated Isothermal Amplification (LAMP) Kit | For rapid, specific amplification of target DNA sequences (e.g., GMO regulatory elements), enabling highly sensitive detection in biosensing platforms [43]. |
| 2D Nanomaterials (rGO, MXenes) | Used to functionalize electrodes; provide high surface area and excellent conductivity, enhancing signal transduction and sensitivity in DNA detection [43]. |
Implementing Internal Standardization and Polynomial Correction Models
Troubleshooting Guide: Internal Standardization
Internal Standard Recoveries are Inconsistent or Outside Acceptable Range
Problem: The recovery of your internal standard (IS) varies excessively between samples, suggesting potential issues with the method or sample processing.
Solutions:
- Verify Internal Standard Selection: Ensure your chosen internal standard is not present in the original sample and does not suffer from spectral interferences. It should have similar mass and ionization potential to your analyte [44] [45].
- Check Addition Technique: Confirm the internal standard is added at the same concentration to all solutions. Use precise, automated addition methods where possible to minimize pipetting errors [45].
- Investigate Sample Matrix: High total dissolved solids (e.g., >0.3%) or easily ionized elements can cause matrix effects. Consider dilution, using an ionization buffer, or matching the internal standard's behavior (atomic or ionic line) to your analytes [45].
- Evaluate Data: Internal standard recovery should typically be within ±20% of the value in the calibration standard. Replicates should have a relative standard deviation (RSD) of less than 3%. Investigate any sample where these criteria are not met [45].
Sample Concentration is Above the Calibration Curve ("Over-Curve")
Problem: A sample's analyte concentration exceeds the highest point on your calibration curve, but dilution is complicated because you are using an internal standard.
Solutions:
- Dilute Before Adding Internal Standard: Dilute the original sample with blank matrix, then add your internal standard. This changes the analyte-to-internal standard ratio [46].
- Increase Internal Standard Concentration: Add twice the normal concentration of internal standard to the undiluted, over-curve sample. This effectively halves the analyte-to-internal standard ratio [46].
- Validation is Key: Any dilution protocol must be validated beforehand. Demonstrate accuracy by spiking blank matrix at known over-curve concentrations, performing the dilution, and showing that corrected results are accurate [46].
Troubleshooting Guide: Polynomial and Drift Correction Models
Model Fails to Correct for Complex Drift
Problem: A simple linear correction is not adequately accounting for the instrument's signal drift over time, leading to inaccurate data.
Solutions:
- Increase Polynomial Order: Complex drift may require a higher-order polynomial. The optimal order can range up to six, depending on the drift pattern [47].
- Use QC-Based Algorithms: Employ quality control (QC) samples measured throughout the run. Advanced algorithms like Random Forest, Support Vector Regression (SVR), or Spline Interpolation can model and correct complex, long-term drift more effectively than simple polynomials [48].
- Incorporate Run Parameters: Define a "batch number" for major instrument events (like maintenance) and an "injection order number" for sequence position. Model the correction factor as a function of these parameters (e.g.,
y_k = f_k(p, t)) [48].
Corrected Data is Unstable or Over-Fit
Problem: After applying a drift correction model, the data shows high variability or the model appears to have over-fitted the QC sample data.
Solutions:
- Optimize Model Selection: Evaluate different models. Random Forest has been shown to provide stable and reliable correction for long-term, highly variable data, whereas SVR can sometimes over-fit and over-correct [48].
- Use a Merit Function for Optimization: When using polynomial corrections, select the polynomial order (
n) by minimizing a merit function (e.g., the range of corrected values) rather than relying solely on least-squares fit, especially since the statistical distribution of ion signals is often non-Gaussian [47]. - Ensure Adequate QC Frequency: For long runs, ensure QC samples are analyzed at regular intervals to provide sufficient data points for the model to accurately represent the drift without fitting to noise [49].
Frequently Asked Questions (FAQs)
What is the fundamental difference between external and internal standardization?
Answer:
- External Standardization: Calibration standards containing only the analyte are used to create a curve (concentration vs. response). The same volume of unknown sample is injected, and its response is compared to the curve. This method does not correct for losses during sample preparation [46].
- Internal Standardization: A known amount of a different compound (the internal standard) is added to every sample and standard early in preparation. The calibration curve is based on the ratio of analyte response to internal standard response. This ratio compensates for volumetric losses, matrix effects, and some instrument drift [46] [44].
When should I use a polynomial correction model over internal standardization?
Answer: The choice depends on your analysis and what you are trying to correct.
- Internal Standardization is ideal for correcting for sample-specific issues like volumetric losses during preparation or matrix effects that differ between samples [46] [44].
- Polynomial/Drift Correction Models are best for correcting temporal changes in instrument sensitivity that affect all measurements, such as signal drift over a long run. These models are often built using repeated measurements of a quality control (QC) sample [48] [49].
- They can be used together. You can first normalize data using an internal standard to account for sample prep variations, then apply a drift correction model based on QCs to account for instrumental changes over time [49].
How do I handle chemical components in my samples that are not present in the QC sample for drift correction?
Answer: This is a common challenge in untargeted analyses. A proposed strategy categorizes components and applies different corrections [48]:
- Category 1 (Found in QC): Apply the direct correction factor derived from the QC model for that component.
- Category 2 (Not in QC, but near a QC peak): Use the correction factor from the nearest QC component peak in retention time.
- Category 3 (Not in QC, no nearby peak): Apply a general correction factor, such as the average of all correction factors derived from the QC data for that batch.
Detailed Methodology: Validating Over-Curve Sample Dilution with Internal Standards
This protocol validates the procedure for accurately analyzing samples whose concentrations exceed the calibration curve.
- Preparation: Spike blank plasma (or other relevant matrix) at concentrations that are 5 and 10 times the concentration of the upper calibration point (e.g., 80% of the top standard) [46].
- Storage: Freeze these spiked samples to mimic normal sample handling procedures.
- Analysis: Thaw the samples and dilute them with blank matrix (e.g., 5-fold or 10-fold) to bring them within the calibration range.
- Processing: Add the internal standard and process these diluted samples alongside a standard calibration curve.
- Validation: The diluted samples must yield accurate results (e.g., within 15% of the known value) after multiplying by the dilution factor. This validation should be documented in the method report [46].
Detailed Methodology: Establishing a QC-Based Drift Correction Model
This protocol outlines the steps for creating a reliable drift correction model using quality control samples.
- QC Sample Creation: Prepare a pooled QC sample that contains all target analytes. For complex samples like whole blood, this can be a pooled sample from multiple donors [49].
- Experimental Design: Analyze the QC sample repeatedly (e.g., 20 times) throughout the entire analytical sequence, including at the beginning, end, and at regular intervals between study samples. Record the batch number and injection order for each run [48].
- Data Collection: For each analyte in the QC sample, record the peak area (or peak area ratio to IS) for all QC runs.
- Model Building:
- Calculate a "true value" for each analyte, often the median of all its QC measurements (
X_T,k) [48]. - For each QC injection
i, calculate a correction factor:y_i,k = X_i,k / X_T,k[48]. - Using the batch (
p) and injection order (t) as inputs, and the correction factors (y_i,k) as targets, fit a model (e.g., Random Forest, polynomial, SVR).
- Calculate a "true value" for each analyte, often the median of all its QC measurements (
- Application: For each study sample, input its batch and injection order into the model to predict its correction factor (
y). Divide the sample's raw peak area by this factor to obtain the drift-corrected value [48].
| Algorithm | Description | Best Use Case | Performance Notes |
|---|---|---|---|
| Polynomial Fit [47] | Fits a polynomial curve (order n) to the drift in QC data. | Short to medium runs with smooth, monotonic drift. | Simplicity is a advantage; optimal order n must be determined and can vary daily. |
| Spline Interpolation (SC) [48] | Uses segmented polynomials to interpolate between QC data points. | Runs with non-uniform drift where local fitting is better. | Can fluctuate heavily with sparse QC data; performance can be the least stable [48]. |
| Support Vector Regression (SVR) [48] | A machine learning technique that finds a regression function. | Complex, non-linear drift patterns. | Can tend to over-fit and over-correct with highly variable data [48]. |
| Random Forest (RF) [48] | An ensemble machine learning method using multiple decision trees. | Long-term, highly variable data with complex drift. | Provides the most stable and reliable correction for challenging data [48]. |
| LOESS [49] | Locally estimated scatterplot smoothing; a non-parametric method. | Runs where the drift pattern is not easily defined by a simple function. | Widely used and cited in metabolomics studies. |
The Scientist's Toolkit: Research Reagent Solutions
| Item | Function & Application |
|---|---|
| Stable Isotope-Labeled Internal Standards | Chemically identical to the analyte but with a different mass. The gold standard for internal standardization in mass spectrometry, correcting for extraction efficiency, matrix effects, and instrument drift [49]. |
| Quality Control (QC) Sample | A pooled sample containing all target analytes. Analyzed repeatedly throughout a run to monitor and model instrument signal drift over time [48] [49]. |
| Blank Matrix | The sample material (e.g., drug-free whole blood, plasma) without the analytes of interest. Used for preparing calibration standards and for diluting over-curve samples before internal standard addition [46]. |
| Ionization Buffer | A solution containing an excess of an easily ionized element (e.g., Cs, Li). Added to all samples and standards to minimize matrix effects from easily ionized elements in ICP-based techniques [45]. |
| Certified Reference Materials (SRMs) | Standards with known, certified concentrations of analytes. Used to create the initial calibration curve and to verify the accuracy of the analytical method [50]. |
Practical Strategies for Troubleshooting and Optimizing Sensor Stability
Proactive Sensor Selection and Specification Analysis for Low Drift
Frequently Asked Questions (FAQs) on Managing Signal Drift
Q1: What are the primary causes of signal drift in sensors used for undiluted whole blood? Signal drift in whole blood measurements primarily stems from biofouling, where proteins and cells adhere to the sensor surface, and electrode degradation, such as the clogging of reference junctions by silver salts or other blood constituents [51] [52] [53]. Environmental factors like temperature fluctuations and the absorption of carbon dioxide (CO₂), which can acidify the sample, also contribute significantly to drift [51] [54].
Q2: How can sensor design itself help minimize drift in complex media like whole blood? Proactive sensor design is crucial. Selecting sensors with intrinsic size-exclusion filtering capabilities can prevent larger cells and proteins from reaching and fouling the active sensing surface [52]. Furthermore, opting for double-junction electrodes or non-silver reference systems (e.g., Calomel or ROSS) can drastically reduce clogging and contamination from precipitates [51] [53].
Q3: What are the key metrics to check during calibration to diagnose a drifting sensor? The most reliable metrics are the pH slope and offset (often applicable to other biosensors by analogy). A properly functioning sensor should typically have a slope between 92-102% and an offset within ±30 mV. Values outside these ranges indicate aging, contamination, or damage, all of which cause drift [51] [53].
Q4: Are there mathematical methods to compensate for observed sensor drift? Yes, data-driven modeling techniques like autoregressive (AR) models can be used as a forecasting engine to predict and correct for drift. These models use past sensor data to forecast future signal behavior, allowing for software-based compensation and more accurate readings [55] [56].
Q5: What is the best practice for storing sensors to extend their lifespan and prevent drift? Sensors should never be stored dry. For long-term storage, place the electrode in a recommended storage solution and use a probe tip cap to keep the critical components, like the glass membrane, hydrated. Storage in pure water accelerates degradation and drift [51] [53].
Troubleshooting Guide: A Step-by-Step Protocol
Follow this systematic guide to identify and address the root cause of signal drift.
Step 1: Visual Inspection
- Action: Before cleaning, visually inspect the sensor's bulb and junction.
- What to Look For:
- Solution: If physical damage is found, the electrode must be replaced. For air bubbles, firmly flick the sensor downward to dislodge them [53].
Step 2: Calibration and Metric Calculation
- Action: Perform a calibration using fresh, room-temperature buffers. Record the sensor output for each buffer and calculate the slope and offset values [53].
- Interpretation & Solution:
- Slope/Offset Out of Range: This indicates a damaged or aged sensor. Proceed to Step 4 (Cleaning). If metrics do not recover after cleaning, replace the electrode [51] [53].
- Slope/Offset In-Range, But Drift in Use: The issue is likely electromagnetic interference (EMI). Check for nearby motors, heaters, or high-voltage lines and shield the sensor accordingly [51] [53].
Step 3: Evaluate Sample and Environmental Factors
- Action: Characterize your sample and measurement environment.
- What to Check:
- Sample Conductivity/Buffering Capacity: Pure water or low-ionic-strength samples have low buffering capacity and are highly susceptible to drift from ambient CO₂ absorption [51] [53].
- Temperature Stability: Rapid temperature changes cause hydrogen ion activity to shift, leading to drift. Allow the sensor and sample to equilibrate thermally before measurement [51] [54].
- Solution: For low-conductivity samples, allow more time for measurement stabilization. Use temperature stabilization methods and ensure the sensor's Automatic Temperature Compensation (ATC) is functional [51] [54].
Step 4: Sensor Cleaning and Regeneration
- Action: Clean the sensor following manufacturer-recommended procedures for the specific type of debris (proteins, lipids, etc.).
- Solution: After cleaning, recalibrate. If the slope and offset return to acceptable ranges, the drift was caused by surface fouling, and more frequent cleaning is needed. If metrics remain out-of-range, the reference electrolyte is likely contaminated or the sensor is degraded beyond recovery and must be replaced [53].
Table 1: Key Electrode Performance Metrics and Interpretation [51] [53]
| Metric | Acceptable Range | Typical New Sensor Value | Out-of-Range Indication |
|---|---|---|---|
| Slope | 92% - 102% | ~90% | Sensor aging, requires cleaning or replacement |
| Offset | ±30 mV | Varies | Reference system contamination or damage |
| Response Time | < 60 seconds in buffers | 20-30 seconds | Fouled or damaged bulb; requires cleaning/replacement |
Table 2: Comparison of Drift Modeling Approaches for Glucose Sensors
| Modeling Approach | Application Context | Key Advantage | Cited Performance |
|---|---|---|---|
| Autoregressive (AR) Model [55] | CGM Forecasting | Portable between individuals with minimal tuning | 95.8 - 99.7% of predictions in clinically acceptable zones (30-min horizon) |
| AR Model for Drift & Noise [56] | ICU CGM Monitoring | Separately characterizes drift and random error | Simulated MARD of 9.6% vs. clinical MARD of 9.9% |
| Random Forest Regressor [24] | CGM Calibration/Simulation | Integrates multiple physiological variables | Mean Absolute Error (MAE) of 11.01 ± 5.12 mg/dL |
Experimental Protocol: Validating Sensor Stability in Whole Blood
This protocol outlines a method to characterize and validate sensor stability against drift during whole blood measurements.
1. Objective To quantitatively assess the signal stability and drift rate of a biosensor when exposed to undiluted whole blood over a defined period.
2. Materials and Reagents Table 3: Research Reagent Solutions and Essential Materials
| Item | Function / Explanation |
|---|---|
| Biosensor of Interest | The device under test (e.g., optical, electrochemical). |
| Whole Blood Sample | Undiluted, anti-coagulated (e.g., with sodium citrate [52]). |
| Reference Buffer Solutions | For pre- and post-experiment calibration to quantify baseline drift. |
| Stabilizing Storage Solution | e.g., 3.0M KCl solution, for proper sensor storage between tests [53]. |
| Environmental Chamber | To maintain a constant temperature and humidity, eliminating external variables [51]. |
3. Methodology
- Pre-Experiment Calibration: Calibrate the sensor according to the manufacturer's instructions using reference buffers. Record the initial slope and offset values.
- Baseline Measurement: Immerse the sensor in a stable, uncontaminated reference solution and record the signal for 15-30 minutes to establish a baseline and check for inherent electronic drift.
- Whole Blood Exposure: Transfer the sensor to the undiluted whole blood sample.
- Continuous Monitoring: Record the sensor's output signal at a high frequency (e.g., every minute) for the duration of the intended measurement period (e.g., 1-2 hours).
- Post-Experiment Calibration: Gently rinse the sensor and perform a final calibration in the reference buffers. Compare the final slope and offset with the initial values to quantify any permanent sensor degradation.
4. Data Analysis
- Drift Rate Calculation: During the baseline and whole blood exposure phases, calculate the drift rate (e.g., signal change per hour) by performing a linear regression on the stable portions of the signal.
- Statistical Comparison: Use a paired t-test to determine if the difference between pre- and post-calibration parameters (slope/offset) is statistically significant (p < 0.05), indicating permanent sensor damage or fouling.
Workflow for Proactive Sensor Selection
This diagram illustrates the logical decision process for selecting a sensor to minimize drift in whole blood applications.
Designing Effective Temperature and Environmental Control Systems
Troubleshooting Guides
Common Sensor and System Malfunctions
Q1: My sensor signal is steadily decreasing over time when measuring in whole blood. What is causing this drift and how can I correct it?
Problem: Signal drift in undiluted whole blood at 37°C, characterized by a biphasic signal loss: an initial rapid decrease followed by a slower, linear decline [2].
Solutions:
- Implement Dual-Frequency Interrogation: Use square wave voltammetry (SWV) at two different frequencies—one responsive to the target and one non-responsive. The ratio of these signals creates a drift-resistant, ratiometric measurement [57].
- Optimize Electrochemical Parameters: Narrow the potential window to between -0.4 V and -0.2 V versus a Ag/AgCl reference to minimize redox-driven desorption of the self-assembled monolayer (SAM) [2].
- Utilize Drift-Correction Algorithms: Apply methods like Kinetic Differential Measurements (KDM) to mathematically correct for signal decay in real-time [31].
Experimental Protocol for Drift Correction:
- Identify Optimal Frequencies: For your specific E-AB sensor, perform a frequency sweep using SWV to determine a high-response frequency (e.g., 500 Hz) and a low- or non-response frequency (e.g., 40 Hz) [57].
- Calibrate Parameters: Using a training set of sensors, globally fit titration data to determine the constants α (relating the non-responsive current to the baseline), γ (the ratio of maximum to minimum current), and KD (the aptamer's dissociation constant) [57].
- Deploy Ratiometric Measurement: For subsequent sensors, use the formula with the predetermined constants to calculate target concentration without individual calibration:
[Target] = KD * [(i/i_NR) - α] / [γα - (i/i_NR)]whereiis the current at the responsive frequency andi_NRis the current at the non-responsive frequency [57].
Q2: My environmental control system won't maintain a stable temperature. What should I check?
Problem: The system cannot achieve or hold the desired temperature setpoint, leading to fluctuations that can compromise experimental results.
Solutions:
- Verify Sensor Calibration: Ensure temperature sensors are calibrated every 6-12 months. Perform monthly checks against a reference standard; adjust if deviations exceed 0.5°C [58].
- Inspect Heating Elements: Check for proper function of flexible polyimide heating elements. Confirm the power supply delivers the correct voltage (e.g., 24 V) for the required wattage [59].
- Tune the Control Algorithm: Fine-tune the Proportional-Integral-Derivative (PID) algorithm parameters to prevent overshoots and oscillations, ensuring stability within ±0.1°C or better [59].
Experimental Protocol for Temperature System Setup:
- Assemble the Heating Block: Attach customized, adhesive-backed polyimide heating elements to the device (e.g., a microscope objective or microfluidic chamber). Use thermal pads for improved heat transfer [59].
- Install Sensors: Place at least one high-accuracy temperature sensor (e.g., MCP9808) on the surface of the heated block. For redundancy, insert a probe sensor (e.g., DS18B20) into a drilled hole within the block [59].
- Upload and Configure Control Code: Use a microcontroller (e.g., Arduino Nano) to run a PID control algorithm. The code should read the sensor, compare it to the target set by a potentiometer, and modulate power to the heating elements via a MOSFET [59].
Q3: Why is there no airflow from my chamber vents, even though the controller seems powered?
Problem: The ventilation system is unresponsive, potentially leading to overheating of equipment or samples.
Solutions:
- Check Circuit Breakers and Fuses: Locate and reset any tripped push-button breakers on the outside or inside of the control unit. For DC motor systems, inspect and replace blown glass fuses [60].
- Perform a Manual Override Test: Disconnect the motor wires from the controller. Using an 18-20 V cordless tool battery (e.g., Milwaukee or DeWalt), touch the two motor wires to the battery's outer two terminals. If the vent operates, the problem lies in the control circuitry. If not, the motor, actuator, or wiring is faulty [60].
- Inspect for Physical Obstructions: Ensure vents, side curtains, or rack-and-pinion mechanisms move freely and are not jammed or bound [60].
Comparative Performance of Electrochemical Interrogation Methods
The choice of voltammetric method significantly impacts the performance of electrochemical biosensors in complex media like whole blood. The table below summarizes a direct comparison of three common techniques [31].
Table 1: Comparison of Voltammetric Methods for Biosensing in Whole Blood
| Interrogation Method | Signal Gain | Noise in 37°C Whole Blood | Drift Correction Accuracy | Recommended Use |
|---|---|---|---|---|
| Square Wave Voltammetry (SWV) | High (e.g., +63.6% to -45.5%) | Low | High | Preferred for in vivo and complex media |
| Alternating Current Voltammetry (ACV) | Moderate | Exceptionally Low | Low | Not suitable for in vivo deployment |
| Differential Pulse Voltammetry (DPV) | Moderate | Moderate | Low | Not suitable for in vivo deployment |
Frequently Asked Questions (FAQs)
Q1: How often should I calibrate my laboratory temperature monitoring system?
Calibrate your primary temperature monitoring system every 6 to 12 months. For critical applications, perform monthly verification checks against an independent, NIST-traceable reference standard. If the deviation exceeds 0.5°C, calibration is immediately required [58].
Q2: What are the primary mechanisms causing signal loss for sensors in the body?
Research identifies two dominant mechanisms [2]:
- Fouling: Proteins and blood cells adsorb to the sensor surface, forming a barrier that reduces electron transfer rates. This causes an initial, exponential signal drop and is partially reversible with cleaning agents like urea.
- SAM Desorption: The electrochemical potential scan can cause the thiol-gold bonds anchoring the DNA probe to the electrode to break, leading to a slow, linear signal decline over time.
Q3: Can a monitoring system predict equipment failures before they occur?
Yes, advanced systems can detect subtle changes in temperature patterns that often serve as warning signs 24-48 hours before a complete equipment failure. Analyzing historical data and trends allows for proactive maintenance, preventing costly disruptions [58].
Q4: What is the optimal humidity range for a general laboratory environment?
For combined workspace and collection storage, maintain relative humidity (RH) between 30% and 60%. This range minimizes the risk of electrostatic discharge (at low RH) and condensation, corrosion, and mold growth (at high RH) [61] [62].
Essential Research Reagent Solutions
The following reagents and materials are fundamental for developing and deploying stable electrochemical biosensors and environmental control systems.
Table 2: Key Research Reagents and Materials
| Item | Function/Application | Specifications/Notes |
|---|---|---|
| Methylene Blue (MB) | Redox reporter for E-AB sensors | Its mid-range formal potential (E⁰ ≈ -0.25 V) is within the stable window of thiol-on-gold SAMs, minimizing destructive desorption [2]. |
| Alkane-Thiol SAM | Creates a stable, organized monolayer on gold electrodes | Prevents non-specific adsorption and fouling. Stability is highly dependent on the applied potential window [2]. |
| 2'O-Methyl RNA Aptamers | Enzyme-resistant recognition element | Replaces DNA aptamers to reduce signal loss from nuclease degradation in biological fluids [2]. |
| Polyimide Heating Elements | Flexible, thin-film heaters for custom temperature control | Can be customized in shape and power rating (e.g., 40W at 24V). Include adhesive backing for easy installation [59]. |
| High-Accuracy Temperature Sensors (e.g., MCP9808) | Precise temperature monitoring for feedback control | Offers accuracy up to ±0.1°C, essential for maintaining stable thermal conditions [59] [58]. |
Signaling Pathways and Workflow Diagrams
Diagram: Mechanism of Sensor Signal Drift and Correction
Diagram: Workflow for Implementing a Custom Temperature Control System
Protocols for Regular In-Situ Calibration and Sensor Re-conditioning
Troubleshooting Guides and FAQs
Frequently Asked Questions
Q1: What are the primary causes of signal drift in electrochemical sensors used in undiluted whole blood?
Research indicates that signal drift in electrochemical aptamer-based (EAB) sensors in whole blood is biphasic, involving two primary mechanisms [2]:
- Exponential Drift Phase (Initial ~1.5 hours): This rapid initial signal loss is predominantly caused by fouling from blood components like cells and proteins adsorbing to the sensor surface. Fouling reduces the electron transfer rate by physically impeding the redox reporter from reaching the electrode surface [2].
- Linear Drift Phase (Long-term): This gradual, long-term signal decrease is primarily due to electrochemically driven desorption of the self-assembled monolayer (SAM) from the gold electrode. The stability of the gold-thiol bond is highly dependent on the applied electrochemical potential window [2].
Q2: How does temperature affect sensor calibration, and what is the best practice?
Matching calibration temperature to measurement temperature is critical. Studies show that calibration curves for EAB sensors differ significantly between room temperature and body temperature (37°C) [7]. These differences can lead to substantial underestimation or overestimation of target concentrations. For example, a frequency that acts as a "signal-on" at room temperature can become a "signal-off" frequency at body temperature [7]. Best Practice: Always perform calibration in freshly collected whole blood at 37°C to ensure accurate quantification for in-vivo or body-temperature measurements [7].
Q3: Can I use commercially sourced blood for calibration instead of freshly collected blood?
While convenient, commercially sourced blood can lead to quantification errors. Research comparing calibration in freshly collected rat blood versus commercially sourced bovine blood showed that the latter yielded lower signal gain, which would result in overestimated target concentrations [7]. Blood age and processing methods are likely contributing factors. For the highest accuracy, calibrate using the freshest blood possible [7].
Troubleshooting Common Issues
Problem: Rapid, substantial signal loss immediately after sensor deployment.
- Potential Cause: Biofouling from blood components.
- Solutions:
- Sensor Re-conditioning: Wash the sensor surface with a solubilizing agent like concentrated urea, which has been shown to recover at least 80% of the initial signal by removing fouled material without disrupting sensor function [2].
- Proactive Design: Consider using sensor architectures or coatings that are resistant to protein adsorption.
Problem: Slow, continuous signal decline over an extended period.
- Potential Cause: Electrochemically driven desorption of the self-assembled monolayer (SAM).
- Solutions:
- Optimize Electrochemical Interrogation: Narrow the applied potential window to avoid the thresholds for reductive (below -0.5 V) and oxidative (above ~1 V) desorption. One study found that limiting the window to -0.4 V to -0.2 V resulted in only 5% signal loss after 1500 scans [2].
- Material Improvement: Investigate more robust SAM chemistries or anchoring groups that are less susceptible to electrochemical desorption.
Problem: Inaccurate concentration readings despite a stable signal.
- Potential Cause: Calibration performed under mismatched conditions (e.g., different temperature, blood age, or media type).
- Solutions:
- Re-calibrate In-Situ: Re-calibrate the sensor using a standard solution with a known target concentration under the actual measurement conditions (in-situ) [63] [7].
- Validate Media: Ensure the calibration media (e.g., whole blood) is as fresh as possible and matches the species and temperature of the experimental measurements [7].
Experimental Protocols
Protocol 1: In-situ Calibration of a Sensor in Whole Blood
This protocol is adapted from studies on EAB sensors to achieve high accuracy in complex biological media [7].
1. Objective: To generate a calibration curve for translating sensor signal into target concentration in fresh, body-temperature whole blood.
2. Materials:
- Functionalized sensor.
- Freshly collected whole blood (recommended: <1 day old).
- Temperature-controlled chamber or water bath set to 37°C.
- Stock solution of the target analyte (e.g., vancomycin).
- Electrochemical workstation.
3. Procedure:
- Step 1: Place the sensor in fresh, undiluted whole blood at 37°C. Allow the signal to stabilize.
- Step 2: Interrogate the sensor using square-wave voltammetry, collecting voltammograms at multiple frequencies (e.g., a "signal-on" and "signal-off" frequency).
- Step 3: Sequentially spike the blood with known concentrations of the target analyte to cover the desired calibration range (e.g., from zero to saturating concentrations).
- Step 4: At each concentration, record the stable sensor output. Calculate the Kinetic Differential Measurement (KDM) value for each concentration as follows:
KDM = (Normalized Signal_off - Normalized Signal_on) / ((Normalized Signal_off + Normalized Signal_on)/2)[7]. - Step 5: Fit the KDM values vs. concentration data to a Hill-Langmuir isotherm to generate the calibration curve using the equation:
KDM = KDM_min + ( (KDM_max - KDM_min) * [Target]^nH ) / ( [Target]^nH + K_1/2^nH )[7].KDM_min: KDM value with no target.KDM_max: KDM value at saturating target.K_1/2: Binding curve midpoint.n_H: Hill coefficient (cooperativity).
4. Data Analysis:
- Use the fitted parameters (
KDM_min,KDM_max,K_1/2,n_H) to convert subsequent experimental KDM readings into estimated target concentrations using the inverted form of the equation [7].
Protocol 2: Quantifying and Remediating Sensor Fouling
1. Objective: To assess the contribution of fouling to signal loss and recover the signal via a re-conditioning wash.
2. Materials:
- Sensor deployed in blood or other fouling media.
- Concentrated urea solution (e.g., 6-8 M) or another suitable denaturant/detergent [2].
- Buffer solution (e.g., phosphate-buffered saline, PBS).
3. Procedure:
- Step 1: Deploy the sensor in undiluted whole blood while monitoring the signal. Observe the characteristic exponential signal decay.
- Step 2: After a set time (e.g., 2.5 hours), gently rinse the sensor with a buffer to remove bulk blood components.
- Step 3: Incubate the sensor in the concentrated urea solution for a predetermined time.
- Step 4: Thoroughly rinse the sensor with buffer to remove the urea.
- Step 5: Re-interrogate the sensor in a clean, target-free buffer (e.g., PBS) and measure the signal recovery.
4. Data Analysis:
- Calculate the percentage of signal recovery:
(Signal_post-wash / Signal_initial) * 100%. - A recovery of ~80% or higher suggests fouling was a major contributor to the signal loss, and the wash was effective [2].
Data Presentation
The table below summarizes key characteristics of the two primary drift mechanisms identified in EAB sensor studies [2].
| Drift Mechanism | Primary Cause | Time Scale | Impact on Signal | Effective Mitigation Strategies |
|---|---|---|---|---|
| Fouling | Adsorption of blood cells/proteins | Initial, exponential (~1.5 hours) | Rapid decrease, reduces electron transfer rate | Urea wash, use of enzyme-resistant backbones [2] |
| SAM Desorption | Electrochemical potential stress | Long-term, linear | Slow, continuous decrease | Narrowing potential window, improved SAM chemistry [2] |
Research Reagent Solutions
The following table details key reagents and materials used in the featured experiments for sensor fabrication, calibration, and re-conditioning.
| Item | Function / Explanation |
|---|---|
| Self-Assembled Monolayer (SAM) | A layer of alkane-thiolate molecules that forms on the gold electrode, providing a stable base for aptamer attachment and reducing non-specific binding [2]. |
| Enzyme-resistant Oligonucleotides | Non-natural oligonucleotide backbones (e.g., 2'O-methyl RNA) used in sensor construction to mitigate signal loss from enzymatic degradation by nucleases in blood [2]. |
| Concentrated Urea Solution | A denaturant used in sensor re-conditioning to solubilize and remove fouling proteins and cells from the sensor surface, recovering signal [2]. |
| Certified Reference Materials | Calibration standards (e.g., certified gas mixtures, standard solutions) with known, traceable values. Essential for accurate sensor calibration [64]. |
| Fresh Whole Blood | The preferred calibration medium for in-vivo sensor applications. Using blood that is freshly collected and at body temperature (37°C) ensures calibration parameters match measurement conditions [7]. |
Workflow and Signaling Diagrams
Signal Drift Mechanisms and Mitigation Workflow
In-situ Calibration and Data Processing Workflow
Frequently Asked Questions (FAQs)
Q1: What are the primary causes of signal drift in electrochemical biosensors used in whole blood? Research indicates that signal drift in electrochemical aptamer-based (EAB) sensors deployed in undiluted whole blood is primarily caused by two mechanisms operating on different timescales [2].
- Short-Term (Exponential) Drift: This initial, rapid signal decrease is predominantly caused by biofouling, where blood components like proteins and cells adsorb to the sensor surface. This fouling layer physically impeders the ability of the redox reporter to reach the electrode surface, slowing electron transfer rates [2].
- Long-Term (Linear) Drift: This slower, persistent signal loss is attributed to electrochemically driven desorption of the self-assembled monolayer (SAM) from the gold electrode surface. The stability of the gold-thiol bond is highly dependent on the electrochemical potential window applied during sensor interrogation [2].
Q2: How can I experimentally determine which drift mechanism is affecting my sensor? A simple buffer vs. blood test can isolate the mechanisms [2].
- Protocol:
- Deploy identical sensors in both undiluted whole blood and a control buffer (e.g., phosphate-buffered saline) at 37°C.
- Continuously interrogate the sensors using square-wave voltammetry.
- Observation: If the rapid exponential drift phase is absent in the buffer but present in blood, biofouling is a significant contributor. If a slow, linear drift persists in both environments, electrochemical desorption is likely occurring.
Q3: What software-based methods can compensate for long-term sensor drift? Advanced machine learning and signal processing techniques are highly effective for drift compensation [65] [66].
- LSTM Networks: Long Short-Term Memory networks are ideal for modeling drift where current sensor output depends on historical conditions. They excel at capturing long-term temporal dependencies in sensor data, making them suitable for complex, non-linear drift [65].
- Incremental Domain-Adversarial Networks (IDAN): This approach combines domain-adversarial training with an incremental adaptation mechanism. It helps a predictive model maintain accuracy by continuously adapting to the slowly changing data distribution caused by sensor drift, making it robust for long-term deployments [66].
- Iterative Random Forest: This algorithm can be used for real-time error correction by leveraging data from multiple sensor channels to identify and rectify abnormal or drifting sensor responses [66].
Q4: Can modifying the sensor's electrochemical protocol reduce drift? Yes, optimizing the interrogation protocol is a direct method to mitigate the electrochemical desorption (linear) drift [2].
- Narrowing the Potential Window: Research has shown that confining the square-wave voltammetry potential window to a range where the SAM is stable (e.g., -0.4 V to -0.2 V) can drastically reduce the rate of signal degradation. One study observed only a 5% signal loss after 1500 scans using a narrow window, compared to significant losses with wider windows [2].
Troubleshooting Guides
Problem: Rapid Signal Loss During Initial In-Vivo/Whole Blood Deployment
Symptoms: A sharp, exponential decay in signal amplitude occurring within the first few hours of sensor operation in whole blood.
Likely Cause: Biofouling from blood proteins and cells.
Recommended Solutions:
- Post-Hoc Chemical Wash: After data collection, the raw signal can be corrected. Experimentally, washing the sensor with a concentrated urea solution has been shown to recover at least 80% of the initial signal by solubilizing the fouling layer [2].
- Use of Enzyme-Resistant Oligonucleotides: Replace DNA strands with enzyme-resistant analogs (e.g., 2'O-methyl RNA). Note that while this protects against enzymatic degradation, it does not prevent fouling, so it should be used in conjunction with other anti-fouling strategies [2].
- Signal Normalization: Implement real-time signal normalization techniques, such as normalizing the signal of interest to a standardizing signal generated at a second square-wave frequency [2].
Problem: Slow, Persistent Signal Decrease Over Extended Operation
Symptoms: A steady, linear decline in signal that continues over many hours or days, even in controlled buffer environments.
Likely Cause: Electrochemically driven desorption of the self-assembled monolayer (SAM).
Recommended Solutions:
- Optimize Voltammetric Parameters: Reconfigure your potentiostat settings to use the narrowest possible electrochemical potential window that still captures the full redox peak of your reporter. Avoid potentials that induce reductive (below -0.5 V) or oxidative (above ~1.0 V) desorption of thiol-on-gold monolayers [2].
- Implement AI-Driven Drift Forecasting: Deploy a software model, such as an LSTM network, to learn the sensor's specific drift characteristics. The model can then forecast the drift trajectory and compensate for it in the final output [65]. This turns calibration into a continuous, software-based process.
Problem: Inconsistent Performance Across a Sensor Array
Symptoms: Different sensors in an array show varying degrees of drift, leading to inconsistent and unreliable data.
Likely Cause: Sensor-to-sensor variability and individual drift patterns, common in large-scale deployments [66].
Recommended Solutions:
- Collaborative Calibration: For dense sensor arrays, use algorithms that allow sensors to cross-check each other. Outliers can be identified and corrected relative to the median behavior of neighboring nodes [67].
- Federated Learning: Implement a federated learning framework where a global drift model is updated using data from all sensors, but without transmitting raw data from individual nodes, thus preserving bandwidth and privacy [67].
- Iterative Random Forest Correction: Apply a real-time error correction algorithm that uses collective data from all sensor channels to identify and rectify abnormal responses from any single sensor [66].
Experimental Protocols & Data
Detailed Protocol: Isolating Drift Mechanisms
This protocol is adapted from foundational research on EAB sensors [2].
Objective: To distinguish between biofouling and electrochemical desorption as sources of signal drift.
Materials:
- Electrochemical biosensors (e.g., EAB sensors with MB-redox reporter).
- Potentiostat.
- Temperature-controlled chamber (37°C).
- Fresh, undiluted whole blood.
- Phosphate Buffered Saline (PBS), pH 7.4.
- Data acquisition software.
Method:
- Sensor Preparation: Prepare and calibrate multiple sensors following standard fabrication procedures.
- Experimental Setup:
- Group A: Immerse sensors in undiluted whole blood at 37°C.
- Group B (Control): Immerse sensors in PBS at 37°C.
- Data Acquisition: Interrogate all sensors continuously using Square-Wave Voltammetry (SWV) for a period of 10+ hours. Use a consistent potential window and frequency.
- Data Analysis:
- Plot signal amplitude versus time for both groups.
- Fit the resulting curves to identify exponential and linear decay components.
- Compare the drift profiles of Group A and Group B.
Expected Outcomes:
- Group A (Blood): Will typically show a biphasic drift: a rapid exponential decay (first ~1.5 hours) followed by a slow linear decay.
- Group B (PBS): Will typically show only the slow linear decay component.
Table 1: Quantitative Summary of Key Drift Mechanisms
| Drift Mechanism | Primary Cause | Drift Profile | Effective Compensation Strategies |
|---|---|---|---|
| Biofouling | Adsorption of blood proteins/cells [2] | Exponential decay (short-term) | Chemical washing (e.g., Urea) [2], Real-time normalization [2] |
| SAM Desorption | Electrochemical breakdown of gold-thiol bond [2] | Linear decay (long-term) | Narrowing potential window [2], LSTM forecasting [65] |
| Component Aging | Sensor aging & material degradation [66] | Slow, continuous drift | Incremental Domain-Adversarial Networks (IDAN) [66], Collaborative calibration [67] |
Quantitative Data on Compensation Efficacy
Table 2: Performance of Advanced Drift Compensation Algorithms
| Compensation Method | Key Principle | Reported Performance / Benefit |
|---|---|---|
| LSTM Network | Uses memory cells to model long-term temporal dependencies in sensor data [65]. | Effectively models complex relationship between external temperature and internal sensor drift in NMR sensors [65]. |
| Incremental Domain-Adversarial Network (IDAN) | Continuously adapts to changing data distributions via domain-adversarial learning [66]. | Maintains high classification accuracy on gas sensor data over 10 batches spanning 36 months [66]. |
| Iterative Random Forest | Leverages multi-sensor data to identify and correct abnormal responses in real-time [66]. | Enhances data integrity and operational efficiency in sensor arrays [66]. |
| Zero-Touch Calibration | AI-driven detection and correction using sensor cross-referencing and digital twins [67]. | Reduces manual maintenance costs by 70-90%, extends sensor lifespan by 60% [67]. |
The Scientist's Toolkit: Research Reagent Solutions
Table 3: Essential Materials and Reagents for Drift Compensation Research
| Item | Function in Research | Example Application / Note |
|---|---|---|
| Electrochemical Aptamer-Based (EAB) Sensor | The core platform for real-time, in-vivo biomarker monitoring. Comprises a redox-labeled DNA aptamer on a gold electrode [2]. | Used as a model system to study drift mechanisms in biologically relevant environments [2]. |
| 2'O-Methyl RNA Oligonucleotides | Enzyme-resistant nucleic acid analogs used to construct more stable biosensors [2]. | Replaces DNA in sensor construction to isolate the impact of enzymatic degradation vs. biofouling [2]. |
| Urea Solution (Concentrated) | A denaturant used to solubilize proteins. | Used in post-experiment washes to recover signal by removing fouling layers from the sensor surface [2]. |
| Long Short-Term Memory (LSTM) Network | A type of recurrent neural network (RNN) used for time-series prediction and modeling. | Software tool for building predictive models of sensor drift based on historical and contextual data [65]. |
| Digital Twin Framework | A virtual replica of a physical sensor system that simulates its behavior under various conditions [67]. | Used as a benchmark in AI-driven systems for detecting deviations between simulated and real-world data, enabling predictive drift correction [67]. |
Diagnostic & Experimental Workflow Diagrams
Diagram 1: Diagnosing Primary Drift Mechanisms
Diagram 2: AI-Enabled Drift Compensation Workflow
Mitigating Fouling with Surface Passivation and Non-Fouling Coatings (e.g., POEGMA)
Troubleshooting Guides
Guide 1: Addressing Signal Drift in Electrochemical Sensors in Whole Blood
Problem: Electrochemical biosensors experience significant signal drift when deployed in undiluted whole blood at 37°C, characterized by a rapid initial signal decrease followed by a slower, linear decline. This compromises measurement accuracy and duration [2].
Solution: A dual-phase approach targeting the two primary mechanisms of drift: surface fouling and electrochemical desorption.
Phase 1: Mitigate Rapid Exponential Drift (Caused by Biofouling)
- Action: Apply a non-fouling coating to the sensor surface.
- Details: Implement a coating such as poly(oligo(ethylene glycol methacrylate)) (POEGMA) or a zwitterionic polymer. These coatings create a physical and energetic barrier that reduces the adsorption of proteins, cells, and other blood components [68] [69] [70]. The effectiveness can depend on the steric accessibility of the sensor's components, such as the position of a redox reporter along a DNA strand [2].
Phase 2: Mitigate Slow Linear Drift (Caused by Electrochemical Desorption)
- Action: Optimize the electrochemical interrogation parameters.
- Details: Confine the applied potential window to a range that minimizes stress on the self-assembled monolayer (SAM). Data indicates that using a narrow window, such as -0.4 V to -0.2 V, can reduce signal loss to only 5% after 1500 scans, compared to wider windows that accelerate SAM desorption [2].
Verification: After implementing these changes, test sensor stability in vitro in whole blood at 37°C. A successful mitigation strategy will show a marked reduction in both the initial exponential signal drop and the longer-term linear decline.
Guide 2: Resolving Poor Performance of Non-Fouling Coatings
Problem: An applied non-fouling coating is underperforming, showing high levels of non-specific protein adsorption or cell adhesion.
Solution: Systematically check the coating's integrity, grafting density, and stability.
- Step 1: Verify Surface Cleaning. Any residual contaminants on the substrate will prevent uniform coating adhesion and create defects for fouling. Ensure a rigorous cleaning protocol (e.g., alkaline cleaning, plasma treatment) is in place before coating application [71].
- Step 2: Optimize Coating Grafting Method.
- Physical Adsorption: Simple but may lack stability for long-term deployments [72].
- Covalent Grafting: Provides a stable, permanent bond. Ensure the reaction between the coating's functional groups (e.g., NHS-ester) and the surface reactive groups (e.g., amine, thiol) is efficient [72].
- Surface-Initiated Polymerization: Allows precise control over chain length and density, which is critical for forming an effective steric repulsion barrier [69] [72].
- Step 3: Challenge Coating Stability. Test the coated sensor in PBS at 37°C under flow conditions if applicable. Significant signal change or coating delamination indicates poor stability. A stable coating like POEGMA should show excellent resistance to degradation during storage and cell culture [69].
Frequently Asked Questions (FAQs)
FAQ 1: What are the primary mechanisms causing signal drift of sensors in blood?
Research has identified two dominant mechanisms operating on different timescales:
- Exponential Drift (Short-term): Primarily caused by biofouling. Proteins and cells from the blood adsorb to the sensor surface, forming a layer that physically blocks diffusion and alters the electron transfer kinetics of the sensor [2].
- Linear Drift (Long-term): Primarily caused by electrochemically driven desorption of the self-assembled monolayer (SAM) that anchors the sensor to the electrode. The applied potentials during measurement can break the gold-thiol bonds, leading to a gradual loss of sensor elements [2].
FAQ 2: How do non-fouling coatings like POEGMA and PEG work?
These hydrophilic polymers work through several combined mechanisms:
- Formation of a Hydration Layer: Their flexible chains form strong hydrogen bonds with water molecules, creating a dense, stable hydration layer at the surface [72].
- Steric Repulsion: The hydrated polymer chains stretch into the solution, creating a physical barrier. When a protein or cell approaches, compressing these chains is entropically unfavorable, resulting in a repulsive force [69] [72].
- Low Surface Energy: They present a surface that is thermodynamically unfavorable for proteins to adhere to, as described by the Baier curve [70].
FAQ 3: What is the difference between passivation and a non-fouling coating?
These terms are related but distinct:
- Passivation: In a broader engineering context, this refers to making a surface "passive" or less reactive. For metals, it often involves creating a thin, inert oxide layer (e.g., on stainless steel or titanium) to prevent corrosion [73] [71]. In biosensors, it can refer to creating a base layer (like a SAM) that prevents non-specific binding.
- Non-Fouling Coating: This is a specific type of surface modification designed explicitly to prevent the adhesion of biological material (proteins, cells, bacteria). POEGMA and PEG coatings are examples of non-fouling coatings [68] [69] [70].
FAQ 4: Can I make my sensor completely immune to fouling and drift?
While complete immunity is likely unattainable for long-term in vivo deployments, significant improvements are possible. A multi-pronged strategy is most effective: combining a high-quality non-fouling coating, optimized electrochemical parameters, and robust drift-correction algorithms in data processing can extend sensor functional lifetime from hours to many days [2].
Data Presentation
Table 1: Impact of Potential Window on Sensor Signal Loss
Data derived from experiments in PBS at 37°C, showing the effect of electrochemical parameters on linear signal drift [2].
| Fixed Potential (V) | Scanned Potential Window (V) | Signal Loss after 1500 Scans |
|---|---|---|
| Negative side at -0.4 V | -0.4 to +0.2 V | High |
| Negative side at -0.4 V | -0.4 to 0.0 V | Low |
| Positive side at -0.2 V | -0.6 to -0.2 V | High |
| Positive side at -0.2 V | -0.4 to -0.2 V | Low |
| N/A | -0.4 to -0.2 V | ~5% |
Table 2: Comparison of Common Anti-Fouling Coating Strategies
A summary of materials and their mechanisms for mitigating the exponential drift phase caused by biofouling [68] [69] [70].
| Coating Material | Mechanism | Key Advantages | Potential Limitations |
|---|---|---|---|
| POEGMA Brushes | Steric repulsion, high hydration | Extreme protein resistance, patternable, high stability [69] | Requires controlled polymerization |
| PEG-based Coatings | Steric repulsion, hydration layer | Biocompatible, widely studied, multiple grafting options [72] | Can oxidize in vivo over time |
| Zwitterionic Polymers | Electrostatic interaction with water | Strong hydration, high stability | Sensitive to pH and ionic strength |
| Superhydrophobic Coatings | Low surface energy, air barrier | Prevents wetting, useful for marine applications | Mechanical fragility, not ideal for blood |
Experimental Protocols
Protocol 1: Fabrication of POEGMA Brush Coatings for Sensor Passivation
This protocol describes creating a stable, protein-resistant poly(oligo(ethylene glycol methacrylate)) brush on a gold substrate for electrochemical sensors [69].
Materials:
- Gold-coated substrates (e.g., 15 nm gold on glass with chromium adhesion layer)
- ω-Mercaptoundecylbromoisobutyrate (initiator)
- Oligo(ethylene glycol methyl ether methacrylate) (OEGMA) monomer
- CuCl, CuBr2, 2,2'-dipyridyl (bpy) (for catalyst system)
- Deionized water, ethanol
Procedure:
- Substrate Preparation: Clean gold substrates thoroughly with plasma treatment (e.g., air plasma).
- Initiator Attachment: Incubate the gold substrates in an ethanolic solution of ω-mercaptoundecylbromoisobutyrate. The thiol group will form a SAM on the gold, presenting bromoisobutyrate initiator groups.
- Surface-Initiated Polymerization:
- Prepare the polymerization solution by dissolving OEGMA monomer, CuCl, CuBr2, and bpy in a mixture of water and ethanol under an inert atmosphere.
- Place the initiator-functionalized substrates into the solution to allow the polymer brushes to grow from the surface.
- Control the brush thickness by varying the reaction time.
- Rinsing and Storage: After polymerization, remove the substrates and rinse extensively with ethanol and deionized water to remove physisorbed material. The coated substrates can be stored in a clean, dry environment.
Validation: Use ellipsometry to measure brush thickness. Confirm protein resistance via surface plasmon resonance (SPR) by flowing bovine serum albumin (BSA) or blood plasma over the surface and measuring minimal adsorption [69].
Protocol 2: Assessing Drift Mechanisms via Potential Window Optimization
This experiment directly probes the contribution of electrochemical desorption to signal drift [2].
Materials:
- Fabricated EAB sensor or a simple SAM-coated proxy electrode.
- Phosphate buffered saline (PBS), pH 7.4.
- Potentiostat.
Procedure:
- Baseline Measurement: Immerse the sensor in PBS at 37°C. Acquire square-wave voltammetry scans using a standard, wide potential window (e.g., -0.5 V to +0.2 V) for 30 minutes to establish a baseline signal and drift rate.
- Systematic Variation: Test a series of progressively narrower potential windows. For example:
- Window 1: -0.4 V to +0.1 V
- Window 2: -0.4 V to -0.1 V
- Window 3: -0.4 V to -0.2 V
- Ensure the chosen window still encompasses the redox potential of your reporter (e.g., Methylene Blue, E₀ ~ -0.25 V).
- Data Analysis: For each potential window, record the sensor signal over time (e.g., 2-4 hours). Plot the signal decay and calculate the rate of signal loss (% per hour or per scan).
Expected Outcome: The rate of linear signal loss will significantly decrease as the potential window is narrowed, particularly when avoiding strongly oxidative (above ~0.0 V) and reductive (below -0.4 V) potentials [2].
Diagrams
Diagram 1: Mechanisms of Sensor Signal Drift and Mitigation
The Scientist's Toolkit
Research Reagent Solutions
| Item | Function | Application Note |
|---|---|---|
| OEGMA Monomer | The building block for creating POEGMA polymer brush coatings via surface-initiated ATRP [69]. | Purity is critical for achieving high-quality, defect-free brushes. |
| ω-Mercaptoundecylbromoisobutyrate | A thiol-containing molecule that acts as the initiator for polymer growth on gold surfaces [69]. | Forms a self-assembled monolayer on gold, presenting the ATRP initiator group. |
| Citric Acid Passivation Solution | A safer, biodegradable alternative to nitric acid for passivating stainless steel components in fluidic systems [71]. | Effective for removing free iron and enhancing the native chromium oxide layer. |
| Methylene Blue Redox Reporter | A commonly used redox reporter in EAB sensors. Its mid-range potential is compatible with stable SAMs [2]. | Its stability is superior to many reporters because its redox potential falls within the stable window of alkane-thiol-on-gold monolayers. |
| Urea Solution (Concentrated) | A chemical denaturant used to test for reversible fouling. Can recover signal by solubilizing and removing adsorbed biomolecules [2]. | Useful for diagnostic experiments to confirm fouling as a primary drift mechanism. |
Systematic Burn-in Procedures and Pre-deployment Stabilization
Technical Support & FAQs: Managing Sensor Drift in Whole Blood
Q: What are the primary causes of signal drift for sensors in undiluted whole blood?
A: Research indicates that signal drift in complex biological fluids like undiluted whole blood is predominantly caused by two main mechanisms [2]:
- Fouling: The non-specific adsorption of blood components (such as proteins and cells) onto the sensor surface, which can block the sensing interface and reduce signal. This often causes an initial, rapid, exponential signal loss [2] [74].
- Electrochemical Degradation: This includes the electrochemically driven desorption of the self-assembled monolayer (SAM) from the electrode surface and potential irreversible reactions of the redox reporter. This typically results in a slower, linear signal decrease over time [2].
Q: What pre-deployment stabilization procedures can reduce drift?
A: A combination of proper storage, surface passivation, and calibration is crucial for sensor stabilization [2] [75] [18].
- Proper Storage: Sensors should be stored wet, away from light (especially UV and fluorescent light), and with protective caps to prevent the sensing foil from drying out, which can cause lower readings [75].
- Anti-fouling SAMs: Using self-assembled monolayers with anti-fouling properties, such as certain oligoethylene glycol (OEG) molecules, can help resist the non-specific adsorption of blood proteins [18].
- Controlled Potential Windowing: Applying a narrow electrochemical potential window during operation can minimize redox-driven SAM desorption. For example, limiting scans to between -0.4 V and -0.2 V has been shown to significantly improve stability [2].
- Pre-deployment Calibration: A two-point calibration (e.g., at 0% and 100% oxygen saturation for optodes) before deployment is essential to rescale the sensor and account for reduced sensitivity. This is best performed at a stable temperature [75].
Q: What specific blood components are responsible for fouling-induced drift?
A: Recent studies have identified that the drift in electrochemical aptamer-based (EAB) sensors in vitro is primarily caused by blood proteins rather than blood cells. Furthermore, the proteins responsible have a molecular weight of approximately >100 kDa. This understanding allows for targeted mitigation strategies, such as using molecular-weight-selective films to block these larger proteins [74].
Q: How can I design an effective systematic burn-in procedure?
A: A systematic burn-in involves characterizing sensor performance under conditions that mimic the final deployment environment.
- Environment: Perform the burn-in in undiluted whole blood at 37°C to replicate in vivo conditions [2].
- Interrogation: Electrochemically interrogate the sensor using the intended potential window and frequency for an extended period (e.g., 10+ hours) to observe both the initial exponential and subsequent linear drift phases [2].
- Analysis: Monitor the signal loss profile and electron transfer rate. A decrease in the electron transfer rate indicates fouling is occurring. This data helps establish a baseline drift profile for post-processing correction algorithms [2].
Experimental Protocols for Drift Management
Protocol 1: Two-Point Calibration for Sensor Rescaling
This procedure is used to correct for a sensor's reducing sensitivity over time and should be performed pre- and post-deployment [75].
- Preparation: Ensure the sensor foil is fully hydrated. Prepare two solutions:
- 100% Saturation Solution: Use an aquarium pump with a porous stone to bubble air through a water volume, rapidly equilibrating it. Homogenize with a magnetic stirrer.
- 0% Saturation Solution: Add ~20 g of sodium sulfite to approximately 1 L of water. Excess crystals are acceptable as they maintain the anoxic environment.
- 100% Point Measurement:
- Immerse the sensor in the 100% solution.
- Connect to and power on the sensor.
- Record the local air pressure and update the instrument if needed.
- Begin measurements and allow the temperature and oxygen readings to stabilize. Use these stable readings as the 100% data point.
- 0% Point Measurement:
- Move the sensor to the 0% solution.
- Wait for the readings to stabilize.
- Use these stable values as the 0% data point.
- Calibration: Input the stabilized values from the two solutions into the sensor's calibration routine to rescale its output.
Protocol 2: In-Vitro Drift Characterization in Whole Blood
This protocol helps quantify the drift profile of electrochemical sensors before in-vivo use [2].
- Setup: Place the sensor in undiluted whole blood maintained at 37°C.
- Electrochemical Interrogation: Run continuous square-wave voltammetry scans over several hours using the intended operational parameters.
- Data Collection: Log the signal output (e.g., peak current) over time.
- Analysis: Plot the signal loss over time to identify and separate the initial exponential decay phase (dominated by fouling) from the subsequent linear decay phase (dominated by electrochemical degradation).
Research Reagent Solutions
The following table details key materials used to manage drift in whole blood measurements.
| Reagent/Material | Function/Benefit | Key Consideration |
|---|---|---|
| Oligoethylene Glycol (OEG) SAMs [18] | Creates an anti-fouling surface that resists protein adsorption via water-mediated repulsion. | Can result in slower electron transfer rates compared to other SAMs like MCH. |
| 6-Mercapto-1-hexanol (MCH) SAM [18] | A common, well-understood SAM that provides a baseline for performance comparison. | Prone to fouling and signal drift in biological fluids. |
| Sodium Sulfite [75] | A low-toxicity, inexpensive chemical used to create a 0% oxygen environment for calibration. | Must ensure all residue is rinsed off before proceeding to 100% calibration to avoid contamination. |
| Methylene Blue (MB) [2] | A redox reporter whose operational potentials fall within the stable window of thiol-on-gold monolayers, enhancing stability. | Stability is highly dependent on the applied potential window. |
Signal Drift Mechanisms and Stabilization Workflow
The diagram below illustrates the primary causes of sensor drift in whole blood and the corresponding stabilization strategies.
Systematic Burn-in and Pre-deployment Logic
This flowchart outlines the logical sequence for a systematic sensor preparation protocol prior to deployment in whole blood.
Validation Frameworks and Comparative Analysis of Sensing Platforms
Defining Core Validation Metrics
What is the distinction between accuracy, precision, and long-term stability in the context of bioanalytical measurements?
In measurement technology, accuracy is a composite term encompassing both correctness and precision [76]. Correctness refers to how close a measured value is to the true value, while precision indicates the repeatability of a measurement under identical conditions [76]. A precise instrument will display the same value repeatedly, but this value could be consistently wrong. Only when the value is both correct and repeatable is the instrument considered accurate [76].
Long-term stability, however, refers to an instrument's or sensor's ability to maintain its accuracy and precision over an extended period. This is challenged by factors like material ageing, fatigue, and wear [76]. For measurements in complex media like undiluted whole blood, maintaining long-term stability is particularly difficult due to biofouling and sensor degradation, which can cause significant signal drift over time [77] [76].
Table 1: Key Definitions for Validation Benchmarks
| Term | Definition | Relevance to Whole Blood Measurements |
|---|---|---|
| Accuracy | The combination of correctness and precision in a measurement [76]. | Ensures reported concentrations reflect true biological values. |
| Correctness | The closeness of a measured value to the true value [76]. | Critical for correct clinical diagnosis or pharmacological decision-making. |
| Precision | The repeatability of a measurement under identical conditions [76]. | Allows for reliable tracking of small concentration changes over time. |
| Long-Term Stability | The ability to maintain accuracy and precision over time and use [76]. | Determines the feasible duration of continuous monitoring in research or clinical settings. |
Troubleshooting Guides and FAQs
FAQ 1: My sensor shows a consistent downward drift in signal when deployed in undiluted whole blood. What are the primary causes?
A consistent downward drift is frequently indicative of biofouling or progressive sensor degradation. When a sensor is placed in the complex environment of whole blood, proteins and cells can adsorb to the sensor interface, a process known as fouling. This fouling can physically impede molecular binding or electron transfer, leading to a declining signal [77]. This drift can be corrected using advanced data processing techniques, such as the "kinetic differential measurement" (KDM), which uses square wave frequency pairs that drift in concert. Subtracting the normalized signals corrects for this signal loss over time [77].
FAQ 2: How can I determine if my poor results are due to an accuracy problem or a precision problem?
You can diagnose this by looking at the pattern of your results:
- Poor Precision: If repeated measurements of the same sample yield widely scattered values, the issue is precision (repeatability). This suggests problems with random error, which could be related to inconsistent sample handling, unstable instrumentation, or variable reagent quality [76].
- Poor Accuracy (Correctness): If your measurements are consistently repeatable (precise) but all differ from the known or expected value by a similar margin, the issue is correctness. This points to a systematic error, such as a calibration error, incorrect standard, or a matrix effect that consistently biases the signal [76].
FAQ 3: What is the best way to validate analyte stability in whole blood for a pharmacokinetic study?
Stability assessment must cover all relevant conditions encountered in practice [78]. For a PK study, this typically includes:
- Bench-Top Stability: To cover sample processing time.
- Freeze/Thaw Stability: For multiple cycles if samples will be re-analyzed.
- Long-Term Frozen Stability: The storage duration should be at least equal to the maximum storage period for any individual study sample [78]. Stability is confirmed if the deviation of the result for a stored sample from the reference value does not exceed ±15% for chromatographic assays or ±20% for ligand-binding assays [78].
FAQ 4: My positive controls are working, but my experimental samples are failing. What should I check first?
This is a classic sign that the problem lies with the sample itself or its interaction with the assay. Follow a structured troubleshooting approach [79] [80]:
- Verify Sample Integrity: Check for sample degradation. Has the sample been stored correctly (time, temperature, light exposure)? For whole blood, consider stability in the presence of blood cells, which may differ from stability in plasma alone [78].
- Check for Matrix Effects: Does your experimental sample have a different matrix composition (e.g., different hematocrit, lipid content) than your controls? Deviating matrix types can impact analyte stability and assay performance [78].
- Review the Protocol: Carefully compare every step you performed with the experimental sample against the established protocol. Look for inadvertent deviations in volumes, incubation times, or wash steps [81].
Experimental Protocols for Key Validation Experiments
Protocol 1: Assessing Long-Term Stability and Signal Drift
This protocol is adapted from practices for validating bioanalytical methods and electrochemical sensors [77] [78].
Objective: To determine the stability of a sensor or assay signal over a defined period, simulating real-world deployment.
Materials:
- Sensor platform or assay kit.
- Relevant matrix (e.g., undiluted whole blood, plasma).
- Quality Control (QC) samples at low and high concentrations.
- Appropriate instrumentation for signal readout.
Method:
- Preparation: Prepare a set of QC samples at low and high concentrations in the relevant biological matrix. A minimum of two concentration levels is sufficient [78].
- Baseline Measurement: Analyze the QC samples in a set of replicates (minimum n=3) to establish the baseline (t=0) signal [78].
- Storage: Subject another set of the same QC samples to the storage condition of interest (e.g., continuous immersion in whole blood at 37°C, or frozen storage at -80°C).
- Interrogation: At predetermined time points, analyze the stored samples against a freshly prepared calibration curve.
- Data Analysis: Calculate the mean measured concentration for the stored QCs. The analyte is considered stable if the deviation from the nominal (or t=0) value is within ±15% (for chromatographic assays) or ±20% (for ligand-binding assays) [78].
Protocol 2: Troubleshooting Signal Failure Using a Systematic Approach
This generalized protocol is based on established troubleshooting frameworks [79] [81].
Objective: To logically identify the root cause of a complete or partial signal failure.
Method:
- Identify the Problem: Clearly define what went wrong without assuming the cause (e.g., "fluorescence signal is 90% dimmer than expected") [79] [81].
- List Possible Causes: Brainstorm all potential explanations. Start with the most obvious (e.g., reagent failure, incorrect protocol) and move to the less obvious (e.g., equipment malfunction, sample degradation) [79].
- Collect Data: Review your experiment. Check equipment logs, reagent expiration dates, and storage conditions. Examine all controls—a failing positive control suggests a broader assay problem, while a passing one points to the sample or a specific reagent [79].
- Eliminate Explanations: Rule out causes that are contradicted by the data you collected (e.g., if the positive control worked, the core assay reagents are likely functional) [79].
- Check with Experimentation: Design a simple experiment to test the remaining possibilities. Change only one variable at a time [81]. For example, test a new aliquot of a critical reagent while keeping all other parameters constant.
- Identify the Cause: Based on the experimental outcome, identify the root cause and implement a fix [79].
Visualizing Workflows and Relationships
Sensor Validation and Troubleshooting Workflow
The diagram below outlines a combined workflow for validating a sensor's long-term performance and systematically troubleshooting issues that arise.
Relationship Between Accuracy, Precision, and Stability
This diagram illustrates the conceptual relationship between the core validation metrics and how they are challenged over time.
The Scientist's Toolkit: Essential Reagent Solutions
For researchers establishing benchmarks for measurements in whole blood, particularly using advanced platforms like Electrochemical Aptamer-Based (EAB) sensors, several key reagents and materials are critical [77].
Table 2: Key Research Reagent Solutions for Whole Blood Sensing
| Reagent/Material | Function | Key Considerations |
|---|---|---|
| Specific Aptamer | The biological recognition element that binds the target molecule with high selectivity [77]. | Must undergo a binding-induced conformational change. Performance is highly sequence-dependent and requires careful truncation and optimization [77]. |
| Redox Reporter (e.g., Methylene Blue) | A molecule attached to the aptamer that facilitates electron transfer, generating the electrochemical signal [77]. | Methylene blue is common but pH-sensitive. New reporters are being explored for better stability [77]. |
| Self-Assembled Monolayer (SAM) | A layer of alkane thiols that coats the electrode, providing a stable surface for aptamer attachment and helping to resist biofouling [77]. | Critical for minimizing non-specific adsorption and maintaining sensor function in complex media [77]. |
| Quality Control (QC) Samples | Spiked samples at known low and high concentrations used to validate assay accuracy, precision, and stability during method development and use [78]. | Should be prepared in the same matrix as study samples (e.g., whole blood). Stability of QCs must be established [78]. |
| Stabilizing Additives | Compounds added to the sample or buffer to maintain analyte integrity and prevent degradation [78]. | Required for analytes unstable in whole blood. Must be identified during method development and their use standardized [78]. |
Troubleshooting Guides
Troubleshooting Signal Drift in Whole Blood Measurements
Problem: Significant signal drift obscures target biomarker detection during real-time measurements in undiluted whole blood.
| Problem Manifestation | Possible Cause | Recommended Solution |
|---|---|---|
| Signal output decreases over time, unrelated to target presence [3]. | Biofouling: Non-specific adsorption of blood components (e.g., proteins >100 kDa) onto the sensor surface [3]. | Implement a molecular-weight-selective barrier like a hydrogel film to block larger fouling agents [3]. For CNT-BioFETs, use a non-fouling polymer brush interface like POEGMA [1]. |
| Signal drift dominates, making low-concentration biomarker detection impossible [1]. | Electrolytic ion diffusion: Slow diffusion of ions from the solution into the sensor's sensing region, altering capacitance and threshold voltage over time [1]. | Adopt a rigorous testing methodology using infrequent DC sweeps instead of continuous static or AC measurements [1]. Ensure proper device passivation and a stable electrical testing configuration [1]. |
| Signal drift is more pronounced in freshly collected blood compared to commercial or old blood. | Blood age and composition: Sensor response is impacted by the age of the blood sample, with fresher blood providing a more accurate but potentially more challenging environment [7]. | Calibrate using the freshest possible whole blood collected under conditions that match the measurement environment (e.g., body temperature) [7]. |
| High background signal and non-specific binding in whole blood. | Fc receptor binding: Off-target cell populations (e.g., monocytes) express Fc receptors that bind the Fc portion of antibodies, causing non-specific staining [82]. | Block samples with Bovine Serum Albumin, Fc receptor blocking reagents, or normal serum from the host species of the primary antibody prior to staining [82]. |
Troubleshooting Sensitivity and Specificity Issues
Problem: Inadequate signal or poor specificity for the target biomarker in complex whole blood matrix.
| Problem Manifestation | Possible Cause | Recommended Solution |
|---|---|---|
| No signal change upon target introduction in CNT-BioFET. | Debye screening: In high ionic strength solutions (like blood), the electrical double layer is very thin (~1 nm), screening the charge of biomarkers bound by large antibodies (~10 nm) [1]. | Functionalize the CNT channel with a polymer brush (e.g., POEGMA) that extends the Debye length via the Donnan potential effect, allowing detection beyond the screening layer [1]. |
| EAB sensor shows reduced signal gain and inaccurate quantification. | Mismatched calibration conditions: Calibration was performed in a proxy medium (e.g., buffer, old blood) or at a different temperature than the measurement environment [7]. | Match calibration and measurement conditions exactly. Use freshly collected, undiluted whole blood at body temperature (37°C) for both calibration and in-vivo measurements [7]. |
| Low signal-to-noise ratio for a weakly expressed target. | Dim fluorochrome or inefficient electron transfer. | Use the brightest fluorochrome (e.g., PE) for the lowest density target in flow cytometry [82]. For EAB sensors, optimize square wave voltammetry frequencies for maximum signal gain [7]. |
Frequently Asked Questions (FAQs)
Q1: What are the primary sources of signal drift for these sensors in whole blood, and how do they differ between EAB sensors and CNT-BioFETs?
A: The dominant drift sources differ between the two platforms. For EAB sensors, drift in whole blood arises from two main factors: biofouling (non-specific adsorption of proteins, primarily those >100 kDa) and enzymatic degradation of the DNA aptamer itself. In vitro, fouling is the dominant factor [3]. For CNT-BioFETs like the D4-TFT, a major source of drift is the slow diffusion of electrolytic ions from the solution into the device's sensing region, which alters electrical properties over time [1]. Both platforms require specific interface engineering and measurement protocols to mitigate these distinct challenges.
Q2: The D4-TFT claims attomolar sensitivity in PBS. How is this possible in a high-ionic-strength solution that normally causes charge screening?
A: The D4-TFT overcomes the fundamental Debye length limitation through a key innovation: a polymer brush interface made of poly(oligo(ethylene glycol) methyl ether methacrylate) (POEGMA). This non-fouling polymer layer, grown above the CNT channel, establishes a Donnan potential equilibrium. This effect effectively extends the sensing distance (Debye length) within the polymer matrix, allowing the electrical field from charged biomarkers bound to antibodies within the brush to reach the CNT channel, even in 1X PBS [1].
Q3: What is the single most critical factor for accurate calibration of EAB sensors for in-vivo measurements?
A: The most critical factor is to perform calibration in freshly collected, undiluted whole blood at body temperature (37°C). Temperature significantly impacts the sensor's gain and binding curve midpoint. Using a calibration curve collected at room temperature for body temperature measurements can lead to substantial quantification errors, sometimes exceeding 10% [7]. Furthermore, blood age affects the sensor response, so fresh blood is superior to commercially sourced, older blood.
Q4: Our BioFET shows perfect performance in diluted buffer but fails in whole blood. What are the first steps we should take?
A: This common issue points to two likely culprits. First, address biofouling by implementing a anti-fouling surface coating like POEGMA [1]. Second, overcome Debye screening by moving away from a bare transistor surface. Integrate a polymer brush or another Debye-length-extending strategy that allows you to operate in physiologically relevant ionic strengths without losing sensitivity [1]. Finally, re-evaluate your performance using a drift-conscious measurement protocol (e.g., infrequent DC sweeps) in undiluted buffer before moving back to whole blood.
Comparative Performance Data
Table 1: Quantitative Performance Comparison of Sensor Platforms in Whole Blood
| Parameter | Electrochemical Aptamer-Based (EAB) Sensors | CNT-Based BioFET (D4-TFT) |
|---|---|---|
| Primary Transduction Mechanism | Target-binding-induced conformational change in a redox-labeled aptamer, measured electrochemically [7]. | Biomolecule binding-induced change in CNT channel conductivity, measured electronically [1]. |
| Reported Sensitivity | Demonstrated for micromolar (µM) range therapeutics (e.g., vancomycin) [7]. | Attomolar (aM) to femtomolar (fM) level detection demonstrated [1] [83]. |
| Key Drift Mitigation Strategy(s) | Use of Kinetic Differential Measurement (KDM) to correct for drift [7]. | Polymer brush interface (POEGMA), stable electrical configuration, infrequent DC sweeps [1]. |
| Key Specificity Strategy | Inherent specificity of the DNA or RNA aptamer recognition element [3]. | Antibody-antigen recognition within a polymer brush matrix [1]. |
| Calibration Requirement | Essential; requires in-situ calibration in fresh whole blood at body temperature [7]. | Essential; control device without antibodies used to confirm specific detection [1]. |
Experimental Protocols
Protocol: D4-TFT Assay for Ultrasensitive Detection in PBS
This protocol outlines the key steps for operating the D4-TFT CNT-based BioFET to achieve attomolar-level detection in high-ionic-strength solutions [1].
Key Research Reagent Solutions:
| Reagent | Function |
|---|---|
| Printed CNT Thin-Film | The core transducer material of the BioFET, providing high carrier mobility and sensitivity [1]. |
| POEGMA (Poly(oligo(ethylene glycol) methyl ether methacrylate)) | A non-fouling polymer brush that extends the Debye length and mitigates biofouling [1]. |
| Capture Antibodies (cAb) | Immobilized within the POEGMA layer to specifically bind the target biomarker [1]. |
| Trehalose-based Excipient Layer | A readily-dissolvable layer printed over the device containing detection antibodies (dAb) [1]. |
| Palladium (Pd) Pseudo-Reference Electrode | Enables a compact, point-of-care form factor by replacing bulky Ag/AgCl reference electrodes [1]. |
Workflow Diagram: D4-TFT Assay Workflow
Procedure:
- Dispense: Apply the liquid sample (e.g., serum, buffer) onto the D4-TFT device. The sample dissolves the printed trehalose excipient layer [1].
- Dissolve: The dissolution of the trehalose layer releases the embedded detection antibodies (dAb) into the solution [1].
- Diffuse: The target analyte (if present) and the dAb diffuse to the sensor surface, which is functionalized with a POEGMA brush containing immobilized capture antibodies (cAb) [1].
- Sandwich Formation: A sandwich immunoassay complex forms on the sensor surface: the target biomarker is bound between the surface-immobilized cAb and the free dAb [1].
- Detect: The formation of this charged complex within the POEGMA brush induces a measurable shift in the on-current of the underlying CNT transistor. This electrical readout is correlated to the target concentration [1].
Critical Note: Throughout the detection phase, a rigorous testing methodology is employed. This involves using infrequent DC sweeps rather than continuous static or AC measurements to minimize the influence of signal drift. Simultaneous testing of a control device with no antibodies confirms specific detection [1].
Protocol: EAB Sensor Calibration for Accurate In-Vivo Quantification
This protocol describes the optimal method for calibrating EAB sensors to achieve accurate (±10%) quantification of molecules like vancomycin in undiluted whole blood [7].
Workflow Diagram: EAB Sensor Calibration & Measurement
Procedure:
- Sensor Preparation: Fabricate the EAB sensor by immobilizing a redox reporter-modified aptamer onto a gold electrode surface via a self-assembled monolayer [7].
- Calibration in Fresh Blood: Titrate the sensor in freshly collected, undiluted whole blood (e.g., rat or bovine) across a range of known target concentrations. This must be performed at body temperature (37°C) [7].
- Square Wave Voltammetry (SWV): At each concentration, collect voltammograms using SWV. Specifically, use two predetermined frequencies: one that produces a "signal-on" response (current increase upon binding) and one that produces a "signal-off" response (current decrease upon binding) [7].
- Calculate KDM: For each measurement, calculate the Kinetic Differential Measurement (KDM) value. This is done by subtracting the normalized peak currents from the signal-on and signal-off frequencies and dividing by their average. This step is crucial for correcting drift and enhancing signal gain [7].
- Generate Calibration Curve: Fit the averaged KDM values versus target concentration to a Hill-Langmuir binding isotherm to extract the parameters (KDMmax, KDMmin, K{1/2}, nH) for the calibration curve [7].
- Measure Unknowns: For an unknown sample, perform SWV under identical conditions (fresh blood, 37°C) and calculate the KDM value.
- Quantify Target: Use the calibration curve parameters to convert the measured KDM value into an estimated target concentration [7].
Analyzing the Impact of Calibration Media and Temperature on Quantification Accuracy
FAQs: Calibration and Signal Drift in Whole Blood Measurements
Q1: Why is matching calibration temperature to measurement temperature critical for accuracy? Matching temperature is critical because it directly impacts fundamental sensor parameters. Research shows that calibration curves differ significantly between room temperature and body temperature (37°C). These temperature changes affect binding equilibrium coefficients and electron transfer rates, which can alter sensor gain and binding curve midpoints. For example, a frequency of 25 Hz can change from a weak signal-on frequency at room temperature to a clear signal-off frequency at body temperature. Using a room temperature calibration for body temperature measurements can lead to substantial concentration underestimates of 10% or more [84].
Q2: What are the primary causes of signal drift in undiluted whole blood? Signal drift in undiluted whole blood is primarily caused by two mechanisms operating on different timescales. The initial, exponential signal loss phase (over ~1.5 hours) is predominantly caused by biological fouling, where blood components adsorb to the sensor surface, reducing electron transfer rates. The subsequent, linear signal loss phase is driven by electrochemical mechanisms, specifically electrochemically driven desorption of the self-assembled monolayer from the gold electrode. Enzymatic degradation of DNA plays a minimal role, as demonstrated by similar drift patterns in enzyme-resistant oligonucleotides [2].
Q3: Can commercially sourced blood be used for calibration instead of freshly collected blood? Commercially sourced blood is not equivalent to freshly collected blood for calibration purposes. Studies reveal that vancomycin sensors challenged in commercially sourced bovine blood yielded lower signal gain compared to fresh rat blood, which would lead to overestimated concentrations. This difference arises partly from blood age, as blood that is at least a day old by the time of use shows altered sensor response, particularly at higher target concentrations. For optimal accuracy, calibration should use the freshest possible blood collected from the same species as measurement samples [84].
Q4: Are there calibration-free approaches for electrochemical biosensors in whole blood? Yes, "dual-frequency" approaches can enable calibration-free operation for electrochemical aptamer-based (EAB) sensors. This method exploits the square-wave frequency dependence of EAB response by using both responsive and non-responsive frequencies to generate a ratiometric signal that is largely insensitive to drift and sensor-to-sensor fabrication variations. This approach has demonstrated accuracy within ±20% across dynamic ranges of up to 100-fold in undiluted whole blood without requiring individual sensor calibration [57].
Troubleshooting Guides
Problem: Inaccurate Concentration Measurements In Vivo
Potential Causes and Solutions:
Cause: Mismatch between calibration and measurement temperatures.
- Solution: Always calibrate sensors at the same temperature used during measurements (typically 37°C for in vivo studies). Use a temperature-controlled setup during calibration curve collection [84].
Cause: Using aged or commercially sourced blood for calibration.
- Solution: Calibrate using freshly collected, undiluted whole blood from the same species as your experimental model. Process and use blood soon after collection [84].
Cause: Significant sensor-to-sensor fabrication variation.
Problem: Rapid Signal Drift During Blood Measurements
Potential Causes and Solutions:
Cause: Biological fouling from blood components.
- Solution: While not always removable in vivo, post-experiment washing with chemicals like concentrated urea can reverse ~80% of signal loss. Consider using fouling-resistant coatings in sensor design [2].
Cause: Electrochemical desorption of the self-assembled monolayer.
- Solution: Optimize the electrochemical interrogation parameters. Use a narrow potential window (e.g., -0.4 V to -0.2 V) to minimize stress on the gold-thiol bond, significantly reducing this degradation pathway [2].
Cause: Irreversible redox reactions degrading the redox reporter.
- Solution: Select redox reporters with potentials that fall within the stable window of alkane-thiol-on-gold monolayers. Methylene blue is a stable choice due to its suitable redox potential [2].
Table 1: Impact of Calibration Conditions on Measurement Accuracy
| Calibration Condition | Measurement Condition | Mean Accuracy (%) | Key Observations |
|---|---|---|---|
| Fresh whole blood, 37°C [84] | Fresh whole blood, 37°C | >±10% (clinical range) | Optimal condition; achieves clinically useful performance. |
| Room temperature [84] | Body temperature (37°C) | >±10% underestimation | Temperature mismatch causes significant error. |
| Commercial bovine blood (aged) [84] | Fresh rat blood | Not specified (overestimation) | Lower signal gain due to species difference and/or blood age. |
| Dual-frequency method [57] | Undiluted whole blood | Within ±20% | Calibration-free approach across 100-fold dynamic range. |
Table 2: Characteristics of Signal Drift Mechanisms in Whole Blood
| Drift Mechanism | Timescale | Primary Cause | Impact on Signal | Potential Remediation |
|---|---|---|---|---|
| Biological Fouling [2] | Exponential (~1.5 hours) | Adsorption of blood proteins/cells | Decreases electron transfer rate | Urea washing; fouling-resistant materials |
| Monolayer Desorption [2] | Linear (long-term) | Electrochemical interrogation | Loss of sensing element | Optimize potential window |
| Enzymatic Degradation [2] | Minimal contribution | Nucleases | DNA cleavage | Use enzyme-resistant oligonucleotides |
Detailed Experimental Protocols
Protocol 1: Generating Accurate Calibration Curves in Whole Blood
Objective: To establish a calibration curve for an electrochemical aptamer-based (EAB) sensor in undiluted whole blood under conditions that mimic the intended measurement environment.
Materials:
- EAB sensors
- Freshly collected undiluted whole blood (from relevant species)
- Target analyte (e.g., vancomycin) stock solutions
- Temperature-controlled electrochemical cell
- Potentiostat
Methodology:
- Blood Collection: Collect whole blood using appropriate anticoagulants. Use the blood as soon as possible after collection—ideally within hours [84].
- Temperature Control: Place the electrochemical cell containing the blood in a heater, maintaining a stable temperature of 37°C throughout the calibration [84].
- Sensor Interrogation: Interrogate the EAB sensor using square-wave voltammetry. Employ the Kinetic Differential Measurement (KDM) method by collecting voltammograms at both "signal-on" and "signal-off" frequencies [84].
- Titration: Spike the blood with the target analyte to achieve a series of known concentrations covering the expected dynamic range (e.g., from zero to saturating).
- Data Fitting: At each concentration, record the KDM value. Fit the averaged KDM values versus concentration to a Hill-Langmuir isotherm (Eq. 1) to determine the parameters KDMmin, KDMmax, K1/2, and nH [84].
- Validation: Validate the calibration curve by estimating concentrations in a separate set of spiked blood samples not used for curve generation.
Protocol 2: Assessing and Isolating Signal Drift Mechanisms
Objective: To characterize the contributions of different mechanisms to signal loss of an EAB-like construct in whole blood.
Materials:
- Gold electrodes functionalized with MB-modified, single-stranded DNA
- Undiluted whole blood and phosphate-buffered saline (PBS)
- Potentiostat
- Urea solution (e.g., concentrated)
Methodology:
- Baseline in PBS: Immerse the sensor in PBS at 37°C and perform continuous square-wave voltammetry. Observe the minimal signal loss, establishing the baseline for electrochemical drift in the absence of biological components [2].
- Challenge in Whole Blood: Transfer the sensor to undiluted whole blood at 37°C and continue electrochemical interrogation. Note the characteristic biphasic signal loss: an initial exponential drop followed by a linear decrease [2].
- Potential Window Manipulation: Repeat the experiment in PBS using different applied potential windows. A strong dependence of degradation rate on the window width, especially near -0.5 V or above ~1 V, indicates monolayer desorption is the primary electrochemical mechanism [2].
- Fouling Assessment: After interrogating a sensor in blood for several hours using a narrow, stable potential window, wash the electrode with a concentrated urea solution. A significant recovery of the initial signal (e.g., 80%) confirms that fouling is a major contributor to the initial exponential drift phase [2].
- Electron Transfer Analysis: Monitor the square-wave frequency at which peak charge transfer occurs during the experiment. A decrease in this frequency during the exponential phase indicates that fouling is physically hindering the redox reporter's approach to the electrode, slowing electron transfer [2].
Experimental Workflows and Signaling Pathways
The Scientist's Toolkit: Research Reagent Solutions
| Reagent / Material | Function in Research |
|---|---|
| Fresh Whole Blood | The optimal calibration matrix for in vivo measurements; provides the correct biological environment for accurate sensor calibration [84]. |
| Matrix-Matched Calibrators | Calibrators prepared in goat (or other animal) blood to match the patient specimen matrix; essential for accurate quantification in analytical methods [85]. |
| Urea Solution | Used to wash fouled electrodes; helps differentiate and reverse fouling-related drift by solubilizing adsorbed biomolecules [2]. |
| 2'O-Methyl RNA Oligos | Enzyme-resistant oligonucleotide analogs; used to isolate the impact of enzymatic degradation vs. fouling in drift studies [2]. |
| Methylene Blue (MB) | A redox reporter with suitable potential that falls within the stable window of thiol-on-gold monolayers, minimizing electrochemical degradation [2]. |
| Anti-CD3/CD28 & LPS | Stimulants used in functional immune assays (e.g., ELISpot) with diluted whole blood to assess adaptive and innate immune cell function, respectively [86]. |
Statistical Methods for Drift Detection and Performance Monitoring in Unsupervised Environments
FAQs on Drift Detection in Unsupervised Environments
1. What is concept drift and why is it a problem for machine learning models in research? Concept drift is the phenomenon where the underlying data distributions and statistical properties of a target domain change over time, leading to model performance degradation. In unsupervised environments, this is particularly challenging because you lack ground-truth labels to monitor performance directly. Drift can occur suddenly, gradually, or periodically, and if undetected, can compromise the reliability of your research findings and model outputs [87].
2. What are the main types of concept drift I should monitor for? The primary patterns of concept drift are:
- Sudden/Abrupt Drift: A rapid change in the data distribution.
- Incremental Drift: A gradual transition of concepts over an extended period.
- Periodic/Recurrent Drift: A seasonal or repeating change in concepts that reverts to a previous state [87].
3. Can I detect drift without true labels for my data?
Yes, unsupervised drift detection methods exist that do not rely on ground-truth labels. These methods typically work by comparing the distribution of new, incoming data to a reference dataset (e.g., your training data or a trusted baseline) using statistical distances or divergence measures. The core idea is to detect significant changes in the input data's distribution, P(X), as an indicator of potential drift [87] [88].
4. What are the advantages of using deep learning representations for drift detection? For high-dimensional, unstructured data (like signals or images), working directly with the raw data can be computationally inefficient. Methods like DriftLens leverage distribution distances in the deep learning model's internal representations. These representations are often lower-dimensional and more stable, enabling more efficient and accurate real-time drift detection regardless of the original data volume [87].
5. How can I explain and characterize drift once it is detected? Modern drift detection frameworks go beyond mere detection. They characterize drift by analyzing its impact. For instance, by examining changes in the distribution of deep learning model outputs or by using explainable AI (XAI) techniques like SHAP (Shapley Additive Explanations) to understand which features contributed most to the drift signal. This helps in diagnosing the root cause [87] [88].
Troubleshooting Guides
Guide 1: Troubleshooting Unsupervised Statistical Drift Detection
This guide addresses common issues when implementing statistical drift detectors.
| Problem | Possible Cause | Diagnostic Steps | Solution | |
|---|---|---|---|---|
| High false positive drift alerts | The threshold for the statistical test is too sensitive. | Check if alerts coincide with known, minor data variations (e.g., time of day). | Adjust the detection threshold or use a larger window size to make the detector less sensitive to noise. | |
| Failure to detect actual drift | The detection method is not powerful enough for the drift type or the reference window is outdated. | Validate with a controlled dataset where you introduce artificial drift. | Use a more sensitive statistical test (e.g., E-Divisive) or update the reference data window to a more recent, stable period [89]. | |
| Inconsistent results between metrics | Different metrics are sensitive to different aspects of distribution change (e.g., mean vs. shape). | Run multiple statistical tests (e.g., K-S test, KL Divergence) on the same data and compare outcomes. | Use a composite or ensemble approach that considers multiple metrics to confirm drift before triggering an alert. | |
| Drift detected, but no performance drop | The drift may be "virtual drift" (change in P(X)) that does not affect the decision boundary (`P(y |
X)`). | Perform a manual check on a small, labeled sample of the data if possible. | Monitor the drift but note that model retraining may not be immediately necessary. Continue to monitor for performance-related "real drift." |
Guide 2: Troubleshooting Drift Detection in Deep Learning Models
This guide focuses on issues specific to detecting drift using deep learning model representations.
| Problem | Possible Cause | Diagnostic Steps | Solution |
|---|---|---|---|
| Drift detection is too slow for real-time use | Calculating distribution distances on high-dimensional representation vectors is computationally expensive. | Profile your code to identify bottlenecks in distance calculation (e.g., Wasserstein distance). | Use a simplified representation (e.g., model embeddings after a pooling layer) or a faster distance metric. Frameworks like DriftLens are designed for this, running in ≤0.2 seconds [87]. |
| Inability to explain which classes are affected by drift | The detection method operates only on the overall data distribution. | Analyze the output (softmax) probabilities of the classifier for the new data and compare them to the baseline. | Use a framework that provides drift characterization per label. For example, DriftLens analyzes the impact on each output label to explain drift [87]. |
| Detector fails to adapt to new, legitimate patterns | The reference data distribution is too narrow or static. | Check if the model's performance is acceptable on the new data pattern. | Implement a mechanism to update the reference dataset with recently seen, verified "normal" data, ensuring the baseline evolves with legitimate, non-drifting changes [89]. |
Experimental Protocols for Drift Detection
Protocol 1: Implementing an Unsupervised Statistical Hypothesis Test for Drift
This methodology uses a statistical test to detect changes in the feature distribution, applicable to tabular data or engineered features [89].
1. Feature Extraction:
- For each data instance in your stream, compute a relevant feature. In behavioral monitoring, this could be the Kullback-Leibler (KL) Divergence of a daily activity probability map compared to a baseline week.
- Let
Bbe your baseline reference data (e.g., the first week of data). - For each new day
D_i, compute the featureF_i = D_KL(P(D_i) || P(B)).
2. Parameter Estimation:
- Under the assumption that your feature values are normally distributed, use the Central Limit Theorem to estimate the population parameters.
- From the baseline period, calculate the sample mean (
μ_ref) and sample standard deviation (σ_ref) of the feature values.
3. Hypothesis Testing:
- For each new incoming feature value
F_new, standardize it:Z = (F_new - μ_ref) / σ_ref. - Define a significance level
α(e.g., 0.05). The null hypothesis (H_0) is thatF_newcomes from the same distribution as the baseline. - If
|Z| > Z_(1-α/2)(e.g., 1.96 for α=0.05), you reject the null hypothesis and signal a drift.
4. Baseline Update (Optional):
- If no drift is detected and the day is considered "normal," you can update the baseline
Bby incorporating the data fromD_ito allow the model to adapt to gradual, non-harmful changes [89].
Protocol 2: XAI-Based Drift Detection using SHAP Values
This protocol leverages model explainability to detect and understand drift in an unsupervised setting [88].
1. Compute Reference SHAP Values:
- Using your pre-trained model and a reference dataset (e.g., training data or a trusted baseline), compute the SHAP values for each instance. This establishes a baseline for feature importance.
2. Calculate the Drift Suspicion Metric:
- For a new batch of data
X_new, compute the SHAP values for each instance. - Calculate a summary statistic for the SHAP values in the reference set and the new set. A common method is to take the mean absolute value of SHAP scores per feature, resulting in a vector
Sfor each dataset. - Compute a distance metric (e.g., Euclidean distance, Cosine distance) between the reference vector
S_refand the new data vectorS_new. This distance is your "drift suspicion metric."
3. Set a Threshold and Detect:
- By analyzing the distribution of the drift suspicion metric on the reference data, establish a threshold. A new batch is flagged for drift if its metric exceeds this threshold.
4. Explain the Drift:
- Once drift is detected, you can explain it by comparing the SHAP summary plots or the mean SHAP values per feature between the reference and new data. This highlights which features are behaving differently and driving the drift [88].
Table 1: Comparison of Unsupervised Drift Detection Methods
| Method | Core Principle | Data Type Suitability | Key Performance Metrics | Computational Efficiency |
|---|---|---|---|---|
| Statistical Hypothesis Test (e.g., K-S Test) | Compares empirical distribution functions of two samples. | Tabular data, low-dimensional features. | Statistical power, p-value, false positive rate. | High for low-dimensional data. |
| Distance-Based (e.g., Wasserstein) | Measures the distance between two probability distributions. | Unstructured data, deep learning representations. | Distance magnitude, correlation with model performance drop (≥0.85 reported) [87]. | Can be high for large datasets; optimized frameworks report ~0.2s runtime [87]. |
| Variational Autoencoder (VAE) with CLT | Uses a VAE to estimate parameters for a statistical test, leveraging the Central Limit Theorem. | Small datasets, feature vectors (e.g., KL Divergence of activity maps) [89]. | F1-Score (min. 91% reported on artificial data) [89]. | Moderate, depends on VAE inference time. |
| XAI-Based (SHAP) | Measures drift in the distribution of feature importance scores. | Model-agnostic; works with any data type the model can process. | Drift suspicion rate, threshold exceedance (>90% in validation) [88]. | Can be high, as SHAP calculation is computationally intensive. |
The Scientist's Toolkit: Research Reagent Solutions
Table 2: Essential Components for a Drift Detection Framework
| Item | Function in Drift Detection |
|---|---|
| Reference Dataset | A trusted, baseline dataset representing the model's expected operating environment. Serves as the benchmark for all distribution comparisons. |
| Distance/Divergence Metric | A mathematical function (e.g., Wasserstein distance, KL Divergence, Euclidean) that quantifies the difference between the reference and new data distributions [87] [89]. |
| Statistical Testing Framework | A library (e.g., SciPy) containing implementations of statistical tests (e.g., Kolmogorov-Smirnov, Cramér–von Mises) to formally test the hypothesis of distribution change. |
| Deep Learning Framework | Software (e.g., TensorFlow, PyTorch) necessary to extract internal model representations (embeddings) from deep learning classifiers for representation-based drift detection [87]. |
| Explainable AI (XAI) Library | A toolkit (e.g., SHAP) used to calculate feature importance scores, which can be repurposed to detect and explain drift based on changes in feature contributions [88]. |
| Threshold Configuration | A predefined or adaptively learned value that determines the sensitivity of the drift detector. Crossing this threshold triggers a drift alert. |
Troubleshooting Guides
Signal Drift in Whole Blood Measurements
Problem: Significant signal decrease over time when deploying sensors in undiluted whole blood at 37°C, characterized by rapid initial loss followed by slower linear decay [2].
| Drift Phase | Characteristics | Primary Mechanisms | Validation Methods |
|---|---|---|---|
| Initial Exponential Drift | Rapid signal loss (~1.5 hours) | Biofouling from blood components (proteins, cells) reducing electron transfer rate [2] | - Urea wash test (80% signal recovery) [2]- Use of enzyme-resistant oligonucleotides (2'O-methyl RNA) [2] |
| Secondary Linear Drift | Slow, steady signal decrease | Electrochemically driven desorption of thiol-on-gold self-assembled monolayer (SAM) [2] | - Potential window manipulation [2]- Interrogation pause in PBS (drift stops) [2] |
Solutions:
- To combat biofouling: Implement surface modifications with antifouling polymers like poly(oligo(ethylene glycol) methyl ether methacrylate) (POEGMA) to create a bioinert barrier [1].
- To prevent SAM desorption: Optimize electrochemical interrogation parameters. Using a narrow potential window (-0.4 V to -0.2 V) reduced signal loss to only 5% after 1500 scans by avoiding reductive (< -0.5 V) and oxidative (> ~1 V) desorption thresholds [2].
- Sensor design: Place the redox reporter (e.g., Methylene Blue) closer to the electrode surface. Studies show the rate and magnitude of fouling-induced drift are reduced when the reporter is positioned nearer the electrode [2].
Overcoming Debye Length Screening
Problem: The electrical double layer (EDL) in high-ionic-strength solutions (like 1X PBS or blood) screens charges, limiting detection to biomarkers within a few nanometers of the sensor surface and preventing antibody-based detection [1] [90].
| Strategy | Principle | Example Implementation |
|---|---|---|
| Polymer Brush Interface | Establishes a Donnan equilibrium potential to extend the sensing distance beyond the native Debye length [1]. | Grafting a POEGMA layer above the Carbon Nanotube (CNT) channel of a BioFET, enabling antibody-antigen binding detection in 1X PBS [1]. |
| Fringing Field Capacitance | Uses electric fields at electrode edges to penetrate the solution and interact with surface-bound molecules, sensitive to changes at nanometer to micrometer distances [90]. | Employing interdigitated or nanoporous electrode designs to leverage fringing fields for label-free capacitive detection [90]. |
| Nanopore Structures | Confines the sensing volume and increases surface area, which can enhance sensitivity and mitigate some screening effects [91]. | Using a nanoporous silicon oxide immunosensor for direct, label-free detection of viruses [91]. |
Solutions:
- Interface Engineering: Integrate a non-fouling polymer brush like POEGMA onto the sensor surface. This layer serves the dual purpose of extending the Debye length via the Donnan potential effect and reducing non-specific binding [1].
- Transducer Design: Utilize sensor topologies that exploit fringing fields, such as interdigitated electrodes (IDEs) or nanoporous structures, to enhance sensitivity to binding events occurring further from the electrode surface [90] [91].
Achieving and Validating Sub-Femtomolar Sensitivity
Problem: Reliably detecting biomarker concentrations below 1 fM (femtomolar) in biologically relevant ionic strength solutions and differentiating specific signal from drift and noise [1] [91].
Solutions:
- Rigorous Testing Methodology: For transistor-based sensors (BioFETs), mitigate drift by using infrequent DC sweeps instead of continuous static or AC measurements. Always include an on-chip control device (e.g., without antibodies) to confirm that signal shifts are due to specific binding and not temporal drift [1].
- Advanced Data Processing: Employ Artificial Neural Networks (ANNs) to process complex sensor data. For example, using peak frequency (
fp) and first cut-off frequency (fc) from impedance spectroscopy as inputs to an ANN enabled quantitative differentiation of multiple viruses in blood with errors below 5% [91]. - Maximize Initial Sensitivity: Use high-surface-area nanostructures (e.g., nanoporous silicon oxide, CNT thin films) to enhance the binding efficiency of trace analytes and the resultant signal change [1] [91].
Frequently Asked Questions (FAQs)
Q1: Why can't I simply dilute my blood sample to reduce ionic strength and avoid Debye screening? While dilution is a common laboratory workaround, it compromises the clinical relevance of the measurement. Diagnostic results obtained in diluted serum may not accurately reflect actual physiological concentrations. The goal of point-of-care diagnostics is to measure in undiluted, clinically relevant matrices like whole blood, serum, or 1X PBS [1].
Q2: My sensor's signal is stable in buffer but drops immediately in blood. What is the most likely cause? The rapid, exponential signal loss is predominantly caused by biofouling. Blood proteins and cells adsorb to the sensor surface, forming a layer that physically hinders electron transfer and/or analyte access. This manifests as a decrease in the electron transfer rate constant [2]. Implementing a robust antifouling surface chemistry, such as a POEGMA brush, is critical to mitigate this [1].
Q3: Is all signal drift considered "bad"? How can I tell if my signal is drifting due to degradation or actual biomarker binding? This is a critical distinction. Negative drift (signal loss) from sensor degradation is undesirable. A positive signal change from specific biomarker binding is the target. The key to differentiation is rigorous experimental controls:
- On-chip controls: Fabricate a control sensor with no capture probe (e.g., antibody) within the same chip. If both experimental and control sensors show an identical positive drift, the change is non-specific [1].
- Drift Correction Signals: For electrochemical sensors, use a normalizing signal (e.g., from a second square-wave frequency) that is insensitive to the target but tracks sensor health [2].
Q4: What are the key considerations for choosing a redox reporter for in vivo electrochemical sensors? The stability of the reporter is paramount. The redox potential of the reporter must fall within the narrow electrochemical window where the thiol-on-gold monolayer is stable (approximately -0.4 V to 0.0 V). Methylene Blue (E⁰ ~ -0.25 V) is notably stable for this reason, while reporters with potentials outside this window can accelerate electrode degradation via SAM desorption [2].
Q5: Can computational tools alone solve the problem of signal drift and low sensitivity? Computational tools like Artificial Neural Networks (ANNs) are powerful for interpreting drifted or complex data and extracting accurate quantitative information, as demonstrated with virus detection [91]. However, they are a complement to, not a replacement for, robust sensor design and stable interface chemistry. The best approach combines physical-chemical strategies to minimize drift with computational methods to correct for any residual drift or interference.
Experimental Protocols
Protocol: Isolating Drift Mechanisms in Whole Blood
Objective: To differentiate between biofouling and electrochemical desorption as sources of signal drift [2].
- Sensor Preparation: Fabricate EAB-like proxy sensors using a thiol-modified DNA strand (e.g., 37-base sequence) labeled with a redox reporter (e.g., Methylene Blue) on a gold electrode.
- Baseline Measurement: Record square-wave voltammetry (SWV) signals in phosphate buffered saline (PBS) at 37°C to establish a stable baseline.
- Whole Blood Challenge: Immerse the sensor in undiluted, warmed whole blood (37°C) and initiate continuous or frequent electrochemical interrogation.
- Data Analysis: Plot signal amplitude over time. A bi-phasic decay (exponential then linear) indicates multiple mechanisms.
- Mechanism Validation:
- Fouling Test: After ~2.5 hours in blood, wash the sensor with a concentrated urea solution. Recovery of ~80% of the initial signal confirms that fouling is a major contributor to the initial exponential drift [2].
- Electrochemical Desorption Test: Repeat the experiment in PBS at 37°C. The absence of the rapid exponential phase suggests it is blood-specific. The persistence of a linear drift phase in PBS points to an electrochemical mechanism [2].
- Potential Window Test: In PBS, test different SWV potential windows. A strong dependence of the degradation rate on the window width (e.g., significant loss when scanning beyond -0.4 V or 0.0 V) confirms the role of potential-driven SAM desorption [2].
Protocol: Implementing a D4-TFT for Ultrasensitive Detection
Objective: To detect sub-femtomolar biomarkers in 1X PBS using a carbon nanotube thin-film transistor (CNT-TFT) with a polymer brush interface [1].
- Device Fabrication:
- Fabricate a CNT thin-film transistor (TFT) on a substrate.
- Graft a poly(oligo(ethylene glycol) methyl ether methacrylate) (POEGMA) polymer brush layer onto the CNT channel area. This layer acts as a Debye length extender and antifouling layer.
- Inkjet-print specific capture antibodies (cAb) into the POEGMA layer above the channel.
- On a separate, dissolvable trehalose layer, print detection antibodies (dAb).
- Assay Execution (D4 Steps):
- Dispense: A small volume of sample is dispensed onto the device.
- Dissolve: The sample dissolves the trehalose layer, releasing the detection antibodies.
- Diffuse: Target analytes and detection antibodies diffuse to the sensor surface. The target binds the capture antibody, forming a sandwich complex with the detection antibody.
- Detect: Apply infrequent DC sweeps to the CNT-TFT to measure the drain current shift caused by the antibody-antigen-antibody complex formation on the channel.
- Control and Validation:
- Include a control TFT on the same chip with POEGMA but no capture antibodies. This controls for signal drift and non-specific binding.
- Valid detection is confirmed by a significant current shift in the experimental device with no corresponding shift in the control device [1].
Visualizations
Diagram: Signal Drift Mechanisms and Solutions
Mechanisms and Solutions for Signal Drift
Diagram: D4-TFT Biosensing Workflow
D4-TFT Biosensing Workflow
The Scientist's Toolkit: Research Reagent Solutions
| Item | Function & Application |
|---|---|
| POEGMA (Poly(oligo(ethylene glycol) methyl ether methacrylate)) | A polymer brush coating that extends the Debye length via the Donnan potential and provides excellent antifouling properties for operation in blood and 1X PBS [1]. |
| 2'O-Methyl RNA Oligonucleotides | Enzyme-resistant nucleic acid analogs used in probe design to mitigate signal loss from nuclease degradation in biological fluids, helping to isolate fouling as a drift mechanism [2]. |
| Methylene Blue (MB) | A redox reporter with a favorable potential (~ -0.25 V) that falls within the stable window of thiol-on-gold monolayers, making it more stable than many other reporters for long-term in vivo sensing [2]. |
| Urea Solution (Concentrated) | A denaturant used in wash steps to remove non-specifically adsorbed proteins (biofoulants) from the sensor surface, helping to confirm and temporarily reverse fouling-based drift [2]. |
| Nanoporous Silicon Oxide Substrate | A high-surface-area 3D substrate used for immunosensors. Its structure enhances binding efficiency and sensitivity, enabling direct, label-free detection of targets like viruses down to sub-femtomolar levels [91]. |
| Halo Inert / Evosphere Max Columns | HPLC columns with fully inert (metal-free) hardware. They prevent adsorption of metal-sensitive analytes (e.g., phosphorylated compounds, peptides), improving peak shape and analyte recovery in chromatographic analyses [92]. |
Troubleshooting Guides and FAQs
Frequently Asked Questions
Q1: What is signal drift and why is it a particularly critical issue in undiluted whole blood measurements? Signal drift refers to the undesirable change in a biosensor's baseline signal over time, even when the target analyte concentration remains constant. In undiluted whole blood, this is a critical problem due to the sample's high ionic strength. The high concentration of ions promotes the slow diffusion of electrolytic ions into the sensing region, which alters the gate capacitance and threshold voltage of transistor-based biosensors (BioFETs), leading to a false signal that can obscure the actual biomarker detection [1].
Q2: How can the Debye length screening effect be mitigated for antibody-based detection in whole blood? Antibodies are typically 10 nm in size, which is far beyond the native Debye length (often less than 1 nm) in high ionic strength solutions like blood. A leading strategy to overcome this is to immobilize a non-fouling polymer layer, such as poly(oligo(ethylene glycol) methyl ether methacrylate) (POEGMA), on the sensor surface. This polymer brush interface acts as a Debye length extender by establishing a Donnan equilibrium potential, allowing for sensitive antibody-antigen interactions to be detected effectively in undiluted solutions like 1X PBS [1].
Q3: What experimental best practices can minimize signal drift during electrical measurements? Research indicates that a combination of approaches is most effective [1]:
- Stable Electrical Configuration: Use a stable testing setup, such as one incorporating a palladium (Pd) pseudo-reference electrode to avoid bulky equipment.
- Passivation and Coatings: Maximize sensor stability through appropriate passivation layers alongside polymer brush coatings.
- Rigorous Testing Methodology: Employ infrequent DC sweeps for measurement rather than static or continuous AC measurements, as this reduces the impact of time-based artifacts.
Q4: Are there novel platforms that integrate sample preparation to improve the reliability of whole-blood analysis? Yes, integrated microfluidic platforms are being developed to handle whole blood's complexity. For example, acoustic microstreaming platforms, such as those using Lateral Cavity Acoustic Transducers (LCATs), can sort undiluted whole blood into its cellular components (platelets, RBCs, WBCs) and enrich rare cells (like circulating tumor cells) based on size. This integrated upstream processing reduces sample complexity and cell-cell interactions before detection, which can enhance the reliability of downstream measurements [93].
Troubleshooting Common Experimental Issues
| Problem | Possible Cause | Solution |
|---|---|---|
| High Background Signal/Noise | Biofouling from proteins or cells in whole blood. | Functionalize the sensor surface with a non-fouling coating like POEGMA or PEG to resist non-specific adsorption [1]. |
| Loss of Sensitivity in Ionic Solutions | Debye length screening effect masking the charge of target biomarkers. | Implement a Donnan potential-based strategy using a polymer brush (e.g., POEGMA) to effectively extend the sensing distance within the solution [1]. |
| Unstable Baseline (Signal Drift) | Slow diffusion of ions from the solution into the sensor's sensing region. | Combine sensor surface passivation, a stable electrical testing configuration, and a measurement protocol based on infrequent DC sweeps rather than continuous monitoring [1]. |
| Low Recovery of Target Cells/Analytes | Complex composition of whole blood interfering with target capture or detection. | Utilize an integrated acoustic microstreaming platform to pre-sort and enrich target cellular subsets from whole blood prior to the detection step [93]. |
| Poor Reproducibility of Sensor Fabrication | Inconsistent functionalization of the electrode surface with bioreceptors. | Focus on developing stable and reproducible functionalization protocols, ensuring strong adhesion of base nanomaterial layers to the electrode [94]. |
Experimental Protocols and Data
Key Experimental Methodology: D4-TFT for Ultrasensitive Detection
The D4-TFT is a CNT-based BioFET designed for stable, ultra-sensitive biomarker detection in undiluted ionic solutions. The following workflow outlines its core operational and fabrication steps [1]:
Quantitative Performance Data
The performance of drift-mitigation strategies and sensing platforms can be quantified as follows:
Table 1: Signal Drift Mitigation Strategies and Performance
| Mitigation Strategy | Key Implementation | Demonstrated Performance / Outcome |
|---|---|---|
| Polymer Brush Interface | Grafting of POEGMA above the CNT channel. | Enables sub-femtomolar (attomolar) detection in 1X PBS by extending Debye length via Donnan potential [1]. |
| Stable Electrical Configuration | Use of a palladium (Pd) pseudo-reference electrode. | Replaces bulky Ag/AgCl electrodes, enabling a compact, point-of-care form factor [1]. |
| Rigorous Measurement Protocol | Reliance on infrequent DC sweeps over static/AC measurements. | Mitigates signal drift effects, allowing for stable and repeated measurements [1]. |
Table 2: Integrated Platform Performance for Whole-Blood Processing
| Platform Function | Method | Performance Metric / Outcome |
|---|---|---|
| Cell Sorting & Enrichment | Acoustic Microstreaming (LCAT). | Sorted undiluted whole blood into cellular subsets (platelets, RBCs, WBCs) [93]. |
| Rare Cell Enrichment | Acoustic Microstreaming (LCAT). | Enriched MCF-7 breast cancer cells spiked in whole blood at 10 cells/mL with an Enrichment Ratio (ER) of 213x relative to WBCs [93]. |
| On-Chip Immunolabeling | Integrated fluorescent antibody delivery. | Enabled in-situ identification of specific target cellular populations by their marker expression [93]. |
The Scientist's Toolkit: Research Reagent Solutions
Table 3: Essential Materials for Drift-Resistant Whole-Blood Biosensing
| Item | Function in the Experiment |
|---|---|
| Poly(oligo(ethylene glycol) methyl ether methacrylate) (POEGMA) | A non-fouling polymer brush coating that extends the Debye length via the Donnan potential, reduces biofouling, and provides a matrix for antibody immobilization [1]. |
| Semiconducting Carbon Nanotubes (CNTs) | Forms the high-sensitivity channel material in the BioFET (D4-TFT) due to their high electrical sensitivity and solution-phase processability [1]. |
| Palladium (Pd) Pseudo-Reference Electrode | Provides a stable gate potential for solution-gated BioFETs in a compact form factor, suitable for point-of-care devices [1]. |
| Lateral Cavity Acoustic Transducers (LCATs) | Generates acoustic microstreaming vortices in a microfluidic chip to sort, enrich, and manipulate cells in undiluted whole blood based on size [93]. |
| Capture and Detection Antibodies | Form the core of the sandwich immunoassay; capture antibodies are immobilized in the POEGMA brush, while detection antibodies bind to the target to transduce the signal [1]. |
Conclusion
Effectively managing signal drift in undiluted whole blood is paramount for transforming sensitive biosensors from research tools into reliable clinical and biomedical monitoring systems. A holistic approach is essential, combining a deep understanding of the underlying electrochemical and biofouling mechanisms with robust methodological corrections and rigorous validation. Key takeaways include the necessity of calibrating in fresh, body-temperature blood, the effectiveness of interface engineering with polymer brushes and stable SAMs, and the importance of a rigorous testing methodology that accounts for drift. Future progress hinges on developing standardized benchmarking protocols, creating new drift-resistant materials, and seamlessly integrating these advanced sensors into closed-loop diagnostic and therapeutic systems, ultimately enabling precise, long-term molecular monitoring in the human body.
References
- 1. Addressing Signal Drift and Screening for Detection of ... [https://pmc.ncbi.nlm.nih.gov/articles/PMC12327215/]
- 2. Elucidating the Mechanisms Underlying the Signal Drift of ... [https://pmc.ncbi.nlm.nih.gov/articles/PMC12038169/]
- 3. On the Blood Components Contributing to the Drift ... [https://pubmed.ncbi.nlm.nih.gov/40591816/]
- 4. Elucidating the Mechanisms Underlying the Signal Drift of ... [https://www.semanticscholar.org/paper/Elucidating-the-Mechanisms-Underlying-the-Signal-of-Leung-Downs/af79e6354f13498395ea94731aeb12390da17dbc]
- 5. Electrochemical Microneedles for Real-Time Monitoring in ... [https://www.mdpi.com/2079-6374/15/6/380]
- 6. Seconds-resolved pharmacokinetic measurements of the ... [https://pubs.rsc.org/en/content/articlehtml/2019/sc/c9sc01495k]
- 7. Improved calibration of electrochemical aptamer-based ... [https://www.nature.com/articles/s41598-022-09070-7]
- 8. The Use of Xenonucleic Acids Significantly Reduces the In ... [https://escholarship.org/uc/item/8rz1k6ss]
- 9. Anti-Biofouling Strategies for Long-Term Continuous Use ... [https://www.mdpi.com/2227-9040/8/3/66]
- 10. Controlling Experimental Parameters to Improve ... [https://pmc.ncbi.nlm.nih.gov/articles/PMC7759637/]
- 11. Do not let electrode fouling be the enemy of bioanalysis [https://www.sciencedirect.com/science/article/abs/pii/S1567539423001160]
- 12. Optimizing self-assembled monolayer construction for ... [https://www.sciencedirect.com/science/article/abs/pii/S0013468625004591]
- 13. Survey of Redox-Active Moieties for Application in ... [https://pmc.ncbi.nlm.nih.gov/articles/PMC5660317/]
- 14. A new paradigm of reliable sensing with field-deployed ... [https://www.nature.com/articles/s41598-022-25920-w]
- 15. A regenerating ultrasensitive electrochemical impedance ... [https://www.sciencedirect.com/science/article/abs/pii/S0956566314009749]
- 16. Removal of Thiol-SAM on a Gold Surface for Re-Use ... [https://pmc.ncbi.nlm.nih.gov/articles/PMC8950519/]
- 17. Effects of Physiological-Scale Variation in Cations, pH, and ... [https://pmc.ncbi.nlm.nih.gov/articles/PMC11855119/]
- 18. Survey of oligoethylene glycol-based self-assembled ... [https://www.sciencedirect.com/science/article/abs/pii/S0006291X23005946]
- 19. What Is Model Drift? | IBM [https://www.ibm.com/think/topics/model-drift]
- 20. What is data drift in ML, and how to detect and handle it [https://www.evidentlyai.com/ml-in-production/data-drift]
- 21. Concept Drift vs Data Drift - How Does AI Embrace it all? [https://www.usdsi.org/data-science-insights/concept-drift-vs-data-drift-how-does-ai-embrace-it-all]
- 22. Understanding Model Drift and Data Drift in LLMs (2025 ... [https://orq.ai/blog/model-vs-data-drift]
- 23. Fault and meal detection by redundant continuous glucose ... [https://www.sciencedirect.com/science/article/abs/pii/S1746809417300952]
- 24. A Stress Generation Model for Tiny ML Drift Compensation [https://www.mdpi.com/2673-7426/4/2/83]
- 25. Best Practices for Maintaining Calibration Accuracy in Harsh ... [https://ips-us.com/best-practices-for-maintaining-calibration-accuracy-in-harsh-conditions/]
- 26. Temperature Sensor Calibration: All You Need to Know [https://www.elpro.com/en/learn/temperature-sensor-calibration]
- 27. Chromogenic [https://www.horiba.com/usa/healthcare/academy/technology/chromogenic/]
- 28. A quantitative assay system for protein C activity, the regulator ... [https://pmc.ncbi.nlm.nih.gov/articles/PMC10711464/]
- 29. Whole Blood Aggregometry in Mice - PMC - PubMed Central [https://pmc.ncbi.nlm.nih.gov/articles/PMC11331681/]
- 30. Dual-Frequency, Ratiometric Approaches to EAB Sensor ... [https://pmc.ncbi.nlm.nih.gov/articles/PMC11821477/]
- 31. Comparison of voltammetric methods used in the interrogation ... [https://pubs.rsc.org/en/content/articlehtml/2024/sd/d3sd00083d]
- 32. Maximizing the Signal Gain of Electrochemical-DNA Sensors [https://pmc.ncbi.nlm.nih.gov/articles/PMC5660313/]
- 33. Blood compatibility of surfaces with superlow protein adsorption [https://pubmed.ncbi.nlm.nih.gov/18722010/]
- 34. Blood compatibility of surfaces with superlow protein ... [https://www.sciencedirect.com/science/article/abs/pii/S014296120800536X]
- 35. Polymer brushes and self-assembled monolayers - PubMed [https://pubmed.ncbi.nlm.nih.gov/20408714/]
- 36. From Self-Assembled Monolayers to Coatings [https://www.mdpi.com/2073-4360/7/7/1346]
- 37. Polymer Brushes Containing Sulfonated Sugar Repeat Units [https://pmc.ncbi.nlm.nih.gov/articles/PMC2766538/]
- 38. An epimer of threose nucleic acid enhances ... [https://www.nature.com/articles/s42004-025-01545-8]
- 39. Oligo modifications that block nuclease degradation | IDT [https://www.idtdna.com/page/support-and-education/decoded-plus/modification-highlight-modifications-that-block-nuclease-degradation/]
- 40. Nuclease Resistance Modifications [https://synoligo.com/nuclease-resistance-modifications/]
- 41. Application of Antisense Oligonucleotides as an Alternative ... [https://pmc.ncbi.nlm.nih.gov/articles/PMC12610768/]
- 42. Electrochemical Analysis - an overview [https://www.sciencedirect.com/topics/medicine-and-dentistry/electrochemical-analysis]
- 43. Advanced Nanomaterial-Based Electrochemical Biosensing of ... [https://pmc.ncbi.nlm.nih.gov/articles/PMC12467743/]
- 44. ICP-MS Data Analysis [https://www.thermofisher.com/us/en/home/industrial/spectroscopy-elemental-isotope-analysis/spectroscopy-elemental-isotope-analysis-learning-center/trace-elemental-analysis-tea-information/inductively-coupled-plasma-mass-spectrometry-icp-ms-information/icp-ms-data-analysis.html]
- 45. Key Points to Remember When Using Internal Standards ... [https://www.spectroscopyonline.com/view/key-points-to-remember-when-using-internal-standards-for-sample-analysis-by-icp-oes]
- 46. Internal Standard Calibration Problems [https://www.chromatographyonline.com/view/internal-standard-calibration-problems-0]
- 47. A drift correction optimization technique for the reduction of ... [https://www.sciencedirect.com/science/article/abs/pii/S0584854714000858]
- 48. Correction of gas chromatography–mass spectrometry long ... [https://www.nature.com/articles/s41598-025-24794-y]
- 49. Evaluation of intensity drift correction strategies using ... [https://pmc.ncbi.nlm.nih.gov/articles/PMC5788449/]
- 50. Calibration — LAtools 0.3.20 documentation [https://latools.readthedocs.io/en/0.3.20/users/beginners/7-calibration.html]
- 51. What Is pH Drift And How To Fix It? A Complete ... [https://atlas-scientific.com/blog/ph-drift/?srsltid=AfmBOoph7KsXXZFHPVoEzmYTZi1Mx8NmB-r1JpAu0QJVaRd0lN7Tkg3A]
- 52. Whole Blood Optical Biosensor - PMC [https://pmc.ncbi.nlm.nih.gov/articles/PMC2080782/]
- 53. The Guide to Fixing pH Drift [https://www.phionics.com/2020/11/05/the-guide-to-ph-drift/]
- 54. Temperature Sensing Issues: Troubleshooting, Tips and ... [https://www.ametherm.com/blog/thermistors/temperature-sensing-issues-troubleshooting-tips-and-solutions/]
- 55. Predictive Monitoring for Improved Management of Glucose ... [https://pmc.ncbi.nlm.nih.gov/articles/PMC2769639/]
- 56. Autoregressive Modeling of Drift and Random Error to ... [https://pmc.ncbi.nlm.nih.gov/articles/PMC5761979/]
- 57. Calibration-Free Electrochemical Biosensors Supporting Accurate... [https://pmc.ncbi.nlm.nih.gov/articles/PMC6519131/]
- 58. Laboratory Temperature Monitoring Systems for Lab ... [https://hopara.io/blog/laboratory-temperature-monitoring-system]
- 59. Protocol for building a user-friendly temperature control ... [https://pmc.ncbi.nlm.nih.gov/articles/PMC10846474/]
- 60. Troubleshooting environmental controls in your greenhouse [https://www.advancingalternatives.com/knowledge-center/my-controller-is-working-why-wont-my-vents-run-why-wont-my-side-curtains-roll/?srsltid=AfmBOopoC-K-cqD3PVvrqGKXdYdo-qByqYrJpPktHqU87j5A7MhHuT9h]
- 61. Best Practices for Environmental Monitoring of Humidity ... [https://www.raritan.com/blog/detail/ashrae-best-practices-for-environmental-monitoring-of-humidity-and-temperature]
- 62. 2.1 Temperature, Relative Humidity, Light, and Air Quality [https://www.nedcc.org/free-resources/preservation-leaflets/2.-the-environment/2.1-temperature,-relative-humidity,-light,-and-air-quality-basic-guidelines-for-preservation]
- 63. In-situ calibration of temperature sensors [https://www.krohne.com/en/trends/safety/occupational-and-process-safety/in-situ-calibration-of-temperature-sensors]
- 64. What Are Best Calibration Practices for Sensors? → Question [https://pollution.sustainability-directory.com/question/what-are-best-calibration-practices-for-sensors/]
- 65. A novel temperature drift compensation method based on ... [https://www.sciencedirect.com/science/article/abs/pii/S0263224124014581]
- 66. Real-Time Correction and Long-Term Drift Compensation ... [https://pmc.ncbi.nlm.nih.gov/articles/PMC12471586/]
- 67. Zero-Touch Calibration and Auto-Drift Compensation in ... [https://promwad.com/news/zero-touch-calibration-auto-drift-compensation-sensor-fleets]
- 68. Anti-fouling coatings for blood-contacting devices [https://www.sciencedirect.com/science/article/pii/S2590183423000431]
- 69. Exploiting the superior protein resistance of polymer brushes ... [https://pmc.ncbi.nlm.nih.gov/articles/PMC3712172/]
- 70. Design and Application of Antifouling Bio-Coatings - PMC [https://pmc.ncbi.nlm.nih.gov/articles/PMC11945268/]
- 71. What is Passivation? How Does Stainless Steel ... [https://www.besttechnologyinc.com/passivation-systems/what-is-passivation/]
- 72. PEG Hydrophilic Coatings and Their Biomedical Uses [https://hydromer.com/peg-hydrophilic-coatings-biomedical-uses/]
- 73. Passivation (chemistry) [https://en.wikipedia.org/wiki/Passivation_(chemistry)]
- 74. On the Blood Components Contributing to the Drift of ... [https://figshare.com/collections/On_the_Blood_Components_Contributing_to_the_Drift_of_Electrochemical_Aptamer-Based_Biosensors/7904704]
- 75. 4. Pre-deployment operations and calibrations [https://oceangliderscommunity.github.io/Oxygen_SOP/sections/oxygen_pre_deployment.html]
- 76. Accuracy, correctness and precision – Long-term stable ... [https://www.trafag.com/en/know-how/post/accuracy-correctness-and-precision-long-term-stable-pressure-transmitters/]
- 77. Real-time, In-vivo Molecular Monitoring Using ... [https://pmc.ncbi.nlm.nih.gov/articles/PMC9840907/]
- 78. Stability: Recommendation for Best Practices and ... [https://pmc.ncbi.nlm.nih.gov/articles/PMC4012051/]
- 79. How to be a Better Troubleshooter in Your Laboratory [https://www.goldbio.com/blogs/articles/how-to-be-a-better-troubleshooter?srsltid=AfmBOore5Q6FAwFgTPxV7sHcJejnAqWgdvL-WOleG0Zzm3EeYsQq_BVJ]
- 80. Teaching troubleshooting skills to graduate students - PMC [https://pmc.ncbi.nlm.nih.gov/articles/PMC11407763/]
- 81. Troubleshooting Protocols - Biological Sciences: Summer ... [https://guides.library.cmu.edu/biologicalsciencesSRI/troubleshooting]
- 82. Flow Cytometry Troubleshooting Guide [https://www.cellsignal.com/learn-and-support/troubleshooting/flow-cytometry-troubleshooting-guide?srsltid=AfmBOorFYwk3KNTTjKmoWAI1tb-pOQxSyW-dQT2THR2eWkotPo7yscZm]
- 83. High-Performance CNT-Based FETs on 200 mm Si Wafers ... [https://ui.adsabs.harvard.edu/abs/2025ISenL...9L2488D/abstract]
- 84. Improved calibration of electrochemical aptamer-based sensors [https://www.nature.com/articles/s41598-022-09070-7?error=cookies_not_supported&code=5bc2d5a9-7550-4316-90a0-35c02d62ac9a]
- 85. Method validation of multi-element panel in whole blood by ... [https://www.sciencedirect.com/science/article/pii/S2667145X22000475]
- 86. Development and optimization of a diluted whole blood ... [https://pmc.ncbi.nlm.nih.gov/articles/PMC11398710/]
- 87. Unsupervised Concept Drift Detection from Deep Learning Representations in Real-time [https://arxiv.org/html/2406.17813v2]
- 88. CMC | Free Full-Text | Explainable Artificial Intelligence-Based Model Drift Detection Applicable to Unsupervised Environments [https://www.techscience.com/cmc/v76n2/54010/html]
- 89. Unsupervised statistical concept drift detection for behaviour abnormality detection | Applied Intelligence [https://link.springer.com/article/10.1007/s10489-022-03611-3]
- 90. Capacitive Sensors for Label-Free Detection in High-Ionic ... [https://pmc.ncbi.nlm.nih.gov/articles/PMC12384789/]
- 91. Quantitative differentiation of multiple virus in blood using ... [https://www.sciencedirect.com/science/article/abs/pii/S0956566317304219]
- 92. Innovations in Liquid Chromatography: 2025 HPLC ... [https://www.chromatographyonline.com/view/innovations-in-liquid-chromatography-2025-hplc-column-and-accessories-review]
- 93. Whole-blood sorting, enrichment and in situ ... [https://www.nature.com/articles/micronano201785]
- 94. Electrochemical Biosensors: A Prospective Insight to ... [https://www.sciencedirect.com/science/article/abs/pii/S2451910325001358]