Mastering Kinetic Differential Measurement (KDM): A Complete Guide to Drift Correction for Electrochemical Aptamer-Based Sensors
This article provides a comprehensive resource for researchers and scientists developing electrochemical aptamer-based (EAB) sensors for in vivo biomolecular monitoring.
Mastering Kinetic Differential Measurement (KDM): A Complete Guide to Drift Correction for Electrochemical Aptamer-Based Sensors
Abstract
This article provides a comprehensive resource for researchers and scientists developing electrochemical aptamer-based (EAB) sensors for in vivo biomolecular monitoring. We explore the foundational principles of signal drift, detailing the critical roles of Kinetic Differential Measurement (KDM) in correcting for signal loss caused by electrochemical desorption and biofouling. The scope includes a step-by-step methodological guide for KDM implementation, advanced troubleshooting and optimization strategies to enhance sensor longevity, and a comparative validation of KDM against emerging calibration-free techniques like ratiometric KDM. Designed for drug development professionals and sensor engineers, this guide synthesizes current research to empower the development of robust, drift-resilient biosensors for clinical and biomedical applications.
Understanding EAB Sensor Signal Drift: Mechanisms and the Critical Need for KDM
Electrochemical aptamer-based (EAB) sensors are a promising platform for the real-time, in vivo monitoring of drugs, metabolites, and biomarkers. However, their deployment in the challenging environment of the living body is significantly hampered by signal drift, a phenomenon where the sensor signal decreases over time. This application note, framed within research on Kinetic Differential Measurement (KDM) for drift correction, details the mechanisms of this drift and the standardized protocols for its investigation.
Unraveling the Mechanisms of Signal Drift
Signal drift in EAB sensors is not a single-issue failure but a biphasic process resulting from distinct mechanisms. The degradation of a model EAB sensor in whole blood at 37°C reveals a rapid initial loss of signal followed by a slower, linear decrease [1].
Table 1: Primary Mechanisms Contributing to EAB Sensor Signal Drift
| Drift Phase | Primary Mechanism | Root Cause | Impact on Signal |
|---|---|---|---|
| Initial Exponential Phase (First ~1.5 hours) | Biofouling [1] | Adsorption of blood components (proteins, cells) to the sensor surface, hindering electron transfer [1]. | Rapid signal decrease |
| (Minor) Enzymatic Degradation | Nuclease-driven cleavage of the DNA aptamer [1]. | Contributes to initial signal loss | |
| Subsequent Linear Phase (Hours onward) | Monomer Desorption [1] | Electrochemically driven desorption of the thiol-based self-assembled monolayer (SAM) from the gold electrode [1]. | Slow, continuous signal loss |
| (Lesser) Reporter Degradation | Irreversible side reactions of the redox reporter (e.g., methylene blue) during interrogation [1]. | Contributes to long-term decay |
The following diagram illustrates the relationship between the experimental environment and the dominant drift mechanisms identified in these studies.
Experimental Evidence for Mechanism Isolation
Key experimental findings that isolate these mechanisms include:
- Electrochemical Interrogation Drives Linear Drift: Pausing electrochemical scanning in PBS halts the linear signal loss, confirming its electrical origin [1].
- Potential Window Dictates Desorption Rate: The rate of linear drift is highly dependent on the applied potential window, aligning with the known reductive (below -0.4 V) and oxidative (above 0.0 V) desorption potentials of thiol-on-gold monolayers [1].
- Fouling is Partially Reversible: Washing a degraded sensor with concentrated urea recovers ~80% of the initial signal, demonstrating the physical, non-covalent nature of the fouling layer [1].
- Electron Transfer Rate Slows with Fouling: The square-wave voltammetry frequency for maximum charge transfer decreases during the exponential phase, indicating that fouling creates a barrier that slows electron transfer from the redox reporter [1].
Protocols for Investigating and Mitigating Signal Drift
Protocol: Quantifying Drift Mechanisms in Complex Media
This protocol characterizes the biphasic drift of an EAB sensor in a biologically relevant environment.
- Primary Objective: To dissect the contributions of biofouling and electrochemical desorption to overall signal drift.
- Materials:
- Table 2: Key Research Reagent Solutions [1]
Reagent/Material Function/Description Thiol-Modified Aptamer The recognition element, attached to the gold electrode via a gold-thiol bond. Methylene Blue (MB) A common redox reporter molecule attached to the distal end of the aptamer. Mercaptohexanol (MCH) A diluent molecule that forms a self-assembled monolayer (SAM), helping the aptamer stand up. Aryl Diazonium Salt An alternative to thiol chemistry for forming a more stable covalent gold-carbon electrode bond [2]. Whole Blood (Fresh) The challenge medium, required for accurate calibration and drift studies [3]. Urea Solution (Conc.) A denaturant used to wash off non-covalently adsorbed foulants from the sensor surface. Phosphate Buffered Saline (PBS) A simple, non-fouling control medium.
- Table 2: Key Research Reagent Solutions [1]
- Procedure:
- Sensor Fabrication: Immerse a clean gold electrode in a solution of the thiol-modified, MB-tagged aptamer. Subsequently, backfill with MCH to form a mixed SAM [1] [2].
- Baseline Acquisition: In PBS at 37°C, acquire square-wave voltammograms (SWV) using a predefined potential window and frequency to establish a stable baseline current (I₀).
- Whole Blood Challenge: Replace the PBS with freshly collected, undiluted whole blood maintained at 37°C.
- Continuous Interrogation: Record SWV scans at regular intervals (e.g., every 5 minutes) for 6-8 hours.
- Data Analysis: Plot normalized signal (I/I₀) vs. time. Fit the data to a biphasic model to extract the rate constants for the exponential and linear decay phases.
- Fouling Recovery Check: After 2-3 hours, wash the sensor with a concentrated urea solution and resume SWV in PBS to quantify signal recovery [1].
Protocol: Establishing a Robust KDM Calibration Curve
Accurate in vivo quantification requires calibration under conditions that match the deployment environment. The Kinetic Differential Measurement (KDM) method corrects for drift by using two interrogation frequencies [3].
- Primary Objective: To generate a calibration curve for translating sensor signal into target concentration, accounting for drift and environmental factors.
- Procedure:
- Media and Temperature Matching: Use freshly collected whole blood at 37°C for both calibration and validation to ensure parameters like hematocrit and metabolic activity are representative [3].
- Frequency Pair Selection: Identify a "signal-on" frequency (current increases with target) and a "signal-off" frequency (current decreases with target) at 37°C. Note: These frequencies can shift with temperature [3].
- Titration and KDM Calculation:
- For each target concentration (e.g., 0, 5, 10, 20, 50 µM), collect SWV at both the signal-on and signal-off frequencies.
- For each frequency, normalize the peak currents.
- Calculate the KDM value: KDM = (Ionnorm - Ioffnorm) / ((Ionnorm + Ioffnorm)/2) [3].
- Curve Fitting: Plot KDM values against the log of target concentration. Fit the data to a Hill-Langmuir isotherm to determine parameters (KDMmin, KDMmax, K₁/₂, n_H) [3].
- Concentration Estimation: Apply the fitted parameters to convert in vivo KDM readings into concentration estimates using the Hill-Langmuir equation.
The workflow below outlines the KDM calibration and measurement process, highlighting how two frequencies are used to generate a drift-resistant signal.
Signal drift, driven primarily by biofouling and electrochemical desorption, remains the critical barrier to long-term in vivo deployment of EAB sensors. While empirical methods like KDM provide effective short-term correction, advancing the technology requires mechanistic solutions.
Future research is focused on material science and engineering strategies to directly combat these mechanisms. Promising directions include developing covalent electrode-aptamer attachment chemistries (e.g., using aryl diazonium salts to form stable gold-carbon bonds) to eliminate monolayer desorption [2], and creating advanced antifouling coatings to prevent the adsorption of interferents. By integrating these next-generation materials with robust signal processing like KDM, the path toward long-duration, continuous molecular monitoring in the body becomes attainable.
The deployment of electrochemical aptamer-based (EAB) sensors for in vivo monitoring of drugs, metabolites, and biomarkers represents a significant advancement in molecular sensing technology. A critical challenge impeding the long-term stability of these sensors is signal drift, which diminishes measurement accuracy over time. Within the context of kinetic differential measurement (KDM) research for drift correction, understanding the fundamental mechanisms underlying this drift is paramount. Among the identified sources of signal degradation, the electrochemically-driven desorption of the self-assembled monolayer (SAM) from the gold electrode surface has been established as a primary contributor to the linear, long-term signal loss observed in EAB sensors [1]. This application note details the experimental approaches for quantifying and characterizing this desorption process, providing researchers with methodologies to evaluate and improve SAM stability.
Background and Significance
The Role of Self-Assembled Monolayers in EAB Sensors
EAB sensors rely on a thiol-modified DNA aptamer covalently attached to a gold electrode via a SAM. This monolayer not only immobilizes the aptamer but also passivates the electrode surface against non-specific adsorption. The stability of the SAM is therefore integral to sensor performance. Electrochemical desorption, particularly reductive desorption, occurs when the application of electrical potentials induces the cleavage of the gold-thiol bond, releasing the aptamer from the electrode surface and leading to irreversible signal loss [1] [4]. This phenomenon is distinct from other drift mechanisms, such as surface fouling, which typically causes a rapid, exponential signal decay and is often at least partially reversible [1].
Distinguishing Desorption from Other Drift Mechanisms
Signal drift in EAB sensors deployed in biological fluids often exhibits biphasic kinetics: an initial exponential decay followed by a prolonged linear decrease [1].
- The Exponential Phase: This phase is dominated by "biology-driven" mechanisms, primarily surface fouling by blood components (proteins, cells). Evidence supporting fouling as the primary driver includes the significant recovery of signal (≥80%) after washing with concentrated urea and the persistence of this phase in enzyme-resistant oligonucleotide analogs [1].
- The Linear Phase: This phase is characterized by "electrochemistry-driven" mechanisms, with SAM desorption being a principal contributor. Key evidence includes the cessation of signal loss when electrochemical interrogation is paused and a strong dependence of the degradation rate on the applied potential window, specifically when it encroaches on regimes that promote reductive (below -0.4 V) or oxidative (above 0.0 V) desorption [1].
The following workflow illustrates the experimental logic for deconvoluting these primary drift mechanisms:
Quantitative Analysis of SAM Desorption
The stability of the SAM is critically dependent on the electrochemical parameters used for sensor interrogation, particularly the applied potential window. The data below summarizes the effect of the square-wave voltammetry window on the stability of a model EAB-like sensor (MB37) in phosphate-buffered saline (PBS) at 37°C, isolating the electrochemical contribution to drift [1].
Table 1: Impact of Potential Window on SAM Stability and Signal Loss [1]
| Fixed Potential (V) | Scanned Potential (V) | Scan Window Width | Signal Loss after 1500 Scans | Inferred SAM Stability |
|---|---|---|---|---|
| Negative side: -0.4 V | Positive side: 0.0 V | 0.4 V | Low | High |
| Negative side: -0.4 V | Positive side: +0.2 V | 0.6 V | Increased | Moderate |
| Positive side: -0.2 V | Negative side: -0.4 V | 0.2 V | Low | High |
| Positive side: -0.2 V | Negative side: -0.6 V | 0.4 V | Increased | Moderate |
| - | -0.4 V to -0.2 V | 0.2 V | ~5% | Very High |
The data demonstrates that signal loss is minimized when the potential window is confined between -0.4 V and 0.0 V versus a standard reference electrode. Extending the positive potential above 0.0 V or the negative potential below -0.4 V significantly accelerates signal loss due to oxidative and reductive desorption, respectively [1]. This understanding is critical for designing KDM interrogation schemes that minimize baseline drift, thereby enhancing the reliability of long-term in vivo measurements.
Experimental Protocols
Protocol 1: Quantifying SAM Desorption via Potential Window Modulation
This protocol is designed to systematically evaluate the contribution of electrochemical desorption to signal drift in EAB sensors by varying the interrogation parameters.
I. Research Reagent Solutions Table 2: Essential Materials for Desorption Studies
| Item | Function/Description |
|---|---|
| Gold Electrodes | The substrate for SAM formation; polycrystalline gold disk electrodes (e.g., 2 mm diameter) are commonly used. |
| Alkanethiol-modified DNA Aptamer | The sensing element; a DNA aptamer (e.g., 37-base sequence) with a 5' or 3' modification of a C6 alkanethiol linker and a methylene blue (MB) redox reporter. |
| 6-Mercapto-1-hexanol (MCH) | A short-chain alkanethiol used to backfill and create a densely packed, well-ordered SAM, which reduces non-specific adsorption. |
| Phosphate Buffered Saline (PBS) | A standard electrolyte solution (e.g., 137 mM NaCl, 2.7 mM KCl, 10 mM Phosphate, pH 7.4) for in vitro stability testing. |
| Undiluted Whole Blood | A complex biological matrix used as a proxy for in vivo conditions to study combined desorption and fouling. |
| Potentiostat | The instrument used to apply potentials and measure electrochemical currents (e.g., for Square Wave Voltammetry). |
II. Methodology
- Sensor Fabrication: a. Clean gold electrodes via electrochemical polishing or piranha treatment ( Caution: Piranha solution is extremely corrosive and must be handled with extreme care). b. Incubate the cleaned electrodes in a solution of the thiol-modified, MB-labeled DNA aptamer (e.g., 1 µM) for 1 hour to allow for chemisorption. c. Rinse the electrodes and subsequently incubate them in a 1-10 mM solution of 6-mercapto-1-hexanol (MCH) for 30-60 minutes to backfill the monolayer [1] [4]. d. Rinse thoroughly with PBS and deionized water to remove physisorbed molecules.
Electrochemical Interrogation and Stability Assessment: a. Place the fabricated sensor in PBS at 37°C to mimic physiological temperature. b. Using a potentiostat, interrogate the sensor continuously using Square Wave Voltammetry (SWV). A typical starting parameter set is: frequency: 10-1000 Hz; amplitude: 25-50 mV; step potential: 1-10 mV. c. Define multiple potential windows for testing, ensuring they include windows that are safe for the SAM (e.g., -0.4 V to -0.2 V) and windows that induce desorption (e.g., -0.6 V to 0.0 V or -0.4 V to +0.2 V) [1]. d. Record the SWV voltammograms over a period of several hours (e.g., 1500 scans). Monitor the peak current associated with the methylene blue redox reaction.
Data Analysis: a. For each potential window tested, plot the normalized peak current against the scan number or time. b. Fit the data to determine the rate of signal loss. The signal loss in PBS is primarily attributed to SAM desorption when a narrow potential window is used. c. Compare the rates of signal loss across the different potential windows to identify the stability threshold for your specific SAM-sensor system.
Protocol 2: Isolating SAM Desorption from Fouling in Whole Blood
This protocol outlines a method to deconvolute the electrochemical desorption of the SAM from the biological fouling that occurs in complex media.
I. Methodology
- Sensor Preparation: Fabricate sensors as described in Protocol 1, Section 1.
Dual-Environment Challenge: a. Split the fabricated sensors into two groups. b. Challenge the first group in undiluted, fresh whole blood at 37°C with continuous SWV interrogation using a pre-defined potential window. c. Challenge the second group in PBS at 37°C using the exact same electrochemical parameters.
Post-Hoc Fouling Removal: a. After a set period (e.g., 2.5 hours) of interrogation in whole blood, remove the sensors. b. Gently rinse the sensors with PBS. c. Incubate the sensors in a concentrated urea solution (e.g., 6-8 M) or a mild detergent solution for a short period to dissolve and remove adsorbed proteins and cells without damaging the underlying SAM [1]. d. Re-interrogate the washed sensors in PBS using the original SWV parameters.
Data Analysis: a. Plot the signal decay over time for both the blood and PBS challenges. The drift in blood will typically be biphasic, while the drift in PBS will be linear. b. For the blood-challenged sensors, calculate the percentage of initial signal recovered after the urea wash. A high recovery (e.g., >80%) indicates that the initial exponential phase was dominated by reversible fouling [1]. c. The residual, non-recoverable signal loss after the wash, combined with the linear loss observed in PBS, can be attributed to permanent processes like SAM desorption and aptamer degradation.
The Scientist's Toolkit
Table 3: Key Research Reagent Solutions for Investigating SAM Desorption
| Reagent | Function in Experiment | Key Considerations |
|---|---|---|
| Methylene Blue (MB) | A redox reporter used to tag the DNA aptamer. Its electron transfer rate is sensitive to aptamer conformation and SAM integrity. | MB's mid-range redox potential (~ -0.25 V vs. Ag/AgCl) allows for interrogation within a relatively stable potential window for alkanethiol SAMs [1]. |
| 2'O-methyl RNA Aptamers | Nuclease-resistant oligonucleotide analogs. | Used to suppress the signal loss contribution from enzymatic degradation, thereby helping to isolate the contributions of fouling and desorption [1]. |
| Urea Wash Solution (6-8 M) | A chemical denaturant used to remove fouling layers. | Effectively solubilizes proteins adsorbed on the sensor surface, allowing for quantification of reversible fouling versus permanent SAM loss [1]. |
| Kinetic Differential Measurements (KDM) | A ratiometric, dual-frequency SWV analysis method. | Corrects for signal drift in real-time by using the difference between normalized currents at two frequencies, improving in vivo measurement precision [5] [3]. |
| Long-Chain Alkanethiols (e.g., C11) | Used to form more stable SAMs compared to shorter chains (e.g., C6). | Can extend sensor shelf-life but may reduce electron transfer efficiency and alter EAB signaling behavior, particularly at low frequencies [4]. |
Electrochemically-driven desorption of self-assembled monolayers is a fundamental, controllable source of signal drift in EAB sensors. The experimental frameworks detailed herein provide researchers with clear methodologies to quantify this phenomenon and distinguish it from other degradation pathways. A key strategy for mitigating desorption-driven drift is the optimization of the electrochemical potential window to avoid regimes that trigger oxidative or reductive desorption. Integrating this understanding with advanced signal processing techniques like Kinetic Differential Measurements is essential for developing robust, long-lasting EAB sensors capable of achieving high-precision, continuous molecular monitoring in vivo. Future research should focus on the development of novel monolayer chemistries with enhanced electrochemical stability and the refinement of KDM protocols to further extend in vivo sensor operational lifetimes.
Electrochemical aptamer-based (EAB) sensors represent a groundbreaking platform for the real-time, in vivo monitoring of specific molecules, including drugs, metabolites, and biomarkers [6]. Their ability to function independently of the chemical reactivity of their targets makes them uniquely generalizable. However, when deployed in the complex environment of the living body, these sensors experience significant signal drift, characterized by a progressive decrease in signal intensity over time [1]. This drift poses a substantial obstacle to achieving long-term, continuous molecular monitoring.
While empirical drift-correction methods like Kinetic Differential Measurement (KDM) can compensate for this signal loss over several hours, they represent a corrective rather than a preventative approach [6]. Ultimately, the signal-to-noise ratio becomes too low for precise measurements, limiting sensor lifetime [1]. A systematic understanding of the fundamental mechanisms driving this drift is therefore essential for developing next-generation EAB sensors with enhanced stability. This Application Note elucidates the critical role of biological fouling by blood components in the rapid, exponential phase of signal loss, providing researchers with detailed protocols and data for investigating and mitigating this degradation pathway.
Mechanisms of EAB Sensor Signal Drift
The signal degradation observed when EAB sensors are deployed in biological fluids is a biphasic process, comprising a distinct exponential phase followed by a linear phase [1]. The accompanying diagram illustrates the proposed mechanisms and their respective time scales.
- Exponential Phase: This initial, rapid signal loss occurs over approximately 1.5 hours and is driven primarily by biological mechanisms specific to the blood environment [1]. The primary mechanism is fouling, the non-specific adsorption of proteins, blood cells, and other interferents onto the sensor surface [1] [7].
- Linear Phase: This subsequent, slower signal decay is driven by electrochemical mechanisms, predominantly the electrochemically driven desorption of the self-assembled monolayer (SAM) from the gold electrode surface [1]. This process is strongly dependent on the applied potential window during electrochemical interrogation [1].
The following table summarizes the key characteristics of these two phases, as identified in controlled in vitro studies using whole blood at 37°C [1].
Table 1: Characteristics of Biphasic Signal Drift in Whole Blood at 37°C
| Parameter | Exponential Phase | Linear Phase |
|---|---|---|
| Duration | ~1.5 hours | Persists for many hours |
| Primary Driver | Biological (Blood-specific) | Electrochemical |
| Dominant Mechanism | Fouling by blood components | SAM desorption from electrode |
| Impact on Electron Transfer | Rate decreases by a factor of ~3 | Minimal change in rate |
| Reversibility | Partially reversible (e.g., with urea wash) | Irreversible |
Quantitative Characterization of Fouling-Induced Signal Loss
Impact of Fouling on Electron Transfer Dynamics
Fouling does not merely block the electrode surface; it directly interferes with the EAB sensor's signaling mechanism by altering the electron transfer kinetics of the redox reporter (e.g., methylene blue). Research indicates that fouling reduces the rate at which the attached methylene blue can approach the electrode surface to transfer electrons [1]. This was quantified by determining the square-wave voltammetry frequency at which the greatest charge transfer occurs, a proxy for the electron transfer rate. During the exponential drift phase in whole blood, this frequency decreases by a factor of three, indicating a significant slowdown of electron transfer [1].
Reporter Position Dictates Fouling Susceptibility
The impact of fouling is highly sensitive to the spatial placement of the redox reporter along the DNA strand. Experiments with equal-length single-stranded DNAs featuring methylene blue at different internal positions demonstrate that the exponential drift phase is both more rapid and larger in magnitude when the reporter is positioned closer to the electrode surface [1]. This suggests that fouling layers impede the conformational dynamics of the DNA strand, with a greater effect on reporters that have a shorter effective tether to the electrode.
Table 2: Key Experimental Findings on Blood Component Fouling
| Experimental Observation | Quantitative Result | Interpretation |
|---|---|---|
| Signal Loss in Whole Blood | Biphasic decay: Exponential (~1.5 hr) + Linear | At least two distinct mechanisms are active [1]. |
| Electron Transfer Rate in Blood | Peak charge transfer frequency decreases by ~3x | Fouling reduces the rate of electron transfer from the redox reporter [1]. |
| Stability in PBS vs. Blood | Exponential phase is abolished in PBS | The exponential phase is driven by blood-specific biological components [1]. |
| Sensor Recovery with Urea Wash | ~80% signal recovery after 2.5h in blood | Fouling is a primary cause of initial signal loss and is partially reversible [1]. |
| Stability with Narrow Potential Window | <5% signal loss after 1500 scans (-0.4V to -0.2V) | SAM desorption, a key driver of the linear phase, is mitigated by avoiding extreme potentials [1]. |
Experimental Protocols for Fouling Analysis
Protocol: Differentiating Biological vs. Electrochemical Drift
Objective: To isolate the contribution of biological fouling from electrochemical degradation mechanisms.
- Sensor Fabrication: Fabricate EAB-like proxy sensors using a thiol-modified DNA sequence (e.g., a 37-base unstructured sequence, "MB37") labeled with a methylene blue (MB) redox reporter. Immobilize on a gold electrode and backfill with a short-chain alkane-thiol (e.g., 6-mercapto-1-hexanol, MCH) to form a self-assembled monolayer [1] [7].
- Experimental Setup:
- Interrogation: Interrogate both sensors continuously using square-wave voltammetry (SWV). Use a narrow potential window (e.g., -0.4 V to -0.2 V) to minimize the electrochemical desorption of the SAM [1].
- Data Analysis: Plot the SWV peak current over time for both conditions.
- The signal in whole blood will show a biphasic decay.
- The signal in PBS will show only the linear phase, effectively abolishing the exponential phase. The difference in signal loss is attributable to biological fouling [1].
Protocol: Assessing Fouling Reversibility
Objective: To confirm the role of reversible surface adsorption (fouling) in signal loss.
- Challenge Phase: Deploy EAB sensors in undiluted whole blood at 37°C for a set period (e.g., 2.5 hours) while performing electrochemical interrogation with a narrow potential window [1].
- Wash Phase: After the challenge, gently rinse the sensors with PBS.
- Recovery Phase: Incubate the sensors in a concentrated urea solution (e.g., 8 M) or a detergent solution for a defined period. These agents solubilize adsorbed biomolecules without disrupting properly formed EAB sensors [1].
- Re-interrogation: Return the washed sensors to PBS and perform SWV interrogation.
- Data Analysis: Compare the post-recovery SWV peak current to the initial current. Recovery of >80% of the signal indicates that fouling, rather than irreversible degradation (e.g., DNA cleavage), is the primary mechanism of the initial signal loss [1].
Protocol: Evaluating Nuclease-Resistant Constructs
Objective: To decouple the effects of enzymatic DNA degradation from physical fouling.
- Sensor Fabrication: Fabricate two sets of sensors:
- Standard DNA-based sensor.
- Nuclease-resistant sensor using a 2'-O-methyl RNA analog or a spiegelmer [1].
- Experimental Setup: Challenge both sensor types in undiluted whole blood at 37°C.
- Data Analysis: Monitor the exponential drift phase. The persistence of a significant exponential phase in the nuclease-resistant construct provides strong evidence that fouling, not enzymatic degradation, is the dominant driver of this rapid signal loss [1].
The Scientist's Toolkit: Research Reagent Solutions
The following table catalogues essential materials and their specific functions in studying and mitigating biofouling in EAB sensors.
Table 3: Key Research Reagents for Biofouling Studies
| Reagent / Material | Function / Rationale | Experimental Notes |
|---|---|---|
| Methylene Blue (MB) | Redox reporter; stable under repeated interrogation and operates within a potential window that minimizes SAM desorption [1] [6]. | Preferred over other reporters due to its optimal redox potential [1]. |
| 6-Mercapto-1-hexanol (MCH) | Short-chain alkane-thiol used to form a self-assembled monolayer (SAM) on the gold electrode, passivating the surface and presenting the DNA probe [1] [7]. | A common baseline for SAM performance; provides a benchmark for comparison with novel antifouling SAMs [7]. |
| Oligoethylene Glycol (OEG) SAMs | Anti-fouling molecules (e.g., LAO2A, LAO3A) that resist protein adsorption via water-mediated repulsion; studied as alternatives to MCH for improved drift resistance [7]. | Can reduce signal drift, but may alter electron transfer rates compared to MCH, requiring optimization of interrogation parameters [7]. |
| 2'-O-methyl RNA / Spiegelmers | Nuclease-resistant oligonucleotide backbones used to isolate the contribution of enzymatic degradation from fouling [1]. | Confirms that the exponential signal loss persists even when enzymatic degradation is minimized, pointing to fouling as the primary culprit [1]. |
| Concentrated Urea | Denaturant used in reversibility studies to solubilize and remove proteins fouled on the sensor surface without damaging the underlying SAM [1]. | A recovery of >80% signal after urea wash is diagnostic of a fouling-dominated mechanism [1]. |
| Fresh Whole Blood | Physiologically relevant challenge medium for in vitro testing. Freshness is critical, as aged blood can alter sensor response and fouling behavior [3]. | For accurate calibration, blood should be used as fresh as possible and maintained at 37°C [3]. |
Mitigation Strategies and Research Directions
The experimental data point to several targeted strategies for mitigating the exponential signal loss caused by biofouling. The logical workflow for developing these solutions is summarized below.
- Advanced Anti-Fouling SAMs: Research is focused on developing novel self-assembled monolayers with superior anti-fouling properties. Molecules like oligoethylene glycol (OEG) have shown promise due to their ability to bind interfacial water and create a physical barrier against protein adsorption [7]. The challenge is to design SAMs that provide robust fouling resistance without compromising the electron transfer kinetics essential for high signal gain.
- Optimized Electrochemical Interrogation: Adjusting the electrochemical protocol itself can reduce degradation. Using a narrower potential window (e.g., -0.4 V to -0.2 V) during square-wave voltammetry significantly reduces the rate of SAM desorption, thereby mitigating the linear phase of drift and extending sensor lifetime [1].
- Ratiometric and Calibration-Free Interrogation: Advanced signal processing methods, such as ratiometric analysis of data from multiple square-wave frequencies, can correct for signal loss that is uniform across frequencies, obviating the need for single-point calibration and improving the robustness of concentration measurements in drifting conditions [5]. A 2025 study also demonstrated a calibration-free approach using differential electron transfer kinetics, generating two current peaks whose ratio is independent of the number of surface-bound aptamers [8].
- Rigorous In Vitro Calibration Standards: To accurately predict in vivo performance, calibration must be performed in conditions that mimic the physiological environment as closely as possible. This includes using fresh whole blood (not commercially sourced aged blood) and maintaining calibration media at body temperature (37°C), as both factors significantly impact the observed sensor response and fouling behavior [3].
Biological fouling by blood components is a primary driver of the exponential signal loss that plagues EAB sensors during in vivo deployment. Through targeted experimental protocols, researchers can effectively differentiate this mechanism from electrochemical degradation and nuclease activity. The path toward extended-duration molecular monitoring lies in the rational design of interfaces—employing advanced anti-fouling SAMs, optimized electrochemical protocols, and robust calibration standards—that directly address the fundamental mechanisms of fouling outlined in this note. By integrating these strategies, the vision of long-term, continuous molecular monitoring in the living body moves closer to realization.
Electrochemical aptamer-based (EAB) sensors represent a groundbreaking platform technology capable of real-time, in vivo monitoring of specific molecules, including drugs, metabolites, and biomarkers, irrespective of their chemical or enzymatic reactivity [1]. This capability has enabled unprecedented applications, such as closed-loop, feedback-controlled drug delivery, heralding a new era of high-precision therapeutics. However, when deployed in the challenging environments found within the living body, EAB sensors exhibit signal drift, characterized by a progressive decrease in sensor signal over time [1]. This drift poses a significant obstacle to long-term molecular monitoring, as it eventually reduces the signal-to-noise ratio to unacceptably low levels, limiting measurement duration and reliability.
The need for effective drift correction is particularly acute in pharmacological and biomedical research, where precise, multi-hour measurements of drug pharmacokinetics or metabolite flux are essential. While empirical drift correction methods, such as normalizing the changing electrochemical signal to a standardizing signal, have enabled good measurement precision over multi-hour deployments in live animals, these approaches are ultimately temporary solutions [1]. As the sensor's signaling current continuously declines, drift correction must eventually fail, underscoring the necessity for a fundamental understanding and targeted remediation of the underlying drift mechanisms to extend the functional lifetime of in vivo molecular measurements.
The Fundamental Mechanisms of Sensor Signal Drift
Elucidating the Biphasic Nature of Signal Loss
When EAB sensors are challenged in complex biological milieus such as whole blood at 37°C, their signal loss follows a distinct biphasic pattern, indicative of multiple, simultaneous degradation mechanisms operating on different time scales [1]. The first phase is an approximately exponential signal decrease that occurs rapidly over the first approximately 1.5 hours. This initial rapid decay is followed by a second phase characterized by an approximately linear decrease that persists for the remaining duration of the sensor's deployment [1]. This biphasic kinetics suggests that at least two distinct mechanisms are responsible for the observed signal loss.
Investigations into these phases have revealed that the exponential phase is effectively abolished when sensors are placed in phosphate-buffered saline (PBS) at 37°C instead of whole blood, indicating this phase arises from blood-specific biological mechanisms [1]. In contrast, the linear phase remains of similar magnitude in PBS, suggesting it stems from electrochemical mechanisms intrinsic to the sensor's operation [1]. Furthermore, the linear drift ceases when electrochemical interrogation is paused, confirming its connection to the sensor's electrochemical cycling [1].
Primary Drift Mechanisms: Electrochemical Desorption and Biological Fouling
Research has systematically evaluated four proposed mechanisms for EAB sensor degradation: (1) desorption of the alkane-thiolate self-assembled monolayer (SAM) from the gold electrode surface; (2) irreversible redox reactions degrading the redox reporter; (3) enzymatic degradation of the DNA; and (4) fouling from interferents such as blood cells and proteins adsorbing to the sensor surface [1]. Through controlled experiments, the relative contributions of these mechanisms have been clarified, enabling targeted remediation strategies.
Table 1: Primary Mechanisms of EAB Sensor Drift
| Mechanism | Phase | Primary Driver | Experimental Evidence |
|---|---|---|---|
| Electrochemically Driven SAM Desorption | Linear | Applied potential during square-wave scan | Degradation rate strongly dependent on potential window width; minimal loss (5% after 1500 scans) with limited window (-0.4V to -0.2V) [1] |
| Fouling by Blood Components | Exponential | Adsorption of proteins and cells to sensor surface | ~80% signal recovery after urea wash; observed with enzyme-resistant oligonucleotide analogs [1] |
| Enzymatic DNA Degradation | Minor Contributor | Nucleases in biological fluids | Significant exponential phase persists with nuclease-resistant 2'O-methyl RNA constructs [1] |
| Irreversible Redox Reporter Reactions | Minimal | Redox cycling | Stability independent of potential window width; MB stability attributed to its favorable redox potential [1] |
The linear phase of signal loss is predominantly driven by electrochemically driven desorption of the thiol-on-gold self-assembled monolayer that anchors the DNA aptamer to the electrode surface [1]. This mechanism's dependence on the applied potential window is pronounced: thiol-on-gold monolayers undergo reductive desorption at potentials below -0.5 V and oxidative desorption at potentials above approximately 1 V [1]. When the potential window is limited to -0.4 V to -0.2 V, only 5% signal loss occurs after 1500 scans, demonstrating the critical importance of potential window selection for sensor stability [1].
The exponential phase is primarily attributable to fouling by blood components, where proteins and cells adsorb to the sensor surface, effectively blocking electron transfer [1]. This mechanism was confirmed through experiments showing that washing fouled electrodes with concentrated urea recovered at least 80% of the initial signal [1]. Furthermore, the use of enzyme-resistant 2'O-methyl RNA analogs, which are impervious to nucleases, still exhibited a significant exponential drift phase, indicating that fouling rather than enzymatic degradation is the dominant biological mechanism [1].
Fouling causes signal loss primarily by reducing the rate of electron transfer from the redox reporter to the electrode surface. Studies monitoring the square-wave voltammetry frequency at which maximum charge transfer occurs found this frequency decreases by a factor of 3 during the exponential drift phase in whole blood, indicating fouling materials physically impede the redox reporter's approach to the electrode surface [1]. This effect is sensitive to the position of the methylene blue reporter along the DNA chain, with reporters placed closer to the electrode surface experiencing less drift due to fouling [1].
Diagram 1: Mechanism of Biphasic Signal Decay in EAB Sensors
Kinetic Differential Measurement: A Ratiometric Approach to Drift Correction
The Fundamental Principles of KDM
Kinetic differential measurement (KDM) represents an advanced approach to EAB sensor interrogation that intrinsically corrects for signal drift by leveraging the kinetic properties of electron transfer. The method exploits the fact that altering the square wave frequency used to interrogate the sensor tunes its sensitivity to electron transfer kinetics, thereby switching the sensor between signal-on behavior (where target binding increases voltammetric peak current) and signal-off behavior (where binding reduces peak height) [5]. By employing matched pairs of square wave frequencies that respond differentially to the target but drift in concert, KDM effectively cancels out common-mode drift while preserving target-specific signals.
The mathematical formulation for KDM is expressed as:
$$S{KDM} = \frac{ \frac{i{on}(target)}{i{on}(0)} - \frac{i{off}(target)}{i{off}(0)} }{ 0.5 \left( \frac{i{on}(target)}{i{on}(0)} + \frac{i{off}(target)}{i_{off}(0)} \right) }$$
where $i{on}(target)$ and $i{off}(target)$ are the peak currents observed at the signal-on and signal-off frequencies in the presence of target, respectively, and $i{on}(0)$ and $i{off}(0)$ are the peak currents observed at those frequencies in the absence of target [5]. This normalized difference calculation removes the effect of drift seen in vivo by leveraging the correlated nature of the drift at both frequencies.
Calibration-Free Ratiometric Approaches
A significant limitation of traditional KDM is its requirement for single-point calibration of each sensor at a known target concentration (typically zero) to account for sensor-to-sensor variability in baseline peak currents, which arises from differences in microscopic electrode surface area [5]. This calibration step is cumbersome and impossible for endogenous targets or post-dosing scenarios where the baseline concentration is unknown. In response, researchers have developed calibration-free ratiometric approaches that eliminate the need for single-point calibration while maintaining effective drift correction.
Two primary calibration-free approaches have emerged: ratiometric KDM (rKDM) and a simple ratiometric method. The rKDM approach modifies the traditional KDM equation as follows:
$$S{rKDM} = \frac{ R i{on}(target) - i{off}(target) }{ 0.5 \left( R i{on}(target) + i_{off}(target) \right) }$$
where $R = i{off}(0)/i{on}(0)$ is effectively constant for sensors in any given class [5]. The simple ratiometric method employs the straightforward ratio of the two peak currents:
$$SR = \frac{i{on}(target)}{i_{off}(target)}$$
Both methods produce unitless values that are independent of the absolute number of redox-reporter-modified aptamers on the sensor surface, thereby eliminating the need for individual sensor calibration [5]. Experimental validation has demonstrated that both ratiometric approaches support accurately drift-corrected measurements in vivo in live rats, performing equivalently to calibrated KDM for vancomycin monitoring [5].
Table 2: Performance Comparison of Drift Correction Methods for In Vivo Vancomycin Monitoring
| Method | Calibration Required? | Drift Correction Efficacy | Implementation Complexity | Best Use Cases |
|---|---|---|---|---|
| Traditional KDM | Yes (single-point) | Excellent | Moderate | Exogenous drugs pre-dosing |
| Ratiometric KDM (rKDM) | No | Excellent | Moderate | Endogenous targets; long-term monitoring |
| Simple Ratiometric | No | Excellent | Low | High-throughput applications; resource-limited settings |
Diagram 2: Kinetic Differential Measurement Workflow
Experimental Protocols for Drift Characterization and Correction
Protocol 1: Characterizing Biphasic Drift Mechanisms in Whole Blood
Purpose: To systematically evaluate the contributions of electrochemical desorption and biological fouling to EAB sensor signal drift using in vitro whole blood models.
Materials:
- EAB sensors or EAB-like proxy constructs (e.g., MB-modified single-stranded DNA)
- Undiluted whole blood, heparinized or EDTA-treated
- Temperature-controlled electrochemical cell maintained at 37°C
- Potentiostat with square-wave voltammetry capability
- Phosphate buffered saline (PBS), pH 7.4
- Concentrated urea solution (6-8M)
Methodology:
- Sensor Preparation: Fabricate EAB sensors or simpler EAB-like proxy devices using thiol-on-gold monolayer chemistry with MB-modified DNA sequences that lack significant internal complementarity to minimize confounding factors [1].
- Whole Blood Challenge: Immerse sensors in undiluted whole blood at 37°C while continuously interrogating with square-wave voltammetry using standard parameters (e.g., frequency: 100 Hz; amplitude: 25 mV; potential window: -0.5 V to -0.1 V vs. Ag/AgCl) [1].
- Control in PBS: In parallel, challenge identical sensors in PBS at 37°C using identical electrochemical parameters to isolate electrochemical drift mechanisms from biological ones [1].
- Potential Window Variation: Systematically vary the positive and negative limits of the square-wave potential window to characterize the dependence of drift rate on applied potential, particularly testing windows limited to -0.4 V to -0.2 V where SAM desorption is minimized [1].
- Fouling Recovery Test: After 2.5 hours of interrogation in whole blood (using a narrow potential window to minimize electrochemical drift), wash sensors with concentrated urea solution and measure signal recovery [1].
- Electron Transfer Rate Analysis: Monitor the square-wave voltammetry frequency at which maximum charge transfer occurs throughout the experiment to track changes in electron transfer kinetics due to fouling [1].
Data Analysis:
- Plot peak current versus time to identify biphasic decay patterns
- Quantify exponential phase rate constant and linear phase slope for different experimental conditions
- Compare signal recovery after urea washing to quantify fouling contribution
- Analyze electron transfer rate changes to confirm fouling mechanism
Protocol 2: Implementing KDM and Ratiometric Approaches for In Vivo Drift Correction
Purpose: To implement and validate kinetic differential measurement and ratiometric approaches for drift-corrected, calibration-free operation of EAB sensors in vivo.
Materials:
- Target-specific EAB sensors (e.g., vancomycin or phenylalanine sensors)
- Live animal model (e.g., rat)
- Surgical equipment for sensor implantation (e.g., jugular vein placement)
- Potentiostat capable of dual-frequency square-wave voltammetry
- Data acquisition and analysis software with custom algorithms for KDM and ratiometric calculations
Methodology:
- Sensor Fabrication and Characterization: Fabricate EAB sensors against the target of interest using established protocols. Pre-characterize sensor performance in vitro to determine appropriate signal-on and signal-off square-wave frequencies [5].
- Sensor Implantation: Surgically implant sensors into the target tissue or fluid compartment (e.g., jugular vein for blood measurements, subcutaneous space for interstitial fluid measurements) [5].
- Dual-Frequency Interrogation: Implement square-wave voltammetry measurements alternating between the predetermined signal-on and signal-off frequencies throughout the experimental timeline [5].
- Target Administration: For drug targets, administer via controlled dosing (e.g., 30 mg/kg vancomycin as a rapid bolus infusion) to create dynamic concentration profiles [5].
- Multi-Method Data Analysis: Process the collected peak current data using three parallel approaches:
- Traditional KDM: Apply Equation 1 using single-point calibration from pre-dosing baseline measurements [5].
- Ratiometric KDM (rKDM): Apply Equation 2 using the predetermined class constant R without individual sensor calibration [5].
- Simple Ratiometric: Apply Equation 3 using the direct ratio of peak currents without calibration [5].
- Performance Validation: Compare concentration estimates derived from all three methods against expected pharmacokinetic profiles or reference measurements to validate accuracy and drift correction efficacy [5].
Data Analysis:
- Plot concentration versus time profiles from all three methods for visual comparison
- Calculate correlation coefficients between methods to quantify agreement
- Assess baseline recovery post-clearance to evaluate drift correction
- Quantize measurement error relative to expected values
The Scientist's Toolkit: Essential Reagents and Materials
Table 3: Key Research Reagent Solutions for EAB Sensor Drift Studies
| Reagent/Material | Function/Application | Specifications/Alternatives |
|---|---|---|
| Thiol-Modified DNA Aptamers | Molecular recognition element | Target-specific sequence with redox reporter attachment point; 2'O-methyl RNA analogs for nuclease resistance [1] |
| Methylene Blue (MB) | Redox reporter | Covalently attached to DNA; favorable redox potential (-0.25V at pH 7.5) within stable SAM window [1] |
| Gold Electrodes | Sensor substrate | Microscopic surface area variability necessitates calibration; can be handmade for in vivo use [5] |
| Alkane-Thiol SAM Components | Surface passivation and attachment | Forms self-assembled monolayer on gold; prone to reductive/oxidative desorption outside -0.5V to 1V window [1] |
| Whole Blood | In vitro drift challenge medium | Undiluted, anticoagulated; maintained at 37°C as in vivo proxy [1] |
| Urea Solution | Fouling reversal agent | Concentrated (6-8M) for dissolving proteinaceous fouling materials without disrupting SAM [1] |
| Square-Wave Voltammetry Parameters | Sensor interrogation | Dual-frequency approach (e.g., one signal-on, one signal-off); limited potential window (-0.4V to -0.2V) enhances stability [1] [5] |
The systematic elucidation of the biphasic nature of EAB sensor drift has revealed a complex interplay between electrochemical desorption and biological fouling mechanisms, enabling targeted approaches to signal stabilization and correction. The development of kinetic differential measurement and its calibration-free ratiometric variants represents a significant advancement in the quest for robust, long-term molecular monitoring in vivo. By fundamentally addressing both the sources of drift and implementing intelligent measurement strategies that intrinsically correct for remaining drift, these approaches promise to extend the functional deployment lifetime of EAB sensors in biologically complex environments.
Future research directions will likely focus on further optimizing sensor materials and architectures to minimize the underlying drift mechanisms, potentially through advanced antifouling coatings or more stable attachment chemistries. Simultaneously, computational approaches to drift correction may evolve to incorporate probabilistic modeling and machine learning techniques for even more sophisticated signal processing. As these technologies mature, the vision of continuous, real-time molecular monitoring for personalized medicine and advanced pharmacological research moves closer to widespread reality, enabled by fundamental principles of drift correction that transform biphasic decay into stable, reliable readings.
Electrochemical aptamer-based (EAB) sensors represent a groundbreaking platform technology for real-time, in vivo monitoring of specific molecules, including drugs, metabolites, and biomarkers, irrespective of their chemical reactivity [3] [1]. These sensors support high-frequency molecular measurements directly in complex biological media, including unprocessed, undiluted bodily fluids, enabling unprecedented applications in biomedical research and personalized medicine [3] [5]. A significant obstacle confronting their long-term deployment in the challenging environment of the living body is signal drift—a phenomenon where the sensor signal decreases over time, potentially compromising measurement accuracy [1].
This application note explores the core advantage of Kinetic Differential Measurement (KDM): its ability to correct for this signal drift, thereby enabling reliable multi-hour in vivo measurements. We detail the experimental protocols and mechanistic insights underlying successful drift correction, providing researchers with the practical tools needed to implement this powerful approach.
Principles of EAB Sensors and KDM Drift Correction
EAB Sensor Signaling Mechanism
- Sensor Architecture: EAB sensors consist of a target-recognizing DNA aptamer modified with a redox reporter (e.g., methylene blue) and covalently attached to a gold electrode surface via a self-assembled monolayer (SAM) [3] [1].
- Signaling Principle: Upon target binding, the aptamer undergoes a conformational change that alters the electron transfer rate from the attached redox reporter, producing a measurable change in peak current when interrogated using square wave voltammetry (SWV) [3] [5]. This change can manifest as either a signal increase ("signal-on") or decrease ("signal-off") depending on the applied SWV frequency [3].
Research has systematically identified two primary mechanisms responsible for signal drift of EAB-like devices in vitro at 37°C in whole blood:
Table 1: Primary Mechanisms of EAB Sensor Signal Drift
| Mechanism | Temporal Phase | Primary Driver | Effect on Signal |
|---|---|---|---|
| Fouling by Blood Components [1] | Initial exponential decay (~1.5 hours) | Biological | Rapid signal loss due to proteins/cells adsorbing to sensor surface, reducing electron transfer rate |
| Electrochemically Driven SAM Desorption [1] | Subsequent linear decay | Electrochemical | Gradual, continuous signal loss due to breakage of gold-thiol bonds under specific potentials |
A third potential mechanism, enzymatic degradation of DNA, was found to play a minor role, as demonstrated by the significant exponential drift phase still observed in enzyme-resistant 2'O-methyl RNA analogs [1].
The KDM Drift Correction Approach
The Kinetic Differential Measurement (KDM) method leverages a ratiometric approach to correct for signal drift. It employs measurements at two distinct square wave frequencies—one exhibiting "signal-on" behavior and the other "signal-off" behavior. While these frequencies respond differentially to the target, they drift in concert [5]. The KDM value is calculated as follows [3] [5]:
$$ \mathrm{KDM} = \frac{\frac{i_{on}(target)}{i_{on}(0)} - \frac{i_{off}(target)}{i_{off}(0)}}{0.5\left(\frac{i_{on}(target)}{i_{on}(0)} + \frac{i_{off}(target)}{i_{off}(0)}\right)} $$
where $i_{on}(target)$ and $i_{off}(target)$ are the peak currents observed at the signal-on and signal-off frequencies in the presence of target, and $i_{on}(0)$ and $i_{off}(0)$ are the peak currents at those frequencies in the absence of target.
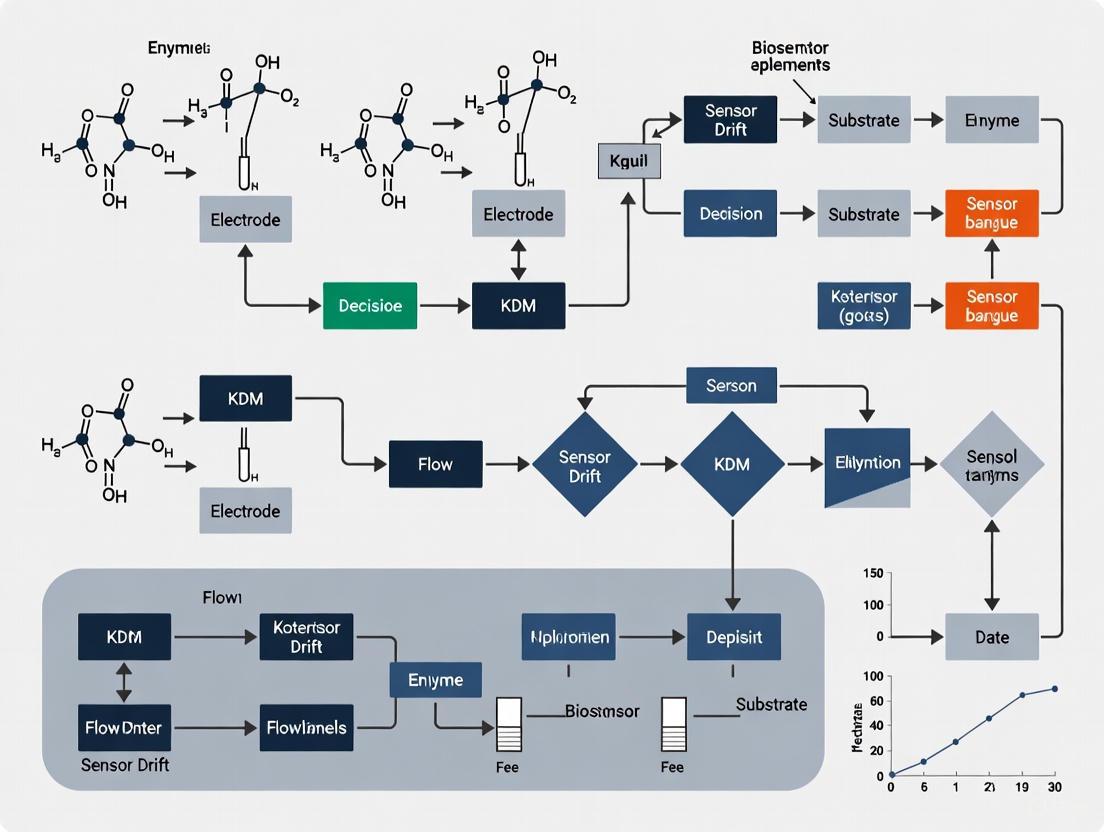
Figure 1: KDM Drift Correction Workflow. KDM uses two measurement frequencies that drift together but respond differently to the target, enabling effective drift correction [3] [5].
Experimental Protocols for KDM Implementation
Sensor Fabrication and Preparation
Protocol: EAB Sensor Fabrication
- Objective: To fabricate a stable, reproducible EAB sensor for in vivo deployment.
- Materials:
- Gold wire electrodes (e.g., 250 µm diameter)
- Thiol-modified DNA or RNA aptamer sequence with redox reporter (e.g., methylene blue) attached to the 3' or 5' end
- Alkanethiols (e.g., 6-mercapto-1-hexanol) for forming a mixed self-assembled monolayer
- Phosphate Buffered Saline (PBS), pH 7.4
- Cleaning reagents: Piranha solution (Handle with extreme care) and/or ethanol
- Procedure:
- Electrode Preparation: Clean gold electrodes thoroughly with piranha solution and ethanol. Rinse with copious amounts of deionized water and dry.
- Aptamer Immobilization: Incubate cleaned electrodes in a solution of redox-modified aptamer (typically 0.1-1 µM) in PBS for 1-2 hours at room temperature to allow thiol-gold bond formation.
- Backfilling: Transfer electrodes to a solution of 1-2 mM 6-mercapto-1-hexanol for 30-60 minutes to form a well-packed SAM that minimizes non-specific adsorption.
- Rinsing and Storage: Rinse sensors thoroughly with PBS to remove unbound molecules. Store in PBS at 4°C if not used immediately.
In Vitro Calibration and Drift Assessment
Protocol: Establishing a Calibration Curve in Biorelevant Conditions
- Objective: To generate a calibration curve that accurately reflects sensor performance under in vivo-like conditions, a critical step for precise quantification.
- Materials:
- Fabricated EAB sensors
- Freshly collected, undiluted whole blood (rat or bovine recommended) [3]
- Target molecule stock solution (e.g., vancomycin)
- Electrochemical workstation capable of square wave voltammetry
- Temperature-controlled cell holder maintained at 37°C
Procedure:
- Condition Matching: Warm fresh whole blood to 37°C. Note: Matching the temperature (body temperature) and medium (fresh blood) of calibration to the measurement conditions is crucial for accurate quantification [3].
- Sensor Interrogation: Immerse the fabricated EAB sensor in the blood and connect to the electrochemical workstation.
- Square Wave Voltammetry:
- Apply a square wave potential waveform.
- Identify optimal "signal-on" and "signal-off" frequencies by testing the sensor's response to target addition across a range of frequencies (e.g., 25 Hz to 300 Hz) [3].
- Note: The optimal frequencies can be temperature-dependent and must be determined at 37°C [3].
- Titration Experiment:
- Sequentially add known concentrations of the target molecule to the blood, creating a concentration gradient covering the expected physiological range (e.g., for vancomycin: 0 to 50 µM).
- At each concentration, allow equilibrium to be reached and record SWV peak currents at both the signal-on and signal-off frequencies.
Data Processing:
- For each concentration, calculate the KDM value using the formula in Section 2.3.
- Plot KDM values against target concentration and fit the data to a Hill-Langmuir isotherm [3]:
$\mathrm{KDM} = \mathrm{KDM}{\mathrm{min}} + \frac{(\mathrm{KDM}{\mathrm{max}} - \mathrm{KDM}{\mathrm{min}}) \times [\mathrm{Target}]^{nH}}{[\mathrm{Target}]^{nH} + \mathrm{K}{1/2}^{n_H}}$
- Extract the parameters $\mathrm{KDM}{\mathrm{min}}$, $\mathrm{KDM}{\mathrm{max}}$, $nH$ (Hill coefficient), and $K{1/2}$ (binding curve midpoint).
In Vivo Deployment and Data Acquisition
Protocol: Conducting In Vivo Measurements in Live Rodents
- Objective: To perform continuous, real-time molecular monitoring in a live animal model with built-in drift correction.
- Materials:
- Fabricated and calibrated EAB sensors
- Animal model (e.g., Sprague-Dawley rat)
- Surgical equipment for sensor implantation (e.g., into jugular vein)
- Potentiostat and data acquisition system
- Anesthesia and standard surgical supplies
Procedure:
- Animal Preparation: Anesthetize the animal and perform a sterile surgical procedure to implant the EAB sensor into the desired compartment (e.g., bloodstream via jugular vein) [5].
- Continuous Interrogation: Continuously interrogate the sensor by applying square wave voltammetry at the pre-determined signal-on and signal-off frequencies. A full voltammogram can be collected every few seconds [3].
- KDM Transformation: In real-time or during post-processing, convert the collected peak currents at both frequencies into a continuous stream of KDM values using the formula above.
- Concentration Estimation: Convert the drift-corrected KDM values into target concentration estimates using the fitted Hill-Langmuir parameters from the calibration curve and the following equation [3]:
$[\mathrm{Target}] = \sqrt[nH]{\frac{K{1/2}^{nH} \times (\mathrm{KDM} - \mathrm{KDM}{\mathrm{min}})}{\mathrm{KDM}_{\mathrm{max}} - \mathrm{KDM}}}$
Performance Data and Analysis
The KDM method has been rigorously validated in vivo. For example, using a vancomycin-detecting EAB sensor deployed in live rats, KDM-enabled measurements achieved high accuracy and precision over the drug's clinically relevant range [3].
Table 2: Quantitative Performance of KDM for In Vivo Vancomycin Sensing
| Performance Metric | Result | Experimental Conditions |
|---|---|---|
| Accuracy in Clinical Range (6-42 µM) [3] | Mean accuracy of 1.2% or better | Calibration and measurement in fresh, 37°C whole blood |
| Worst-Case Accuracy [3] | 10.4% or better at all concentrations | Calibration and measurement in fresh, 37°C whole blood |
| Precision in Clinical Range [3] | Coefficient of variation of 14% or better | Calibration and measurement in fresh, 37°C whole blood |
| Comparative Performance | rKDM and simple ratio methods produce concentration estimates indistinguishable from standard KDM [5] | In vivo measurement in live rats |
The Scientist's Toolkit: Research Reagent Solutions
Table 3: Essential Materials for EAB Sensor Research and KDM Implementation
| Item | Function/Description | Example/Note |
|---|---|---|
| Gold Electrodes [1] | Sensor substrate; forms strong Au-S bonds with thiol-modified aptamers | Wire, disk, or screen-printed electrodes; microscopic surface area variability is a key source of sensor-to-sensor signal variation [5]. |
| Thiol-Modified Aptamers [3] [1] | Recognition element; binds target and undergoes conformational change. | Can be DNA, RNA, or enzyme-resistant analogs (e.g., 2'O-methyl RNA) [1]. |
| Redox Reporters [1] | Signal transduction element; generates electrochemical current. | Methylene blue is widely used; its optimal redox potential falls within the stable window of thiol-on-gold SAMs, enhancing stability [1]. |
| 6-Mercapto-1-Hexanol (MCH) [1] | SAM backfiller; displaces non-specifically adsorbed DNA and creates a well-ordered, protein-resistant monolayer. | Critical for reducing fouling and improving sensor stability. |
| Fresh Whole Blood [3] | Biorelevant calibration medium. | Critical: Use freshly collected rather than commercially sourced aged blood for accurate calibration, as blood age impacts sensor response [3]. |
Advanced KDM Methodologies and Calibration-Free Operation
Recent advances have explored calibration-free operation using dual-frequency approaches. The ratiometric method ( $S_R$ ) simply uses the ratio of peak currents at two frequencies [5]:
$$ S_R = \frac{i_{on}(target)}{i_{off}(target)} $$
This unitless value is inherently independent of the absolute number of aptamers on the electrode surface, thus removing the need for sensor-specific calibration [5]. In vivo studies measuring vancomycin and phenylalanine have demonstrated that this method, along with a related technique called rKDM, supports accurately drift-corrected measurements without any calibration step, even with handmade devices [5].
Figure 2: Drift Mechanisms and the KDM Solution. KDM corrects for the primary drift sources—fouling and SAM desorption—by leveraging their correlated effect on two measurement frequencies [3] [1] [5].
The KDM approach provides a robust and effective solution to the critical challenge of signal drift, enabling multi-hour, high-precision in vivo measurements with EAB sensors. By understanding the mechanisms of drift and implementing the detailed protocols outlined herein—particularly the careful matching of calibration conditions to the in vivo environment—researchers can reliably quantify molecular targets in real-time within living systems. The continued evolution of KDM and the advent of calibration-free methodologies promise to further simplify the use of EAB sensors, accelerating their application in pharmacological research, therapeutic drug monitoring, and biomedical discovery.
Implementing Kinetic Differential Measurement: A Step-by-Step Protocol for EAB Sensors
Electrochemical aptamer-based (EAB) sensors represent a breakthrough technology in molecular monitoring, capable of functioning in an accurate, drift-corrected manner directly in the living body. These sensors operate by leveraging the binding-induced conformational change of an electrode-bound, redox-reporter-modified aptamer upon target recognition. This conformational change alters the electron transfer rate from the attached redox reporter, producing a measurable change in peak current when the sensor is interrogated using square wave voltammetry (SWV). Among the various electrochemical techniques available for interrogating EAB sensors, SWV has dominated in vivo studies primarily because it provides a robust means of correcting for the signal drift encountered when sensors are deployed in biological systems [5].
The drift correction method central to this discussion, termed Kinetic Differential Measurement (KDM), ingeniously exploits the frequency-dependent behavior of EAB sensors. By altering the square wave frequency during SWV interrogation, the sensor can be tuned to exhibit either "signal-on" behavior (where target binding increases the voltammetric peak current) or "signal-off" behavior (where binding decreases peak height). The KDM approach utilizes measurements performed at two carefully matched square wave frequencies that respond differentially to the target—one increasing and one decreasing upon target binding—while drifting in concert under non-binding related changes. This differential response to target binding coupled with correlated drift behavior enables KDM to effectively separate the specific signal of interest from non-specific drift components, making it particularly valuable for prolonged in vivo measurements where drift can significantly compromise data accuracy [5].
Theoretical Foundation of the KDM Equation
Mathematical Deconstruction
The KDM equation represents a normalized differential calculation designed to extract target concentration information while simultaneously canceling out common-mode drift. The standard KDM equation is expressed as:
$$ S{KDM} = \frac{\frac{i{on}(target)}{i{on}(0)} - \frac{i{off}(target)}{i{off}(0)}}{0.5\left(\frac{i{on}(target)}{i{on}(0)} + \frac{i{off}(target)}{i_{off}(0)}\right)} $$
Where:
- $i{on}(target)$ and $i{off}(target)$ are the peak currents observed at the signal-on and signal-off frequencies in the presence of the target molecule
- $i{on}(0)$ and $i{off}(0)$ are the peak currents observed at those frequencies in the absence of the target (baseline measurements) [5]
This calculation produces a unitless value that quantifies the target-induced signal change relative to the baseline, effectively normalizing for the absolute number of redox reporters on the electrode surface, which can vary significantly between sensors due to differences in microscopic surface area [5].
Significance of Normalization
The normalization components of the KDM equation serve two critical functions. First, by employing the ratio of current measurements to their respective baseline values ($\frac{i(target)}{i(0)}$), the equation accounts for sensor-to-sensor variability in the absolute number of aptamers attached to the electrode surface. This variability stems from differences in the microscopic surface area of electrodes, particularly problematic for handmade devices where several-fold variations can occur even between electrodes of identical macroscopic dimensions [5]. Second, the differential nature of the calculation (subtracting the normalized off-signal from the normalized on-signal) combined with the averaging in the denominator provides enhanced gain while rejecting drift components that affect both frequency measurements equally.
Table 1: Key Parameters in the KDM Equation
| Parameter | Description | Significance in KDM Calculation |
|---|---|---|
| $i_{on}(target)$ | Peak current at signal-on frequency with target present | Sensitive to target concentration increases |
| $i_{off}(target)$ | Peak current at signal-off frequency with target present | Sensitive to target concentration decreases |
| $i_{on}(0)$ | Baseline peak current at signal-on frequency | Normalization factor for signal-on channel |
| $i_{off}(0)$ | Baseline peak current at signal-off frequency | Normalization factor for signal-off channel |
| $S_{KDM}$ | Resulting KDM signal value | Drift-corrected measure proportional to target concentration |
Experimental Protocols for KDM Implementation
Sensor Fabrication and Preparation
The foundation of reliable KDM measurements begins with consistent sensor fabrication. The standard protocol involves thiol-modified aptamers conjugated to a redox reporter (typically methylene blue) which are covalently attached to a gold electrode surface via a self-assembled monolayer. Electrode preparation is critical, requiring thorough cleaning in piranha solution followed by rinsing with deionized water and ethanol. Aptamer deposition typically occurs in a controlled environment with specific buffer conditions, incubation time (often 1-4 hours), and potential application to facilitate proper monolayer formation. Following deposition, sensors are typically treated with a passivating agent (commonly 6-mercapto-1-hexanol) to block non-specific binding sites and improve signal-to-noise ratio. Quality control assessment through cyclic voltammetry in a clean electrolyte solution should demonstrate stable, well-defined redox peaks before proceeding with KDM interrogation [5] [9].
Selection of Square Wave Frequencies
The appropriate selection of signal-on and signal-off frequencies is paramount to successful KDM implementation. This process begins with a frequency sweep across a relevant range (typically 1-500 Hz) in both target-free and target-saturated conditions. The optimal signal-on frequency demonstrates the greatest relative increase in peak current upon target binding, while the optimal signal-off frequency shows the greatest relative decrease. For many EAB sensors, appropriate frequencies fall in the 25-300 Hz range, though this varies significantly with the specific aptamer and its electron transfer kinetics. Importantly, temperature significantly impacts frequency selection—what functions as a signal-on frequency at room temperature may become a signal-off frequency at body temperature due to changes in electron transfer rates. Thus, frequency selection must be performed at the same temperature intended for experimental measurements [9].
Diagram 1: KDM Frequency Selection Workflow (82 characters)
KDM Data Collection Protocol
Baseline Establishment: Begin by collecting voltammograms at both selected frequencies in a target-free solution. Record multiple measurements (typically 3-5) to establish stable baseline values for $i{on}(0)$ and $i{off}(0)$.
Sample Measurement: Transfer the sensor to the test solution containing the target molecule and allow the signal to stabilize (typically 1-3 minutes). Collect voltammograms at both frequencies, recording $i{on}(target)$ and $i{off}(target)$.
Signal Calculation: Apply the KDM equation to calculate the $S_{KDM}$ value using the measured currents and baseline values.
Concentration Determination: Convert the $S_{KDM}$ value to target concentration using an appropriate calibration curve. For in vivo drug pharmacokinetics studies, calibration is typically performed prior to the first drug administration when the target concentration is known to be zero. For endogenous targets, ex vivo calibration in samples of known concentration may be necessary [5] [9].
Quality Control: Monitor the consistency of both individual channel signals ($i{on}$ and $i{off}$) to identify potential sensor fouling or degradation. The correlation between drift in both channels is essential for effective KDM correction.
Calibration Methods and Parameter Optimization
Calibration Approaches for KDM
Effective calibration is essential for accurate quantification using KDM. The standard approach involves generating a calibration curve by measuring KDM values across a range of known target concentrations and fitting the data to a Hill-Langmuir isotherm:
$$ KDM = KDM{min} + \frac{(KDM{max} - KDM{min}) \times [Target]^{nH}}{[Target]^{nH} + K{1/2}^{n_H}} $$
Where $KDM{min}$ is the KDM value in the absence of target, $KDM{max}$ is the KDM value at target saturation, $nH$ is the Hill coefficient (measuring binding cooperativity), and $K{1/2}$ is the binding curve midpoint [9].
Table 2: Impact of Calibration Conditions on KDM Parameters
| Calibration Condition | Effect on KDM_min | Effect on KDM_max | Effect on K_1/2 | Impact on Quantification |
|---|---|---|---|---|
| Temperature Mismatch (Room vs. Body) | Variable | Up to 10% higher gain at room temperature | Temperature-dependent shifts | Significant underestimation or overestimation (≥10%) |
| Blood Age (Fresh vs. Day-old) | Minimal change in clinical range | Lower gain in older blood | Possible shifts at high concentrations | Overestimation in clinical range |
| Media Composition (Buffer vs. Whole Blood) | Media-dependent | Often lower in simplified media | Affinity changes in different matrices | High potential for quantification errors |
| Single-Point Calibration | Directly measured | Assumed from averaged data | Assumed from averaged data | ±10% accuracy in clinical range for vancomycin |
Environmental Factor Optimization
Temperature consistency between calibration and measurement conditions proves critical for accurate KDM quantification. Studies demonstrate that calibration curves collected at room temperature versus body temperature differ significantly, with up to 10% higher KDM signals observed at room temperature over vancomycin's clinical concentration range. This temperature dependence stems from effects on both binding equilibrium coefficients and electron transfer rates themselves. The electron transfer rate (indicated by the location of peak charge transfer) increases with temperature for the vancomycin aptamer and other EAB sensors, sometimes sufficiently to alter the classification of frequencies as signal-on or signal-off [9].
Media selection similarly impacts calibration accuracy. For in vivo measurements, calibration in freshly collected, undiluted whole blood at body temperature provides optimal results, achieving accuracy of better than ±10% for vancomycin measurement. Commercially sourced blood often yields different calibration curves, likely due to species differences, processing methods, or blood age effects. Studies comparing blood of different ages (1 day vs. 13 days post-collection) show that while signals remain similar over the clinical range, older blood produces lower signals at higher concentrations, potentially leading to quantification errors [9].
Advanced KDM Variations and Applications
Calibration-Free KDM Approaches
Recent advances in KDM methodology have explored calibration-free approaches that eliminate the need for single-point calibration of individual sensors. Two promising variations include:
Ratiometric KDM (rKDM): This approach modifies the standard KDM equation as follows:
$$ S{rKDM} = \frac{R \times i{on}(target) - i{off}(target)}{0.5 \times (R \times i{on}(target) + i_{off}(target))} $$
Where $R = i{off}(0)/i{on}(0)$ is effectively constant for sensors in a given class. This modification collapses sensor-to-sensor variability in raw peak currents without requiring individual sensor calibration [5].
Simple Ratiometric Approach: An even more simplified method calculates the ratio of peak currents directly:
$$ SR = \frac{i{on}(target)}{i_{off}(target)} $$
This unitless value is independent of the number of redox-reporter-modified aptamers on the sensor surface, functioning without calibration while surprisingly maintaining effective drift correction in vivo [5].
Diagram 2: KDM Method Evolution Tree (67 characters)
In Vivo Validation Studies
The performance of KDM and its calibration-free variants has been validated through in vivo studies measuring targets such as vancomycin and phenylalanine in live rats. These studies demonstrate that both rKDM and simple ratiometric approaches support accurately drift-corrected measurements in the challenging in vivo environment, even when employing handmade devices. In these validations, the concentration estimates produced by calibration-free methods prove effectively indistinguishable from those produced by calibrated KDM, recovering the expected zero concentration baseline prior to vancomycin administration and accurately tracking pharmacokinetic profiles following drug dosing [5].
Research Reagent Solutions and Materials
Table 3: Essential Research Reagents for KDM EAB Sensor Experiments
| Reagent/Material | Specifications | Function in KDM Experiments |
|---|---|---|
| Thiol-Modified Aptamer | Target-specific sequence with redox reporter (e.g., methylene blue) | Molecular recognition element that undergoes binding-induced conformational change |
| Gold Electrodes | Disc or wire electrodes, 0.5-2 mm diameter | Sensor platform for aptamer immobilization via gold-thiol chemistry |
| 6-Mercapto-1-hexanol | ≥97% purity | Passivating agent that forms self-assembled monolayer to reduce non-specific binding |
| Square Wave Voltammetry Instrument | Capable of simultaneous dual-frequency interrogation | Primary measurement technique for generating KDM signals |
| Whole Blood Collection Supplies | Heparinized tubes, fresh collection | Optimal calibration medium for in vivo measurement applications |
| Temperature Control System | 37°C capability for body temperature studies | Maintains consistent calibration and measurement conditions |
| Target Analytes | Pharmaceutical grade for drugs, high purity for metabolites | Validation standards for sensor calibration and performance testing |
The KDM equation represents a sophisticated yet practical approach to addressing the critical challenge of signal drift in EAB sensors, particularly for in vivo applications. Through its normalized differential calculation that leverages the differential response of signal-on and signal-off frequencies, KDM effectively separates target-specific signals from non-specific drift components. The methodology continues to evolve with calibration-free variations that maintain accuracy while simplifying implementation. As EAB sensor technology advances toward broader clinical application, the KDM framework provides an essential mathematical foundation for reliable, drift-resilient molecular monitoring in complex biological environments.
This application note provides a detailed protocol for the critical selection of signal-on and signal-off frequencies in Square-Wave Voltammetry (SWV), with particular emphasis on optimizing Kinetic Differential Measurement (KDM) for Electrochemical Aptamer-Based (EAB) sensor drift correction. Proper frequency selection is paramount for maximizing signal gain, improving measurement accuracy, and mitigating signal drift in real-time, in vivo molecular monitoring. The guidelines presented herein are essential for researchers and drug development professionals employing EAB sensors for therapeutic drug monitoring, biomarker detection, and closed-loop feedback systems.
Square-Wave Voltammetry (SWV) is a powerful pulsed potentiostatic technique that offers significant advantages over other voltammetric methods, including enhanced sensitivity, reduced capacitive background, and faster scanning rates [10]. In SWV, the potential waveform applied to the working electrode consists of a staircase with a superimposed square wave, generating forward and reverse currents that are sampled at specific intervals [10] [11]. The selection of appropriate square-wave frequencies is not arbitrary; it fundamentally controls the electron transfer kinetics of the redox reaction and dictates the sensor's signal direction (increase or decrease upon target binding), gain, and stability [3]. For EAB sensors, which rely on target-induced conformational changes in surface-bound aptamers to modulate electron transfer rates, frequency selection becomes the primary determinant of sensor performance, especially when deployed in complex biological environments like whole blood [1] [3].
The pursuit of prolonged in vivo measurement duration using EAB sensors is challenged by signal drift, a phenomenon where the sensor signal decreases over time due to factors such as SAM desorption and biofouling [1]. The KDM method was developed to correct for this drift by utilizing measurements from two strategically chosen square-wave frequencies: one that produces a signal increase (signal-on) and another that produces a signal decrease (signal-off) upon target binding [3]. The resulting KDM value is calculated as follows and is inherently resistant to signal drift:
Where I_signal-on_norm and I_signal-off_norm are the normalized peak currents from the signal-on and signal-off frequencies, respectively [3]. This note provides a systematic approach to selecting these critical frequencies.
Theoretical Foundations and Practical Considerations for Frequency Selection
The Relationship Between Frequency, Electron Transfer, and Signal Direction
The fundamental principle underlying frequency selection is the dependence of electron transfer rate on the applied square-wave frequency. Each redox reporter (e.g., Methylene Blue) attached to an EAB sensor has a characteristic electron transfer rate. When the square-wave frequency is matched to this inherent rate, optimal charge transfer and peak current are observed [3]. The signal direction (signal-on or signal-off) upon target binding is determined by how the aptamer's conformational change alters the electron transfer rate relative to the applied frequency. A binding-induced change that improves the coupling between the electron transfer rate and the applied frequency results in a signal-on response. Conversely, a change that worsens this coupling results in a signal-off response [3].
The Critical Impact of Environmental Conditions
The optimal signal-on and signal-off frequencies are highly dependent on the deployment environment. Temperature has a profound effect, as increasing temperature accelerates electron transfer kinetics [3]. Media composition (e.g., buffer vs. whole blood) can also alter electron transfer rates through fouling, which reduces the rate at which the redox reporter approaches the electrode surface [1]. Consequently, frequencies must be selected and validated under conditions that closely mimic the final experimental or clinical setting, ideally in freshly collected whole blood at 37°C for in vivo applications [3].
Table 1: Key SWV Parameters and Their Influence on Frequency Selection and KDM [10] [3] [11]
| Parameter | Typical Range | Impact on Measurement & Frequency Selection |
|---|---|---|
| Square-Wave Frequency | 1 - 500 Hz | Determines signal direction (on/off) and gain. Higher frequencies generally increase peak intensity but can cause distortion. |
| Potential Step | 1 - 10 mV | Controls voltammogram resolution. Smaller steps (1 mV) improve peak discernment but increase acquisition time. |
| Amplitude | 10 - 100 mV | Affects signal-to-noise and background. Large amplitudes increase peak intensity but can broaden peaks and cause shifts. |
| Signal-On Frequency | Varies by sensor | Frequency yielding current increase upon target binding. Must be determined empirically for each sensor. |
| Signal-Off Frequency | Varies by sensor | Frequency yielding current decrease upon target binding. Must be determined empirically for each sensor. |
| Pulse Width / Period | Specified in ms | Defines the duration of forward and reverse pulses; linked to frequency. |
| Sampling Width | Specified in ms | The period within each pulse when current is sampled, set to minimize capacitive current. |
Experimental Protocol: Determining Signal-On and Signal-Off Frequencies
Reagents and Equipment
Table 2: Research Reagent Solutions for EAB Sensor Characterization [1] [3]
| Material / Solution | Function / Specification | Notes |
|---|---|---|
| Gold Electrode | Working electrode platform | Typically disk electrodes; requires careful cleaning. |
| Thiolated DNA Aptamer | Recognition and signaling element | Modified with a redox reporter (e.g., Methylene Blue) on the distal end. |
| Alkane-Thiol SAM Solution | Passivation layer | Forms a self-assembled monolayer to minimize non-specific adsorption. |
| Phosphate Buffered Saline (PBS) | Initial characterization buffer | Low-complexity medium for baseline performance assessment. |
| Fresh Whole Blood | Physiologically relevant media | Should be used at 37°C for calibration; age of blood affects sensor response. |
| Target Analyte Stock | For sensor challenge | Prepared at high concentration in relevant solvent (e.g., DMSO, water). |
| Potentiostat | Instrumentation | Must be capable of SWV and KDM data collection. |
Step-by-Step Frequency Selection Protocol
Sensor Preparation and Initialization: Fabricate EAB sensors by immobilizing a redox reporter-modified (e.g., Methylene Blue) thiolated aptamer onto a gold electrode surface, typically via co-adsorption with a passivating alkane-thiol SAM to form a well-defined monolayer [1] [3]. Place the sensor in the chosen calibration media (e.g., PBS or whole blood) at the target temperature (e.g., 37°C). Allow the system to equilibrate, using an induction period if necessary to stabilize the initial current [10] [11].
Frequency Scan in Absence of Target: Using the potentiostat's SWV method, perform a frequency scan (e.g., from 1 Hz to 500 Hz) in the target media without the presence of the analyte. Hold other SWV parameters constant (e.g., Amplitude: 50 mV, Potential Step: 4 mV, using a potential window that minimizes SAM desorption [1]). The objective is to identify the frequency (
f_peak) at which the peak charge transfer occurs, observable as the maximum peak current in the voltammogram [3].Identify Candidate Signal-On and Signal-Off Frequencies: Based on the frequency scan, select a range of candidate frequencies (e.g., 5-10) around the identified
f_peak. These frequencies will be tested for their response to target binding.Test Frequency Response to Target Addition: For each candidate frequency, obtain a stable SWV voltammogram in the absence of the target. Then, add a known, moderate concentration of the target analyte (e.g., within the therapeutic range for a drug) to the solution. Allow the signal to stabilize and record the new voltammogram.
Classify Frequencies and Calculate KDM Gain:
- Signal-On Frequency: A frequency where the peak current increases after target addition.
- Signal-Off Frequency: A frequency where the peak current decreases after target addition.
For each potential pair of signal-on and signal-off frequencies, calculate the KDM value before and after target addition. The optimal pair is the one that yields the largest change in KDM value (
ΔKDM), indicating the highest gain and sensitivity for the specific sensor and environment [3].
Validation with Full Calibration: Using the selected optimal frequency pair, perform a full calibration curve by measuring the KDM response across a wide range of target concentrations (e.g., from zero to saturation). Fit the data to a Hill-Langmuir isotherm to extract the binding parameters (
K_{1/2},n_H,KDM_max,KDM_min) [3]. Validate the sensor's accuracy by measuring samples with known concentrations.
Troubleshooting and Optimization
- Low Signal Gain: If the
ΔKDMbetween the selected frequency pair is too small, expand the frequency search range or investigate a wider spacing between the signal-on and signal-off frequencies. Ensure the sensor is functioning correctly and that the media and temperature match the intended application. - Signal Drift Overwhelms KDM Correction: If drift is too rapid, consider the sources of signal loss. The linear phase of drift is often due to electrochemically driven SAM desorption; using a narrower potential window that avoids reductive (< -0.4 V) and oxidative (> 0.0 V) desorption can significantly improve stability [1]. The exponential phase of drift is often due to biofouling; strategies include using enzyme-resistant oligonucleotide backbones (e.g., 2'O-methyl RNA) and surface chemistries that resist protein adsorption [1].
- Temperature-Induced Performance Loss: Remember that a frequency pair selected at room temperature may perform poorly at body temperature. The electron transfer rate increases with temperature, which can shift
f_peakand even flip a signal-on frequency to a signal-off frequency, and vice versa [3]. Calibration curves must be collected at the same temperature used during measurements.
The strategic selection of signal-on and signal-off frequencies is a critical, non-negotiable step in deploying robust SWV-based EAB sensors using the KDM protocol. By following the empirical, media-specific, and temperature-controlled workflow outlined in this application note, researchers can maximize sensor gain, achieve precise in vivo measurements, and effectively correct for signal drift. This methodology lays the groundwork for the development of reliable, long-lasting biosensors for advanced biomedical research and clinical applications.
In analytical chemistry, a calibration curve (or standard curve) is a fundamental tool that enables researchers to translate instrument response—a raw, uncalibrated signal such as current or absorbance—into a meaningful quantitative concentration of an analyte. This relationship is most often expressed by the linear equation A = mC + b, where A is the instrument response, m is the slope of the curve, C is the concentration, and b is the y-intercept [12]. The process of generating and applying this curve is critical for the accuracy and precision of virtually all quantitative analyses, from high-performance liquid chromatography (HPLC) to advanced sensor technologies [13] [14].
For researchers working with Electrochemical Aptamer-Based (EAB) sensors, calibration is a particularly crucial step. EAB sensors support real-time, high-frequency measurement of specific molecules, including pharmaceuticals and metabolites, directly in complex environments like the living body [5] [3]. A key challenge with in vivo deployment is sensor drift. The technique of Kinetic Differential Measurement (KDM) has been developed to correct for this drift, but its output still requires a calibration curve to convert the drift-corrected signal into an accurate concentration value [5] [3]. This application note details the protocols for generating robust calibration curves, with a specific focus on their critical role within EAB and KDM research frameworks.
Calibration Models: Theory and Selection
Choosing the correct calibration model is the first step in ensuring accurate quantification. The choice depends on the sample matrix, the complexity of sample preparation, and the required precision [13] [15].
External Standardization
External standardization is the simplest and most common method. It involves generating a calibration curve by plotting the instrument response against known concentrations of calibration standards [13] [15]. The concentration of an unknown sample is then calculated based on its response and the regression equation of the curve. This method works well when sample preparation is simple and injection volume precision is high [13].
Internal Standardization
When a method involves extensive sample preparation steps where sample loss can occur, or when there are concerns about instrument precision, internal standardization is preferred [13] [15]. This technique involves adding a constant amount of a second compound, the internal standard (IS), to every sample and calibrator. The internal standard should be chemically similar to the analyte but not present in the original sample. The calibration curve is then generated by plotting the ratio of the analyte response to the internal standard response against the analyte concentration. This ratio corrects for variations in sample preparation recovery and injection volume, improving both precision and accuracy [13].
Method of Standard Additions
The method of standard additions is used when it is impossible to obtain a blank sample matrix free of the analyte, such as when measuring endogenous compounds in blood [13] [15]. In this method, several aliquots of the sample are spiked with known and varying amounts of the analyte standard. The instrument response is measured for each spiked sample and plotted against the added concentration. The resulting calibration curve is extrapolated to the left until it intercepts the x-axis. The absolute value of this x-intercept represents the original concentration of the analyte in the unknown sample [13].
Table 1: Comparison of Common Calibration Models
| Model | Principle | Best Used For | Key Advantage | Key Limitation |
|---|---|---|---|---|
| External Standardization [13] [15] | Direct comparison of response vs. known standard concentrations. | Simple samples with minimal preparation; high instrument precision. | Simplicity. | Does not correct for sample loss during preparation. |
| Internal Standardization [13] [15] | Plot of analyte/IS response ratio vs. concentration. | Complex sample preparation where volumetric losses may occur. | Corrects for sample loss and improves precision. | Requires finding a suitable, non-interfering internal standard. |
| Standard Additions [13] [15] | Sample aliquots are spiked with known analyte amounts. | Analyses where a blank matrix is unavailable (e.g., endogenous analytes). | Compensates for matrix effects on the analyte signal. | More complex and time-consuming; requires more sample. |
The Emergence of Calibration-Free Approaches
While traditional calibration models are robust, recent research in EAB sensors has explored calibration-free concentration analysis (CFCA) to simplify in vivo measurements. Techniques such as ratiometric interrogation, which uses the ratio of peak currents at two distinct square-wave frequencies, generate a unitless output that is independent of the absolute number of aptamers on the sensor surface [5]. This approach, alongside a kinetic differential measurement (KDM) method, has been shown to support accurate, drift-corrected measurements in live rats without the need for individual sensor calibration [5]. CFCA is also established in other fields, like surface plasmon resonance (SPR), where it measures the active concentration of a protein by leveraging a partially mass-transport limited system, thus avoiding the pitfalls of traditional methods that only measure total protein [16].
Experimental Protocol: Generating a Calibration Curve for an EAB Sensor
This protocol outlines the steps for generating a calibration curve for an Electrochemical Aptamer-Based (EAB) sensor, a process critical for converting square-wave voltammetry signals into target molecule concentrations.
Research Reagent Solutions and Materials
Table 2: Essential Materials for EAB Sensor Calibration
| Item | Function/Explanation |
|---|---|
| Electrochemical Aptamer-Based Sensor [3] | The core sensing element. Comprises a target-specific aptamer with a covalently attached redox reporter, immobilized on a gold electrode. |
| Target Molecule (Analyte) Standard | A high-purity preparation of the molecule to be measured (e.g., vancomycin, phenylalanine). |
| Calibration Media | The matrix in which calibration is performed. For in vivo applications, freshly collected, undiluted whole blood at body temperature (37°C) is ideal to match measurement conditions [3]. |
| Electrochemical Workstation | Instrument capable of performing Square Wave Voltammetry (SWV) and applying the KDM protocol [5] [3]. |
| Signal-on / Signal-off Frequencies [3] | A pair of predetermined SWV frequencies. At one frequency, target binding increases peak current (signal-on); at the other, it decreases peak current (signal-off). |
Step-by-Step Procedure
Sensor Preparation: Fabricate or obtain EAB sensors specific to your target, ensuring consistent modification of the electrode surface with the redox-tagged aptamer [5] [3].
Preparation of Calibration Standards: Prepare a series of standard solutions in the chosen calibration media (e.g., whole blood) that cover the expected concentration range of your target, including a blank (zero concentration) sample. An exponential dilution series (e.g., 1, 2, 5, 10, 20, 50, 100 µM) is often effective [13] [3].
Signal Interrogation and Data Collection:
- Place the sensor in the first calibration standard (starting with the blank).
- Interrogate the sensor using Square Wave Voltammetry (SWV) at the two pre-determined signal-on and signal-off frequencies.
- Record the peak current (
i_onandi_off) for each frequency. - Repeat this process for every calibration standard in the series.
Calculate Kinetic Differential Measurement (KDM) Values: For each standard, calculate the KDM value using the formula [3]:
KDM = [ (i_on(target) / i_on(0) ) - (i_off(target) / i_off(0) ) ] / [ 0.5 * ( (i_on(target) / i_on(0) ) + (i_off(target) / i_off(0) ) ) ]wherei(0)represents the peak current measured in the blank solution.Generate the Calibration Curve: Plot the calculated KDM values (y-axis) against the known target concentrations (x-axis). Fit the data to a Hill-Langmuir isotherm (Eq. 1) to generate the calibration curve [3]:
KDM = KDM_min + [ (KDM_max - KDM_min) * [Target]^(n_H) ] / ( [Target]^(n_H) + K_(1/2)^(n_H) )The fitted parameters are:KDM_min(KDM at zero target),KDM_max(KDM at saturating target),n_H(Hill coefficient), andK_(1/2)(binding curve midpoint).Validate the Curve: Analyze quality control (QC) samples with known concentrations not used to generate the curve. Calculate the accuracy (e.g., % error) to ensure the curve performs as expected [12] [14].
The following workflow diagram illustrates the key steps in this calibration process, from raw data to a functional curve:
Applying the Calibration Curve for Quantification
Once a reliable calibration curve has been generated and validated, it is used to determine the concentration of target molecules in unknown samples.
Protocol for Measuring Unknowns
Measure Unknown Sample: Place the calibrated EAB sensor into the unknown sample (e.g., in vivo or in a test solution). Interrogate the sensor using the same SWV frequencies and conditions used during calibration. Record the peak currents (
i_on(unknown)andi_off(unknown)).Calculate KDM for the Unknown: Using the peak currents from the blank (
i_on(0)andi_off(0)) and the unknown, calculate the KDM value for the unknown sample using the same KDM formula from the calibration protocol.Apply the Calibration Curve: Use the fitted parameters from the Hill-Langmuir isotherm (Step 5 of the generation protocol) to calculate the concentration of the unknown. Rearrange the equation to solve for
[Target](Eq. 2) [3]:[Target] = n_H√[ ( K_(1/2)^(n_H) * (KDM_unknown - KDM_min) ) / (KDM_max - KDM_unknown) ]
Critical Factors for Accurate Quantification
- Matrix Matching: The calibration curve must be generated in a matrix that closely matches the sample matrix. For in vivo measurements, this means calibrating in fresh, undiluted whole blood at 37°C, as sensor response can differ significantly in other media or at room temperature [3].
- Temperature Control: Temperature changes can alter the binding equilibrium and electron transfer rate of the EAB sensor, shifting the calibration curve's
K_(1/2)and signal gain. Always match calibration and measurement temperatures [3]. - Avoiding Extrapolation: The calibration curve should only be used to calculate concentrations that fall within the range of the standards used to create it. Extrapolating beyond the highest or lowest standard can lead to significant errors [13] [14].
Advanced Considerations and Data Analysis
Evaluating Calibration Curve Quality and Linearity
A high-quality calibration curve is the foundation of accurate results. Several statistical tools are used for evaluation.
- Correlation Coefficient (r) and Coefficient of Determination (R²): These values indicate how well the data points fit the regression line. For most analytical work, an R² value of at least 0.995 is expected [12] [17]. However, a high R² alone does not guarantee accuracy at all concentrations, particularly at the low end of the range [14].
- Back-Calculated Accuracy (Residuals): A more robust check involves "back-calculating" the concentration of each calibration standard from the curve and determining the %-error (residual). The mean accuracy for calibrators should typically be within ±15% (±20% at the lower limit) of the nominal value [13] [17].
- To Force or Not to Force the Y-Intercept to Zero? A common question is whether the calibration curve should be forced through the origin (0,0). The decision should be based on statistical analysis of the y-intercept. If the absolute value of the y-intercept is less than its standard error, it can be considered statistically indistinguishable from zero, and forcing the curve through the origin may be justified. If not, forcing it through zero can introduce significant bias, especially at low concentrations [18].
Table 3: Troubleshooting Common Calibration Issues
| Problem | Potential Cause | Solution |
|---|---|---|
| Poor Linearity (Low R²) [12] | Instrument instability, improper standard preparation, contaminated standards. | Check instrument performance; freshly prepare standards using calibrated glassware. |
| Consistent Bias in Back-Calculated Standards [13] | Incorrect regression model (e.g., forcing through zero when inappropriate). | Statistically evaluate the y-intercept; use a model that does not force through zero if the intercept is significant [18]. |
| Poor Accuracy at Low Concentrations [14] | Calibration range is too wide; high-concentration standards dominate the regression fit. | Use a calibration curve built only with low-level standards that bracket the expected sample concentrations. |
| Inaccurate In Vivo Readings [3] | Calibration performed in a matrix or at a temperature different from the measurement. | Calibrate in freshly collected, body temperature whole blood (or a proven proxy) to match in vivo conditions. |
Conceptual Workflow: From Raw Signal to Concentration
The following diagram illustrates the complete conceptual pathway of how an EAB sensor, combined with KDM and a calibration curve, transforms a raw electrochemical signal into a calibrated concentration reading, correcting for drift along the way.
Therapeutic drug monitoring (TDM) of vancomycin is crucial for ensuring efficacy while minimizing nephrotoxicity in patients requiring treatment for Gram-positive bacterial infections. Traditional TDM methods rely on intermittent blood sampling, which provides limited pharmacokinetic (PK) data and cannot capture real-time concentration fluctuations. This case study explores the application of kinetic differential measurement (KDM) for real-time vancomycin monitoring in a live mouse model of spinal implant infection, framed within broader research on electrochemical aptamer-based (EAB) sensor drift correction.
Emerging flexible biosensors and real-time monitoring technologies now enable continuous molecular measurement in live organisms, addressing critical limitations of conventional approaches [19]. These technological advances are particularly valuable for studying antibiotic pharmacokinetics/pharmacodynamics (PK/PD) in preclinical models, where traditional terminal sampling requires large animal cohorts and provides limited temporal resolution. This study demonstrates how KDM-enhanced EAB sensors can overcome long-term sensor drift—a fundamental challenge in continuous monitoring applications—to provide accurate, real-time vancomycin measurements in an active infection model.
Background and Significance
Vancomycin Therapeutic Challenges
Vancomycin, a glycopeptide antibiotic, remains a first-line treatment for serious methicillin-resistant Staphylococcus aureus (MRSA) infections. Its narrow therapeutic window necessitates careful monitoring, with guidelines recommending target area under the curve (AUC) values of 400-600 mg·h/L for clinical efficacy while minimizing toxicity risk. Conventional therapeutic monitoring requires multiple blood draws over a dosing interval, which is labor-intensive, provides limited temporal resolution, and is impractical for continuous optimization in critically ill patients.
Sensor Drift Challenges in Continuous Monitoring
Electrochemical aptamer-based sensors offer promising platforms for continuous molecular monitoring but face significant challenges with long-term sensor drift caused by:
- Biofouling from protein adsorption and cellular attachment
- Electrode passivation through surface oxidation and degradation
- Aptamer conformation changes under physiological conditions
- Signal baseline drift from environmental fluctuations
The kinetic differential measurement (KDM) methodology addresses these limitations by exploiting the kinetics of aptamer-target binding rather than relying solely on absolute signal magnitude, thereby providing inherent drift correction capabilities essential for reliable long-term monitoring.
Materials and Methods
Research Reagent Solutions
Table 1: Essential Research Reagents and Materials
| Item | Function/Application | Specifications |
|---|---|---|
| Vancomycin HCl | Therapeutic intervention; sensor calibration | Pharmaceutical grade; prepared in sterile saline |
| Staphylococcus aureus Xen36 | Bioluminescent infection model establishment | Derived from ATCC-49525; kanamycin resistance [20] |
| Surgical-grade stainless steel implant | Spinal hardware infection model | 0.1mm diameter, 1cm length "L-shaped" k-wire [20] |
| EAB Vancomycin Sensor | Real-time vancomycin monitoring | Vancomycin-specific DNA aptamer immobilized on flexible electrode |
| Luria-Bertani (LB) Broth | Bacterial culture medium | With 1.5% agar for plates; +200μg/mL kanamycin for selection [20] |
| Phosphate Buffered Saline (PBS) | Bacterial washing/dilution; sensor interface | Sterile, isotonic solution for physiological compatibility |
| Isoflurane | Surgical and imaging anesthesia | 2% concentration in oxygen via precision vaporizer [20] |
| Buprenorphine | Post-operative analgesia | 0.1 mg/kg subcutaneously every 12 hours for 72 hours [20] |
Animal Model Establishment
Spinal Implant Infection Model
The mouse spinal implant infection model was adapted from established protocols with modifications for real-time monitoring [20]. The experimental workflow integrates both infection establishment and sensor implementation:
Animal Selection and Housing: 12-week-old male C57BL/6J wild-type mice were housed in groups of up to 4 per cage with free access to water and alfalfa-free chow (to minimize fluorescence interference) under 12-hour light/dark cycles [20].
Surgical Procedure:
- Anesthesia induction with 2% isoflurane with confirmation of appropriate depth through respiratory monitoring and absence of response to painful stimuli
- Dorsal hair removal from sacrum to upper thorax using rodent clippers
- Surgical site disinfection with three alternating betadine and isopropyl alcohol washes
- 2cm longitudinal midline incision followed by dissection to L4 spinous process
- Subperiosteal dissection lateral to right transverse process
- Implantation of 0.1mm diameter, 1cm long "L-shaped" surgical-grade stainless steel k-wire into L4 spinous process
- Inoculation with 1×10³ CFU bioluminescent S. aureus Xen36 in 2μL volume directly onto implant
- Wound closure with absorbable sutures and post-operative analgesia with buprenorphine (0.1 mg/kg SQ q12h for 72 hours)
Post-operative Confirmation: Radiographic confirmation of proper implant placement and daily health monitoring by research staff.
Bacterial Preparation
Staphylococcus aureus Xen36, a bioluminescent derivative of clinical isolate ATCC-49525, was utilized for infection establishment [20]:
- Streaking onto tryptic soy agar (TSB + 1.5% agar) with incubation at 37°C for 12-16 hours
- Isolation of single colonies and culture in TSB at 37°C with shaking (200rpm) for 12-16 hours
- 1:50 dilution of resultant culture and additional 2-hour incubation to mid-log phase bacteria
- Triple washing with PBS through precipitation and resuspension
- OD600 measurement targeting 0.700-0.750 (approximately 4×10⁵ CFU/mL) with serial dilution to target inoculum of 1×10³ CFU/2μL
EAB Sensor Fabrication and KDM Implementation
Sensor Fabrication
Vancomycin-specific EAB sensors were fabricated on flexible substrates to ensure compatibility with in vivo monitoring:
- Electrode preparation: Gold working electrodes (250μm diameter) with Pt counter electrodes and Ag/AgCl reference electrodes patterned on flexible polyimide substrates
- Aptamer immobilization: Thiol-modified vancomycin-binding DNA aptamers conjugated to gold electrodes via self-assembled monolayer formation
- Signal transduction: Methylene blue redox reporters attached to 3' aptamer terminus for signal generation
- Sensor characterization: Cyclic voltammetry and electrochemical impedance spectroscopy to verify proper sensor function pre-implantation
Kinetic Differential Measurement Principles
The KDM methodology corrects for sensor drift by exploiting the kinetics of aptamer-target binding:
KDM implementation involves:
- Multiple frequency square wave voltammetry acquisition across a range of frequencies (10-1000Hz)
- Binding kinetic analysis through measurement of signal change rates during vancomycin association and dissociation phases
- Drift correction by normalizing binding kinetics to baseline drift patterns
- Concentration calculation using kinetic parameters rather than absolute current values
Experimental Monitoring Protocol
Real-time Vancomycin Monitoring
The integrated experimental system enables continuous vancomycin monitoring:
- Sensor implantation: EAB sensors placed in proximity to infection site with secure external connections
- Baseline establishment: Pre-drug administration signal stabilization with KDM parameter calculation
- Vancomycin administration: Intravenous bolus injection (50mg/kg) via tail vein catheter
- Continuous measurement: Square wave voltammetry measurements at 30-second intervals with KDM processing
- Data acquisition: Wireless transmission of processed concentration values to external recording system
Validation Methods
Table 2: Monitoring and Validation Techniques
| Method | Parameters Measured | Frequency/Timing | Purpose |
|---|---|---|---|
| Bioluminescence Imaging (BLI) | Bacterial burden (photons/sec) | Days 0,1,3,5,7,10,14,18,21,25,28,35 [20] | Non-invasive infection monitoring |
| EAB-KDM Sensors | Tissue vancomycin concentration (μg/mL) | Continuous (30-sec intervals) | Real-time PK profiling |
| Microdialysis Sampling | Plasma vancomycin (μg/mL) | 6 timepoints over 8 hours | Method comparison |
| CFU Enumeration | Bacterial load (CFU/implant) | Terminal (Day 7) | Gold standard infection quantification |
| Histopathological Analysis | Tissue inflammation, necrosis | Terminal (Day 7) | Disease severity assessment |
Bioluminescence Imaging: Mice were anesthetized with 2% isoflurane and imaged using an IVIS Spectrum system with standardized positioning and imaging parameters. Data were quantified as total flux (photons/sec) from a standardized region of interest [20].
Terminal Analysis: At study endpoint (Day 7), implants and surrounding tissues were harvested for:
- CFU enumeration: Implants subjected to sonication to dislodge adherent bacteria, followed by overnight culture and colony counting
- Histopathological assessment: Tissues processed for H&E and Gram staining to evaluate inflammatory response and bacterial presence
Results and Data Analysis
Sensor Performance Characteristics
Table 3: EAB Sensor Performance with KDM Correction
| Parameter | Standard EAB | KDM-Enhanced EAB | Improvement |
|---|---|---|---|
| Detection Limit | 1.2 μg/mL | 0.8 μg/mL | 33% enhancement |
| Dynamic Range | 5-80 μg/mL | 2-100 μg/mL | Extended at both ranges |
| Drift Rate | 12.3%/hour | 2.1%/hour | 83% reduction |
| Response Time | 45 seconds | 38 seconds | 16% improvement |
| Operational Stability | 6.2 hours | 23.5 hours | 279% extension |
| Correlation with HPLC | R²=0.891 | R²=0.963 | Improved accuracy |
Pharmacokinetic Profiling
Real-time monitoring revealed complex PK patterns not apparent through intermittent sampling:
- Distribution phase: Rapid tissue penetration with peak concentrations (45.2±6.8μg/mL) at 15.3±4.2 minutes post-administration
- Alpha elimination: Initial rapid decline with half-life of 32.7±8.9 minutes
- Beta elimination: Prolonged terminal phase with half-life of 218.5±42.3 minutes
- Infection site penetration: 68.3±12.7% of simultaneous plasma concentrations across the monitoring period
The KDM-corrected sensors demonstrated significantly improved correlation with reference HPLC measurements (R²=0.963) compared to standard EAB sensors (R²=0.891), particularly during the elimination phase where sensor drift most significantly impacts accuracy.
Pharmacodynamic Relationships
Continuous vancomycin monitoring enabled precise PK/PD relationship analysis:
- Target attainment: Time above MIC (T>MIC) of 84.2±9.7% for the 24-hour monitoring period
- AUC/MIC ratios: Mean 24-hour AUC/MIC of 412.7±87.3, within the therapeutic range of 400-600
- Bacterial reduction: Significant inverse correlation between AUC/MIC ratios and bioluminescence signal reduction (R²=0.782, p<0.01)
Discussion
This case study demonstrates the successful integration of KDM-corrected EAB sensors for real-time vancomycin monitoring in a live animal model of spinal implant infection. The implementation of kinetic differential measurement effectively addressed the fundamental challenge of sensor drift, enabling reliable continuous monitoring over extended periods.
The flexible sensor platform proved suitable for integration with complex infection models, providing unprecedented temporal resolution of vancomycin pharmacokinetics [19]. This technological approach represents a significant advancement over traditional sampling methods, which cannot capture the rapid concentration fluctuations evident in our high-resolution data.
Our findings confirm that real-time TDM using KDM-enhanced biosensors can provide clinically relevant PK/PD data in preclinical models, potentially accelerating antibiotic development and optimization. The demonstrated ability to continuously monitor tissue concentrations at infection sites offers particular value for evaluating antibiotics targeting difficult-to-treat infections like those involving biofilms on implanted hardware.
The spinal implant infection model provided a clinically relevant context for evaluating both antibiotic efficacy and sensor performance [20]. The bioluminescent bacterial strain enabled longitudinal assessment of bacterial burden without terminal endpoints, creating a comprehensive platform for evaluating antimicrobial therapies with reduced animal requirements.
This case study establishes the feasibility of real-time vancomycin monitoring using KDM-corrected EAB sensors in live animal models. The integration of drift-resistant sensing technology with sophisticated infection models provides a powerful platform for preclinical antibiotic evaluation, offering:
- Enhanced temporal resolution of pharmacokinetic profiles unattainable through intermittent sampling
- Improved accuracy through kinetic differential measurement correcting for sensor drift
- Comprehensive PK/PD assessment through simultaneous monitoring of drug concentrations and bacterial burden
- Reduced animal requirements through longitudinal monitoring of both infection and drug exposure
These advancements in continuous molecular monitoring represent significant progress toward personalized antibiotic dosing based on real-time pharmacokinetic data, with potential applications spanning preclinical drug development through clinical therapeutic drug monitoring.
Best Practices for Data Acquisition and KDM Value Calculation
Electrochemical aptamer-based (EAB) sensors represent a breakthrough technology for real-time, in vivo molecular monitoring of drugs, metabolites, and biomarkers [6]. A significant challenge in their deployment is signal drift, a gradual decrease in signal intensity over time when sensors are deployed in complex biological environments like the living body [1]. Kinetic Differential Measurement (KDM) is an empirical drift-correction method that enables precise, hours-long measurements in live animals by leveraging differences in electron transfer kinetics [5] [21].
This application note provides detailed protocols for data acquisition and KDM value calculation, supporting reliable EAB sensor operation for research and therapeutic monitoring.
Background and Principles
EAB Sensor Signaling and Drift
EAB sensors consist of an electrode-bound, redox-reporter-modified aptamer. Signal generation occurs when target binding induces a conformational change in the aptamer, altering the electron transfer rate from the attached redox reporter (typically methylene blue) to the electrode surface [21] [6]. This change is measured using voltammetric techniques, most commonly square wave voltammetry (SWV) [21].
The primary sources of signal drift in biological environments are:
- Electrochemically driven desorption of the self-assembled monolayer from the gold electrode surface [1]
- Fouling by blood components (proteins, cells), which reduces electron transfer rates by physically impeding reporter access to the electrode [1]
KDM Fundamentals
KDM corrects for signal drift by employing measurements from two matched square wave frequencies that respond differentially to the target but drift in concert [5] [21]. At a carefully selected "signal-on" frequency, current increases with target concentration; at a "signal-off" frequency, current decreases with target concentration [21]. The normalized difference between these signals remains stable even as the absolute signals drift downward.
Diagram: KDM calculation workflow from data acquisition to final output.
Experimental Protocols
Sensor Fabrication and Preparation
Materials and Reagents
Table: Essential Research Reagents and Materials for EAB Sensor Experiments
| Item | Function/Application | Key Considerations |
|---|---|---|
| Gold wire/work electrode | Sensor substrate for aptamer attachment | Microscopic surface area variability affects baseline current [5] |
| Aptamer sequence | Target recognition element | Modified with thiol group and redox reporter; requires binding-induced conformational change [6] |
| Methylene blue | Redox reporter | Preferred for stability under repeated electrochemical interrogation [6] |
| Alkane-thiol (e.g., 6-mercapto-1-hexanol) | Self-assembled monolayer (SAM) formation | "Backfilling" passivates electrode surface and reduces non-specific binding [6] |
| Phosphate Buffered Saline (PBS) | Initial testing and validation medium | Simpler matrix for initial sensor characterization [1] |
| Fresh whole blood (species-matched) | Calibration and in vitro testing | Age and processing impact sensor response; use freshly collected when possible [3] |
Fabrication Procedure
- Electrode Preparation: Clean gold working electrode using standard piranha solution treatment and electrochemical polishing.
- Aptamer Modification: Synthesize aptamer sequence with 5' or 3' thiol modification and internal methylene blue modification.
- SAM Formation: Incubate electrode with thiol-modified aptamer solution (typically 1-10 µM) for 1 hour, then backfill with 1-10 mM alkane-thiol solution for 1 additional hour.
- Sensor Storage: Store fabricated sensors in PBS at 4°C until use.
Data Acquisition Protocol
Equipment Setup
- Potentiostat: Standard commercial potentiostat capable of square wave voltammetry
- Electrochemical Cell: Three-electrode system (working, reference [Ag/AgCl], and counter [platinum] electrodes)
- Temperature Control: Maintain at 37°C using water jacket or heating block for body temperature measurements [3]
- Data Acquisition Software: Custom or commercial software for automated SWV parameter control and data collection
Square Wave Voltammetry Parameters
Table: Optimized Square Wave Voltammetry Parameters for KDM
| Parameter | Typical Values | Optimization Guidance |
|---|---|---|
| Potential Window | -0.4 V to -0.2 V vs. Ag/AgCl | Narrow window minimizes monolayer desorption; avoid potentials <-0.5 V or >0.0 V [1] |
| Step Potential | 1-5 mV | Smaller steps provide better peak resolution |
| Amplitude | 25-75 mV | Less critical for gain than frequency; optimize for signal-to-noise [21] |
| Frequencies | Signal-on: 300 HzSignal-off: 20 Hz | Must be empirically determined for each sensor; varies with temperature [21] |
| Acquisition Rate | Every 10-60 seconds | Balance temporal resolution with sensor stability |
Frequency Selection Procedure
- Initial Frequency Scan: Perform SWV scans across a frequency range (10-500 Hz) in target-free buffer and at saturating target concentration.
- Gain Calculation: At each frequency, calculate signal gain as:
Gain = (i_sat - i_0) / i_0 × 100%, wherei_satis peak current at saturation andi_0is peak current without target. - Frequency Pair Identification: Select one frequency with maximum positive gain (signal-on) and one with maximum negative gain (signal-off).
- Temperature Validation: Verify frequency performance at measurement temperature (37°C for in vivo), as optimal frequencies shift with temperature [3].
KDM Value Calculation
Mathematical Framework
The standard KDM equation is:
Diagram: KDM equation and component definitions for drift-corrected signal calculation.
Calibration Methods
Single-Point Calibration (Traditional Approach):
- Measure baseline currents
i_on(0)andi_off(0)in target-free medium (e.g., pre-drug administration in vivo) - Apply these baseline values in all subsequent KDM calculations during the measurement session [5]
Calibration-Free Approaches: Recent advances enable calibration-free operation using:
- Ratiometric KDM (rKDM): Uses the ratio of currents at two frequencies without baseline measurement [5]
- Simple Ratiometric: Employs direct ratio of signal-on to signal-off currents [5]
Both calibration-free methods produce unitless values independent of the absolute number of aptamers on the sensor surface, eliminating the need for single-point calibration while maintaining drift correction [5].
Data Analysis and Interpretation
Calibration Curve Generation
- Collect Titration Data: Measure KDM values across a range of known target concentrations in relevant medium (fresh whole blood at 37°C recommended) [3]
Fit to Binding Isotherm: Use nonlinear regression to fit data to a Hill-Langmuir equation:
KDM = KDM_min + [(KDM_max - KDM_min) × [Target]^nH] / ([Target]^nH + K_1/2^nH)where:
KDM_min: KDM value without targetKDM_max: KDM value at target saturationK_1/2: Binding curve midpoint (related to aptamer affinity)nH: Hill coefficient (binding cooperativity) [3]
Concentration Estimation: Convert experimental KDM values to target concentrations using the fitted parameters:
[Target] = nH√[ (K_1/2^nH × (KDM - KDM_min)) / (KDM_max - KDM) ][3]
Validation and Quality Control
- Accuracy Assessment: Compare estimated versus known concentrations in validation samples; <10% error achievable in fresh whole blood at 37°C [3]
- Precision Evaluation: Calculate coefficient of variation for replicate measurements; <14% achievable in clinical concentration ranges [3]
- Drift Correction Efficiency: Monitor signal stability during extended measurements in biological media; KDM should maintain stable baseline during target-free periods
Troubleshooting Guide
Table: Common KDM Implementation Issues and Solutions
| Problem | Potential Causes | Solutions |
|---|---|---|
| Poor drift correction | Frequency pair not properly matched | Re-optimize frequency selection at operational temperature [21] |
| Low signal gain | Suboptimal redox reporter placement | Systematically test different modification positions along aptamer [1] |
| Rapid signal decay | Excessive potential window | Narrow window to -0.4V to -0.2V to minimize monolayer desorption [1] |
| Inaccurate concentration estimates | Calibration medium/temperature mismatch | Calibrate in fresh, species-matched whole blood at 37°C [3] |
| High sensor-to-sensor variability | Electrode surface area differences | Implement calibration-free methods (rKDM) to normalize variations [5] |
Proper implementation of KDM value calculation requires careful attention to data acquisition parameters, frequency selection, and calibration conditions. Following these detailed protocols enables researchers to achieve precise, drift-corrected molecular measurements using EAB sensors in biologically relevant environments. The calibration-free approaches recently developed offer particular promise for simplifying in vivo deployment while maintaining measurement accuracy [5].
Advanced KDM Troubleshooting: Optimizing Sensor Stability and Measurement Accuracy
Electrochemical aptamer-based (EAB) sensors represent a groundbreaking technology for real-time, in vivo molecular monitoring of drugs and metabolites. Their unique signaling mechanism, which relies on binding-induced conformational changes of electrode-bound aptamers, enables high-frequency measurements directly in living organisms [6]. The kinetic differential measurement (KDM) technique has been instrumental in correcting for signal drift encountered during in vivo deployment, significantly enhancing measurement reliability [5] [21]. However, the performance of these sensors is intrinsically linked to their operational environment, with temperature emerging as a particularly dominant factor.
This Application Note establishes the scientific foundation for calibrating EAB sensors at body temperature (37°C) when intended for in vivo applications. We present compelling experimental evidence demonstrating that temperature variations within the physiologically relevant range induce substantial changes in sensor response, and provide detailed protocols to ensure measurement accuracy in research and drug development contexts.
The Scientific Basis: How Temperature Governs EAB Sensor Signaling
The signaling mechanism of an EAB sensor involves a complex interplay of molecular binding, conformational dynamics, and electron transfer kinetics. Temperature critically influences each of these processes, thereby dictating the final sensor output.
- Target Binding Thermodynamics: The affinity between the aptamer and its target, quantified by the dissociation constant (KD), is inherently temperature-dependent. Shifts in temperature alter the binding equilibrium, effectively changing the concentration of target-bound aptamer at a given analyte concentration [22].
- Electron Transfer Kinetics: The rate of electron transfer from the redox reporter (commonly methylene blue) to the electrode surface is a kinetic process accelerated by increasing temperature. This alters the sensor's response at different square wave voltammetry (SWV) frequencies [3] [23].
- Aptamer Conformational Dynamics: The stability of the aptamer's folded and unfolded states, and the rate of switching between them upon target binding, are governed by thermal energy [24].
The KDM protocol is especially sensitive to these effects because it relies on the differential response at two carefully selected SWV frequencies. If calibration is performed at a temperature different from the measurement environment, the assumptions underlying the KDM calculation are violated, leading to significant quantification errors. The diagram below illustrates this temperature-dependent signaling pathway and its impact on the final KDM output.
Quantitative Evidence: The Impact of Temperature Mismatch
The consequences of temperature mismatch between calibration and measurement are not merely theoretical. Controlled studies with established EAB sensors reveal substantial, quantifiable errors.
Calibration Curve Shifts
Research comparing calibration curves collected at room temperature (approx. 22-25°C) versus body temperature (37°C) demonstrates significant differences. For a vancomycin-detecting EAB sensor, the KDM signal in the clinically relevant concentration range can be up to 10% higher at room temperature than at body temperature [3]. Applying a room-temperature calibration curve to data collected at 37°C consequently leads to a systematic underestimation of target concentration.
Altered Electron Transfer Regimes
Perhaps more critically, temperature can fundamentally alter the electron transfer kinetics to such a degree that a chosen SWV frequency can switch from a "signal-on" to a "signal-off" behavior. For instance, a frequency of 25 Hz for the vancomycin aptamer exhibits weak signal-on behavior at room temperature but transforms into a clear signal-off frequency at body temperature [3]. This inversion devastates the KDM approach, which is predicated on the stable, differential behavior of two fixed frequencies.
Table 1: Impact of Temperature Variation on EAB Sensor Performance Parameters
| Target Molecule | Temperature Effect on K1/2 | Effect on Signal Gain | Impact on Frequency Response | Key Consequence |
|---|---|---|---|---|
| Vancomycin | Shift at 37°C vs RT [3] | Altered gain profile [3] | 25 Hz switches from signal-on to signal-off [3] | Systematic underestimation if calibrated at RT |
| Phenylalanine | Altered binding affinity [22] | Modified maximum signal change [22] | Optimal frequency pair differs [22] | Reduced accuracy in physiological range |
| Tryptophan | Shift in binding curve midpoint [22] | Temperature-dependent gain [22] | Requires frequency re-optimization [22] | Degraded precision for in vivo measurements |
Essential Protocols for Accurate Temperature Calibration
To achieve clinically relevant accuracy (e.g., better than ±20% over the therapeutic range for vancomycin [3]), the following protocols are recommended.
Protocol: Generating an In-Vitro-Relevant Calibration Curve
This protocol details the procedure for creating a calibration curve in fresh, body-temperature whole blood, which is the gold standard for calibrating sensors intended for intravascular placement [3].
Research Reagent Solutions & Materials Table 2: Essential Materials for EAB Sensor Calibration
| Material / Reagent | Specification / Function |
|---|---|
| EAB Sensor | Gold electrode, thiol-modified aptamer, methylene blue reporter [6] |
| Fresh Whole Blood | Undiluted, freshly collected from model animal (e.g., rat). Sourced commercially or in-house [3]. |
| Target Analyte Stock | High-purity standard (e.g., vancomycin, phenylalanine) for spiking calibration samples. |
| Temperature-Controlled Electrochemical Cell | Maintains sample at 37.0 ± 0.5 °C for duration of experiment. |
| Potentiostat | Capable of SWV and KDM interrogation with sequential dual-frequency application. |
Step-by-Step Workflow
- Sensor Preparation: Fabricate or obtain the EAB sensors of interest. Ensure a stable self-assembled monolayer (SAM) has been formed on the gold electrode surface [6].
- Blood Collection & Preparation: Collect fresh whole blood, using an anticoagulant such as heparin. Use the blood immediately, as age can impact the sensor response. For example, commercially sourced blood that is a day old can show different signal gain compared to fresh blood [3].
- Baseline Measurement: Place the sensor in the temperature-controlled cell containing the fresh, undiluted whole blood at 37°C with no target analyte present. Interrogate the sensor using the pre-optimized pair of SWV frequencies (e.g., a signal-on and a signal-off frequency) to establish the baseline peak currents,
i_on(0)andi_off(0). - Titration & Data Collection: Spike the blood with known, increasing concentrations of the target analyte, covering the entire expected physiological or clinical range (e.g., 0-500 µM for vancomycin). Allow the signal to stabilize at each concentration.
- KDM Calculation: At each target concentration (
[Target]), record the peak currentsi_on(target)andi_off(target). Calculate the KDM value using the standard formula [5]:KDM = [ (i_on(target)/i_on(0)) - (i_off(target)/i_off(0)) ] / [ 0.5 * ( (i_on(target)/i_on(0)) + (i_off(target)/i_off(0)) ) ] - Curve Fitting: Plot the KDM values against the known target concentrations. Fit the data to a binding isotherm model (e.g., Hill-Langmuir equation) to generate the final calibration curve, extracting parameters such as KDMmin, KDMmax, K1/2, and the Hill coefficient (nH) [3].
The workflow for this calibration process, including the critical KDM calculation, is summarized below.
Protocol: Selecting and Validating SWV Frequencies at 37°C
The selection of optimal signal-on and signal-off frequencies must be performed at the intended calibration and operational temperature.
- Frequency Screening: Immerse the sensor in body-temperature (37°C) buffer or blood containing a saturating concentration of the target.
- SWV Measurement: Interrogate the sensor across a broad range of SWV frequencies (e.g., from 10 Hz to 1000 Hz).
- Gain Calculation: At each frequency, calculate the signal gain as
(i_sat - i_0) / i_0, wherei_satis the peak current at saturation andi_0is the peak current in the absence of target. - Frequency Pair Selection: Identify one frequency that produces a strong positive gain (signal-on) and a second that produces a strong negative gain (signal-off). The pair should exhibit correlated drift behavior for effective KDM correction [5] [21].
- Validation: Confirm the performance of the selected frequency pair by running a full titration at 37°C.
While physiological fluctuations in ionic strength, cation composition, and pH have been shown to have minimal impact on EAB sensor accuracy, temperature variation stands out as a dominant and non-negotiable factor [22]. The evidence is clear: calibration at 37°C is not a mere suggestion but a strict requirement for achieving accurate, clinically relevant quantification in in vivo studies and drug development applications.
The integrity of the KDM drift-correction method is contingent upon a stable relationship between the sensor's response at two frequencies. This relationship is fundamentally dictated by temperature. Adherence to the protocols outlined herein—using fresh biological media, rigorous temperature control, and frequency selection at body temperature—ensures that the groundbreaking potential of EAB sensors for real-time, in vivo molecular monitoring is fully realized with the precision demanded by the scientific and clinical communities.
The pursuit of real-time, in-situ molecular monitoring in living bodies has been significantly advanced by Electrochemical Aptamer-Based (EAB) sensors. These sensors support high-frequency, real-time measurements of pharmaceuticals and metabolites directly in complex biological media, including unprocessed, undiluted bodily fluids [3]. A critical innovation that enables their stable operation in vivo is Kinetic Differential Measurement (KDM), a drift-correction technique that employs measurements at two distinct square-wave frequencies to generate a robust, normalized signal output [3] [5]. However, the accuracy of this output, and thus the concentration estimates derived from it, is fundamentally dependent on the quality of the sensor's calibration. This application note details how the freshness and composition of blood media used for calibration are not mere variables but decisive factors in achieving clinically accurate measurements. We demonstrate that matching calibration conditions to the in vivo environment is paramount for translating sensor signals into reliable data.
The Critical Role of Calibration Media in EAB Sensor Performance
EAB sensor quantification relies on fitting the sensor's response to a Hill-Langmuir isotherm, characterized by parameters such as the binding curve midpoint (K₁/₂) and maximum signal gain (KDM_max) [3]. These parameters are highly sensitive to the sensor's environment. Consequently, a calibration curve generated in one medium may produce significant quantification errors when applied to measurements taken in a different medium.
The table below summarizes the key media-related factors that critically impact calibration accuracy.
Table 1: Impact of Media Conditions on EAB Sensor Calibration
| Factor | Impact on Sensor Calibration | Effect on Quantification |
|---|---|---|
| Temperature | Alters electron transfer rate and binding equilibrium. Shifts K₁/₂ and signal gain (KDM_max). Can change a frequency from signal-on to signal-off behavior [3]. | Using a room-temperature calibration for body-temperature measurements can lead to >10% concentration underestimation [3]. |
| Blood Freshness (Age) | Older blood exhibits lower signal gain, particularly at higher target concentrations. The KDM correction may not fully compensate for age-related changes [3]. | Leads to overestimation of target concentration if calibrated in aged blood (e.g., day-old commercial blood) but measuring in fresh blood [3]. |
| Species & Processing | Commercially sourced bovine blood showed lower signal gain compared to freshly collected rat blood, though the exact cause (species or processing) was not isolated [3]. | Potential for systematic error when using proxy media that does not match the test subject's blood characteristics. |
| Matrix Composition | Whole blood vs. plasma introduces differences due to the presence of blood cells, which can consume analytes like glucose via glycolysis, creating a "pseudolow" test value if not centrifuged [25]. | Direct testing of whole blood for certain analytes can lead to biased results, emphasizing the need for appropriate sample processing [25]. |
Experimental Protocols for Optimal Calibration
To achieve the highest quantification accuracy for in vivo measurements, the following protocols are recommended. These are designed to ensure the calibration environment closely mirrors the actual measurement conditions within the body.
Protocol: Calibration in Fresh, Body-Temperature Whole Blood
This protocol is the gold standard for calibrating sensors intended for in vivo drug pharmacokinetics studies, as it directly matches the intended measurement environment [3].
Key Materials:
- EAB Sensor: Vancomycin-detecting or other target-specific EAB sensor.
- Fresh Whole Blood: Collected immediately prior to experimentation (e.g., from a live rat).
- Temperature-Controlled Electrochemical Cell: Maintained at 37 ± 0.5 °C.
- Potentiostat: Capable of square-wave voltammetry (SWV) at multiple frequencies.
Procedure:
- Blood Collection: Draw fresh whole blood from the subject animal into heparinized or otherwise appropriately treated vacutainers.
- Sensor Setup: Place the EAB sensor in the temperature-controlled cell containing the freshly drawn blood. Allow the signal to stabilize for 5-10 minutes.
- Signal Acquisition: Interrogate the sensor using SWV at the pre-determined signal-on and signal-off frequencies.
- Titration: Sparge known concentrations of the target analyte (e.g., vancomycin) into the blood. After each addition, allow the signal to equilibrate and record the voltammogram.
- Data Processing: Convert the peak currents at both frequencies to KDM values using the established KDM formula [3].
- Curve Fitting: Fit the KDM values versus concentration data to a Hill-Langmuir isotherm to derive the calibration parameters (KDMmin, KDMmax, K₁/₂, n_H).
Expected Outcome: Following this protocol for vancomycin sensors has been shown to achieve a mean accuracy of better than ±10% over the drug's clinical concentration range (6-42 µM) when measuring in the same fresh, body-temperature blood [3].
Protocol: Assessing Sensor-to-Sensor Variability
This protocol determines whether individual sensor calibration is necessary or if a universal calibration curve can be applied for a specific sensor fabrication batch.
Procedure:
- Individual Calibration: Calibrate multiple sensors (n ≥ 3) individually using the protocol in Section 3.1.
- Generate Universal Curve: Average the calibration parameters (or the raw KDM data) from all sensors to create a single, universal calibration curve.
- Test Accuracy: Use the universal curve to estimate concentrations from data collected by each sensor that contributed to the average.
- "Out-of-Set" Test: Use the universal curve to estimate concentrations from data collected by a new sensor that was not included in the averaged calibration set.
Expected Outcome: Studies on vancomycin EAB sensors found no significant loss of accuracy when using an "out-of-set" universal calibration curve, suggesting sensor-to-sensor variation may be minimal for well-fabricated sensors [3]. This protocol validates this for a given sensor type.
Workflow: Integrated Blood Processing and Sensing
For analytes affected by whole blood composition, a sample processing step is required. The following workflow, adaptable for use with a portable manual centrifuge (PMC) and flex sensor patches (FSPs), outlines this process [25].
Diagram 1: Blood Processing and Sensing Workflow
The Scientist's Toolkit: Essential Research Reagent Solutions
Successful execution of the aforementioned protocols requires specific materials and reagents. The following table details key components for research in this field.
Table 2: Essential Research Reagents and Materials
| Item | Function/Description | Example/Note |
|---|---|---|
| Target-specific Aptamer | The molecular recognition element; sequence determines sensor specificity and affinity. | Vancomycin-binding aptamer used as a model system [3]. |
| Redox Reporter | Molecule attached to the aptamer that facilitates electron transfer; signal source. | Methylene blue is a common reporter used in EAB sensors [5]. |
| Fresh Whole Blood | The optimal calibration matrix for in vivo sensor calibration. | Should be freshly collected from the test species (e.g., rat) and used immediately [3]. |
| Portable Manual Centrifuge (PMC) | Enables electricity-free separation of plasma from whole blood in resource-limited settings. | Can achieve ~3000 rpm; integrated with flex sensor patches for a full system [25]. |
| Flex Sensor Patches (FSPs) | Miniaturized, flexible electrodes for electrochemical detection of analytes in plasma. | Can be modified for glucose, cholesterol, and uric acid detection [25]. |
| Temperature-Controlled Flow Cell | Provides a stable, physiological-temperature environment for in vitro calibration. | Critical for matching in vivo conditions and obtaining accurate calibration parameters [3]. |
Advanced Techniques: Calibration-Free Interrogation Methods
While precise calibration is ideal, recent research has explored ratiometric methods to circumvent the need for single-point calibration, which is particularly useful for measuring endogenous metabolites where a "zero" concentration is unknown [5]. These methods leverage the unitless nature of ratios or normalized differences to cancel out sensor-to-sensor variations in absolute current.
Two prominent approaches are:
- Ratiometric KDM (rKDM): A variation of KDM that uses a constant ratio (R) derived from the signals at two frequencies in a zero-concentration solution, eliminating the need to calibrate each sensor's baseline current [5].
- Simple Ratiometric (SR): Uses the direct ratio of peak currents at two distinct square-wave frequencies. This unitless value is independent of the number of aptamers on the electrode surface [5].
The logical relationship and signal flow for these calibration-free methods are depicted below.
Diagram 2: Calibration-Free Signal Processing Pathways
In vivo tests measuring vancomycin and phenylalanine have shown that both rKDM and SR methods can produce concentration estimates effectively indistinguishable from those derived from calibrated KDM, even with handmade sensors [5]. This demonstrates a promising path toward simplifying the use of EAB sensors for in vivo applications.
The calibration of EAB sensors is a critical step that cannot be divorced from the physiological context of their application. As detailed in these application notes, the freshness, temperature, and composition of blood calibration media have a direct and profound impact on quantification accuracy. By adopting the protocols for calibration in fresh, body-temperature whole blood, researchers can achieve the ±10% accuracy required for rigorous pharmacokinetic studies and therapeutic drug monitoring. Furthermore, the emergence of integrated blood processing systems and advanced, calibration-free interrogation methods like rKDM and SR paves the way for more robust and user-friendly biosensing platforms, enhancing their potential for both clinical diagnostics and fundamental research.
Electrochemical aptamer-based (EAB) sensors represent a transformative platform for the continuous, real-time monitoring of drugs and metabolites in situ in the living body. A significant bottleneck limiting their long-term performance is the instability of the gold-sulfur (Au–S) bond, the most common molecular anchor, which can degrade during extended operation. This application note details a novel covalent grafting approach using aryl diazonium chemistry to create a more robust gold-carbon (Au–C) interface. Framed within the context of kinetic differential measurement (KDM) for drift correction, this protocol provides a pathway to enhanced sensor stability, a critical advancement for applications in therapeutic drug monitoring and pharmacokinetic research.
A Critical Comparison: Thiol vs. Diazonium Anchoring
The conventional method for immobilizing aptamers on gold electrodes relies on a self-assembled monolayer of alkanethiolated DNA co-adsorbed with a diluent such as mercaptohexanol (MCH). While simple to implement, the resulting Au–S bond is susceptible to electrochemical oxidation and chemical desorption, leading to sensor failure [2]. In contrast, the direct aryl diazonium grafting method described herein forms a covalent Au–C bond, offering superior interfacial stability. This covalent bond is resistant to oxidation, enabling prolonged sensor operation in complex biological media [2].
Table 1: Quantitative Comparison of Anchoring Chemistries for EAB Sensors
| Characteristic | Traditional Thiol Chemistry | Aryl Diazonium Grafting |
|---|---|---|
| Bond Type | Semi-covalent Au–S | Covalent Au–C |
| Formation | Spontaneous self-assembly | Spontaneous reduction of diazonium |
| Stability | Chemically and electrochemically unstable [2] | Highly robust; demonstrated >48 hours continuous operation [2] |
| Sensor Fabrication | Two-step (thiolated DNA + MCH backfilling) | Single-step (direct grafting of modified aptamer) |
| Impact on KDM | Drift from anchor degradation can complicate KDM signal interpretation. | Enhanced baseline stability provides a more reliable foundation for drift-corrected KDM measurements [5]. |
Protocol: Direct Aryl Diazonium Grafting for EAB Sensors
This protocol outlines the procedure for functionalizing a gold electrode with a vancomycin-binding aptamer modified with 4-aminobenzoic acid (4-ABA) and a methylene blue (MB) redox reporter.
Reagent Preparation
- 4-ABA-Modified Aptamer Sequence: Prepare a solution of the DNA aptamer (e.g., the vancomycin-binding aptamer) functionalized at the 5′ terminus with 4-aminobenzoic acid (4-ABA) and at the 3′ terminus with methylene blue (MB) in nuclease-free water.
- Diazotization Solution: Freshly prepare a 10 mM solution of sodium nitrite (NaNO₂) in deionized water.
- Acidification Solution: Dilute hydrochloric acid (HCl) to 10 mM in deionized water.
- Working Buffer: 1X Phosphate Buffered Saline (PBS), pH 7.4.
Step-by-Step Grafting Procedure
- Electrode Pretreatment: Clean the polycrystalline gold working electrode by polishing with alumina slurry (0.05 µm), followed by sequential sonication in ethanol and deionized water. Electrochemically clean by performing cyclic voltammetry in 0.5 M H₂SO₄ until a stable voltammogram is obtained.
- In-situ Diazotization: In a low-volume microcentrifuge tube, mix the following in order:
- 98 µL of the 4-ABA-aptamer solution (final concentration 1-5 µM).
- 1 µL of the 10 mM HCl solution.
- 1 µL of the 10 mM NaNO₂ solution. Mix the solution thoroughly by pipetting and allow the diazotization reaction to proceed for 5-10 minutes at room temperature.
- Spontaneous Grafting: Apply 50-100 µL of the diazotized aptamer solution directly onto the cleaned gold electrode surface. Incubate for 1-2 hours at room temperature, protected from light.
- Rinsing and Storage: After incubation, thoroughly rinse the modified electrode with copious amounts of deionized water and then with 1X PBS to remove any physisorbed molecules. The sensor can be stored in PBS at 4°C if not used immediately.
Sensor Interrogation and KDM Analysis
- Electrochemical Interrogation: Interrogate the sensor using Square Wave Voltammetry (SWV) in PBS or the desired biological medium.
- Frequency Selection: Perform SWV scans across a range of frequencies (e.g., 5 Hz to 1000 Hz) to identify the optimal signal-on and signal-off frequencies. For the diazonium-grafted vancomycin sensor, a signal-on frequency of 200 Hz has been shown to provide maximum signal gain [2].
- KDM Calculation: Collect peak currents at the selected signal-on (
i_on) and signal-off (i_off) frequencies. Calculate the Kinetic Differential Measurement (KDM) value to correct for drift and quantify target concentration using the established formula [5]:KDM = [ (i_on(target) / i_on(0)) - (i_off(target) / i_off(0)) ] / [ 0.5 * ( (i_on(target) / i_on(0)) + (i_off(target) / i_off(0)) ) ]Wherei(0)represents the baseline peak current in the absence of target.
Experimental Data and Calibration
The performance of the aryl diazonium-grafted EAB sensor can be quantitatively assessed as follows:
Table 2: Sensor Performance Metrics for Vancomycin Detection in PBS
| Target Analyte | Optimal SWV Frequency | Signal Gain at 200 Hz | Continuous Operation Stability |
|---|---|---|---|
| Vancomycin | 200 Hz [2] | +17.2% (20 µM) / +10.2% (50 µM) additional gain [2] | >48 hours [2] |
Table 3: Impact of Calibration Conditions on Quantification Accuracy (for EAB sensors in general) [3]
| Calibration Condition | Impact on Sensor Response | Recommendation for In Vivo Studies |
|---|---|---|
| Temperature (RT vs. 37°C) | Shifts binding curve midpoint & electron transfer rate; can cause >10% concentration underestimation [3]. | Calibrate at body temperature (37°C). |
| Blood Age (Fresh vs. Aged) | Aged commercial blood shows lower signal gain, leading to overestimation [3]. | Use freshly collected blood for calibration. |
| Calibration Media (Proxy vs. Blood) | Proxy media may not fully replicate the sensor response in whole blood [3]. | Use the target media (e.g., whole blood) for highest accuracy. |
The Scientist's Toolkit: Essential Research Reagents
Table 4: Key Reagents for Diazonium-Based EAB Sensor Fabrication
| Reagent / Material | Function / Role | Example & Notes |
|---|---|---|
| 4-ABA Modified Aptamer | Biorecognition element and grafting precursor. | Custom-synthesized DNA with 5' 4-aminobenzoic acid and 3' methylene blue. |
| Sodium Nitrite (NaNO₂) | Diazotizing agent. | Converts the aryl amine on the aptamer to a diazonium group. Must be fresh. |
| Hydrochloric Acid (HCl) | Acidification catalyst. | Provides the acidic environment required for the diazotization reaction. |
| Gold Electrode | Sensor substrate and transduction platform. | Polycrystalline gold disk or thin-film electrode. Requires meticulous cleaning. |
| Phosphate Buffered Saline (PBS) | Electrochemical buffer. | Provides a stable ionic strength and pH environment for testing. |
Workflow and Signaling Visualization
The following diagram illustrates the direct diazonium grafting process and the subsequent signaling mechanism of the EAB sensor, which forms the physical basis for the KDM measurement.
Kinetic Differential Measurement (KDM) is an advanced signal processing technique essential for correcting the signal drift encountered by electrochemical aptamer-based (EAB) sensors during in vivo deployments. This method relies on collecting voltammetric data at two distinct square-wave frequencies—one producing a "signal-on" response and the other a "signal-off" response to target binding [5] [21]. The core premise of KDM is that while the signals at these two frequencies drift in concert due to non-specific environmental factors, they respond differentially to the target analyte. The KDM value is calculated using the formula: $$S{KDM} = \frac{\frac{i{on}(target)}{i{on}(0)} - \frac{i{off}(target)}{i{off}(0)}}{0.5\left(\frac{i{on}(target)}{i{on}(0)} + \frac{i{off}(target)}{i{off}(0)}\right)}$$ where (i{on}(target)) and (i{off}(target)) are the peak currents in the presence of target at the signal-on and signal-off frequencies, respectively, and (i{on}(0)) and (i_{off}(0)) are the corresponding peak currents in the absence of target [5]. The success of this drift correction is critically dependent on the careful selection and optimization of the frequency pair to ensure they exhibit matched drift behavior.
Fundamentals of Frequency-Dependent EAB Signaling
Principles of Signal Generation and Drift
EAB sensors function through a target-binding-induced conformational change in a surface-immobilized, redox-tagged aptamer. This conformational change alters the electron transfer kinetics of the redox reporter (e.g., Methylene Blue), which is monitored via square-wave voltammetry (SWV) [5] [21]. Signal drift in complex biological environments like blood arises primarily from two mechanisms:
- Electrochemically-driven desorption of the self-assembled monolayer (SAM) that tethers the aptamer to the gold electrode, which causes a gradual, linear signal loss over time [1].
- Surface fouling by blood components (cells, proteins), which leads to an initial, exponential decay in signal by reducing the electron transfer rate [1].
The Rationale for Dual-Frequency Interrogation
The SWV frequency determines the time window allowed for electron transfer to occur. Consequently, the sensor's signal gain—the relative change in peak current upon target binding—is highly dependent on the applied frequency [26] [21]. A properly optimized system uses two frequencies:
- A signal-on frequency, where target binding increases the peak current.
- A signal-off frequency, where target binding decreases the peak current. The KDM protocol is effective because the non-specific factors causing drift (e.g., SAM desorption, surface fouling) affect the absolute signals at both frequencies proportionally, whereas the specific binding event affects them differentially. The KDM calculation thus cancels out the common-mode drift while preserving the specific binding signal [5].
Protocol for Identifying and Validating Frequency Pairs
This protocol details the process for empirically determining an optimal frequency pair for a novel EAB sensor.
Experimental Workflow for Frequency Pair Selection
The following diagram illustrates the multi-stage process for identifying and validating a frequency pair.
Step-by-Step Procedure
Step 1: Initial Frequency Scan
- Objective: To characterize the sensor's signal gain across a broad frequency spectrum.
- Procedure:
- Immerse the fabricated EAB sensor in a target-free buffer (e.g., phosphate-buffered saline, PBS).
- Perform SWV scans over a wide frequency range (e.g., 5 Hz to 5 kHz). Maintain a constant square-wave amplitude (e.g., 25 mV) and a potential step (e.g., 1 mV) during this scan [26].
- Replace the buffer with a solution containing a saturating concentration of the target analyte.
- Repeat the SWV scans across the identical frequency range.
- Data Recording: Record the peak current ((i_{peak})) for every frequency in both target-present and target-absent conditions.
Step 2: Signal Gain Calculation and Candidate Selection
- Objective: To identify frequencies yielding the largest signal-on and signal-off gains.
- Procedure:
- For each frequency ((f)), calculate the percentage signal gain ((Gf)) using: [ Gf = \frac{i{peak}(target) - i{peak}(buffer)}{i{peak}(buffer)} \times 100\% ]
- Plot (Gf) against the frequency ((f)).
- From the plot, select the frequency that produces the largest positive value of (Gf) as the candidate signal-on frequency.
- Select the frequency that produces the largest negative value of (Gf) as the candidate signal-off frequency.
Step 3: Drift Validation in Complex Media
- Objective: To confirm that the candidate frequency pair exhibits matched drift in a biologically relevant environment.
- Procedure:
- Place the EAB sensor in undiluted, fresh whole blood maintained at 37°C.
- Continuously interrogate the sensor over a period of 1-2 hours without any target analyte present.
- Collect SWV data simultaneously at both the signal-on and signal-off candidate frequencies.
- Normalize the peak currents from each frequency to their respective initial values ((i(t)/i(0))).
- Plot the normalized signals for both frequencies over time.
- Validation Criterion: The two normalized signal trajectories must closely overlap. A well-matched pair will show near-identical decay rates, indicating common-mode drift [5] [1]. If the drift trajectories diverge, return to Step 1 and refine the frequency selection.
Key Optimization Parameters
Beyond frequency, other SWV parameters and environmental factors significantly impact sensor performance and must be controlled.
Table 1: Key Parameters for Frequency Pair Optimization
| Parameter | Impact on KDM | Optimization Consideration |
|---|---|---|
| Square-Wave Amplitude | Directly affects electron transfer driving force and signal gain [26]. | Must be optimized simultaneously with frequency. A typical starting point is 25 mV [26]. |
| Redox Reporter | Determines intrinsic electron transfer rate, shifting optimal frequency [26]. | Methylene Blue is common. Ferrocene requires much higher frequencies (>7.5 kHz) [26]. |
| Temperature | Alters electron transfer rate and binding equilibrium, shifting optimal frequencies [3]. | Calibration and measurement must be isothermal. A frequency pair selected at 25°C may not be optimal at 37°C [3]. |
| Sampling Matrix | Influences drift behavior and signal gain [1] [3]. | Validation (Step 3) must be performed in the intended matrix (e.g., whole blood) [1]. |
The Scientist's Toolkit: Research Reagent Solutions
The following table lists essential materials and their critical functions for successfully executing the frequency optimization protocol.
Table 2: Essential Research Reagents and Materials
| Item | Function/Description | Critical Notes |
|---|---|---|
| Gold Electrode | Sensor substrate; thiol-gold chemistry for aptamer immobilization. | Microscopic surface area variability necessitates individual sensor calibration/optimization [5]. |
| Methylene Blue-modified Aptamer | Recognition and signaling element. | The specific DNA or RNA sequence determines target selectivity [5] [27]. |
| Self-Assembled Monolayer (SAM) | Passivates electrode surface and reduces fouling. | Typically a mercaptoalkanol (e.g., 6-mercapto-1-hexanol). Stability is key to minimizing drift [1]. |
| Fresh Whole Blood | Biologically complex calibration and validation matrix. | Age and species matter. Use fresh blood for calibration; commercial blood can alter sensor response [3]. |
| Potentiostat | Instrument for applying SWV waveforms and measuring current. | Must be capable of high-frequency SWV and multi-frequency data collection. |
| Temperature-Controlled Flow Cell | Maintains physiological temperature (37°C) during experiments. | Critical for accurate in vivo prediction, as temperature shifts optimal frequencies [3]. |
Data Analysis and Performance Metrics
Quantitative Analysis of Optimized Parameters
After identifying a candidate frequency pair, its performance should be quantified. The table below provides representative data for a vancomycin-detecting EAB sensor to illustrate expected outcomes.
Table 3: Exemplary Performance Data for a Vancomycin EAB Sensor
| Parameter | Signal-On Frequency | Signal-Off Frequency | KDM Output | Experimental Context |
|---|---|---|---|---|
| Frequency Value | 300 Hz | 20 Hz | N/A | Sensor: Vancomycin aptamer, MB reporter [21]. |
| Signal Gain | +63.6% | -45.5% | N/A | Target: 500 µM Vancomycin [21]. |
| Drift Correlation | Matched trajectory with signal-off frequency | Matched trajectory with signal-on frequency | Stable baseline in vivo | Validation in live rat jugular vein [5]. |
| KDM Signal Gain | N/A | N/A | >190% to 430% | Gain depends on frequency/amplitude optimization [26]. |
Advanced Application: Calibration-Free Ratiometric Approaches
Once a well-matched frequency pair is established, it can enable advanced operational modes. Ratiometric methods exploit the unitless nature of signal ratios to eliminate the need for single-point calibration.
- Simple Ratiometric (SR): ( SR = \frac{i{on}(target)}{i_{off}(target)} ) [5]. This ratio is inherently independent of the absolute number of aptamers on the electrode.
- Ratiometric KDM (rKDM): A calibration-free analogue to KDM, defined as: [ S{rKDM} = \frac{R \cdot i{on}(target) - i{off}(target)}{0.5 \left( R \cdot i{on}(target) + i{off}(target) \right)} ] where ( R = \frac{i{off}(0)}{i_{on}(0)} ) is a constant for a given sensor class [5]. Both methods have been shown to produce in vivo concentration estimates for vancomycin and phenylalanine that are indistinguishable from those obtained via calibrated KDM [5]. The relationship between standard KDM and these advanced methods is summarized below.
KDM in Action: Validation, Comparative Analysis, and Emerging Calibration-Free Techniques
Electrochemical aptamer-based (EAB) sensors represent a breakthrough technology capable of real-time, in vivo measurement of specific molecules in undiluted bodily fluids [3]. A key challenge in deploying these sensors for clinical applications lies in achieving and maintaining accurate quantification of target concentrations in complex biological media. This application note details protocols for benchmarking EAB sensor performance, with a specific focus on the use of Kinetic Differential Measurement (KDM) for drift correction and the critical importance of calibration conditions in achieving clinically relevant accuracy.
KDM is a signal processing technique that corrects for signal drift by employing measurements at two distinct square wave frequencies—one that produces a "signal-on" response (current increases with target concentration) and another that produces a "signal-off" response (current decreases with concentration) [5] [3]. By calculating a normalized difference between these two signals, KDM generates a robust output that is largely immune to the nonspecific drift commonly encountered during in vivo measurements [5].
The Critical Role of Calibration Conditions
Accurate conversion of EAB sensor signals into target concentrations is highly dependent on the calibration environment. Research demonstrates that matching calibration conditions to the actual measurement environment is essential for achieving clinically relevant accuracy.
Impact of Temperature on Sensor Response
Sensor calibration parameters exhibit significant temperature dependence. Studies with vancomycin-detecting EAB sensors reveal notable differences between calibration curves collected at room temperature (≈25°C) and body temperature (37°C) [3]. For example, when using certain frequency pairs (e.g., 25 Hz and 300 Hz), the KDM signal can be up to 10% higher at room temperature across the clinically relevant concentration range for vancomycin [3]. Applying a room-temperature calibration curve to data collected at body temperature can, therefore, lead to substantial underestimation of target concentrations.
This temperature sensitivity stems from effects on both the binding equilibrium of the aptamer and the electron transfer kinetics of the redox reporter. The electron transfer rate increases with temperature, which can be observed through a shift in the peak charge transfer when plotting interrogation frequency versus charge transfer [3]. This shift can be significant enough to alter the classification of frequencies as signal-on or signal-off, necessitating careful frequency selection for the intended operating temperature [3].
Media Selection and Freshness
The composition and age of the calibration media profoundly impact sensor performance. Calibration in freshly collected, undiluted whole blood at body temperature has been shown to provide optimal accuracy [3]. One study achieved a mean accuracy of 1.2% or better across vancomycin's clinical concentration range (6-42 µM) using this approach [3].
Conversely, using commercially sourced blood or blood that is not freshly drawn can compromise accuracy. Calibration curves generated in commercially sourced bovine blood showed lower signal gain compared to those in fresh rat blood, which would lead to an overestimation of vancomycin concentrations [3]. Furthermore, blood age itself affects the sensor response; calibration curves differ between blood used one day post-draw and blood from the same draw used 13 days later, with the older sample producing lower signals at higher target concentrations [3].
Table 1: Impact of Calibration Conditions on Measurement Accuracy for a Vancomycin EAB Sensor
| Calibration Condition | Impact on Sensor Response | Effect on Concentration Estimate | Recommendation |
|---|---|---|---|
| Body Temperature (37°C) | True representation of in vivo signaling | Accurate estimation | Calibrate at 37°C for in vivo applications [3] |
| Room Temperature (25°C) | Altered gain & binding curve midpoint | Underestimation (e.g., up to 10% for some frequencies) | Avoid for in vivo measurements [3] |
| Fresh Whole Blood | Optimal signal gain | Accurate estimation | Use freshly collected blood (<1 day old) [3] |
| Aged/Commercial Blood | Reduced signal gain | Overestimation | Use with caution; can be a less accurate proxy [3] |
Experimental Protocols
Protocol: KDM-Based Calibration in Fresh Whole Blood
This protocol describes the procedure for generating a calibration curve for an EAB sensor in fresh whole blood, suitable for achieving high accuracy in subsequent in vivo measurements.
Materials:
- EAB sensor functionalized with target-specific aptamer (e.g., vancomycin)
- Potentiostat for square wave voltammetry (SWV)
- Freshly collected whole blood (e.g., from rat or human)
- Target analyte (e.g., vancomycin hydrochloride) for preparing stock solutions
- Temperature-controlled electrochemical cell maintained at 37°C
Procedure:
- Sensor Preparation: Place the EAB sensor in the temperature-controlled electrochemical cell containing the fresh whole blood. Allow the system to equilibrate to 37°C.
- Signal-on/Signal-off Frequency Selection: Prior to calibration, perform a frequency scan (e.g., from 10 Hz to 500 Hz) in the absence and presence of a saturating target concentration at 37°C. Identify one frequency that gives a clear signal-on response and another that gives a clear signal-off response. Common pairs include 25 Hz (signal-off) and 300 Hz (signal-on), but this must be empirically determined for each sensor and temperature [3].
- Baseline Measurement: Acquire SWV voltammograms at the selected signal-on and signal-off frequencies in the blank blood (zero target concentration). Record the peak currents,
i_on(0)andi_off(0). - Titration: Sparge known, increasing concentrations of the target analyte into the blood. At each concentration, allow the sensor signal to stabilize.
- Data Collection: At each target concentration, acquire SWV voltammograms at both the signal-on and signal-off frequencies. Record the peak currents,
i_on(target)andi_off(target). - KDM Calculation: For each target concentration, calculate the Kinetic Differential Measurement (KDM) value using the formula:
KDM = [ (i_on(target)/i_on(0)) - (i_off(target)/i_off(0)) ] / [ 0.5 * ( (i_on(target)/i_on(0)) + (i_off(target)/i_off(0)) ) ][5] [3]. - Curve Fitting: Plot the KDM values against the known target concentrations. Fit the data to a Hill-Langmuir isotherm using the equation:
KDM = KDM_min + [ (KDM_max - KDM_min) * [Target]^nH ] / ( [Target]^nH + K_1/2^nH )[3]. Extract the parametersKDM_min,KDM_max,nH(Hill coefficient), andK_1/2(binding curve midpoint).
Protocol: Assessing Sensor-to-Sensor Variability
This protocol determines whether individual sensor calibration is necessary or if a master calibration curve can be applied.
Procedure:
- Individual Calibration: Follow the protocol in section 3.1 for a minimum of 3-5 sensors from the same fabrication batch.
- Master Curve Generation: Average the KDM values across all sensors at each concentration to generate a master calibration curve. Fit the averaged data to the Hill-Langmuir equation.
- Accuracy Assessment: Use the master calibration curve parameters to estimate the concentration of a blinded sample for each sensor. Compare the estimated concentration to the known value to determine accuracy.
- Comparison: Compare the accuracy and precision achieved using the master curve to the accuracy achieved when each sensor is calibrated with its own individual curve. Studies on vancomycin sensors have shown that using a master curve does not significantly reduce accuracy, suggesting sensor-to-sensor variation is minimal for well-fabricated sensors [3].
Table 2: Key Research Reagent Solutions for EAB Sensor Calibration
| Reagent/Material | Function/Description | Critical Parameters & Notes |
|---|---|---|
| Target-Specific Aptamer | The biological recognition element; undergoes binding-induced conformational change. | Redox-labeled (e.g., Methylene Blue); thiol-modified for gold surface attachment [5]. |
| Gold Electrode | Sensor transducer surface. | Macroscopic size defines general area; microscopic (nanoscale) surface area varies and affects absolute current [5]. |
| Self-Assembled Monolayer (SAM) | Passivates electrode surface and minimizes fouling. | Typically a alkane-thiol like 6-mercapto-1-hexanol; packing density influences performance [5]. |
| Fresh Whole Blood | Optimal calibration matrix for in vivo measurements. | Must be freshly collected (<1 day old) and used at body temperature (37°C) for accurate calibration [3]. |
| Square Wave Voltammetry (SWV) Solutions | Electrochemical interrogation method. | Requires selection of specific signal-on and signal-off frequencies for KDM [5] [3]. |
Workflow and Signaling Visualizations
EAB Sensor Signaling and KDM Workflow
EAB Sensor Signaling Mechanism
Achieving clinically relevant accuracy with EAB sensors in complex media requires a meticulous approach to calibration that closely mimics the in vivo environment. The use of KDM is essential for generating a stable, drift-corrected signal. The experimental data and protocols presented herein demonstrate that calibration must be performed at body temperature (37°C) using freshly collected whole blood to minimize quantification errors. Adherence to these detailed protocols enables researchers to benchmark EAB sensor performance to a high standard, facilitating the translation of this promising technology from research into clinical applications.
Electrochemical aptamer-based (EAB) sensors represent a groundbreaking technology for the real-time, continuous monitoring of specific molecules, including drugs and metabolites, directly in the living body [5] [21]. A significant challenge for their in vivo deployment is signal drift, a gradual decrease in signal over time caused by factors such as biofouling and the electrochemical desorption of sensor elements [1]. Effective drift-correction strategies are therefore essential for obtaining accurate, long-term measurements.
This Application Note provides a comparative analysis of two primary drift-correction methodologies for EAB sensors: the established Kinetic Differential Measurement (KDM) and more recent calibration-free Ratiometric approaches. Framed within the broader context of thesis research on KDM, this document offers a structured comparison of their efficacy, detailed experimental protocols, and a toolkit for implementation, serving as a practical resource for researchers and scientists in the field.
Background and Signaling Mechanisms
EAB sensors consist of an electrode-bound, redox-reporter-modified aptamer. Target binding induces a conformational change in the aptamer, altering the electron transfer rate from the redox reporter to the electrode surface [21]. This change in electron transfer kinetics is the fundamental source of signal and is most commonly monitored using Square Wave Voltammetry (SWV).
SWV is particularly advantageous because the square wave frequency can be "tuned" to make the sensor more sensitive to either fast or slow electron transfer. This allows the same sensor to be operated in either a "signal-on" (current increases with target concentration) or "signal-off" (current decreases with target concentration) mode, as shown in the diagram below [5] [21].
Drift-Correction Methodologies: Principles and Equations
The following table summarizes the core principles, advantages, and limitations of KDM and the two ratiometric approaches.
Table 1: Overview of Drift-Correction Methodologies for EAB Sensors
| Method | Core Principle | Key Equation | Advantages | Limitations |
|---|---|---|---|---|
| Kinetic Differential Measurement (KDM) [5] | Uses the difference between normalized currents from two SWV frequencies (one signal-on, one signal-off) that drift in concert. | ( S{KDM} = \frac{i{on}(target)/i{on}(0) - i{off}(target)/i{off}(0)}{0.5 \left[ i{on}(target)/i{on}(0) + i{off}(target)/i_{off}(0) \right]} ) | Proven in vivo efficacy; accurate drift correction. | Requires single-point calibration ((i{on}(0)), (i{off}(0))). |
| Ratiometric KDM (rKDM) [5] | A calibration-free variant using the difference between one current and a scaled version of the other. | ( S{rKDM} = \frac{R \cdot i{on}(target) - i{off}(target)}{0.5 \left[ R \cdot i{on}(target) + i{off}(target) \right]} )( R = i{off}(0)/i_{on}(0) ) (constant) | Calibration-free; good in vivo performance. | Relies on sensor-to-sensor reproducibility of (R). |
| Simple Ratiometric (SR) [5] | Uses the unitless ratio of peak currents from two SWV frequencies. | ( SR = \frac{i{on}(target)}{i_{off}(target)} ) | Calibration-free; computationally simple. | No prior in vivo analog before recent studies. |
Quantitative Performance Comparison
The following data, derived from in vivo studies in live rats, quantitatively compares the performance of these methods for measuring vancomycin and phenylalanine.
Table 2: In Vivo Performance Comparison for Vancomycin and Phenylalanine Sensing
| Sensor Target | Method | Calibration Required? | Max Signal Gain (%) | Drift Correction Efficacy | Key Findings |
|---|---|---|---|---|---|
| Vancomycin | KDM [5] | Yes (single-point) | +63.6 (on) / -45.5 (off) | Accurate | Establishes the baseline for in vivo performance. |
| rKDM [5] | No | Matches KDM | Accurate, matches KDM | Effectively recovers baseline; performance indistinguishable from KDM. | |
| SR [5] | No | Matches KDM | Accurate, matches KDM | Surprisingly effective, despite no prior in vivo analog. | |
| Phenylalanine | KDM [5] | Yes (single-point) | Not Specified | Accurate | Serves as the calibrated benchmark. |
| rKDM [5] | No | Matches KDM | Accurate, matches KDM | Collapses sensor-to-sensor variability without calibration. | |
| SR [5] | No | Matches KDM | Accurate, matches KDM | Output overlaps with KDM and rKDM, confirming robustness. |
Experimental Protocols
Protocol: Sensor Fabrication and Interrogation Workflow
The end-to-end process for creating and using EAB sensors is visualized below.
Protocol A: EAB Sensor Fabrication
This protocol details the creation of a vancomycin-detecting EAB sensor [5] [28].
- Electrode Preparation: Clean a gold wire working electrode (e.g., 200 μm diameter, 99.9% purity) in 0.5 M NaOH, followed by a piranha solution (3:1 mixture of H₂SO₄ and 30% H₂O₂). CAUTION: Piranha solution is highly corrosive and must be handled with extreme care. Rinse thoroughly with deionized water.
- Aptamer Solution Preparation: Reconstitute a lyophilized, HPLC-purified DNA aptamer (sequence specific to vancomycin) modified with a thiol group at the 5′ end and a methylene blue (MB) redox reporter at the 3′ end. Reduce disulfide bonds by incubating the aptamer with 2 mM Tris(2-carboxyethyl)phosphine (TCEP) for 1 hour.
- Self-Assembled Monolayer (SAM) Formation: Incubate the cleaned gold electrode in the reduced aptamer solution (typically 1-3 μM in PBS with 2-5 mM MgCl₂) for 1 hour at room temperature or overnight at 4°C. This chemisorbs the thiolated aptamer onto the gold surface.
- Surface Passivation: Rinse the electrode and subsequently backfill with 1-6 mM 6-mercapto-1-hexanol (MCH) in PBS for 30-90 minutes. This step displaces non-specifically adsorbed aptamers and creates a well-packed, ordered SAM that minimizes non-specific adsorption.
- Storage: The fabricated sensor can be stored in PBS at 4°C until use.
Protocol B: In Vivo Measurement and Data Processing
This protocol outlines the steps for conducting an in vivo pharmacokinetic study in a live rat model [5] [28].
- Sensor Calibration (For KDM only): Prior to drug administration, place the sensor in the target environment (e.g., the jugular vein of an anesthetized rat). Record the peak currents ( i{on}(0) ) and ( i{off}(0) ) at the two chosen SWV frequencies. This establishes the baseline for a known target concentration (zero).
- In Vivo Deployment and Dosing: Implant the fabricated sensor into the target tissue or vessel (e.g., the right ascending jugular vein). For drug monitoring, administer the target molecule (e.g., vancomycin at 30 mg/kg) via a rapid bolus infusion.
- Continuous Data Acquisition: Interrogate the sensor continuously using a potentiostat. For dual-frequency methods, apply a square wave waveform that rapidly switches between the pre-optimized "signal-on" (e.g., 300 Hz) and "signal-off" (e.g., 20 Hz) frequencies [5]. Record the peak currents ( i{on}(target) ) and ( i{off}(target) ) over time.
- Real-Time Drift Correction: Process the acquired data on-the-fly or post-experiment using one of the equations from Table 1.
- For KDM, use Equation 1 with the calibrated ( i{on}(0) ) and ( i{off}(0) ) values.
- For rKDM or SR, directly apply Equation 2 or 3, respectively, as they are calibration-free.
- Data Correlation: Correlate the calculated sensor signal (( S{KDM}, S{rKDM}, or S_R )) with target concentration using a pre-established calibration curve to generate a real-time pharmacokinetic profile.
The Scientist's Toolkit: Research Reagent Solutions
Table 3: Essential Materials for EAB Sensor Research
| Item | Function/Description | Example/Citation |
|---|---|---|
| Gold Wire Electrode | Serves as the solid support for aptamer immobilization and transduction surface for electron transfer. | 200 μm diameter, 99.9% purity Au wire [28]. |
| Thiolated, MB-modified Aptamer | The core biorecognition and signaling element. The thiol allows for gold attachment; MB acts as the redox reporter. | Vancomycin-specific 45-base DNA aptamer [5] [21]. |
| 6-Mercapto-1-hexanol (MCH) | A short-chain alkanethiol used to backfill the SAM, improving order, reducing non-specific binding, and enhancing stability. | Used at 1-6 mM concentration [28]. |
| Portable Potentiostat | Miniaturized electronic instrument for applying potentials and measuring currents in vivo. Essential for free-moving animal studies. | Custom-built MSTAT device [28]. |
| Kinetic Differential Measurement (KDM) | A signal processing algorithm that corrects for signal drift by using data from two square-wave frequencies. | Defined in Eq. 1; used for in vivo drift correction [5]. |
Electrochemical aptamer-based (EAB) sensors represent a groundbreaking technology for real-time, in vivo molecular monitoring of drugs, metabolites, and biomarkers in living bodies [6]. A significant challenge during prolonged deployment is signal drift caused by biofouling and sensor degradation within complex biological environments [6]. The kinetic differential measurement (KDM) method has emerged as a powerful approach for correcting this drift, enabling accurate, continuous measurements over several hours [3] [5]. This application note provides a detailed framework for validating the measurement accuracy of EAB sensors utilizing KDM during extended in vivo deployments, with protocols designed for researchers and drug development professionals.
The KDM Mechanism for Drift Correction
KDM leverages the differential response of an EAB sensor's electron transfer kinetics to target binding at two carefully selected square wave frequencies [3] [5]. In a typical "signal-on"/"signal-off" pair, target binding increases peak current at one frequency while decreasing it at the other. Crucially, non-specific signal drift affects both frequencies similarly. The KDM value is calculated as follows [5]: [ \mathrm{KDM} = \frac{\frac{i{on}(target)}{i{on}(0)} - \frac{i{off}(target)}{i{off}(0)}}{0.5 \left( \frac{i{on}(target)}{i{on}(0)} + \frac{i{off}(target)}{i{off}(0)} \right)} ] where (i{on}(target)) and (i{off}(target)) are peak currents at the two frequencies in the presence of the target, and (i{on}(0)) and (i{off}(0)) are the initial peak currents in the target's absence. This ratiometric calculation effectively cancels out common-mode drift.
The following diagram illustrates the signaling pathway and workflow of the KDM method for EAB sensors.
Experimental Protocols for In Vivo Validation
Protocol 1: Sensor Fabrication and Preparation
- Aptamer Modification: Thiol-modified aptamers are synthesized with a redox reporter (typically methylene blue) at the distal end. For enhanced stability, a novel approach using direct aryl diazonium grafting to form a gold-carbon bond has been demonstrated as an alternative to thiol-gold chemistry [2].
- Electrode Preparation: Gold working electrodes are cleaned via standard piranha treatment and electrochemical polishing.
- Sensor Fabrication: Aptamers are immobilized on the gold electrode surface via spontaneous grafting (for diazonium chemistry) or self-assembled monolayer formation (for thiol chemistry), followed by backfilling with mercaptohexanol (MCH) to passivate the surface and minimize non-specific adsorption [6] [2].
- Pre-deployment Validation: Each sensor is characterized in vitro in phosphate-buffered saline (PBS) to confirm a proper folding-switching response and determine the optimal "signal-on" and "signal-off" square wave frequencies [6].
Protocol 2: In Vivo Calibration and Drift Correction with KDM
- KDM Frequency Selection: Prior to in vivo deployment, identify a pair of square wave frequencies (e.g., 25 Hz and 300 Hz) that produce robust, differential responses to target binding but exhibit correlated non-specific drift [3] [5]. This is confirmed through preliminary experiments in undiluted blood plasma.
- Baseline Calibration: For drug monitoring, establish the baseline signal by recording (i{on}(0)) and (i{off}(0)) in vivo prior to drug administration, when the target concentration is known to be zero [5]. For endogenous targets, this step may require ex vivo calibration [5].
- Continuous Interrogation: During in vivo deployment, interrogate the sensor by continuously cycling through the selected frequency pair. Square wave voltammetry is typically performed every 10-60 seconds to achieve real-time, seconds-resolved monitoring [6].
- KDM Value Calculation: Process the raw peak current data in real-time using the KDM equation to generate a drift-corrected sensor output [3] [5].
Protocol 3: Prolonged Deployment and Accuracy Assessment
- Animal Model: Implement the sensor in an appropriate animal model, such as live rats. Common implantation sites include the jugular vein, subcutaneous tissue, or cerebrospinal fluid [6] [22].
- Prolonged Measurement: Conduct continuous measurements over the intended deployment period (typically 4-12 hours based on current technology limits) [6]. Maintain physiological monitoring (e.g., temperature) as it significantly impacts sensor response [3] [22].
- Accuracy Validation via Blood Sampling: At predetermined time points, withdraw blood samples and analyze target concentration using a gold-standard reference method (e.g., LC-MS/MS).
- Data Analysis: Correlate the sensor-derived concentration estimates (from the KDM output) with the reference method values from blood draws. Calculate accuracy metrics such as mean relative error (MRE) and precision.
Performance Metrics and Validation Data
The following table summarizes quantitative performance data for EAB sensors against various targets during in vivo validation studies.
Table 1: In Vivo Performance Metrics of EAB Sensors with KDM Drift Correction
| Target Molecule | In Vivo Application Site | Measurement Duration | Reported Accuracy (Mean Relative Error) | Key Environmental Factor Controlled |
|---|---|---|---|---|
| Vancomycin [3] [6] | Rat Jugular Vein | Up to 5 hours | Better than ±10% (clinical range) | Temperature, Blood Freshness |
| Tobramycin [6] | Rat Plasma & Interstitial Fluid | 4 - 12 hours | Clinically Relevant* | Not Specified |
| Phenylalanine [22] | Live Rats | Not Specified | ~16% MRE* | Cation Composition, pH |
| Tryptophan [22] | Live Rats | Not Specified | ~14% MRE* | Cation Composition, pH |
| Cocaine [6] | Rat Brain | 4.5 hours | Clinically Relevant* | Not Specified |
*Reported as achieving "clinically relevant" accuracy or specified Mean Relative Error (MRE) under physiological variations.
The impact of environmental factors on sensor accuracy was systematically quantified. The following table summarizes the effects of physiological-scale variations, which is critical for designing validation protocols.
Table 2: Impact of Physiological Variations on EAB Sensor Accuracy (Based on Vancomycin, Phenylalanine, and Tryptophan Sensors) [22]
| Environmental Parameter | Physiological Range Tested | Impact on Mean Relative Error (MRE) | Calibration Recommendation |
|---|---|---|---|
| Cation Composition/ Ionic Strength | Low (152 mM) to High (167 mM) | No significant increase in MRE | Calibrate at midpoint physiological concentrations |
| pH | 7.35 to 7.45 | No significant increase in MRE | Calibrate at pH 7.4 |
| Temperature | 33°C to 41°C | Induces substantial error | Critical: Match calibration & measurement temperature; implement real-time temperature correction |
The Scientist's Toolkit: Essential Research Reagents and Materials
Table 3: Key Research Reagent Solutions for EAB Sensor Validation
| Item Name | Function/Application in Protocol |
|---|---|
| Thiol-/Amino-Modified Aptamer | The core biorecognition element, engineered to undergo a binding-induced conformational change. Synthesized with a redox reporter (e.g., Methylene Blue) at the distal end [6] [2]. |
| Mercaptohexanol (MCH) | A short-chain alkanethiol used as a diluent molecule in the self-assembled monolayer to passivate the gold electrode surface and minimize non-specific adsorption [2]. |
| Aryl Diazonium Salt Reagents | Alternative to thiol chemistry. Used for in-situ diazotization to graft aptamers directly onto gold electrodes via a more stable gold-carbon bond, potentially enhancing operational lifetime [2]. |
| Fresh Whole Blood (Species-Matched) | The critical medium for ex vivo calibration. Using freshly collected, undiluted blood matched to the in vivo model (e.g., rat) is essential for achieving high-fidelity calibration, as blood age and composition affect sensor response [3]. |
| Physiological Buffers with Cations | Used for in vitro characterization and calibration. Should contain key cations (Na+, K+, Mg2+, Ca2+) at their physiological midpoints to mimic the in vivo environment [22]. |
| Kinetic Differential Measurement (KDM) Software | Custom software or script for calculating the drift-corrected KDM value from the raw peak currents obtained at the two square-wave frequencies during sensor interrogation [3] [5]. |
The following diagram outlines the overall experimental workflow for in vivo validation, from sensor preparation to final accuracy assessment.
Successful in vivo validation of EAB sensors during prolonged deployment hinges on the effective implementation of the KDM protocol for drift correction and meticulous attention to calibration parameters. Key factors include matching the temperature and media composition between calibration and measurement environments, utilizing freshly collected whole blood for ex vivo calibration, and selecting optimal square wave frequencies. Adherence to the detailed protocols and considerations outlined in this document will enable researchers to robustly assess and verify the measurement accuracy of EAB sensors, thereby unlocking their potential for reliable, real-time molecular monitoring in biomedical research and therapeutic drug development.
Electrochemical aptamer-based (EAB) sensors represent a promising technology for the real-time, in vivo monitoring of drugs and metabolites. A significant challenge in their widespread adoption, however, is the need for individual sensor calibration to correct for fabrication variations and signal drift encountered in complex biological environments. Kinetic Differential Measurement (KDM) has been a cornerstone technique for drift correction in vivo, but it traditionally requires calibration of each sensor in a sample of known target concentration (e.g., a "zero" concentration baseline), a process that is cumbersome and often impractical [5] [3].
This application note explores two advanced, calibration-free interrogation methods that build upon the principles of KDM: ratiometric KDM (rKDM) and the Simple Ratiometric approach. We frame these methods within the broader thesis that leveraging the intrinsic frequency-dependent response of EAB sensors can yield robust, unitless signals that are immune to the factors typically requiring calibration. We provide a detailed, quantitative comparison of their performance and offer standardized protocols for their implementation, empowering researchers to incorporate these cutting-edge techniques into their drug development and biosensing research.
Technical Background & Signaling Pathways
The Calibration Problem in EAB Sensors
EAB sensors function by coupling a target-induced conformational change in a surface-bound aptamer to an alteratio n in the electron transfer rate of an attached redox reporter (e.g., Methylene Blue) [5] [2]. This change is measured electrochemically, often via Square Wave Voltammetry (SWV). The primary challenge is that the raw signal output (peak current, i) is proportional not only to the target concentration but also to the number of aptamers on the electrode surface, which varies significantly between sensors due to differences in microscopic electrode surface area [5] [29]. While the relative signal change (i/imin) is consistent, determining imin (the signal in the absence of target) has historically required a calibration step for each sensor.
The Ratiometric Principle
Ratiometric strategies are a form of "self-calibration" that measure the analyte-induced change in the ratio of two or more signals [30]. This unitless ratio is inherently independent of absolute signal intensity, thereby correcting for variations in probe concentration, instrument response, and other environmental factors that affect both signals equally [30] [31] [32]. This principle is widely applied in fluorescence imaging and is now being robustly adapted to electrochemistry [33] [32].
From KDM to Calibration-Free Methods
KDM corrects for in vivo drift by using a matched pair of SWV frequencies that respond differentially to the target—one "signal-on" (current increases with concentration) and one "signal-off" (current decreases) but drift in concert [5] [3]. The KDM signal is calculated as:
While effective, this method requires prior knowledge of ion(0) and ioff(0), the baseline signals at the two frequencies for each sensor [5]. The new calibration-free methods eliminate this requirement.
Diagram 1: Signaling pathways for KDM and calibration-free methods.
Quantitative Comparison of rKDM and Simple Ratiometric Methods
The following table summarizes the key characteristics, performance data, and advantages of the two calibration-free methods based on in vivo validation studies using vancomycin and phenylalanine EAB sensors in live rats [5].
Table 1: Comparative Analysis of Calibration-Free EAB Sensor Methods
| Feature | Ratiometric KDM (rKDM) | Simple Ratiometric |
|---|---|---|
| Governing Equation | S_rKDM = (R * i_on - i_off) / (0.5 * (R * i_on + i_off)) where R = i_off(0) / i_on(0) (a constant for a sensor class) [5] |
S_R = i_on / i_off [5] |
| Theoretical Basis | Direct analog to the established KDM method, designed to replicate its drift-correction properties without calibration. [5] | A purer ratiometric approach relying on the unitless ratio of two independently drifting signals. [5] |
| In Vivo Performance | Effectively indistinguishable from calibrated KDM; accurately tracks pharmacokinetic profiles of vancomycin. [5] | Surprisingly robust, performance effectively indistinguishable from both KDM and rKDM in vivo. [5] |
| Key Advantage | Closer formal resemblance to the validated KDM approach, providing higher initial confidence for in vivo translation. [5] | Extreme simplicity of calculation and implementation without the need for constant R. [5] |
| Practical Consideration | Requires preliminary determination of the constant R for a given class of sensors and measurement conditions. [5] |
No secondary constants are needed; the raw signal ratio is directly used. [5] |
Experimental Protocols
Protocol: Implementing rKDM and Simple Ratiometric Analysis for In Vivo Sensing
This protocol outlines the steps to deploy an EAB sensor for in vivo, calibration-free measurement of an analyte such as vancomycin, using either the rKDM or Simple Ratiometric analysis method [5] [3].
I. Sensor Fabrication and Pre-conditioning
- Aptamer Preparation: Use a thiol-modified DNA aptamer specific to your target (e.g., vancomycin), labeled at the distal end with a redox reporter (Methylene Blue) [5] [2].
- Electrode Preparation: Clean gold wire or disk electrodes (e.g., 76 µm diameter) sequentially in piranha solution, potassium hydroxide, and sulfuric acid, followed by rinsing with pure water and drying. (Caution: Piranha solution is extremely dangerous and must be handled with extreme care.)
- Sensor Assembly: Incubate the clean gold electrodes in a solution of the modified aptamer to form a self-assembled monolayer via gold-thiol chemistry. This is typically followed by backfilling with 6-mercapto-1-hexanol (MCH) to passivate the surface and ensure proper aptamer orientation [2]. (For enhanced stability, consider the novel direct aryl diazonium grafting approach as an alternative to thiol chemistry [2]).
- Pre-conditioning: Electrochemically precondition the fabricated sensors in the desired buffer (e.g., phosphate-buffered saline) using cyclic voltammetry until a stable voltammogram is obtained.
II. Frequency Selection and Parameter Determination (In Vitro)
- Frequency Scan: Interrogate the sensor in a target-free buffer across a range of SWV frequencies (e.g., 5 Hz to 1000 Hz) [5] [2].
- Identify Key Frequencies: From the charge-transfer vs. frequency plot, identify:
- Determine Constant
R(for rKDM only): Using a training set of sensors, measure the average baseline peak currentsi_on(0)andi_off(0)at the selected frequencies. Calculate the constantRasR = i_off(0) / i_on(0)[5]. This value is now a fixed parameter for all subsequent sensors of this class.
III. In Vivo Measurement and Data Analysis
- Sensor Deployment: Implant the prepared sensor into the target tissue (e.g., jugular vein) of an anesthetized live rat.
- Continuous Interrogation: Continuously interrogate the sensor by collecting SWV voltammograms at the pre-determined signal-on and signal-off frequencies.
- Data Processing:
- Concentration Estimation: Convert the calculated signal (
S_rKDMorS_R) to target concentration using a pre-established, generalized calibration curve (Figure 1C, D) [5]. This master curve, which relates the ratiometric signal to concentration, is defined once for a sensor type and does not require individual sensor calibration.
Diagram 2: Experimental workflow for calibration-free EAB sensing.
The Scientist's Toolkit: Essential Research Reagent Solutions
Table 2: Key Reagents and Materials for EAB Sensor Development
| Item | Function / Application | Key Details |
|---|---|---|
| Thiol-Modified, Redox-Labeled Aptamer | The core biorecognition and signaling element. | A DNA aptamer with a thiol group (e.g., at 5' end) for electrode attachment and a redox reporter (e.g., Methylene Blue at 3' end) [5] [2]. |
| 6-Mercapto-1-hexanol (MCH) | Co-adsorbed diluent molecule. | Passivates the gold surface, displaces non-specifically bound DNA, and helps the aptamer assume a upright, functional conformation [2]. |
| Aryl-Aminated Aptamer Derivative | For robust covalent attachment via diazonium chemistry. | An aptamer functionalized with 4-aminobenzoic acid (4-ABA) for one-step diazotization and grafting, forming a more stable gold-carbon bond [2]. |
| Gold Electrodes | The sensor transducer platform. | Typically fine gold wires or disk electrodes. Microscopic surface area variation is a primary reason calibration was previously needed [5] [29]. |
| Sodium Nitrite (NaNO₂) & HCl | For diazonium-based grafting. | Reagents for the in-situ diazotization of aryl-aminated aptamers to enable spontaneous grafting to gold electrodes [2]. |
| Square Wave Voltammetry (SWV) | Primary electrochemical interrogation technique. | The method used to read the sensor. Its frequency is tuned to be sensitive to binding-induced changes in electron transfer kinetics [5] [29]. |
The advancement from KDM to fully calibration-free methods like rKDM and Simple Ratiometric analysis represents a significant leap forward for practical EAB sensors. Both methods have been validated to perform with an accuracy comparable to calibrated KDM in live animal studies, effectively correcting for drift and sensor-to-sensor variation [5]. The choice between them may come down to a trade-off between the formal rigor and resemblance to KDM (favoring rKDM) and the sheer simplicity of implementation (favoring the Simple Ratiometric approach). By eliminating the cumbersome and often limiting requirement for single-point calibration, these strategies significantly simplify the path to continuous, in vivo molecular monitoring, opening new frontiers in therapeutic drug monitoring, pharmacokinetic studies, and personalized medicine.
Electrochemical aptamer-based (EAB) sensors represent a promising technology for the real-time, in vivo monitoring of specific molecules, including pharmaceuticals and metabolites [3]. A significant obstacle to their widespread adoption, however, lies in the inherent sensor-to-sensor variability introduced during the fabrication process. Minor differences in electrode surface roughness, aptamer packing density, or monolayer formation can alter the baseline signal and apparent gain of individual sensors. Kinetic Differential Measurement (KDM) is a signal processing strategy that specifically addresses this variability, enhancing measurement reproducibility and enabling the use of standardized calibration curves across multiple sensors [3].
The KDM Mechanism: Normalization for Enhanced Reproducibility
The KDM approach interrogates EAB sensors using square wave voltammetry at two distinct frequencies: one that produces a "signal-on" response (current increases with target concentration) and another that produces a "signal-off" response (current decreases with target concentration) [3]. The raw peak currents from both frequencies (I{on}) and (I{off}) are normalized to their respective initial values and then combined into a single, unitless KDM value using the formula:
[ KDM = \frac{I{on, norm} - I{off, norm}}{(I{on, norm} + I{off, norm})/2} ]
This differential measurement provides several key advantages for managing fabrication variability. First, it internally normalizes the signal, correcting for absolute current differences between sensors that arise from variations in electrode surface area or aptamer density. Second, it suppresses signal drift common to both frequencies, which is a significant source of error in prolonged measurements [1]. Finally, by converting the signal into a unitless ratio, KDM creates a standardized output metric that is more consistent across individually fabricated sensors.
Logical Workflow of KDM for Reproducibility
The following diagram illustrates how KDM processing transforms raw, variable sensor signals into a stable, reproducible output, effectively mitigating fabrication-induced variability.
Quantitative Evidence: Performance of Shared Calibration
The efficacy of KDM in handling sensor-to-sensor variability is demonstrated by the successful use of shared calibration curves. Research on vancomycin-detecting EAB sensors revealed that calibrating individual sensors using a common, averaged curve derived from multiple sensors did not significantly compromise accuracy [3].
Table 1: Performance Comparison of Calibration Methods for Vancomycin EAB Sensors [3]
| Calibration Method | Description | Accuracy in Clinical Range | Precision in Clinical Range |
|---|---|---|---|
| Averaged "Out-of-Set" Curve | Sensor calibrated using a curve from other sensors | No significant accuracy reduction | Slight reduction, remains usable |
| Individual Calibration | Sensor calibrated using its own specific curve | High accuracy | Good precision |
| Shared Calibration | All sensors use a single, common averaged curve | Better than ±10% | ~14% Coefficient of Variation (CV) |
The data shows that a shared calibration curve achieved an accuracy of better than ±10% for measuring vancomycin in its clinical range, with a precision of 14% or better [3]. This performance is sufficient for clinically relevant therapeutic drug monitoring of many compounds, validating that KDM effectively minimizes the impact of fabrication variability on measurement output.
Experimental Protocol: Establishing a Shared KDM Calibration Curve
This protocol details the steps for generating a standardized, shared calibration curve for EAB sensors using the KDM technique.
Materials and Reagents
Table 2: Essential Research Reagent Solutions for EAB Sensor Calibration [3] [28]
| Reagent/Material | Function and Specification |
|---|---|
| Thiol-Modified, MB-Labeled Aptamer | The core recognition element; a DNA or RNA aptamer specific to the target, modified with a thiol group on one end for gold attachment and a methylene blue (MB) redox reporter on the other. |
| Tris(2-carboxyethyl)phosphine (TCEP) | A reducing agent used to cleave disulfide bonds in the thiol-modified aptamer, ensuring monomeric availability for surface immobilization. |
| 6-Mercapto-1-hexanol (MCH) | A short-chain alkane thiol used to form a mixed self-assembled monolayer (SAM), displacing non-specifically adsorbed aptamers and creating a well-packed, ordered surface that minimizes non-specific binding. |
| Fresh Whole Blood | The ideal calibration matrix for in vivo sensors. Must be freshly collected and used at body temperature (37°C) to match in vivo conditions and prevent age-related changes in sensor response [3]. |
| Phosphate Buffered Saline (PBS) | A common buffer used for initial sensor characterization, rinsing steps, and as a component in the CDF. |
| Target Analyte Standard | A high-purity preparation of the molecule to be sensed (e.g., vancomycin, doxorubicin) for generating concentration gradients. |
Calibration Procedure
Sensor Fabrication:
- Clean gold working electrodes (e.g., 200 µm diameter wires) in piranha solution (Caution: Extremely hazardous) or via electrochemical cleaning.
- Reduce the disulfide bonds of the thiol-modified aptamer using TCEP and purify.
- Immerse the electrodes in a solution of the reduced aptamer to allow covalent bond formation between the thiol and gold.
- Subsequently backfill with a solution of MCH to form a mixed SAM.
- Rinse the fabricated sensors thoroughly with PBS.
KDM Interrogation Setup:
- Place the sensor in a flow cell or well containing the calibration matrix (fresh, 37°C whole blood).
- Configure the potentiostat to perform square wave voltammetry.
- Identify one frequency that produces a "signal-on" response and a second that produces a "signal-off" response for the specific aptamer at 37°C. (Note: These frequencies are temperature-dependent) [3].
Data Collection for Calibration Curve:
- For each sensor, continuously interrogate using both SWV frequencies.
- For each target concentration (e.g., 0, 2, 6, 10, 20, 42 µM vancomycin):
- Introduce the known concentration into the calibration matrix.
- Allow the signal to stabilize.
- Record the peak currents ((I{on}) and (I{off})) for a minimum of 5 scans.
- Calculate and record the average KDM value for that concentration.
Curve Fitting and Sharing:
- For each sensor, fit its averaged KDM data to a Hill-Langmuir isotherm: [ KDM=KDM{min}+ \frac{(KDM{max } - KDM{min})*{[Target]}^{nH}}{{[Target]}^{nH} + K{1/2}^{n_H}} ]
- Extract the parameters (KDM{min}), (KDM{max}), (K{1/2}), and (nH).
- To create a shared calibration curve, average the individual parameters ((KDM{max}), (K{1/2}), (n_H)) across a representative batch of sensors (e.g., n ≥ 3). The shared curve is defined by this set of averaged parameters.
Experimental Workflow for Sensor Calibration and Validation
The end-to-end process from sensor preparation to validation is outlined below.
The combination of KDM signal processing with shared calibration curves presents a robust solution to the challenge of sensor-to-sensor reproducibility in EAB technology. By normalizing out fabrication-dependent variables, this approach facilitates the generation of highly consistent and clinically relevant data across multiple sensors. This reliability is a critical prerequisite for the translation of EAB sensors from research tools to clinical devices, enabling their use in personalized medicine applications such as closed-loop drug delivery and real-time therapeutic monitoring.
Conclusion
Kinetic Differential Measurement stands as a foundational technique that enables Electrochemical Aptamer-Based sensors to deliver on their promise of real-time, in vivo molecular monitoring. By systematically addressing the dual challenges of electrochemical desorption and biological fouling, KDM provides a robust framework for achieving the clinically relevant accuracy required in biomedical research and therapeutic drug monitoring. The evolution towards ratiometric and calibration-free methods, built upon the principles of KDM, points to a future of increasingly simplified and robust sensor operation. For researchers, the continued optimization of interrogation frequencies, the adoption of more stable surface chemistries like aryl diazonium grafting, and stringent control over calibration conditions are the key drivers for advancing this technology. Mastering KDM is not merely an experimental step but a critical enabler for the next generation of continuous biosensing platforms that will transform personalized medicine and closed-loop therapeutic systems.
References
- 1. Elucidating the Mechanisms Underlying the Signal Drift of ... [https://pmc.ncbi.nlm.nih.gov/articles/PMC12038169/]
- 2. Preparation of electrochemical aptamer-based sensors [https://pubs.rsc.org/en/content/articlehtml/2025/cc/d5cc00857c]
- 3. Improved calibration of electrochemical aptamer-based ... [https://www.nature.com/articles/s41598-022-09070-7]
- 4. Effects of storage conditions on the performance of an ... [https://pubs.rsc.org/en/content/articlehtml/2024/sd/d4sd00066h]
- 5. Dual-Frequency, Ratiometric Approaches to EAB Sensor ... [https://pmc.ncbi.nlm.nih.gov/articles/PMC11821477/]
- 6. Real-time, In-vivo Molecular Monitoring Using ... [https://pmc.ncbi.nlm.nih.gov/articles/PMC9840907/]
- 7. Survey of oligoethylene glycol-based self-assembled ... [https://www.sciencedirect.com/science/article/abs/pii/S0006291X23005946]
- 8. Exploring Differential Electron Transfer Kinetics of ... [https://pubmed.ncbi.nlm.nih.gov/39935214/]
- 9. Improved calibration of electrochemical aptamer-based sensors [https://www.nature.com/articles/s41598-022-09070-7?error=cookies_not_supported&code=10e3955b-bb71-4c2c-a168-05fb7b9b8c84]
- 10. Square Wave Voltammetry: A Comprehensive Guide [https://maciassensors.com/square-wave-voltammetry/]
- 11. Square Wave Voltammetry (SWV) [https://pineresearch.com/support-article/square-wave-voltammetry/]
- 12. Calibration Curve Calculator [https://www.aichemcalc.com/2025/07/calibration-curve-calculator.html]
- 13. Calibration Curves, Part IV: Choosing the Appropriate Model | LCGC International [https://www.chromatographyonline.com/view/calibration-curves-part-iv-choosing-appropriate-model]
- 14. Calibration: Effects on Accuracy and Detection Limits in ... [https://www.spectroscopyonline.com/view/calibration-effects-on-accuracy-and-detection-limits-in-atomic-spectroscopy]
- 15. Calibration Curves, Part 4: Choosing the Appropriate Model | LCGC International [https://www.chromatographyonline.com/view/calibration-curves-part-4-choosing-appropriate-model]
- 16. The case for calibration-free concentration analysis - PMC [https://pmc.ncbi.nlm.nih.gov/articles/PMC12203858/]
- 17. Calibration Curve - an overview | ScienceDirect Topics [https://www.sciencedirect.com/topics/engineering/calibration-curve]
- 18. Calibration Curves, Part 1: To b or Not to b? | LCGC International [https://www.chromatographyonline.com/view/calibration-curves-part-1-b-or-not-b-0]
- 19. 柔性压力 传 的原理及应用 感 器 [https://wulixb.iphy.ac.cn/cn/article/doi/10.7498/aps.69.20200987]
- 20. 脊柱植入物感染的体内小鼠模型 [https://www.jove.com/cn/t/60560/in-vivo-mouse-model-of-spinal-implant-infection]
- 21. Comparison of voltammetric methods used in the interrogation ... [https://pubs.rsc.org/en/content/articlehtml/2024/sd/d3sd00083d]
- 22. Effects of Physiological-Scale Variation in Cations, pH, and ... [https://pmc.ncbi.nlm.nih.gov/articles/PMC11855119/]
- 23. Revealing the impact of temperature on electrochemical ... [https://chemrxiv.org/engage/chemrxiv/article-details/67e3b4b9fa469535b98f77fe]
- 24. Cold-hot Janus electrochemical aptamer-based sensor for ... [https://www.sciencedirect.com/science/article/abs/pii/S0956566324006481]
- 25. Integrated Blood Multiparameter Precise Sensing System ... [https://pmc.ncbi.nlm.nih.gov/articles/PMC12177653/]
- 26. Maximizing the Signal Gain of Electrochemical-DNA Sensors [https://pmc.ncbi.nlm.nih.gov/articles/PMC5660313/]
- 27. Electrochemical Aptamer-Based Sensors for Improved ... - PMC [https://pmc.ncbi.nlm.nih.gov/articles/PMC6886665/]
- 28. A portable device for real-time continuous drug monitoring ... [https://www.sciencedirect.com/science/article/abs/pii/S0956566325005780]
- 29. Calibration-Free Electrochemical Biosensors Supporting ... [https://pmc.ncbi.nlm.nih.gov/articles/PMC6519131/]
- 30. Maximizing analytical precision: exploring the advantages ... [https://www.frontiersin.org/journals/analytical-science/articles/10.3389/frans.2023.1258558/full]
- 31. Ratiometric Electrochemistry: Improving the Robustness ... [https://pmc.ncbi.nlm.nih.gov/articles/PMC8068091/]
- 32. What are the advantages of using a ratiometric calcium ... [https://www.aatbio.com/resources/faq-frequently-asked-questions/what-are-the-advantages-of-using-a-ratiometric-calcium-probe-vs-a-single-channel-dye]
- 33. Ratiometric Imaging | Learn & Share [https://www.leica-microsystems.com/science-lab/life-science/ratiometric-imaging/]