Multiplex Biosensors for Simultaneous Biomarker Detection: A Comprehensive Guide for Researchers and Developers
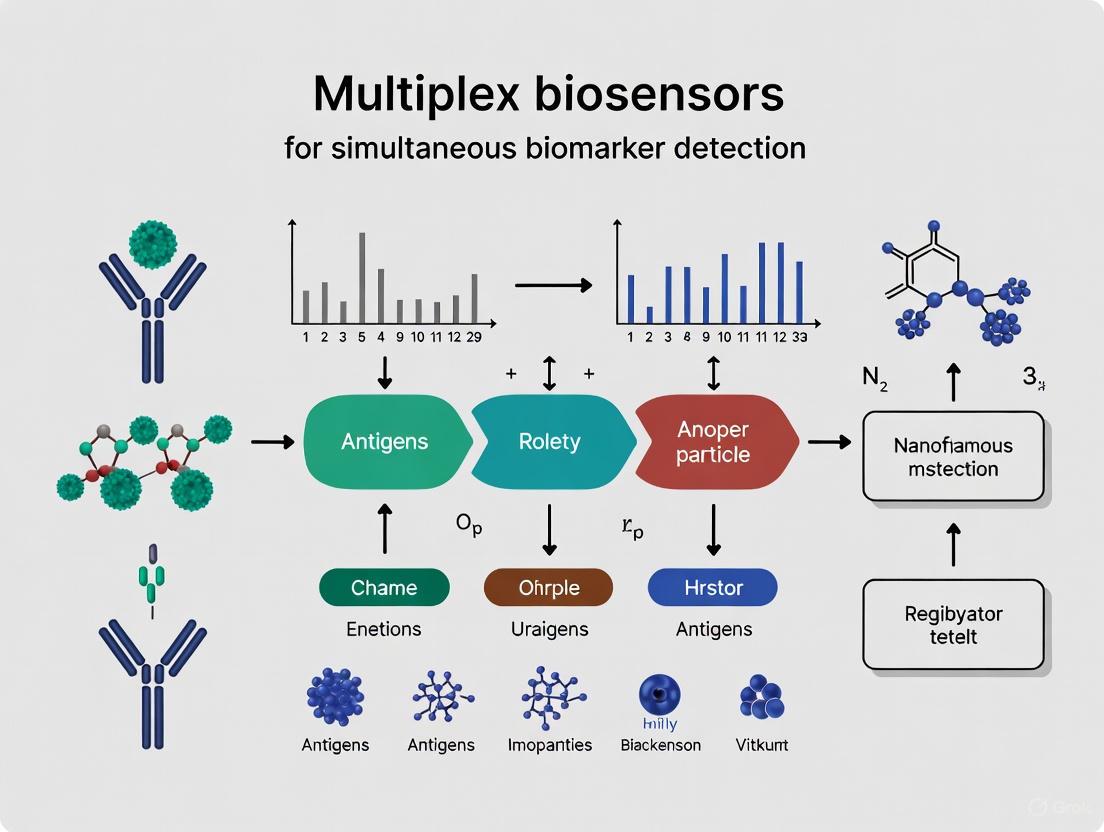
This article provides a comprehensive overview of the rapidly advancing field of multiplex biosensors, which enable the simultaneous detection of multiple disease biomarkers to significantly enhance diagnostic accuracy and reliability.
Multiplex Biosensors for Simultaneous Biomarker Detection: A Comprehensive Guide for Researchers and Developers
Abstract
This article provides a comprehensive overview of the rapidly advancing field of multiplex biosensors, which enable the simultaneous detection of multiple disease biomarkers to significantly enhance diagnostic accuracy and reliability. Aimed at researchers, scientists, and drug development professionals, it explores the fundamental principles driving the shift from single-analyte to multi-analyte detection systems, detailing various optical, electrochemical, and mechanical transduction platforms. The content covers cutting-edge methodologies incorporating nanomaterials and microfluidics, addresses critical challenges in sensor design and clinical translation, and offers comparative analyses of performance metrics against established gold-standard techniques. By synthesizing recent advancements and future directions, this review serves as a valuable resource for professionals developing next-generation diagnostic tools for precision medicine and point-of-care applications.
The Critical Need for Multiplexing: Moving Beyond Single-Biomarker Diagnostics
Limitations of Single-Biomarker Detection and Diagnostic Specificity Issues
The detection of specific biomarkers is a cornerstone of modern in vitro diagnostics, enabling the identification and monitoring of numerous diseases, including cancers, infectious diseases, and chronic conditions. Historically, diagnostic tests have relied on the measurement of a single biomarker to provide a clinical result. While this approach has proven utility, its limitations are increasingly apparent in the context of complex, multifactorial diseases. Relying on a single analyte can lead to issues with diagnostic specificity, false positives, false negatives, and an inability to capture the full pathophysiological profile of a disease state. These challenges are particularly acute in early-stage disease detection, where biomarker concentrations are often low and biological heterogeneity is high. This Application Note details the critical limitations of single-biomarker detection and frames these challenges within the broader thesis that multiplex biosensors, capable of simultaneously quantifying multiple biomarkers, represent a necessary evolution for precise and reliable diagnostics.
Key Limitations of Single-Biomarker Detection
The reliance on a single biomarker for diagnostic decisions is fraught with challenges that can compromise clinical utility. The table below summarizes the core limitations and their clinical implications.
Table 1: Core Limitations of Single-Biomarker Detection and Their Clinical Impact
| Limitation | Description | Exemplary Clinical Scenario |
|---|---|---|
| Lack of Specificity | A single biomarker may be elevated in multiple disease states or non-pathological conditions, leading to false positives and misdiagnosis [1]. | Prostate-Specific Antigen (PSA) can be elevated in prostate cancer, benign prostatic hyperplasia, or prostatitis, complicating diagnosis [1]. |
| Insufficient Sensitivity | For early-stage diseases, the concentration of a single biomarker may be below the detection limit of conventional assays, resulting in false negatives [1] [2]. | Early-stage cancers often release trace amounts of biomarkers into circulation, which can go undetected by single-analyte tests [2]. |
| Biological Heterogeneity | Diseases often exhibit significant molecular variation between patients; a single biomarker cannot capture this diversity, leading to under-diagnosis [1]. | Cancers are highly heterogeneous, and a tumor may not express the specific protein targeted by a single-marker test in a given patient [1]. |
| Inability for Patient Stratification | Single biomarkers often lack the informational depth needed to classify disease subtypes or predict response to specific therapies [1]. | Without a panel of biomarkers, it is difficult to distinguish between aggressive and indolent forms of cancer for tailored treatment plans [1]. |
The Multiplexing Solution: Enhancing Specificity via Simultaneous Detection
Multiplex biosensors address the core limitations of single-analyte tests by enabling the parallel measurement of multiple biomarkers from a single, small-volume sample. This approach significantly improves diagnostic specificity through a combinatorial analysis of biomarker profiles. For instance, while one biomarker might be associated with several conditions, the simultaneous detection of a specific panel of biomarkers can create a unique signature that is pathognomonic for a particular disease. Research indicates that for effective cancer screening, the measurement of at least 4-10 biomarkers is recommended [3]. A concrete example is the simultaneous detection of Neuron-Specific Enolase (NSE) and Carcinoembryonic Antigen (CEA), which, when measured together, provide a more robust and specific diagnostic readout for certain cancers than either marker alone [2].
The following diagram illustrates the fundamental workflow and logical advantage of a multiplexed biosensor system over a single-marker approach.
Experimental Protocol: Simultaneous Detection of NSE and CEA Using a Smartphone-Based Fluorescent Microscope
This protocol details a specific methodology for multiplexed biomarker detection, as presented in recent research. The system integrates microfluidics, functionalized carbon dots (CDs), and artificial intelligence to achieve high-specificity detection of trace protein biomarkers from a single drop of blood [2].
Research Reagent Solutions
Table 2: Essential Reagents and Materials for the Multiplexed Assay
| Item | Function/Description |
|---|---|
| Microfluidic Chip | Integrated platform for blood plasma separation, biomarker capture, and analysis [2]. |
| Functionalized Carbon Dots (CDs) | Fluorescent nanoprobes with superior biocompatibility and photostability. Emit at 460 nm (blue) and 580 nm (yellow) for multiplexing [2]. |
| Capture Antibodies | Anti-NSE and anti-CEA antibodies immobilized on the sensor surface within distinct microchannels to specifically bind target biomarkers [2]. |
| Smartphone-Based Fluorescence Microscope | Portable imaging device with 1000X magnification and UV excitation for high-resolution image acquisition [2]. |
| AI-Based Image Analysis Software | Automated algorithm for quantifying biomarker concentrations from the fluorescence images [2]. |
Step-by-Step Procedure
- Chip Priming and Preparation: Ensure the microfluidic chip is clean and the microchannels are functional.
- Sample Introduction: Apply a single drop of whole blood (~20-50 µL) to the sample inlet of the microfluidic chip [2].
- On-Chip Plasma Separation: Allow the chip's integrated mechanism to separate blood plasma from cellular components.
- Biomarker Incubation and Binding: The separated plasma flows over the functionalized detection zones. Incubate to allow specific binding of NSE and CEA to their respective capture antibodies.
- Fluorescent Labeling: Introduce the functionalized carbon dots, which bind to the captured biomarkers, forming a "sandwich" complex.
- Washing: Flush the microchannels with buffer to remove unbound CDs, minimizing background signal.
- Image Acquisition: Place the chip under the smartphone-based fluorescence microscope. Acquire images of the detection zones under UV excitation.
- Data Analysis: Process the acquired fluorescence images using the integrated AI algorithm. The software automatically quantifies the fluorescence intensity, which correlates with the concentration of NSE and CEA.
- Result Interpretation: The assay provides quantitative results for both biomarkers, with demonstrated detection limits of 0.4 ng/mL for CEA and 0.9 ng/mL for NSE. The entire workflow is completed in approximately 10 minutes [2].
The experimental workflow is visualized below.
Quantitative Performance of Multiplexed vs. Single-Biomarker Assays
The advantages of multiplexing are not merely conceptual but are reflected in tangible performance metrics. The following table compares the performance of the described multiplex assay with general characteristics of single-marker tests.
Table 3: Performance Comparison: Single vs. Multiplexed Detection
| Parameter | Typical Single-Biomarker Assay | Multiplexed Biosensor (NSE & CEA) |
|---|---|---|
| Number of Analytes | 1 | 2 (or more, depending on platform) [2] |
| Sample Volume | Can be large (mL scale) for multiple tests | A single drop of blood (~20-50 µL) [2] |
| Time-to-Result | Hours for lab-based tests (e.g., ELISA) | ~10 minutes [2] |
| Limit of Detection (LoD) | Varies; may be inadequate for early detection | CEA: 0.4 ng/mL; NSE: 0.9 ng/mL [2] |
| Key Differentiator | Limited information per test | Combinatorial power for improved specificity [1] |
The limitations of single-biomarker detection, including poor specificity, inadequate sensitivity for early disease, and an inability to manage biological heterogeneity, present significant obstacles to accurate diagnosis and personalized medicine. The experimental data and protocols outlined herein demonstrate that multiplex biosensors offer a viable and superior alternative. By enabling the simultaneous, quantitative analysis of multiple biomarkers from a minimal sample, these platforms directly address the diagnostic specificity issues inherent to single-analyte methods. The integration of multiplexing with advanced materials like nanomaterials [1], portable readout devices, and AI-powered data analysis [2] paves the way for a new generation of diagnostics that are not only more precise but also accessible and actionable for point-of-care clinical decision-making.
Fundamental Principles of Multiplex Biosensing and Signal Transduction
Multiplex biosensing represents a transformative approach in bioanalytical science, enabling the simultaneous detection and quantification of multiple distinct biomarkers within a single assay. This capability is paramount for deciphering complex intracellular signaling networks, where the interplay of multiple components—rather than the activity of a single entity—dictates cellular outcomes [4]. The fundamental principle underpinning this technology involves the integration of multiple specific biorecognition elements with transducers that convert molecular interactions into quantifiable signals. In disease diagnostics, particularly for complex conditions like cancer, the ability to detect several biomarkers concurrently provides a more comprehensive assessment than single-analyte detection, as a single biomarker may be implicated in various diseases while multiple biomarkers often characterize specific disease states [5]. The advancement of multiplex biosensing has been driven by the critical need to understand signaling pathway crosstalk and determine the precise sequence of molecular events in living cells [6]. This article delineates the core principles, detailed methodologies, and practical applications of multiplex biosensing technologies, providing researchers with the foundational knowledge and protocols necessary for implementation in drug development and basic research.
Core Principles and Signaling Pathways
The design and implementation of multiplex biosensors are governed by several interconnected principles centered on specificity, parallel detection, and signal transduction.
Key Design Principles
Effective multiplex biosensing platforms rely on several foundational design principles. First, biorecognition specificity ensures that each sensor element interacts exclusively with its intended target analyte, whether it be a protein, nucleic acid, or small molecule. Second, orthogonal signal transduction is crucial, whereby the readout mechanisms for each sensor must be distinguishable without spectral or electronic interference. Third, spatiotemporal coordination allows for the simultaneous monitoring of multiple analytes within the same cellular compartment or sample volume, providing a cohesive picture of network dynamics [4]. The complexity arises from the interconnectedness of signaling pathways, where the activation state, duration, and subcellular localization of multiple enzymes collectively determine cellular responses [6].
Major Signaling Pathways and Crosstalk
A quintessential example of signaling crosstalk amenable to multiplex biosensing is the interaction between the cyclic adenosine monophosphate/protein kinase-A (cAMP/PKA) and mitogen-activated protein kinase/extracellular signal-regulated kinase 1&2 (MAPK/ERK1&2) pathways [6]. The MAPK cascade is composed of a three-tiered kinase relay: a MAPK kinase kinase (Raf), a MAPK kinase (MEK), and a MAPK (ERK) [6]. PKA, a serine/threonine kinase, exists as an inactive tetramer comprising two regulatory and two catalytic subunits; cAMP binding induces dissociation and activation of the catalytic units [6]. These pathways converge at multiple nodes, with PKA capable of modulating ERK activity through differential phosphorylation of Raf isoforms, while scaffold proteins like A-kinase anchoring proteins (AKAP) and kinase suppressor of Ras (KSR) further regulate this crosstalk [6].
The following diagram illustrates the core architecture and crosstalk between the PKA and MAPK/ERK signaling pathways:
Figure 1: PKA and MAPK/ERK Pathway Crosstalk. This diagram illustrates the core components and key interaction points between the PKA and MAPK/ERK signaling pathways, highlighting how extracellular signals like EGF and cAMP-elevating agents (e.g., Forskolin) converge to regulate cellular outcomes through direct activation and bidirectional modulation.
Multiplexing Methodologies and Experimental Protocols
Multiple sophisticated methodologies have been developed to achieve simultaneous monitoring of several biomarkers or signaling activities, each with distinct experimental requirements and implementation protocols.
Fluorescence Resonance Energy Transfer combined with Fluorescence Lifetime Imaging Microscopy (FRET-FLIM) using a single excitation wavelength represents a powerful approach for multiplexed biosensing in living cells. This method overcomes limitations of sequential acquisition and spectral bleed-through by exciting multiple donors with one wavelength and distinguishing them via lifetime decay characteristics in different emission channels [6].
Detailed Protocol: Simultaneous PKA and ERK1&2 Kinase Activity Monitoring [6]
Cell Culture and Transfection:
- Culture HeLa or U2OS cells in appropriate medium (e.g., Dulbecco's Modified Eagle Medium supplemented with 10% fetal bovine serum) under standard conditions (37°C, 5% CO₂).
- Transfect cells with the following FRET biosensor constructs using a preferred method (e.g., lipofection, electroporation):
- mTFP1/ShadowG-based EKAR2G biosensor for monitoring ERK1&2 kinase activity.
- LSSmOrange/mKate2-based AKAR4 biosensor for monitoring PKA activity.
- Allow 24-48 hours for expression before imaging.
Microscopy Setup and Image Acquisition:
- Utilize a microscope system equipped with:
- A 440 nm laser for simultaneous excitation of both mTFP1 and LSSmOrange donors.
- A dual-channel detection system (e.g., a dual-view module) to split emissions:
- Cyan channel: 475/50 nm bandpass filter to capture mTFP1 emission.
- Orange channel: 570/80 nm bandpass filter to capture LSSmOrange emission.
- A time-correlated single-photon counting (TCSPC) module or time-gated detection system for FLIM.
- Maintain cells at 37°C and 5% CO₂ during live-cell imaging.
- Acquire fluorescence lifetime images for both channels before and after stimulation.
- Utilize a microscope system equipped with:
Stimulation and Kinetic Measurements:
- Acquire a 1-2 minute baseline recording.
- Stimulate cells with EGF (e.g., 50-100 ng/mL) to activate both PKA and ERK1&2 pathways.
- Continue acquisition for 15-30 minutes to monitor transient activation.
- To probe crosstalk, subsequently add Forskolin (e.g., 10-25 µM) to elevate cAMP levels and continue acquisition for an additional 15-30 minutes.
Data Analysis:
- Fit fluorescence decay curves for each pixel in both channels using a bi-exponential model.
- Calculate the mean fluorescence lifetime (τ) for each biosensor.
- Determine FRET efficiency (E) using the formula:
E = 1 - (τ_DA / τ_D), where τDA is the donor lifetime in the presence of the acceptor, and τD is the donor lifetime alone. - Generate ratiometric or lifetime maps to visualize spatiotemporal kinase activity changes.
The workflow for this multiplexed FRET-FLIM protocol is summarized below:
Figure 2: Multiplexed FRET-FLIM Experimental Workflow. This diagram outlines the key steps for a live-cell imaging experiment to simultaneously monitor PKA and ERK1/2 kinase activities using single-excitation, dual-color FLIM.
Optical and Sequencing-Based Multiplexing
Other prominent multiplexing methodologies include optical biosensing for in vitro diagnostics and next-generation sequencing for pathogen identification.
Optical Biosensor Techniques [5]: Surface Plasmon Resonance (SPR) and Localized Surface Plasmon Resonance (LSPR) detect biomarker binding in real-time through changes in refractive index at a metal surface. Fluorescence Resonance Energy Transfer (FRET) based sensors detect biomolecular interactions via distance-dependent energy transfer between fluorophores. Surface-Enhanced Raman Spectroscopy (SERS) provides highly specific vibrational fingerprints of target molecules amplified by nanostructured metal surfaces. These techniques can be multiplexed by patterning distinct capture molecules in an array or using spectrally unique labels.
Multiplex Metagenomic Sequencing [7]: This approach uses Oxford Nanopore Technology (ONT) for unbiased detection of viral pathogens. The protocol involves: 1) Filtering clinical specimens through 0.22 µm filters to remove host cells; 2) DNase treatment to degrade residual host DNA; 3) Separate viral RNA and DNA extraction; 4) Sequence-independent single-primer amplification (SISPA) for nucleic acid amplification; 5) Rapid barcoding of up to 96 samples; 6) Pooling and sequencing on a MinION flow cell; 7) Real-time basecalling and bioinformatic analysis (human read depletion, taxonomic classification). This method achieved 80% concordance with clinical diagnostics and identified co-infections in 7% of cases missed by routine testing [7].
Table 1: Comparison of Major Multiplex Biosensing Platforms
| Methodology | Key Principle | Multiplexing Capacity | Temporal Resolution | Primary Applications |
|---|---|---|---|---|
| FRET-FLIM [6] | Distance-dependent energy transfer measured via fluorescence lifetime | 2-3 targets simultaneously with spectral separation | Very High (seconds) | Live-cell kinase activity, protein-protein interactions, signaling dynamics |
| SPR/LSPR [5] | Biomarker binding alters refractive index at sensor surface | High (array-based) | High (minutes) | Label-free biomarker detection, receptor-ligand kinetics, serum profiling |
| SERS [5] | Enhanced Raman scattering by molecules on nanostructured surfaces | Very High (spectrally unique fingerprints) | Medium | Ultrasensitive detection of multiple biomarkers, infectious agent identification |
| Metagenomic Sequencing [7] | Unbiased amplification and sequencing of all nucleic acids in a sample | Extremely High (computational demultiplexing of barcodes) | Low (hours-days) | Pathogen identification and surveillance, co-infection detection, novel pathogen discovery |
Data Presentation and Quantitative Analysis
Quantitative data from multiplex biosensing experiments provide critical insights into dynamic biological processes, requiring careful analysis and presentation for meaningful interpretation.
Table 2: Representative Quantitative Data from Multiplex Biosensing Applications
| Application / Biosensor | Measured Parameter | Baseline / Control Value | Stimulated / Experimental Value | Key Experimental Observation |
|---|---|---|---|---|
| FRET-FLIM: LSSmOrange/mKate2 [6] | Fluorescence Lifetime (ns) | 2.76 ± 0.03 ns (donor alone) | 2.32 ± 0.08 ns (in tandem) | FRET efficiency of ~0.16 confirms functional biosensor |
| FRET-FLIM: mTFP1/EYFP [6] | Fluorescence Lifetime (ns) | Reference donor lifetime | Reduced lifetime in tandem | Higher FRET efficiency (~0.23) compared to LSSmOrange/mKate2 pair |
| Multiplexed PKA & ERK Monitoring [6] | Kinase Activity (FRET Efficiency) | Basal PKA & ERK activity | Concomitant EGF-mediated activation | Subsequent Forskolin reverses ERK activation while reinforcing PKA activity |
| ONT-Seq Viral Detection [7] | Concordance with Clinical Diagnostics | Routine clinical test results | 80% concordance | Identified additional co-infections (7% of cases) missed by routine tests |
| ONT-Seq for Genotyping [7] | Genome Coverage (Adenovirus) | Not Applicable | >80% coverage at 20x depth in 31/58 samples | Enabled phylogenetic analysis identifying Adenovirus B3 as predominant strain |
The Scientist's Toolkit: Essential Research Reagent Solutions
Successful implementation of multiplex biosensing requires specific reagents and materials tailored to the chosen methodology.
Table 3: Essential Research Reagents and Materials for Multiplex Biosensing
| Reagent / Material | Specification / Example | Primary Function in Experiment |
|---|---|---|
| Genetically Encoded FRET Biosensors | EKAR2G (mTFP1/ShadowG) for ERK1&2; AKAR4 (LSSmOrange/mKate2) for PKA [6] | Target-specific sensing element; translates kinase activity into quantifiable FRET signal |
| Cell Lines | HeLa, U2OS, or other relevant adherent cell lines | Model system for expressing biosensors and studying intracellular signaling |
| Activation Agonists | EGF (Epidermal Growth Factor); Forskolin (adenylyl cyclase activator) [6] | Controlled stimulation of specific signaling pathways (MAPK/ERK and cAMP/PKA) |
| SMRTbell Adapter Indexes | 384 unique index sequences (PacBio) [8] | Sample barcoding for multiplexed sequencing; enables pooling and downstream demultiplexing |
| Kinnex Adapters & Kits | Kinnex full-length RNA, 16S rRNA, or single-cell RNA kits (PacBio) [8] | Enables amplicon concatenation and library-level multiplexing for RNA sequencing applications |
| Viral Nucleic Acid Extraction Kits | QIAamp DNA Mini Kit; QIAamp Viral RNA Mini Kit (QIAGEN) [7] | Isolation of high-purity viral nucleic acids from clinical specimens for metagenomic sequencing |
| SISPA Primers | Primer A: 5’-GTTTCCCACTGGAGGATA-(N9)-3’ [7] | Sequence-independent single-primer amplification for unbiased amplification of viral genomes |
| Rapid Barcoding Kit | Oxford Nanopore Rapid Barcoding kit [7] | Efficient and rapid attachment of barcodes to amplified DNA for multiplexed ONT sequencing |
The protocols and principles described herein find practical application across diverse research and clinical domains. In drug discovery and development, multiplex biosensing enables the high-content screening of compound libraries against multiple signaling nodes simultaneously, providing rich datasets on mechanism of action and potential off-target effects. The ability to monitor pathway crosstalk, as demonstrated by the PKA-ERK interplay, is crucial for understanding drug efficacy and resistance mechanisms [6]. In clinical diagnostics, multiplex metagenomic sequencing offers a powerful agnostic approach for rapid viral pathogen identification and surveillance, capable of detecting novel or unexpected strains that evade targeted PCR panels [7]. Furthermore, the application of these technologies to cancer biomarker validation allows for the creation of more robust diagnostic and prognostic panels based on multiple biomarkers, potentially leading to earlier detection and more personalized treatment strategies [5].
In conclusion, multiplex biosensing technologies, underpinned by sophisticated signal transduction principles, have fundamentally expanded our capacity to interrogate complex biological systems. The methodologies detailed—from live-cell FRET-FLIM to sequencing-based detection—provide researchers with a powerful toolkit to move beyond single-analyte measurements. By enabling the simultaneous observation of multiple biomarkers or signaling activities, these approaches illuminate the dynamic networks that govern cellular function in health and disease. As these technologies continue to evolve, they promise to further accelerate biomarker discovery, therapeutic development, and our fundamental understanding of cellular signaling complexity.
Multiplex biosensors represent a transformative advancement in analytical technology, enabling the simultaneous detection and quantification of multiple distinct biomarkers within a single, integrated assay [9]. These devices combine a biological recognition element (such as an antibody, enzyme, or DNA strand) with a physical transducer that converts the molecular binding event into a quantifiable signal [10] [9]. The core power of multiplexing lies in its ability to provide a comprehensive diagnostic profile from a minimal sample volume, dramatically improving efficiency and information yield compared to traditional single-analyte tests [1]. For researchers and drug development professionals, this technology offers unprecedented insights into complex disease mechanisms, patient stratification, and therapeutic efficacy. This application note details specific protocols and methodologies for employing multiplex biosensors in three critical areas: cancer stratification, infectious disease panel testing, and therapeutic drug monitoring, providing a practical framework for implementation in research and clinical development settings.
Application Note: Cancer Stratification
Background and Rationale
Cancer is a highly heterogeneous disease, necessitating precise stratification for accurate prognosis and targeted therapy. The earlier cancer can be detected, the better the chance of a cure, yet many cancers are diagnosed only after metastasis has occurred [10]. Multiplex biosensors address this challenge by profiling panels of protein, nucleic acid, and cellular biomarkers from liquid biopsies, such as blood or serum, offering a non-invasive means for early detection, molecular subtyping, and monitoring of treatment response [10] [1]. Key circulating biomarkers include circulating tumor cells (CTCs), circulating tumor DNA (ctDNA), microRNAs (miRNAs), and exosomes, each providing unique information about the tumor's genetic and proteomic landscape [11]. The integration of nanotechnology and microfluidics has significantly enhanced the sensitivity and specificity of these biosensors, allowing for the detection of rare and low-abundance biomarkers present in early-stage disease [1].
Key Biomarkers for Cancer Stratification
Table 1: Key Cancer Biomarkers for Multiplex Biosensor Stratification
| Cancer Type | Key Biomarkers | Clinical Utility | Sample Matrix |
|---|---|---|---|
| Breast Cancer | BRCA1, BRCA2, HER2/NEU, CA 15-3, CA 27.29, ER/PR [10] | Hereditary risk assessment, prognosis, and treatment selection (e.g., Trastuzumab) [10] | Serum, Tissue |
| Prostate Cancer | Prostate-Specific Antigen (PSA) [10] | Screening and monitoring; controversy exists due to false positives [10] | Serum |
| Ovarian Cancer | CA 125, HCG, p53 [10] | Diagnosis and monitoring of treatment response and recurrence [10] | Serum |
| Lung Cancer | CEA, CA 19-9, NY-ESO-1 [10] | Diagnosis and disease monitoring | Serum |
| Colon Cancer | Carcinoembryonic Antigen (CEA), p53 [10] | Staging and monitoring recurrence | Serum |
| Pancreatic Cancer | CA 19-9 [10] | Diagnosis and monitoring | Serum |
| Liquid Biopsy (General) | Circulating Tumor Cells (CTCs), Circulating Tumor DNA (ctDNA), microRNAs (miRNAs) [11] | Real-time monitoring of tumor dynamics, heterogeneity, and treatment response [11] | Blood, Plasma |
Experimental Protocol: Microfluidic SERS Biosensor for Liquid Biopsy Analysis
This protocol describes a methodology for the simultaneous detection of multiple circulating protein biomarkers using a microfluidic biosensor integrated with a Surface-Enhanced Raman Scattering (SERS) detection system [1] [11]. SERS offers exceptional sensitivity and multiplexing capability through its unique molecular fingerprinting.
Workflow Overview:
Materials and Reagents:
- Polydimethylsiloxane (PDMS) and photoresist for microfluidic chip fabrication [1].
- Gold Nanoparticles (AuNPs) or Silver Nanoparticles (AgNPs), ~50-100 nm, as the SERS-active substrate [11].
- Capture Antibodies: A panel of monoclonal antibodies specific to target biomarkers (e.g., anti-PSA, anti-CA-125, anti-CEA).
- SERS Nanotags: AuNPs conjugated with a Raman reporter molecule (e.g., 4-mercaptobenzoic acid, 5,5'-dithiobis(2-nitrobenzoic acid)) and a detection antibody.
- Blocking Buffer: 1% Bovine Serum Albumin (BSA) in phosphate-buffered saline (PBS) to minimize non-specific adsorption [9].
- Washing Buffer: PBS containing 0.05% Tween-20 (PBST).
- Clinical Samples: Serum or plasma samples from patients and healthy controls.
Step-by-Step Procedure:
- Chip Fabrication: Fabricate a microfluidic chip with integrated mixing channels and a detection chamber using standard soft lithography techniques. A master silicon wafer is patterned via photolithography. PDMS, mixed in a 10:1 base-to-curing agent ratio, is poured onto the master, cured at 65°C for 2 hours, and then peeled off. Inlet and outlet ports are created using a biopsy punch [1].
- Substrate Functionalization: Introduce a solution of capture antibodies (e.g., 10 µg/mL in PBS) into the microfluidic channel and incubate for 1 hour at room temperature. Wash with PBS to remove unbound antibodies. Passivate the remaining surface with 1% BSA for 30 minutes to block non-specific sites [9] [1].
- Sample Introduction and Incubation: Dilute the serum or plasma sample 1:1 in PBST. Introduce 100 µL of the prepared sample into the microfluidic channel at a controlled flow rate (e.g., 5 µL/min) using a syringe pump. Allow the target biomarkers to bind to the immobilized capture antibodies during a 30-minute incubation period.
- SERS Tag Binding and Washing: Introduce the solution of SERS nanotags (OD~1 at 520 nm) into the channel and incubate for 20 minutes to form a sandwich immunocomplex. Flush the channel thoroughly with PBST for 10 minutes to remove any unbound nanotags.
- Signal Acquisition and Analysis: Place the chip under a Raman microspectrometer. Focus the laser (e.g., 785 nm) onto the detection chamber. Collect SERS spectra from at least 10 random spots. The intensity of the characteristic Raman peak for each nanotag is directly proportional to the concentration of the corresponding biomarker. Use principal component analysis (PCA) or other machine learning algorithms to deconvolute the multiplexed signals and quantify each biomarker [11].
The Scientist's Toolkit: Research Reagent Solutions
Table 2: Essential Reagents for Cancer Biomarker Detection
| Reagent/Material | Function | Example Application |
|---|---|---|
| Gold Nanoparticles (AuNPs) | SERS substrate and carrier for detection antibodies; provides signal enhancement via localized surface plasmon resonance [11]. | Signal amplification in SERS-based immunoassays for CTC or protein detection [11]. |
| Specific Monoclonal Antibodies | Biorecognition elements that selectively bind to target biomarkers (e.g., CTC surface markers, CA-125) [9]. | Capturing and identifying specific cancer cells or proteins in a complex sample. |
| Bovine Serum Albumin (BSA) | Blocking agent to passivate sensor surfaces and minimize non-specific adsorption of non-target molecules [9]. | Reducing background signal in immunoassays to improve sensitivity and specificity. |
| Quantum Dots (QDs) | Semiconductor nanocrystals with size-tunable fluorescence; used as fluorescent labels for multiplexed detection [1]. | Simultaneous detection of multiple biomarkers by using QDs with different emission wavelengths. |
| Carbon Nanotubes (CNTs) | Nanomaterial with high electrical conductivity; used in electrochemical biosensors to enhance electron transfer and stability [1]. | Signal transduction in electrochemical sensors for detecting ctDNA or proteins. |
Application Note: Infectious Disease Panels
Background and Rationale
Rapid Multiplex Molecular Syndromic Panels (RMMSP) represent a paradigm shift in the diagnosis of infectious diseases, particularly in critical care settings [12]. These panels are designed to simultaneously detect 3 or more pathogens (bacteria, viruses, fungi, parasites) and associated antimicrobial resistance (AMR) genes from a single patient sample in less than 6 hours [12]. This is a critical improvement over traditional culture-based methods, which can take 24-72 hours, leading to delays in appropriate antimicrobial therapy. For critically ill patients, such delays are associated with increased mortality and morbidity [12]. RMMSPs are tailored to specific clinical syndromes, such as respiratory infections, sepsis, and meningitis/encephalitis, allowing clinicians to rapidly de-escalate or tailor empiric antibiotic regimens, thereby strengthening antimicrobial stewardship programs [13] [12].
Experimental Protocol: Multiplex PCR-Based Panel for Lower Respiratory Tract Infections
This protocol outlines the use of a commercial RMMSP for the comprehensive analysis of bronchoalveolar lavage (BAL) samples from patients with suspected pneumonia.
Workflow Overview:
Materials and Reagents:
- Commercial RMMSP Kit: For example, BioFire FilmArray Pneumonia Panel or similar.
- Clinical Sample: Bronchoalveolar lavage (BAL) fluid, collected aseptically.
- Nucleic Acid Extraction Kit: Typically provided with the RMMSP kit.
- Microcentrifuge and Vortexer.
- Real-time PCR Instrument or dedicated Panel Analyzer.
Step-by-Step Procedure:
- Sample Preparation and Nucleic Acid Extraction: Process the BAL sample according to the manufacturer's instructions. This typically involves a brief centrifugation to pellet cells, followed by resuspension in a lysis buffer. Extract total nucleic acids (DNA and RNA) using the provided kit, which may involve magnetic bead-based purification [12].
- Panel Hydration and Loading: Hydrate the freeze-dried PCR reagents within the test pouch or cartridge using the provided hydration solution. Transfer the extracted nucleic acid sample into the designated injection port on the pouch/cartridge.
- Automated Multiplex Amplification and Detection: Insert the pouch/cartridge into the dedicated analyzer. The instrument automates the entire process:
- Nested PCR: The first stage amplifies broad pathogen groups.
- Second-stage PCR: Amplifies specific targets using primers for each pathogen and AMR gene on the panel.
- Detection: Melting curve analysis or endpoint detection with fluorescent probes identifies the presence of specific amplicons, corresponding to pathogens and resistance markers (e.g., mecA for methicillin resistance, blaKPC, blaNDM for carbapenem resistance) [12].
- Data Analysis and Interpretation: The integrated software analyzes the detection data and generates a patient report listing the detected pathogens and any relevant AMR genes. Crucial Consideration: This result must be interpreted in the clinical context of the patient. A positive result may indicate colonization, not infection, and the presence of a resistance gene does not always equate to phenotypic resistance. Results should be correlated with clinical symptoms, signs, and other laboratory findings [12].
Application Note: Therapeutic Drug Monitoring
Background and Rationale
Therapeutic Drug Monitoring (TDM) is the clinical practice of measuring specific drugs at timed intervals to maintain a constant concentration in a patient's bloodstream, thereby optimizing individual dosage regimens [14] [15]. It is crucial for drugs with a narrow therapeutic index (NTI), where small variations in concentration can lead to subtherapeutic failure or toxic side effects [14]. Traditional TDM methods like high-performance liquid chromatography (HPLC) and immunoassays, while robust, are often time-consuming, require centralized laboratories, and are incapable of real-time monitoring [14] [15]. Biosensors offer a compelling alternative with their potential for point-of-care testing, rapid analysis, low cost, and ability for continuous monitoring, facilitating personalized medicine [14] [16] [15].
Key Drugs for Therapeutic Monitoring
Table 3: Exemplary Drugs for Biosensor-Based TDM
| Drug Category | Specific Drug | Therapeutic Range | Clinical Context & Toxicity |
|---|---|---|---|
| Antibiotics | Aminoglycosides, Vancomycin, Colistin [14] | Drug-specific | Treatment of multi-drug resistant bacteria; nephrotoxicity and ototoxicity [14]. |
| Anticonvulsants | Phenytoin, Carbamazepine, Valproic Acid [14] | Drug-specific | Management of epilepsy; neurological toxicity, hepatotoxicity [14]. |
| Chemotherapeutic Agents | Methotrexate, Paclitaxel [14] | Drug-specific (e.g., Methotrexate: >10µM can be toxic) | Hematological toxicity, cardiotoxicity, neurotoxicity [14]. |
| Anti-arrhythmics | Digoxin [14] | 0.5-2.0 ng/mL | Cardiotoxicity; small variations can lead to adverse reactions [14]. |
| Immunosuppressants | Cyclosporine [14] | Drug-specific | Prevention of organ transplant rejection; nephrotoxicity. |
Experimental Protocol: Electrochemical Aptasensor for Monitoring Anticancer Drugs
This protocol details the development of an electrochemical biosensor using an aptamer as the biorecognition element for the detection of an anticancer drug like Methotrexate.
Workflow Overview:
Materials and Reagents:
- Electrochemical Workstation: Capable of Electrochemical Impedance Spectroscopy (EIS) and Differential Pulse Voltammetry (DPV).
- Gold Working Electrode, Platinum Counter Electrode, and Ag/AgCl Reference Electrode.
- Thiol-modified DNA Aptamer specific to the target drug (e.g., Methotrexate).
- Redox Probe: 5 mM Potassium ferricyanide/ferrocyanide ([Fe(CN)₆]³⁻/⁴⁻) in PBS.
- Blocking Agent: 1 mM 6-mercapto-1-hexanol (MCH) in ethanol.
- Drug Standards: Pure analytical standards of the target drug for calibration.
Step-by-Step Procedure:
- Electrode Pretreatment: Clean the gold working electrode by polishing with 0.3 µm and 0.05 µm alumina slurry, followed by sonication in ethanol and deionized water. Electrochemically clean by cycling the potential in 0.5 M H₂SO₄ until a stable cyclic voltammogram is obtained.
- Aptamer Immobilization: Incubate the cleaned gold electrode with a 1 µM solution of the thiol-modified aptamer in PBS buffer for 16 hours at 4°C. The thiol group will form a self-assembled monolayer on the gold surface, covalently tethering the aptamer.
- Surface Blocking: Rinse the electrode with PBS and then incubate it with 1 mM MCH for 1 hour. MCH backfills any uncovered gold sites, displaces non-specifically adsorbed aptamers, and creates a well-aligned recognition layer, significantly reducing non-specific binding [9].
- Drug Binding and Measurement:
- Prepare a series of calibration standards by spiking known concentrations of the drug into diluted human serum or plasma.
- Incubate the modified electrode with 50 µL of the standard or patient sample for 15 minutes.
- Wash the electrode gently with PBS to remove unbound molecules.
- Perform EIS measurements in the presence of the [Fe(CN)₆]³⁻/⁴⁻ redox probe (frequency range: 0.1 Hz to 100 kHz, amplitude: 5 mV). Alternatively, DPV can be used.
- Data Analysis: The binding of the drug to the immobilized aptamer causes a conformational change or creates a steric hindrance, increasing the electron transfer resistance (Rₑₜ) measured by EIS. Plot the change in Rₑₜ (or DPV peak current) against the logarithm of the drug concentration to generate a calibration curve. Use this curve to interpolate the concentration of the drug in unknown patient samples.
Multiplexing represents a paradigm shift in biomedical detection, allowing for the simultaneous quantification of multiple analytes from a single sample in a single step. This approach provides significant advantages over traditional individual testing, including shorter processing time, reduced sample volume requirements, lower cost per test, and the ability to generate more comprehensive diagnostic information from limited samples [17] [18]. The technological landscape for multiplexing has expanded considerably, encompassing platforms based on spatial separation, regional separation through microfluidic networks, and the use of different biorecognition or signal-generating elements [19]. These advancements have positioned multiplexed biosensors as indispensable tools for accurate clinical diagnostics, particularly for complex conditions that require monitoring multiple biomarkers for accurate diagnosis and therapeutic monitoring [20] [19].
The importance of multiplexing has grown substantially with the recognition that clinical assessment based on a single biomarker is often insufficient for adequate diagnosis of diseases or monitoring therapy effectiveness [19]. For conditions like sepsis, acute kidney injury, urinary tract infections, HIV/AIDS, and various cancers, detecting multiple biomarkers simultaneously provides a more accurate representation of disease status and progression [17]. Furthermore, patients with multiple comorbidities benefit dramatically from multiplexed platforms that can measure several relevant biomarkers from a single drop of body fluid, reducing both discomfort and testing complexity [19].
Key Advantages of Multiplexed Biosensing Platforms
Enhanced Diagnostic Accuracy and Reliability
Multiplexed biosensors significantly enhance diagnostic accuracy by simultaneously detecting multiple biomarkers, providing a more comprehensive profile than single-analyte tests. This multi-parameter approach increases the reproducibility and reliability of clinical assessments, as the correlation between different biomarkers offers built-in verification mechanisms [20]. For infectious disease diagnostics, multiplexed systems enable the simultaneous identification of multiple pathogens or multiple mutations within a single pathogen, which is crucial for tracking variants of concern, as demonstrated during the SARS-CoV-2 pandemic [21]. The ability to detect several targets in a single reaction reduces the likelihood of errors that might occur when running separate individual tests [22].
Reduced Sample Volume and Resource Requirements
Multiplexed biosensors address critical challenges associated with sample volume limitations, particularly important for pediatric patients, those in critical care settings, or when monitoring chronic diseases requiring frequent testing. By design, these systems require smaller sample volumes to detect multiple analytes compared to running separate tests for each target [17] [20]. This reduction extends beyond the sample itself to include fewer materials, lower reagent consumption, and reduced waste generation [20]. The resource efficiency of multiplexing also translates to economic benefits through reduced healthcare costs while maintaining comprehensive diagnostic capabilities [19].
Increased Analytical Throughput and Efficiency
Perhaps the most evident advantage of multiplexing is the substantial increase in analytical throughput. By detecting multiple targets simultaneously, these systems dramatically reduce the average analysis time per biomarker [20]. This efficiency enables faster results for clinical decision-making and allows researchers and clinical laboratories to process more samples in less time, accelerating both diagnostic workflows and research progress [22] [19]. The integration of multiplexing with automated platforms further enhances throughput potential, making these systems particularly valuable for public health emergencies, large-scale screening programs, and high-volume clinical laboratories.
Table 1: Quantitative Advantages of Representative Multiplexed Biosensing Platforms
| Technology Platform | Multiplexing Capacity | Detection Limit | Key Performance Metrics | Reference |
|---|---|---|---|---|
| Digital Barcoded Particles & Impedance Spectroscopy | Numerous distinct patterns via coding regions | 7 µm microsphere limit of detection | Identifies particles based on electrical signatures | [17] |
| Electrochemical Microfluidic Biosensor (BiosensorX) | 4, 6, or 8 analytes/samples simultaneously | Not specified | Individual electrochemical cells in single channel; minimal cross-contamination | [19] |
| Multicolor FRET Biosensors (ChemoX Platform) | Multiple cellular targets simultaneously | Not specified | Near-quantitative FRET efficiency (≥94%); large dynamic range | [23] |
| 'Turn-on' Fluorescent Biosensor for GMO Detection | Multiple DNA targets | Quantitative detection limit: 5 pg | Overcomes asymmetric amplification; homogeneous efficiency | [24] |
Multiplexed Biosensor Technologies: Mechanisms and Implementation
Microfluidic-Based Multiplexed Biosensors
Microfluidic architectures represent one of the most promising platforms for implementing multiplexed biosensing. These systems miniaturize and integrate multiple analytical functions into single devices, offering precise fluid control, reduced reagent consumption, and rapid analysis times. The BiosensorX platform exemplifies this approach, featuring a sequential design concept with multiple immobilization areas where assay components are adsorbed, followed by individual electrochemical cells for amperometric signal readout within a single microfluidic channel [19]. This design can be configured to detect 4, 6, or 8 different analytes or samples simultaneously, with vertical channel orientation preferred due to easier handling and superior fluidic behavior compared to horizontal layouts [19].
A particularly innovative microfluidic approach utilizes digital barcoded particles fabricated using stop-flow lithography. These particles can be designed with specific coding regions that generate numerous distinct patterns, enabling digital barcoding for multiplexed analyte quantification. As these asymmetric barcoded particles move through a microfluidic channel with integrated electrodes, each generates a distinct electrical signature based on its specific barcode sequence, allowing identification and quantification through impedance spectroscopy [17]. This system can enumerate micron-sized spheres in a single assay using various barcode configurations, with applications for analyzing blood cells and other biological targets.
Table 2: Research Reagent Solutions for Multiplexed Biosensing
| Reagent/Material | Function in Multiplexed Biosensing | Example Applications | Key Characteristics |
|---|---|---|---|
| Polydimethylsiloxane (PDMS) | Microfluidic device fabrication | Microfluidic impedance detection | Flexible, easy to handle, suitable for batch production |
| Digital Barcoded Particles | Multiplexed analyte capture and identification | Impedance-based biomarker detection | Distinct coding regions generate unique electrical signatures |
| Fluorescently Labeled HaloTag (HT7) | FRET acceptor in chemogenetic biosensors | Calcium, ATP, and NAD+ biosensors | Enables spectral tuning with different fluorophore substrates |
| Silicon Rhodamine (SiR) | Fluorophore for FRET-based detection | ChemoG5 FRET biosensors | Far-red emission; near-quantitative FRET efficiency with eGFP |
| Dry-Film Photoresists (DFRs) | Building 3D microfluidic structures | BiosensorX multiplexed electrochemical biosensors | Flexible, cheap, suitable for batch production |
| Universal Primers and Probes | Amplification and detection of multiple targets | Multiplex GMO detection | Overcomes asymmetric amplification; ensures homogeneous efficiency |
Optical Multiplexed Biosensing Platforms
Optical biosensors constitute another major category of multiplexing technologies, leveraging various detection mechanisms including fluorescence, surface-enhanced Raman scattering (SERS), and surface plasmon resonance (SPR). These platforms are particularly valuable for pathogenic detection, with recent advancements focusing on improving sensitivity, specificity, and multiplexing capabilities [25]. Fluorescence-based detection remains widely used, with innovations continuously expanding the available options for multiplexed analysis.
The ChemoX platform represents a groundbreaking advancement in FRET-based biosensing, addressing the limitation of low dynamic ranges in conventional biosensors. This system utilizes engineered FRET pairs with near-quantitative FRET efficiencies based on the reversible interaction of fluorescent proteins with a fluorescently labeled HaloTag. These pairs enable the design of biosensors for targets like calcium, ATP, and NAD+ with unprecedented dynamic ranges [23]. The color of each biosensor can be readily tuned by changing either the fluorescent protein or the synthetic fluorophore, enabling simultaneous monitoring of different analytes or the same analyte in different subcellular compartments [23].
Electrical and Electrochemical Multiplexed Biosensors
Electrical and electrochemical transduction methods offer distinct advantages for multiplexed biosensing, including high sensitivity, compatibility with miniaturization, and relatively simple instrumentation. Impedance spectroscopy represents one such approach, capable of detecting and differentiating barcoded particles based on their electrical signatures as they pass through a microfluidic channel with integrated electrodes [17]. This method uses a single excitation and detection scheme without requiring fluorescent labeling, reducing complexity and cost.
Electrochemical biosensors employing amperometric detection have also been successfully implemented in multiplexed formats. The BiosensorX platform utilizes this approach, with multiple working electrodes arranged sequentially within a single microfluidic channel, each capable of detecting a different analyte or sample [19]. These systems can employ various biorecognition elements, including antibodies, antigens, enzymes, or proteins, immobilized in distinct regions of the sensor to enable specific detection of different targets [19].
Diagram 1: Generalized workflow for multiplexed biosensor operation, showing the integration of various detection technologies for simultaneous multi-analyte detection from a single sample.
Experimental Protocols for Multiplexed Biosensing
Protocol: Multiplexed Electrochemical Biosensor (BiosensorX) Fabrication and Operation
This protocol details the fabrication and use of the BiosensorX platform for simultaneous detection of multiple analytes, adapted from the methodology described by [19].
Materials:
- Polyimide substrate
- Platinum for metallization
- SU-8 photoresist
- Dry-film photoresist (DFR) layers
- Teflon for hydrophobic stopping barriers
- Biomolecules for immobilization (antibodies, antigens, enzymes, or proteins as appropriate)
- Measurement solutions (buffer, substrates, etc.)
- Microfluidic pumping system
- Potentiostat for electrochemical measurements
Fabrication Procedure:
- Pattern the polyimide substrate with platinum metallization using a lift-off process.
- Define the functional surface with SU-8 photoresist.
- Laminate multiple previously developed DFR layers to create the microfluidic channel structure.
- Incorporate hydrophobic stopping barriers filled with Teflon between incubation areas and electrochemical cells to prevent biomolecule migration.
- For multiplexed designs, arrange multiple units (incubation area + electrochemical cell) sequentially in a single channel.
- Equip each incubation area with individual incubation and washing holes for proper fluid introduction and washing.
- Include common inlet and outlet ports for homogeneous pumping of measurement solutions.
- Add contact pads for electrical connection to measurement instrumentation.
Measurement Procedure:
- Introduce sample through individual incubation inlets or common inlet.
- Allow binding reaction to occur in incubation areas (typically 15-30 minutes).
- Wash individual incubation areas through dedicated washing holes to remove unbound material.
- Pump measurement solution through the common inlet.
- Perform amperometric measurements simultaneously at all working electrodes.
- Record current signals and correlate with analyte concentrations using appropriate calibration curves.
Validation:
- Test for cross-contamination between different incubation areas using control experiments.
- Establish calibration curves for each analyte using single and multiplexed formats to verify comparable performance.
- Determine detection limits, sensitivity, and dynamic range for each target analyte.
Protocol: Implementation of Barcoded Particles for Multiplexed Impedance Detection
This protocol describes the use of digital barcoded particles for multiplexed analyte detection via impedance spectroscopy, based on the work presented by [17].
Materials:
- Barcoded particles fabricated via stop-flow lithography
- PDMS monomer for particle fabrication
- Microfluidic channel architecture (50 μm height, 100 μm width, 1 mm length)
- Coplanar platinum electrodes (8 μm width and spacing)
- AC signal generator (10 V AC)
- Impedance measurement instrumentation
- Target analytes (proteins, cells, or other biomarkers)
- Functionalization reagents for particle surface modification
Particle Fabrication:
- Create barcoded particles using stop-flow lithography with a stationary monomer PDMS film.
- Generate barcoding regions in the PDMS via a micron-sized high-pressure air nozzle to create specific coding regions.
- Design asymmetric particles with multiple coding regions (e.g., 330 μm length, 30 μm height, 70 μm width).
- Incorporate removed barcode regions (12 μm width, spaced 40 μm apart) to create distinct electrical signatures.
- Functionalize different particle populations with specific capture probes for target analytes.
Detection Procedure:
- Introduce functionalized barcoded particles into the microfluidic channel.
- Apply 10 V AC signal to the central platinum electrode.
- Measure impedance between the peripheral electrodes.
- As particles flow through the channel, record electrical signatures generated when they cross the electrode area.
- Identify specific barcode patterns based on characteristic bipolar pulses in the impedance signal.
- Detect analyte binding through changes in electrical signature when target analytes (e.g., microspheres modeling blood cells) are conjugated to particles.
- Differentiate particle types and bound analytes based on their distinct electrical fingerprints.
Signal Analysis:
- Identify particle entry and exit from electric field based on characteristic major peaks.
- Decode barcode sequences by counting and analyzing minor peaks corresponding to coding regions.
- Quantify analyte binding by measuring changes in peak amplitudes.
- Correlate signal changes with analyte size and concentration using established calibration models.
Diagram 2: Mechanism of FRET-based multiplexed biosensors using the ChemoX platform, showing how analyte binding induces conformational changes that alter FRET efficiency between the donor fluorescent protein and acceptor-labeled HaloTag.
Protocol: Multiplexed Real-Time Fluorescent Biosensor for Nucleic Acid Detection
This protocol outlines the procedure for implementing a 'turn-on' ultra-sensitive multiplex real-time fluorescent quantitative biosensor for detecting multiple DNA targets, such as genetically modified organisms or pathogen mutations, based on the methodology from [24].
Materials:
- Universal primer and universal TaqMan probe system
- Target-specific oligonucleotides
- DNA ligase for multiplex ligation-dependent amplification (MLDA)
- Fluorescently labeled probes
- Real-time PCR instrument with multiple detection channels
- DNA extraction and purification reagents
- Positive control templates for all targets
Assay Design:
- Design target-specific oligonucleotides for each DNA target of interest.
- Incorporate universal primer binding sites into all target-specific oligonucleotides.
- Design a universal TaqMan probe with a fluorescent label and quencher.
- Optimize oligonucleotide sequences to minimize cross-reactivity and ensure similar amplification efficiency.
Detection Procedure:
- Extract and purify DNA from sample material.
- Set up MLDA reaction with target-specific oligonucleotides, DNA ligase, and universal components.
- Perform ligation reaction to join target-specific oligonucleotides when target DNA is present.
- Conduct real-time PCR amplification using universal primers.
- Monitor fluorescence signal in real-time as universal TaqMan probes bind to amplified products.
- Record amplification curves for each target.
- Determine presence and quantity of each target based on threshold cycle (Ct) values.
Multiplexing Capability:
- Utilize different fluorescent labels on universal probes for different targets to enable multiplex detection.
- Alternatively, perform parallel single-plex reactions using the universal system for multiple targets from the same sample.
- Analyze results using appropriate software to distinguish different targets based on their fluorescence signatures.
Applications in Clinical Diagnostics and Biomedical Research
The implementation of multiplexed biosensors has transformed approaches to clinical diagnostics and biomedical research by enabling comprehensive biomarker profiling from minimal samples. In critical care settings, multiplexed platforms facilitate rapid diagnosis of complex conditions like sepsis through simultaneous detection of multiple pathogens and host response biomarkers [17] [20]. For infectious disease management, these systems allow tracking of multiple pathogen mutations, as demonstrated during the COVID-19 pandemic where multiplexed biosensors were developed to detect various SARS-CoV-2 variants by targeting characteristic mutations in the spike protein [21].
In therapeutic drug monitoring, multiplexed biosensors enable simultaneous measurement of drug concentrations and relevant biomarkers, supporting personalized treatment regimens [19]. This approach is particularly valuable for drugs with narrow therapeutic windows or significant inter-patient variability in metabolism. For chronic disease management, multiplexed platforms allow patients to monitor multiple relevant biomarkers from a single blood drop, reducing the burden of frequent testing [19].
Cancer diagnostics represents another promising application area, where multiplexed detection of protein biomarkers, nucleic acid mutations, and metabolic indicators provides a more comprehensive view of disease status and progression than single-parameter tests [17] [18]. The integration of multiplexed biosensors with point-of-care platforms further expands their utility in resource-limited settings, where rapid, comprehensive diagnostic information can significantly impact patient outcomes.
Multiplexed biosensing technologies represent a significant advancement in analytical capabilities, offering enhanced accuracy, reduced sample volume requirements, and higher throughput compared to traditional single-analyte approaches. The diverse technological platforms available—including microfluidic systems, optical biosensors, and electrochemical platforms—provide flexible options for addressing various diagnostic and research needs. As these technologies continue to evolve, their integration into clinical practice and research workflows will undoubtedly expand, driven by the growing recognition that comprehensive biomarker profiling provides invaluable information for disease diagnosis, monitoring, and treatment personalization. The ongoing development of increasingly sophisticated multiplexed biosensors promises to further transform biomedical analysis and contribute significantly to improved healthcare outcomes.
Advanced Sensing Platforms and Nanomaterial-Enhanced Detection Methodologies
Optical biosensors have emerged as powerful tools for the sensitive and specific detection of biomarkers, playing a critical role in biomedical research, clinical diagnostics, and drug development. These devices transduce biological binding events into quantifiable optical signals, enabling researchers to monitor biomolecular interactions in real-time. The field has evolved significantly since the conceptual foundation was laid by Leland C. Clark in the 1960s, with contemporary biosensors offering unprecedented sensitivity and versatility [26]. For researchers investigating complex disease states through multiplexed biomarker analysis, optical biosensors provide a technological platform capable of simultaneous detection of multiple analytes from minimal sample volumes, thereby enhancing diagnostic reliability while reducing costs and analysis time [20] [27].
The fundamental principle underlying optical biosensing involves the detection of changes in optical properties—such as intensity, wavelength, polarization, or phase—resulting from the interaction between a target analyte and a biological recognition element immobilized on the sensor surface. The integration of these platforms with microfluidic technology has further enhanced their capabilities, enabling precise fluid manipulation at nano- or micro-scales, minimal sample consumption, shortened processing time, and improved sensitivity [1]. This review examines four principal optical biosensing modalities—fluorescence-based, surface plasmon resonance (SPR/localized SPR), surface-enhanced Raman scattering (SERS), and colorimetric systems—with emphasis on their working principles, performance characteristics, and implementation protocols for multiplexed biomarker detection.
Table 1: Comparison of Major Optical Biosensing Platforms
| Technology | Detection Mechanism | Sensitivity Range | Multiplexing Capability | Key Advantages | Common Recognition Elements |
|---|---|---|---|---|---|
| Fluorescence-Based | Emission light intensity/wavelength shift | Femtomolar to attomolar [26] | High (with spectral coding) [27] | High sensitivity, well-established protocols | Antibodies, oligonucleotides, aptamers |
| SPR/LSPR | Refractive index change at metal-dielectric interface | NM/RIU [28] | Moderate (spatial/angular resolution) | Label-free, real-time kinetics | Antibodies, DNA, molecularly imprinted polymers |
| SERS | Raman signal enhancement via plasmonics | Single molecule [29] | High (spectral fingerprinting) | Rich molecular information, extreme sensitivity | Antibodies, aptamers, direct adsorption |
| Colorimetric | Visible color change | Nanomolar [26] | Moderate (spatial separation) | Simplicity, minimal instrumentation | Functionalized nanoparticles, enzymes |
Table 2: Nanomaterial Applications in Multiplexed Optical Biosensing
| Nanomaterial | Optical Properties | Role in Biosensing | Multiplexing Implementation |
|---|---|---|---|
| Quantum Dots (QDs) | Size-tunable emission, narrow bandwidth, high quantum yield [27] | Fluorescent labels | Simultaneous detection via different emission wavelengths with single excitation [27] |
| Gold Nanoparticles | Localized Surface Plasmon Resonance, extinction coefficients | Colorimetric probes, SERS substrates, quenching agents | Spatial patterning, spectral signature distinction |
| Silver Nanoparticles | Strong plasmonic enhancement, high scattering efficiency | SERS substrates, plasmonic enhancers | Multiplexed detection through encoding strategies |
| Upconverting Nanoparticles | Anti-Stokes emission, no autofluorescence | Background-free fluorescent labels | Multiple analyte tracking with minimal interference |
| Graphene | Quenching efficiency, high surface area | Fluorescence quencher, SPR enhancement | Platform for multiple probe immobilization |
Fluorescence-Based Biosensing Systems
Fluorescence-based biosensors represent one of the most sensitive and widely adopted platforms for biomarker detection, leveraging the emission properties of fluorophores to quantify biological interactions. These systems operate on the principle that specific molecular recognition events—such as antigen-antibody binding, nucleic acid hybridization, or enzyme-substrate interactions—produce measurable changes in fluorescence intensity, polarization, or lifetime.
Single Molecule Array (SIMOA)
SIMOA represents a significant advancement in fluorescence-based detection, achieving remarkable sensitivity through digital analyte counting. This technology utilizes paramagnetic beads coated with capture antibodies that are isolated into femtoliter-sized wells, effectively creating an array of individual reaction chambers [26].
Protocol: SIMOA for Protein Biomarker Detection
Materials: Paramagnetic beads conjugated with capture antibodies, detector antibodies conjugated with enzyme (typically β-galactosidase), fluorescent substrate (resorufin β-D-galactopyranoside), SIMOA disc with microwells, washing buffer, sample diluent.
Procedure:
- Sample Incubation: Mix 100 µL of sample or standard with antibody-conjugated paramagnetic beads. Incubate with shaking for 15-30 minutes to allow antigen-antibody complex formation [26].
- Detection Antibody Binding: Add enzyme-conjugated detection antibody and incubate for an additional 15-30 minutes, forming a sandwich immunoassay complex on bead surfaces.
- Bead Washing: Apply magnetic field to separate beads from unbound components, followed by two wash cycles to minimize background signal.
- Enzyme Substrate Addition: Resuspend beads in enzyme substrate solution containing resorufin β-D-galactopyranoside.
- Compartmentalization: Load bead suspension onto SIMOA disc containing >200,000 microwells, using oil to seal each well and ensure single-bead occupancy in most wells [26].
- Fluorescence Imaging: Capture fluorescence images of microwells after incubation. Beads associated with target molecules generate fluorescent products, appearing as bright spots.
- Data Analysis: Calculate biomarker concentration based on the ratio of positive (fluorescent) to total beads, compared against a standard curve.
FRET-Based Biosensing
Fluorescence Resonance Energy Transfer (FRET) biosensors utilize non-radiative energy transfer between donor and acceptor fluorophores when in close proximity (1-10 nm), enabling detection of molecular interactions, conformational changes, or enzymatic activity [26].
Figure 1: FRET Biosensing Principle
Protocol: FRET-Based Protease Activity Assay
Materials: FRET pair-labeled peptide substrate (donor: fluorescein, acceptor: quencher or Cy5), reaction buffer, microplate reader with temperature control, purified protease or cell lysate samples.
Procedure:
- Plate Preparation: Dilute FRET-labeled peptide substrate in reaction buffer to working concentration (typically 1-10 µM) and dispense 50 µL/well into black microplates.
- Baseline Measurement: Record initial fluorescence intensities for both donor and acceptor channels using appropriate excitation/emission filters.
- Reaction Initiation: Add 50 µL of protease sample or standard to each well, mix gently, and immediately begin kinetic measurements.
- Kinetic Monitoring: Continuously monitor fluorescence emission in both donor and acceptor channels at 1-5 minute intervals for 30-120 minutes, maintaining constant temperature.
- Data Processing: Calculate FRET efficiency as the ratio of acceptor emission intensity to donor emission intensity. Plot FRET efficiency versus time to determine protease activity.
- Validation: Include control wells without enzyme (background) and with known protease inhibitors (specificity control).
Surface Plasmon Resonance (SPR and LSPR) Systems
SPR and LSPR biosensors are label-free technologies that detect biomolecular interactions by monitoring changes in the local refractive index near a metal surface. While SPR relies on propagating surface plasmon polaritons along continuous metal films, LSPR utilizes confined electron oscillations in metallic nanostructures [30] [31].
Fundamental Principles and Sensitivity
SPR biosensing typically employs the Kretschmann configuration, where light incident through a prism undergoes total internal reflection, exciting surface plasmons at the gold film-solution interface. The resonance condition is highly sensitive to refractive index changes within the evanescent field (typically 100-200 nm penetration depth) [30]. The resonance condition is given by:
[ k{SPP} = \frac{\omega}{c} \cdot \sqrt{\frac{\varepsilon{metal} \cdot \varepsilon{diel}}{\varepsilon{metal} + \varepsilon_{diel}}} ]
where (k{SPP}) is the surface plasmon wave vector, (\omega) is the angular frequency of light, (c) is the speed of light, and (\varepsilon{metal}) and (\varepsilon_{diel}) are the dielectric constants of the metal and dielectric medium, respectively [30].
LSPR exhibits a shorter electromagnetic field decay length (~30 nm) compared to SPR, making it particularly sensitive to smaller molecules and binding events closer to the nanoparticle surface [30]. The sensitivity of LSPR sensors is defined as:
[ S = \frac{\Delta \lambda}{\Delta n} ]
where (\Delta \lambda) is the resonance wavelength shift and (\Delta n) is the change in refractive index, with units of nm/RIU (refractive index units) [28].
Table 3: Performance Enhancement Strategies for LSPR Biosensors
| Enhancement Strategy | Implementation Methods | Effect on Performance |
|---|---|---|
| Nanostructure Engineering | Nanostars, nanorods, nanocubes, nanorice | Increased local field enhancement, higher sensitivity [28] |
| Material Composition | Bimetallic nanoparticles, graphene coatings, metamaterials | Improved FOM, tailored optical properties [28] |
| Interface Modification | Chemical functionalization, hydrogel layers, spatial patterning | Enhanced biorecognition, reduced non-specific binding |
SPR Sensor Implementation Protocol
Protocol: SPR-Based Kinetic Analysis of Protein-Protein Interactions
Materials: SPR instrument with flow system, gold sensor chip, coupling reagents (EDC/NHS), ethanolamine, running buffer (HBS-EP: 10 mM HEPES, 150 mM NaCl, 3 mM EDTA, 0.005% surfactant P20, pH 7.4), ligand protein, analyte protein samples.
Procedure:
- System Preparation: Prime the SPR instrument with running buffer until a stable baseline is achieved. Maintain constant temperature (typically 25°C) throughout the experiment.
- Surface Functionalization:
- Activate the carboxymethylated dextran surface with a 7-minute injection of a 1:1 mixture of 0.4 M EDC and 0.1 M NHS.
- Dilute ligand protein in 10 mM sodium acetate buffer (pH 4.5-5.5, optimized for specific protein) and inject over activated surface for 5-10 minutes to achieve desired immobilization level.
- Block remaining activated esters with a 7-minute injection of 1 M ethanolamine-HCl (pH 8.5).
- Equilibration: Wash system with running buffer until stable baseline is reestablished.
- Kinetic Measurements:
- Inject analyte samples at various concentrations (typically spanning 0.1-10 × expected KD) for 2-5 minutes at constant flow rate (typically 30 µL/min).
- Monitor association phase during injection.
- Switch to running buffer and monitor dissociation phase for 5-15 minutes.
- Regenerate surface with brief pulse (30-60 seconds) of regeneration solution (e.g., 10 mM glycine-HCl, pH 2.0-3.0) between cycles.
- Data Analysis: Fit resulting sensorgrams globally to appropriate binding models (1:1 Langmuir, bivalent analyte, etc.) using instrument software to determine association rate (ka), dissociation rate (kd), and equilibrium dissociation constant (KD = kd/ka).
Figure 2: SPR Kinetic Analysis Workflow
Surface-Enhanced Raman Scattering (SERS) Biosensors
SERS biosensors leverage the enormous Raman signal enhancement (typically 10⁶-10⁸, up to single-molecule detection) that occurs when molecules are adsorbed onto plasmonic nanostructures, primarily gold and silver nanoparticles [29]. The enhancement arises from both electromagnetic (localized plasmon resonance) and chemical (charge transfer) mechanisms.
SERS Substrate Fabrication and Signal Enhancement
Effective SERS biosensing requires optimized substrates that provide reproducible and uniform enhancement. Common approaches include colloidal nanoparticles, immobilized nanostructures, and patterned plasmonic arrays. The design of "hot spots"—nanoscale gaps between metallic structures where electromagnetic enhancement is maximal—is crucial for achieving maximum sensitivity [29].
Protocol: SERS-Based Multiplexed DNA Detection
Materials: Gold nanoparticles (60 nm diameter), thiol-modified DNA capture probes, Raman reporter molecules (e.g., malachite green, cyanine dyes), target DNA sequences, quartz substrate, Raman spectrometer.
Procedure:
- SERS Nanoprobe Preparation:
- Functionalize gold nanoparticles with thiolated DNA capture probes via incubating overnight in phosphate buffer (pH 7.4) with gentle shaking.
- Add Raman reporter molecules (10⁻⁶ M final concentration) and incubate for 2 hours to allow adsorption onto gold surface.
- Purify functionalized nanoparticles by centrifugation (3000 rpm, 10 minutes) and resuspend in assay buffer.
- Assay Assembly:
- Mix 50 µL of SERS nanoprobes with 50 µL of target DNA samples.
- Incubate at 37°C for 60 minutes to allow hybridization.
- For solid-phase detection, immobilize capture probes on patterned substrate and then add mixture of SERS nanoprobes and sample.
- Signal Detection:
- Aliquot 10 µL of assay mixture onto aluminum-coated slide or quartz substrate.
- Acquire Raman spectra using 785 nm laser excitation (to minimize fluorescence background) with 5-10 second integration time.
- Collect multiple spectra from different spots for statistical analysis.
- Data Analysis:
- Identify characteristic Raman peaks for each reporter molecule.
- Generate calibration curves by plotting peak intensity versus analyte concentration.
- For multiplex detection, deconvolute composite spectra using characteristic peaks of each reporter.
- SERS Nanoprobe Preparation:
Colorimetric Biosensing Systems
Colorimetric biosensors translate molecular recognition events into visible color changes detectable by simple instrumentation or even visual inspection. These systems are particularly valuable for point-of-care applications due to their simplicity and low cost [26].
Gold Nanoparticle Aggregation Assays
Gold nanoparticles exhibit intense surface plasmon resonance absorption and characteristic color (ruby red for ~20 nm particles) that depends on their size, shape, and interparticle distance. Target-induced aggregation leads to interparticle plasmon coupling and color shift from red to blue [26].
Protocol: Gold Nanoparticle-Based Protein Detection
Materials: Citrate-stabilized gold nanoparticles (20 nm diameter), phosphate buffer (pH 8.0-9.0), specific antibodies or recognition elements, target protein, 96-well plate, plate reader.
Procedure:
- Nanoparticle Functionalization:
- Adjust pH of gold nanoparticle solution to slightly basic (pH 8.0-9.0) using low-salt buffer.
- Add specific antibodies or other recognition elements (optimized concentration typically 5-20 µg/mL) and incubate for 30 minutes with gentle mixing.
- Block remaining surface with BSA or other blocking agent (1% solution, 30 minutes).
- Centrifuge and resuspend in stabilization buffer containing surfactants.
- Assay Execution:
- Dispense 50 µL of functionalized gold nanoparticles into wells of 96-well plate.
- Add 50 µL of sample or standard containing target protein.
- Incubate for 10-20 minutes at room temperature.
- For aggregation-based detection, add salt solution (e.g., NaCl) to critical concentration that induces controlled aggregation.
- Signal Measurement:
- Measure absorbance at 520 nm (dispersed nanoparticles) and 620-650 nm (aggregated nanoparticles) using plate reader.
- Calculate ratio of absorbance at longer wavelength to shorter wavelength (A650/A520) as aggregation index.
- Alternatively, capture digital images of wells and analyze RGB values using image processing software.
- Quantification:
- Generate standard curve by plotting aggregation index versus protein concentration.
- Determine unknown concentrations from standard curve.
- Nanoparticle Functionalization:
The Scientist's Toolkit: Essential Research Reagents
Table 4: Key Research Reagent Solutions for Optical Biosensing
| Reagent Category | Specific Examples | Function in Biosensing | Application Notes |
|---|---|---|---|
| Plasmonic Nanoparticles | Gold nanospheres (20-100 nm), gold nanorods, silver nanocubes | Transducers for LSPR, SERS, colorimetric detection | Size, shape, and composition tune plasmon resonance [28] |
| Fluorescent Labels | Quantum dots (CdSe/ZnS, PbS), organic dyes (FITC, Cy3, Cy5), upconverting nanoparticles | Signal generation in fluorescence assays | QDs offer narrow emission for multiplexing [27] |
| Surface Chemistry Reagents | Alkanethiols, silanes, EDC/NHS, biotin-streptavidin | Sensor surface functionalization and bioreceptor immobilization | Critical for minimizing non-specific binding |
| Recognition Elements | Monoclonal antibodies, single-chain variable fragments, aptamers, molecularly imprinted polymers | Target capture with high specificity and affinity | Affinity and stability determine sensor performance |
| Signal Amplification Systems | Enzyme-polymer conjugates, catalytic nanomaterials, hybridization chain reaction components | Enhance detection sensitivity | Particularly valuable for low-abundance biomarkers |
| Microfluidic Components | PDMS chips, dry-film photoresists, surface modification reagents | Sample processing and fluid handling | Enable automation and multiplexed analysis [1] [19] |
Optical biosensors incorporating fluorescence, SPR/LSPR, SERS, and colorimetric detection schemes provide powerful platforms for multiplexed biomarker analysis in research and diagnostic applications. Each technology offers distinct advantages in sensitivity, multiplexing capability, instrumentation requirements, and implementation complexity. The continuing advancement of nanomaterial engineering, surface chemistry, and microfluidic integration is addressing current challenges in reproducibility, stability, and clinical translation. Emerging trends include the development of multimodal sensing platforms, integration with artificial intelligence for data analysis, and creation of wearable biosensors for continuous monitoring [1]. As these technologies mature, they hold significant promise for advancing personalized medicine through comprehensive biomarker profiling capabilities.
Electrochemical and Electrochemiluminescence (ECL) Multiplex Platforms
Electrochemical and electrochemiluminescence (ECL) multiplex platforms represent a transformative advancement in biosensing technology, enabling the simultaneous quantification of multiple disease biomarkers from a single, low-volume sample [32]. These platforms synergistically combine the exceptional sensitivity and low background of ECL with the precise spatial and temporal control afforded by electrochemistry [33] [34]. The capacity to detect multiple analytes concurrently offers significant advantages for diagnostic accuracy, as it mitigates the risk of misdiagnosis associated with single-marker tests and provides a more comprehensive pathophysiological profile [32] [34]. Such capabilities are particularly crucial for precision medicine, personalized health assessment, and the development of portable medical devices [33]. This document details the core principles, experimental protocols, and key applications of these multiplex platforms to support their implementation in research and diagnostic development.
Core Multiplexing Strategies and Principles
Multiplexed ECL detection is primarily achieved through three distinct strategies: spatial resolution, potential resolution, and spectral resolution. Each strategy offers unique mechanisms for discriminating between different analytes in a mixture.
Spatial-Resolved Strategy
The spatial-resolved strategy employs physically separated detection areas, each functionalized with a specific capture probe, to simultaneously quantify different targets. The ECL signal from each discrete region is generated and collected independently [34].
- Principle: This approach utilizes an array of working electrodes, a single shared counter electrode, and a single reference electrode. Each working electrode is modified with a distinct biorecognition element (e.g., an antibody or DNA probe) specific to a target analyte. During detection, a uniform potential is applied, generating ECL signals at each electrode proportional to the local concentration of its target. The signals are typically collected using a non-array detector, such as a photomultiplier tube (PMT), with the spatial origin of the light identifying the analyte [34].
- Platform Example: A prominent example is the spatially resolved ECL immunoassay (SR-ECLIA), which can host up to 50 individual immunoassay spots on a single screen-printed carbon electrode (SPCE) with a 4 mm diameter. This design significantly boosts analytical reliability and multiplexing capabilities for point-of-care applications [32].
Potential-Resolved Strategy
Potential-resolved ECL enables the simultaneous detection of multiple targets within a single working zone by using ECL luminophores that emit light at distinct, characteristic applied potentials [33] [34].
- Principle: Different ECL luminophores require different activation energies (potentials) to generate an optical signal. By applying a sweeping potential to a single working electrode modified with multiple luminophores, their respective ECL signals can be triggered sequentially. The resulting ECL peaks are resolved in the potential domain, with each peak's position and intensity identifying and quantifying a specific analyte [33].
- Luminophore Systems: This strategy often employs inorganic complexes (e.g., ruthenium (Ru) and iridium (Ir) complexes) or nanomaterials that exhibit well-separated oxidation/reduction potentials. For instance, a mixture of Ru(II) and Ir(III) complexes can produce two distinct ECL signals during a single potential sweep [33]. This capability is particularly promising for developing self-calibrating assays and simplified multiplexed detection systems [33].
Spectrum-Resolved Strategy
The spectrum-resolved strategy discriminates between multiple targets based on the distinct emission wavelengths (colors) of different ECL luminophores [34].
- Principle: Multiple ECL probes, such as quantum dots (QDs) of different sizes or metal complexes with different ligands, are used as labels. These probes are co-localized on a single electrode but possess different emission maxima, from visible to near-infrared. The composite ECL signal is collected and then spectrally decomposed using filters or a spectrometer, allowing simultaneous detection of all targets from a single applied potential [34].
- Probe Requirements: Successful implementation requires ECL probes with narrow and well-resolved emission spectra to minimize optical crosstalk. CdTe or CdSe QDs are commonly used due to their size-tunable, monochromatic ECL emission [34].
Table 1: Comparison of Core ECL Multiplexing Strategies
| Strategy | Discrimination Basis | Key Advantage | Common Luminophores/Probes | Typical Platform Configuration |
|---|---|---|---|---|
| Spatial-Resolved | Physical location of the ECL signal | Simplicity; avoids spectral or potential crosstalk | [Ru(bpy)₃]²⁺, Luminol | Electrode arrays, patterned single electrodes [32] [34] |
| Potential-Resolved | Applied potential triggering the ECL signal | Uses a single working electrode; enables self-calibration | Ru(II)/Ir(III) complexes, specific nanomaterials | Single working electrode with mixed luminophores [33] [34] |
| Spectrum-Resolved | Emission wavelength of the ECL signal | Single-potential excitation for all targets | Multicolor Quantum Dots (CdSe, CdTe) | Single working electrode with multi-color luminophores [34] |
Detailed Experimental Protocols
Protocol 1: Multiplexed Detection via a Spatially Resolved ECL Immunoassay
This protocol outlines the procedure for simultaneously quantifying multiple protein biomarkers (e.g., for cardiac or traumatic brain injury applications) using a spatially resolved ECL immunoassay on a single screen-printed carbon electrode (SPCE) [32].
Materials and Reagents
- Capture Antibodies: Monoclonal antibodies for each target biomarker (e.g., anti-GFAP, anti-H-FABP, anti-S100b for mTBI).
- Detection Antibodies: Monoclonal antibodies for each biomarker, distinct from the capture antibodies.
- ECL Luminophore: Ruthenium-complex label, such as [Ru(bpy)₃]²⁺-NHS ester, for conjugating to detection antibodies.
- Assay Buffer: 0.1 M phosphate buffer saline (PBS), pH 7.4, containing 0.1% BSA.
- Washing Buffer: PBS with 0.05% Tween 20.
- ECL Coreactant Buffer: 0.1 M phosphate buffer (pH 8.5) containing 0.1 M tripropylamine (TPrA).
- Platform Components:
- Disposable SPCE.
- Microfluidic cartridge (e.g., 3D printed) to handle reagents and sample.
- ECL read-out device with a photodetector (e.g., PMT or CCD camera) [32].
Step-by-Step Procedure
Electrode Patterning and Functionalization:
- Using a non-contact microdispenser, spot individual capture antibody solutions (≈ 0.5-1 µL per spot, 0.1-1 mg/mL in PBS) onto predefined locations on the SPCE surface. For a 4 mm diameter electrode, up to 50 spots, including replicates for each biomarker, can be patterned.
- Incubate the electrode for 1 hour at 37°C in a humidified chamber to allow antibody adsorption.
- Wash the electrode three times with washing buffer to remove unbound antibodies.
- Block non-specific binding sites by incubating with a blocking solution (e.g., 1% BSA in PBS) for 1 hour at room temperature. Wash again.
Sample Incubation and Immunocomplex Formation:
- Introduce the sample (e.g., human plasma, serum, or BALF; 10-100 µL volume) onto the functionalized electrode surface housed within the microfluidic cartridge.
- Incubate for 30-60 minutes at 37°C with gentle agitation to facilitate antigen-antibody binding.
- Wash thoroughly with washing buffer to remove unbound antigens and matrix components.
Detection Antibody Incubation:
- Introduce a cocktail of detection antibodies, each conjugated with the [Ru(bpy)₃]²⁺ ECL label, into the cartridge.
- Incubate for 30-60 minutes at 37°C to form a sandwich immunocomplex on the respective capture spots.
- Perform a final stringent wash to remove any unbound detection antibodies.
ECL Measurement and Data Acquisition:
- Fill the cartridge's electrochemical cell with the coreactant buffer containing TPrA.
- Apply a pulsed DC potential of ~1.0 V (vs. a pseudo-reference in the SPCE) using the ECL reader.
- Capture the emitted light using a CCD camera. The ECL image will show a spatially resolved pattern of light spots.
- Quantify the intensity of each spot using dedicated image analysis software. The intensity is proportional to the concentration of the corresponding biomarker in the sample [32].
Data Analysis
- Generate a standard curve for each biomarker by plotting the ECL intensity of its spots against the known concentration of a serial dilution of the purified antigen.
- Use these calibration curves to interpolate the concentrations of the biomarkers in unknown samples.
- The lower limit of detection (LOD) for this method is typically in the low picogram per milliliter (pg mL⁻¹) range [32].
Protocol 2: Multiplexed Detection via a Potential-Resolved ECL System
This protocol describes a methodology for the simultaneous detection of two distinct analytes using a potential-resolved ECL system on a single working electrode, leveraging luminophores with different triggering potentials [33] [34].
Materials and Reagents
- ECL Luminophores: A pair of ECL probes with sufficiently separated oxidation potentials, such as functionalized graphitic-carbon nitride (g-C₃N₄) nanosheets and a Ru-based complex (e.g., Ru-NH₂) [34].
- Capture Probes: Aptamers or antibodies specific to the target analytes.
- Assay and Washing Buffers: As described in Protocol 3.1.1.
- Coreactant: Potassium persulfate (K₂S₂O₈) in neutral buffer.
Step-by-Step Procedure
Electrode Modification with Mixed Luminophores:
- Co-immobilize the two recognition elements (e.g., antibodies or aptamers) and their respective ECL labels onto the surface of a single working electrode (e.g., glassy carbon electrode). This can be achieved through covalent coupling or layer-by-layer assembly.
- For example, incubate the electrode with a mixture of the two bioconjugates: Ab₁-g-C₃N₄ and Ab₂-Ru-NH₂.
- Block with BSA and wash thoroughly.
Sample Incubation:
- Incubate the modified electrode with the sample containing the target analytes for a set time (e.g., 40 minutes) to form the immunocomplex on the electrode surface.
- Wash to remove unbound material.
Potential-Resolved ECL Measurement:
- Place the electrode in an electrochemical cell containing a coreactant solution suitable for both luminophores (e.g., 0.1 M PBS with K₂S₂O₈).
- Using a potentiostat, apply a linear sweep or stepwise increasing potential from a low initial potential (e.g., -1.5 V) to a higher final potential (e.g., +1.2 V vs. Ag/AgCl).
- Simultaneously, record the ECL intensity as a function of the applied potential (ECL-potential spectrum).
Data Analysis
- The resulting ECL-potential profile will show two distinct peaks. The first peak at a more negative potential corresponds to the g-C₃N₄ label and analyte 1, while the second peak at a more positive potential corresponds to the Ru-based label and analyte 2 [34].
- The intensity of each peak is quantified and correlated to the concentration of its respective analyte via separate calibration curves.
The logical workflow for developing and executing these multiplex ECL assays is summarized below.
The Scientist's Toolkit: Essential Reagents and Materials
Successful implementation of ECL multiplex platforms relies on a core set of reagents and materials. The following table details these essential components and their functions.
Table 2: Key Research Reagent Solutions for ECL Multiplex Platforms
| Category/Item | Specific Examples | Function/Purpose | Key Characteristics |
|---|---|---|---|
| ECL Luminophores | |||
| ∙ Inorganic Complexes | [Ru(bpy)₃]²⁺, Iridium(III) complexes | Primary ECL light emitter; conjugated to detection antibodies [33] [35] | High ECL efficiency, stability in aqueous media [33] |
| ∙ Organic Molecules | Luminol, L-012 | ECL emitter in peroxidase-driven systems [35] | Low oxidation potential, easy functionalization [35] |
| ∙ Nanomaterials | Quantum Dots (CdSe, CdTe), carbon dots, g-C₃N₄ nanosheets | ECL nanoemitters for potential-/spectrum-resolved strategies [33] [35] | Size-tunable emission, high stability against photobleaching [35] |
| Coreactants | Tripropylamine (TPrA), Potassium Persulfate (K₂S₂O₈), Hydrogen Peroxide (H₂O₂) | Electrochemically generated radical intermediates that react with luminophores to produce excited states [35] | TPrA is standard for Ru(bpy)₃²⁺; H₂O₂ is used with luminol [35] |
| Biological Reagents | |||
| ∙ Capture Molecules | Monoclonal Antibodies, Aptamers | Immobilized on electrode to specifically bind target analyte | High specificity and affinity |
| ∙ Detection Molecules | Monoclonal/Polyclonal Antibodies | Bind captured analyte; conjugated to ECL luminophore | Must recognize a different epitope than capture antibody |
| Assay Buffers | Phosphate Buffered Saline (PBS), Borate Buffer | Provide optimal pH and ionic strength for immunoreactions | Typically pH 7.4 for incubation |
| Washing Buffers | PBS with Tween 20 | Remove non-specifically bound material to reduce background | Low concentration of surfactant (e.g., 0.05%) |
| Platform Components | |||
| ∙ Electrodes | Screen-printed Carbon Electrodes (SPCE), ITO, Gold | Transduction element; provides surface for biorecognition and ECL generation [36] [32] | SPCEs are low-cost and disposable [32] |
| ∙ Magnetic Beads | Streptavidin-functionalized magnetic beads | Solid support for capture antibodies in bead-based assays; enables separation and concentration [35] | Beads are captured on electrode by magnet for ECL readout [35] |
Performance Metrics and Validation
Rigorous validation is critical to ensure the reliability of any multiplex platform for research or clinical use. Key performance metrics must be established.
Table 3: Key Performance Metrics for ECL Multiplex Platforms
| Performance Metric | Description | Typical Benchmark/Value |
|---|---|---|
| Limit of Detection (LOD) | The lowest analyte concentration that can be reliably distinguished from zero. | Low pg mL⁻¹ range (e.g., 1-30 pg mL⁻¹) for sensitive immunoassays [32] |
| Dynamic Range | The range of analyte concentrations over which the sensor response is linear and quantifiable. | 3-4 orders of magnitude (e.g., from LOD to 10,000 pg/mL) [37] |
| Intra-Assay Precision (CV%) | The reproducibility of replicate measurements within a single assay run. | Human plasma: <5% CV for platforms like MSD [37] |
| Inter-Assay Precision (CV%) | The reproducibility of measurements across different assay runs, plates, or days. | Human plasma: Can be <10% CV [37] |
| Spike Recovery | The percentage of a known amount of analyte added to a real sample that is measured by the assay. | Ideally 80-120% [37] |
| Cross-Reactivity | The degree to which the assay for one analyte generates a signal from a non-target analyte. | Should be negligible (<1%) for a high-quality multiplex assay |
A standardized validation protocol should include: 1) Determining intra- and inter-assay coefficients of variation (CV%) using a minimum of 10 patient or animal-derived samples; 2) Performing spike and recovery tests in the relevant biological matrix (e.g., plasma, BALF); and 3) Conducting cross-platform comparisons where feasible [37]. It is important to note that CV% is often more variable at lower protein concentrations, and assay performance can vary significantly between sample types (e.g., human plasma vs. mouse BALF) [37].
The development of multiplex biosensors for the simultaneous detection of multiple biomarkers represents a frontier in medical diagnostics, enabling more comprehensive disease profiling and rapid patient stratification. A significant challenge in this field is achieving high sensitivity and specificity for multiple analytes within a single, miniaturized device. The integration of advanced nanomaterials directly addresses this challenge by providing powerful signal enhancement mechanisms. Noble metal nanoparticles, quantum dots, and magnetic nanoparticles (MNPs) have emerged as particularly versatile tools for this purpose [38] [39] [40]. Their unique physicochemical properties—including superior catalytic activity, tunable optical characteristics, and magnetic manipulability—can be harnessed to significantly amplify the detection signals in electrochemical, optical, and magnetic biosensing platforms [41] [42] [40]. This document provides detailed application notes and experimental protocols for the integration of these nanomaterials, framed within the context of advancing multiplex biosensor research for simultaneous biomarker detection.
Nanomaterial Properties and Selection Guide
The strategic selection of nanomaterials is paramount to biosensor performance. The following table summarizes the key properties of the three primary nanomaterial classes discussed in these application notes.
Table 1: Properties and Signal Enhancement Mechanisms of Key Nanomaterials
| Nanomaterial Class | Core Material Examples | Key Properties for Biosensing | Primary Enhancement Mechanism | Compatible Transduction Methods |
|---|---|---|---|---|
| Noble Metals | Gold (Au), Silver (Ag), Platinum (Pt) [43] [40] | Excellent electrical conductivity (e.g., Au: 0.452x10⁶ S/cm, Ag: 0.63x10⁶ S/cm) [44], Surface Plasmon Resonance (SPR), catalytic activity, biocompatibility [42] [40] | Electron wiring, catalysis of reactions, surface enhancement (SPR, SERS) [42] [40] | Electrochemical (Amperometric, Voltametric), Optical (SPR, Colorimetric, SERS) [40] |
| Quantum Dots (QDs) | CdSe, CdTe, PbS [39] | Size-tunable photoluminescence, high quantum yield, broad absorption with narrow emission spectra [39] | Fluorescent labeling and signal amplification via intense, stable emission [39] | Optical (Fluorescence, Photoelectrochemical) [39] |
| Magnetic Nanoparticles (MNPs) | Iron Oxides (Fe₃O₄), Cobalt ferrite [41] [45] | Superparamagnetism, high surface area-to-volume ratio, magnetic enrichment capability, low toxicity [41] [45] | Sample concentration/separation, reduction of matrix effects, amplification of magnetic signals [41] [45] | Magnetic, Electrochemical, Optical (when functionalized) [41] [45] |
Application Notes and Protocols
Noble Metal Nanoparticles for Electrochemical and Optical Enhancement
Application Note: Noble metal nanoparticles (NPs), particularly gold and platinum, are extensively used to enhance signal transduction. Their high electrical conductivity facilitates electron transfer in electrochemical sensors, while their strong plasmonic properties enable sensitive optical detection [42] [40]. In multiplexed configurations, different noble metal NPs (e.g., spherical Au, Ag, Pt) can be functionalized with distinct biorecognition elements and integrated onto a single electrode or chip.
Protocol 1: Fabrication of a Gold Nanowire Array (AuNWA) Electrochemical Biosensor for Glucose Detection [40]
- Objective: To create a highly sensitive enzymatic biosensor for glucose quantification using AuNWA for signal amplification.
Materials:
- Template membrane (e.g., anodized aluminum oxide)
- Gold electroplating solution
- Glucose Oxidase (GOx) enzyme
- Phosphate Buffered Saline (PBS), pH 7.4
- Glutaraldehyde or other cross-linking agents
- Potentiostat/Galvanostat
Procedure:
- AuNWA Synthesis: Place the template membrane onto a conductive substrate. Perform electrodeposition of gold into the nanopores of the membrane using a standard gold plating solution. Dissolve the template membrane to release the freestanding AuNWA.
- Electrode Modification: Transfer and immobilize the AuNWA onto the surface of a glassy carbon or gold working electrode.
- Enzyme Immobilization: Prepare a solution of GOx in PBS. Apply the enzyme solution to the AuNWA-modified electrode. Use a cross-linking agent like glutaraldehyde to covalently bind the enzyme to the nanostructured surface. Rinse thoroughly with PBS to remove unbound enzyme.
- Amperometric Detection: Place the functionalized biosensor in an electrochemical cell with a standard three-electrode setup. Apply a constant potential suitable for the oxidation of H₂O₂ (+0.6 V to +0.7 V vs. Ag/AgCl). Upon successive additions of glucose standard solutions, record the change in current. The enzymatic reaction produces H₂O₂, which is oxidized at the AuNWA surface, generating a current proportional to the glucose concentration [40].
Visualization:
Diagram 1: Workflow for AuNWA biosensor fabrication and detection.
Magnetic Nanoparticles for Sample Preparation and Signal Amplification
Application Note: Magnetic nanoparticles (MNPs) are indispensable for point-of-care testing (POCT) due to their ability to isolate and concentrate target analytes from complex biological matrices like blood, serum, or saliva [41] [45]. This enrichment step significantly improves the sensitivity and reliability of multiplex biosensors by reducing background interference.
Protocol 2: MNP-based Capture and Detection of a Cardiac Biomarker [41] [45]
- Objective: To isolate and detect cardiac troponin I (cTnI) from human serum using antibody-functionalized MNPs.
Materials:
- Carboxyl- or amine-functionalized magnetic nanoparticles (e.g., 30 nm diameter)
- Anti-cTnI monoclonal antibodies
- EDC/NHS crosslinking chemistry reagents
- Blocking buffer (e.g., 1% BSA in PBS)
- Human serum samples
- Magnetic separation rack
- Detection system (e.g., fluorescence reader, electrochemical sensor)
Procedure:
- MNP Functionalization: Activate the carboxyl groups on the MNPs using a mixture of EDC and NHS. Incubate the activated MNPs with the anti-cTnI antibody to form a stable amide bond. Block any remaining active sites with BSA to prevent non-specific binding.
- Sample Incubation and Capture: Mix the antibody-conjugated MNPs with the human serum sample. Incubate with gentle agitation for 15-20 minutes to allow the cTnI antigens to bind to the antibodies on the MNPs.
- Magnetic Separation: Place the tube in a magnetic separation rack for 2-5 minutes. The MNP-cTnI complexes will be pulled to the side of the tube. Carefully aspirate and discard the supernatant containing the sample matrix.
- Washing: Resuspend the pelleted MNPs in washing buffer and repeat the magnetic separation step 2-3 times to remove any unbound substances.
- Detection: The purified MNP-cTnI complex can be detected in multiple ways:
Visualization:
Diagram 2: MNP-based capture and detection workflow for a cardiac biomarker.
Integration for Multiplexed Detection
Application Note: A true multiplex biosensor combines different nanomaterials on a single platform. For example, a single device could use MNPs for universal sample cleanup and concentration, while different quantum dots or noble metal NPs, each with a unique optical signature or redox potential, are used to tag and detect different biomarkers simultaneously [39] [46].
Protocol 3: Conceptual Framework for a Multiplexed Electrochemical Immunosensor
- Objective: To simultaneously detect three distinct biomarkers (e.g., cTnI, C-reactive protein, and Procalcitonin) on a single electrode.
- Materials:
- Screen-printed electrode with three distinct working electrodes.
- MNP-antibody conjugates for all three targets (for pre-concentration).
- Three different noble metal nanoparticle tags (e.g., Pt NP, Au NP, Ag NP) conjugated to secondary antibodies.
- Procedure:
- Sample Pre-concentration: Incubate the sample with a mixture of the three MNP-antibody conjugates. Use a magnet to isolate and wash the complexes, as in Protocol 2.
- Sandwich Assay: Incubate the isolated complexes with a mixture of the three noble metal NP-antibody conjugates to form sandwich complexes (MNP-Ab1:Biomarker:Ab2-NP).
- Magnetic Deposition: Use a magnet to capture the sandwich complexes onto the surface of the respective working electrodes of the sensor.
- Multiplexed Readout: Perform square-wave voltammetry. Each metal nanoparticle (Pt, Au, Ag) will produce a distinct and well-separated voltammetric peak when dissolved, allowing for the simultaneous quantification of all three biomarkers based on their respective peak currents [40].
The Scientist's Toolkit: Research Reagent Solutions
Table 2: Essential Materials for Nanomaterial-Enhanced Biosensing
| Reagent/Material | Function | Example Application |
|---|---|---|
| Gold Nanowire/NP Arrays | High-surface-area electrode material; enhances electron transfer and enzyme loading [40]. | Amperometric glucose sensing [40]. |
| Antibody-Functionalized MNPs | Target capture, isolation, and concentration from complex samples [41] [45]. | Pre-concentration of cardiac troponin from serum [41] [45]. |
| EDC/NHS Crosslinker Kit | Standard chemistry for covalent conjugation of biomolecules (e.g., antibodies) to nanomaterial surfaces [42]. | Immobilizing antibodies on carboxylated MNPs or noble metal NPs. |
| Quantum Dots with Streptavidin | Highly fluorescent labels for bioassays; streptavidin-biotin interaction provides versatile binding [39]. | Multiplexed optical detection of nucleic acids or proteins. |
| Platinum Nanoparticles (Pt NPs) | Electrocatalytic labels; catalyze reactions (e.g., H₂O₂ reduction) to amplify electrochemical signals [40]. | Signal amplification in immunosensors and nucleic acid sensors. |
| Microfluidic Chip | Provides miniaturized fluid control, enabling automation and integration of multi-step assays [41]. | Point-of-care multiplex biosensing platforms. |
Microfluidic and Lab-on-a-Chip Designs for Automated Multiplex Analysis
Automated multiplex analysis represents a paradigm shift in biosensing, enabling the simultaneous quantification of multiple biomarkers from a single, minute sample volume. Lab-on-a-Chip (LOC) and microfluidic technologies are at the forefront of this shift, offering unparalleled capabilities for miniaturization, integration, and automation of complex laboratory functions [47]. Within the broader context of multiplex biosensor research for simultaneous biomarker detection, these designs address a critical need: translating the vast potential of biomarker panels into practical, robust, and user-friendly diagnostic tools. The ability to perform multiplexed analyses in an automated "sample-in-answer-out" format is crucial for advancing personalized medicine, drug discovery, and point-of-care testing [1] [48]. This document provides detailed application notes and protocols for key microfluidic platforms, focusing on their operational principles, fabrication, and implementation for automated multiplex analysis.
Application Notes: Key Platforms and Performance
Controllable Enzyme Assembly for Broad-Range Multiplex Immunoassays
This platform utilizes controlled enzyme assembly via click chemistry to dynamically tune the sensitivity of immunoassays, allowing for the simultaneous quantification of biomarkers with vastly different physiological concentrations.
Principle: Horseradish peroxidase (HRP) enzymes are controllably assembled onto detection antibodies using click chemistry. The number of enzymes per antibody directly amplifies the detection signal, enabling the assay's detection range to be tuned for specific biomarkers [49].
Key Applications: Simultaneous quantification of clinically relevant inflammatory biomarkers (e.g., Interleukin-6 (IL-6), Procalcitonin (PCT), and C-reactive Protein (CRP)) in serum [49].
Performance Data: Table 1: Performance metrics of the controllable enzyme assembly LOC for inflammatory biomarkers.
| Biomarker | Limit of Detection (LOD) | Dynamic Range | Assay Time |
|---|---|---|---|
| Interleukin-6 (IL-6) | 0.47 pg mL⁻¹ | pg mL⁻¹ to μg mL⁻¹ | Multiplexed analysis in a single run [49] |
| Procalcitonin (PCT) | 2.6 pg mL⁻¹ | pg mL⁻¹ to μg mL⁻¹ | Multiplexed analysis in a single run [49] |
| C-reactive Protein (CRP) | 40 ng mL⁻¹ | pg mL⁻¹ to μg mL⁻¹ | Multiplexed analysis in a single run [49] |
Integrated Microfluidic Chip for Pathogen Serotyping
This design exemplifies a fully integrated system for molecular diagnostics, combining sample processing with downstream colorimetric detection for rapid pathogen identification.
Principle: The chip integrates modules for sample loading, cell lysis, RNA extraction, and reverse transcription-PCR (RT-PCR). A downstream detection module uses a multi-channel design with pre-loaded cyanine dye for colorimetric readout. Positive samples induce a color change from blue to violet, enabling rapid serotype discrimination [50].
Key Applications: On-field identification and serotyping of dengue virus (DENV-1 to DENV-4) [50].
Performance Data: Table 2: Characteristics of the integrated microfluidic chip for dengue serotyping.
| Parameter | Specification |
|---|---|
| Detection Principle | Colorimetric (cyanine dye; blue to violet) |
| Chip Architecture | 6-channel bi-assay design |
| Key Feature | Simultaneous fluidic manipulation from a single actuation source; integrated membranes for color contrast |
| Readout Method | Visual or smartphone-based color analysis [50] |
Structural Colour-Enhanced OM Microfluidics
Organized Microfibrillation (OM) microfluidics presents a novel fabrication method that creates self-enclosed, porous microfluidic devices with intrinsic sensing capability through structural colour.
Principle: A photosensitive polymer film is exposed to monochromatic light through a shadow mask. Subsequent development creates self-enclosed channels with an internal, periodic porous-nonporous substructure. This structure not only drives capillary flow but also produces structural colour, the properties of which are directly coupled to the internal pore size and flow dynamics [51].
Key Applications: Pore-size based separation of biomolecular mixtures; in-situ sensing where flow properties are visualized as a colorimetric value [51].
Performance Data: Table 3: Characteristics of Structural Colour-Enhanced OM Microfluidics.
| Parameter | Specification |
|---|---|
| Fabrication Method | Organized Microfibrillation (OM) with shadow mask or micro-LED |
| Key Advantage | Self-enclosed channels; no bonding required |
| Feature Size | Down to 5 μm |
| Sensing Modality | Intrinsic structural colour correlated with pore size and flow speed [51] |
| Flow Mechanism | Capillary action; flow speed dependent on porosity, not channel geometry [51] |
Detailed Experimental Protocols
Protocol 1: Multiplexed Immunoassay on a LOC with Tunable Detection Range
This protocol details the procedure for performing a multiplexed immunoassay for inflammatory biomarkers using the controllable enzyme assembly strategy [49].
I. Materials and Reagents
- LOC Device: Fabricated chip with patterned microchannels for parallel assays.
- Antibodies: Capture antibodies immobilized on distinct regions of the chip; detection antibodies conjugated with click chemistry handles.
- Enzyme Assemblies: Horseradish peroxidase (HRP) constructs of varying sizes, pre-assembled via click chemistry.
- Sample: Human serum sample containing target biomarkers (IL-6, PCT, CRP).
- Assay Buffers: Washing buffer (e.g., PBS with Tween), blocking buffer (e.g., BSA in PBS).
- Substrate: Chromogenic or chemiluminescent substrate for HRP (e.g., TMB).
- Detection Instrument: Microplate reader or integrated optical detector.
II. Procedure
- Chip Preparation:
- Condition the channels with washing buffer.
- Apply blocking buffer to passivate non-specific binding sites. Incubate for 1 hour at room temperature and wash.
Sample Incubation:
- Introduce the serum sample into the chip's sample inlet.
- Allow the sample to flow through and incubate within the reaction chambers containing the immobilized capture antibodies for 1-2 hours. Biomarkers are captured onto the surface.
Detection Probe Incubation:
- Flush the chip with washing buffer to remove unbound sample.
- Introduce the solution of detection antibodies conjugated with click chemistry handles. Incubate for 1 hour to form the antibody-biomarker-capture antibody sandwich. Wash thoroughly.
Signal Amplification via Enzyme Assembly:
- Introduce the pre-formed HRP assemblies. The click chemistry handle on the detection antibody will specifically bind to the complementary handle on the HRP assembly. The size/number of the HRP assembly used is predetermined based on the target biomarker's expected concentration.
- Incubate for 45-60 minutes. Wash stringently to remove any unbound enzyme assemblies.
Signal Detection and Readout:
- Introduce the HRP substrate into the chip.
- Incubate in the dark for 15-30 minutes for color/light development.
- Measure the resulting signal (color intensity or luminescence) using the detector. The signal intensity is proportional to the biomarker concentration.
III. Data Analysis
- Generate standard curves for each biomarker using known concentrations of calibration standards run on the same chip platform.
- Correlate the measured signal intensity from the sample with the standard curve to determine the concentration of each biomarker in the serum sample.
Protocol 2: DNA Microarray Hybridization on a LOC for Multiplexed Pathogen Detection
This protocol describes a rapid, automated DNA microarray hybridization process on a LOC device for identifying bacterial species and antibiotic resistance genes [52].
I. Materials and Reagents
- LOC Device: Fraunhofer in vitro diagnostics (ivD) platform or equivalent, integrating a DNA microarray chip and fluidic control.
- Target DNA: Amplified and fragmented DNA sample (e.g., from Staphylococcus aureus).
- Hybridization Buffer: Standard saline-sodium citrate (SSC) buffer with Denhardt's solution and SDS.
- Washing Buffers: Solutions of varying stringency (e.g., 2x SSC, 0.1x SSC).
- Detection Reagents: Fluorescently labeled streptavidin (if using biotin-labeled targets).
- Microarray Scanner: Device for fluorescence readout of the microarray.
II. Procedure
- Sample Preparation (Lab-based):
- Extract genomic DNA from the bacterial sample.
- Amplify target genes (e.g., nuc for S. aureus identification, mecA for methicillin resistance) via PCR using biotin-labeled primers.
Chip Loading and Hybridization:
- Denature the amplified PCR product at 95°C for 5 minutes and immediately cool on ice.
- Mix the denatured DNA with an appropriate volume of pre-heated hybridization buffer.
- Load the mixture into the sample chamber of the LOC device.
- Initiate the automated protocol. The device controls the fluidics to drive the sample over the DNA microarray surface.
- Hybridization is performed at a defined temperature (e.g., 45°C) for less than 10 minutes [52].
Washing and Stringency Control:
- The device automatically flushes the microarray with a series of washing buffers of decreasing ionic strength to remove non-specifically bound DNA.
Signal Detection and Readout:
- If using biotin-labeled DNA, a solution of fluorescent streptavidin is introduced and incubated.
- After a final wash, the microarray is dried and scanned using a fluorescence scanner.
- Specific hybridization is indicated by fluorescent spots at the corresponding probe locations.
III. Data Analysis
- Microarray scanner software converts fluorescence into digital data.
- The presence or absence of specific genes is determined by comparing signal intensities to established thresholds and control spots.
Visualization of Workflows
Multiplexed LOC Immunoassay Workflow
DNA Microarray LOC Hybridization Workflow
The Scientist's Toolkit: Research Reagent Solutions
Table 4: Essential materials and reagents for microfluidic multiplex analysis.
| Item | Function/Description | Example Application |
|---|---|---|
| Polydimethylsiloxane (PDMS) | Silicone-based elastomer; optically transparent, gas-permeable, and easily molded for rapid chip prototyping [47]. | Organ-on-a-chip models, general microfluidics [47]. |
| Screen-Printed Electrodes (SPE) | Disposable, mass-producible electrodes (working, reference, counter) for electrochemical detection integrated into chips [53]. | Electrochemical biosensors for bacterial detection [53]. |
| Click Chemistry Reagents | Bio-orthogonal reactions (e.g., copper-catalyzed azide-alkyne cycloaddition) for controlled, covalent assembly of biomolecules and enzymes [49]. | Tuning detection range in multiplex immunoassays [49]. |
| Photoresists (e.g., SU-8) | Light-sensitive polymers used in photolithography to create high-resolution master molds for soft lithography [47]. | Fabricating microfluidic channel molds [47]. |
| Functional Nanomaterials | Gold nanoparticles (AuNPs), carbon nanotubes (CNTs), quantum dots (QDs); enhance signal transduction, improve immobilization, and increase sensitivity [1]. | Signal amplification in optical and electrochemical biosensors [1]. |
| DNA Microarrays | Patterned substrates with immobilized DNA probes for parallel hybridization of multiple genetic targets [52]. | Pathogen identification and antibiotic resistance genotyping [52]. |
Emerging CRISPR-Based and Synthetic Biology Approaches for Nucleic Acid Detection
The rapid and specific detection of nucleic acids is a cornerstone of modern molecular diagnostics, functional genomics, and pathogen surveillance. Traditional methods, while reliable, often face limitations in multiplexing capability, portability, and ease of use. The convergence of CRISPR-based diagnostics and synthetic biology has catalyzed a paradigm shift, enabling the development of highly programmable, sensitive, and field-deployable detection platforms [54]. These emerging technologies are particularly transformative for the development of multiplex biosensors capable of simultaneously detecting multiple biomarkers, a critical requirement for understanding complex diseases, identifying co-infections, and tracking viral variants [55]. This article details the core principles, provides standardized application protocols, and explores the integration of these tools into the next generation of diagnostic and research tools for simultaneous biomarker detection.
CRISPR-Based Nucleic Acid Detection Platforms
CRISPR-based detection harnesses the collateral activity of certain Cas enzymes upon recognition of a target nucleic acid sequence. This activity, when coupled with pre-amplification steps, enables ultra-sensitive detection suitable for clinical applications [56].
Core Mechanisms and Key Enzymes
The fundamental architecture of these systems involves a Cas nuclease complexed with a guide RNA that is complementary to a target nucleic acid sequence.
- Cas13 (Class VI, Type VI): This enzyme targets single-stranded RNA (ssRNA). Upon target recognition and subsequent cis-cleavage, its collateral RNase activity is activated, leading to the non-specific degradation of nearby reporter RNA molecules [56] [55].
- Cas12 (Class V, Type V): Cas12 targets double-stranded DNA (dsDNA). Similar to Cas13, its target-binding activates indiscriminate trans-cleavage of surrounding single-stranded DNA (ssDNA) [55]. This mechanism is exploited in platforms like SHERLOCK and DNA Endonuclease-Targeted CRISPR Trans Reporter (DETECTR).
Table 1: Key CRISPR Effectors for Nucleic Acid Detection
| CRISPR Enzyme | Target Nucleic Acid | Collateral Cleavage Substrate | Example Platforms |
|---|---|---|---|
| Cas13a (C2c2) | ssRNA | ssRNA | SHERLOCK |
| Cas12a (Cpf1) | dsDNA | ssDNA | DETECTR, HOLMES |
| Cas12b | dsDNA | ssDNA | - |
| Cas13b | ssRNA | ssRNA | - |
The following diagram illustrates the fundamental signaling pathway shared by Cas13 and Cas12 enzymes.
Quantitative Performance of Multiplexed Detection Platforms
Multiplexing is a key advantage of CRISPR-based systems. Advanced platforms have been engineered to detect numerous targets in a single reaction.
Table 2: Performance Comparison of Multiplex Nucleic Acid Detection Methods
| Platform | Turnaround Time (Hours) | Multiplexing Capacity (Targets) | Limit of Detection (copies/μL) | Key Features | References |
|---|---|---|---|---|---|
| SHERLOCKv2 | 0.75 - 2 | 4 | 1 - 10 | Fluorescence & colorimetric readouts; portable | [56] [55] |
| MiCaR | ~1 | 9 | 0.16 | High clinical sensitivity/specificity for HPV | [55] |
| mCARMEN | ~5 | 24 - 96 | 0.1 | High-throughput; combines CRISPR with microfluidics | [55] |
| LEOPARD | ~6 | 5 | 1.2 | Single-reaction multiplexing | [55] |
| RT-qPCR | 1 - 2 | ≤5 | 1 | Gold standard; requires specialized equipment | [55] |
| NGS (NovaSeq) | 24 - 96 | 50 - 1000+ | 30 - 500 | Unbiased; high multiplexing; high cost and complexity | [55] |
Application Notes & Protocols
Protocol: SHERLOCK for DNA/RNA Detection
The SHERLOCK (Specific High-sensitivity Enzymatic Reporter unLOCKing) platform exemplifies the integration of isothermal pre-amplification with CRISPR-Cas detection for sensitive, specific, and quantitative nucleic acid detection [56].
Experimental Workflow:
Detailed Methodology:
- Nucleic Acid Extraction (Optional but Recommended): Extract DNA or RNA from sample (e.g., serum, saliva) using standard commercial kits. SHERLOCK has also been demonstrated with direct sampling (extraction-free) for RNA, using 1 μL of input [55].
- Isothermal Pre-amplification (15-25 min):
- For DNA Targets: Use Recombinase Polymerase Amplification (RPA). Prepare a 50 μL RPA reaction mix according to the manufacturer's instructions, using primers designed for the target sequence. Incubate at 37-42°C for 15-25 minutes.
- For RNA Targets: Use Reverse Transcription-RPA (RT-RPA). The reaction includes reverse transcriptase for the initial cDNA synthesis, followed by RPA amplification.
- CRISPR Detection Reaction (30-60 min):
- Prepare the detection mix in a total volume of 20-25 μL containing:
- Cas enzyme: 100-200 nM of Cas13a (for RNA) or Cas12a (for DNA).
- crRNA: 20-40 nM of CRISPR RNA designed against the target amplicon.
- Reporter molecule: 1-2 μM of fluorescent-quencher (FQ) labeled ssRNA reporter (for Cas13) or ssDNA reporter (for Cas12).
- Buffer: An appropriate reaction buffer (e.g., NEBuffer 2.1).
- Add 2-5 μL of the pre-amplification product to the detection mix.
- Incubate at 37°C for 30-60 minutes. Protect from light if using a fluorescent readout.
- Prepare the detection mix in a total volume of 20-25 μL containing:
- Result Readout (<5 min):
- Fluorescence: Measure fluorescence intensity using a plate reader, portable fluorometer, or other suitable device. A significant increase in fluorescence over a no-template control indicates a positive detection.
- Lateral Flow: For a visual, equipment-free readout, use a lateral flow dipstick. The reaction can be designed so that cleavage products are detected as a visible band on the strip.
Troubleshooting Notes:
- Low Signal: Ensure crRNA is designed to target the amplicon efficiently. Verify the activity of the RPA/RPA and Cas enzymes. Optimize the ratio of the pre-amplification product to the detection mix.
- High Background: Reduce the concentration of the reporter molecule. Ensure reagents are not contaminated with nucleases. Include a no-template control (NTC) in every run.
The Scientist's Toolkit: Essential Research Reagents
Table 3: Key Research Reagent Solutions for CRISPR-Based Detection
| Reagent / Material | Function / Role | Example & Notes |
|---|---|---|
| Cas Enzymes | Core effector proteins that provide programmable recognition and collateral cleavage. | Cas12a (Cpf1), Cas13a (C2c2). Commercially available from suppliers like IDT and NEB. |
| crRNA | Provides target specificity by guiding the Cas enzyme to the complementary nucleic acid sequence. | Custom-designed synthetic RNA; critical for specificity and minimizing off-target effects. |
| Fluorescent Reporters | ssRNA or ssDNA molecules that, upon collateral cleavage, produce a detectable signal. | e.g., FAM-Quencher labeled oligonucleotides. Stable at room temperature. |
| Isothermal Amplification Kits | Enables rapid, exponential amplification of target sequences without thermal cycling. | RPA (TwistAmp) kits are commonly used for SHERLOCK. |
| Lateral Flow Dipsticks | Provide a simple, visual, and equipment-free readout for point-of-care applications. | e.g., Milenia HybriDetect strips. |
| Microfluidic Chips | Miniaturized platforms for integrating sample prep, amplification, and detection; enable high-throughput multiplexing. | Used in platforms like mCARMEN [55]. |
Synthetic Biology-Enabled Whole-Cell Biosensors
Synthetic biology offers a complementary approach by engineering living cells to function as programmable biosensors. These whole-cell biosensors (WCBs) harness natural or engineered cellular pathways to detect target analytes and convert this recognition into a quantifiable output [57] [58].
Design Principles and Genetic Circuitry
The core architecture of a WCB consists of a sensing element, a genetic circuit for signal processing, and a reporting element for output generation.
Key Components:
- Sensing Elements: Typically, transcription factors (TFs) or riboswitches that undergo a conformational change upon binding the target analyte. For example, the MerR TF is used for mercury detection, and the ArsR TF is used for arsenic [59] [58].
- Reporting Elements: Genes encoding easily detectable proteins. Common reporters include Green Fluorescent Protein (GFP) for fluorescence, bacterial luciferase (LuxAB) for bioluminescence, and enzymes like β-galactosidase (LacZ) for colorimetric changes [59].
- Signal Processing: More advanced WCBs incorporate genetic logic gates (AND, OR) to perform complex computations. This allows for multiplexed detection, where a signal is only generated when multiple biomarkers are present, enhancing specificity for complex diagnostics [60] [57].
Protocol: Engineering a Whole-Cell Biosensor for a Small Molecule
This protocol outlines the creation of a bacterial biosensor for a specific small molecule, such as a heavy metal or metabolite.
Detailed Methodology:
- Identify and Clone the Sensing Element:
- Identify a transcription factor (TF) and its corresponding inducible promoter that responds to your target analyte from databases or literature (e.g., MerR/pMer for Hg²⁺).
- Clone the inducible promoter upstream of a multiple cloning site (MCS) in a plasmid vector. If the TF is not constitutively expressed in your chassis, also clone its gene under a constitutive promoter in the same or a compatible plasmid.
- Clone the Reporting Element:
- Insert a reporter gene (e.g., gfp, lacZ) into the MCS, placing it under the control of the inducible promoter.
- Transform the constructed plasmid(s) into the chassis cell (e.g., E. coli).
- Characterization and Calibration:
- Grow the engineered biosensor cells to mid-log phase.
- Expose the cells to a range of known concentrations of the target analyte in a multi-well plate, including a negative control (no analyte).
- Incubate for a defined period (e.g., 2-4 hours) to allow for gene expression.
- Measure the output signal (e.g., fluorescence with a plate reader, absorbance for colorimetric assays).
- Plot the dose-response curve (signal vs. analyte concentration) to determine the dynamic range, sensitivity, and limit of detection of the biosensor.
Troubleshooting Notes:
- High Background/Leakiness: Use a promoter with lower basal expression. Tune the system by modifying the ribosome binding site (RBS) strength or the copy number of the plasmid.
- Low Signal/Response: Ensure the TF is expressed and functional. Optimize growth and induction conditions (temperature, medium, induction time). Consider using a stronger promoter or a more sensitive reporter.
CRISPR-based methods and synthetic biology approaches are no longer nascent technologies but are rapidly maturing into powerful, versatile platforms for nucleic acid and biomarker detection. CRISPR systems, with their high sensitivity and specificity, are ideal for developing rapid, multiplexed in vitro diagnostics [56] [55]. In parallel, synthetic biology-enabled whole-cell biosensors offer a unique ability to detect non-nucleic acid targets, such as metabolites and environmental contaminants, in a low-cost and portable format [57] [58]. The future of this field lies in the deeper integration of these platforms with microfluidics for automated "sample-to-answer" systems [1], nanomaterials for enhanced signal transduction [1], and artificial intelligence for robust data analysis and interpretation [61] [1]. As these technologies continue to evolve, they hold immense promise for advancing multiplex biosensor research, ultimately enabling more precise diagnostics, personalized medicine, and comprehensive environmental monitoring.
Overcoming Technical Hurdles: Sensor Design, Specificity, and Clinical Implementation
Strategies to Minimize Cross-Reactivity and Signal Interference
The simultaneous detection of multiple biomarkers, or multiplexing, is a powerful advancement in biosensing that increases the information density from a single assay while reducing sample volume, cost, and time [62] [63]. However, the performance of multiplex biosensors is critically dependent on their ability to minimize cross-reactivity and signal interference. Cross-reactivity occurs when a biorecognition element (e.g., an antibody or aptamer) binds to non-target molecules, leading to false-positive results [64] [65]. Signal interference arises when components of the sample or assay matrix alter the signal output, compromising sensitivity and accuracy [64] [65]. These challenges are magnified in complex biological samples and can undermine the reliability of diagnostic data. This document outlines key challenges and provides detailed, actionable protocols to mitigate these issues, ensuring the generation of robust and reliable data for researchers and drug development professionals.
Key Challenges in Multiplex Assays
Understanding the fundamental challenges is the first step toward developing effective mitigation strategies. The table below summarizes the core problems and their impacts on assay performance.
Table 1: Core Challenges in Multiplex Biosensor Assays
| Challenge | Description | Impact on Assay Performance |
|---|---|---|
| Cross-Reactivity | Capture/detection antibodies bind to non-target antigens or structurally similar molecules [64] [65]. | Reduced specificity, false positives, overestimation of analyte concentration [64] [65]. |
| Signal Interference | Assay components, readout measures, or the sample itself obscure target detection [64]. | Compromised sensitivity and accuracy, higher limit of detection [64]. |
| Matrix Effects | Complex biological samples (e.g., serum, plasma) cause non-specific binding or alter signal transduction [65]. | High background noise, low signal-to-noise ratio, poor reproducibility. |
| Limited Dynamic Range | The wide concentration range of different analytes complicates their simultaneous detection [64]. | Inaccurate quantification of both high- and low-abundance biomarkers [64]. |
Experimental Protocols for Minimizing Interference
Protocol 1: Strategic Bioreceptor Selection and Validation
Principle: The careful selection and rigorous validation of biorecognition elements are the most effective strategies to ensure assay specificity and minimize cross-reactivity [64] [65].
Materials:
- Bioreceptors: Monoclonal antibodies (mAbs), polyclonal antibodies (pAbs), aptamers, Molecularly Imprinted Polymers (MIPs).
- Validation Tools: Western Blot apparatus, reference standards for target and related off-target analytes, surface plasmon resonance (SPR) or biolayer interferometry (BLI) systems.
Procedure:
- Initial Selection:
- Prefer monoclonal antibodies (mAbs) for the capture antibody to establish high assay specificity, as they recognize a single epitope [65].
- Polyclonal antibodies (pAbs) can be used as detection reagents for signal amplification due to their ability to bind multiple epitopes, but they require more stringent validation to check for cross-reactivity [65].
- Consider aptamers or MIPs as alternatives. Aptamers offer animal-free production, ease of modification, and adjustable binding affinity, while MIPs provide superior chemical and thermal stability [66].
Cross-Reactivity Validation:
- Test all antibody candidates against a panel of closely related proteins (e.g., protein isoforms, precursors, and proteins co-expressed in the target disease) [65].
- Use techniques like Western Blotting to confirm that the antibody produces a single band at the expected molecular weight. A study found that only 531 out of 11,000 antibodies passed this test, highlighting the pervasiveness of cross-reactivity [65].
- For aptamers, validate specificity under the assay's specific environmental conditions (pH, ionic concentration), as they are sensitive to these factors [66].
Immobilization and Spacer Arms:
- When immobilizing bioreceptors on a sensor surface, introduce a spacer arm (e.g., polyethylene glycol - PEG) between the surface and the bioreceptor. This improves orientation and accessibility to the target, reducing steric hindrance and non-specific binding [63].
Diagram 1: Bioreceptor selection and validation workflow. Key steps for ensuring specificity are highlighted.
Protocol 2: Assay Condition Optimization to Minimize Interference
Principle: Optimizing physical and chemical assay conditions can favor specific high-affinity interactions while suppressing low-affinity, non-specific binding [65].
Materials:
- Assay Buffers: Selection of blocking buffers (e.g., BSA, casein, commercial proprietary blockers), detergents (e.g., Tween-20), and salts.
- Platform: Microfluidic flow-through system (e.g., Gyrolab) or standard well-plate setup with washing capabilities.
Procedure:
- Blocking Agent Screening:
- Test a variety of blocking agents to find the most effective one for your specific sample matrix. The optimal blocker saturates non-specific binding sites on the sensor surface without interfering with specific molecular recognition.
Reduction of Contact Time:
- Molecular interactions causing interference are a function of affinity, concentration, and exposure time. Low-affinity interference can be minimized by reducing the contact time between the sample and the bioreceptors [65].
- Implement this using flow-through microfluidic systems. In these devices, samples and reagents are passed over the sensing surface in a continuous or sequential flow, favoring the specific, high-affinity binding of the target to the immobilized bioreceptor while washing away weakly bound, non-specific molecules [65].
Sample and Reagent Dilution:
- Dilute the sample in an appropriate buffer to reduce the concentration of interfering substances. This is the simplest and most common method to reduce matrix effects, though it also reduces sensitivity and must be optimized [65].
Protocol 3: Advanced Nanomaterials and Optical Readouts
Principle: Leveraging nanomaterials with unique optical properties can enhance signal-to-noise ratios, enabling highly sensitive and simultaneous detection of multiple biomarkers with minimal interference [63] [67].
Materials:
- Nanomaterials: Plasmonic nanoparticles (Gold, Silver), carbon-based nanoparticles, silica nanoparticles.
- Instrumentation: Fluorescence microscope, Raman spectrometer, UV-Vis spectrophotometer.
Procedure:
- Spatial Separation via Microarrays:
- Create a microarray by patterning different bioreceptors at spatially distinct locations on a functionalized substrate (e.g., a photonic crystal (PC) array or a gold film for SPR) [63] [68].
- This physical separation prevents crosstalk between different detection probes and allows for the simultaneous, label-free detection of multiple analytes [68].
Signal Enhancement with Nanomaterials:
- Metal-Enhanced Fluorescence (MEF): Immobilize capture antibodies near noble metal nanoparticles (e.g., silver or gold nanostars). The localized surface plasmon resonance (LSPR) of these nanoparticles creates a strong electromagnetic field that enhances the fluorescence intensity of nearby fluorophores, increasing sensitivity and photostability [63]. Critical: Control the distance between the fluorophore and the metal surface to be ~7–8 nm using a dielectric spacer (e.g., silica, DNA) to achieve enhancement; closer proximity can cause quenching [63].
- Surface-Enhanced Raman Scattering (SERS): Functionalize SERS-active substrates (e.g., aggregates of silver nanoparticles) with different bioreceptors. Each biomarker binding event generates a unique, fingerprint-like Raman signal that is dramatically amplified by the substrate, allowing for highly specific multiplexing with minimal background [63].
Wavelength Discrimination:
- For fluorescence-based multiplexing, use fluorophores with non-overlapping excitation/emission spectra. The distinct signals can be collected simultaneously by a single light source and discriminated using optical filters, enabling the parallel detection of several targets [68].
Diagram 2: Metal-enhanced fluorescence mechanism. The critical spacer distance prevents quenching and ensures signal enhancement.
The Scientist's Toolkit: Research Reagent Solutions
The following table lists key reagents and their functions for developing robust multiplex biosensors.
Table 2: Essential Research Reagents for Multiplex Biosensor Development
| Reagent / Material | Function / Application | Key Considerations |
|---|---|---|
| Monoclonal Antibodies (mAbs) | High-specificity capture agent; minimizes cross-reactivity by binding a single epitope [65]. | Requires rigorous validation; offers high specificity but potentially lower sensitivity than pAbs. |
| Aptamers | Nucleic acid-based recognition element; alternative to antibodies [66]. | Animal-free production, tunable affinity; sensitive to nuclease degradation and environmental conditions [66]. |
| Molecularly Imprinted Polymers (MIPs) | "Artificial antibodies"; synthetic polymers with high-stability recognition cavities [66]. | Excellent chemical/thermal stability; can suffer from limited selectivity for very similar molecules and reproducibility challenges [66]. |
| Blocking Buffers (e.g., BSA, Casein) | Reduces non-specific binding by saturating unused surface sites on the sensor. | Must be screened for compatibility with the specific sample matrix and detection method. |
| Plasmonic Nanoparticles (Au, Ag) | Enhances optical signals (MEF, SERS) for improved sensitivity and multiplexing [63] [67]. | Size, shape, and composition dictate optical properties; surface chemistry must be controlled for stable bioreceptor conjugation [63]. |
| Microfluidic Chips with Flow-Control | Minimizes matrix interference and non-specific binding by reducing sample/reagent contact time [65]. | Enables automation and miniaturization, reducing sample and reagent consumption. |
Troubleshooting Guide
Even with careful planning, issues can arise. This guide helps diagnose and correct common problems.
Table 3: Troubleshooting Cross-Reactivity and Signal Interference
| Problem | Potential Cause | Solution |
|---|---|---|
| High background signal across all channels | Inadequate blocking or high matrix interference. | Screen different blocking agents. Increase sample dilution or transition to a flow-through assay format to reduce contact time [65]. |
| False positive signal for a specific analyte | Cross-reactive bioreceptor. | Re-validate the offending antibody/aptamer against a panel of related proteins. Replace it with a more specific monoclonal antibody if available [64] [65]. |
| Low signal for a specific analyte | Signal interference from the matrix or steric hindrance. | Optimize the orientation and density of the immobilized bioreceptor. Introduce a spacer arm. Check for biomolecule fouling on the sensor surface [63]. |
| Inconsistent results between runs | High assay variability; inadequate quality controls. | Implement robust automation to minimize manual handling errors. Introduce internal controls and standardize sample processing protocols [64]. |
The successful development of multiplex biosensors hinges on a proactive and multi-faceted strategy to conquer cross-reactivity and signal interference. There is no single solution; rather, robustness is achieved through the strategic selection and validation of bioreceptors, meticulous optimization of assay conditions, and the intelligent application of advanced nanomaterials and microfluidic architectures. By adhering to the detailed protocols and utilizing the toolkit outlined in this document, researchers can significantly enhance the specificity, sensitivity, and reliability of their multiplex assays. This, in turn, accelerates the development of precise diagnostic tools for biomarker panels, ultimately advancing the fields of personalized medicine and drug development.
Biointerface Engineering and Bioreceptor Immobilization Techniques
The performance of multiplex biosensors for the simultaneous detection of disease biomarkers is critically dependent on the precise engineering of the biointerface. This specialized region, where biological recognition events are transduced into measurable signals, governs key analytical parameters such as sensitivity, specificity, and reproducibility. The controlled immobilization of bioreceptors—including antibodies, nucleic acids, and aptamers—onto transducer surfaces constitutes a fundamental aspect of biointerface engineering. In multiplexed configurations, where several distinct bioreceptors must function in parallel, achieving uniform and optimized immobilization for each recognition element becomes technologically challenging yet essential for reliable operation. This protocol details established and emerging methodologies for fabricating such biointerfaces, with particular emphasis on techniques compatible with multiplex biosensor platforms for parallel biomarker detection.
Bioreceptor Immobilization Techniques
The method of attaching bioreceptors to a sensor surface profoundly affects their orientation, stability, and accessibility to target analytes. The following section outlines primary immobilization strategies.
Covalent Immobilization
Covalent bonding provides a stable, often irreversible, attachment of bioreceptors to functionalized transducer surfaces.
- Protocol: Antibody Immobilization via Amine Coupling on Gold Surfaces
- Step 1: Surface Functionalization. Clean gold electrodes or SPR chips with oxygen plasma or piranha solution (Note: handle with extreme care). Incubate in a 1-10 mM solution of 11-mercaptoundecanoic acid (11-MUA) in ethanol for 12-18 hours to form a self-assembled monolayer (SAM) with terminal carboxyl groups [69].
- Step 2: Linker Attachment. Rinse with ethanol and water. Activate the carboxyl groups by immersing the substrate in a fresh aqueous solution containing 0.4 M EDC (1-Ethyl-3-(3-dimethylaminopropyl)carbodiimide) and 0.1 M NHS (N-Hydroxysuccinimide) for 15-30 minutes. This forms an amine-reactive NHS ester [69].
- Step 3: Bioreceptor Conjugation. Rinse thoroughly with the appropriate immobilization buffer (e.g., 10 mM acetate buffer, pH 5.0). Immediately incubate the activated surface with a solution of the antibody (typically 10-100 µg/mL in acetate buffer) for 30-60 minutes. The primary amines (lysine residues) on the antibody form stable amide bonds with the NHS ester.
- Step 4: Surface Blocking. Rinse with PBS to remove non-specifically bound antibodies. To deactivate any remaining active esters and block non-specific binding sites, incubate the surface with a blocking agent such as 1 M ethanolamine (pH 8.5) or 1% BSA for 15-30 minutes. A final rinse with PBS completes the process.
Affinity-Based Immobilization
This approach utilizes high-affinity biological interactions, such as biotin-streptavidin, for directed and often oriented immobilization.
- Protocol: Streptavidin-Biotin Immobilization for DNA Probes
- Step 1: Surface Streptavidin Coating. A surface (e.g., glass, gold, or carbon) is first functionalized to present streptavidin. This can be achieved by covalently immobilizing streptavidin onto an amino- or carboxyl-functionalized surface using EDC/NHS chemistry, or by adsorbing it onto a polystyrene or nitrocellulose substrate [70].
- Step 2: Biotinylated Bioreceptor Incubation. The biotinylated bioreceptor (e.g., DNA probe, biotinylated antibody) is diluted in a suitable binding buffer (e.g., PBS with 0.1% Tween 20). The streptavidin-coated surface is incubated with this solution for 15-60 minutes. The strong non-covalent interaction (K_d ≈ 10^{-15} M) between biotin and streptavidin leads to a highly stable complex.
- Step 3: Washing. The surface is rinsed thoroughly with the binding buffer and PBS to remove any unbound bioreceptor.
Physical Adsorption and Hydrogen Bonding
This simple method relies on non-specific physical interactions, such as hydrophobic forces, van der Waals interactions, or hydrogen bonding.
- Protocol: Hydrogen Bond-Mediated Antibody Immobilization
- Step 1: Surface Preparation with Hydrogen-Bond Acceptors. A gold electrode is modified with a monolayer of cysteamine (which presents primary amine groups) or other suitable linkers by incubation in a 1-10 mM aqueous solution for 1-2 hours [69].
- Step 2: Direct Bioreceptor Adsorption. The functionalized surface is rinsed and then incubated directly with a solution of the antibody. The hydrogen bonding groups (e.g., -OH, -COOH, -NH2) on the antibody's Fc region can form multiple hydrogen bonds with the amine-functionalized surface, leading to immobilization without additional coupling reagents [69].
- Step 3: Washing and Blocking. The surface is rinsed with a mild buffer to remove loosely bound molecules. Subsequent blocking with BSA or other proteins is recommended to minimize non-specific binding.
Table 1: Comparative Analysis of Bioreceptor Immobilization Techniques
| Immobilization Technique | Binding Chemistry | Orientation Control | Stability | Best Suited For | Key Advantage |
|---|---|---|---|---|---|
| Covalent (Amine Coupling) | Amide bond formation via EDC/NHS | Low | High | Antibodies, Enzymes | High stability, well-established protocol [69] |
| Affinity (Streptavidin-Biotin) | Non-covalent biological affinity | High | Very High | DNA, Biotinylated Antibodies | Excellent orientation, high stability [70] |
| Hydrogen Bonding | Multiple H-bonds with surface | Low | Moderate | Antibodies, Proteins | Simple, label-free, low-cost [69] |
| Physical Adsorption | Hydrophobic, van der Waals | None | Low | Cells, Proteins | Extremely simple, no surface modification |
| Entrapment (e.g., in Hydrogels) | Physical confinement in a polymer matrix | None | Moderate | Enzymes, Whole Cells | Maintains bioreceptor activity in a hydrated environment [71] |
The Scientist's Toolkit: Key Reagents for Biointerface Engineering
Table 2: Essential Research Reagents and Materials
| Reagent/Material | Function/Explanation | Example Use Case |
|---|---|---|
| EDC & NHS | Crosslinkers for activating carboxyl groups to form amine-reactive esters. | Covalent immobilization of antibodies on COOH-functionalized surfaces (e.g., SAMs on gold) [69]. |
| Sulfo-SMCC | A heterobifunctional crosslinker that reacts with amine and sulfhydryl groups. | Directed covalent coupling between an amine-functionalized surface and a thiolated antibody or aptamer. |
| 11-Mercaptoundecanoic acid | A thiolated molecule that forms a self-assembled monolayer (SAM) on gold with terminal carboxyl groups. | Creating a functional interface on gold electrodes or SPR chips for subsequent covalent immobilization [69]. |
| Cysteamine | A short-chain thiol that forms a SAM on gold with a terminal primary amine group. | Creating a surface for hydrogen bonding immobilization or as a foundation for further crosslinking [69]. |
| Streptavidin | A tetrameric protein that binds up to four biotin molecules with extremely high affinity. | Coating surfaces to capture and orient biotinylated DNA probes, antibodies, or other bioreceptors [70]. |
| Bovine Serum Albumin (BSA) | A neutral protein used as a blocking agent. | Occupying non-specific binding sites on the sensor surface after bioreceptor immobilization to reduce background noise. |
| Molecularly Imprinted Polymers | Synthetic polymers with tailor-made recognition sites for a specific analyte. | Creating synthetic, stable biorecognition elements for targets where biological receptors are unavailable or unstable [71]. |
Workflow for a Multiplexed Biosensor Biointerface
The following diagram illustrates the logical workflow for fabricating a biointerface for a multiplex biosensor, integrating the techniques described above.
Multiplex Biosensor Biointerface Fabrication Workflow. The process begins with substrate preparation, followed by parallel surface functionalization paths (A1-A3) that determine the subsequent bioreceptor immobilization method (B1-B3). After immobilization, a common workflow of blocking, analyte incubation, and signal readout is followed.
Experimental Protocol: Developing a Label-Free Electrochemical Immunosensor
This protocol details the creation of a label-free biosensor using hydrogen bonding for antibody immobilization and Differential Pulse Voltammetry (DPV) for detection, adapted from a study on HBV detection [69].
- Objective: To immobilize an antibody on a gold electrode via hydrogen bonding and detect a target antigen using DPV.
- Principle: The antibody is immobilized on an amine-functionalized gold surface via hydrogen bonding. Binding of the target antigen alters the electrochemical interface, leading to a measurable change in the DPV signal.
Materials:
- Gold working electrode, Pt counter electrode, Ag/AgCl reference electrode.
- Cysteamine hydrochloride (CT).
- Purified antibody against the target biomarker.
- Target antigen (e.g., HBV surface antigen).
- Phosphate Buffered Saline (PBS), pH 7.4.
- Human serum (for validation in complex media).
- Potentiostat.
Step-by-Step Procedure:
- Electrode Pretreatment: Clean the gold working electrode by cycling in 0.5 M H₂SO₄ or by polishing with alumina slurry, followed by sonication in ethanol and water. Dry under a stream of nitrogen.
- Surface Functionalization: Incubate the clean gold electrode in a 10 mM aqueous solution of cysteamine for 2 hours at room temperature to form a self-assembled monolayer. Rinse thoroughly with deionized water to remove physically adsorbed molecules.
- Antibody Immobilization: Incubate the cysteamine-modified electrode in a solution of the specific antibody (e.g., 50 µg/mL in PBS, pH 7.4) for 60 minutes. Rinse gently with PBS to remove unbound antibodies.
- Surface Blocking: Incubate the electrode in a 1% BSA solution in PBS for 30 minutes to block non-specific binding sites. Rinse with PBS.
- Antigen Detection & DPV Measurement:
- Prepare a baseline DVP measurement in a suitable redox probe solution (e.g., 5 mM [Fe(CN)₆]³⁻/⁴⁻ in PBS).
- Incubate the biosensor in a sample containing the target antigen for 20 minutes.
- Rinse the electrode and perform a second DPV measurement in the same redox probe solution.
- The binding of the target antigen insulates the electrode surface, causing a decrease in the Faradaic current. The change in peak current (∆I) is proportional to the antigen concentration.
Validation in Serum: For analysis in complex media like human serum, dilute the sample 1:10 in PBS. The protocol has demonstrated 100% recovery for HBV antigen in this medium [69].
- Performance Metrics: The described method can achieve a low limit of detection (e.g., 0.14 ng/mL) and preserve functionality for at least 7 days post-fabrication [69].
The strategic design of the biointerface is paramount for unlocking the full potential of multiplex biosensors in advanced diagnostic and research applications. The choice of immobilization technique—whether covalent, affinity-based, or through simpler hydrogen bonding—directly dictates the analytical performance and reliability of the sensor. The protocols and comparative data provided here serve as a foundation for researchers to engineer robust and sensitive biosensing interfaces. As the field progresses, the integration of these techniques with novel nanomaterials, microfluidics, and sophisticated data analysis will further enhance the capability to simultaneously track multiple biomarkers with high precision, thereby contributing significantly to personalized medicine and drug development.
Optimizing Nanomaterial Properties for Enhanced Sensitivity and Stability
Application Notes
The integration of functional nanomaterials is pivotal in advancing the performance of multiplex biosensors, directly enhancing key analytical figures of merit such as sensitivity, limit of detection (LOD), and stability [72] [73]. These improvements are foundational for developing robust point-of-care (POC) diagnostic tools capable of the simultaneous, or multiplexed, detection of several biomarkers from a single, small-volume sample [5]. This document details the quantitative performance gains achieved through nanomaterial optimization and provides standardized protocols for their implementation in biosensing platforms for researchers and drug development professionals.
The performance of a biosensor is quantified through specific analytical figures of merit, including sensitivity, selectivity, LOD, and reproducibility [73]. Nanomaterials enhance these parameters primarily by providing a large surface-to-volume ratio for increased bioreceptor immobilization, improving electron transfer kinetics in electrochemical sensors, and enabling signal amplification strategies [72] [74]. For instance, the use of single-walled carbon nanotubes (SWCNTs) and gold nanoparticles (AuNPs) has been shown to dramatically lower the LOD in DNA and immuno-sensing applications [75].
Table 1: Performance of Selected Nanomaterial-Based Biosensing Platforms for Biomarker Detection.
| Nanomaterial Platform | Target Analyte | Detection Limit | Key Performance Metric | Reference Application |
|---|---|---|---|---|
| Semi-Distributed Interferometer (Optical Fiber) | Vascular Endothelial Growth Factor (VEGF) | 26.6 fg/mL | Label-free detection in artificial tear fluid | Diabetic retinopathy biomarker detection [76] |
| Semi-Distributed Interferometer (Optical Fiber) | Lipocalin 1 | 5.98 ng/mL | Label-free detection under dynamic flow | Diabetic retinopathy biomarker detection [76] |
| Gold Nanoparticle-amplified DNA Sensor | DNA | 10 fM | Signal amplification vs. 0.5 nM without AuNPs | Nucleic acid detection [73] |
| Microfluidic Bead-based Immunosensor (with AuNPs) | α-fetoprotein | 50-fold improvement in LOD | Signal amplification from large surface area | Clinical cancer biomarker detection [73] |
| Dual-Nanoparticle (Nanorod/Spherical) SPR Sensor | Thrombin | 0.1 aM | 10-fold improvement over single-particle methods | Protein detection [73] |
| Printed Photonic Crystal (PC) Biochip | Inflammatory Biomarkers | High sensitivity (specific LOD not stated) | Rapid detection (10 min), low cost (<$0.41 per chip) | Point-of-care testing in body fluids [77] |
Beyond the data in Table 1, the stability of biosensors is significantly improved by employing nanomaterials that facilitate stable immobilization of bioreceptors. For example, functionalized multi-walled carbon nanotubes (f-MWCNTs) enable covalent bonding with antibody amino groups, leading to more robust sensing interfaces [75]. Furthermore, the application of machine learning (ML) for analyzing complex sensing data is an emerging strategy to enhance effective sensitivity and selectivity by reducing noise and identifying latent patterns in multiplexed signals [72].
The following workflow diagram illustrates the logical progression for developing and optimizing a nanomaterial-based multiplex biosensor, from material selection to data analysis.
Experimental Protocols
Protocol A: Functionalization of Optical Fiber Biosensors for Multiplex Biomarker Detection
This protocol details the procedure for creating a label-free, multiplexed optical fiber biosensor, based on the work of Seipetdenova et al. (2025), for the simultaneous detection of biomarkers such as VEGF and Lipocalin 1 in artificial tear fluid [76]. The core of this method is the functionalization of a semi-distributed interferometric sensor with specific antibodies.
- Primary Goal: To functionalize optical fiber sensors for specific, label-free, and multiplexed detection of protein biomarkers.
- Sample Requirements: Artificial tear fluid or similar biofluid for assay validation.
- Experimental Workflow: The entire process, from sensor preparation to detection, is summarized in the following workflow.
Materials:
- Semi-distributed interferometric optical fiber sensors [76].
- Bioreceptors: Purified monoclonal or polyclonal antibodies against target biomarkers (e.g., anti-VEGF, anti-Lipocalin 1).
- Chemical Reagents:
- (3-Aminopropyl)triethoxysilane (APTES) or similar silane for surface silanization.
- Phosphate Buffered Saline (PBS), pH 7.4.
- Bovine Serum Albumin (BSA).
- Glutaraldehyde or EDC/NHS for cross-linking.
- Analyte Solutions: Prepared in artificial tear fluid at known concentrations for calibration [76].
Procedure:
- Sensor Preparation and Selection:
- Fabricate the semi-distributed interferometric sensors on the optical fiber [76].
- Select sensors with high sensitivity and consistent performance for further functionalization.
- Surface Activation:
- Clean the sensor surface with oxygen plasma or piranha solution (Note: handle with extreme care).
- Perform vapor-phase or solution-phase silanization with APTES to introduce amine groups onto the sensor surface.
- Antibody Immobilization:
- Incubate the silanized sensors with a cross-linker (e.g., glutaraldehyde).
- Wash thoroughly to remove unbound cross-linker.
- Immobilize the specific antibodies by incubating the sensors in a solution of the antibodies (e.g., 50-100 µg/mL in PBS) for 2 hours at room temperature or overnight at 4°C.
- Blocking:
- Incubate the sensor with a 1-3% BSA solution in PBS for 1 hour to block any remaining non-specific binding sites on the sensor surface.
- Assay and Detection:
- Mount the biosensor in a flow cell system to simulate dynamic tear flow conditions [76].
- Introduce the sample (e.g., artificial tear fluid spiked with biomarkers) over the sensor surface.
- Monitor the interferometric signal change in real-time using a suitable interrogator. The binding of biomarkers to their antibodies alters the local refractive index, causing a measurable shift in the interference pattern.
- Quantify the analyte concentration by correlating the signal shift with a calibration curve generated from standards of known concentration.
Protocol B: Enhancing Electrochemical Biosensor Performance with Nanocomposites
This protocol describes a general method for modifying a transducer surface with carbon nanotube-based nanocomposites to significantly improve the sensitivity and stability of electrochemical biosensors [75]. This platform can be adapted for various bioreceptors, including enzymes, antibodies, and aptamers.
- Primary Goal: To fabricate a high-sensitivity electrochemical biosensor by modifying the electrode with a carbon nanotube-polymer nanocomposite.
- Sample Requirements: Buffer or processed real samples (e.g., serum, urine).
- Experimental Workflow: The key steps for preparing the enhanced electrode are outlined below.
Materials:
- Electrodes: Glassy Carbon Electrode (GCE), screen-printed carbon electrodes (SPCEs), or gold electrodes.
- Nanomaterials: Single-walled or multi-walled carbon nanotubes (SWCNTs/MWCNTs). A nanocomposite such as SWCNT-Polypyrrole can also be pre-formed [75].
- Chemical Reagents:
- N,N-Dimethylformamide (DMF) or suitable solvent for dispersing CNTs.
- Polyethylenimine (PEI) or other polymers for wrapping and stabilizing CNTs [75].
- EDC and NHS for covalent immobilization of bioreceptors.
- PBS, pH 7.4.
- Bioreceptors: Specific to the target analyte (e.g., glucose oxidase, anti-carcinoembryonic antigen antibody, DNA aptamer).
Procedure:
- Electrode Preparation:
- Polish the GCE with alumina slurry (e.g., 0.05 µm) to a mirror finish. Rinse thoroughly with deionized water and dry. For SPCEs, a simple rinse may suffice.
- Nanocomposite Modification:
- Prepare a stable dispersion of CNTs (e.g., 1 mg/mL) in DMF with sonication. Alternatively, prepare a SWCNT-Polypyrrole composite as described in the literature [75].
- Deposit a precise volume (e.g., 5-10 µL) of the nanocomposite dispersion onto the active surface of the clean electrode.
- Allow the solvent to evaporate at room temperature, forming a uniform film.
- Bioreceptor Immobilization:
- Activate the nanocomposite-modified electrode for covalent bonding. If the composite contains carboxylic groups, incubate with a solution of EDC/NHS for 30 minutes.
- Incubate the activated electrode with a solution of the bioreceptor (e.g., antibody, enzyme) for 1-2 hours.
- Rinse the electrode to remove physically adsorbed molecules and block with BSA if necessary.
- Electrochemical Detection:
- Use techniques such as Differential Pulse Voltammetry (DPV) or Electrochemical Impedance Spectroscopy (EIS) for detection.
- Record the electrochemical signal (e.g., current for DPV, charge transfer resistance for EIS) in a buffer solution to establish a baseline.
- Incubate the biosensor with the sample containing the target analyte and measure the signal again. The change in signal is proportional to the analyte concentration.
The Scientist's Toolkit: Essential Research Reagent Solutions
Table 2: Key reagents and materials for nanomaterial-based biosensor development.
| Reagent/Material | Function/Application | Specific Example |
|---|---|---|
| Single-Walled Carbon Nanotubes (SWCNTs) | Electrode scaffold; enhances electron transfer and surface area for bioreceptor immobilization [75]. | Used in electrochemical impedance DNA sensors for increased probe loading and lower LOD [75]. |
| Gold Nanoparticles (AuNPs) | Signal amplification tag; provides large surface area for enzyme or label binding in optical and electrochemical sensors [73]. | Used in dual-amplification strategies for SPR sensors and for signal enhancement in microfluidic immunosensors [73]. |
| Functionalized MWCNTs (f-MWCNTs) | Stable immobilization support; surface oxygen groups allow covalent bonding to bioreceptors [75]. | Covalent attachment of antibodies for immunosensors [75]. |
| Core-Shell Latex Nanospheres | Self-assembling photonic crystal (PC) material for signal enhancement in optical biosensors [77]. | Printed PC biochips for fluorescent-based point-of-care testing [77]. |
| Specific Bioreceptors (Antibodies, Aptamers) | Molecular recognition element that provides selectivity for the target biomarker [78]. | Antibodies against VEGF and Lipocalin 1 for diabetic retinopathy detection [76]. |
| Cross-linking Chemicals (EDC, NHS, Glutaraldehyde) | Facilitates covalent immobilization of bioreceptors onto nanomaterial surfaces [74] [75]. | Creating amide bonds between antibody amine groups and carboxylic-functionalized nanomaterials. |
| Blocking Agents (BSA, Casein) | Reduces non-specific binding by occupying non-functionalized sites on the sensor surface [76]. | Standard step after bioreceptor immobilization to improve assay selectivity. |
Addressing Matrix Effects in Complex Biological Samples like Serum and Blood
Matrix effects pose a significant challenge in the development and deployment of biosensors for clinical diagnostics, particularly when performing multiplexed detection of biomarkers in complex biological samples such as serum, plasma, and whole blood [79] [80]. These effects arise from the complex composition of biological fluids, which can contain proteins, lipids, salts, and other endogenous compounds that interfere with analyte detection, leading to signal suppression or enhancement and ultimately reducing assay accuracy, sensitivity, and reproducibility [81] [82]. For multiplex biosensor platforms aimed at simultaneous biomarker detection, matrix effects can be particularly problematic as they may affect different analytes inconsistently, compromising the reliability of the entire panel [83]. This application note systematically evaluates matrix effects across various sample types and presents detailed protocols for assessing and mitigating these interferences, enabling more robust and reliable biosensor performance in complex biological matrices.
Understanding and Assessing Matrix Effects
Matrix effects in complex biological samples primarily occur when interfering compounds co-elute or interact with the target analyte during the detection process, leading to ionization suppression or enhancement in mass spectrometry-based methods [81] [82], or nonspecific binding and signal interference in optical and electrochemical biosensors [79] [80]. In cell-free biosensing systems, clinical samples have demonstrated strong inhibitory effects on reporter production, with serum and plasma causing >98% inhibition, urine >90% inhibition, and saliva 40-70% inhibition depending on the reporter system used [79]. These interferences stem from various sources, including:
- Enzymatic Activity: RNases and proteases present in biological samples can degrade critical biosensor components [79]
- Nonspecific Binding: Proteins and phospholipids adsorb to sensor surfaces, reducing binding sites and altering sensor response [80]
- Ionic Interference: Varying salt concentrations affect electrochemical properties and reaction kinetics [81]
- Optical Interference: Hemolysis in blood samples increases background absorbance in colorimetric assays [84]
- Surface Fouling: Biofouling on sensor surfaces diminishes sensitivity and specificity over time [80]
Quantitative Assessment of Matrix Effects
The first step in addressing matrix effects is their systematic evaluation. The following table summarizes common assessment methods and their applications:
Table 1: Methods for Assessing Matrix Effects in Complex Biological Samples
| Method | Principle | Application | Advantages | Limitations |
|---|---|---|---|---|
| Post-Column Infusion [82] | Continuous analyte infusion with blank matrix injection to identify ionization suppression/enhancement regions | Qualitative screening of MS-based methods | Identifies problematic retention time regions | Does not provide quantitative data; requires specialized equipment |
| Post-Extraction Spike [82] | Comparison of analyte response in neat solution vs. matrix spiked post-extraction | Quantitative evaluation of extraction efficiency | Provides quantitative matrix effect magnitude | Requires analyte-free matrix (challenging for endogenous compounds) |
| Slope Ratio Analysis [82] | Comparison of calibration curve slopes in neat solution vs. matrix | Semi-quantitative assessment across concentration ranges | Evaluates effects across dynamic range | Only semi-quantitative; more complex implementation |
| Standard Addition Method [81] | analyte spiking at multiple levels into sample matrix | Endogenous analyte quantification | Does not require blank matrix; corrects for matrix effects | Time-consuming; requires multiple sample preparations |
For biosensor applications, a modified approach evaluating signal recovery in spiked matrices compared to reference standards provides practical assessment of matrix effects. The following experimental protocol outlines this process:
Experimental Protocols
Protocol 1: Evaluation of Matrix Effects on Biosensor Performance
Principle: This protocol evaluates the impact of various biological matrices on biosensor signal generation using a spike-and-recovery approach, adapted from studies on cell-free systems and electrochemical biosensors [79] [80].
Materials:
- Biosensor platform (e.g., cell-free expression system, electrochemical sensor, optical sensor)
- Target biological matrices (serum, plasma, whole blood, urine, saliva)
- Analyte standards or reporter systems (sfGFP plasmid, luciferase, specific biomarkers)
- Reference standards in ideal buffer conditions
- RNase inhibitor (glycerol-free formulation recommended)
- Appropriate buffers and reagents for biosensor operation
Procedure:
- Prepare biosensor components according to manufacturer or established protocols
- Spike identical concentrations of target analyte or reporter system into:
- a) Ideal buffer (reference)
- b) Various biological matrices (10% final volume recommended [79])
- For inhibition studies, include conditions with:
- a) No additives
- b) RNase inhibitors
- c) Protease inhibitors (bacterial and mammalian)
- Incubate under optimal sensor operating conditions
- Measure signal output at predetermined endpoint or in real-time
- Calculate signal recovery using the formula: % Recovery = (Signal in matrix / Signal in reference) × 100
- Calculate % Inhibition: % Inhibition = 100 - % Recovery
Expected Results: Significant matrix effects typically manifest as <70% recovery across biological samples, with serum and plasma generally showing the strongest inhibition [79].
Protocol 2: Implementation of Antifouling Nanocomposite Coatings
Principle: This protocol describes the application of nanoporous conductive coatings to minimize surface fouling in electrochemical biosensors, based on demonstrated success with gold nanowires, carbon nanotubes, and reduced graphene oxide [80].
Materials:
- Electrode/sensor surface
- Conductive nanomaterials (AuNWs, CNTs, or rGOx)
- Bovine serum albumin (BSA)
- Glutaraldehyde cross-linker
- Phosphate buffer (pH 7.4)
- Microfluidic integration components (if applicable)
Procedure:
- Clean sensor surface according to manufacturer specifications
- Prepare nanocomposite solution:
- a) Disperse conductive nanomaterial in buffer (e.g., 1 mg/mL)
- b) Add BSA (5% w/v)
- c) Add glutaraldehyde (0.1% v/v) as cross-linker
- Apply coating to sensor surface using:
- a) Drop-casting (simplest method)
- b) Localized heat-induced coating (<1 min processing [80])
- Cure coating per established parameters (e.g., room temperature, 2 hours)
- Validate coating effectiveness using electrochemical impedance spectroscopy
- Store coated sensors at room temperature (stable up to 5 months [80])
Expected Results: Properly applied coatings demonstrate excellent antifouling activity against various biological fluids while maintaining sensor sensitivity, enabling detection of biomarkers in both single and multiplex formats with assay times of 15-37 minutes [80].
Mitigation Strategies and Data Analysis
Comparison of Matrix Effect Mitigation Approaches
Various strategies can be employed to address matrix effects, each with distinct advantages and limitations:
Table 2: Strategies for Mitigating Matrix Effects in Biosensing Applications
| Strategy | Mechanism | Best For | Efficacy | Considerations |
|---|---|---|---|---|
| RNase Inhibition [79] | Prevents degradation of RNA-based biosensor components | Cell-free systems, nucleic acid-based sensors | 20-70% recovery depending on matrix | Commercial inhibitors may contain glycerol which inhibits reactions; use glycerol-free formulations |
| Nanocomposite Coatings [80] | Physical barrier preventing fouling; selective permeability | Electrochemical sensors, surface-based detection | Excellent antifouling; maintained sensitivity over months | Requires optimization of coating process; potential impact on assay kinetics |
| Sample Dilution [81] | Reduces concentration of interfering compounds | High-sensitivity assays with ample sample | Variable; may improve or worsen effects depending on assay | Reduces analyte concentration; may affect sensitivity |
| Internal Standardization [81] | Corrects for variability in sample processing and analysis | Mass spectrometry, quantitative assays | High when appropriate internal standard used | Stable isotope-labeled standards ideal but expensive; structural analogs may suffice |
| Extract-Based RNase Inhibitor [79] | Endogenous inhibitor production during extract preparation | Cell-free biosensing systems | Higher reporter levels than commercial inhibitors | Requires genetic engineering of extract source; no additional cost or steps |
Data Analysis and Interpretation
The following workflow diagram illustrates the logical process for addressing matrix effects in biosensor development:
When analyzing data from matrix effect studies, consider the following key parameters:
- Signal Recovery: Ideally 85-115% for accurate quantification
- Inter-patient Variability: Assess using samples from multiple donors
- Limit of Detection (LOD) Shift: Compare LOD in buffer vs. biological matrix
- Dynamic Range: Evaluate potential compression or expansion in biological matrix
The Scientist's Toolkit
Essential Research Reagent Solutions
Successful implementation of multiplex biosensors in complex biological samples requires careful selection of reagents and materials. The following table details essential components and their functions:
Table 3: Research Reagent Solutions for Addressing Matrix Effects
| Reagent/Material | Function | Application Examples | Key Considerations |
|---|---|---|---|
| Glycerol-Free RNase Inhibitors [79] | Prevents RNA degradation in nucleic acid-based sensors | Cell-free biosensors, aptamer-based detection | Commercial inhibitors often contain glycerol which inhibits reactions (50% signal reduction) |
| Nanocomposite Coatings [80] | Anti-fouling surface modification | Electrochemical sensors, plasmonic biosensors | Gold nanowires, carbon nanotubes, or reduced graphene oxide with BSA cross-linking |
| Stable Isotope-Labeled Internal Standards [81] | Corrects for analyte-specific matrix effects | Mass spectrometry-based detection | Ideal compensation but expensive; structural analogs may be alternatives |
| Chromogenic Substrates [84] | Enzyme-amplified colorimetric readout | ELISA, western blot, enzymatic biosensors | HRP/TMB (blue), ALP/PNPP (yellow), β-Gal/X-Gal (blue) systems |
| Plasmid Reporters [79] | Signal generation in cell-free systems | sfGFP, luciferase constitutively expressed | Enable quantitative assessment of matrix inhibition |
| Murine RNase Inhibitor Plasmid [79] | Endogenous RNase inhibitor production | Engineered cell-free systems | Eliminates cost of commercial inhibitors; avoids glycerol inhibition |
Matrix effects present a significant barrier to the reliable deployment of multiplex biosensors in complex biological samples, but systematic assessment and strategic mitigation can overcome these challenges. Through appropriate selection of mitigation strategies—including glycerol-free RNase inhibitors for cell-free systems, nanocomposite coatings for electrochemical sensors, and internal standardization for quantitative assays—researchers can develop robust biosensing platforms capable of accurate multiplexed biomarker detection in clinically relevant matrices. The protocols and analytical frameworks presented here provide a pathway to validate biosensor performance across diverse biological samples, ultimately supporting the advancement of diagnostic tools for personalized healthcare, therapeutic monitoring, and rapid clinical decision-making.
Scalability, Manufacturing, and Regulatory Pathway Considerations
The transition of multiplex biosensors from research prototypes to clinically viable tools hinges on overcoming significant challenges in scalable manufacturing and navigating a clear regulatory pathway. Multiplex biosensors, which simultaneously detect multiple biomarkers, provide a more comprehensive assessment of complex diseases like cancer than single-analyte devices [5]. However, their inherent complexity, which integrates microfluidics, advanced detection elements, and data analytics, introduces substantial hurdles in mass production and regulatory approval. This document outlines the key considerations, protocols, and pathways to address these challenges, providing a framework for researchers and developers.
Key Scalability and Manufacturing Challenges
The manufacturing of multiplex biosensors must balance performance with reproducibility and cost-effectiveness. Several critical challenges emerge at this junction.
- Integration of Complex Systems: A single biosensor often combines microfluidic chips for sample handling, biological recognition elements (e.g., aptamers, antibodies), and transducers (e.g., optical, electrochemical) [1] [5]. Ensuring the reliable and consistent integration of these disparate components at scale is non-trivial.
- Material Selection and Biocompatibility: The use of novel nanomaterials such as gold nanoparticles (AuNPs), carbon nanotubes (CNTs), and graphene is common to enhance sensitivity and selectivity [1]. Sourcing these materials with consistent quality and ensuring their biocompatibility and stable functionalization over large production batches is a key challenge.
- Cost Control and Accessibility: High expenses associated with advanced materials and sophisticated fabrication techniques can limit the technology's accessibility [1]. Developing cost-effective manufacturing methods is essential for widespread adoption, especially in point-of-care settings.
- Long-Term Stability and Shelf-Life: Many biosensors face issues with degradation over time or under varying environmental conditions, compromising their reliability for clinical use [1]. Validating shelf-life and establishing robust packaging standards are crucial for commercial viability.
Quantitative Analysis of Manufacturing Methods
The choice of fabrication method profoundly impacts scalability, resolution, and cost. The table below summarizes key characteristics of common manufacturing techniques for microfluidic biosensor components.
Table 1: Comparison of Fabrication Methods for Microfluidic Biosensor Components
| Manufacturing Method | Typical Resolution | Scalability Potential | Relative Cost | Best Suited Materials | Key Considerations for Multiplexing |
|---|---|---|---|---|---|
| Soft Lithography | ~100 nm – 500 µm | Medium | Medium | Polydimethylsiloxane (PDMS) | Excellent for rapid prototyping; can suffer from solvent swelling and dimensional instability in mass production. |
| Injection Molding | ~1 µm – 1 mm | High | Low (at high volumes) | Thermoplastics (e.g., PMMA, COP) | High upfront tooling cost; ideal for high-volume production of disposable chips. |
| Hot Embossing | ~50 nm – 500 µm | High | Medium | Thermoplastics | Lower tooling cost than injection molding; suitable for medium-to-high volumes. |
| 3D Printing | ~10 µm – 200 µm | Low to Medium | High (per unit) | Photopolymers, Resins | Unmatched design flexibility for complex channels; slower and more expensive for batch production. |
Experimental Protocol for an Automated Biosensor Evolution Pipeline
The DRIVER (De novo Rapid In Vitro Evolution of RNA biosensors) pipeline is a prime example of a scalable, automated methodology for generating the core sensing elements of biosensors [85]. This protocol enables the multiplexed discovery of RNA biosensors against multiple small molecules simultaneously.
Principle
DRIVER performs directed evolution of RNA libraries where ligand binding to an evolved aptamer region modulates the self-cleavage activity of a linked hammerhead ribozyme. This ligand-dependent cleavage is used to selectively amplify functional biosensors entirely in solution, without requiring chemical modification of the target ligands [85].
Materials and Equipment
- Liquid-Handing Robot: For full automation of the selection process (e.g., systems from Hamilton, Tecan).
- DNA Library Template: A degenerate DNA library encoding random sequences within the loops of a hammerhead ribozyme (e.g., 1012–1014 diversity) [85].
- Triple-Function Oligonucleotide: A key oligonucleotide combining a reverse transcription primer, a ligation substrate, and a splint sequence to enable efficient library regeneration post-cleavage [85].
- In Vitro Transcription Kit: For generating RNA from the DNA library.
- Target Ligands: The small molecules or biomarkers of interest for biosensor development.
- PCR Thermocycler and Reagents: For amplification of selected sequences.
- Next-Generation Sequencing (NGS) Platform: For high-throughput characterization via CleaveSeq.
Step-by-Step Procedure
- Library Transcription: Transcribe the DNA library to RNA using an in vitro transcription system.
- Cleavage Reaction: Divide the RNA library into two conditions: with (+) and without (-) the target ligand(s). Incubate under appropriate buffer conditions to allow for ribozyme self-cleavage.
- Regeneration and Separation: a. Use the triple-function oligonucleotide for reverse transcription of the cleaved RNA products. b. The same oligonucleotide acts as a splint to guide the ligation that "regenerates" the full-length sequence, adding a unique prefix sequence to molecules that were cleaved.
- Selective PCR Amplification:
- For positive selection rounds (with ligand), perform PCR with primers that specifically amplify the unmodified prefix sequence, corresponding to RNA molecules that did not cleave in the presence of the ligand.
- For negative selection rounds (without ligand), perform PCR with primers that target the newly ligated prefix, amplifying sequences that did cleave in the absence of the ligand.
- Iteration: Use the PCR product as the input for the next round of selection. The entire process is automated on a liquid-handling robot, enabling 8-12 rounds per day.
- Characterization (CleaveSeq): After 32-40 rounds, characterize the enriched pool via NGS. The unique prefix added during regeneration allows for precise quantification of cleaved vs. uncleaved reads for thousands of sequences in parallel, identifying ligand-responsive biosensors [85].
The following workflow diagram illustrates the automated DRIVER pipeline:
The Scientist's Toolkit: Research Reagent Solutions
Successful development and manufacturing of multiplex biosensors rely on a suite of specialized reagents and materials.
Table 2: Essential Research Reagents and Materials for Multiplex Biosensor Development
| Reagent/Material | Function/Application | Key Considerations |
|---|---|---|
| Nucleic Acid Aptamers | High-affinity recognition elements; selected via SELEX or DRIVER [85]. | Superior stability and lower cost than antibodies; amenable to chemical modification for surface immobilization. |
| Monoclonal Antibodies | Protein-based recognition elements for specific biomarker capture. | Require cold chain; batch-to-batch variability must be controlled; high specificity. |
| Gold Nanoparticles (AuNPs) | Signal amplification in electrochemical and optical (e.g., SERS) sensors due to high conductivity and unique optical properties [1]. | Size and shape uniformity is critical for consistent performance; functionalization chemistry must be optimized. |
| Graphene & Carbon Nanotubes | Enhance electrochemical sensor sensitivity due to high surface area and excellent conductivity [1]. | Dispersion quality and purity are key manufacturing parameters. |
| Quantum Dots (QDs) | Fluorescent labels for multiplexed optical detection; offer size-tunable emission and high photostability [1]. | Potential cytotoxicity and blinking effects must be evaluated for clinical use. |
| Functionalized PDMS/Polymers | Main substrate for microfluidic chip fabrication; enables precise fluid manipulation at nano-/micro-scale [1]. | Surface modification often required to prevent non-specific protein adsorption; gas permeability can be an issue. |
Regulatory Pathway Considerations
Navigating the regulatory landscape is a critical and iterative process that should be integrated early in the development cycle.
- Pre-Submission and Preclinical Validation: Engagement with regulatory bodies (e.g., FDA, EMA) via pre-submission meetings is crucial to align on validation requirements. Preclinical studies must robustly demonstrate analytical validity—sensitivity, specificity, precision, and limits of detection for each biomarker in the multiplex panel [1]. Stability studies under intended storage conditions are mandatory.
- Clinical Evidence for Validation: The biosensor must demonstrate clinical validity by proving that the detected biomarkers are meaningfully associated with the specific disease or condition [5]. This requires well-designed clinical studies that correlate biosensor readings with established clinical endpoints or standard-of-care diagnostic results.
- Quality System and Manufacturing Controls: Compliance with Quality System Regulations (QSR), such as ISO 13485, is mandatory. The manufacturing process must be conducted under a Quality Management System (QMS) to ensure every device is produced to a consistent standard. This includes strict control over raw materials, production processes, and final product testing.
- Software and Data Analytics Regulation: If the biosensor incorporates algorithms or Artificial Intelligence/Machine Learning (AI/ML) for data analysis, this software becomes a regulated component [1]. Validation of the software's performance, cybersecurity, and transparency is required.
The following diagram outlines the key stages in the regulatory pathway:
The path to commercial and clinical success for multiplex biosensors is complex but navigable. A proactive approach that integrates scalable, automated manufacturing principles—as exemplified by the DRIVER pipeline—with a deep understanding of regulatory requirements from the outset is paramount. By addressing the challenges of integration, material stability, and cost control during R&D, and by generating robust analytical and clinical data, developers can accelerate the translation of these powerful diagnostic tools from the lab to the clinic, ultimately enabling more precise and personalized healthcare.
Performance Benchmarking: Analytical Validation and Clinical Utility Assessment
Limit of Detection (LOD) and Dynamic Range Comparisons Across Platforms
The evolution of biosensing technologies has fundamentally transformed biomarker detection, shifting the paradigm from single-analyte measurements toward sophisticated multiplex platforms capable of simultaneous quantification of multiple biomarkers. Within this context, two analytical parameters—Limit of Detection (LOD) and Dynamic Range—serve as critical benchmarks for evaluating platform performance. LOD represents the lowest analyte concentration that can be reliably distinguished from analytical noise, while dynamic range defines the concentration interval over which quantitative measurements can be performed with acceptable accuracy and precision [86]. For researchers and drug development professionals selecting appropriate analytical platforms, understanding the comparative performance across available technologies is essential for generating robust, clinically relevant data.
This Application Note provides a systematic comparison of LOD and dynamic range across established and emerging biosensing platforms, with particular emphasis on their application in multiplexed biomarker detection. The document further presents standardized experimental protocols for platform evaluation and visualizes the critical workflows and statistical decision processes underlying these essential analytical parameters.
Comparative Performance Analysis of Detection Platforms
Performance Metrics for Traditional vs. Emerging Platforms
The table below summarizes the typical LOD and dynamic range characteristics for various single-plex and multiplex immunoassay platforms, based on comparative studies and manufacturer specifications.
Table 1: LOD and Dynamic Range Comparison for Immunoassay Platforms
| Platform / Category | Representative Technology | Typical LOD Range | Typical Dynamic Range | Multiplexing Capacity |
|---|---|---|---|---|
| Traditional Single-Plex | Conventional ELISA | Variable (e.g., ~11-30 U/ml for CA 15-3) [87] | ~2-3 orders of magnitude [88] | Low (Single analyte) |
| Commercial Multiplex Immunoassays | MULTI-ARRAY (Meso Scale Discovery) | Low (e.g., 0.6 ng/L for IL-6) [88] | Widest (10^5 to 10^6) [89] [88] | Medium-High |
| Bio-Plex (Bio-Rad) | Low (e.g., 0.1 ng/L for IL-6) [88] | ~10^3 to 10^4 [88] | High | |
| A2 (Beckman Coulter) | Moderate (e.g., 7.1 ng/L for IL-6) [88] | ~10^3 [88] | Medium | |
| Advanced Electrochemical Biosensors | Multiplex Electrochemical Biosensors (Research) | Superior for various biomarkers (e.g., 0.5 ng/ml for HER-2; 2.54×10^-16 M for miRNA-16) [87] | ≥4 orders of magnitude [87] | Medium |
| AI-Enhanced POC Biosensors | AI-enabled Cytokine POC Platforms | Very Low (0.01–100 pg/mL) [90] | 3–4 orders of magnitude [90] | Medium |
Benchmarking Against Clinical Standards
Emerging biosensing platforms frequently demonstrate superior analytical sensitivity compared to established clinical methods. For breast cancer biomarker detection, multiplex electrochemical biosensors report LODs that surpass current standards like ELISA, FISH, and PCR [87].
Table 2: LOD Comparison: Emerging Biosensors vs. Clinical Gold Standards
| Biomarker | Detection Method | Reported LOD | Clinical Relevance |
|---|---|---|---|
| HER-2 | Electrochemical Multiplex Platform | 0.5 ng/ml [87] | Within clinical range measured by ELISA (picogram/ml to nanogram/ml) [87] |
| CA 15-3 | Electrochemical Multiplex Platform | 0.21 U/ml [87] | More sensitive than clinical blood tests (≤30 U/ml) [87] |
| miRNA-21 | Electrochemical Multiplex Platform | 3.58 × 10^-15 M [87] | Superior to qRT-PCR dogma (ng/ml range) [87] |
| RANKL / TNF | Electrochemical Dual Immunoassay | 2.6 pg/ml / 3.0 pg/ml [87] | Much lower than ELISA (78–5,000 pg/ml / 16–1,000 pg/ml) [87] |
| EGFR / VEGF | Electrochemical Immunoassay | 0.01 pg/ml / 0.005 pg/ml [87] | Much lower than ELISA (0.31–20 ng/ml / 31.3–2,000 pg/ml) [87] |
Fundamental Concepts and Statistical Foundations
Defining Limit of Detection (LOD)
The LOD is formally defined as the lowest true net concentration of an analyte that will lead, with a high probability (1-β), to the conclusion that the analyte is present in the sample. Its determination is inherently statistical and involves managing two types of errors [86]:
- Type I Error (α - False Positive): The risk of concluding an analyte is present when it is not. This defines the Critical Level (L_C), the signal threshold above which a detection is declared.
- Type II Error (β - False Negative): The risk of failing to detect an analyte that is actually present at the LOD.
Assuming normal distributions and known variance, the expressions for LC and LOD (LD) are [86]:
- LC = z(1-α) * σ_0
- LD = (z(1-α) + z(1-β)) * σ0 ~ 3.3 * σ_0 (for α = β = 0.05)
Where σ_0 is the standard deviation of the blank signal, and z represents critical values from the standardized normal distribution.
The LOD Paradox: Practical Utility vs. Technical Achievement
While the drive for lower LODs has fueled significant technological advances, an intense focus on this single parameter can sometimes overlook other vital factors for real-world application. The LOD paradox acknowledges that a lower LOD is not always synonymous with a better biosensor for practical use. A sensor with an extremely low LOD might have a narrow dynamic range, poor stability, high cost, or complex usability requirements that limit its practical deployment. A balanced approach to biosensor development aligns technical performance with practical needs such as detection range, cost-effectiveness, and ease of use [91].
Experimental Protocols for Platform Evaluation
Protocol 1: Determination of LOD and Critical Level
This protocol outlines the statistical determination of the Method Detection Limit based on the analysis of blank and low-concentration samples [86].
Procedure:
- Sample Preparation: Obtain a test sample with low analyte concentration (near the expected LOD). If a real low-concentration sample is unavailable, a spiked sample can be used.
- Replication and Analysis: Analyze a minimum of n=10 portions of the sample, following the complete, validated analytical procedure.
- Data Conversion: For each replicate, convert the raw instrument signal (e.g., current, optical density) into a concentration value. This is typically done by subtracting the average blank signal and dividing by the slope of the analytical calibration curve.
- Standard Deviation Calculation: Calculate the standard deviation (s_0) of the calculated concentration values from the n replicates.
- Calculation of L_C and LOD: Compute the Critical Level and Limit of Detection using the formulas. For n=10 replicates (ν=9 degrees of freedom) and α=β=0.05, the formulas are:
- LC = t(1-α, ν) * s0 = 1.83 * s0
- LD = 2 * t(1-α, ν) * s0 = 3.66 * s0
Protocol 2: Characterizing Dynamic Range and Linearity
This protocol describes the process for establishing the quantitative working interval of an assay.
Procedure:
- Calibrator Preparation: Prepare a series of standard solutions (calibrators) that span the expected concentration range of the assay, from below the LOD to above the expected maximum. Use a minimum of 5-7 concentration levels.
- Analysis of Calibrators: Analyze each calibrator in duplicate or triplicate, following the standard assay protocol.
- Curve Fitting and Analysis: Plot the mean measured signal against the known concentration for each calibrator. Apply appropriate curve-fitting procedures (e.g., linear, 4- or 5-parameter logistic).
- Define Quantifiable Interval: The dynamic (or quantifiable) range is defined as the concentration interval over which the assay demonstrates:
- Precision: CV < 20-25% (or a pre-defined acceptable level).
- Accuracy: Mean percentage recovery within 80-120% of the actual concentration.
- Linearity: The signal output maintains a defined, monotonic relationship with concentration (e.g., linear signal output over 3-6 orders of magnitude, as seen in platforms like MULTI-ARRAY) [89] [88].
Visualizing Workflows and Logical Relationships
Statistical Decision Process in LOD Determination
The following diagram illustrates the statistical concepts of false positives and false negatives underlying the determination of the Critical Level (LC) and the Limit of Detection (LD).
Generalized Workflow for Multiplex Biosensor Analysis
This diagram outlines a standard experimental workflow for the characterization and use of a multiplex biosensor platform.
The Scientist's Toolkit: Essential Research Reagents and Materials
Table 3: Key Research Reagent Solutions for Multiplex Biosensor Development
| Category / Item | Specific Examples | Function & Importance in Development |
|---|---|---|
| Biorecognition Elements | Capture Antibodies, Nucleic Acid Aptamers, Nanobodies [87] [92] | Provides analytical specificity by binding target analytes. Choice dictates sensor selectivity and potential cross-reactivity in multiplex formats. |
| Signal Transduction Materials | Electroactive Probes (e.g., Prussian Blue), Enzyme Labels (e.g., HRP), Fluorescent Dyes/Microbeads [89] [93] [88] | Generates a measurable signal (current, light) from the biological binding event. Critical for achieving low LOD and wide dynamic range. |
| Solid-Phase Platforms | Planar Electrode Arrays (MULTI-ARRAY), Magnetic Microbeads (Bio-Plex), Screen-Printed Electrodes [89] [93] [88] | The physical substrate for bioreceptor immobilization and reaction. Platform choice defines multiplexing capacity, cost, and suitability for POC use. |
| Calibration & Buffer Solutions | Diluents, Blocking Reagents, Calibrators with known analyte concentrations [88] | Essential for preparing standard curves, minimizing non-specific binding, and ensuring quantitative accuracy and precision across the dynamic range. |
| Signal Processing Tools | Machine Learning Algorithms (CNNs, Decision Trees) [90] | Used for advanced data analysis, noise reduction, drift correction, and pattern recognition in complex multiplex data, improving effective LOD and reliability. |
The accurate detection of biomarkers is fundamental to advancements in biomedical research, clinical diagnostics, and therapeutic development. For decades, enzyme-linked immunosorbent assays (ELISAs), polymerase chain reaction (PCR), and flow cytometry have served as the gold standard techniques for protein and nucleic acid detection, offering reliability and well-characterized performance [94] [95]. However, a paradigm shift is underway, driven by the growing need to analyze multiple biomarkers simultaneously from a single, often limited, sample volume. This need has catalyzed the development of multiplex biosensors, innovative platforms designed for the concurrent quantification of multiple analytes, thereby enhancing throughput, conserving samples, and providing a more comprehensive biological snapshot [63] [87].
This Application Note provides a detailed comparison of emerging multiplex biosensing technologies against established gold standard methods. It includes structured performance data, detailed experimental protocols for key multiplex platforms, and visual workflow diagrams to guide researchers and drug development professionals in integrating these advanced tools into their experimental designs, framed within the broader context of multiplex biomarker detection research.
Performance Comparison: Multiplex Biosensors vs. Gold Standards
The transition from single-plex to multiplex analysis requires a clear understanding of performance metrics. The following tables summarize the key advantages and limitations of these approaches and provide quantitative detection data.
Table 1: Characteristic Comparison of Gold Standard and Multiplex Methods
| Method | Key Strength | Key Limitation | Multiplexing Capacity | Typical Assay Time |
|---|---|---|---|---|
| Standard ELISA [94] [96] | High specificity, cost-effective, easy data interpretation | Single-plex, moderate sensitivity, requires relatively large sample volumes | Low (Single-plex) | ~5 hours |
| Real-Time PCR [95] [97] | High sensitivity and specificity for nucleic acids, quantitative | Limited multiplexity due to fluorescence channel availability, requires target amplification | Low to Moderate (Typically < 5-plex) | ~2 hours (qPCR) |
| Flow Cytometry [98] [99] | Single-cell resolution, can analyze complex cell populations | Technically complex, high instrument cost, data analysis can be challenging | High (10+ parameters) | ~3-5 hours (incl. sample prep) |
| Multiplex Electrochemical Biosensors [87] | Exceptional sensitivity, portable, low sample volume | Emerging technology, few FDA-approved devices, requires electrode optimization | Moderate (2-6 targets) | Varies (often <1 hour) |
| Bead-Based Multiplex Arrays [100] | High-throughput, validated for many cytokines, uses 96-well plate format | Antibody clone compatibility is critical for performance vs. ELISA | High (10-100+ targets) | ~4 hours |
Table 2: Quantitative Limits of Detection (LOD) Comparison for Key Biomarkers
| Biomarker | Gold Standard Method (LOD) | Multiplex Biosensor Method (LOD) | Reference |
|---|---|---|---|
| Breast Cancer HER-2 | ELISA: Picogram/ml to nanogram/ml range | Electrochemical Biosensor: 0.5 ng/mL | [87] |
| Breast Cancer CA 15-3 | Clinical Blood Test: ≤30 U/mL | Electrochemical Biosensor: 0.21 U/mL or 5.8 × 10⁻³ U/mL | [87] |
| miRNA-21 | qRT-PCR: ng/mL level | Electrochemical Multiplex Assay: 3.58 × 10⁻¹⁵ M | [87] |
| Cytokines (General) | Standard ELISA: ~1-100 pg/mL | SIMOA: 10 fg/mL to 1 pg/mL (465x avg. increase) | [96] |
| Cytokines (General) | Standard ELISA: ~1-100 pg/mL | Immuno-PCR (IQELISA): 23-fold avg. increase in sensitivity | [96] |
| Bacterial Pathogens | Singleplex Real-Time PCR | Multiplex Amplicon Sequencing (ONT): 100x more sensitive with extended sequencing | [97] |
Detailed Experimental Protocols
Protocol: Multiplex Flow Cytometry for Antibody Detection
This protocol describes a high-throughput, multiplex flow cytometry-based assay to identify and quantify isotype-specific antibody responses induced by immunotherapies, using small sample volumes with high sensitivity [98] [99].
Research Reagent Solutions & Essential Materials
| Item | Function/Application |
|---|---|
| DF-1, Vero, or ID8 Cell Lines | Antigen-expressing target cells serving as reservoirs for antibody binding. |
| Complete DMEM Media | Cell culture growth medium. |
| FACS Buffer (PBS + 0.5% BSA) | Buffer for washing and diluting cells to reduce non-specific binding. |
| Fluorochrome-conjugated Anti-Ig Antibodies (e.g., anti-IgG1-AF488, anti-IgM-PerCP-Cy5.5) | Detection antibodies for specific immunoglobulin isotypes. |
| Quantum MESF Bead Kit | Standardized beads for quantification and instrument calibration. |
| Fixation Buffer | To preserve cells after staining for later analysis. |
| 96-well U-bottom Plates | Platform for hosting cells during antibody staining steps. |
| FACS Canto II Flow Cytometer | Instrument for multi-color analysis and data acquisition. |
Stepwise Procedure
- Preparation of Target Cells: Culture adherent target cells (e.g., DF-1, Vero, ID8) in T75 cm² flasks until 80-90% confluent in a humidified incubator (5% CO₂, 37°C). Ensure cells are mycoplasma-free.
- Harvesting and Seeding: Wash cells with PBS and detach using 0.25% EDTA. Resuspend cells in complete media, count with a hemocytometer, and adjust concentration. Seed 1×10⁵ target cells per well of a 96-well U-bottom plate. Centrifuge (300-400 x g, 5 min) and discard supernatant.
- Incubation with Test Sample: Resuspend the cell pellet in the test sample (e.g., plasma, serum) diluted in FACS buffer. A dilution series is recommended for quantitative analysis. Incubate for 1-2 hours at 4°C to allow antibody binding.
- Washing: Centrifuge the plate and carefully aspirate the supernatant. Wash the cells twice with FACS buffer to remove unbound antibodies.
- Staining with Detection Antibodies: Resuspend the cell pellet in a master mix of fluorochrome-conjugated anti-isotype antibodies (e.g., anti-IgG1, IgG2a/c, IgG2b, IgM, IgA). Incubate for 30-60 minutes at 4°C in the dark.
- Washing and Fixation: Wash cells twice with FACS buffer to remove unbound detection antibodies. Resuspend cells in fixation buffer and incubate for 15-20 minutes at room temperature in the dark. (Optional: For intracellular staining, permeabilize cells after fixation using a permeabilization wash buffer).
- Data Acquisition: Resuspend the fixed cells in a known volume of FACS buffer. Acquire data on a flow cytometer capable of detecting multiple colors (e.g., an 8-color FACS Canto II). Use MESF beads for quantification.
- Data Analysis: Analyze flow cytometry data using software such as FlowJo. The mean fluorescence intensity (MFI) for each isotype is proportional to the amount of bound antibody from the sample.
Protocol: Multiplex Electrochemical Sensing for Cancer Biomarkers
This protocol outlines the development of a multiplex electrochemical immunosensor for the simultaneous detection of breast cancer biomarkers, demonstrating superior sensitivity compared to clinical ELISAs [87].
Research Reagent Solutions & Essential Materials
| Item | Function/Application |
|---|---|
| Screen-Printed or Fabricated Electrode Array | Solid support with multiple working electrodes for parallel detection. |
| Capture Antibodies (e.g., anti-HER-2, anti-MUC-1) | High-affinity antibodies immobilized on the electrode surface to specifically bind target biomarkers. |
| Detection Antibodies conjugated to Redox Enzymes (e.g., HRP) | Antibodies that provide an electrochemical signal upon binding to the captured biomarker. |
| Blocking Buffer (e.g., BSA, Casein) | Used to block non-specific binding sites on the electrode surface. |
| Electrochemical Redox Probe (e.g., H₂O₂ for HRP) | Enzyme substrate that generates a measurable current upon reaction. |
| Potentiostat | Instrument for applying potential and measuring resulting current. |
Stepwise Procedure
- Electrode Modification and Antibody Immobilization: Functionalize the surface of distinct working electrodes on the sensor array. Immobilize specific capture antibodies (e.g., anti-HER-2 on electrode 1, anti-MUC-1 on electrode 2) via covalent chemistry or adsorption. Incubate overnight at 4°C or for 1-2 hours at room temperature.
- Blocking: Rinse the electrodes with PBS to remove unbound antibodies. Incubate the sensor with a blocking buffer (e.g., 1% BSA) for 1-2 hours to passivate any remaining non-specific binding sites.
- Sample Incubation: Apply the sample (e.g., serum, plasma) to the sensor, ensuring all functionalized electrodes are covered. Incubate for 30-60 minutes to allow target biomarkers to bind to their respective capture antibodies.
- Washing: Gently wash the sensor with PBS-Tween or a similar wash buffer to remove unbound proteins and matrix components.
- Incubation with Detection Antibodies: Introduce a cocktail of detection antibodies, each specific to a different biomarker and conjugated to a redox enzyme (e.g., HRP). Incubate for 30-60 minutes to form sandwich complexes on the electrode surfaces.
- Final Washing: Perform a final stringent wash to remove any unbound detection antibodies.
- Electrochemical Measurement: Place the sensor in an electrochemical cell containing a suitable redox probe. Use a potentiostat to apply a specific potential (e.g., in amperometric or voltammetric mode) and measure the resulting current. The magnitude of the current is proportional to the concentration of the enzyme label, and thus, the target biomarker.
- Data Analysis: Generate standard curves for each biomarker using known concentrations. Calculate the concentration of biomarkers in unknown samples by interpolating the measured signal from the corresponding standard curve.
Advanced Optical Nanobiosensors
Multiplexed optical nanobiosensors represent a cutting-edge approach that exploits the unique properties of nanomaterials to enhance signal detection. Key technologies include:
- Fluorescence-based Detection: Enhanced using Metal-Enhanced Fluorescence (MEF), where noble metal nanoparticles (e.g., gold nanorods, silver nanostars) amplify the fluorescence intensity of nearby fluorophores, significantly improving sensitivity and the signal-to-noise ratio [63]. The distance between the fluorophore and metal surface is critical, with an optimal separation of ~7–8 nm for maximum enhancement [63].
- Surface-Enhanced Raman Scattering (SERS): Utilizes nanostructured metallic surfaces to provide enormous amplification (up to 10¹⁰-10¹¹) of the inherently weak Raman scattering signals. SERS produces sharp, molecule-specific spectral fingerprints, allowing for the simultaneous detection of multiple targets with high specificity in a multiplexed format [63].
- Colorimetric Detection: Relies on target-induced color changes that can often be observed visually. The integration of nanomaterials, such as gold nanoparticles, which undergo aggregation-dependent color shifts from red to blue, enables simple and portable multiplex assays suitable for point-of-care testing (POCT) [63].
Comparative Workflow: Gold Standard PCR vs. Multiplex Amplicon Sequencing
The following diagram contrasts the traditional singleplex PCR approach with a high-throughput multiplex amplicon sequencing workflow for pathogen detection, highlighting the significant gains in efficiency [97].
Multiplex biosensors represent a powerful evolution in diagnostic technology, offering significant advantages in throughput, sample conservation, and diagnostic power through simultaneous multi-analyte profiling. While gold standard methods like ELISA, PCR, and flow cytometry remain foundational due to their reliability and established protocols, the integration of multiplex platforms is becoming increasingly critical for advanced research and drug development. The choice of platform depends on the specific application, required sensitivity, and the nature of the target analytes. As these biosensing technologies continue to mature and gain regulatory approval, they are poised to become the new standard for complex biomarker analysis, enabling more precise and personalized medical interventions.
Clinical Sensitivity and Specificity for Disease Stratification
In the realm of medical diagnostics and disease stratification, sensitivity and specificity are fundamental statistical measures that describe the accuracy of a test in identifying the presence or absence of a medical condition [101] [102]. Sensitivity, or the true positive rate, is defined as the probability that a test result will be positive when the disease is present. Mathematically, it is calculated as the number of true positives divided by the sum of true positives and false negatives [102]. A test with high sensitivity effectively rules out a disease when the result is negative, as it rarely misclassifies diseased individuals as healthy [103]. This is particularly crucial when failing to treat a condition carries serious consequences or when the treatment is highly effective with minimal side effects [102].
Specificity, or the true negative rate, is the probability that a test result will be negative when the disease is not present [101]. It is calculated as the number of true negatives divided by the sum of true negatives and false positives [102]. A test with high specificity reliably rules in a disease when the result is positive, as it seldom misclassifies healthy individuals as diseased [103]. This is especially important when a positive test leads to further invasive testing, expense, or patient anxiety [102]. The relationship between sensitivity and specificity is often inverse; increasing one typically decreases the other, and this trade-off is managed by adjusting the test's cutoff point [101] [102].
Figure 1: Conceptual relationship between sensitivity and specificity and their clinical utilities for ruling disease in or out.
The Role of Sensitivity and Specificity in Multiplex Biosensing
Multiplex biosensors represent a transformative advancement in diagnostic technology, enabling the simultaneous detection of multiple distinct biomarkers from a single sample [104]. For complex, heterogeneous diseases such as breast cancer, which is categorized into multiple subtypes based on biomarkers like HER2, ER, and PR, single-analyte tests provide an incomplete clinical picture [104]. Multiplex platforms address this limitation by integrating an array of receptors on a single transducer, permitting the concurrent measurement of a panel of diagnostic, prognostic, and predictive biomarkers [104]. This capability is paramount for precise disease stratification, which involves classifying a disease into distinct subtypes or stages to guide personalized treatment strategies.
In the context of multiplex sensing, the intrinsic sensitivity and specificity of the platform are critical. The overall analytical sensitivity of the system must be sufficient to detect clinically relevant concentrations of each target biomarker, while the specificity of each immobilized receptor must be high enough to minimize cross-reactivity and false positives among the closely spaced detection sites [104]. Electrochemical biosensors, a prominent format for multiplexing, have demonstrated superior performance in this regard, often achieving lower limits of detection (LOD) than conventional methods like ELISA, FISH, or PCR [104]. For instance, electrochemical sensors for micro-RNAs (miRNAs) can achieve detection in the femtomolar range (10⁻¹⁶ M), significantly surpassing the ng/ml sensitivity of quantitative RT-PCR [104]. This high sensitivity and specificity across a multiplexed panel allows for a more comprehensive and accurate molecular fingerprint, thereby enabling more robust disease stratification and ultimately improving patient outcomes through timely and targeted intervention.
Performance Data of Diagnostic Modalities
The following tables summarize the sensitivity and specificity of various diagnostic tests and the performance of advanced multiplex electrochemical biosensors compared to established clinical methods.
Table 1: Documented sensitivity and specificity of various laboratory tests from clinical studies
| Disease/Condition | Test or Biomarker | Sensitivity (%) | Specificity (%) | Citation |
|---|---|---|---|---|
| Systemic Lupus Erythematosus (SLE) | Antinuclear-antibody (ANA) test | Specific to population | Specific to population | [101] |
| External Root Resorption | 6 different CBCT scanners | 85.42 - 98.96 | 97.60 (Highest reported) | [101] |
| Coronary Artery Disease (CAD) | 9p21.3 locus (rs1333049 CC genotype) | Not explicitly stated | Not explicitly stated | [105] |
| Myocardial Infarction (MI) | 9p21.3 locus (rs1333049 CC genotype) | Not explicitly stated | Not explicitly stated | [105] |
| Lung Cancer (Early-Stage) | Liquid Biopsy | 84 | 100 | [101] |
| Colorectal Cancer (Early-Stage) | Liquid Biopsy | 73 | 92 | [101] |
Table 2: Comparison of limits of detection (LOD) for breast cancer biomarkers: Multiplex electrochemical biosensors vs. conventional methods
| Biomarker | Multiplex Electrochemical Sensor LOD | Conventional Method (e.g., ELISA, PCR) | Conventional Method LOD |
|---|---|---|---|
| HER-2 | 0.5 ng/ml | ELISA | Picogram/ml to nanogram/ml |
| MUC-1 | 0.53 ng/ml | Clinical Blood Test | 11–12 ng/ml |
| CA 15-3 | 0.21 U/ml or 5.8 × 10⁻³ U/ml | Clinical Blood Test | ≤30 U/ml |
| miRNA-155 | 9.79 × 10⁻¹⁶ M | qRT-PCR | ng/ml level |
| miRNA-21 | 3.58 × 10⁻¹⁵ M | qRT-PCR | ng/ml level |
| miRNA-16 | 2.54 × 10⁻¹⁶ M | qRT-PCR | ng/ml level |
| RANKL | 2.6 pg/ml | ELISA | 78–5,000 pg/ml |
| TNF | 3.0 pg/ml | ELISA | 16–1,000 pg/ml |
| EGFR | 0.01 pg/ml | ELISA | 0.31–20 ng/ml |
| VEGF | 0.005 pg/ml | ELISA | 31.3–2,000 pg/ml |
| Breast Cancer Exosomes | 10³–10⁸ particles/mL | Nanoparticle Tracking, Flow Cytometry | ~10⁷ particles/ml |
Experimental Protocols for Validation
Protocol for Determining Sensitivity and Specificity
This protocol outlines the procedure for establishing the sensitivity and specificity of a diagnostic test using a validated gold standard for comparison [102].
Study Population Definition: Define and recruit two distinct groups:
- Disease-Positive Group: A cohort of individuals confirmed to have the target disease using the accepted gold standard diagnostic method.
- Disease-Negative Group: A cohort of individuals confirmed to be free of the target disease, ideally matched for demographics and comorbidities that could interfere with the test.
Blinded Testing: Administer the new diagnostic test to all participants in both groups under identical conditions. The personnel performing and interpreting the test must be blinded to the gold standard results.
Result Classification: For each participant, compare the result of the new test (positive or negative) against their true disease status (positive or negative) as determined by the gold standard. Tally the results into four categories:
- True Positives (TP): Individuals with the disease who test positive.
- False Positives (FP): Individuals without the disease who test positive.
- True Negatives (TN): Individuals without the disease who test negative.
- False Negatives (FN): Individuals with the disease who test negative.
Calculation:
- Sensitivity = TP / (TP + FN) × 100%
- Specificity = TN / (TN + FP) × 100%
Figure 2: Workflow for validating a diagnostic test's sensitivity and specificity against a gold standard.
Protocol for Multiplex Electrochemical Biosensor Assay
This protocol details a standard sandwich-type amperometric procedure for the simultaneous detection of multiple protein biomarkers, such as those used in breast cancer stratification [104].
Biosensor Functionalization:
- Obtain a screen-printed electrode array with multiple working electrodes.
- Immobilize specific capture receptors (e.g., antibodies, aptamers) for each target biomarker (e.g., HER-2, CA 15-3, MUC-1) onto distinct working electrodes. This can be achieved via drop-casting and covalent cross-linking.
- Block the entire electrode surface with a blocking agent (e.g., Bovine Serum Albumin) to prevent non-specific binding.
Sample Incubation and Binding:
- Apply a single sample (e.g., serum, plasma, or a single drop of blood) to the sensor, ensuring it covers all functionalized electrodes.
- Incubate to allow target biomarkers in the sample to bind to their respective capture receptors, forming a "sandwich" complex.
Signal Generation and Measurement:
- Introduce a solution containing redox-labeled detection probes (e.g., enzyme-linked or nanoparticle-conjugated secondary antibodies).
- After washing to remove unbound probes, add an appropriate substrate or apply a specific electrochemical potential.
- Use a potentiostat to perform amperometric measurement. The binding event alters the current at each electrode proportionally to the analyte concentration.
Data Analysis and Stratification:
- Measure the electrochemical current at each working electrode simultaneously.
- Generate a standard curve for each biomarker to convert current signals into quantitative concentrations.
- Interpret the multi-analyte profile against established clinical thresholds to stratify the disease into specific subtypes or stages.
The Scientist's Toolkit: Research Reagent Solutions
Table 3: Essential reagents and materials for developing and running multiplex electrochemical biosensor assays
| Item | Function/Description |
|---|---|
| Screen-Printed Electrode (SPE) Array | A disposable, low-cost solid substrate with multiple working electrodes, a counter electrode, and a reference electrode. Serves as the transducer platform [104]. |
| Capture Receptors (Antibodies, Aptamers) | Biorecognition elements immobilized on the electrode surface. They bind with high specificity to the target biomarkers in the sample [104]. |
| Redox-Active Molecules (e.g., [Fe(CN)₆]³⁻/⁴⁻) | A redox probe added to the measurement solution. Binding events between the receptor and analyte change the electron transfer efficiency of the probe, generating a measurable current signal [104]. |
| Blocking Agents (e.g., BSA, Casein) | Proteins used to cover unused surface areas on the electrode after functionalization. They are crucial for minimizing non-specific adsorption and reducing background noise [104]. |
| Potentiostat/Galvanostat | The core electronic instrument that applies a controlled potential to the electrochemical cell and measures the resulting current. Essential for amperometric and voltammetric measurements [104]. |
| Labeled Detection Probes | Secondary antibodies or aptamers conjugated to enzymes (e.g., Horseradish Peroxidase) or nanoparticles. Used in sandwich-type assays to amplify the signal and enhance sensitivity [104]. |
Analysis of Real-World Applicability and Point-of-Care Suitability
Multiplex biosensors represent a transformative technology in clinical diagnostics and biomedical research, enabling the simultaneous quantification of multiple biomarkers from a single sample [18]. The real-world applicability of these platforms is paramount for enhancing diagnostic accuracy, as many disease states can only be reliably identified by monitoring a panel of discriminative biomarkers rather than relying on single-analyte detection [106]. Point-of-care (POC) suitability further extends the value proposition of multiplex biosensors by facilitating rapid, on-site testing that delivers timely results for clinical decision-making [107]. This application note provides a structured analysis of current multiplex biosensor platforms, evaluates their performance characteristics for real-world implementation, and details standardized protocols for assessing their POC suitability within the broader context of advancing simultaneous biomarker detection research.
Performance Analysis of Multiplex Biosensor Platforms
The transition of multiplex biosensors from research tools to clinically viable platforms requires careful evaluation of their analytical performance. The tables below summarize key operational characteristics and performance metrics of major multiplex biosensor categories.
Table 1: Operational Characteristics of Major Multiplex Biosensor Platforms
| Platform Type | Multiplexing Mechanism | Key Strengths | Sample Volume | Assay Time | POC Suitability |
|---|---|---|---|---|---|
| Bead-Based Arrays [88] [108] | Fluorescently-coded microspheres | High multiplexing capacity, proven reproducibility | Low (µL range) | 1-3 hours | Moderate (requires flow cytometer) |
| Planar Electrochemical Arrays [88] [19] | Spatially separated electrodes | Wide linear range, high sensitivity | Low (µL range) | 15-30 minutes | High (portable readers available) |
| Microfluidic Biosensors [19] [1] | Integrated channel networks | Minimal sample consumption, automated fluid handling | Very low (nL-µL range) | < 30 minutes | High (compact, portable systems) |
| Smartphone-Based Sensors [106] | Optical or electrochemical detection | High accessibility, connectivity, imaging capabilities | Low (µL range) | < 20 minutes | Very High (consumer hardware) |
Table 2: Quantitative Performance Comparison of Representative Platforms
| Platform (Representative Example) | Analytes Measured | Linear Range | Sensitivity (LOD) | Precision (CV) | Multiplexing Capacity |
|---|---|---|---|---|---|
| MULTI-ARRAY (Meso Scale Discovery) [88] | Cytokines (IL-6) | 10⁵-10⁶ | 0.6 ng/L | 4.7% | 10-100 |
| Bio-Plex (Bio-Rad Laboratories) [88] | Cytokines (IL-6) | 10³-10⁴ | 2.1 ng/L | 2.8% | 10-500 |
| Mass Sensitive Microarray (Mycotoxin Detection) [109] | T2-toxin, ZEN, FumB1 | NA | 1.3-6.8 ng/mL (singleplex) | NR | 3-16 |
| Microfluidic Electrochemical (BiosensorX) [19] | Antibiotics, biomarkers | NA | nM range | <15% | 4-8 |
Experimental Protocols for POC Suitability Assessment
Protocol for Microfluidic Multiplexed Biosensor Evaluation
This protocol evaluates the performance of microfluidic electrochemical biosensors for POC applications, adapted from the BiosensorX platform development [19].
Materials and Reagents:
- DFR-based microfluidic chips with integrated electrodes
- Phosphate Buffered Saline (PBS), pH 7.4
- Target biomarkers (e.g., meropenem, cytokines, cardiac biomarkers)
- Enzymatic assay components (e.g., β-lactamase for antibiotic detection)
- Wash buffer (0.1% Tween-20 in PBS)
- Potentiostat or portable electrochemical reader
Procedure:
- Chip Preparation:
- Initialize the microfluidic biosensor by priming the common inlet with wash buffer.
- Verify fluidic integrity by observing uniform flow through all parallel channels.
Sample Introduction:
- Apply 10-50 µL of calibrators or clinical samples through individual incubation inlets.
- Incubate for 10-15 minutes at room temperature to allow complete binding.
Washing:
- Remove unbound materials by introducing 100 µL wash buffer through washing inlets.
- Ensure complete buffer exchange across all incubation areas.
Electrochemical Measurement:
- Pump enzyme substrate solution through the common inlet.
- Apply appropriate potential to working electrodes (+0.2 to +0.5 V vs. Ag/AgCl).
- Record amperometric signals simultaneously from all working electrodes.
Data Analysis:
- Generate calibration curves for each analyte using standard solutions.
- Calculate analyte concentrations in unknown samples from standard curves.
- Determine cross-reactivity by comparing signals in singleplex vs. multiplex formats.
Troubleshooting Notes:
- Incomplete fluidic priming indicates potential channel blockage; apply increased pressure or sonicate.
- High background signal suggests insufficient washing; optimize wash volume or surfactant concentration.
- Signal variation between channels may indicate improper electrode fabrication; inspect electrode surfaces.
Protocol for Smartphone-Based Multiplex Biosensing
This protocol outlines the implementation of smartphone-based biosensors for POC multiplex detection, utilizing the smartphone's inherent capabilities for signal acquisition and processing [106].
Materials and Reagents:
- Smartphone with camera and relevant connectivity (Bluetooth, USB, or NFC)
- Custom-designed mobile application for data acquisition and analysis
- Test strips or microfluidic chip with immobilized capture agents
- Colorimetric or fluorescent detection reagents
- Calibrators with known analyte concentrations
- Portable incubation chamber (if required)
Procedure:
- Assay Assembly:
- Apply 5-20 µL of sample to the sample port of the test strip or microfluidic device.
- Allow sample to migrate through the detection zones via capillary action.
Signal Development:
- Incubate for 5-15 minutes to allow complete reaction.
- If required, add detection reagent to enhance signal intensity.
Signal Acquisition:
- Position the test device in a standardized imaging accessory attached to the smartphone.
- Use the smartphone camera to capture an image of the detection zones.
- Alternatively, connect to electrochemical sensors via Bluetooth or audio port for direct signal measurement.
Data Processing:
- Process the captured image using the mobile application to convert color intensity to analyte concentration.
- For electrochemical detection, record current or voltage signals through the connected interface.
- Generate quantitative results for all analytes simultaneously using built-in calibration algorithms.
Data Management:
- Transmit results to electronic health records via wireless connectivity.
- Store data in cloud servers for longitudinal monitoring and analysis.
Validation Parameters:
- Compare results with reference laboratory methods using correlation analysis.
- Determine within-run and between-run precision using replicate measurements.
- Assess analytical sensitivity (LOD) and specificity (cross-reactivity) for each analyte.
Signaling Pathways and Experimental Workflows
The implementation of multiplex biosensors involves several critical operational pathways that determine their real-world applicability. The diagrams below visualize the core biosensor signaling mechanism and the systematic workflow for POC suitability assessment.
Diagram 1: Multiplex Biosensor Signaling Pathway
Diagram 2: POC Suitability Assessment Workflow
The Scientist's Toolkit: Essential Research Reagent Solutions
Successful implementation of multiplex biosensing requires carefully selected reagents and materials optimized for each platform technology. The table below details essential components and their functions for developing and validating multiplex biosensors.
Table 3: Essential Research Reagents for Multiplex Biosensor Development
| Reagent Category | Specific Examples | Function in Biosensing | Compatibility Notes |
|---|---|---|---|
| Capture Agents [18] [108] | Monoclonal antibodies, oligonucleotide probes, molecularly imprinted polymers | Target recognition and immobilization | Specificity and cross-reactivity profile critical for multiplexing |
| Signal Transduction Elements [88] [106] | Enzyme labels (HRP, ALP), fluorescent dyes (FITC, Qdots), redox mediators (ferrocene) | Generation of measurable signal proportional to analyte concentration | Must minimize spectral overlap in fluorescence-based systems |
| Nanomaterial Enhancers [106] [1] | Gold nanoparticles, carbon nanotubes, graphene, quantum dots | Signal amplification, increased surface area, enhanced conductivity | Size and functionalization critical for performance |
| Microfluidic Substrates [19] [1] | PDMS, polyimide, polyester, dry-film photoresists | Fabrication of microchannel networks for fluid manipulation | Biocompatibility and surface chemistry determine immobilization efficiency |
| Calibration Standards [88] [108] | Recombinant proteins, synthetic oligonucleotides, characterized clinical samples | Quantification reference for target analytes | Matrix matching essential for accurate measurements in clinical samples |
| Surface Chemistry Reagents [18] [109] | NHS esters, epoxides, streptavidin-biotin systems, thiol-gold chemistry | Immobilization of capture agents onto solid surfaces | Density and orientation critical for assay sensitivity |
The real-world applicability of multiplex biosensors continues to expand with advancements in microfluidics, nanomaterials, and detection technologies [1]. Current platforms demonstrate varying degrees of POC suitability, with smartphone-based and microfluidic electrochemical sensors showing particular promise for decentralized testing [106] [19]. Successful implementation requires rigorous validation using standardized protocols that address both analytical performance and operational requirements in clinical settings. Future development should focus on enhancing connectivity with healthcare informatics systems, improving user interfaces for non-specialist operators, and reducing manufacturing costs to enable broader adoption [107] [106]. As these technologies mature, multiplex biosensors are poised to significantly impact personalized medicine by providing comprehensive biomarker profiles that guide targeted therapeutic interventions.
Cost-Effectiveness, Throughput, and Operational Complexity Assessment
Multiplex biosensors represent a transformative technology in biomedical research and clinical diagnostics, enabling the simultaneous quantification of multiple biomarkers from a single sample. For researchers and drug development professionals, a critical assessment of their cost-effectiveness, throughput, and operational complexity is essential for technology selection and laboratory implementation. This application note provides a structured evaluation framework and detailed protocols to guide researchers in leveraging these advanced diagnostic platforms.
Quantitative Performance Comparison of Multiplex Biosensing Platforms
The selection of an appropriate multiplex biosensing platform requires careful consideration of performance metrics, operational requirements, and economic factors. The table below provides a comparative analysis of major technology platforms based on current implementations.
Table 1: Performance comparison of multiplex biosensing platforms
| Platform Technology | Multiplexing Capacity | Throughput (Samples/Hour) | Approximate Detection Limit | Dynamic Range | Relative Cost Per Test | Operational Complexity |
|---|---|---|---|---|---|---|
| Electrochemical (BiosensorX) [19] | 4-8 targets | Medium (Limited by incubation) | Varies by assay (e.g., meropenem) | >2 orders of magnitude | Low | Moderate (Microfluidic handling) |
| Optical (AVAC Digital Counting) [110] | High (Multiple targets) | High (Up to 1,000) | 26 fg/mL (HIV p24) | >4 orders of magnitude | Medium-High | Low (Automated) |
| Impedance (Barcoded Particles) [17] | High (Digital barcoding) | Medium | 7 µm microsphere LOD | N/A | Low-Moderate | High (Particle synthesis) |
| Standard ELISA [110] | Low (Typically single-plex) | Low-Moderate (20-40) | µg-ng/mL range | 1-2 orders of magnitude | Low | Moderate (Multiple washing steps) |
Detailed Experimental Protocols
Protocol 1: Microfluidic Electrochemical Multiplexed Biosensor (BiosensorX)
This protocol details the implementation of a spatially-separated, multiplexed electrochemical biosensor for simultaneous detection of multiple analytes [19].
Materials and Reagents
- Substrate Material: Polyimide sheets with patterned platinum electrodes
- Microfluidic Layer: Dry-film photoresists (DFRs) laminated to form channels
- Biological Reagents: Target-specific capture molecules (antibodies, enzymes, or proteins)
- Hydrophobic Barrier: Teflon-based stopping barriers
- Measurement Buffer: Phosphate-buffered saline (PBS) with redox mediators
Experimental Workflow
Step 1: Chip Preparation and Functionalization
- Utilize pre-fabricated BiosensorX chips with 4-8 sequential detection units [19].
- Functionalize each immobilization area with specific capture molecules via physical adsorption or covalent chemistry.
- Apply blocking solution (e.g., BSA) to minimize non-specific binding.
- Insert hydrophobic stopping barriers between incubation areas and electrochemical cells.
Step 2: Sample Introduction and Incubation
- Introduce samples through individual incubation holes or common inlet.
- For multisample analysis, use dedicated inlets for different biofluids.
- Incubate for 30-60 minutes at room temperature to allow biomarker capture.
Step 3: Washing and Measurement
- Remove unbound molecules through washing holes with buffer solution.
- Introduce measurement solution containing enzymatic substrates or redox mediators.
- Pump solution homogeneously through all immobilization areas to electrochemical cells.
Step 4: Signal Readout and Analysis
- Apply appropriate potential to working electrodes relative to reference electrodes.
- Measure amperometric current at each electrochemical cell simultaneously.
- Convert current signals to analyte concentrations using calibration curves.
- Assess potential cross-contamination between adjacent detection areas.
Protocol 2: AVAC Digital Counting Platform for Ultrasensitive Multiplexing
This protocol describes the automated digital counting of plasmonic nanoparticles for high-throughput, ultrasensitive biomarker detection [110].
Materials and Reagents
- AVAC Platform: Reflective dark-field microscope with automated XY stage
- Substrates: Dielectric materials (glass, silicon) with high flatness
- Nanoparticles: 100 nm spherical gold nanoparticles (GNPs) functionalized with detection antibodies
- Capture Antibodies: High-density monolayer of oriented antibodies on substrate
- Blocking Agents: BSA or other blocking proteins to reduce non-specific binding
Experimental Workflow
Step 1: Substrate Functionalization
- Immobilize capture antibodies on dielectric substrates through chemical bonding.
- Create high-density monolayer with oriented binding sites.
- Apply blocking agents to minimize non-specific binding of nanoparticles.
- Attach removable 96-well structure to form individual reaction chambers.
Step 2: Sample and Nanoparticle Incubation
- Incubate samples with functionalized gold nanoparticles (100 nm) for 30 minutes.
- Utilize detection antibody-conjugated GNPs for specific biomarker binding.
- Employ different GNP sizes or compositions for multiplexed detection.
Step 3: Washing and Preparation for Imaging
- Remove well structure after incubation.
- Wash substrate to remove unbound nanoparticles.
- Dry surface to prepare for dark-field microscopy.
Step 4: Automated Imaging and Digital Counting
- Insert substrate into AVAC scanner with motorized XY stage.
- Capture high-resolution dark-field images using CMOS camera (20,000 images/hour).
- Process images with proprietary algorithm: particle identification, characterization, classification, and counting.
- Focus specifically on monomer counts for most accurate quantification.
Step 5: Data Analysis and Multiplexing
- Calculate statistical values from particle counts across all images.
- Convert digital counts to biomarker concentrations using calibration curves.
- For multiplexing, distinguish different nanoparticle types based on spectral properties.
- Achieve broad dynamic range (e.g., 160 fg/mL to 850 pg/mL for IL-6).
The Scientist's Toolkit: Essential Research Reagents and Materials
Table 2: Key research reagents and materials for multiplex biosensor development
| Category | Specific Examples | Function in Experiment | Technical Considerations |
|---|---|---|---|
| Substrate Materials | Polyimide, PDMS, Dry-film photoresists (DFRs), Glass/Silicon substrates [19] [110] | Structural foundation for microfluidics and sensing elements | Biocompatibility, surface chemistry, optical properties, fabrication compatibility |
| Recognition Elements | Monoclonal antibodies, Enzymes (glucose oxidase), Nucleic acid probes, Proteins [19] | Biomolecular recognition of specific analytes | Specificity, affinity, stability, orientation on surface |
| Signal Transduction | Platinum electrodes, Gold nanoparticles (100 nm), Fluorescent dyes, Electrochemical mediators [19] [110] | Convert biological interaction to measurable signal | Sensitivity, background noise, multiplexing capability |
| Microfluidic Components | Hydrophobic stopping barriers (Teflon), Laminated DFR channels, Incubation/washing holes [19] | Fluid control, sample manipulation, prevention of cross-contamination | Flow resistance, chemical compatibility, precision manufacturing |
| Detection Instruments | Potentiostats, Reflective dark-field microscopes, High-speed CMOS cameras, Automated XY stages [19] [110] | Signal measurement and data acquisition | Sensitivity, throughput, automation capability, data processing software |
Cost-Effectiveness Analysis
The economic assessment of multiplex biosensors must consider both direct and indirect costs across the technology lifecycle.
Direct Cost Components
- Consumables: Microfluidic chips ($5-20 per chip depending on complexity) and reagents [19].
- Equipment: Platform-specific readers ($10,000-$100,000 capital investment) [111] [112].
- Labor: Technician time significantly reduced in automated systems like AVAC (up to 1,000 samples/hour) [110].
Cost-Benefit Considerations
- Multiplexing Advantage: Simultaneous detection of multiple biomarkers reduces per-analyte cost compared to individual tests [19].
- Throughput Impact: High-throughput systems (e.g., AVAC) offer lower operational costs per test in high-volume settings [110].
- Sample Volume: Microfluidic platforms minimize sample and reagent consumption (microliter volumes), reducing costs [1].
- Market Context: The global biosensors market is projected to grow at 7.9-9.5% CAGR, potentially reducing costs through economies of scale [111] [112].
Operational Complexity Assessment
Implementation Challenges
- Fabrication Complexity: Microfluidic biosensors require specialized manufacturing (photolithography, lift-off processes) [19].
- Assay Development: Multiplexed assays require extensive optimization to minimize cross-reactivity and maintain sensitivity [1].
- Regulatory Hurdles: FDA approval and CLIA compliance present significant barriers with lengthy certification cycles [111].
Usability Considerations
- Automation Level: Platforms like AVAC offer full automation, reducing operator dependency and training requirements [110].
- Assay Time: Protocols range from 15 minutes for electrochemical detection to several hours for more complex workflows [19] [110].
- Data Analysis: Digital counting platforms require sophisticated image processing algorithms but provide intuitive results [110].
Multiplex biosensor technologies offer diverse options balancing cost, throughput, and complexity. Electrochemical platforms provide cost-effective solutions for moderate multiplexing, while optical digital counting systems deliver superior sensitivity and throughput at higher cost. Researchers should select platforms based on specific application requirements, considering that operational simplicity often correlates with higher initial investment. The ongoing advancement in microfluidics, nanotechnology, and automation continues to improve the cost-benefit profile of these technologies for research and clinical applications.
Conclusion
Multiplex biosensors represent a paradigm shift in diagnostic capabilities, offering unprecedented opportunities for precise disease detection and monitoring through simultaneous evaluation of biomarker panels. The integration of advanced nanomaterials with sophisticated optical and electrochemical sensing platforms has enabled detection sensitivities that frequently surpass traditional methods like ELISA and PCR. Despite significant progress, challenges remain in standardization, clinical validation, and seamless integration into point-of-care settings. Future directions will likely focus on developing AI-enhanced analytical systems, creating more robust and sustainable manufacturing processes, and validating larger biomarker panels for complex diseases. The continued evolution of these technologies promises to transform biomedical research, drug development, and clinical diagnostics by providing comprehensive, reliable, and accessible tools for personalized medicine and global health initiatives.
References
- 1. Microfluidic biosensors for biomarker detection in body fluids: a key... [https://biomarkerres.biomedcentral.com/articles/10.1186/s40364-024-00697-4]
- 2. Simultaneous detection of trace protein biomarkers from a single ... [https://pubmed.ncbi.nlm.nih.gov/39965417/]
- 3. Multiplex optical biosensors based on multi-pinhole interferometry - PMC [https://www.ncbi.nlm.nih.gov/pmc/articles/PMC8367262/]
- 4. Strategies for Multiplexed Biosensor Imaging to Study Intracellular... [https://pubmed.ncbi.nlm.nih.gov/34331275/]
- 5. Recent advances in receptor-based optical biosensors for the... [https://pubmed.ncbi.nlm.nih.gov/39321560/]
- 6. PKA and ERK1&2 kinases FRET biosensors in living... Multiplexing [https://www.nature.com/articles/srep41026?error=cookies_not_supported]
- 7. Multiplex metagenomic sequencing for rapid viral pathogen identification and surveillance in clinical specimens | BMC Infectious Diseases | Full Text [https://bmcinfectdis.biomedcentral.com/articles/10.1186/s12879-025-11952-w]
- 8. Decrease your cost-per-sample with multiplexing - PacBio [https://www.pacb.com/multiplexing/]
- 9. Innovations in Biosensor Technologies for Healthcare Diagnostics and Therapeutic Drug Monitoring: Applications, Recent Progress, and Future Research Challenges - PMC [https://pmc.ncbi.nlm.nih.gov/articles/PMC11360123/]
- 10. : the new wave in Biosensors diagnosis - PMC cancer [https://pmc.ncbi.nlm.nih.gov/articles/PMC3781701/]
- 11. SERS biosensors for liquid biopsy towards cancer diagnosis by... [https://nanoconvergencejournal.springeropen.com/articles/10.1186/s40580-024-00428-3]
- 12. The role of rapid multiplex molecular syndromic panels in the clinical... [https://ccforum.biomedcentral.com/articles/10.1186/s13054-024-05224-3]
- 13. Exploring the Utility of Multiplex Testing for... Infectious Disease Panel [https://pubmed.ncbi.nlm.nih.gov/37757952/]
- 14. Optical Biosensors for Therapeutic Drug Monitoring - PMC [https://pmc.ncbi.nlm.nih.gov/articles/PMC6955905/]
- 15. F1000Research Article: Biosensors for therapeutic drug monitoring: a review. [https://f1000research.com/articles/12-171]
- 16. Amperometric biosensors for clinical and therapeutic drug monitoring: a review - ScienceDirect [https://www.sciencedirect.com/science/article/abs/pii/S0731708598000569]
- 17. Design of a Multiplexed Analyte Biosensor using Digital Barcoded... [https://www.nature.com/articles/s41598-020-62894-z?error=cookies_not_supported]
- 18. Capabilities of Multiplexing for Clinical... | IntechOpen Biosensors [https://www.intechopen.com/chapters/16484]
- 19. Designing electrochemical microfluidic multiplexed for... biosensors [https://pmc.ncbi.nlm.nih.gov/articles/PMC9411084/]
- 20. Multiplexed immunosensors for point-of-care diagnostic applications - ScienceDirect [https://www.sciencedirect.com/science/article/pii/S0956566322000902]
- 21. Multiplex Biosensing for Simultaneous Detection of Mutations in SARS-CoV-2 - PMC [https://www.ncbi.nlm.nih.gov/pmc/articles/PMC8491437/]
- 22. , an international, peer- Biosensors Open Access journal. reviewed [https://www.mdpi.com/journal/biosensors/special_issues/5ILF2XH4B0]
- 23. A general method for the development of multicolor biosensors with large dynamic ranges | Nature Chemical Biology [https://www.nature.com/articles/s41589-023-01350-1]
- 24. A 'turn-on' ultra-sensitive multiplex real-time fluorescent quantitative ... [https://pubmed.ncbi.nlm.nih.gov/32535319/]
- 25. Progress on Research Pathogen Detection Using Optical... Multiplexed [https://pubmed.ncbi.nlm.nih.gov/40558460/]
- 26. for diagnosing neurodegenerative diseases - PMC Optical biosensors [https://pmc.ncbi.nlm.nih.gov/articles/PMC12048351/]
- 27. Multiplexed Nanobiosensors: Current Trends in Early Diagnostics - PMC [https://www.ncbi.nlm.nih.gov/pmc/articles/PMC7729484/]
- 28. Strategies to improve performances of LSPR biosensing: Structure, materials, and interface modification - ScienceDirect [https://www.sciencedirect.com/science/article/abs/pii/S0956566320308368]
- 29. Plasmonic biosensing schemes for virus | Encyclopedia MDPI [https://encyclopedia.pub/entry/1805]
- 30. Plasmon-Enhanced Optical Sensors: A Review - PMC [https://pmc.ncbi.nlm.nih.gov/articles/PMC4274271/]
- 31. A comprehensive review on plasmonic-based biosensors used in viral diagnostics | Communications Biology [https://www.nature.com/articles/s42003-020-01615-8]
- 32. Engineering a diagnostic platform based on a spatially ... [https://pubs.rsc.org/en/content/articlehtml/2025/lc/d5lc00360a]
- 33. Potential-Resolved Electrochemiluminescence and Its ... [https://www.mdpi.com/2079-6374/15/11/749]
- 34. Recent advances in electrochemiluminescence-based ... [https://www.sciencedirect.com/science/article/abs/pii/S0165993619305631]
- 35. Recent advances in electrochemiluminescence immunosensing [https://pubs.rsc.org/en/content/articlehtml/2024/sd/d4sd00272e]
- 36. A single-electrode electrochemical system for multiplex ... [https://pmc.ncbi.nlm.nih.gov/articles/PMC5935220/]
- 37. Validation of a multiplex electrochemiluminescent ... [https://pmc.ncbi.nlm.nih.gov/articles/PMC4120713/]
- 38. for the Biosensors of Inflammatory Disease... Multiplex Detection [https://pmc.ncbi.nlm.nih.gov/articles/PMC7823974/]
- 39. sciencedirect.com/science/article/pii/S2405844023071372 [https://www.sciencedirect.com/science/article/pii/S2405844023071372]
- 40. nanoparticles in Noble : recent studies and... metal biosensors [https://pmc.ncbi.nlm.nih.gov/articles/PMC5766271/]
- 41. Frontiers | Advancements in magnetic nanoparticle-based biosensors for point-of-care testing [https://www.frontiersin.org/journals/bioengineering-and-biotechnology/articles/10.3389/fbioe.2024.1393789/full]
- 42. Frontiers | Nanomaterials for biosensing applications: a review [https://www.frontiersin.org/journals/chemistry/articles/10.3389/fchem.2014.00063/full]
- 43. Noble Metals: Definition, Properties, Use, and Types | Xometry [https://www.xometry.com/resources/materials/noble-metals/]
- 44. Reference Table of Elemental Electrical Conductivity - Alfa Chemistry [https://www.alfa-chemistry.com/resources/reference-table-of-elemental-electrical-conductivity.html]
- 45. Advancements in magnetic nanoparticle-based biosensors for point-of-care testing - PMC [https://pmc.ncbi.nlm.nih.gov/articles/PMC11079239/]
- 46. for Efficient Diagnosis of the... | SpringerLink Multiplexed Biosensors [https://link.springer.com/chapter/10.1007/978-981-16-9897-2_9]
- 47. Lab-on-a-Chip Platforms as Tools for Drug Screening in Neuropathologies Associated with Blood–Brain Barrier Alterations - PMC [https://pmc.ncbi.nlm.nih.gov/articles/PMC8235582/]
- 48. Frontiers | Microfluidic for rapid biosensors of foodborne... detection [https://www.frontiersin.org/journals/chemistry/articles/10.3389/fchem.2025.1536928/full]
- 49. Controllable Assembly of Enzymes for Multiplexed - Lab - on - a ... Chip [https://pubmed.ncbi.nlm.nih.gov/29480958/]
- 50. A facile microfluidic chip design for DNA detection using dengue serotypes as a proof-of-concept case study - ScienceDirect [https://www.sciencedirect.com/science/article/pii/S2665906923000077]
- 51. Structural colour enhanced microfluidics | Nature Communications [https://www.nature.com/articles/s41467-022-29956-4]
- 52. - Lab - on - a Assays | SpringerLink Chip Multiplex [https://link.springer.com/protocol/10.1007/978-1-4939-6730-8_25]
- 53. A protocol to execute a lab-on-chip platform for simultaneous culture and electrochemical detection of bacteria - PMC [https://pmc.ncbi.nlm.nih.gov/articles/PMC10227457/]
- 54. Synthetic biology meets diagnostics: Engineering biosensing platforms for rapid and accurate pathogen and viral detection - PubMed [https://pubmed.ncbi.nlm.nih.gov/40939269/]
- 55. Multiplexed CRISPR-based Methods for Pathogen Nucleic Acid Detection - PMC [https://pmc.ncbi.nlm.nih.gov/articles/PMC10310064/]
- 56. SHERLOCK: nucleic with acid ... | Nature detection CRISPR Protocols [https://www.nature.com/articles/s41596-019-0210-2?error=cookies_not_supported&code=69b4d375-5119-4f42-b716-042ae8e87e67]
- 57. Synthetic Biology Enables Programmable Cell‐Based Biosensors - PMC [https://pmc.ncbi.nlm.nih.gov/articles/PMC7004036/]
- 58. Advances in Synthetic-Biology-Based Whole-Cell Biosensors: Principles, Genetic Modules, and Applications in Food Safety - PMC [https://pmc.ncbi.nlm.nih.gov/articles/PMC10178329/]
- 59. SYNTHETIC BIOLOGY AND THE ART OF BIOSENSOR DESIGN - The Science and Applications of Synthetic and Systems Biology - NCBI Bookshelf [https://www.ncbi.nlm.nih.gov/books/NBK84465/]
- 60. cell-based diagnostic devices for Multiplexed of renal... detection [https://pubmed.ncbi.nlm.nih.gov/36571991/]
- 61. Frontiers | Editorial: Insights in biosensors and biomolecular... [https://www.frontiersin.org/journals/bioengineering-and-biotechnology/articles/10.3389/fbioe.2025.1668411/full]
- 62. Detection Multiplexed for Strategies Based on the... Biosensors [https://pubmed.ncbi.nlm.nih.gov/38860462/]
- 63. Multiplexed Optical Nanobiosensing Technologies for Disease Biomarker Detection [https://www.mdpi.com/2079-6374/15/10/682]
- 64. Immunoassay for Biomarker Research — Olink Multiplex [https://olink.com/blog/multiplex-immunoassay-for-biomarker-research]
- 65. Solutions to immunoassay interference , cross and other... reactivity [https://www.gyrosproteintechnologies.com/spinblog/immunoassay-interference-crossreactivity-challenges]
- 66. Wearable Electrochemical Biosensors for Advanced Healthcare Monitoring - PMC [https://pmc.ncbi.nlm.nih.gov/articles/PMC11727287/]
- 67. of silver nanoparticles in optical and... Signaling strategies [https://link.springer.com/article/10.1007/s00604-023-05666-6]
- 68. Recent advances in receptor-based optical biosensors for the detection of multiplex biomarkers - ScienceDirect [https://www.sciencedirect.com/science/article/abs/pii/S0039914024012311]
- 69. ' Bioreceptors by hydrogen bonding interactions and... immobilization [https://pubmed.ncbi.nlm.nih.gov/39400624/]
- 70. A Review on Biosensors and Recent Development of Nanostructured Materials-Enabled Biosensors - PMC [https://pmc.ncbi.nlm.nih.gov/articles/PMC7915135/]
- 71. Biosensing Basics | IntechOpen [https://www.intechopen.com/chapters/89025]
- 72. Nanotechnology-Enabled Biosensors: A Review of Fundamentals, Design Principles, Materials, and Applications - PMC [https://pmc.ncbi.nlm.nih.gov/articles/PMC9856107/]
- 73. Critical overview on the application of sensors and biosensors for clinical analysis - PMC [https://pmc.ncbi.nlm.nih.gov/articles/PMC7112812/]
- 74. The nanomaterials and recent progress in biosensing systems: A review - ScienceDirect [https://www.sciencedirect.com/science/article/abs/pii/S2214158820300155]
- 75. Electrochemical biosensors: perspective on functional nanomaterials for on-site analysis | Biomaterials Research | Full Text [https://biomaterialsres.biomedcentral.com/articles/10.1186/s40824-019-0181-y]
- 76. Label-free multiplexed of diabetic retinopathy detection ... biomarkers [https://research.nu.edu.kz/en/publications/label-free-multiplexed-detection-of-diabetic-retinopathy-biomarke/]
- 77. Printed photonic crystal biochips for rapid and... | Nature Protocols [https://www.nature.com/articles/s41596-025-01215-y?error=cookies_not_supported&code=8b1d065f-2877-4829-b932-33c7e7143957]
- 78. Biosensor - Wikipedia [https://en.wikipedia.org/wiki/Biosensor]
- 79. Evaluating and mitigating clinical samples matrix on TX-TL... effects [https://www.nature.com/articles/s41598-022-17583-4?error=cookies_not_supported&code=640504c2-4289-498f-8618-c9338e7047b5]
- 80. Enabling Multiplexed Electrochemical Detection of Biomarkers with... [https://pubmed.ncbi.nlm.nih.gov/34478255/]
- 81. Strategies for the Detection and Elimination of Matrix Effects in Quantitative LC–MS Analysis | LCGC International [https://www.chromatographyonline.com/view/strategies-detection-and-elimination-matrix-effects-quantitative-lc-ms-analysis]
- 82. Compensate for or Minimize Matrix Effects? Strategies for Overcoming Matrix Effects in Liquid Chromatography-Mass Spectrometry Technique: A Tutorial Review - PMC [https://pmc.ncbi.nlm.nih.gov/articles/PMC7412464/]
- 83. NanoSPR Molecular Multiplex for Biosensor Cytokine Monitoring Blood [https://apb.tbzmed.ac.ir/FullHtml/apb-30740]
- 84. Chromogenic Assays: What they are and how they are used in research | GoldBio [https://goldbio.com/articles/article/chromogenic-assays-introduction-overview]
- 85. A multiplexed , automated evolution pipeline... | Nature Communications [https://www.nature.com/articles/s41467-021-21716-0?error=cookies_not_supported&code=d4824d1b-f9b2-4a2c-969b-c3d2c60e58b5]
- 86. The Limit | LCGC International of Detection [https://www.chromatographyonline.com/view/limit-detection]
- 87. electrochemical sensing platforms for the detection of breast... Multiplex [https://pubmed.ncbi.nlm.nih.gov/38425422/]
- 88. Comparison of Multiplex Immunoassay Platforms - PMC [https://pmc.ncbi.nlm.nih.gov/articles/PMC2905867/]
- 89. Comparison of multiplex immunoassay platforms - PubMed [https://pubmed.ncbi.nlm.nih.gov/20022982/]
- 90. Transforming cytokine diagnostics: AI, multiplexing, and point-of-care biosensing technologies | Microchimica Acta [https://link.springer.com/article/10.1007/s00604-025-07632-w]
- 91. The LOD paradox: When lower isn't always better in biosensor research and development - PubMed [https://pubmed.ncbi.nlm.nih.gov/39151260/]
- 92. Synthetic Biology Enables Programmable Cell‐Based Biosensors - PMC [https://www.ncbi.nlm.nih.gov/pmc/articles/PMC7004036/]
- 93. Recent Advances in Portable Biosensors for Biomarker Detection in... [https://pmc.ncbi.nlm.nih.gov/articles/PMC7559030/]
- 94. : Qualitative vs. ELISA | MyBioSource Learning Center Quantitative [https://www.mybiosource.com/learn/qualitative-vs-quantitative-elisa/]
- 95. evaluation of four commercial Comparative ... performance multiplex [https://pmc.ncbi.nlm.nih.gov/articles/PMC6453453/]
- 96. . Immuno- ELISA . SIMOA: vs of... | RayBiotech PCR vs Comparison [https://www.raybiotech.com/elisa-immunopcr-simoa]
- 97. of the Comparison of an amplicon sequencing assay... performance [https://bmcgenomics.biomedcentral.com/articles/10.1186/s12864-020-6557-5]
- 98. Frontiers | Multiplex flow cytometry-based assay for quantifying tumor- and virus-associated antibodies induced by immunotherapies [https://www.frontiersin.org/journals/immunology/articles/10.3389/fimmu.2022.1038340/full]
- 99. Multiplex flow cytometry-based assay for quantifying tumor- and virus-associated antibodies induced by immunotherapies - PMC [https://pmc.ncbi.nlm.nih.gov/articles/PMC9708883/]
- 100. bead array assays: performance evaluation and Multiplex ... comparison [https://pubmed.ncbi.nlm.nih.gov/16481199/]
- 101. sciencedirect.com/topics/medicine-and-dentistry/ sensitivity -and... [https://www.sciencedirect.com/topics/medicine-and-dentistry/sensitivity-and-specificity]
- 102. and Sensitivity - Wikipedia specificity [https://en.wikipedia.org/wiki/Sensitivity_and_specificity]
- 103. and Sensitivity Fundamentals | Beckman Coulter Specificity [https://www.beckmancoulter.com/en/blog/diagnostics/sensitivity-and-specificity-fundamentals]
- 104. Frontiers | Multiplex electrochemical sensing platforms for the... [https://www.frontiersin.org/journals/medical-technology/articles/10.3389/fmedt.2024.1360510/full]
- 105. Clinical application of chromosome 9p21.3 genotyping in ... [https://www.spandidos-publications.com/10.3892/etm.2019.7884]
- 106. Smartphone-Based Multiplexed Biosensing Tools for Health... [https://pmc.ncbi.nlm.nih.gov/articles/PMC9406027/]
- 107. POC ( Point - of - care ) Biosensors in the Real : 5 Uses You'll... World [https://www.linkedin.com/pulse/poc-point-of-care-biosensors-real-world-5-uses-ueyte/]
- 108. Multiplex Bead Array Assays: Performance Evaluation and Comparison of Sensitivity to ELISA - PMC [https://pmc.ncbi.nlm.nih.gov/articles/PMC1534009/]
- 109. Evaluation of Mass Sensitive Micro-Array biosensors for their... [https://pure.qub.ac.uk/en/publications/evaluation-of-mass-sensitive-micro-array-biosensors-for-their-fea]
- 110. Introducing AVAC as an ultra-sensitive platform with broad dynamical... [https://www.nature.com/articles/s41598-025-88992-4?error=cookies_not_supported&code=caacaa58-7e65-426b-99dd-2bcbaa3957f8]
- 111. Biosensors Market Size, Share, Trends & Growth 2030 [https://www.marketsandmarkets.com/Market-Reports/biosensors-market-798.html]
- 112. Biosensors Market Size & Share Report, 2025 – 2034 [https://www.gminsights.com/industry-analysis/biosensors-market]