Optimizing Biosensor Performance: A Comprehensive Guide to Response Surface Methodology for Calibration and Validation
This article provides a comprehensive overview of Response Surface Methodology (RSM) for the calibration and optimization of biosensors, a critical tool for researchers, scientists, and drug development professionals.
Optimizing Biosensor Performance: A Comprehensive Guide to Response Surface Methodology for Calibration and Validation
Abstract
This article provides a comprehensive overview of Response Surface Methodology (RSM) for the calibration and optimization of biosensors, a critical tool for researchers, scientists, and drug development professionals. It covers the foundational principles of RSM as a superior alternative to one-factor-at-a-time experiments, detailing its application across various biosensor types, including electrochemical, optical, and surface plasmon resonance (SPR) systems. The content delivers practical troubleshooting strategies for common experimental challenges and presents a framework for the rigorous validation of RSM-optimized biosensor models against traditional methods. By integrating advanced topics such as machine learning and multi-objective optimization, this guide serves as a valuable resource for developing highly sensitive, accurate, and reliable biosensing platforms for biomedical and clinical applications.
Beyond One-Variable-at-a-Time: Foundational Principles of RSM for Robust Biosensor Design
The Limitation of Single-Factor Optimization
Traditional one-factor-at-a-time (OFAT) optimization approaches present significant limitations for complex systems like biosensor calibration. This method involves varying a single parameter while holding all others constant, which precludes the detection of critical interactions between different variables [1]. The OFAT approach can be time-consuming, resource-intensive, and often fails to identify the true optimum conditions, as it cannot account for synergistic or antagonistic effects between multiple factors simultaneously influencing the biosensor response [2] [3].
Fundamental Principles of RSM
Response Surface Methodology (RSM) is a collection of statistical techniques for designing experiments, building models, evaluating factor effects, and searching for optimal conditions [3]. As a model-based optimization approach, RSM develops a data-driven model that establishes a causal relationship between input variables (e.g., materials properties, fabrication parameters) and sensor outputs [2]. This methodology enables researchers to:
- Efficiently quantify individual and interactive effects of multiple factors
- Navigate the experimental domain systematically to find optimum conditions
- Develop predictive mathematical models for biosensor performance
- Reduce experimental effort compared to univariate strategies while obtaining more comprehensive information [2]
RSM is particularly valuable for optimizing ultrasensitive biosensing platforms with sub-femtomolar detection limits, where challenges like enhancing signal-to-noise ratio, improving selectivity, and ensuring reproducibility are especially pronounced [2].
Key Experimental Designs in RSM
Central Composite Design (CCD)
Central Composite Design is one of the most commonly used response surface designs for fitting second-order models. A CCD consists of:
- 2^k factorial points (or fractional factorial for k > 4)
- 2k axial points (star points) located at distance ±α from the center
- Multiple center points (typically 3-6) to estimate experimental error [1]
For three variables (k=3), this results in 8 factorial points, 6 axial points, and multiple center points (typically 6), totaling 20 experiments [1]. The axial points allow estimation of curvature in the response surface, while the center points provide an estimate of pure error and allow checking for model adequacy.
Box-Behnken Design (BBD)
Box-Behnken Design is an alternative to CCD that offers some advantages for certain applications:
- Requires fewer experimental runs than CCD for the same number of factors
- All design points fall within safe operating limits (no extreme combinations)
- Avoids simultaneous extreme conditions for all factors [4]
For three factors, a BBD requires only 15 experiments (including center points) compared to 20 for a CCD, making it more efficient for resource-intensive biosensor studies.
Comparison of Experimental Designs
Table 1: Comparison of Common Experimental Designs Used in RSM
| Design Type | Number of Experiments for k=3 | Model Fitted | Key Advantages | Common Applications |
|---|---|---|---|---|
| Central Composite Design (CCD) | 8 factorial + 6 axial + 6 center = 20 | Second-order (quadratic) | Detects curvature; comprehensive coverage | Biosensor fabrication optimization [1] [3] |
| Box-Behnken Design (BBD) | 12 edges + 3 center = 15 | Second-order (quadratic) | Fewer runs; avoids extreme conditions | Process parameter optimization [4] |
| 3^k Full Factorial | 27 (for k=3, 3 levels) | Second-order (quadratic) | Comprehensive; estimates all interactions | Preliminary screening studies |
| Plackett-Burman | 12 (for k=11) | First-order (linear) | Efficient screening of many factors | Initial factor screening [3] |
RSM Implementation Protocol for Biosensor Optimization
Preliminary Factor Screening
Before undertaking a full RSM optimization, conduct factor screening experiments to identify the most influential variables:
- Identify potential factors through literature review and preliminary experiments
- Use Plackett-Burman designs or fractional factorials to efficiently screen many factors [3]
- Select 3-5 most critical factors for detailed RSM optimization
- Define appropriate factor ranges based on screening results
For example, in developing an electrochemical DNA biosensor for Mycobacterium tuberculosis detection, researchers first employed a Plackett-Burman design to evaluate eleven potential factors before focusing RSM optimization on the most significant variables [3].
Protocol: Central Composite Design Implementation
Objective: Optimize biosensor performance using a three-factor CCD Materials: Biosensor components, analytical instrumentation, statistical software
Procedure:
- Define factors and levels: Select three critical factors and determine appropriate ranges
- Example: For Pt/PPD/GOx biosensor: enzyme concentration (50-800 U·mL⁻¹), scan cycles (10-30), flow rate (0.3-1 mL·min⁻¹) [1]
- Code factor levels: -α (low axial), -1 (low), 0 (center), +1 (high), +α (high axial)
Randomize experimental order to minimize systematic error
- Use statistical software or random number generator
- Document execution order separately from design matrix
Execute experiments according to the design matrix
- Maintain consistent experimental conditions for uncontrolled factors
- Replicate center points throughout the experimental sequence
Measure responses for each experimental run
- Example responses: Sensitivity (µA·mM⁻¹), limit of detection, reproducibility [1]
- Perform multiple measurements for each run to estimate pure error
Record data in structured format matching design matrix
Table 2: Example CCD Experimental Matrix for Biosensor Optimization
| Run Order | X₁: Enzyme Concentration (U·mL⁻¹) | X₂: Scan Cycles | X₃: Flow Rate (mL·min⁻¹) | Response: Sensitivity (µA·mM⁻¹) |
|---|---|---|---|---|
| 1 | -1 (50) | -1 (10) | -1 (0.3) | 12.5 |
| 2 | +1 (800) | -1 (10) | -1 (0.3) | 8.2 |
| 3 | -1 (50) | +1 (30) | -1 (0.3) | 15.3 |
| 4 | +1 (800) | +1 (30) | -1 (0.3) | 10.7 |
| 5 | -1 (50) | -1 (10) | +1 (1.0) | 9.8 |
| 6 | +1 (800) | -1 (10) | +1 (1.0) | 6.4 |
| 7 | -1 (50) | +1 (30) | +1 (1.0) | 12.1 |
| 8 | +1 (800) | +1 (30) | +1 (1.0) | 8.9 |
| 9 | -α (5) | 0 (20) | 0 (0.65) | 7.5 |
| 10 | +α (845) | 0 (20) | 0 (0.65) | 7.1 |
| 11 | 0 (425) | -α (5) | 0 (0.65) | 8.3 |
| 12 | 0 (425) | +α (35) | 0 (0.65) | 11.9 |
| 13 | 0 (425) | 0 (20) | -α (0.1) | 14.2 |
| 14 | 0 (425) | 0 (20) | +α (1.2) | 7.8 |
| 15-20 | 0 (425) | 0 (20) | 0 (0.65) | 10.5, 10.8, 10.2, 10.9, 10.4, 10.7 |
Data Analysis and Model Building
Statistical Analysis Procedure:
- Perform multiple linear regression to fit the second-order polynomial model: Y = β₀ + ΣβᵢXᵢ + ΣβᵢᵢXᵢ² + ΣβᵢⱼXᵢXⱼ + ε [1] Where Y is the predicted response, β₀ is the constant coefficient, βᵢ are linear coefficients, βᵢᵢ are quadratic coefficients, βᵢⱼ are interaction coefficients, and ε is the random error
Conduct Analysis of Variance (ANOVA) to evaluate:
- Model significance: F-test with p-value < 0.05
- Lack of fit test: Compare pure error with model error
- Coefficient significance: t-test for individual terms
- Model adequacy: R², adjusted R², and predicted R²
Validate model assumptions:
- Normal distribution of residuals
- Constant variance of residuals
- Independence of residuals
Create response surface plots to visualize factor-effects relationships
- 3D surface plots for two factors at a time
- Contour plots for identifying optimum regions
Optimization and Validation
Optimization Protocol:
- Use desirability function approach for multiple responses
- Apply numerical optimization algorithms to find factor levels that maximize/minimize responses
- Predict optimal responses with appropriate confidence intervals
- Verify predictions experimentally by conducting confirmation runs at optimal conditions
- Validate biosensor performance with independent test samples
Research Reagent Solutions for Biosensor RSM Studies
Table 3: Essential Materials for Biosensor Development and Optimization
| Reagent/Material | Function in Biosensor Development | Example Application |
|---|---|---|
| Hydroxyapatite Nanoparticles (HAPNPs) | Immobilization substrate for biomolecules; provides good bioactivity, biocompatibility, and multiple adsorption sites [3] | Used in electrochemical DNA biosensors for Mycobacterium tuberculosis detection [3] |
| Polypyrrole (PPY) | Conductive polymer that increases biocompatibility, conductivity, and chemical stability while reducing toxicity [3] | Component of HAPNPTs/PPY/MWCNTs nanocomposite for DNA biosensors [3] |
| Multi-Walled Carbon Nanotubes (MWCNTs) | Enhance electrical conductivity and surface-to-volume ratio; provide chemical inertness [3] | Electrode surface modifier in genosensors [3] |
| Glucose Oxidase (GOx) | Enzyme for biosensor development; inhibition used for detecting heavy metal ions [1] | Recognition element in Pt/PPD/GOx biosensor for metal ion detection [1] |
| o-Phenylenediamine (oPD) | Monomer for electrosynthesis of polymeric networks to entrap enzymes [1] | Used for developing Pt/PPD/GOx biosensors through electrochemical polymerization [1] |
| Screen-Printed Electrodes | Disposable transducer elements with working, reference, and counter electrodes [1] | Platform for Pt/PPD/GOx and other electrochemical biosensors [1] |
| Methylene Blue (MB) | Redox indicator in electrochemical biosensors [3] | Signal amplifier in DNA biosensors [3] |
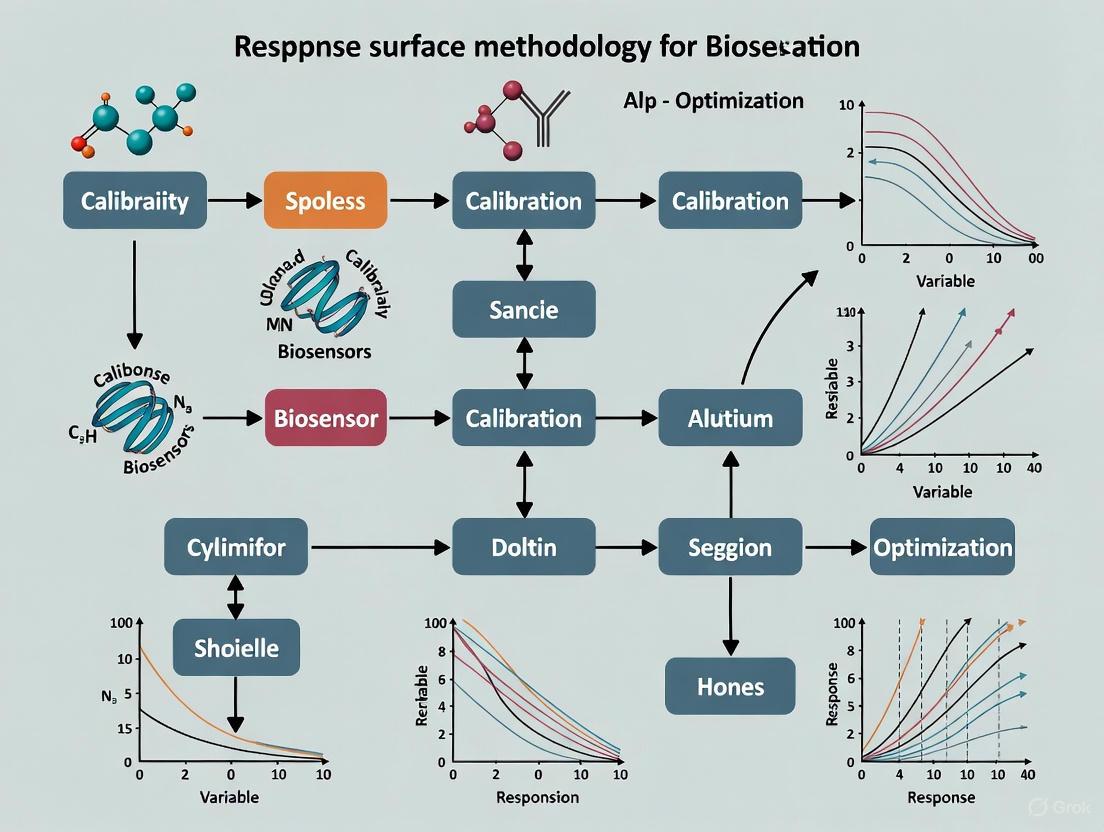
RSM Workflow Visualization
Diagram 1: RSM Optimization Workflow
Case Study: RSM for Electrochemical DNA Biosensor
Background and Application
A practical application of RSM in biosensor development demonstrates the methodology's effectiveness. Researchers developed an electrochemical DNA biosensor for detecting Mycobacterium tuberculosis using a nanocomposite of hydroxyapatite nanoparticles, polypyrrole, and multi-walled carbon nanotubes (HAPNPTs/PPY/MWCNTs) [3].
Implementation and Results
The optimization process involved:
- Initial screening of eleven factors using Plackett-Burman design
- RSM optimization of significant factors including:
- Probe concentration
- Probe immobilization time
- Scan rate of electrodeposition
- Target hybridization time [3]
- Model development with excellent predictive capability
- Confirmation of optimized conditions
The RSM-optimized biosensor demonstrated significantly improved performance compared to one-factor-at-a-time approaches, with enhanced sensitivity, specificity, and reduced development time [3].
Advantages of RSM in Biosensor Calibration
Comparison with Traditional Methods
The implementation of RSM for biosensor calibration offers substantial advantages over univariate approaches:
Table 4: RSM vs. One-Factor-at-a-Time Optimization
| Aspect | RSM Approach | One-Factor-at-a-Time |
|---|---|---|
| Experimental Efficiency | Simultaneous evaluation of multiple factors; fewer total experiments [2] | Sequential evaluation; often requires more experiments |
| Interaction Detection | Quantifies factor interactions through cross terms in model [1] [2] | Cannot detect interactions between factors |
| Optimum Identification | Global optimum identification through mathematical modeling [2] | Risk of finding local rather than global optimum |
| Model Development | Creates predictive model for entire experimental domain [2] | No predictive capability beyond tested points |
| Resource Consumption | Reduced reagents, time, and materials [1] | Higher consumption due to extensive testing |
Enhanced Biosensor Performance
RSM-optimized biosensors demonstrate superior analytical performance:
- Wider working range with maintained sensitivity [1]
- Higher reproducibility of response (e.g., RSD = 0.72% reported) [1]
- Improved accuracy and precision in clinical concentration ranges [5]
- Robust calibration across varying environmental conditions [6]
For electrochemical aptamer-based sensors, proper calibration using designed experiments enables accuracy of better than ±10% for measurement of vancomycin in clinical ranges, demonstrating the method's utility for therapeutic drug monitoring [5].
Response Surface Methodology provides a systematic, efficient framework for overcoming the critical limitations of single-factor optimization in biosensor calibration research. By simultaneously investigating multiple factors and their interactions, RSM enables researchers to develop mathematically robust models that accurately predict biosensor performance across the entire experimental domain. The methodology significantly reduces development time and resource consumption while improving biosensor sensitivity, reproducibility, and reliability. For researchers and drug development professionals working with increasingly complex biosensing platforms, RSM represents an indispensable tool for optimizing performance and accelerating the translation of biosensors from research laboratories to clinical applications.
Response Surface Methodology (RSM) is a powerful collection of statistical techniques for process and product optimization, enabling researchers to model and analyze relationships between multiple explanatory variables and one or more response variables. Within biosensor calibration research, where performance is influenced by complex, interacting fabrication and operational parameters, RSM provides a structured framework for efficient experimentation. The two most prevalent RSM designs are Central Composite Design (CCD) and Box-Behnken Design (BBD). Both are second-order designs used to fit quadratic models, which are essential for capturing the curvature in response surfaces to locate optimal conditions, such as maximizing sensor sensitivity or minimizing detection limits. Their systematic approach is crucial for moving beyond traditional one-variable-at-a-time (OFAT) optimization, which fails to account for factor interactions and often leads to suboptimal results [7] [8].
The choice between CCD and BBD is a critical decision in the experimental planning phase. While both can fit a full quadratic model, their structure, experimental run requirements, and applicability differ. This article provides a detailed comparison of CCD and BBD, complete with structured data, experimental protocols, and visualization to guide researchers and drug development professionals in selecting and implementing the appropriate design for their biosensor calibration and development projects.
Comparative Analysis: CCD vs. BBD
The following table summarizes the core structural and practical differences between Central Composite Design and Box-Behnken Design.
Table 1: Comparative Characteristics of CCD and BBD
| Feature | Central Composite Design (CCD) | Box-Behnken Design (BBD) |
|---|---|---|
| Basic Structure | Comprises three distinct elements: a factorial (or fractional factorial) cube, axial (star) points, and center points [9]. | Comprises points at the midpoints of the edges of the design space cube, plus center points; it does not include corner points [9]. |
| Factor Levels | Five levels (for a rotatable design): -α, -1, 0, +1, +α [8]. | Three levels: -1, 0, +1 [9]. |
| Design Space | Spherical or spherical with star points extending beyond the original factorial cube [8]. | Spherical, strictly within the defined cube boundaries [9]. |
| Sequentiality | Highly sequential. One can begin with a factorial design and later add star and center points to capture curvature [9]. | Not sequential. It is an "all-or-nothing" design that must be executed in a single set of experiments [9]. |
| Key Advantage | Flexibility of sequential experimentation and exploration beyond initial boundaries [9]. | Operates safely within defined boundaries, avoiding extreme factor combinations [9]. |
| Ideal Use Case | Early-stage process understanding where extreme conditions are feasible and exploring beyond initial ranges is desirable [9]. | Optimizing well-characterized processes where extreme combinations are risky, expensive, or impractical [9]. |
A critical practical consideration is the number of experimental runs required, which impacts resource allocation and time. The table below provides a comparison of run counts for different numbers of factors (k). It is generally recommended to use RSM with no more than 6 factors, having first used screening designs to identify the most critical ones [9].
Table 2: Experimental Run Count Comparison for CCD and BBD
| Number of Factors (k) | Box-Behnken Design (BBD) | Central Composite Design (CCD) |
|---|---|---|
| 3 | 15 [9] | 17 [9] |
| 4 | 27 [9] | 27 [9] |
| 5 | 43 [9] | 45 [9] |
| 6 | 63 [9] | 79 [9] |
Experimental Protocols
Protocol for Central Composite Design (CCD)
The following workflow outlines the key stages for planning and executing a CCD for biosensor optimization, such as fine-tuning the composition of an electrode surface.
Title: CCD Experimental Workflow
Procedure:
Define Variables and Ranges: Identify critical factors (e.g., amount of carboxylated multiwall carbon nanotubes (c-MWCNT), titanium dioxide nanoparticles (TiO2NP), and glucose oxidase (GOx) for a glucose biosensor [10]). Establish experimentally feasible low (-1) and high (+1) levels for each factor.
Construct the Experimental Matrix: The matrix is built from three components:
- Factorial Points: A full or fractional factorial design at the ±1 levels. This forms the "cube" of the design.
- Axial (Star) Points: Points are added on the axis of each factor at a distance ±α from the center. The value of α depends on the desired properties (e.g., α=1 for a face-centered design, which keeps all points within the original range).
- Center Points: Several replicates (typically 3-6) are performed at the center point (0 level) to estimate pure error and model curvature.
Execute Randomized Runs: Conduct all experiments as per the CCD matrix in a fully randomized order to minimize the effects of confounding variables.
Model and Analyze Data: Using the experimental responses, fit a second-order polynomial model (e.g.,
Y = β₀ + ΣβᵢXᵢ + ΣβᵢᵢXᵢ² + ΣβᵢⱼXᵢXⱼ). Analyze the significance of the model and individual terms using Analysis of Variance (ANOVA) at a 95% confidence level [10].Locate the Optimum: Analyze the fitted model using 3D response surface and 2D contour plots to visualize the relationship between factors and the response. Identify the factor levels that produce the optimal response (e.g., maximum sensitivity).
Validate the Model: Perform a confirmatory experiment at the predicted optimal conditions to verify the model's accuracy. Compare the observed response with the model's prediction.
Protocol for Box-Behnken Design (BBD)
This protocol is suited for optimization tasks where testing extreme conditions simultaneously is undesirable, such as formulating nanoliposomal drug delivery systems.
Procedure:
Screen and Define Factors: After initial screening to identify critical factors, define the low (-1), middle (0), and high (+1) levels for each. For a nanoliposome formulation, this could include factors like lipid concentration, drug-to-lipid ratio, and sonication time [11].
Construct the BBD Matrix: The design is constructed by combining two-level factorial designs with incomplete block designs. Crucially, experiments are placed at the midpoints of the edges of the multidimensional process space; no points are at the vertices (extreme corners) of the cube [9]. Include multiple center points.
Execute Randomized Runs: Perform all experimental runs specified by the BBD matrix in a random order. For a three-factor BBD, this would require 15 experiments, including center points [9].
Model and Analyze Data: Fit a second-order quadratic model to the experimental data, just as with CCD. Use ANOVA to assess the model's significance and the influence of each factor and their interactions. The lack of extreme points makes BBD very efficient for estimating pure quadratic terms.
Interpret and Optimize: Use the statistical model and response surfaces to understand the impact of each factor. The model will predict the optimal conditions that lie within the safe, defined boundaries of the experiment, avoiding risky extremes [9].
Experimental Validation: Conduct validation runs at the predicted optimum settings to confirm the model's predictive power and that the product meets the target profile (e.g., particle size <250 nm, PDI <0.3 [11]).
The Scientist's Toolkit: Research Reagent Solutions
The following table lists key materials and their functions commonly used in experiments optimized by RSM designs, particularly in biosensor and nanomedicine development.
Table 3: Essential Reagents and Materials for Biosensor and Nanocarrier Development
| Research Reagent / Material | Function in Experimentation |
|---|---|
| Carboxylated Multiwall Carbon Nanotubes (c-MWCNT) | Electrode nanomaterial; enhances electron transfer, increases surface area for biomolecule immobilization, and improves biosensor sensitivity [10]. |
| Titanium Dioxide Nanoparticles (TiO2NP) | Electrode modifier; provides biocompatible environment, can facilitate charge transfer, and stabilizes immobilized enzymes in biosensors [10]. |
| Glucose Oxidase (GOx) | Biorecognition element; a model enzyme that catalyzes the oxidation of glucose, used in the fabrication of amperometric glucose biosensors [10]. |
| DPPC (1,2-dipalmitoyl-sn-glycerol-3-phosphocholine) | Endogenous phospholipid; a primary building block of nanoliposomes, forming the biocompatible bilayer structure for drug encapsulation [11]. |
| DSPE-PEG2000 (Polyethylene glycol-lipid conjugate) | Stealth polymer; conjugated on the liposome surface to provide a near-neutral charge, enhance stability, reduce macrophage uptake, and improve mucus penetration [11]. |
| Cholesterol | Lipid component; incorporated into the liposomal bilayer to improve membrane stability and rigidity, reducing drug leakage [11]. |
| Ionic Liquids (e.g., in MWCNTs-IL) | Electrode modifier; enhances conductivity and stability of the modified electrode surface, improving biosensor performance [12]. |
Decision Workflow for Design Selection
Choosing between CCD and BBD depends on the specific context of the research project. The following diagram outlines a logical decision pathway to guide researchers.
Title: RSM Design Selection Guide
This workflow synthesizes the core advantages of each design. CCD is recommended when the research is exploratory, as its sequential nature allows for building understanding incrementally. It is also preferable when the experimental domain is not fully constrained and exploring beyond initial boundaries is valuable. BBD is the superior choice when operational constraints are a primary concern, as it avoids potentially dangerous or impractical extreme combinations of all factors. It is also highly efficient in terms of run count for a given number of factors, making it suitable for optimizing more mature, well-characterized systems [9].
The performance of a biosensor is determined by the complex interplay between its biological recognition element and physicochemical transducer. Optimizing these systems using a one-factor-at-a-time (OFAT) approach is inefficient and often fails to identify optimal conditions due to ignored parameter interactions [7]. Response Surface Methodology (RSM) provides a powerful chemometric alternative, enabling systematic development and optimization through a reduced number of experiments while accounting for interactive effects between multiple variables [1] [8].
This protocol details the application of RSM for biosensor optimization, focusing on the critical parameters spanning immobilization chemistry to transducer response. We provide researchers with a structured framework for designing experiments, constructing models, and identifying optimal biosensor configurations to enhance sensitivity, selectivity, and operational stability.
Key Biosensor Parameters for RSM Optimization
The analytical performance of a biosensor is governed by multiple interdependent factors. The table below summarizes the core parameters for RSM optimization, categorized by biosensor subsystem.
Table 1: Key Optimization Parameters in Biosensor Development
| Biosensor Subsystem | Parameter | Influence on Performance | Typical Optimization Range |
|---|---|---|---|
| Bioreceptor Immobilization | Enzyme Concentration [1] | Determines analyte turnover rate and signal intensity; excess can cause matrix diffusion issues. | 50 - 800 U·mL⁻¹ [1] |
| Immobilization Method [13] [14] | Affects bioreceptor orientation, activity, stability, and leakage. | Adsorption, Covalent, Entrapment, Cross-linking, Affinity | |
| Cross-linker Concentration (e.g., Glutaraldehyde) [14] | Impacts enzyme activity retention and stability of the immobilized layer. | 0.1 - 2.5 % (v/v) | |
| Transducer Interface & Operation | Applied Potential (Amperometric) [1] | Controls driving force for redox reactions; affects selectivity and background current. | +0.3 - +0.7 V (vs. Ag/AgCl) |
| Flow Rate (Flow Injection Systems) [1] | Influences sample dispersion, incubation time, and analysis throughput. | 0.3 - 1.0 mL·min⁻¹ [1] | |
| Number of Electropolymerization Cycles [1] | Determines thickness, permeability, and diffusional properties of the polymer film. | 10 - 30 cycles [1] | |
| Signal Generation & Measurement | Incubation Time | Governs extent of biorecognition event (e.g., antibody-antigen binding). | 1 - 30 minutes |
| Working Electrode Material [7] | Affects electron transfer kinetics, potential window, and background noise. | Glassy Carbon, Gold, Platinum, Screen-printed |
Experimental Protocols for RSM-Based Biosensor Optimization
Initial Screening with Factorial Design
Objective: To identify significant factors from a large set of potential parameters prior to in-depth RSM optimization.
Procedure:
- Select Factors and Levels: Choose 4-6 potentially influential parameters (see Table 1). Define a low (-1) and high (+1) level for each based on preliminary data or literature.
- Generate Experimental Matrix: Use a 2k fractional factorial design, which requires 2k experiments. For example, a 2⁴ design with 4 factors requires 16 experimental runs [8].
- Run Experiments Randomly: Execute the experiments in a randomized order to minimize the effects of uncontrolled variables.
- Statistical Analysis: Perform Analysis of Variance (ANOVA) on the collected response data (e.g., sensitivity, limit of detection) to determine which factors have a statistically significant effect (typically p-value < 0.05).
In-Depth Optimization with Central Composite Design (CCD)
Objective: To model quadratic effects and interactions between significant factors identified in the screening phase, and to locate the true optimum conditions.
Procedure:
- Define the Experimental Domain: Select 2-4 critical factors and set their low (-α), low (-1), center (0), high (+1), and high (+α) levels. A circumscribed (CCD) or face-centered (FCCCD) design can be used [1] [15].
- Construct the Design: A CCD for k factors consists of:
- Execute the Design: Prepare biosensors and perform measurements according to the randomized run order specified by the design matrix.
- Model Building and Validation: Use multiple linear regression to fit the data to a second-order polynomial model:
y = β₀ + ∑βᵢxᵢ + ∑βᵢᵢxᵢ² + ∑βᵢⱼxᵢxⱼ + ε[1]. Assess model quality via ANOVA (R², adjusted R², lack-of-fit test) [8]. - Response Surface Analysis: Utilize the validated model to generate 2D contour plots or 3D surface plots to visualize the relationship between factors and the response, and to identify the optimal region [1].
Protocol for an Optimized Amperometric Enzyme Biosensor
This protocol exemplifies the application of RSM for optimizing a Pt/PPD/GOx (Platinum/o-Phenylenediamine/Glucose Oxidase) amperometric biosensor for inhibitor detection [1].
Materials:
- Apparatus: Potentiostat, screen-printed platinum electrode (SPPtE), flow injection analysis (FIA) system with peristaltic pump and injection valve.
- Reagents: Glucose Oxidase (GOx) from Aspergillus niger, o-Phenylenediamine (oPD), D-(+)-Glucose, acetate buffer (50 mM, pH 5.2), target analytes (e.g., metal ions).
Immobilization and Measurement Procedure:
- Electrode Pretreatment: Clean the SPPtE surface with Milli-Q water. Condition the electrode by cyclic voltammetry (CV) in 10 mM K₃Fe(CN)₆ between -0.3 V and +0.5 V until a stable voltammogram is obtained.
- Enzymatic Layer Electropolymerization:
- Cast 50 µL of a solution containing GOx (concentration set by CCD, e.g., 50-800 U·mL⁻¹) and 5 mM oPD in acetate buffer onto the electrode surface.
- Perform CV for a number of cycles (set by CCD, e.g., 10-30 cycles) between -0.07 V and +0.77 V to form the Pt/PPD/GOx biosensor.
- Rinse the modified electrode thoroughly with acetate buffer.
- Amperometric Measurement:
- Mount the biosensor in the FIA cell. Set the applied potential to +0.47 V (vs. Ag/AgCl) and the flow rate (set by CCD, e.g., 0.3-1.0 mL·min⁻¹) of the acetate buffer carrier stream.
- Inject 200 µL of glucose solution with or without the target inhibitor.
- Record the steady-state current (I) for the sample and the current for glucose alone (I₀). Calculate the inhibition percentage as:
Inhibition % = [(I₀ - I) / I₀] × 100[1].
The Scientist's Toolkit: Essential Reagents and Materials
Table 2: Key Research Reagent Solutions for Biosensor Development and Optimization
| Reagent/Material | Function in Biosensor Development | Example Application |
|---|---|---|
| Glucose Oxidase (GOx) | Model enzyme for biorecognition; catalyzes glucose oxidation. | Central component in first-generation amperometric glucose biosensors and inhibition-based sensors [1] [13]. |
| o-Phenylenediamine (oPD) | Monomer for electrosynthesis of non-conducting polymer (PPD) films. | Entrapment of enzymes (e.g., GOx) during one-step electrode modification; creates size-selective barrier [1]. |
| Glutaraldehyde (GTA) | Bifunctional cross-linking agent. | Creates covalent bonds between enzyme amino groups and activated supports, or between enzyme molecules [13] [14]. |
| Screen-Printed Electrodes (SPEs) | Disposable, miniaturized electrochemical transducers. | Provide a robust and reproducible platform for rapid biosensor prototyping and deployment [1] [7]. |
| Gold Nanoparticles (AuNPs) | Nanomaterial for electrode modification. | Enhances electron transfer, increases surface area, and provides a platform for biomolecule immobilization [13] [7]. |
| Carbon Nanotubes (CNTs) | Nanomaterial for electrode modification. | Improves electrochemical reactivity and promotes electron-transfer reactions of proteins [13]. |
Workflow and Signaling Diagrams
RSM Optimization Workflow
The following diagram illustrates the iterative, multi-stage process for optimizing biosensors using Response Surface Methodology.
Biosensor Signaling Generations
This diagram outlines the electron transfer pathways that define the different generations of amperometric enzymatic biosensors.
Response Surface Methodology (RSM) is a powerful collection of statistical and mathematical techniques for developing, improving, and optimizing processes and products. Within the field of biosensor calibration research, RSM provides a systematic approach for modeling the complex, often nonlinear relationships between multiple input variables (factors) and key performance responses. Unlike the traditional "one factor at a time" (OFAT) approach, which requires significant experimental work and fails to capture interactions between factors, RSM efficiently explores factor spaces to build predictive models and identify optimal operational conditions [7].
The primary advantage of RSM lies in its ability to model interactions and predict optimal performance. For scientists and drug development professionals, this translates to more robust and reliable biosensor calibration protocols. By employing designed experiments, researchers can construct empirical models that not only describe how factors individually influence critical responses like sensitivity, selectivity, and limit of detection but also reveal how these factors interact. For instance, the effect of pH on a biosensor's response might depend on the immobilization time of a biorecognition element. Such interactions are invisible to OFAT but are readily captured by a well-designed RSM study, enabling the prediction of a true performance optimum [7] [16].
Key Experimental Protocols for RSM in Biosensor Development
Protocol 1: Initial Screening and Experimental Design Using a Central Composite Design (CCD)
Purpose: To identify significant factors and construct a quadratic model for optimizing biosensor performance.
Materials:
- Working Electrode (e.g., Glassy Carbon Electrode, Screen-Printed Electrode)
- Electrochemical Analyzer
- Buffer Solutions for pH control
- Nanomaterial suspensions (e.g., multi-walled carbon nanotubes, graphene oxide, gold nanoparticles)
- Biorecognition elements (e.g., enzymes, antibodies, aptamers)
- Cross-linking agents (e.g., Glutaraldehyde, EDC/NHS)
Methodology:
- Factor Selection: Based on preliminary knowledge, select critical factors for optimization. For a typical electrochemical biosensor, these may include:
- A: pH of the solution
- B: Accumulation Potential (Eacc)
- C: Accumulation Time (tacc)
- D: Concentration of the immobilized biorecognition element [16].
- Define Factor Levels: Establish low (-1) and high (+1) levels for each continuous factor, as shown in Table 1.
- Design Selection: Choose a Central Composite Design (CCD). A three-factor CCD is composed of a factorial cube (8 runs), axial (star) points (6 runs), and center points (typically 6 runs), totaling 20 experimental runs. Center points are used to estimate pure error and model curvature [17].
- Blocking: If experiments must be conducted over multiple days or with different reagent batches, organize the design into blocks (e.g., Block 1: factorial and center points; Block 2: axial and center points) to account for this potential source of variation [17].
- Randomization: Randomize the run order of all experiments to minimize the effects of uncontrolled variables.
- Execution: Perform experiments according to the randomized design matrix and record the response data (e.g., peak current, impedance change, limit of detection).
Protocol 2: Model Fitting, Validation, and Optimization
Purpose: To analyze experimental data, validate the predictive model, and determine optimal factor settings.
Materials:
- Experimental response data from Protocol 1.
- Statistical software (e.g., Minitab, Stat-Ease 360, R).
Methodology:
- Model Fitting: Use least-squares regression to fit a quadratic polynomial model to the experimental data. The general form of a model for three factors (A, B, C) is:
Y = β₀ + β₁A + β₂B + β₃C + β₁₂AB + β₁₃AC + β₂₃BC + β₁₁A² + β₂₂B² + β₃₃C² + εwhere Y is the predicted response, β₀ is the constant, β₁-β₃ are linear coefficients, β₁₂-β₂₃ are interaction coefficients, β₁₁-β₃₃ are quadratic coefficients, and ε is the error term. - Analysis of Variance (ANOVA): Perform ANOVA to assess the significance and adequacy of the model. Evaluate the p-value for the overall model and individual terms (typically at a significance level of α=0.05). Examine lack-of-fit tests to ensure the model adequately fits the data.
- Diagnostic Checking: Analyze residual plots (e.g., normal probability plot of residuals, residuals vs. predicted values) to verify the assumptions of normality, constant variance, and independence.
- Model Validation: Use the model to predict responses under conditions not in the original design. Compare predictions with actual experimental results to confirm the model's predictive power.
- Optimization and Visualization: Use the validated model to generate response surface and contour plots. These visualizations help understand the relationship between factors and the response. Utilize numerical optimization techniques (e.g., Desirability Function) to identify factor settings that simultaneously optimize one or multiple responses [16] [17].
The following workflow diagram illustrates the complete RSM process for biosensor optimization.
Data Presentation and Model Interpretation
Key Statistical Metrics for Model Evaluation
After performing ANOVA, a model summary table provides key statistics to evaluate the fitted response surface model. The interpretation of these metrics is crucial for determining the model's utility for prediction and optimization [18].
Table 1: Key Statistical Metrics for Interpreting RSM Model Quality
| Statistic | Definition | Interpretation in Biosensor Context |
|---|---|---|
| S | Standard deviation of the distance between data values and fitted values. | A lower S indicates a more precise model. For example, a model predicting current density with S=1.79 nA/cm² is better than one with S=2.50 nA/cm² [18]. |
| R² (R-sq) | Percentage of variation in the response explained by the model. | A high R² (e.g., >80%) suggests the model accounts for most of the variability in the response, such as sensor signal [19] [18]. |
| Adjusted R² | R² adjusted for the number of predictors in the model. | Used to compare models with different numbers of terms. An increase suggests a new term improves the model [18]. |
| Predicted R² | Indicates how well the model predicts responses for new observations. | A value close to the Adjusted R² (e.g., within 0.20) suggests the model is not overfit and will have good predictive performance [18]. |
Exemplary RSM Application: Optimizing an Electrochemical Biosensor
The following table summarizes a hypothetical but representative RSM study for optimizing a biosensor, based on common research outcomes. This example demonstrates how quantitative factor settings lead to predicted performance optima.
Table 2: Exemplary RSM Optimization of an Imidacloprid Biosensor Using Square Wave Voltammetry
| Factor | Low Level (-1) | High Level (+1) | Optimal Setting |
|---|---|---|---|
| A: pH | 5.0 | 9.0 | 7.45 |
| B: Accumulation Potential (V) | -0.9 | -0.5 | -0.70 |
| C: Accumulation Time (s) | 30 | 60 | 46.45 |
| Response | Goal | Optimal Prediction | Experimental Validation |
| Peak Current (µA) | Maximize | 2.51 | 2.48 ± 0.09 |
| Limit of Detection (mol/L) | Minimize | 3.65 × 10⁻⁸ | 3.82 × 10⁻⁸ |
Note: This example is informed by a real RSM study for pesticide detection [16].
Advanced Hybrid RSM-Machine Learning Workflow
For processes with highly complex, nonlinear behavior, a standalone RSM model may be insufficient. A hybrid approach that integrates RSM with machine learning (ML) has been shown to enhance predictive accuracy significantly. In this workflow, RSM provides a foundational model, and an ML algorithm (e.g., Regression Tree) is used to model the residuals (the differences between the RSM predictions and the actual experimental values). The final, superior prediction is the sum of the RSM output and the ML-corrected residuals [19].
The following diagram illustrates this integrated framework for achieving higher predictive accuracy in complex biosensor systems.
A study on laser cutting, analogous to complex biosensor systems, demonstrated this principle: a quadratic RSM model achieved an R² of 0.8227. After applying a regression tree to model the residuals, the hybrid RSM-ML model's R² improved to 0.8889, confirming the effectiveness of this approach for capturing complex dependencies [19].
The Scientist's Toolkit: Essential Reagent Solutions for Biosensor RSM
The construction and optimization of a modern biosensor rely on a specific set of materials and reagents. The following table details key components, their functions, and their role in the RSM optimization process.
Table 3: Essential Research Reagent Solutions for Electrochemical Biosensor Development and Optimization
| Category / Item | Function in Biosensor Development | RSM Optimization Context |
|---|---|---|
| Electrode Platforms | ||
| Screen-Printed Electrodes (SPEs) | Disposable, portable solid support; often modified with nanomaterials and biorecognition elements. | A key factor whose surface area and composition can be a categorical variable in an RSM design [7]. |
| Glassy Carbon Electrodes (GCEs) | Renewable, polished surface used as a robust base for modifications. | Electrode pre-treatment (e.g., polishing time, potential cycling) is a common factor for optimization [7]. |
| Nanomaterials | ||
| Multi-walled Carbon Nanotubes (MWCNTs) | Enhance electron transfer, increase surface area for biomolecule immobilization. | Concentration/amount of nanomaterial is a frequent continuous factor to optimize signal-to-noise ratio [7]. |
| Gold Nanoparticles (AuNPs) | Improve electrical conductivity, facilitate antibody/enzyme immobilization via thiol groups. | Nanoparticle size and loading density are critical factors influencing sensitivity and stability [7]. |
| Graphene Oxide (GO) | Provides a high-surface-area platform with functional groups for covalent immobilization. | The degree of reduction (chemical/electrochemical) can be a critical factor for tuning electronic properties [7]. |
| Biorecognition Elements | ||
| Enzymes (e.g., Glucose Oxidase) | Catalyze specific reactions, generating an electroactive product measured by the transducer. | Immobilization time and enzyme concentration are prime factors for optimizing response and activity [7]. |
| Antibodies | Bind specific antigens (analytes) with high affinity, used in immunosensors. | Concentration and incubation time are optimized to maximize binding and minimize non-specific adsorption [7]. |
| Aptamers | Single-stranded DNA/RNA oligonucleotides that bind targets; offer stability and design flexibility. | The density of aptamer packing on the electrode surface is a key factor for optimizing selectivity and LOD [20]. |
| Immobilization Reagents | ||
| EDC / NHS | Cross-linkers that activate carboxyl groups for covalent bonding to primary amines on biomolecules. | The ratio and concentration of EDC/NHS are often optimized to maximize biomolecule activity and surface coverage [20]. |
| Glutaraldehyde | A homobifunctional crosslinker that creates bridges between amine groups on proteins and aminated surfaces. | Cross-linking time and concentration are factors balanced to achieve stable immobilization without deactivating the biomolecule [7]. |
From Theory to Practice: A Step-by-Step RSM Workflow for Biosensor Calibration
The performance of a biosensor is governed by a complex interplay of its design (factors) and its resulting analytical characteristics (responses). Response Surface Methodology (RSM) is a powerful collection of statistical techniques for designing experiments, building models, and optimizing processes where a response of interest is influenced by several variables. A core principle of RSM is moving beyond the inefficient "one-factor-at-a-time" (OFAT) approach, which fails to capture interaction effects between factors and can lead to suboptimal conclusions [1]. Properly selecting which factors to study and which responses to measure is the most critical first step in any RSM-based biosensor calibration, as it directly determines the validity and utility of the resulting model. This document provides a structured framework for making these foundational choices.
A Framework for Selecting Critical Factors
Factors are the input variables of your biosensor system that you can control and vary during experimentation. They can be categorized for systematic selection.
Table 1: Categories of Critical Factors in Biosensor Development
| Factor Category | Description | Exemplary Factors |
|---|---|---|
| Physical Design Parameters | Geometric and structural properties of the sensor. | Gold layer thickness, pitch distance in photonic crystal fibers, air hole radius [21]. |
| Biochemical Parameters | Properties related to the biological recognition element. | Enzyme concentration (U·mL⁻¹) [1], probe concentration (µM), antibody density, immobilization time [3]. |
| Operational Parameters | Conditions under which the sensor is used. | Flow rate (mL·min⁻¹) [1], analyte pH, incubation temperature, applied potential (V) in electrochemical sensors [1]. |
The selection of factors should be guided by preliminary research, literature review, and screening designs (e.g., Plackett-Burman) to identify the most influential parameters from a larger candidate set [3].
Defining Key Performance Responses
Responses are the measurable outputs that define the performance and quality of the biosensor. Selecting relevant, quantifiable responses is essential for effective optimization.
Table 2: Key Performance Responses for Biosensor Optimization
| Response | Definition and Significance | Typical Units |
|---|---|---|
| Sensitivity (S) | The change in sensor signal per unit change in analyte concentration. A primary indicator of performance. | nm/RIU (refractive index), µA·mM⁻¹ (amperometric), nA·µM⁻¹ [21] [1] |
| Confinement Loss (CL) | The optical signal loss in waveguide-based sensors. Minimizing this is often critical. | dB/cm [21] |
| Figure of Merit (FOM) | A composite metric that often combines sensitivity and resolution. Maximizing FOM is a common goal. | RIU⁻¹ [21] |
| Resolution | The smallest detectable change in analyte concentration. | RIU [21] |
| Signal-to-Noise Ratio (SNR) | The ratio of the desired signal to the background noise. Critical for reliable detection. | Unitless ratio [22] |
| Tumor-to-Normal Tissue Ratio (T/N Ratio) | Specific to in vivo imaging biosensors, indicating targeting specificity. | Unitless ratio [22] |
Experimental Protocol: Implementing a Screening Design
This protocol outlines the initial steps to identify the most critical factors for a subsequent, more detailed RSM study.
Materials and Reagents
Table 3: Research Reagent Solutions for a Model Electrochemical DNA Biosensor
| Reagent/Material | Function in the Experiment |
|---|---|
| Multi-Walled Carbon Nanotubes (MWCNTs) | Nanocomposite component to enhance electrode conductivity and surface area [3]. |
| Polypyrrole (PPY) | Conductive polymer for biocompatibility and stable biomolecule immobilization [3]. |
| Hydroxyapatite Nanoparticles (HAPNPs) | Biomaterial substrate for probe immobilization, offering high biocompatibility [3]. |
| Methylene Blue (MB) | An electrochemical redox indicator for signal amplification [3]. |
| Specific DNA Probe | The biological recognition element that hybridizes with the target sequence [3]. |
Procedure
- Factor Candidate Identification: Based on your biosensor design and literature, list all potential factors (e.g., from Table 1). For a DNA biosensor, this could include probe concentration, immobilization time, and hybridization time [3].
- Select a Screening Design: Choose a statistical design suitable for screening, such as a Plackett-Burman design. This design allows for the investigation of 'n' factors with a minimal number of experimental runs (e.g., 'n+1' runs).
- Define Factor Ranges: Set a realistic high and low level for each factor to be tested.
- Randomize and Execute Experiments: Perform the experiments in a randomized order to minimize the effects of uncontrolled variables.
- Statistical Analysis: Analyze the results using analysis of variance (ANOVA). Factors with p-values below a chosen significance level (e.g., p < 0.05) are identified as critical and should be selected for further optimization in a central composite or Box-Behnken design.
Experimental Protocol: Central Composite Design (CCD) for Biosensor Optimization
Once critical factors are identified, this protocol uses a Central Composite Design (CCD), a standard RSM design, to build a predictive model.
Procedure
- Design the Experiment: For the 2-4 critical factors selected from the screening phase, construct a CCD using statistical software. A CCD for 'k' factors typically includes:
- 2^k factorial points,
- 2k axial (star) points,
- Center points (replicated to estimate pure error).
- Run Experiments and Measure Responses: Execute the designed experiments, measuring all key responses (e.g., Sensitivity, Confinement Loss) for each run.
- Model Building and ANOVA: Fit a second-order polynomial model (Equation 1) to the data and perform ANOVA to check the model's significance and lack-of-fit.
- Validation: Confirm the model's predictive power by running additional confirmation experiments at conditions not in the original design.
The following workflow diagram illustrates the complete RSM process from initial factor selection to a finalized, optimized biosensor.
The optimization of biosensor performance requires the careful balancing of multiple, often interacting, input parameters. The "one factor at a time" (OFAT) approach is inefficient and precludes the discovery of these critical interactions, often leading to suboptimal results [7]. Response Surface Methodology (RSM) is a powerful collection of statistical techniques that overcomes these limitations by fitting empirical models to data collected from a structured experimental plan, known as the Design of Experiment (DoE) [8]. This guide provides a detailed, practical protocol for implementing RSM, specifically through a Central Composite Design (CCD), to efficiently calibrate and optimize biosensor systems, enabling researchers to model complex factor-response relationships and locate optimal operational conditions with minimal experimental effort.
Phase I: Pre-Experimental Planning
Defining the System and Selecting Factors
The first critical step is to define the system boundaries and select the input factors (k) and output responses. Factors should be selected based on preliminary experiments or literature reviews, and they must be continuous and controllable.
Protocol: Factor and Response Selection
- Identify Critical Factors: Conduct a literature review or preliminary screening experiments (e.g., a Plackett-Burman design) to identify which factors significantly influence your biosensor's performance. In biosensor optimization, common factors include:
- Biorecognition Element Concentration: e.g., enzyme, DNA probe, or antibody concentration [23] [24].
- Immobilization Parameters: e.g., number of electropolymerization cycles, immobilization time, or polymer concentration [23] [3].
- Operational Conditions: e.g., flow rate in a flow injection system, applied potential, pH, or incubation time [23] [3].
- Define the Experimental Domain: For each selected factor, establish a realistic and scientifically justified range (low and high level). The range should be wide enough to observe a clear effect but narrow enough to remain practically relevant.
- Select Measurable Responses: Choose one or more quantitative responses that accurately reflect biosensor performance. These become the dependent variables (
y) in the model. Typical responses include:
Table 1: Example Factors and Responses from Biosensor Optimization Studies
| Biosensor Type | Factors (k) | Ranges | Responses (y) | Citation |
|---|---|---|---|---|
| Electrochemical / GOx-based | Enzyme Concentration, Flow Rate, Scan Cycles | 50-800 U·mL⁻¹, 0.3-1 mL·min⁻¹, 10-30 cycles | Sensitivity to Bi³⁺, Al³⁺ (µA·mM⁻¹) | [23] |
| DNA Biosensor | Probe Concentration, Immobilization Time, Hybridization Time | Specific ranges not provided | DPV Peak Current (µA) | [3] |
| Paper-based / AChE-based | AChE Concentration, Sucrose Concentration | Specific ranges not provided | Immobilization Yield, Relative Enzyme Activity | [24] |
Choosing and Generating the Experimental Design
For RSM, a Central Composite Design (CCD) is highly effective for fitting a second-order polynomial model. A CCD consists of three parts: a factorial portion, axial (star) points, and center points.
Protocol: Generating a Central Composite Design (CCD)
- Determine the Number of Experiments: For
kfactors, a full CCD requires2^k(factorial points) +2k(axial points) +nc(center point replicates) total experiments. For example, withk=3factors andnc=6, the total is 8 + 6 + 6 = 20 runs [23]. - Code the Factor Levels: Convert the actual factor values into coded values (-1, +1, 0) to simplify modeling and analysis. The axial points are placed at a distance
±αfrom the center. For a circumscribed (CCC) or face-centered (CCF) design,αis chosen to ensure rotatability or practical constraints. - Randomize the Run Order: The order of conducting the experiments must be fully randomized to avoid systematic bias from lurking variables.
- Software Implementation: Use statistical software (e.g., Minitab, Design-Expert, R) to generate the design matrix. The software will output a table specifying the exact conditions for each experimental run.
Table 2: Experimental Matrix for a Three-Factor CCD (k=3)
| Standard Order | Run Order | X₁: Enzyme (U·mL⁻¹) | X₂: Flow Rate (mL·min⁻¹) | X₃: Scan Cycles | Response: Sensitivity (µA·mM⁻¹) |
|---|---|---|---|---|---|
| 1 | 12 | -1 (50) | -1 (0.3) | -1 (10) | ... |
| 2 | 18 | +1 (800) | -1 (0.3) | -1 (10) | ... |
| ... | ... | ... | ... | ... | ... |
| 9 | 5 | -α | 0 (0.65) | 0 (20) | ... |
| 10 | 14 | +α | 0 (0.65) | 0 (20) | ... |
| ... | ... | ... | ... | ... | ... |
| 15 | 3 | 0 (425) | 0 (0.65) | 0 (20) | ... |
| ... | ... | ... | ... | ... | ... |
Phase II: Experimental Execution and Data Modeling
Model Fitting and Statistical Analysis
With the experimental data collected, the next step is to fit a second-order polynomial model and evaluate its statistical significance.
Protocol: Model Fitting and ANOVA
- Model Formulation: Fit the experimental data to a second-order polynomial model (Equation 1) using multiple least squares regression [23] [8].
y = β₀ + ∑βᵢxᵢ + ∑βᵢᵢxᵢ² + ∑βᵢⱼxᵢxⱼ + ε... (Equation 1) whereyis the predicted response,β₀is the constant coefficient,βᵢare the linear coefficients,βᵢᵢare the quadratic coefficients,βᵢⱼare the interaction coefficients, andεis the random error. - Perform ANOVA: Conduct Analysis of Variance (ANOVA) to assess the model's adequacy. Key outputs to evaluate include:
- Model F-value and p-value: A significant p-value (typically < 0.05) indicates the model is statistically significant compared to a null model.
- Lack-of-Fit Test: A non-significant Lack-of-Fit (p-value > 0.05) is desirable, suggesting the model adequately fits the data.
- Coefficient of Determination (R²): The proportion of variance in the response explained by the model. Adjusted-R² and Predicted-R² should be in reasonable agreement.
- Evaluate Coefficient Significance: Check the p-values for individual model terms. Insignificant terms (p > 0.05) may be removed via a backward elimination process to simplify the model, unless required for hierarchy.
Phase III: Optimization and Model Validation
Finding the Optimum
The fitted model allows for the prediction of the response across the entire experimental domain, enabling the location of optimal factor settings.
Protocol: Locating the Optimum
- Analyze Response Surfaces: Use the model to generate contour and 3D surface plots. These visualizations show how the response changes with two factors while holding others constant, revealing the nature of any maxima, minima, or saddle points [8].
- Utilize Optimization Functions: Employ numerical optimization techniques, such as the desirability function, to find factor settings that simultaneously optimize one or multiple responses [24]. The desirability function (
d) ranges from 0 (undesirable) to 1 (fully desirable). - Predict Optimal Response: Once optimal factor settings are identified, use the model to predict the expected response at this point.
Critical Model Validation
A model is only useful if it can accurately predict new observations. Experimental validation is the final, crucial step.
Protocol: Model Validation
- Perform Validation Experiments: Conduct a small number of experiments (e.g., n=3) at the predicted optimal conditions. These conditions should not have been part of the original experimental design matrix.
- Compare Results: Measure the actual response and compare it to the model's prediction. Calculate the prediction error.
- Assess Validation: If the experimental results agree with the predicted values within a statistically acceptable margin of error, the model is validated. For instance, in one study, the sensitivity of an optimized biosensor agreed closely with the experimental design prediction, confirming the model's accuracy [23].
The Scientist's Toolkit: Research Reagent Solutions
Table 3: Essential Reagents and Materials for RSM-Optimized Biosensor Development
| Item Name | Function / Role in Biosensor Development | Exemplary Use Case |
|---|---|---|
| Glucose Oxidase (GOx) | Enzyme inhibitor-based detection of heavy metal ions. | Pt/PPD/GOx biosensor for Bi³⁺, Al³⁺, Ag⁺ [23]. |
| Acetylcholinesterase (AChE) | Enzyme for inhibitor-based detection of organophosphate pesticides. | Paper-based colorimetric biosensor for pesticide detection [24]. |
| o-Phenylenediamine (oPD) | Monomer for electrosynthesis of a non-conducting polymer (PPD) to entrap enzymes. | Formation of a protective polymer matrix on a Pt electrode [23]. |
| Sol-Gel Silica Matrices | Porous inorganic matrix for enzyme immobilization, enhancing stability. | Entrapment of AChE in a paper-based biosensor [24]. |
| Sucrose | Stabilizer to preserve enzymatic activity during storage. | Added to the immobilization matrix to maintain AChE activity [24]. |
| Hydroxyapatite Nanoparticles (HAPNPs) | Biocompatible substrate with high adsorption capacity for biomolecule immobilization. | Used in a nanocomposite DNA biosensor for M. tuberculosis detection [3]. |
| Multi-Walled Carbon Nanotubes (MWCNTs) | Nanomaterial to enhance electrode conductivity and surface area. | Component of a HAPNPs/PPy/MWCNTs nanocomposite for DNA sensing [3]. |
| Screen-Printed Electrodes (SPEs) | Disposable, miniaturized electrochemical cell platforms for portable sensing. | Used as the transducer in a flow injection analysis system [23]. |
This protocol details the procedure for building, validating, and interpreting a predictive mathematical model within a Response Surface Methodology (RSM) framework, specifically tailored for biosensor calibration research. RSM is a collection of statistical and mathematical techniques used to develop, improve, and optimize processes, and is particularly valuable for modeling the complex relationships between multiple influencing factors and biosensor response outputs [25] [26]. The primary goal is to derive an empirical model that accurately represents the biosensor's behavior, enabling researchers to identify optimal operational conditions for sensitivity, specificity, or other critical performance parameters.
For biosensor applications, such as the development of peptide-based electrochemical or SERS biosensors for detecting SARS-CoV-2 antibodies, a well-fitted model is crucial for understanding how factors like pH, temperature, and immobilization chemistry affect the sensor's output signal [27]. This document provides a standardized workflow for constructing this model, from experimental design to its practical interpretation for optimization.
Mathematical Foundation of the RSM Model
The relationship between a biosensor's response (Y) and a set of 'k' influential factors (x~1~, x~2~, ..., x~k~) is typically approximated by a second-order polynomial equation. This model is chosen for its ability to capture linear, interaction, and quadratic effects, which are common in complex biochemical systems.
The general form of the full quadratic RSM model for three process variables is [28]:
Y = β~0~ + β~1~x~1~ + β~2~x~2~ + β~3~x~3~ + β~11~x~12~ + β~22~x~22~ + β~33~x~3~~2~ + β~12~x~1~x~2~ + β~13~x~1~x~3~ + β~23~x~2~x~3~ + ε
Table 1: Interpretation of Terms in the RSM Model Equation
| Term | Description | Role in Biosensor Calibration |
|---|---|---|
| Y | The predicted response variable. | e.g., electrochemical signal intensity, SERS intensity, or detection limit. |
| x~1~, x~2~, x~k~ | The coded or actual levels of the independent factors. | e.g., pH, temperature, concentration of a recognition element, incubation time. |
| β~0~ | The constant or intercept term. | The modeled response when all factors are at their zero level (e.g., center point). |
| β~1~, β~2~, β~k~ | The linear coefficients. | Represent the main, direct effect of each individual factor on the response. |
| β~11~, β~22~, β~kk~ | The quadratic coefficients. | Capture curvature in the response surface, indicating the presence of an optimum level for a factor. |
| β~12~, β~13~, β~23~ | The interaction coefficients. | Quantify how the effect of one factor changes depending on the level of another factor. |
| ε | The random error term. | Accounts for variability not explained by the model. |
Experimental Design for Model Fitting
A key feature of RSM is the use of structured experimental designs that efficiently generate data for fitting the second-order model. The three most common designs are compared below.
Table 2: Common Experimental Designs for RSM in Biosensor Development
| Design Type | Description | Key Advantages | Typical Run Number for 3 Factors |
|---|---|---|---|
| Central Composite Design (CCD) [29] [28] | Combines a two-level factorial/sectional design, axial (star) points, and center points. | The most popular design; highly efficient for fitting quadratic models; allows for estimation of pure error. | 16-20 runs |
| Box-Behnken Design (BBD) [28] | An incomplete three-level factorial design based on balanced incomplete block designs. | Fewer required runs than CCD for the same number of factors; all points lie within a safe operating region. | 15 runs |
| Full Factorial Design (FFD) [28] | Experiments with all possible combinations of the factor levels. | Provides the most comprehensive data; can estimate all possible interactions. | 27 runs (for 3 levels) |
The experimental runs are executed according to the chosen design matrix, and the biosensor response (e.g., current, impedance, or optical signal) is recorded for each combination of factor levels [26].
Model Building, Validation, and Adequacy Checking
After data collection, multiple linear regression is used to fit the second-order model and calculate the coefficients (β-values) [25] [28]. However, simply fitting the model is insufficient; its adequacy and predictive power must be rigorously validated.
A. Variable Significance Assessment: Use backward elimination or t-tests on the coefficients' p-values to remove non-significant terms (e.g., p > 0.05), unless they are involved in a significant higher-order term, thereby simplifying the model [28].
B. Model Fit and Lack-of-Fit: Evaluate the model's goodness-of-fit using Analysis of Variance (ANOVA). Key metrics include [28]:
- F-value: A significant model F-value (typically p < 0.05) indicates the model is statistically significant compared to a null model.
- Lack-of-fit test: A non-significant lack-of-fit (p > 0.05) is desired, suggesting the model adequately fits the data and that no significant terms are missing.
C. Predictive Power and Diagnostic Checks:
- Coefficient of Determination (R²): The proportion of variance in the response explained by the model. A value closer to 1.0 is better.
- Adjusted R² (R²~adj~): Modifies R² to account for the number of terms in the model; more reliable for comparing models with different numbers of predictors.
- Predicted R² (R²~pred~): Indicates how well the model predicts responses for new observations. It should be in reasonable agreement with the R²~adj~ [28].
- Residual Analysis: Check residuals (differences between observed and predicted values) for normality and constant variance to ensure they are randomly scattered, validating the model's underlying assumptions [28].
Table 3: Key Criteria for Model Adequacy Checking
| Criterion | Purpose | Target/Interpretation |
|---|---|---|
| Model F-value & p-value (from ANOVA) | Tests the global significance of the model. | p-value < 0.05 indicates the model is statistically significant. |
| Lack-of-Fit Test | Tests whether the model form is adequate. | A non-significant result (p-value > 0.05) is good. |
| R² | Measures the proportion of explained variance. | Closer to 1.0 is better (e.g., >0.90). |
| Adjusted R² | R² adjusted for the number of model terms. | Prevents overfitting; should be close to R². |
| Predicted R² | Measures the model's predictive ability. | Should be in reasonable agreement with Adjusted R². |
| Residual Analysis | Checks assumptions of normality and constant variance. | Residuals should be randomly scattered around zero. |
Protocol for Numerical Optimization and Interpretation
Once a validated model is obtained, it can be used to find the factor settings that optimize the biosensor's response.
A. Graphical Interpretation:
- Contour Plots: Two-dimensional graphs showing lines of constant response for two factors while holding others constant. The shape of the contours (elliptical vs. hyperbolic) reveals the nature of the optimum [25] [28].
- 3D Response Surface Plots: Three-dimensional graphs that provide a visual representation of the response as a function of two factors. A peak indicates a maximum, a valley indicates a minimum, and a saddle shape indicates a saddle point [29] [25].
B. Numerical Optimization using Desirability Functions: For multiple responses (e.g., maximizing signal while minimizing noise), numerical optimization is essential. The Derringer-Suich method, implemented in software like Stat-Ease, is commonly used [29].
- Define Goals: For each response, set a goal (e.g., Maximize, Minimize, Target, Within Range).
- Set Limits: Define lower and/or upper acceptable limits for each response.
- Assign Importance: Assign an importance value to each goal (e.g., from 1+ to 5+) to prioritize them [29].
- Calculate Overall Desirability (D): The software combines individual desirabilities (d~i~) into a single overall desirability index (D) that ranges from 0 (unacceptable) to 1 (ideal). The algorithm searches for factor settings that maximize D [29].
The Scientist's Toolkit: Research Reagent Solutions
Table 4: Essential Materials for Peptide-Based Biosensor Development and Calibration
| Reagent/Material | Function in Biosensor RSM Studies |
|---|---|
| Gold Nanoparticles (AuNPs) [27] | Serve as a plasmonic substrate for optical (SERS) biosensors or as a conductive nanomaterial for enhancing electron transfer in electrochemical biosensors. |
| Synthetic Peptides (e.g., P44) [27] | Act as the biorecognition element, specifically binding to target antibodies or proteins. Their sequence can be easily modified to adapt to different variants. |
| 4-Mercaptobenzoic Acid (MBA) [27] | Used as a stabilizer and a Raman reporter molecule in SERS-based biosensors; its thiol group binds to gold surfaces. |
| Phosphate Buffered Saline (PBS) [27] | Provides a stable pH and ionic strength environment for biochemical reactions and biosensor operation. |
| Site-Specific Recombinases (e.g., Cre) [30] | In genetic circuit biosensors, used for programmable timing of gene availability to reduce leakage and improve dynamic range, a form of system optimization. |
Experimental and Optimization Workflow
The following diagram illustrates the complete workflow from experimental design through to the identification of optimal biosensor operating conditions.
Diagram 1: RSM Model Building and Optimization Workflow
Optimization Logic and Output
The core optimization process for a multi-response biosensor system, using the desirability function approach, is detailed below.
Diagram 2: Multi-Response Optimization Logic
In the field of biosensor calibration and development, achieving high precision and reliability is paramount, particularly for applications in pharmaceutical and diagnostic industries. Response Surface Methodology (RSM) is a powerful collection of statistical and mathematical techniques used for developing, improving, and optimizing processes and products [25]. This case study details the application of RSM for optimizing the design parameters of an ultrasonic liquid-level measurement system—a critical calibration component for various biosensing and industrial applications, including the handling of aerospace propellants and pharmaceutical solutions [31]. The non-invasive nature of ultrasonic detection, with its advantages of easy operation and cost-effectiveness, makes it particularly suitable for environments requiring high safety standards [32]. By establishing a quantitative model between multiple input parameters and system output, RSM enables researchers to efficiently identify optimal operating conditions, thereby enhancing measurement accuracy and signal stability.
Theoretical Background
Fundamentals of Response Surface Methodology (RSM)
RSM is a foundational tool in empirical model optimization, particularly useful when a response of interest is influenced by several variables. The primary objective is to simultaneously optimize this response by identifying the best factor level combinations [33]. The methodology is inherently sequential, often beginning with a first-order model to ascend the response surface rapidly. Upon nearing the optimum region, characterized by significant curvature, a more complex second-order model is employed to precisely locate the peak performance point [33]. A general second-order model can be represented as:
[ y = \beta0 + \sum{i=1}^k \betai xi + \sum{i=1}^k \beta{ii} xi^2 + \sum{i < j} \beta{ij} xi x_j + \varepsilon ]
where (y) is the predicted response, (\beta0) is the constant term, (\betai) are the linear coefficients, (\beta{ii}) are the quadratic coefficients, (\beta{ij}) are the interaction coefficients, (xi) and (xj) are the coded input variables, and (\varepsilon) represents the error [26].
Ultrasonic Liquid-Level Measurement Principles
Ultrasonic liquid-level detection operates on the principle of transmitting sound waves and analyzing their echo from the liquid surface. The energy and travel time of the returning echo signal are fundamentally related to the liquid level [32]. In the context of biosensor calibration, precise liquid-level measurement is crucial for the accurate preparation of standard solutions, calibration curves, and reagent volumes, directly impacting the reliability of diagnostic and drug development assays. Advanced signal processing techniques, such as Variational Mode Decomposition (VMD), can be applied to the complex echo signal to extract intrinsic mode functions (IMFs), enhancing the relationship between signal energy and liquid level for improved accuracy [32].
Experimental Design and Optimization Protocol
Defining the Problem and Critical Parameters
The optimization goal was to maximize the output voltage of an ultrasonic liquid-level measurement system, thereby enhancing its signal stability and measurement accuracy for high-precision applications [31]. Based on prior knowledge and one-way screening tests, three continuous factors were identified as critically influencing the system's energy transfer efficiency:
- Piezoelectric Ceramic Sheet Diameter (D): Directly affects the surface area for ultrasonic wave generation and reception.
- Ultrasonic Frequency (f): Influences the resolution and penetration depth of the acoustic wave.
- Liquid Temperature (T): Affects the speed of sound and the amplitude of the echo signal [31].
Initial one-way tests established that the output voltage peaked at a diameter of 15 mm and a frequency of 1 MHz. A positive correlation was observed between excitation voltage and output voltage, while elevated liquid temperature consistently enhanced the echo amplitude across different liquid levels [31].
Response Surface Methodology Design and Execution
The core experiment was conducted at a fixed liquid level of 12 cm, representing a half-full operational condition. A three-factor, three-level RSM design, specifically a Central Composite Design (CCD) or Box-Behnken Design (BBD), was implemented [34]. These designs are highly efficient for fitting a second-order (quadratic) response surface model, as they include axial and center points that allow for the estimation of curvature [25] [26].
Protocol Steps:
- Factor Coding: The natural units of the factors were converted into coded units (-1, 0, +1) to normalize their influence and simplify model computation [34]. For example, a factor like temperature with a range of 15° to 45° Celsius would be coded to -1, 0, and +1.
- Experimental Matrix: An RSM design requiring 18 experimental runs was generated. This design allowed for the estimation of all main effects, two-factor interactions, and quadratic effects [25].
- System Operation: The ultrasonic transducer, fixed to the outer wall of a test vessel, was connected to a pulse transmitter/receiver (e.g., CTS-8077PR). For each combination of factor levels specified by the design, the output voltage was recorded as the response [32] [31].
- Model Fitting: A second-order polynomial regression model was fitted to the experimental data using multiple linear regression. The model equation took the form: ( \text{Output Voltage} = \beta0 + \beta1D + \beta2f + \beta3T + \beta{12}Df + \beta{13}DT + \beta{23}fT + \beta{11}D^2 + \beta{22}f^2 + \beta{33}T^2 )
- Model Validation: The fitted model's adequacy was checked using Analysis of Variance (ANOVA), lack-of-fit tests, R-squared (R²) values, and residual analysis [26] [34].
- Optimization: The validated model was used to navigate the design space and identify the specific combination of factor levels that maximized the predicted output voltage [25].
The following workflow diagram illustrates the sequential stages of this RSM-based optimization process.
Results and Data Analysis
Model Fitting and Statistical Analysis
The application of RSM yielded a predictive quadratic model for the output voltage. The model's quality was confirmed by a high R-squared value, and the significance of the model terms was validated using ANOVA [31]. The analysis revealed that both linear and quadratic effects of the piezoelectric ceramic diameter, ultrasonic frequency, and liquid temperature were significant for the output response. Furthermore, interaction effects between these parameters were also found to be statistically important.
Table 1: Optimized Parameters and Predicted Response from RSM Analysis
| Factor | Optimal Value | Factor Type | Response Goal | Predicted Output Voltage |
|---|---|---|---|---|
| Piezoelectric Diameter (D) | 14.773 mm | Continuous | Maximize | 8.976 V |
| Ultrasonic Frequency (f) | 0.878 MHz | Continuous | Maximize | 8.976 V |
| Liquid Temperature (T) | 33.661 °C | Continuous | Maximize | 8.976 V |
Validation of the Optimized Model
Validation experiments conducted using the optimal parameter settings confirmed the model's high predictive accuracy. The measured average output voltage closely matched the predicted value, with an error rate of less than 1% across different liquid levels [31]. Furthermore, the coefficient of variation (CV) for the output signal was significantly reduced to 0.9%, demonstrating a substantial improvement in signal stability and measurement repeatability. This level of precision meets the stringent error requirements for critical applications such as aerospace propellant measurement and high-precision industrial biosensor calibration [31].
Table 2: Key Performance Metrics Before and After RSM Optimization
| Performance Metric | Pre-Optimization Condition | Post-Optimization Validation |
|---|---|---|
| Output Voltage | Variable, subject to parameter choice | 8.98 V (closely matching prediction) |
| Measurement Error Rate | Not specified | < 1% |
| Signal Stability (Coefficient of Variation) | Not specified | 0.9% |
| Primary Application Suitability | General purpose | Aerospace propellants, high-precision industrial and biosensor applications |
The Scientist's Toolkit: Research Reagent Solutions
The following table details the essential materials and reagents required to replicate the RSM optimization of an ultrasonic liquid-level measurement system.
Table 3: Essential Materials and Reagents for Ultrasonic System Optimization
| Item Name | Function/Application in the Experiment |
|---|---|
| Piezoelectric Ceramic Probe | Core transducer element that converts electrical energy into ultrasonic waves and vice versa. The diameter is a key optimized parameter [31]. |
| Pulse Transmitter/Receiver (e.g., CTS-8077PR) | Electronic instrument that generates the excitation pulse for the probe and receives the returning echo signal [32]. |
| Silicone Grease | Acoustic couplant applied between the probe and the container wall to ensure efficient transmission of ultrasonic energy [32]. |
| Test Vessel (e.g., Rectangular Q345 Steel) | Container for the liquid under test, whose wall properties and geometry influence sound wave propagation [32]. |
| Temperature Control System | Apparatus to maintain and vary the liquid temperature (a key factor in the RSM model) at precise levels [31]. |
Statistical Software (e.g., JMP, R with rsm package) |
Used for generating the experimental design, performing regression analysis, model validation, and optimization [25] [34]. |
This application note has demonstrated the successful use of Response Surface Methodology to optimize an ultrasonic liquid-level measurement system rigorously. By establishing a quantitative model between critical design parameters—piezoelectric ceramic diameter, ultrasonic frequency, and liquid temperature—and the system's output voltage, the RSM approach enabled the identification of a precise optimal parameter set. The validated model resulted in a system with enhanced measurement accuracy (error < 1%) and superior signal stability (CV = 0.9%). The principles and protocols outlined herein provide a robust framework for researchers and drug development professionals seeking to calibrate and optimize sensitive measurement and biosensor systems, ensuring the highest levels of precision and reliability in their analytical data.
Response Surface Methodology (RSM) is a powerful collection of statistical and mathematical techniques used for developing, improving, and optimizing complex processes and products. In the field of biosensing, RSM provides a systematic framework for modeling and analyzing the relationship between multiple influencing variables and one or more response variables, enabling researchers to efficiently identify optimal operational conditions with fewer experimental trials. This case study explores the pivotal role of RSM in enhancing the performance of two critical biosensor types: electrochemical biosensors and surface plasmon resonance (SPR) biosensors. These advanced analytical devices are transforming medical diagnostics, environmental monitoring, and pharmaceutical development through their exceptional sensitivity and real-time detection capabilities. By examining specific applications in cancer detection, tuberculosis diagnosis, and antibiotic monitoring, this study demonstrates how RSM-driven optimization leads to significant improvements in biosensor sensitivity, selectivity, and reproducibility, thereby accelerating their translation from research laboratories to clinical and field applications.
Theoretical Framework: RSM in Biosensor Development
Fundamentals of Response Surface Methodology
The application of RSM in biosensor optimization typically involves several well-defined stages. Initially, researchers identify critical independent variables that influence biosensor performance, such as chemical concentrations, incubation times, pH levels, or nanomaterial dimensions. Subsequently, a structured experimental design, such as Central Composite Design (CCD) or Box-Behnken Design, is implemented to explore the variable space efficiently. The data collected from these experiments are then used to construct a mathematical model, often a second-order polynomial equation, that describes the relationship between the independent variables and the response metrics. Key performance indicators for biosensors include sensitivity, detection limit, selectivity, and reproducibility. Finally, the model is validated experimentally, and optimization algorithms are employed to identify the precise combination of factors that yields the best possible biosensor performance.
Complementary Modeling Approaches
While RSM is highly effective for mapping the experimental response surface, its integration with advanced computational techniques can further enhance the optimization process. For instance, the combination of RSM with Backpropagation (BP) Neural Networks creates a robust, closed-loop optimization framework. In this hybrid approach, RSM provides high-quality, systematically designed training data, while the BP neural network leverages its powerful nonlinear modeling capabilities to predict outcomes with superior generalization [35]. This synergy is particularly valuable for controlling complex, multivariate synthesis processes where traditional one-factor-at-a-time methods are inadequate.
Application Notes: RSM-Optimized Biosensor Platforms
Electrochemical Biosensor for Breast Cancer Detection
A compelling application of RSM in electrochemical biosensing is the development of a label-free immunosensor for the ultrasensitive detection of the HER2 breast cancer biomarker. The biosensor platform incorporated a nanocomposite of green-synthesized reduced graphene oxide/Fe3O4/Nafion/polyaniline on a glassy carbon electrode. The modification process was meticulously characterized using SEM, TEM, FTIR, Raman, VSM, and electrochemical methods [36].
- RSM Optimization Goal: To determine the optimal values for two critical independent variables that significantly affect the biosensor's performance: Nafion concentration and incubation time.
- Experimental Design: A Central Composite Design (CCD) was employed within the RSM framework to model the interactions between these variables and the electrochemical response.
- Optimized Performance: The RSM-optimized biosensor achieved an exceptionally broad linear detection range of 10² to 10⁶ cells mL⁻¹ and an ultra-low detection limit of 5 cells mL⁻¹. This high sensitivity is crucial for the early diagnosis of breast cancer, where biomarker concentrations can be very low [36].
SPR Biosensor for Tuberculosis Detection
In the realm of optical biosensors, RSM and evolutionary algorithms have been leveraged to design a high-performance multilayer Surface Plasmon Resonance (SPR) biosensor for detecting Myobacterium tuberculosis.
- Sensor Configuration: The proposed structure consisted of a prism with successive layers of CaF₂TiO₂/Ag/TiO₂/black [37].
- Optimization Algorithm: The Differential Evolution (DE) algorithm, a stochastic optimization technique, was used to fine-tune essential structural dimensions of the biosensor.
- Optimized Performance: This algorithm-driven optimization resulted in a sensor with an outstanding angular sensitivity of 654 deg/RIU and a high Figure of Merit (FOM) of 176.9 RIU⁻¹. The sensor also demonstrated a wide refractive index detection range (1.25-1.35), enabling the precise, label-free identification of diverse biological and chemical analytes [37].
SERS Biosensor for Antibiotic Monitoring
RSM has also proven invaluable in optimizing substrates for Surface-Enhanced Raman Spectroscopy (SERS), a highly sensitive technique for molecular detection. One study focused on creating a reliable SERS platform for detecting tetracycline (TC) antibiotics in complex aqueous matrices.
- Platform Basis: The platform utilized gold nanorods (AuNRs) as signal enhancers due to their tunable localized surface plasmon resonance properties, which generate high-intensity electromagnetic "hot spots" [35].
- Hybrid Modeling Approach: A synergistic strategy combining RSM with a BP Neural Network was implemented to optimize the seed-free, in-situ synthesis of AuNRs. RSM was first used to model the interactions between key synthesis parameters (CTAB, AgNO₃, ascorbic acid, and NaBH₄ concentrations). A trained BP neural network then predicted the optimal synthesis conditions.
- Outcome: This integrated approach ensured the reproducible synthesis of high-quality AuNRs, which formed the basis of a sensitive SERS platform capable of detecting tetracycline over a wide concentration range. This addresses critical challenges in environmental and food safety monitoring [35].
Table 1: Summary of RSM Applications in Optimizing Biosensor Performance
| Biosensor Type | Target Analyte | RSM Design/Algorithm | Key Optimized Parameters | Achieved Performance |
|---|---|---|---|---|
| Electrochemical | HER2 (Breast Cancer) | Central Composite Design (CCD) | Nafion concentration, Incubation time | LOD: 5 cells mL⁻¹; Linear range: 10²–10⁶ cells mL⁻¹ [36] |
| SPR | Mycobacterium tuberculosis | Differential Evolution (DE) Algorithm | Thickness of multilayer structure | Sensitivity: 654 deg/RIU; FOM: 176.9 RIU⁻¹ [37] |
| SERS | Tetracycline (Antibiotic) | RSM + BP Neural Network | CTAB, AgNO₃, AA, NaBH₄ concentrations | High reproducibility & wide detection range for TC [35] |
Experimental Protocols
Protocol 1: RSM-Optimized Fabrication of an Electrochemical Immunosensor
This protocol details the development of a label-free electrochemical biosensor for detecting the SKBR3 cell line, following the RSM-optimized procedure outlined by [36].
4.1.1 Materials and Reagents
- Glassy Carbon Electrode (GCE)
- Graphite fine powder (particle size ≤ 50 μm)
- Ascorbic Acid (AA), for green reduction of GO
- Ferrous sulfate heptahydrate & Iron(III) chloride hexahydrate (for Fe₃O₄ synthesis)
- Nafion (5% EtOH solution)
- Aniline (for Polyaniline polymerization)
- Herceptin antibody (biorecognition element)
- SK-BR3, MCF7, and LO2 cell lines
- NHS (98%), EDC (98%), PBS, Bovine Serum Albumin (BSA)
4.1.2 Step-by-Step Procedure
Step 1: Synthesis of rGO/Fe₃O4/Nafion/PANI Nanocomposite
- Reduce Graphene Oxide (GO) to rGO using ascorbic acid as a green reducing agent.
- Synthesize Fe₃O₄ nanoparticles via co-precipitation of ferrous and ferric salts.
- Polymerize aniline in the presence of the rGO/Fe₃O₄ composite to form the conductive PANI matrix.
- Disperse the final nanocomposite in a Nafion solution.
Step 2: Electrode Modification
- Polish the GCE sequentially with alumina slurry and diamond paste, followed by sonication in ethanol and deionized water.
- Drop-cast the optimized volume of the rGO/Fe₃O₄/Nafion/PANI nanocomposite onto the clean GCE surface and allow it to dry.
- Activate the surface with a mixture of EDC and NHS to facilitate antibody immobilization.
- Incubate the electrode with Herceptin antibody for the optimized duration determined by RSM.
- Block non-specific sites by incubating with a BSA solution.
Step 3: RSM Optimization of Assay Conditions
- Select independent variables (e.g., Nafion concentration, antibody incubation time).
- Design experiments using a Central Composite Design (CCD).
- Record electrochemical responses (e.g., via Square Wave Voltammetry) for each experimental run.
- Fit the data to a second-order polynomial model and generate response surface plots.
- Validate the model by conducting experiments at the predicted optimal conditions.
Step 4: Analytical Measurement
- Incubate the modified immunosensor with different concentrations of SKBR3 cells.
- Perform electrochemical measurements using Square Wave Voltammetry (SWV).
- Record the change in current signal, which is proportional to the concentration of captured cells.
- Construct a calibration curve from which unknown samples can be quantified.
Protocol 2: Algorithm-Assisted Optimization of an SPR Biosensor
This protocol describes the computational design and optimization of an SPR biosensor for microbial detection, based on the methodology of [37].
4.2.1 Materials and Software
- Simulation Software: COMSOL Multiphysics (Finite Element Method) or equivalent.
- Optimization Algorithm: Differential Evolution (DE) algorithm script (Python, MATLAB).
- Substrate Materials: Prism, CaF₂, TiO₂, Silver (Ag) layer.
4.2.2 Step-by-Step Procedure
Step 1: Initial Sensor Design and Parameter Definition
- Propose a multilayer SPR configuration (e.g., Prism/CaF₂TiO₂/Ag/TiO₂/black).
- Define the initial thickness ranges for each layer based on literature.
- Set the target performance metrics: Angular Sensitivity and Figure of Merit (FOM).
Step 2: Integration of the Optimization Algorithm
- Implement a Differential Evolution algorithm to iteratively adjust the layer thicknesses.
- Set the algorithm's parameters (e.g., population size, crossover probability, mutation factor).
Step 3: Automated Simulation and Fitness Evaluation
- For each set of thickness parameters generated by the DE algorithm, run an electromagnetic simulation (e.g., using Transfer Matrix Method or FEM).
- Calculate the fitness function, which is a combination of sensitivity and FOM.
- The algorithm selects the parameter sets with the highest fitness for the next iteration.
Step 4: Model Validation and Performance Analysis
- Once convergence is achieved, validate the final optimized structure by analyzing its reflectance curve.
- Compare the predicted sensitivity and FOM with initial designs to quantify the improvement.
- The resulting design, with layers tuned by the DE algorithm, is ready for experimental fabrication.
The Scientist's Toolkit: Research Reagent Solutions
Table 2: Essential Materials for RSM-Optimized Biosensor Development
| Material / Reagent | Function in Biosensor Development | Exemplary Application |
|---|---|---|
| Reduced Graphene Oxide (rGO) | Enhances electrical conductivity and surface area for immobilization; improves electron transfer. | Electrochemical biosensor for HER2 detection [36]. |
| Gold Nanorods (AuNRs) | Acts as a plasmonic signal enhancer; tunable LSPR properties generate "hot spots" for SERS. | SERS-based detection of tetracycline [35]. |
| Nafion | A perfluorosulfonated ionomer; used as a permselective membrane to repel interferents and stabilize the sensing interface. | Matrix component in electrochemical immunosensor [36]. |
| Polyaniline (PANI) | A conductive polymer; facilitates electron shuttle and provides a stable matrix for biomolecule immobilization. | Component of rGO/Fe₃O₄ nanocomposite [36]. |
| Fe₃O₄ Nanoparticles | Provide magnetic properties, high surface area, and biocompatibility; can enhance electron transport. | Component of rGO/Fe₃O₄ nanocomposite [36]. |
| CTAB (Cetyltrimethylammonium bromide) | A surfactant template directing the growth and stabilizing the morphology of metallic nanostructures like AuNRs. | Synthesis of gold nanorods for SERS substrate [35]. |
| EDC/NHS Crosslinkers | Activate carboxyl groups on sensor surfaces to form stable amide bonds with primary amines of biomolecules (e.g., antibodies). | Immobilization of Herceptin antibody on electrode surface [36]. |
Workflow and Signaling Pathways
The following diagrams illustrate the logical workflow for RSM-based biosensor optimization and the signaling pathway in a typical electrochemical biosensor.
RSM Biosensor Optimization Workflow
Diagram 1: RSM Optimization Workflow. This flowchart outlines the systematic steps for applying Response Surface Methodology to biosensor development, from initial problem definition to final validated sensor.
Electrochemical Biosensor Signaling Pathway
Diagram 2: Biosensor Signaling Pathway. This diagram illustrates the core mechanism of a typical electrochemical immunosensor, showing the sequence from biorecognition to measurable electronic readout.
Solving Common Challenges: Troubleshooting and Advanced Optimization of RSM in Biosensing
Addressing Low Signal Intensity and Poor Reproducibility
Low signal intensity and poor reproducibility are significant challenges in the development and deployment of robust biosensors. These limitations impede the reliability of analytical measurements, particularly in critical fields such as healthcare diagnostics and environmental monitoring. This application note details the integration of Response Surface Methodology (RSM) as a powerful chemometric tool to systematically optimize biosensor parameters, thereby enhancing signal response and analytical reproducibility. Protocols and data are presented within the context of electrochemical biosensor development for metal ion detection, providing a framework applicable to a broad range of biosensing platforms.
Biosensors are integrated analytical devices that convert a biological response into a quantifiable electrical signal [38]. A typical biosensor consists of a bioreceptor (e.g., enzyme, antibody) for target recognition and a transducer (e.g., electrochemical, optical) for signal conversion [38]. A primary challenge in biosensor development lies in efficiently capturing biorecognition events and transforming them into a stable, measurable signal while achieving high sensitivity, a short response time, and low detection limits [38].
Poor reproducibility often stems from the complex interplay of multiple factors during biosensor fabrication and operation. The traditional "one-factor-at-a-time" optimization approach is inefficient and fails to account for interactions between variables. Response Surface Methodology (RSM) overcomes these limitations by using statistical techniques to design experiments, build models, and optimize processes with a minimal number of experimental runs [1]. This multivariate approach is particularly suited for identifying the optimal combination of parameters that simultaneously maximize signal intensity and ensure long-term reproducibility.
Quantitative Data on RSM-Optimized Performance
The following data, adapted from a study optimizing an amperometric biosensor for metal ion detection, demonstrates the efficacy of RSM. The Central Composite Design (CCD) was used to model the effects of three key factors on biosensor sensitivity [1].
Table 1: Factors and Levels for the Central Composite Design (CCD) in Biosensor Optimization [1]
| Factor | Name | Units | Low Level | High Level |
|---|---|---|---|---|
| X₁ | Enzyme Concentration | U·mL⁻¹ | 50 | 800 |
| X₂ | Number of Cycles | - | 10 | 30 |
| X₃ | Flow Rate | mL·min⁻¹ | 0.3 | 1.0 |
Table 2: Optimization Results for Pt/PPD/GOx Biosensor Performance [1]
| Response | Optimal Condition | Performance Outcome |
|---|---|---|
| Sensitivity towards Bi³⁺ and Al³⁺ | Enzyme: 50 U·mL⁻¹, Cycles: 30, Flow Rate: 0.3 mL·min⁻¹ | High sensitivity (S, µA·mM⁻¹) agreed with model predictions |
| Reproducibility | As above | High reproducibility of response (RSD = 0.72%) |
The study confirmed that the optimized parameters from the RSM model yielded a biosensor with a wide working range and high reproducibility, a critical metric for reliable sensing [1].
Experimental Protocols
Protocol: Designing an RSM Experiment for Biosensor Optimization
This protocol outlines the steps for applying RSM to biosensor calibration.
- Define the Objective: Clearly state the goal (e.g., "Maximize sensitivity (S) for a target analyte").
- Identify Critical Factors: Select independent variables known to influence the response. Common factors include:
- Bioreceptor (e.g., enzyme) concentration
- Immobilization time or number of deposition cycles
- Operational parameters (e.g., flow rate, applied potential, pH)
- Choose the Experimental Design:
- Central Composite Design (CCD) is highly recommended for RSM as it efficiently fits a second-order polynomial model [1].
- Use software (e.g., Minitab, Design-Expert) to generate the experimental matrix.
- Execute Experiments: Run the experiments in a randomized order to minimize the effects of uncontrolled variables.
- Model and Analyze Data:
- Fit the experimental data to a quadratic model:
y = β₀ + ∑βᵢxᵢ + ∑βᵢᵢxᵢ² + ∑βᵢⱼxᵢxⱼ + εwhere y is the response, β are regression coefficients, x are factors, and ε is error [1]. - Perform Analysis of Variance (ANOVA) to assess the model's significance and the influence of each factor.
- Fit the experimental data to a quadratic model:
- Validation: Confirm the model's predictive accuracy by performing additional experiments under the identified optimal conditions and comparing the results to predictions.
Protocol: Fabrication of an Electrochemical Pt/PPD/GOx Biosensor
This detailed protocol is for the biosensor used in the RSM case study [1].
Materials:
- Screen-printed platinum electrode (SPPtE)
- Glucose oxidase (GOx) from Aspergillus niger
- o-phenylenediamine (oPD)
- Acetate buffer (50 mM, pH 5.2)
- Potentiostat and flow injection analysis apparatus
Procedure:
- Electrode Pretreatment: Clean the surface of the platinum screen-printed electrode with Milli-Q water. Condition the electrode by cyclic voltammetry (CV) in a 10 mM K₃Fe(CN)₆ solution between -0.3 V and +0.5 V until a stable voltammogram is achieved.
- Preparation of Polymerization Solution: Prepare a 50 µL solution containing the desired concentration of GOx (as per the experimental design, e.g., 50 U·mL⁻¹) and 5 mmol/L o-phenylenediamine.
- Enzyme Immobilization and Polymer Formation: Cast the 50 µL solution onto the electrode surface. Perform cyclic voltammetry between -0.07 V and +0.77 V for a specific number of cycles (e.g., 30 cycles) to electrosynthesize the poly(o-phenylenediamine) film and entrap the enzyme.
- Biosensor Rinsing and Storage: Rinse the fabricated Pt/PPD/GOx biosensor thoroughly with acetate buffer to remove unimmobilized reagents. Store the biosensor in acetate buffer at 4°C when not in use.
The Scientist's Toolkit: Research Reagent Solutions
Table 3: Essential Materials for Electrochemical Biosensor Development and Optimization
| Item | Function / Role |
|---|---|
| Glucose Oxidase (GOx) | Model enzyme; biorecognition element for substrate (glucose) and inhibitor (metal ions) detection [1]. |
| o-Phenylenediamine (oPD) | Monomer for electrosynthesizing a non-conducting polymer matrix to entrap and stabilize the enzyme on the electrode surface [1]. |
| Screen-printed Electrodes | Disposable, miniaturized electrochemical cells (working, reference, and counter electrodes) serving as the transducer platform [1]. |
| Response Surface Methodology Software | Statistical software (e.g., Minitab) for designing experiments, performing regression analysis, and optimizing parameters via CCD [1]. |
| Gold Nanoparticles (AuNPs) | Nanomaterial used to enhance signal transduction in various biosensors due to high stability and conductivity [38] [27]. |
Workflow and Logical Diagrams
Optimization Workflow
Key Parameter Interplay
Optimizing Immobilization Strategies and Surface Chemistry to Minimize Non-Specific Binding
Non-specific binding (NSB) presents a significant challenge in the development of robust and reliable biosensors, often leading to inflated signals, erroneous kinetic calculations, and compromised detection limits [39]. Within a broader research context focused on response surface methodology (RSM) for biosensor calibration, optimizing surface chemistry is a critical preliminary step. A meticulously optimized and characterized surface ensures that the response variable measured during RSM is primarily due to specific biomolecular interactions rather than confounding NSB, leading to more accurate models and reliable sensor performance [7] [3]. This application note provides detailed protocols and data for immobilization strategies designed to minimize NSB, forming a foundational element for subsequent multivariate optimization of biosensor calibration curves.
Quantitative Comparison of Immobilization Strategies
The choice of immobilization strategy profoundly impacts biosensor performance by influencing probe orientation, density, and accessibility. The following table summarizes key parameters for different approaches.
Table 1: Comparison of Immobilization Strategies and Their Performance Characteristics
| Immobilization Strategy | Mechanism | Key Performance Advantages | Limitations | Example Dissociation Constant (KD) |
|---|---|---|---|---|
| Covalent (Non-oriented) | Amine coupling via EDC/NHS chemistry on carboxylated SAMs [40] | Simple, robust covalent attachment | Random antibody orientation can block paratopes [40] | 37 nM (Shiga toxin) [40] |
| Protein G-mediated (Oriented) | Bioaffinity capture of antibody Fc regions [40] | Preserves binding site functionality; improves sensitivity [40] | Requires an extra immobilization step | 16 nM (Shiga toxin) [40] |
| Streptavidin-Biotin | High-affinity interaction between streptavidin and biotin [41] | Versatile; applicable to most materials; controlled density [42] | Potential for non-specific avidin adsorption | N/A |
| Thiol-Based Self-Assembled Monolayers (SAMs) on Gold | Chemisorption of thiolated probes onto gold surfaces [42] | Well-ordered, dense layers; permits backfilling to reduce NSB [42] | Limited to gold surfaces; SAM stability can vary | N/A |
Detailed Experimental Protocols
Protocol 1: Protein G-Mediated Oriented Antibody Immobilization on Gold Surfaces
This protocol details an oriented immobilization strategy using Protein G, which significantly enhances binding affinity and reduces detection limits compared to non-oriented methods [40].
Research Reagent Solutions
- 11-Mercaptoundecanoic acid (11-MUA): Serves as the foundation for the self-assembled monolayer (SAM), presenting carboxyl groups for subsequent coupling [40].
- NHS/EDC Mixture: Activates surface carboxyl groups to form amine-reactive esters for covalent immobilization [40].
- Protein G: A recombinant protein that binds the Fc region of antibodies, ensuring proper orientation of the paratopes [40].
- Ethanolamine-HCl: Blocks any remaining activated ester groups after immobilization to prevent non-specific attachment [40].
- HEPES Buffer with Surfactant: The running buffer (e.g., 10 mM HEPES, 150 mM NaCl, 0.005% Tween 20, pH 7.4) maintains pH and ionic strength, while the surfactant reduces hydrophobic interactions [39] [40].
Procedure
- Surface Cleaning: Clean the gold sensor chip in a freshly prepared piranha solution (3:1 v/v H2SO4:H2O2) for 2-5 minutes. Caution: Piranha solution is highly corrosive and must be handled with extreme care. Rinse thoroughly with deionized water and absolute ethanol [40].
- SAM Formation: Incubate the clean gold chip in a 1 mM solution of 11-MUA in absolute ethanol for a minimum of 12 hours at room temperature to form a carboxyl-terminated SAM. Rinse the chip sequentially with ethanol and deionized water to remove unbound thiols, then dry under a stream of nitrogen [40].
- Surface Activation: Install the chip in the SPR instrument or fluidic system. Inject a freshly prepared mixture of 400 mM EDC and 100 mM NHS for 5-10 minutes to activate the carboxyl groups on the SAM [40].
- Protein G Immobilization: Inject a 25 µg/mL solution of Protein G in 10 mM acetate buffer (pH 4.5) over the activated surface for a sufficient time to achieve the desired immobilization level (e.g., 10-15 minutes) [40].
- Surface Blocking: Inject 1 M ethanolamine-HCl (pH 8.5) for 10 minutes to quench any remaining activated esters [40].
- Antibody Capture: Inject the anti-target antibody (e.g., 40 µg/mL in HEPES running buffer) for 5-10 minutes. Protein G will specifically bind the antibody via its Fc region, resulting in a uniformly oriented surface with accessible antigen-binding sites [40].
- Conditioning: Perform a brief wash with regeneration buffer to remove any loosely associated antibody before initiating binding experiments.
The following workflow diagram illustrates the key steps in this protocol:
Protocol 2: Aptamer Immobilization via Thiol-Gold Chemistry with Backfilling
This protocol is ideal for nucleic acid-based sensors, leveraging the strong Au-S bond for stable probe immobilization while using a backfilling agent to create a non-fouling surface.
Research Reagent Solutions
- Thiol-Modified DNA Aptamer: The recognition element; the thiol group allows for covalent attachment to the gold surface [42].
- 6-Mercapto-1-hexanol (MCH): A hydrophilic thiol used as a backfilling agent to displace non-specifically adsorbed aptamers and create a well-oriented, protein-resistant monolayer [42].
- PBS Buffer (with Mg²⁺): Provides a physiologically compatible ionic environment, and Mg²⁺ can help stabilize nucleic acid structure.
Procedure
- Surface Cleaning: Clean the gold electrode or chip as described in Protocol 1, Step 1.
- Aptamer Immobilization: Spot or incubate the gold surface with a 1-5 µM solution of thiol-modified aptamer in a suitable buffer (e.g., PBS) for 1-4 hours at room temperature. This allows the thiol group to chemisorb onto the gold, creating a Au-S bond [42].
- Backfilling: Rinse the surface gently with buffer to remove loosely bound aptamers. Subsequently, incubate the surface with a 1-10 mM solution of MCH for 30-60 minutes. MCH binds to unoccupied gold sites, displacing any aptamers lying flat on the surface and forcing the remaining probes into an upright orientation. This step is critical for maximizing hybridization efficiency and minimizing NSB [42].
- Rinsing and Storage: Rinse the functionalized sensor thoroughly with running buffer and store in an appropriate buffer at 4°C if not used immediately.
Strategic Optimization of Assay Conditions to Minimize NSB
Beyond the immobilization chemistry, the composition of the running buffer and assay milieu is paramount for suppressing NSB. The following table outlines common additives and their roles.
Table 2: Buffer Additives and Conditions for Reducing Non-Specific Binding
| Additive/Condition | Mechanism of Action | Typical Working Concentration | Considerations |
|---|---|---|---|
| Bovine Serum Albumin (BSA) | Acts as a protein blocker, adsorbing to hydrophobic surfaces and tubing, thereby shielding the analyte from non-specific interactions [39]. | 0.1 - 1.0% (w/v) | A readily available and cost-effective additive; must be confirmed not to interfere with the specific binding event. |
| Non-Ionic Surfactants (e.g., Tween 20) | Disrupts hydrophobic interactions, a major driver of NSB, by reducing surface tension [39]. | 0.005 - 0.05% (v/v) | Use at low concentrations to avoid denaturing biomolecules; highly effective for reducing NSB to polymer and metal surfaces. |
| Increased Ionic Strength (e.g., NaCl) | Shields electrostatic interactions between charged analytes and the sensor surface by forming a double layer [39]. | 150 - 500 mM | Optimal concentration is analyte-dependent; high salt may promote hydrophobic interactions or disrupt specific binding. |
| pH Adjustment | Modifies the net charge of proteins/analytes and the surface, preventing electrostatic attraction. Adjust pH to the isoelectric point of the analyte for a neutral charge [39]. | Analyte-dependent | Requires knowledge of the isoelectric point (pI) of both the analyte and immobilized ligand; a pH between their pIs can create charge repulsion. |
| Organic Polymers (e.g., PEG) | Creates a hydrated, steric exclusion layer that is energetically unfavorable for proteins to adsorb to [42]. | 0.1 - 1.0% (w/v) | Can be incorporated into surface chemistries or added to buffers; effective at reducing protein fouling. |
Integrating Surface Optimization with Response Surface Methodology
The optimization of surface chemistry and immobilization strategies is not an end in itself but a crucial prerequisite for effective biosensor calibration using RSM. A stable, low-noise surface with minimal NSB ensures that the signal response modeled by RSM accurately reflects the specific binding isotherm. For instance, in the development of an electrochemical DNA biosensor for Mycobacterium tuberculosis, a Plackett-Burman design was first used to screen significant factors affecting the response, which inherently included parameters like probe concentration and immobilization time [3]. Once a low-NSB surface is established, RSM, particularly Central Composite Design, can be applied to model the complex, non-linear relationships between factors such as hybridization temperature, incubation time, and ionic strength, and the resulting sensor response, ultimately identifying the true optimum conditions for calibration [8] [3]. This sequential approach—first minimizing NSB through strategic surface design and then employing DoE for global optimization—streamlines the development of highly sensitive and reliable biosensors.
Buffer Selection and Flow Condition Optimization for Stable Baselines
Achieving a stable baseline is a prerequisite for obtaining reliable, reproducible, and quantitative data from biosensors. Instability manifests as signal drift and heightened noise, often originating from inadequate buffer systems, suboptimal flow hydrodynamics, or nonspecific binding [43] [44]. While a univariate ("one-variable-at-a-time") approach can identify grossly unsuitable conditions, it often fails to capture the complex interactions between chemical and physical parameters that dictate baseline performance. This application note, framed within a broader thesis on Response Surface Methodology (RSM) for biosensor calibration, details a systematic protocol for optimizing buffer selection and flow conditions. We demonstrate how employing a Central Composite Design (CCD) enables researchers to efficiently identify a robust operational window that ensures superior baseline stability, a critical foundation for any subsequent biosensing assay [1] [8].
Systematic Optimization Using Response Surface Methodology
The optimization of a biosensing system involves navigating a multi-parameter space where factors can interact in non-linear ways. For instance, the pH of a buffer can influence the rate of nonspecific binding to the sensor surface, which in turn can be mitigated by an optimal flow rate that minimizes the diffusion boundary layer [43] [45]. A one-variable-at-a-time approach is inefficient and likely to miss these significant interaction effects.
Response Surface Methodology is a powerful collection of statistical techniques for designing experiments, building models, evaluating the effects of multiple factors, and searching for optimum conditions [8]. The typical workflow involves:
- Screening to identify significant factors from a large set of potential variables.
- Optimization using a design like a Central Composite Design (CCD) to model the curvature of the response and identify a optimum.
- Verification of the predicted optimal conditions through experimental runs [8].
In this context, we focus on the optimization phase for factors already known to be critical for baseline stability. The response (or output variable) to be minimized is the Baseline Drift Rate, measured as the change in signal per unit time (e.g., µV/min or RU/min) under constant buffer flow.
Table 1: Key Factors and Their Ranges for a CCD Optimization of Baseline Stability
| Factor | Name | Units | Low Level (-1) | High Level (+1) | Axial Point (-α, +α) |
|---|---|---|---|---|---|
| X₁ | Buffer pH | - | 6.8 | 7.6 | 6.6, 7.8 |
| X₂ | Ionic Strength | mM | 100 | 200 | 75, 225 |
| X₃ | Flow Rate | mL/min | 0.2 | 0.4 | 0.1, 0.5 |
| X₄ | Surfactant Concentration | % v/v | 0.005 | 0.02 | 0.001, 0.025 |
A CCD for these four factors would require a strategically selected set of experiments (e.g., 16 factorial points, 8 axial points, and 6 center point replicates, for a total of 30 runs) [1] [8]. The resulting data is fitted to a second-order polynomial model, allowing for the prediction of the baseline drift rate across the entire experimental domain and the identification of the optimal combination of factors.
Figure 1: RSM Optimization Workflow. This diagram outlines the key steps in using Response Surface Methodology to systematically optimize biosensor conditions.
The Scientist's Toolkit: Key Reagents and Materials
Table 2: Essential Research Reagent Solutions for Baseline Stabilization
| Reagent/Material | Typical Composition / Example | Primary Function in Baseline Stabilization |
|---|---|---|
| Buffering Agents | 10-50 mM Phosphate (PBS), HEPES, or Acetate buffer | Maintains constant pH, preventing signal drift from protonation/deprotonation of surface groups [46]. |
| Salts | Sodium Chloride (NaCl), Potassium Chloride (KCl) | Modifies ionic strength to shield electrostatic nonspecific binding and maintain consistent buffer capacity [44]. |
| Surfactants | Polysorbate 20 (Tween 20), Triton X-100 | Reduces nonspecific binding (NSB) of hydrophobic or proteinaceous material to the sensor surface and fluidics [47]. |
| Blocking Agents | Bovine Serum Albumin (BSA), casein, ethanolamine | Passivates unreacted or nonspecific sites on the sensor surface to minimize NSB [47] [44]. |
| Chelating Agents | Ethylenediaminetetraacetic acid (EDTA) | Binds divalent metal ions that can catalyze oxidative degradation or promote unwanted protein aggregation [1]. |
| Organic Modifiers | Glycerol, Ethylene Glycol | Stabilizes biomolecules and can reduce hydrophobic interactions that lead to NSB [44]. |
Detailed Experimental Protocols
Protocol: Systematic Optimization of Baseline Conditions Using a Central Composite Design (CCD)
This protocol guides the optimization of four critical factors for a stable baseline using a CCD. The expected outcome is a statistically validated model that identifies the optimal settings for pH, ionic strength, flow rate, and surfactant concentration.
I. Materials and Equipment
- Biosensor system with flow cell (e.g., SPR, QCM, or electrochemical flow cell)
- Peristaltic pump or syringe pump capable of precise flow control
- Buffer reagents (see Table 2)
- pH meter and standard solutions
- Analytical balance
- Data acquisition software for recording baseline signal
II. Procedure
- Define the Experimental Domain: Based on preliminary experiments or literature, set the levels for each factor as shown in Table 1.
- Generate the CCD Matrix: Use statistical software (e.g., Minitab, JMP, Design-Expert) to generate a randomized run order for the CCD. This includes factorial, axial, and center points.
- Prepare Buffer Solutions: For each experimental run in the matrix, prepare the corresponding buffer solution according to the specified pH, ionic strength, and surfactant concentration. Filter all solutions (0.22 µm) and degas prior to use to prevent bubble formation.
- Equilibrate the Biosensor System:
- Mount the sensor chip (functionalized with your bioreceptor or a mock surface) into the flow cell.
- Prime the fluidic system with deionized water, followed by the baseline buffer for the first run.
- Set the flow rate as specified for the first experimental run.
- Allow the system to equilibrate until a stable temperature is reached and the signal drift falls below 1 RU/min (or equivalent) for at least 10 minutes.
- Execute Experimental Runs and Collect Data:
- Switch the buffer flow to the specific test solution for that run.
- Record the baseline signal for a minimum of 30 minutes under constant flow.
- At the end of the recording, flush the system extensively with deionized water before proceeding to the next randomized run to prevent carryover.
- Data Processing: For each run, calculate the Baseline Drift Rate by performing a linear regression of the signal versus time over the final 20 minutes of the recording.
III. Data Analysis and Model Validation
- Model Fitting: Input the experimental drift rates into the statistical software and fit a second-order polynomial model.
- Analysis of Variance (ANOVA): Evaluate the model's significance via ANOVA. Check for a high F-value and a low p-value for the model. The coefficient of determination (R²) and the predicted R² indicate the model's goodness-of-fit.
- Interpretation: Use contour plots and 3D response surface plots from the software to visualize the relationship between factors and the drift rate. Identify the region where the drift rate is minimized.
- Locate the Optimum: Use the software's numerical optimization function to pinpoint the specific factor levels that predict the lowest possible drift rate.
- Validation: Prepare the buffer and set the flow conditions as predicted by the model. Perform at least three independent validation runs. The experimentally observed drift rate should be low and show no significant difference from the model's prediction.
Protocol: Evaluating Flow Cell Geometry and Hydrodynamics
This protocol uses a simplified experimental and computational approach to assess the impact of flow cell design on baseline stability, which is critical for minimizing signal noise and "dead volumes" that cause carryover.
I. Materials and Equipment
- Microfluidic flow cell(s) with different channel geometries (e.g., straight, expansion/contraction regions)
- Fluorescent dye (e.g., fluorescein sodium salt) and deionized water
- Fluorescence microscope with CCD camera and appropriate filters
- Image analysis software (e.g., ImageJ, Matlab)
II. Procedure
- Experimental Flow Analysis:
- Fill the flow cell with deionized water.
- Using a syringe pump, switch the inflow to a solution of fluorescent dye at a defined concentration, maintaining a constant flow rate.
- Record a video of the flow cell at a fixed frame rate (e.g., 25 fps) until the fluorescence intensity in the entire cell reaches a steady state.
- Repeat for different flow rates and/or different flow cell geometries.
- Image Analysis:
- Process the video frames to determine the normalized fluorescent intensity (C_ratio) over time for different regions of interest (ROI) within the flow cell, particularly near the sensor surface [43].
- The efficiency of the flow cell can be assessed by the time and volume required for the sensor chamber ROI to reach 95% of the influent concentration. Slower times indicate poor mass transport and a propensity for baseline instability.
III. Computational Fluid Dynamics (CFD) Analysis
- Model Setup: Create a 2D or 3D geometry of the flow cell in CFD software (e.g., COMSOL Multiphysics).
- Physics Definition: Apply the Navier-Stokes equations for incompressible flow and the convection-diffusion equation to simulate the transport of a dilute species (the analyte) [45].
- Simulation and Analysis:
- Solve for the flow velocity field and analyte concentration distribution.
- Analyze the streamlines for the development of recirculation zones (eddies), which act as reservoirs of analyte and cause slow signal changes and baseline drift [43].
- A well-designed flow cell with a gradual channel expansion/contraction (e.g., an "iCell" design) will minimize these eddies and lead to a more stable and responsive baseline [43].
Figure 2: Factors Influencing Baseline Stability. This diagram maps the relationship between fluidic/surface factors and their effect on the baseline, highlighting pathways to a stable state and the negative impact of eddy formation.
Results and Data Interpretation
The successful application of the RSM protocol yields a predictive model and quantitative data for informed decision-making.
Table 3: Exemplar Optimization Results from a Hypothetical CCD Study
| Factor | Optimum Level | Effect on Baseline Drift Rate | p-value |
|---|---|---|---|
| Buffer pH | 7.4 | Strong quadratic effect; drift increases at both lower and higher pH. | < 0.001 |
| Ionic Strength | 150 mM | Significant negative linear effect; higher ionic strength reduces drift up to a point. | 0.005 |
| Flow Rate | 0.3 mL/min | Significant interaction with pH; optimal flow minimizes drift at the optimal pH. | 0.008 (for X₁*X₃) |
| Surfactant (P-20) | 0.01% v/v | Significant negative linear effect; reduces nonspecific binding. | 0.002 |
| Model Statistics | R² = 0.94, Adjusted R² = 0.91, Predicted R² = 0.87 |
Interpreting the Data:
- The high R² values indicate that the model explains most of the variability in the baseline drift.
- The significant interaction between Flow Rate and pH (p=0.008) underscores the power of RSM; this effect would be missed in a univariate study. The contour plot for this interaction would show that the lowest drift is achieved only at a specific combination of these two factors.
- The validation experiments conducted at the predicted optimum (pH 7.4, 150 mM Ionic Strength, 0.3 mL/min, 0.01% P-20) should confirm a low, stable drift rate, thereby verifying the model's robustness.
Achieving a stable baseline is not a matter of chance but of systematic design. This application note has detailed how Response Surface Methodology provides a structured, efficient framework for optimizing the complex, interacting factors of buffer chemistry and flow dynamics. By moving beyond one-variable-at-a-time experimentation, researchers can develop a deep understanding of their biosensing system, leading to a robustly defined operational window. The implemented optimal conditions—validated through both statistical models and experimental confirmation—form the critical foundation required for acquiring high-quality, reliable biosensor data in demanding applications such as drug discovery and diagnostic development [8] [48].
Integrating RSM with Machine Learning for Enhanced Predictive Power and Multi-Objective Optimization
The integration of Response Surface Methodology (RSM) and Machine Learning (ML) represents a paradigm shift in the optimization and calibration of complex analytical systems, including biosensors. RSM is a powerful collection of statistical and mathematical techniques used for developing, improving, and optimizing processes, particularly when multiple variables influence a performance metric or quality characteristic of interest [26]. Its core strength lies in designing experiments, building empirical models, evaluating factor effects, and seeking optimal conditions for desirable responses. Meanwhile, ML algorithms provide advanced computational capabilities for learning from data, identifying complex nonlinear patterns, and making accurate predictions on high-dimensional datasets that may challenge traditional statistical approaches [49].
When applied to biosensor calibration research, this integration creates a synergistic framework that leverages the structured experimental design of RSM with the superior predictive capabilities of ML. This hybrid approach is particularly valuable for modeling the multi-factorial relationships between biosensor composition parameters, operational conditions, and analytical performance metrics such as sensitivity, specificity, and detection limits. The fusion of these methodologies enables researchers to navigate complex response surfaces more efficiently, ultimately accelerating the development of highly sensitive and reliable biosensing platforms for pharmaceutical applications and clinical diagnostics [49] [50].
Fundamental Principles and Comparative Framework
Core Components of Response Surface Methodology
RSM operates through a systematic sequence that begins with problem definition and identification of critical response variables. The methodology then progresses through factor screening, experimental design implementation, model development using regression analysis, and finally optimization using desirability functions [26] [50]. Central composite designs and Box-Behnken designs are particularly valuable in RSM as they efficiently explore the factor space while requiring fewer experimental runs than full factorial designs. The ultimate output is a mathematical model, typically a second-order polynomial equation, that describes the relationship between independent variables and the response of interest, enabling the identification of optimal operational conditions [26].
A key advantage of RSM in biosensor research is its ability to quantify interaction effects between multiple factors simultaneously. For instance, in polymer inclusion membrane (PIM) optode development for metal ion sensing, RSM has successfully optimized four critical factors: chromophore amount, cellulose triacetate content, plasticizer amount, and membrane exposure time [50]. The methodology employs desirability functions to reconcile multiple, often competing objectives into a single optimization criterion, a feature particularly valuable in biosensor calibration where sensitivity, response time, and selectivity must be balanced [50].
Machine Learning Algorithms for Predictive Modeling
ML brings complementary capabilities to the optimization pipeline, particularly in handling complex, nonlinear relationships in high-dimensional data. Supervised learning algorithms, including Artificial Neural Networks (ANN), Extreme Gradient Boosting (XGB), and K-Nearest Neighbors (KNN), excel at establishing predictive relationships between input parameters and output responses [51] [49]. Research comparing ML models with traditional RSM for biodiesel optimization demonstrated that ANN significantly outperformed RSM in predictive accuracy for engine performance characteristics, highlighting ML's superior capability for modeling complex systems [51].
Unsupervised learning algorithms such as Principal Component Analysis (PCA) provide powerful tools for dimensionality reduction and pattern recognition in complex spectral data. In biosensor applications, PCA can transform high-dimensional spectral responses into lower-dimensional spaces while preserving critical information, facilitating the interpretation of complex sensor responses to different analytes [50]. Deep learning architectures further extend these capabilities for processing sophisticated signal patterns from electrochemical, optical, and microfluidic biosensors, enabling real-time analysis and classification in clinical diagnostics [49].
Comparative Analysis: RSM versus Machine Learning
Table 1: Comparative characteristics of RSM and ML approaches for biosensor optimization
| Feature | Response Surface Methodology | Machine Learning |
|---|---|---|
| Experimental Design | Structured designs (e.g., Central Composite, Box-Behnken) | Data-driven; less emphasis on structured design |
| Model Type | Typically polynomial (first or second-order) | Flexible (ANN, XGB, KNN, RT, PCA) |
| Handling Nonlinearity | Limited to specified polynomial order | Excellent for complex nonlinear relationships |
| Data Requirements | Efficient with limited data points | Generally requires larger datasets |
| Interpretability | High (explicit mathematical models) | Variable (often "black box" models) |
| Optimization Approach | Desirability functions, gradient methods | Evolutionary algorithms, gradient-based methods |
| Primary Strength | Design space exploration, factor effect quantification | Predictive accuracy, pattern recognition |
Integrated RSM-ML Framework for Biosensor Calibration
Conceptual Workflow Integration
The synergistic integration of RSM and ML follows a sequential framework that leverages the strengths of both approaches. The process begins with RSM-guided experimental design to efficiently explore the multi-dimensional parameter space with minimal experimental runs. The resulting data then feeds into ML algorithms that build more accurate predictive models than traditional polynomial approximations. These ML models subsequently enable more effective navigation of the response surface to identify global optima, especially for complex, nonlinear systems where RSM alone may converge on local optima [51] [50].
This hybrid approach is particularly valuable in biosensor calibration research where experimental constraints often limit the number of feasible trials. By combining the experimental efficiency of RSM with the predictive power of ML, researchers can develop robust calibration models that accurately predict biosensor performance across a wide range of compositional and operational parameters. The integration also facilitates the optimization of multiple, often competing objectives such as sensitivity, specificity, response time, and operational stability through multi-objective optimization algorithms [51].
Application Notes for Biosensor Calibration
The integrated RSM-ML framework offers particular advantages for addressing key challenges in biosensor calibration. For optical biosensors based on polymer inclusion membranes, researchers have successfully employed RSM with Doehlert experimental designs to optimize membrane composition while using PCA for analyzing complex spectral response data [50]. This approach efficiently handled four critical factors simultaneously: chromophore concentration (0.06-1 mg), cellulose triacetate support matrix (25-100 mg), plasticizer content (25-100 mg), and membrane exposure time to analyte solutions (20-80 minutes) [50].
For electrochemical biosensors in pharmaceutical applications, the integration of ML algorithms addresses critical limitations in signal processing and interpretation. ML-enhanced biosensors demonstrate improved accuracy in classifying overlapping conditions, indicating disease severity, and differentiating between multiple analytes in complex biological matrices [49]. Supervised learning algorithms, particularly ANN and XGB, have shown exceptional performance in predicting biosensor response based on fabrication parameters and operational conditions, enabling virtual screening of potential configurations before experimental validation [51] [49].
The desirability function approach, central to RSM optimization, can be enhanced through ML by developing more sophisticated predictive models for individual desirability scores. This hybrid strategy proved highly effective in biodiesel optimization research, where it achieved a superior desirability rating of 0.9282 for balancing multiple performance and emission characteristics [51]. Similarly, in biosensor calibration, this approach can simultaneously optimize sensitivity, detection limit, dynamic range, and response time, which often present competing requirements.
Experimental Protocols and Methodologies
Protocol 1: RSM Experimental Design for Biosensor Development
Objective: To systematically optimize biosensor composition and operational parameters using Response Surface Methodology.
Materials and Reagents:
- Cellulose triacetate (polymer matrix)
- 2-nitrophenyl octyl ether or tris(2-ethylhexyl) phosphate (plasticizer)
- Chromophore agents (e.g., dithizone, PAN for optical sensors)
- Dichloromethane (solvent for membrane preparation)
- Buffer solutions (appropriate for target analyte)
- Standard solutions of target analytes
Experimental Design:
- Factor Selection: Identify critical factors influencing biosensor performance based on preliminary experiments. Typical factors include:
- Chromophore concentration (0.06-1.0 mg)
- Polymer matrix amount (25-100 mg)
- Plasticizer content (25-100 mg)
- Operational parameter (e.g., exposure time: 20-80 min)
Design Matrix Implementation:
- Employ a Central Composite Design (CCD) or Doehlert design for efficient factor space exploration
- For 4 factors, a CCD typically requires 25-30 experimental runs including center points
- Code factor levels to standardized values (-1, 0, +1) to eliminate scale dependence
Experimental Procedure:
- Prepare biosensors according to the compositions specified by the design matrix
- Expose biosensors to standard analyte solutions under controlled conditions
- Measure response signals (absorbance, current, voltage, etc.) for each experimental run
- Record all environmental conditions (temperature, pH, humidity) that may affect responses
Data Collection:
- Collect multiple response measurements for each experimental run to estimate variability
- Include replicate measurements at center points to estimate pure error
- Document all observations regarding sensor stability, response time, and physical characteristics
Table 2: Example Doehlert Experimental Design for Biosensor Optimization with Four Factors
| Run | Time (min) | Chromophore (mg) | Plasticizer (mg) | Polymer (mg) |
|---|---|---|---|---|
| 1 | 50 (0) | 0.53 (0) | 62.5 (0) | 62.5 (0) |
| 2 | 80 (1) | 0.53 (0) | 62.5 (0) | 62.5 (0) |
| 3 | 65 (0.5) | 1.0 (0.866) | 62.5 (0) | 62.5 (0) |
| 4 | 65 (0.5) | 0.68 (0.289) | 100 (0.817) | 62.5 (0) |
| 5 | 65 (0.5) | 0.68 (0.289) | 71.86 (0.204) | 100 (0.791) |
| 6 | 20 (-1) | 0.53 (0) | 62.5 (0) | 62.5 (0) |
| 7 | 35 (-0.5) | 0.06 (-0.866) | 62.5 (0) | 62.5 (0) |
| 8 | 35 (-0.5) | 0.37 (-0.289) | 25.0 (-0.817) | 62.5 (0) |
| 9 | 35 (-0.5) | 0.37 (-0.289) | 53.13 (-0.204) | 25 (-0.791) |
| 10 | 65 (0.5) | 0.06 (-0.866) | 62.5 (0) | 62.5 (0) |
| ... | ... | ... | ... | ... |
Note: Values in parentheses represent coded factor levels [50]
Protocol 2: Machine Learning Model Development for Biosensor Response Prediction
Objective: To develop accurate predictive models for biosensor performance using machine learning algorithms.
Data Preparation:
- Compile the experimental data from RSM experiments into a structured dataset
- Partition data into training (70-80%) and testing (20-30%) sets using stratified sampling
- Preprocess data through normalization or standardization of input variables
- Consider feature engineering to create derived parameters that may enhance predictive performance
Model Training and Validation:
- Algorithm Selection: Implement multiple ML algorithms for comparative performance:
- Artificial Neural Networks (ANN) with optimized architecture
- Extreme Gradient Boosting (XGB) with hyperparameter tuning
- Random Trees (RT) for ensemble modeling
- K-Nearest Neighbors (KNN) for instance-based learning
Model Training:
- Employ k-fold cross-validation (typically k=5 or 10) during training to prevent overfitting
- Utilize grid search or Bayesian optimization for hyperparameter tuning
- Implement early stopping criteria for iterative algorithms
Model Evaluation:
- Evaluate model performance using test set data not used during training
- Calculate performance metrics: R², RMSE, MAE, and MAPE
- Compare ML model performance against traditional RSM polynomial models
- Assess residual plots for patterns indicating model inadequacy
Model Interpretation:
- Conduct feature importance analysis to identify dominant factors
- Generate partial dependence plots to visualize factor-response relationships
- Perform sensitivity analysis to quantify the effect of input variations on predictions
Protocol 3: Multi-Objective Optimization Using Hybrid RSM-ML Approach
Objective: To identify optimal biosensor configurations that simultaneously satisfy multiple performance criteria.
Desirability Function Implementation:
- Individual Desirability Functions:
- For each response variable, define individual desirability functions (d_i)
- Apply linear or nonlinear transformation based on optimization goal (maximize, minimize, target)
- Set acceptable ranges for each response based on application requirements
Overall Desirability Calculation:
- Compute overall desirability (D) as geometric mean of individual desirabilities: D = (d₁ × d₂ × ... × dₙ)^(1/n)
- Alternatively, apply weighted geometric mean if responses have different priorities
Optimization Procedure:
- Use the trained ML model as a surrogate for actual experiments
- Apply optimization algorithms (e.g., genetic algorithms, particle swarm optimization) to maximize overall desirability
- Constrain the optimization within the experimental domain to avoid extrapolation
Validation Experiments:
- Conduct confirmatory experiments at predicted optimal conditions
- Compare predicted and observed responses to validate model accuracy
- If discrepancy exceeds acceptable limits, refine models with additional data
Data Analysis and Performance Metrics
Quantitative Comparison of Model Performance
Table 3: Performance comparison of RSM and ML models for biodiesel optimization (example framework for biosensor applications)
| Model Type | R² Value | RMSE | MAE | MAPE (%) | Implementation Complexity |
|---|---|---|---|---|---|
| RSM (Quadratic) | 0.892 | 0.324 | 0.261 | 8.76 | Low |
| Artificial Neural Network | 0.974 | 0.128 | 0.098 | 3.12 | High |
| Extreme Gradient Boosting | 0.961 | 0.156 | 0.121 | 3.89 | Medium |
| Random Trees | 0.943 | 0.201 | 0.158 | 5.24 | Medium |
| K-Nearest Neighbors | 0.918 | 0.267 | 0.214 | 7.13 | Low |
Data adapted from biodiesel optimization study demonstrating typical performance advantages of ML approaches [51]
Optimization Outcomes for Multi-Objective Problems
Table 4: Optimal biosensor configurations derived from hybrid RSM-ML optimization
| Parameter | Lower Limit | Upper Limit | Optimal Value | Response at Optimum |
|---|---|---|---|---|
| Chromophore (mg) | 0.06 | 1.0 | 0.53-1.0 | Maximal sensitivity |
| Polymer Matrix (mg) | 25 | 100 | 62.5-100 | Mechanical stability |
| Plasticizer (mg) | 25 | 100 | 34.4-71.9 | Response homogeneity |
| Exposure Time (min) | 20 | 80 | 35-65 | Practical analysis time |
| Overall Desirability | - | - | 0.85-0.95 | Balanced performance |
Ranges represent optimal values for different metal ions (Hg(II), Cd(II), Pb(II)) in PIM optodes [50]
The Scientist's Toolkit: Essential Research Reagents and Materials
Table 5: Key research reagents and materials for RSM-ML optimized biosensor development
| Reagent/Material | Function | Application Example | Considerations |
|---|---|---|---|
| Cellulose Triacetate | Polymer matrix for membrane formation | Provides structural support for polymer inclusion membranes | Molecular weight affects porosity and mechanical properties |
| 2-Nitrophenyl Octyl Ether | Plasticizer for polymer membranes | Enhances flexibility and regulates analyte diffusion | Hydrophobicity influences partitioning of analytes |
| Dithizone | Chromophore for metal ion detection | Forms colored complexes with Hg(II), Cd(II), Pb(II) | Concentration optimization critical for signal intensity |
| 1-(2-Pyridylazo)-2-naphthol | Alternative chromophore | Broader metal ion detection capability | Different complexation kinetics vs. dithizone |
| THEP Plasticizer | Alternative plasticizer | Modifies membrane polarity and selectivity | Compatibility with specific polymer matrices must be verified |
| Dichloromethane | Solvent for membrane preparation | Dissolves polymer components for homogeneous mixing | Evaporation rate affects membrane morphology |
| MES Buffer | pH control for aqueous solutions | Maintains consistent pH for reproducible responses | Buffer capacity must match analyte concentration |
Implementation Considerations and Challenges
Data Quality and Experimental Design
The success of the integrated RSM-ML approach critically depends on appropriate experimental design and data quality. RSM provides the structured framework for generating informative datasets that enable effective ML model training. Careful consideration must be given to the selection of factor ranges, the choice of experimental design, and the number of replicate measurements. Insufficient exploration of the factor space or inadequate replication can limit the development of robust predictive models, regardless of the sophistication of the ML algorithms employed [26].
Experimental designs should adequately cover the region of interest while maintaining practical feasibility. Central composite designs are particularly valuable as they efficiently estimate quadratic response surfaces with a reasonable number of experimental runs. For initial screening of multiple factors, fractional factorial or Plackett-Burman designs can identify the most influential parameters before undertaking more comprehensive optimization studies [26].
The implementation of ML components requires appropriate computational resources and algorithm selection tailored to the specific characteristics of the biosensor calibration problem. While sophisticated deep learning architectures may offer maximum flexibility, they typically require larger datasets and greater computational resources. For many biosensor applications with moderate dataset sizes, ensemble methods like Random Trees or Gradient Boosting may provide the optimal balance between performance and computational requirements [51] [49].
Algorithm selection should consider the nature of the relationship between factors and responses, the presence of potential interactions, and the noise characteristics of the measurement system. Cross-validation procedures are essential for honest performance assessment and preventing overfitting, particularly with flexible ML algorithms that can easily memorize training data without generalizing well to new observations [51].
Validation and Practical Implementation
Robust validation is essential before implementing RSM-ML models for critical biosensor applications. Validation should include both internal validation using statistical measures and external validation through confirmatory experiments. The latter is particularly important for verifying that predictions made by the optimized models translate to actual performance improvements in practical settings [51] [50].
For biosensors intended for clinical diagnostics or pharmaceutical applications, additional validation following regulatory guidelines may be necessary. This includes assessing accuracy, precision, sensitivity, specificity, and robustness under conditions of intended use. The integration of RSM and ML can significantly accelerate this process by identifying optimal operating conditions and establishing method operable design regions that ensure reliable performance despite normal variations in operating parameters [49].
Proving Performance: Validation Protocols and Comparative Analysis of RSM-Optimized Biosensors
In biosensor calibration research, the reliability of analytical results is fundamentally dependent on the robustness of the underlying mathematical models. Response Surface Methodology (RSM) provides a powerful framework for developing and optimizing these calibration models, but its effectiveness hinges on rigorous validation protocols that assess both goodness-of-fit and predictive accuracy. Proper model validation ensures that biosensors generate accurate, reproducible, and meaningful data across their intended operational range—a critical requirement for applications in pharmaceutical development, clinical diagnostics, and environmental monitoring.
This protocol outlines comprehensive procedures for evaluating calibration models in biosensor research, with particular emphasis on methodologies compatible with RSM frameworks. We provide detailed guidelines for assessing model adequacy through statistical measures, diagnostic plots, and validation experiments, enabling researchers to establish confidence in their analytical methods and generate reliable quantitative data.
Goodness-of-Fit Assessment Protocols
Goodness-of-fit (GoF) evaluation determines how well a calibration model describes the observed data. This assessment should incorporate multiple complementary approaches, as no single metric provides a complete picture of model performance.
Residual Analysis for Bias Detection
Residual analysis provides critical information about model adequacy that coefficient of determination (R²) values alone cannot reveal [52].
- Procedure:
- Calculate residuals as the difference between observed and predicted values for each calibration standard.
- Plot residuals against predicted values to identify systematic patterns (heteroscedasticity).
- Plot residuals against concentration values to detect proportional errors.
- Calculate percentage relative error (%RE) for each calibration point using the formula: %RE = [(xobserved - xpredicted)/x_observed] × 100 [52].
- Interpretation: A well-fitting model shows randomly scattered residuals around zero across the concentration range. Non-random patterns indicate model misspecification, while increasing residual variance with concentration suggests the need for weighted regression approaches.
Statistical Metrics for Model Comparison
Multiple statistical parameters should be employed to comprehensively evaluate model performance [52].
- Key Metrics:
- R² (Coefficient of Determination): Measures the proportion of variance explained by the model. Note that high R² values alone do not guarantee model adequacy [52].
- Adjusted R²: Adjusts R² for the number of parameters in the model, preventing overfitting.
- Root Mean Square Error (RMSE): Quantifies average prediction error in original units.
- Akaike Information Criterion (AIC): Facilitates model comparison with penalty for complexity.
- Decision Framework: No single metric should determine model selection. The model with the lowest AIC, RMSE, and %RE bias, along with random residual patterns, typically represents the optimal choice [52].
Table 1: Goodness-of-Fit Metrics for Calibration Model Evaluation
| Metric | Calculation Formula | Optimal Value | Interpretation Notes |
|---|---|---|---|
| R² | 1 - (SSres/SStot) | Close to 1 | Should not be used in isolation; insensitive to systematic bias [52] |
| Adjusted R² | 1 - [(1-R²)(n-1)/(n-k-1)] | Close to 1 | Prefers parsimonious models; penalizes unnecessary complexity |
| RMSE | √(Σ(yobs-ypred)²/n) | Minimized | Expressed in concentration units; useful for practical error estimation |
| AIC | 2k - 2ln(L) | Minimized | Comparative metric for model selection; balances fit and complexity |
| %RE | [(xobs-xpred)/x_obs]×100 | Close to 0 | Quantifies bias at individual concentration levels [52] |
Diagnostic Visualization Workflow
Visualization techniques provide intuitive assessment of model performance and residual patterns that might not be apparent from numerical metrics alone.
Figure 1: Goodness-of-Fit Assessment Workflow. This diagram illustrates the sequential process for evaluating calibration models, with emphasis on diagnostic visualization techniques that reveal patterns not captured by summary statistics alone.
Predictive Accuracy Validation
Predictive accuracy assessment evaluates how well the calibrated model performs with new, independent data—a critical requirement for establishing method validity.
External Validation with Test Sets
The most robust approach for assessing predictive accuracy involves using data not employed in model building [52].
- Procedure:
- Split dataset into training (70-80%) and testing (20-30%) subsets using stratified sampling to ensure concentration representation.
- Develop calibration model using only training data.
- Apply model to predict concentrations in test samples.
- Calculate predictive accuracy metrics: Mean Absolute Error (MAE), Predictive R², and Prediction Intervals.
- Acceptance Criteria: For bioanalytical methods, mean predicted values should be within ±15% of nominal values (±20% at Lower Limit of Quantification). Prediction errors should be randomly distributed without systematic trends.
Cross-Validation Techniques
When sample size is limited, cross-validation provides a robust alternative to simple train-test splitting.
- k-Fold Cross-Validation:
- Randomly partition dataset into k subsets of approximately equal size.
- Iteratively use k-1 folds for model training and the remaining fold for validation.
- Repeat process k times, using each fold exactly once as validation.
- Aggregate performance metrics across all k iterations.
- Leave-One-Out Cross-Validation (LOOCV): Special case where k equals the number of observations. Particularly useful for small datasets but computationally intensive.
Comparison of Predictive Performance Metrics
Different metrics provide complementary perspectives on predictive accuracy, each with distinct advantages and limitations.
Table 2: Predictive Accuracy Metrics for Model Validation
| Metric | Formula | Strengths | Limitations |
|---|---|---|---|
| Mean Absolute Error (MAE) | MAE = (1/n) × Σ|yobs - ypred| | Intuitive interpretation; robust to outliers | Does not penalize large errors heavily |
| Predictive R² | R²pred = 1 - (PRESS/SStot) | Measures performance on new data | Can be negative if model performs worse than mean |
| Prediction Error Variance | PEV = (1/n) × Σ(yobs - ypred)² | Comprehensive error assessment | Sensitive to outliers |
| 95% Prediction Interval | PI = ypred ± t(0.025,n-2) × SE_pred | Quantifies uncertainty in future predictions | Depends on normality assumption |
Response Surface Methodology Integration
In biosensor development, RSM generates multidimensional calibration models that require specialized validation approaches to account for multiple input factors and complex response surfaces.
Model Selection for RSM Applications
The choice of appropriate model form is critical when working with response surfaces in biosensor calibration [52].
- First-Order (Linear) Models: Suitable for preliminary studies or when response is linear across factor ranges.
- Second-Order (Quadratic) Models: Commonly used in RSM to capture curvature and interaction effects: y = β₀ + Σβi xi + Σβii xi² + Σβij xi x_j + ε
- Model Comparison Protocol:
- Fit competing models (linear, quadratic, cubic) to calibration data.
- Perform lack-of-fit testing to assess model adequacy.
- Use sequential F-tests or AIC comparisons to select optimal complexity.
- Verify selected model can adequately describe response surface curvature.
Machine Learning Enhancement for Complex Biosensors
Advanced biosensors with complex response patterns may benefit from machine learning approaches integrated with traditional RSM [21].
- Algorithm Selection: Random Forest, Gradient Boosting, and Artificial Neural Networks can capture non-linear relationships in high-dimensional biosensor data [21].
- Explainable AI (XAI) Integration: Employ SHAP (Shapley Additive Explanations) analysis to interpret complex model predictions and identify critical factors influencing biosensor response [21].
- Validation Framework:
- Split data into training, validation, and test sets.
- Use k-fold cross-validation to optimize hyperparameters.
- Evaluate feature importance using permutation tests or XAI methods.
- Assess spatial prediction patterns to detect regions of poor performance.
Figure 2: RSM Model Development and Validation Workflow. This integrated approach combines traditional response surface methodology with rigorous validation protocols specifically adapted for biosensor calibration research.
Experimental Protocols
Protocol 1: Comprehensive Goodness-of-Fit Assessment
This protocol provides step-by-step procedures for evaluating how well a calibration model fits the observed data.
- Materials:
- Calibration standard measurements (minimum 6 concentration levels, 3 replicates each)
- Statistical software with regression modeling capabilities
- Procedure:
- Prepare calibration standards across the working range, ensuring appropriate spacing and replication.
- Measure instrument response for each standard using the biosensor platform.
- Fit candidate models (ordinary least squares, weighted least squares, quadratic) to the data.
- Calculate goodness-of-fit metrics (R², Adjusted R², RMSE, AIC) for each model.
- Compute residuals and percentage relative error (%RE) for each calibration point.
- Generate diagnostic plots: residuals vs. fitted values, residuals vs. concentration, Q-Q plot.
- Evaluate residual patterns for randomness and homoscedasticity.
- Compare models using both statistical metrics and visual assessment.
- Select the model with optimal performance across all criteria.
- Troubleshooting:
- Systematic residual patterns: Consider higher-order terms or alternative model forms.
- Increasing variance with concentration: Apply weighted least squares regression.
- High %RE at extreme concentrations: Verify standard preparation and instrument detection limits.
Protocol 2: Predictive Accuracy Validation
This protocol establishes procedures for evaluating how well the calibrated model predicts new observations.
- Materials:
- Independent validation samples with known concentrations
- Calibrated biosensor system
- Data analysis software with statistical computing capabilities
- Procedure:
- Prepare independent validation samples spanning the calibration range (not used in model development).
- For internal validation: Implement k-fold cross-validation (typically k=5 or 10) with appropriate stratification.
- For external validation: Measure instrument response for independent test samples using the biosensor.
- Use the calibrated model to predict concentrations for validation samples.
- Calculate predictive accuracy metrics (MAE, predictive R², prediction error variance).
- Compute 95% prediction intervals for each prediction.
- Generate observed vs. predicted plots with confidence and prediction intervals.
- Perform bias assessment at different concentration levels (e.g., low, medium, high).
- Document prediction errors and validate against acceptance criteria.
- Acceptance Criteria:
- ≥85% of predictions should fall within ±15% of nominal values (±20% at LLOQ)
- Mean prediction error should not be statistically significantly different from zero (t-test, α=0.05)
- No significant trends in prediction errors across concentration range
Research Reagent Solutions
Successful implementation of model validation protocols requires specific materials and computational tools. The following table outlines essential components for biosensor calibration and validation workflows.
Table 3: Essential Research Reagents and Computational Tools for Biosensor Calibration Validation
| Category | Specific Examples | Function in Validation | Implementation Notes |
|---|---|---|---|
| Calibration Standards | Synthetic peptides (e.g., P44 sequence: TGKIADYNYKLPDDF) [27], antigen solutions, reference materials | Generate response data across analytical range | Should cover entire working range with appropriate concentration spacing |
| Nanomaterial Platforms | Gold nanoparticles (30nm), graphene-silver metasurfaces [53], functionalized electrodes | Enhance biosensor signal and sensitivity | Turkevich method for AuNP synthesis [27]; CVD for graphene [53] |
| Immobilization Reagents | 4-mercaptobenzoic acid (MBA), SAM-forming thiols, glutaraldehyde | Stabilize biorecognition elements on sensor surface | Critical for maintaining biological activity during validation [27] |
| Statistical Software | R, Python (scikit-learn), COMSOL Multiphysics, MATLAB | Implement regression models and validation algorithms | R/packages: drc for dose-response, caret for ML validation [21] |
| Machine Learning Libraries | Scikit-learn, XGBoost, SHAP explanation package | Model complex response surfaces and provide interpretability | Essential for high-dimensional biosensor data [21] |
The development of high-performance electrochemical biosensors requires meticulous optimization of numerous fabrication and assay parameters. This process ensures maximum sensitivity, selectivity, and reliability. Response Surface Methodology (RSM) is a collection of statistical and mathematical techniques专门用于对受多个变量影响的系统进行建模和优化 [54]. It belongs to the broader framework of Design of Experiments (DoE), with a specific focus on building predictive models and guiding optimization [54]. Traditionally, many researchers employed the "One Factor at a Time" (OFAT) approach, which varies a single factor while holding all others constant [7]. More recently, machine learning (ML) algorithms have emerged as powerful computational tools for modeling complex systems.
This article provides a comparative analysis of these methodologies, framed within the context of biosensor calibration research for researchers, scientists, and drug development professionals. We will juxtapose RSM against both the traditional OFAT method and contemporary ML algorithms, highlighting the theoretical underpinnings, practical applications, and relative advantages of each approach through structured data presentation, detailed protocols, and visual workflows.
Theoretical Foundation and Comparative Framework
Core Principles of Each Method
Traditional OFAT Approach: OFAT is characterized by its sequential process. It involves changing one independent variable while maintaining all other variables at fixed levels. A major limitation is that it requires significant experimental work and only provides local optima, as it does not take into consideration possible interactions among the factors being tested [7]. This often leads to suboptimal results because the complex interplay between factors, which is common in biosensor fabrication (e.g., between immobilization pH and time), remains unexplored.
Response Surface Methodology (RSM): RSM is designed to overcome the limitations of OFAT. It is a systematic method used to design experiments, fit mathematical models to data, and identify the optimum location for operational conditions [54]. A key advantage is its ability to quantify how input variables jointly affect a response and to determine optimal variable settings [54]. RSM uses structured designs (e.g., Central Composite Design, Box-Behnken Design) to efficiently explore the factor space and fit a model, often a quadratic polynomial, that can describe curvature and factor interactions. The model is then used to navigate the design space toward optimal conditions.
Machine Learning (ML) Algorithms: ML algorithms, such as those available in libraries like Scikit-learn, can learn complex, non-linear relationships between inputs and outputs from data without requiring a pre-specified model form [55]. They are particularly powerful for handling very large and complex datasets. However, a comparative study showed that when using carefully designed experiments, an RSM model performed at least similar or even better than several ML algorithms as measured by Root Mean Squared Error, noting that the tested variable combinations were selected in favor of the statistical design of experiments [55].
Quantitative Comparison of Methodologies
The table below summarizes the key characteristics of each optimization method for direct comparison.
Table 1: Comparative Analysis of Optimization Methodologies in Biosensor Development
| Feature | OFAT (One Factor at a Time) | Response Surface Methodology (RSM) | Machine Learning (ML) Algorithms |
|---|---|---|---|
| Experimental Efficiency | Low; requires many runs, inefficient use of resources [7] | High; uses structured designs (e.g., CCD, BBD) for maximal information from minimal runs [54] [36] | Variable; often requires large datasets, but can use DoE-generated data [55] |
| Modeling of Interactions | Cannot detect interactions between factors [7] | Explicitly models and quantifies interaction effects and curvature [56] [54] | Can model complex, non-linear interactions and higher-order effects [55] |
| Primary Output | Local optimum; no comprehensive model [7] | Predictive mathematical model (e.g., quadratic polynomial) and global optimum [54] | Predictive model (e.g., neural network, random forest); can be a "black box" [55] |
| Handling of Complexity | Suitable only for very simple systems with few, non-interacting factors | Excellent for multi-factor systems where interactions and quadratic effects are suspected [36] | Superior for extremely complex, non-linear systems with many variables |
| Resource Requirements | Low computational demand, but high experimental cost | Moderate computational demand, low to moderate experimental cost | High computational demand, can require high experimental cost for data |
| Interpretability | Simple to understand but provides incomplete picture | High; model coefficients provide clear insight on factor effects [54] | Low to medium; often acts as a "black box" with limited mechanistic insight [55] |
| Application in Biosensors | Suboptimal for multi-step biosensor fabrication and assay optimization | Ideal for optimizing fabrication parameters (e.g., Nafion concentration [36], probe density) and assay conditions | Emerging use; potential for analyzing complex sensor arrays or multi-analyte detection |
Experimental Protocols for Biosensor Optimization
Protocol for OFAT Optimization of an Electrochemical Biosensor
This protocol outlines the steps for optimizing a single parameter, such as the concentration of a nanocomposite material on the electrode surface, using the OFAT method.
1. Principle: Isolate and sequentially test the effect of each independent variable on the biosensor's response (e.g., peak current, impedance) while keeping all other parameters constant.
2. Reagents and Materials:
- Glassy Carbon Electrode (GCE)
- Polishing supplies (alumina powder, polishing cloth)
- Nanocomposite solution (e.g., rGO/Fe3O4/Nafion/PANI) [36]
- Phosphate Buffered Saline (PBS), pH 7.4
- Redox probe (e.g., 5mM K₃[Fe(CN)₆]/K₄[Fe(CN)₆] in 0.1M KCl)
- Target analyte
3. Procedure:
- Step 1: Baseline Establishment. Polish the GCE to a mirror finish and clean. Characterize the bare electrode using Cyclic Voltammetry (CV) and Electrochemical Impedance Spectroscopy (EIS) in the redox probe solution.
- Step 2: Define Fixed Parameters. Set all other fabrication variables to a fixed level (e.g., immobilization time: 60 min; incubation temperature: 25°C; antibody concentration: 10 µg/mL).
- Step 3: Sequential Variation. Vary the concentration of the nanocomposite (e.g., 0.5, 1.0, 1.5, 2.0 mg/mL) while holding all other parameters constant from Step 2. For each concentration, prepare the modified electrode, perform CV and EIS, and record the resulting electron transfer rate or signal intensity.
- Step 4: Analysis. Plot the sensor response (e.g., peak current) against the nanocomposite concentration. Select the concentration that yields the highest response as the "optimal" value.
- Step 5: Iteration. Using the now-fixed "optimal" nanocomposite concentration, repeat Steps 3 and 4 for the next factor (e.g., immobilization time). Continue until all factors have been varied.
4. Critical Notes: This protocol does not guarantee a global optimum and may miss optimal conditions arising from factor interactions. The final set of parameters is often suboptimal [7].
Protocol for RSM-Based Optimization Using Central Composite Design (CCD)
This protocol details the use of RSM with a CCD to optimize multiple factors simultaneously for the calibration of an electrochemical immunosensor, as demonstrated for the detection of HER2 breast cancer cells [36].
1. Principle: Systematically execute a pre-determined set of experiments based on a CCD to fit a quadratic model that describes how multiple factors jointly influence the biosensor's response, enabling the finding of a true optimum.
2. Reagents and Materials:
- (Include all items from Protocol 3.1)
- Specific biorecognition element (e.g., Herceptin antibody for HER2 detection) [36]
- Coupling reagents (e.g., EDC and NHS for antibody immobilization)
- BSA for blocking non-specific sites
3. Procedure:
- Step 1: Factor Screening (Optional). Use a preliminary screening design (e.g., fractional factorial) to identify the most influential factors.
- Step 2: Experimental Design. Select critical factors (e.g., Nafion concentration (
A), Antibody incubation time (B)) and define their low (-1) and high (+1) levels. Use software or standard tables to generate a CCD, which includes factorial points, axial (star) points, and center points. A CCD for two factors typically requires 13 runs [54] [36]. - Step 3: Randomized Experimentation. Conduct the experiments as per the CCD matrix in a randomized order to minimize bias. For each run, prepare the biosensor and measure the response (e.g., square wave voltammetry peak current).
- Step 4: Model Fitting. Use multiple regression analysis to fit the experimental data to a quadratic model:
Y = β₀ + β₁A + β₂B + β₁₁A² + β₂₂B² + β₁₂ABwhereYis the predicted response,β₀is the constant,β₁andβ₂are linear coefficients,β₁₁andβ₂₂are quadratic coefficients, andβ₁₂is the interaction coefficient [54]. - Step 5: Model Validation & Optimization. Check the model's statistical significance (p-value) and goodness-of-fit (R²). Use contour plots and 3D surface plots to visualize the relationship between factors and the response. Identify the optimal factor settings that maximize or minimize the response [54].
4. Critical Notes: CCD provides a comprehensive model of the design space with a manageable number of experiments. The inclusion of center points allows for the estimation of pure error and the detection of curvature [54].
The following workflow diagram illustrates the key stages of the RSM-based optimization process.
Essential Research Reagent Solutions for Biosensor Optimization
The table below lists key materials and reagents commonly used in the development and optimization of electrochemical biosensors, as referenced in the studies analyzed.
Table 2: Key Research Reagent Solutions for Electrochemical Biosensor Development
| Reagent/Material | Function in Biosensor Development | Exemplary Application |
|---|---|---|
| Glassy Carbon Electrode (GCE) | A common working electrode; provides a stable, conductive surface for modifications [7]. | Baseline transducer for immobilizing nanocomposites and biorecognition elements [36]. |
| Reduced Graphene Oxide (rGO) | Nanomaterial used to enhance electrical conductivity, surface area, and electron transfer kinetics [36]. | Component in rGO/Fe3O4/Nafion/PANI nanocomposite for ultrasensitive HER2 detection [36]. |
| Magnetite (Fe₃O₄) Nanoparticles | Nanomaterial offering high surface area, good biocompatibility, and properties that can speed up electron transport [36]. | Used in nanocomposites to improve catalytic activity and sensor accessibility [36]. |
| Nafion | A perfluorosulfonated ionomer; used as a permselective membrane to repel interferents and as a binder to form stable films [36]. | Optimized for its concentration in a biosensor nanocomposite using RSM [36]. |
| Polyaniline (PANI) | A conductive polymer providing interesting redox properties, environmental stability, and enhanced electrochemical performance [36]. | Combined with rGO in nanocomposites to leverage synergistic effects for sensing [36]. |
| EDC & NHS | Crosslinking agents; activate carboxyl groups for covalent immobilization of biomolecules (e.g., antibodies) onto sensor surfaces [7]. | Standard chemistry for attaching Herceptin antibody to a functionalized electrode surface [36]. |
| Central Composite Design (CCD) | A statistical experimental design used in RSM to build quadratic models and efficiently locate optimal conditions [54]. | Employed to optimize Nafion concentration and incubation time in an immunosensor [36]. |
The comparative analysis presented herein underscores that RSM offers a superior balance of efficiency, robustness, and interpretability compared to the traditional OFAT approach for the optimization of biosensor systems. While ML algorithms present a powerful alternative for extremely complex scenarios, RSM's model-based transparency and strong performance with resource-efficient experimental designs make it particularly well-suited for the multi-factorial optimization problems endemic to biosensor calibration and fabrication. The integration of RSM, and potentially a sequential combination of DoE and ML, represents the most strategic path forward for accelerating the development of robust, high-performance analytical devices in research and drug development.
The rigorous calibration and performance validation of biosensors are fundamental to their successful application in medical diagnostics, environmental monitoring, and pharmaceutical development. This document provides detailed application notes and protocols for evaluating three critical analytical performance metrics: Sensitivity, Limit of Detection (LoD), and Figure of Merit (FOM). Framed within a broader thesis on Response Surface Methodology (RSM) for biosensor calibration, these protocols are designed to enable researchers to quantitatively assess and optimize biosensor performance, thereby ensuring reliability and accuracy in data generation for drug development and clinical research.
Defining Key Performance Metrics
A clear understanding of the core metrics is essential before undertaking experimental evaluation. The definitions below are consistent with those used in contemporary biosensing literature.
Sensitivity (S) quantifies the magnitude of the biosensor's output signal change in response to a unit change in analyte concentration or property. It is a measure of the sensor's responsiveness. The specific units depend on the transduction mechanism:
- For wavelength-interrogated optical sensors (e.g., SPR, photonic crystal fiber (PCF)), sensitivity is often reported as the spectral shift per refractive index unit (RIU), such as
nm/RIU[57] [21] orTHz/RIUfor terahertz sensors [58]. - For angular-interrogated sensors (e.g., conventional SPR), it is expressed as degrees per RIU (
°/RIU) [59]. - For electrochemical sensors, sensitivity may be derived from the slope of the calibration curve (e.g.,
µA·mL/ngfor voltammetric sensors) [27].
- For wavelength-interrogated optical sensors (e.g., SPR, photonic crystal fiber (PCF)), sensitivity is often reported as the spectral shift per refractive index unit (RIU), such as
Limit of Detection (LoD) is the lowest concentration or amount of analyte that can be reliably distinguished from the background noise. It represents the sensor's capability to detect trace-level analytes. It is typically calculated using the formula
LoD = 3.3 × σ / S, whereσis the standard deviation of the blank signal (or the intercept of the calibration curve) andSis the sensitivity of the calibration curve [59]. For refractive index-based sensors, it can also be expressed as the minimum detectable refractive index change [60].Figure of Merit (FOM) is a dimensionless metric that provides a comprehensive assessment of the sensor's overall performance by combining its sensitivity and resonance sharpness. A higher FOM indicates a superior, more resolvable sensor. It is commonly calculated as
FOM = Sensitivity / FWHM, whereFWHMis the full width at half maximum of the resonance peak [60] [59]. Alternative formulations also incorporate the minimum reflectance(1-Rmin)into the calculation [59].
Performance Metrics of Contemporary Biosensing Platforms
Recent advancements in biosensor technology have yielded platforms with exceptional performance. The table below summarizes the reported metrics from several state-of-the-art biosensors, providing a benchmark for evaluation.
Table 1: Performance Metrics of Advanced Biosensing Platforms
| Biosensor Platform | Target Analyte | Sensitivity (S) | Limit of Detection (LoD) | Figure of Merit (FOM) | Citation |
|---|---|---|---|---|---|
| PCF-SPR (Machine Learning-optimized) | Refractive Index (General) | 125,000 nm/RIU (Wavelength) | 8.0 × 10⁻⁷ RIU | 2112.15 RIU-1 | [57] [21] |
| Terahertz Metasensor (Graphene Micro-ribbon) | Breast Cancer Cells | 3.5 THz/RIU | Not Specified | Not Specified | [58] |
| Plasmonic MIM Ring Resonator | Bacterial Pathogens | 324.76 nm/RIU | 0.075 RIU | 10.187 RIU-1 | [60] |
| SPR (Graphene/Si3N4/ssDNA) | Malaria Parasites (Ring stage) | 353.14 °/RIU (Angular) | Calculated via Eq. 12 [59] | 263.25 RIU-1 (Quality Factor) | [59] |
| Electrochemical Impedance (Peptide-based) | SARS-CoV-2 Antibodies | LoD: 0.43 ng/mL (for P44-WT peptide) | Not Applicable | [27] |
Experimental Protocols for Metric Evaluation
The following protocols outline standardized procedures for determining Sensitivity, LoD, and FOM across different biosensor types.
Protocol for Optical Refractive Index Sensors (SPR, PCF, Metasensors)
This protocol is applicable to sensors whose operation is based on tracking resonance shifts due to refractive index changes.
Key Research Reagent Solutions
- Analyte Solutions: Prepare a series of standard solutions with known, precisely measured refractive indices (e.g., glycerol-water or sucrose-water mixtures) across a range relevant to your target application (e.g., 1.31 to 1.42 RIU) [21].
- Buffer Solution: A stable, low-autofluorescence buffer (e.g., phosphate-buffered saline, PBS) for dilution and as a blank.
- Functionalization Reagents: Ligands specific to the target (e.g., antibodies [58], aptamers [59], or synthetic peptides [27]) and coupling chemistry reagents (e.g., for thiol-gold binding).
Step-by-Step Workflow
- Sensor Functionalization: Immobilize the biorecognition element (e.g., antibody) onto the sensor surface using an appropriate covalent chemistry. For a gold surface, this may involve creating a self-assembled monolayer followed by activation and ligand coupling [27] [59].
- Baseline Acquisition: Flow the buffer solution over the sensor surface and record a stable baseline signal (reflectance vs. wavelength or angle).
- Sample Measurement: Introduce the standard analyte solutions in order of increasing refractive index. For each solution, allow the sensor response to stabilize and record the full resonance spectrum.
- Data Analysis:
- Sensitivity (S): Plot the resonance wavelength/angle shift (
ΔλorΔθ) against the refractive index change (Δn). Perform a linear regression fit. The slope of this curve is the sensitivity [60] [59]. - Full Width at Half Maximum (FWHM): For each resonance peak, calculate the FWHM from the spectrum obtained in step 3.
- Figure of Merit (FOM): Calculate FOM as
FOM = S / FWHM[59]. - Limit of Detection (LoD): Calculate using
LoD = 3.3 × σ / S, whereσis the standard deviation of multiple measurements of the blank (buffer) solution.
- Sensitivity (S): Plot the resonance wavelength/angle shift (
The following diagram illustrates the logical workflow and data analysis pathway for this protocol.
Protocol for Electrochemical Biosensors
This protocol applies to sensors using electrochemical techniques like Electrochemical Impedance Spectroscopy (EIS) or square-wave voltammetry.
Key Research Reagent Solutions
- Standard Analyte Solutions: Prepare a series of solutions with known concentrations of the target analyte, covering the expected dynamic range (e.g., from zero to saturating concentrations) [5].
- Supporting Electrolyte: A high-purity electrolyte solution (e.g., PBS with a defined redox couple like
[Fe(CN)6]³⁻/⁴⁻). - Calibration Media: For sensors intended for in-vivo use, the ideal calibration matrix is freshly collected, undiluted whole blood at body temperature (37°C) to match measurement conditions [5].
Step-by-Step Workflow
- Sensor Preparation: Assemble the electrochemical cell (Working, Counter, and Reference electrodes) and precondition the electrode if required.
- Calibration Curve Acquisition: In the chosen calibration media, perform electrochemical measurements (e.g., EIS, square-wave voltammetry) for each standard analyte concentration. For each concentration, record the output signal (e.g., charge transfer resistance
R_ct, peak currentI_p, or normalized KDM value) [27] [5]. - Data Analysis:
- Sensitivity (S): Plot the output signal against the logarithm of the analyte concentration. The slope of the linear portion of this calibration curve is the sensitivity [27].
- Limit of Detection (LoD): Calculate using
LoD = 3.3 × σ / S, whereσis the standard deviation of the signal from the blank (zero-concentration) solution or the y-intercept standard deviation from the calibration curve.
The Scientist's Toolkit: Research Reagent Solutions
The table below details key reagents and their critical functions in biosensor development and evaluation, as evidenced by recent research.
Table 2: Essential Research Reagents for Biosensor Evaluation
| Reagent / Material | Function in Biosensor Development | Exemplar Application |
|---|---|---|
| Synthetic Peptides (e.g., P44) | Serve as stable, tunable biorecognition elements to capture target antibodies or proteins. | Variant-specific detection of SARS-CoV-2 antibodies [27]. |
| Gold Nanoparticles (AuNPs) | Enhance signal transduction by amplifying optical (SERS) or electrochemical signals. | Used as a platform for peptide functionalization in SERS-based immunoassays [27]. |
| Graphene & 2D Materials | Increase surface area for biomolecule immobilization and enhance electromagnetic field confinement. | Integrated with THz metasurfaces and SPR sensors to boost sensitivity [58] [59]. |
| Thiol-tethered ssDNA | Provides a stable, oriented functionalization layer on gold surfaces for specific DNA hybridization. | Used for capturing complementary malaria DNA sequences on an SPR sensor [59]. |
| Standard Refractive Index | A series of solutions with known RI used to calibrate and quantify the sensitivity of optical biosensors. | Essential for characterizing PCF-SPR and plasmonic MIM resonator performance [57] [60]. |
Advanced Optimization: Integrating Machine Learning and RSM
The optimization of biosensors is a multi-parameter challenge. Response Surface Methodology (RSM) is a powerful statistical and mathematical approach for modeling and optimizing complex processes where multiple variables influence a response of interest. In biosensor design, RSM can be employed to efficiently navigate the design space of parameters like gold layer thickness, pitch distance in PCFs, and graphene layer count to maximize Sensitivity and FOM [21].
Recent studies demonstrate the potent synergy between RSM and Machine Learning (ML). ML regression models (Random Forest, Gradient Boosting) can predict optical properties (effective index, confinement loss) with high accuracy, drastically reducing computational time compared to traditional simulation methods [57] [21]. Furthermore, Explainable AI (XAI) techniques like SHAP (SHapley Additive exPlanations) can identify the most influential design parameters, providing actionable insights for sensor optimization. For instance, SHAP analysis has revealed that wavelength, analyte refractive index, and gold thickness are among the most critical factors affecting PCF-SPR sensor performance [21]. This ML-XAI guided approach provides a robust, data-driven framework for calibrating and optimizing biosensors, aligning perfectly with the objectives of a thesis on RSM for biosensor calibration.
The transition of biosensors from controlled laboratory settings to real-world clinical applications hinges on their reliable performance in complex biological matrices such as blood serum. Serum presents a significant challenge for biosensing platforms due to its high protein content, variable composition, and propensity for nonspecific binding (NSB) that can obscure signal detection and compromise accuracy [47]. For researchers employing Response Surface Methodology (RSM) to calibrate and optimize biosensors, incorporating validation in these complex environments is not merely a final verification step but a critical component of the model-building process itself. This application note details protocols for assessing biosensor performance in serum, framed within a systematic RSM approach to ensure that optimized parameters translate effectively from idealized buffers to clinically relevant conditions.
Theoretical Framework: RSM and Matrix Effects
Response Surface Methodology is a powerful collection of statistical techniques for modeling and optimizing processes where multiple variables influence a desired response. When applied to biosensor calibration, RSM moves beyond inefficient one-variable-at-a-time (OVAT) approaches to efficiently characterize interactions between critical parameters such as pH, temperature, bioreceptor density, and incubation time [1] [8].
The presence of serum fundamentally alters the response surface that RSM aims to map. Key matrix-related challenges that must be accounted for include:
- Signal Occlusion: NSB of serum proteins (e.g., albumin, immunoglobulins) to the sensor surface can increase background noise and reduce the signal-to-noise ratio.
- Analyte Interference: Binding interactions between the target analyte and other serum components can alter the fraction of bioavailable, detectable analyte.
- Fouling and Inactivation: The biorecognition element (e.g., antibody, enzyme) may be deactivated or masked by matrix constituents [47].
Therefore, an RSM study intended for real-world application must integrate these matrix effects into its experimental design from the outset, ensuring the final model is robust and the optimized conditions are clinically viable.
Critical Experimental Parameters and Protocols
Key Validation Parameters for Complex Matrices
The following parameters are essential for a comprehensive assessment of biosensor performance in serum. These can be directly incorporated as responses in an RSM study.
Table 1: Key Performance Parameters for Serum-Based Validation
| Parameter | Description | Significance in RSM |
|---|---|---|
| Sensitivity | Change in signal per unit change in analyte concentration (e.g., slope of the calibration curve). | A primary response variable to be maximized. Serum components can cause a significant drop versus buffer. |
| Limit of Detection (LOD) | The lowest analyte concentration that can be reliably distinguished from zero. | A critical response to be minimized. NSB noise can elevate the LOD unacceptably. |
| Selectivity/Specificity | Ability to measure the analyte accurately in the presence of interferences. | Can be quantified as a response (e.g., % signal change from interferents). |
| Nonspecific Binding (NSB) | Signal generated by matrix components in the absence of the target analyte. | A key response to be minimized. Directly measured using a reference channel. |
| Accuracy & Precision | Closeness to the true value and reproducibility of the measurement, respectively. | Can be modeled as responses (e.g., % recovery, % RSD) across the RSM experimental domain. |
Protocol: Reference Subtraction for Nonspecific Binding
A fundamental practice for isolating specific signal from NSB in label-free biosensors is the use of a reference channel [47].
Procedure:
- Sensor Functionalization: Implement a multi-channel sensor system (e.g., SPR, photonic microring resonator). In one channel, immobilize the specific capture probe (e.g., anti-IL-17A antibody). In a separate reference channel, immobilize a negative control probe.
- Control Probe Selection: The choice of control is critical and should be optimized. Candidates include [47]:
- Isotype-matched control antibody: An antibody of the same subclass (e.g., mouse IgG1) that does not bind the target.
- Bovine Serum Albumin (BSA): A common blocking protein.
- Anti-FITC antibody: An antibody against a hapten not present in the sample.
- Sample Injection: Inject the serum sample containing the analyte simultaneously or sequentially over both the active and reference channels.
- Data Analysis: Subtract the signal response from the reference channel from the signal response of the active channel. The result is the specific binding signal attributable to the target analyte.
The workflow for this protocol is summarized in the diagram below:
Protocol: Calibration-Free Concentration Analysis (CFCA)
For techniques like Surface Plasmon Resonance (SPR), CFCA offers a method to determine the active concentration of an analyte in solution without a calibration standard, which is particularly useful for novel biomarkers [61].
Procedure:
- Immobilization: Immobilize the binding partner (ligand) on the sensor chip at a relatively high density to intentionally induce mass transport limitation.
- Dual Flow Rate Injection: Inject the same serum sample at two different, sufficiently high flow rates (e.g., 30 µL/min and 100 µL/min).
- Data Analysis: Analyze the initial binding rates from the two sensorgrams using a mathematical model that incorporates a pre-calculated transport coefficient. This allows for the direct calculation of the analyte's active concentration in the sample, factoring in the matrix environment [61].
The Scientist's Toolkit: Essential Research Reagents
Table 2: Key Reagent Solutions for Serum-Based Biosensor Validation
| Reagent / Material | Function / Application | Example & Notes |
|---|---|---|
| Negative Control Probes | To account for NSB via reference subtraction; must be selected case-by-case. | Isotype control antibodies, BSA, Anti-FITC, Cytochrome C [47]. |
| Validated Gold Standard | Comparator for accuracy assessment in clinical validation studies. | 12-lead ECG (arrhythmia), clinical-grade pulse oximeter (SpO₂), validated sphygmomanometer (BP) [62]. |
| Blocking Buffers | To passivate sensor surfaces and minimize NSB prior to sample introduction. | Solutions containing BSA, casein, or commercial blocking buffers. |
| Complex Assay Diluents | To mimic the intended use matrix during RSM optimization and calibration. | Fetal Bovine Serum (FBS), diluted human serum, EGM-2 growth medium [47]. |
| Structured Validation Panels | For testing performance across diverse biological variables. | Samples spanning various skin tones (Fitzpatrick scale), BMI, and health states [62]. |
Integrating Validation into an RSM Workflow
To effectively frame serum validation within an RSM for biosensor calibration, follow this integrated workflow. Key serum-specific steps are highlighted.
The following diagram illustrates the integrated RSM and validation workflow:
Workflow Steps:
- Preliminary Studies: Use OVAT to identify critical factors (e.g., antibody concentration, incubation time, pH) and their plausible ranges.
- Define RSM Model: Select the factors and their ranges. Crucially, decide on the response variables, which must include serum-specific metrics like
NSB Signaland% Recovery in Serumalongside standard metrics likeSensitivityandLOD[1] [8]. - Design Experiment: Select an appropriate design (e.g., Central Composite Design (CCD)) that allows for efficient exploration of the variable space and modeling of quadratic effects [1] [8].
- Execute DoE in Complex Matrix: Conduct the experiments as per the design matrix. It is imperative that these experiments are performed in the presence of serum or the intended complex matrix, not just buffer.
- Model Fitting & Analysis: Use statistical software to fit a polynomial model (e.g., a second-order model) to the data. Analyze the model with ANOVA to identify significant factors and interaction effects [1].
- Model and Biosensor Assessment: This critical serum-validation phase involves:
- Model Validation: Confirm the model's predictive power using check-point experiments not in the original design.
- Biosensor Performance Assessment: Rigorously test the biosensor under model-predicted optimum conditions against key clinical benchmarks, including sensitivity/specificity, AUROC, and statistical agreement analyses like Bland-Altman plots, using a clinically appropriate gold standard [62].
- Establish Optimal Conditions: Finalize the biosensor preparation and operational parameters that yield the best performance in the real-world matrix.
Integrating rigorous validation within complex matrices like blood serum into the RSM workflow is paramount for developing clinically viable biosensors. By treating matrix-derived challenges not as external nuisances but as integral responses within a systematic DoE, researchers can efficiently optimize biosensor platforms that are not only sensitive and specific but also robust and reliable for real-world diagnostic and drug development applications. The protocols outlined here for NSB correction, control selection, and clinical benchmarking provide a concrete pathway to achieving this goal.
Conclusion
Response Surface Methodology emerges as an indispensable, systematic framework for the calibration and optimization of modern biosensors, effectively navigating complex parameter interactions that traditional methods miss. By integrating RSM from foundational design through to rigorous validation, researchers can significantly enhance key performance metrics such as sensitivity, specificity, and reproducibility. The convergence of RSM with machine learning and explainable AI represents the future frontier, promising even more powerful, automated, and insightful biosensor development. This synergistic approach paves the way for the next generation of high-precision diagnostic tools, accelerating their translation from the laboratory to clinical point-of-care applications and ultimately strengthening biomedical research and patient care.
References
- 1. Response Surface Methodology for the Optimisation of ... [https://pmc.ncbi.nlm.nih.gov/articles/PMC6468913/]
- 2. Perspectives on systematic optimization of ultrasensitive ... [https://pmc.ncbi.nlm.nih.gov/articles/PMC11403992/]
- 3. Response surface methodology optimized electrochemical ... [https://www.sciencedirect.com/science/article/abs/pii/S0039914021000205]
- 4. Response surface methodology for process optimization in ... [https://www.sciencedirect.com/science/article/pii/S2405844024063576]
- 5. Improved calibration of electrochemical aptamer-based ... [https://www.nature.com/articles/s41598-022-09070-7]
- 6. Optimizing Sensor Calibration In Manufacturing ... [https://enertherm-engineering.com/optimizing-sensor-calibration-in-manufacturing-automation-with-design-of-experiments/]
- 7. Multivariate Optimization of Electrochemical Biosensors for the ... [https://pmc.ncbi.nlm.nih.gov/articles/PMC10377565/]
- 8. Perspectives on systematic optimization of ultrasensitive ... [https://pubs.rsc.org/en/content/articlehtml/2024/tc/d4tc02131b]
- 9. Central Composite Design vs. Box-Behnken Design [https://experimentaldesignhub.com/blog/doe_11/]
- 10. Application of central composite design for the optimization ... [https://pubmed.ncbi.nlm.nih.gov/30467766/]
- 11. Design of experiments using box behnken design in the ... [https://www.sciencedirect.com/science/article/abs/pii/S1773224724004799]
- 12. Smart chemometrics-assisted electrochemical biosensor ... [https://www.sciencedirect.com/science/article/pii/S1452398125002494]
- 13. Immobilization strategies to develop enzymatic biosensors [https://www.sciencedirect.com/science/article/abs/pii/S073497501100156X]
- 14. Immobilized Enzymes in Biosensor Applications - PMC [https://pmc.ncbi.nlm.nih.gov/articles/PMC6337536/]
- 15. An Industrial Perspective of Microalgae Cultivation [https://www.mdpi.com/2673-9410/5/4/62]
- 16. Response surface methodology optimization for enhancing ... [https://www.sciencedirect.com/science/article/pii/S2211715624001760]
- 17. se360 » Tutorials » Response Surface [https://www.statease.com/docs/se360/tutorials/multifactor-rsm/]
- 18. Model summary table for Analyze Response Surface Design [https://support.minitab.com/en-us/minitab/help-and-how-to/statistical-modeling/doe/how-to/response-surface/analyze-response-surface-design/interpret-the-results/all-statistics-and-graphs/model-summary-table/]
- 19. Integration of RSM and Machine Learning for Accurate ... [https://www.mdpi.com/2076-3417/15/13/7064]
- 20. Biosensors, Volume 15, Issue 9 (September 2025) [https://www.mdpi.com/2079-6374/15/9]
- 21. Design optimization of high-sensitivity PCF-SPR biosensor ... [https://journals.plos.org/plosone/article?id=10.1371/journal.pone.0330944]
- 22. NIR-II bioluminescence for in vivo high contrast imaging ... [https://www.nature.com/articles/s41467-020-18051-1]
- 23. Response Surface Methodology for the Optimisation of ... [https://www.mdpi.com/2079-6374/9/1/26]
- 24. Optimization of Acetylcholinesterase and Sucrose ... [https://tis.wu.ac.th/index.php/tis/article/view/8849]
- 25. Response Surface Methodology | Statistics Knowledge Portal [https://www.jmp.com/en/statistics-knowledge-portal/design-of-experiments/response-surface-methodology]
- 26. Response Surface Methodology (RSM) in Design of ... [https://www.6sigma.us/six-sigma-in-focus/response-surface-methodology-rsm/]
- 27. Peptide-based biosensors for variant-specific detection of ... [https://pubs.rsc.org/en/content/articlehtml/2025/ma/d5ma00485c]
- 28. A Study of the Response Surface Methodology Model with ... [https://www.mdpi.com/2571-5577/8/4/99]
- 29. v25.0 » Tutorials » Response Surface (pt 2) [https://www.statease.com/docs/v25.0/tutorials/multifactor-rsm-pt2/]
- 30. Digital switching in a biosensor circuit via programmable ... [https://pmc.ncbi.nlm.nih.gov/articles/PMC4232471/]
- 31. Response Surface Methodology for Optimizing the Design ... [https://www.scilit.com/publications/f1377051f8f814d79d84bd4e40f6e25b]
- 32. Research on improving the accuracy of liquid level ... [https://www.sciencedirect.com/science/article/abs/pii/S0003682X24001841]
- 33. Lesson 11: Response Surface Methods and Designs [https://online.stat.psu.edu/stat503/lesson/11]
- 34. RSM tutorial [https://bookdown.org/apicellapv/rsm_tutorial/]
- 35. Application to SERS detection of tetracycline [https://www.sciencedirect.com/science/article/abs/pii/S0026265X25019897]
- 36. Label-free electrochemical biosensor based on green ... [https://www.nature.com/articles/s41598-024-62231-8]
- 37. Optimized design of a surface plasmon resonance ... [https://pubmed.ncbi.nlm.nih.gov/41186760/]
- 38. A Review on Biosensors and Recent Development of ... [https://pmc.ncbi.nlm.nih.gov/articles/PMC7915135/]
- 39. 4 Ways to Reduce Non-Specific Binding in SPR Experiments [https://nicoyalife.com/blog/4-ways-reduce-non-specific-binding-spr/]
- 40. Enhancing Shiga toxin detection using surface plasmon ... [https://www.nature.com/articles/s41598-025-01686-9]
- 41. A Guide to Quantitative Biomarker Assay Development using ... [https://pmc.ncbi.nlm.nih.gov/articles/PMC5657521/]
- 42. Surface immobilization strategies for the development of ... [https://www.sciencedirect.com/science/article/abs/pii/S0956566323003822]
- 43. Flow Cell Design for Effective Biosensing - PMC [https://pmc.ncbi.nlm.nih.gov/articles/PMC3574664/]
- 44. Designing a high performance, stable spectroscopic ... [https://www.sciencedirect.com/science/article/abs/pii/S0021979717309621]
- 45. Optimization of microfluidic biosensor efficiency by means ... [https://www.nature.com/articles/s41598-017-06204-0]
- 46. Calibrating Biosensors in Flow-Through Set-Ups: Studies ... [https://www.intechopen.com/chapters/43507]
- 47. Everything's under Control: Maximizing Biosensor ... [https://pmc.ncbi.nlm.nih.gov/articles/PMC11840803/]
- 48. Review Frontiers in nano-biosensors for drug monitoring [https://www.sciencedirect.com/science/article/abs/pii/S1385894725068779]
- 49. Advancement of machine learning algorithms in biosensors [https://www.sciencedirect.com/science/article/abs/pii/S000989812500556X]
- 50. Integration of Response Surface Methodology (RSM) and ... [https://pmc.ncbi.nlm.nih.gov/articles/PMC8070702/]
- 51. Artificial intelligence based prediction and multi-objective ... [https://www.nature.com/articles/s41598-025-87640-1]
- 52. Assessment of goodness-of-fit for the main analytical ... [https://www.sciencedirect.com/science/article/abs/pii/S0165993621001965]
- 53. Next-generation COVID-19 detection using a metasurface ... [https://www.nature.com/articles/s41598-025-18753-w]
- 54. Response Surface Methodology - Overview & Applications [https://www.neuralconcept.com/post/response-surface-methodology-overview-applications]
- 55. modeling Response . machine learning surface ... vs algorithms [https://link.springer.com/article/10.1007/s40964-025-01114-4]
- 56. Response surface methodology (RSM) for optimizing ... [https://www.sciencedirect.com/science/article/pii/S2590123023003407]
- 57. Design optimization of high-sensitivity PCF-SPR biosensor ... [https://pubmed.ncbi.nlm.nih.gov/40953064/]
- 58. Ultra-sensitive graphene micro-ribbon integrated THz ... [https://www.sciencedirect.com/science/article/abs/pii/S1046202325001112]
- 59. Design and simulation of a graphene-integrated SPR ... [https://www.frontiersin.org/journals/bioengineering-and-biotechnology/articles/10.3389/fbioe.2025.1580344/full]
- 60. Design of a plasmonic optical biosensor based on a metal ... [https://www.nature.com/articles/s41598-025-07331-9]
- 61. Biosensor binding data and its applicability to the ... [https://pmc.ncbi.nlm.nih.gov/articles/PMC5418478/]
- 62. Clinical Validation of Biosensors: Protocols That Investors ... [https://medstartups.org/clinical-validation-biosensors-protocols-investors-expect]