Scaling the Wall: Overcoming Mass Production Challenges in Biosensor Manufacturing for Biomedicine
This article addresses the critical technical and operational bottlenecks hindering the scalable manufacturing of reliable biosensors, a key concern for researchers and drug development professionals.
Scaling the Wall: Overcoming Mass Production Challenges in Biosensor Manufacturing for Biomedicine
Abstract
This article addresses the critical technical and operational bottlenecks hindering the scalable manufacturing of reliable biosensors, a key concern for researchers and drug development professionals. It explores the foundational hurdles in sensor stability and standardization, details advanced manufacturing methodologies and materials, provides strategies for troubleshooting and optimizing production, and establishes frameworks for the rigorous validation and comparative analysis required for clinical and industrial adoption. By synthesizing current research and market analyses, this work provides a roadmap for translating innovative biosensor prototypes from the laboratory to large-scale production, thereby accelerating their impact in biomedical research and therapeutic development.
The Scalability Bottleneck: Understanding Core Manufacturing Hurdles
The Stability and Reliability Imperative in Industrial Settings
Technical Support Center: Troubleshooting Guides and FAQs
This technical support center addresses common stability and reliability challenges faced by researchers and professionals during the development and mass production of biosensors. The following guides provide solutions for specific experimental and manufacturing issues.
Frequently Asked Questions on Biosensor Performance
Q1: Why does my biosensor signal degrade over time during long-term experiments?
Signal degradation, or biosensor ageing, is a complex process resulting from the cumulative deterioration of biological and physical components [1]. The primary causes include:
- Deactivation of biological elements: Enzymes, antibodies, and other bioreceptors can lose activity due to denaturation, microbial contamination, or inhibitor adsorption [1] [2].
- Instability of immobilization matrices: The materials used to fix biological components to the transducer can degrade, leading to leakage of bioreceptors [1].
- Electrode fouling: The accumulation of nonspecific materials on the electrode surface inhibits electron transfer [1].
- Mediator degradation: Electron transfer mediators in electrochemical biosensors can become unstable over time [1].
Q2: What factors most significantly impact biosensor stability during scale-up from prototype to mass production?
Transitioning from laboratory prototypes to mass-produced biosensors introduces multiple stability challenges [3] [4]:
- Batch-to-batch variability: Inconsistent performance across production batches due to variations in raw materials and fabrication processes [3].
- Reproducibility of immobilization: Difficulty in achieving uniform bioreceptor attachment across large electrode arrays [2].
- Environmental sensitivity: Performance variations under different temperature, humidity, and storage conditions [5].
- Material incompatibilities: Interactions between biological components and industrial-scale substrates or housing materials that were not evident at lab scale [4].
Q3: How can I improve the operational stability of my electrochemical biosensor?
Implement these strategies to enhance operational stability [3] [1] [5]:
- Optimize immobilization matrices: Use advanced materials like reduced graphene oxide or gold nanoparticles to create more stable bioreceptor environments [1].
- Implement stabilization additives: Incorporate polyols, sugars, or polymers in your immobilization matrix to protect biological elements from denaturation [5].
- Enhance electron transfer: Utilize direct electron transfer approaches or stable mediators like ferrocene derivatives to reduce dependence on dissolved oxygen [1].
- Control operational parameters: Maintain consistent temperature and pH during operation, as fluctuations accelerate degradation [5].
Q4: Why do I get inconsistent results between different biosensor batches, and how can I improve reproducibility?
Batch-to-batch inconsistencies stem from multiple manufacturing variables [3] [2]:
- Bioreceptor quality variations: Differences in enzyme or antibody activity between production lots [2].
- Inconsistent surface modification: Variations in electrode pretreatment, cleaning, or functionalization processes [1].
- Environmental control gaps: Fluctuations in temperature and humidity during manufacturing and storage [4].
- Material sourcing changes: Differences in raw material properties between suppliers or batches [4].
Table 1: Critical Performance Metrics for Biosensor Stability Assessment
| Performance Metric | Definition | Target Range for Industrial Applications | Testing Method |
|---|---|---|---|
| Operational Stability | Retention of sensor performance during use | <10% signal loss over 30 days | Continuous or repeated measurement in operating conditions [5] |
| Shelf Life | Duration of acceptable performance during storage | >6 months at 4-25°C | Performance testing after accelerated aging [2] |
| Signal-to-Noise Ratio | Ratio of target signal to background variability | >5:1 | Statistical analysis of repeated measurements [3] |
| Response Time | Time to reach 95% of maximum signal | <30 seconds for most applications | Measurement after analyte introduction [3] |
| Batch Consistency | Coefficient of variation between production batches | <5-10% | Statistical comparison of multiple batches [4] |
Troubleshooting Guide: Common Biosensor Reliability Issues
Problem: Rapid signal drift during continuous monitoring
Possible Causes and Solutions:
Cause: Degradation of the biological recognition element due to environmental stress [1].
- Solution: Optimize immobilization matrix using experimental design methodologies (e.g., central composite design) to identify optimal stabilizers and crosslinkers [6].
Cause: Fouling of the transducer surface by sample matrix components [1].
- Solution: Implement additional membrane layers or surface modifications (e.g., Nafion coatings) to create size-exclusion or charge-selective barriers [5].
Cause: Inadequate reference electrode stability in electrochemical systems [5].
- Solution: Use stable reference systems with proper junction design and consider integrated reference electrodes rather than external ones [5].
Problem: High inter-sensor variability in mass production
Possible Causes and Solutions:
Cause: Inconsistent bioreceptor immobilization across sensor arrays [4].
- Solution: Implement automated dispensing systems with vision verification and statistical process control for immobilization steps [4].
Cause: Variations in electrode surface properties between production batches [1].
- Solution: Establish rigorous incoming quality control for electrode materials and implement standardized pretreatment protocols [4].
Cause: Environmental fluctuations during manufacturing [4].
- Solution: Implement cleanroom conditions with tight control of temperature (±1°C) and humidity (±5% RH) during critical manufacturing steps [4].
Table 2: Research Reagent Solutions for Enhanced Biosensor Stability
| Reagent Category | Specific Examples | Function in Biosensor Development | Application Notes |
|---|---|---|---|
| Stabilizing Matrices | Reduced graphene oxide, Gold nanoparticles, Conducting polymers | Enhance electron transfer, Provide stable immobilization environment | Gold nanoparticles boost signal amplification efficiency by up to 50% with <5% inter-batch variation [1] |
| Crosslinking Agents | Glutaraldehyde, EDAC/NHS, Genipin | Create stable covalent bonds with bioreceptors | Concentration optimization critical; excess crosslinking can reduce bioreceptor activity [5] |
| Enzyme Stabilizers | Trehalose, Sucrose, Polyethylene glycol, Albumin | Protect enzyme conformation during storage and operation | Particularly important for labile enzymes in single-use biosensors [2] |
| Membrane Materials | Nafion, Polyurethane, Cellulose acetate | Provide selective permeability, Reduce fouling | Thickness optimization essential to balance response time and protection [5] |
| Signal Mediators | Ferrocene derivatives, Organic dyes, Quantum dots | Facilitate electron transfer in electrochemical biosensors | Must demonstrate both electrochemical stability and biocompatibility [1] |
Experimental Protocols for Stability Assessment
Protocol 1: Accelerated Shelf-Life Testing
Purpose: Predict long-term storage stability through accelerated aging studies [2].
Materials:
- Biosensor prototypes
- Controlled environmental chambers
- Reference analyte solutions
- Data acquisition system
Methodology:
- Divide biosensors into three groups stored at 4°C, 25°C, and 40°C.
- At predetermined intervals (0, 1, 2, 4, 8 weeks), test sensor response using standardized analyte solutions.
- Measure response time, sensitivity, and signal-to-noise ratio.
- Use the Arrhenius equation to extrapolate room-temperature stability from elevated temperature data.
- Establish correlation between accelerated testing and real-time stability.
Expected Outcomes: Reliable prediction of shelf life; identification of critical storage conditions.
Protocol 2: Operational Stability Under Continuous Use
Purpose: Evaluate biosensor performance degradation during extended operation [5].
Materials:
- Flow injection analysis system
- Temperature-controlled measurement cell
- Standard analyte solutions
- Data logging equipment
Methodology:
- Mount biosensor in flow cell with controlled temperature (±0.5°C).
- Continuously perfuse with buffer solution containing relevant analyte concentrations.
- Introduce calibration standards at regular intervals (e.g., every 4 hours).
- Monitor signal drift, sensitivity changes, and response time.
- Continue testing until signal degradation exceeds 20% of initial value.
- Analyze failure mechanisms through post-testing surface analysis.
Expected Outcomes: Quantification of operational lifetime; identification of primary failure mechanisms.
Workflow Visualization: Systematic Optimization of Biosensor Stability
Systematic Stability Optimization Workflow
Manufacturing Scale-Up Challenges
Biosensors are powerful diagnostic tools that combine a biorecognition element for analyte specificity with a transducer for signal generation. Despite their transformative potential in healthcare and environmental monitoring, the widespread adoption of biosensors, particularly for point-of-care applications, faces a significant obstacle: the standardization gap in manufacturing protocols. This gap is most pronounced in the production and immobilization of biorecognition elements—the biological components that grant biosensors their specificity. The inherent variability of biological molecules, combined with non-standardized fabrication processes, creates critical challenges in achieving consistent performance, sensitivity, and shelf-life across production batches. This technical support center addresses these challenges through targeted troubleshooting guides and FAQs, providing researchers with practical solutions to common manufacturing hurdles, thereby bridging the gap between laboratory innovation and commercial mass production.
Understanding Biorecognition Elements
Types and Characteristics
Biorecognition elements are the cornerstone of biosensor specificity, responsible for selectively sequestering the target analyte. The selection of an appropriate element directly influences key performance characteristics: sensitivity, selectivity, reproducibility, and reusability [7]. The table below summarizes the primary classes of biorecognition elements and their inherent manufacturing considerations.
Table 1: Biorecognition Elements and Their Manufacturing Profiles
| Biorecognition Element | Type | Key Manufacturing Advantage | Key Manufacturing Challenge | Typical Immobilization Method |
|---|---|---|---|---|
| Antibodies [7] | Natural | High specificity and affinity well-understood. | Time-consuming and costly production; batch-to-batch variability; sensitivity to denaturation. | Covalent linkage to sensor surface [7]. |
| Enzymes [7] | Natural | High catalytic turnover for signal amplification. | Stability and activity are dependent on environmental conditions; can be expensive to purify. | Embedded within surface structures [7]. |
| Aptamers [7] | Pseudo-natural | Synthetic production reduces batch variability; can be engineered for specific targets. | SELEX discovery process can be costly and time-consuming [7]. | Often covalent via modified functional groups. |
| Molecularly Imprinted Polymers (MIPs) [7] | Synthetic | High stability and robustness; tailorable for a wide range of analytes. | Complexity in achieving specificity comparable to biological elements. | Often formed in situ on the sensor surface [7]. |
| Nucleic Acids [7] | Natural | Predictable binding via complementarity; synthetic production. | Limited to nucleic acid targets or aptamer applications. | Adsorption or covalent binding. |
The following diagram illustrates the decision-making workflow for selecting a biorecognition element based on mass production requirements.
FAQs on Manufacturing and Standardization
Q1: Why is achieving reproducibility so difficult in biosensor mass production? Reproducibility is hindered by the complex, multi-step nature of biosensor fabrication. Key challenges include:
- Biorecognition Element Variability: Natural elements like antibodies can differ between production batches [7].
- Immobilization Chemistry: Slight variations in surface functionalization, linker chemistry, or reaction conditions (pH, temperature, time) can drastically alter the density, orientation, and activity of immobilized elements [8].
- Signal Drift: The inherent instability of biological components can lead to a loss of signal over time, affecting shelf-life and reliability [9].
Q2: What are the best practices for immobilizing biorecognition elements to ensure consistency? Systematic optimization is crucial. A recommended practice is using Design of Experiments (DoE) instead of one-variable-at-a-time approaches. DoE is a chemometric tool that efficiently accounts for interactions between multiple variables (e.g., silane type, protein concentration, pH) [10]. For instance, a full factorial design can model the effects of these variables and their interactions on the thickness and quality of the immobilized layer, leading to a more robust and reproducible process [10].
Q3: How can I troubleshoot low signal output from my biosensor prototype? Low signal can stem from multiple issues in the manufacturing chain. A systematic troubleshooting approach is recommended, as outlined in the diagram below.
Troubleshooting Guides
Antibody and Protein Conjugation Issues
Antibody conjugation is a critical step for many immunosensors. Problems here directly impact sensitivity and limit of detection.
Table 2: Troubleshooting Antibody Conjugation for Biosensors
| Symptom | Possible Cause | Recommended Solution | Impact on Manufacturing |
|---|---|---|---|
| Low yield of conjugates [9] [11] | Impure antibody; competing proteins in sample. | Use antibodies with >95% purity. Purify from ascites fluid or serum using recommended kits [11]. | Increases cost and adds a purification step, but is essential for batch-to-batch consistency. |
| Incompatible buffer additives (e.g., Tris, glycine, azide). | Perform buffer exchange via dialysis, ultrafiltration, or gel filtration to remove amines [9] [11]. | Adds complexity to the protocol; requires strict quality control of input reagents. | |
| Lack of site specificity [9] | Multiple reaction sites (e.g., lysines) lead to heterogeneous conjugates. | Use catalysts for site-specificity or incorporate unnatural amino acids [9]. | Improves consistency but requires advanced genetic engineering, which may not be scalable for all labs. |
| Poor stability of conjugates [9] [11] | Incorrect storage conditions. | Store at recommended temperatures (-20°C to -80°C); avoid freeze-thaw cycles by using aliquots; for HRP, avoid azide [9] [11]. | Requires a controlled cold chain, impacting logistics and cost for mass production and distribution. |
| Inherent instability of the antibody. | Add suitable stabilizers to the conjugate formulation [9]. | Formulation development becomes a critical part of the manufacturing process. |
Surface Functionalization and Immobilization Issues
The process of modifying the sensor surface and attaching the biorecognition element is a fundamental source of variability.
Table 3: Troubleshooting Surface Functionalization and Immobilization
| Process Step | Symptom | Optimization Strategy | Experimental Example |
|---|---|---|---|
| Silane Functionalization [8] | Inconsistent layer thickness or poor biorecognition element binding. | Test different silanes (e.g., APTES vs. GOPS). Use ellipsometry to measure layer thickness (target ~1.5 nm) [8]. | In uEV capture, both APTES and GOPS were viable, but required precise control [8]. |
| Biorecognition Element Loading [8] | Low analyte capture efficiency; high non-specific binding. | Systematically optimize the concentration of the capture element. | For lactadherin (LACT) immobilization, a concentration of 25 µg/mL was found optimal for capturing urinary extracellular vesicles, balancing surface coverage with activity [8]. |
| General Optimization [10] | Unpredictable performance; failure to achieve theoretical sensitivity. | Employ Design of Experiments (DoE). Use a Full Factorial or Central Composite Design to model interactions between variables (e.g., concentration, time, temperature) [10]. | A 2² factorial design (2 variables, 2 levels each) requires only 4 experiments to test all combinations and identify interactions, saving time and resources [10]. |
The Scientist's Toolkit: Research Reagent Solutions
The following table details key materials and their functions, critical for standardizing biosensor fabrication protocols.
Table 4: Essential Reagents for Biosensor Fabrication
| Reagent / Material | Function in Biosensor Manufacturing | Key Consideration for Standardization |
|---|---|---|
| Crosslinkers (Homobifunctional, e.g., Glutaraldehyde) [8] | Covalently links surface functional groups (e.g., amines from APTES) to biorecognition elements. | Homobifunctional crosslinkers can cause random orientation and polymerization. Site-specific heterobifunctional crosslinkers are preferred for uniform orientation. |
| Silanes (e.g., APTES, GOPS) [8] | Functionalizes inert sensor surfaces (e.g., silicon, gold) with chemical groups (-NH₂, epoxide) for biomolecule attachment. | Purity and reaction conditions (humidity, solvent) must be tightly controlled to form consistent, homogeneous monolayers. |
| Purification Kits (Antibody Concentration & Clean-up) [11] | Removes incompatible buffer components (BSA, Tris, glycine, azide) and concentrates antibodies to optimal levels (>0.5 mg/mL). | An essential quality control step before conjugation. Standardizing the pre-conjugation purity and concentration of antibodies is critical for reproducibility. |
| Stabilizers (e.g., LifeXtend) [11] | Extends the shelf-life of conjugated biorecognition elements, particularly enzymes like HRP, by minimizing degradation. | The choice of stabilizer and storage buffer must be part of the defined manufacturing protocol to ensure consistent sensor performance over time. |
| Design of Experiments (DoE) Software [10] | A statistical tool, not a physical reagent, but essential for systematically optimizing fabrication parameters and understanding variable interactions. | Replaces ad-hoc optimization. Using a standardized DoE approach across development projects creates a unified knowledge base and accelerates process scaling. |
High Development and Validation Cost Barriers
The development and mass production of biosensors represent a significant frontier in modern medicine and diagnostics. However, this field faces substantial economic and technical hurdles, particularly in the stages of development and validation. The journey from a promising concept to a commercially viable biosensor product is fraught with challenges that require sophisticated troubleshooting and methodical problem-solving approaches. This technical support center addresses the specific issues researchers, scientists, and drug development professionals encounter during biosensor development experiments, with particular focus on overcoming the cost barriers that often impede progress toward manufacturable products.
The global biosensor market demonstrates impressive growth potential, projected to expand from $28.5 billion in 2022 to $58 billion by 2032, with some segments experiencing growth rates exceeding 20% annually [4]. Despite this promising outlook, the path to successful commercialization remains challenging. A critical economic reality is that the average development cost for medical devices ranges from $6.1 million to $17.8 million depending on regulatory classification, with development timelines spanning 33 to 80 months [4]. These substantial investments create significant barriers, particularly for startups and research institutions with limited resources.
Quantitative Analysis of Development Costs and Timelines
Understanding the financial and temporal commitments required for biosensor development is crucial for effective project planning and resource allocation. The following tables summarize key quantitative data relevant to assessing these barriers.
Table 1: Biosensor Market Analysis and Projections
| Market Segment | 2022 Value (Billion USD) | 2032 Projection (Billion USD) | Annual Growth Rate |
|---|---|---|---|
| Overall Biosensor Market | 28.5 | 58.0 | >20% for some segments |
| Medical Applications (Historical) | 7.79 (2005) | 10.28 (2008) | ~7.2% annually |
| Diabetes Monitoring (2008) | - | 3.0 (2008) | 7.2% annually |
Table 2: Development Cost and Timeline Analysis
| Factor | Lower Range | Upper Range | Key Dependencies |
|---|---|---|---|
| Development Cost | $6.1 million | $17.8 million | Regulatory classification, complexity |
| Development Timeline | 33 months | 80 months | Regulatory pathway, technical challenges |
| FDA Approval Denial Rate | ~25% annually | - | Design quality, regulatory strategy |
| Prototype to Production Steps | 5 distinct stages | - | Manufacturing complexity |
Table 3: Manufacturing Cost Structure for High-Volume Biosensors
| Component | Typical Cost Range | Notes |
|---|---|---|
| Glucose Strip Manufacturing | $0.05 - $0.10 per strip | Requires reel-to-reel production, billions in infrastructure investment [12] |
| Diabetic Test Strips Retail | $0.60 - $0.75 per strip | Sold in boxes of 100 for $60-75 [13] |
| Glucose Meter + Strips | $15 - $66 (meter + 10 strips) | Often subsidized or provided free with strip purchases [13] |
Troubleshooting Guides and FAQs
Development Phase Troubleshooting
Q: Why do our biosensor prototypes fail to meet performance specifications when transitioning from laboratory scale to pilot manufacturing?
A: This common issue typically stems from insufficient attention to Design for Manufacturability (DFM) principles during early development stages. Failure at this stage extends production timelines, increases costs, and makes scaling difficult or impossible [4]. To address this:
- Material Selection Review: Evaluate whether materials selected for prototyping are suitable for mass production. Adhesives like glue or epoxy may work initially but often present challenges in full-scale manufacturing operations [4].
- Process Control Assessment: Implement statistical process control measures to identify variation sources. Functional testing at each manufacturing stage is crucial, as visual inspection alone cannot verify performance [12].
- Supplier Qualification: Ensure component suppliers can maintain consistent quality at production volumes, as variations in raw materials significantly impact biosensor performance.
Q: How can we reduce the risk of regulatory rejection for our novel biosensor technology?
A: Approximately 25% of medical devices submitted for FDA approval are denied annually, often due to issues originating in the design phase [4]. To mitigate this risk:
- Regulatory Strategy Development: Research regulatory guidance and precedents for similar devices early in development. Real-life requirements extend beyond written rules to include submission experiences for related devices [4].
- User-Centered Design Validation: Thoroughly document how your design addresses end-user needs, including patient comfort and physician workflow integration. Regulatory bodies increasingly emphasize real-world usability data [4].
- Clinical Trial Design: Partner with regulatory experts to design clinically relevant trials that generate valid performance data. The main bottleneck in technology transfer often occurs at the clinical trial stage, with failures rooted in insufficient design [4].
Q: Why do our biosensors exhibit inconsistent performance across production batches despite using identical materials and processes?
A: Inconsistent performance typically indicates underlying issues with manufacturing process control or material variability:
- Functional Testing Implementation: Move beyond visual inspection to implement comprehensive functional testing. Contamination and subtle manufacturing variations often escape visual detection but significantly impact performance [12].
- Environmental Control Enhancement: Monitor and control environmental factors (humidity, temperature, particulate levels) during manufacturing, as biosensors are particularly sensitive to these conditions [12].
- Component Traceability: Establish rigorous lot tracking for all materials to correlate performance issues with specific supplier batches when they occur.
Validation Phase Troubleshooting
Q: How can we establish appropriate validation protocols for broad-spectrum biosensors capable of detecting multiple analytes?
A: Traditional validation approaches designed for single-analyte detection systems are inefficient for broad-spectrum biosensors, which may identify hundreds or thousands of targets [14]. Implement these strategies:
- Representative Subset Validation: Select genetically diverse representative species across the biosensor's designed breadth of coverage to determine the range and variance of overall detection sensitivity and identification accuracy [14].
- Bioinformatic Validation: Recognize that for broad-spectrum methods, biochemical processes define detection capability, while digital information processes provide identification specificity [14].
- Limit of Detection Characterization: Account for the inextricable link between breadth of coverage and limit of detection, as these parameters must be established together rather than in isolation [14].
Q: What strategies can reduce validation costs without compromising regulatory requirements?
A: Cost-effective validation requires strategic planning and leveraging existing resources:
- Leverage Existing Databases: Utilize established signature databases (e.g., for 16S ribosomal gene sequencing) where possible rather than developing completely novel validation frameworks [14].
- Modular Validation Approach: Validate core technology components separately from application-specific implementations to spread costs across multiple product developments.
- Academic Collaboration: Partner with research institutions to access specialized expertise and share validation burdens through funded research programs.
Q: How should we approach biosensor validation for non-sterile sample types where background contamination may interfere with results?
A: For non-sterile sample types (e.g., throat swabs, food samples), background contamination presents significant validation challenges:
- Specific Biosensor Selection: Utilize biosensors targeted specifically at groups of highly pathogenic organisms rather than truly universal technologies when validating for complex matrices [14].
- Interference Testing: Expand validation protocols to include testing with likely interferents and commensal organisms present in the sample matrix.
- Background Characterization: Thoroughly characterize normal background signals for each sample type to establish appropriate baseline corrections and positivity thresholds [14].
Experimental Protocols for Cost-Effective Biosensor Development
Manufacturing Scalability Assessment Protocol
Objective: Systematically evaluate biosensor design for manufacturability and scalability potential before committing to production.
Materials:
- Functional biosensor prototypes
- Measurement equipment appropriate to biosensor type (potentiostat for electrochemical sensors, optical readers for optical sensors, etc.)
- Materials for proposed manufacturing process
- Statistical analysis software
Methodology:
- Component Analysis: Document every component and material, identifying those with limited suppliers, high cost, or special handling requirements.
- Assembly Process Mapping: Detail each assembly step, noting manual procedures requiring skilled technicians versus automated processes.
- Yield Assessment: Produce a minimum of 50 units using pilot manufacturing processes, tracking yield at each production stage.
- Performance Correlation: Measure critical performance parameters for all units and correlate with manufacturing variables.
- Cost Projection: Model production costs at scales of 1,000, 10,000, and 100,000 units, identifying cost drivers.
Troubleshooting Notes:
- If yield falls below 90% at any production stage, redesign that process step.
- If any single component exceeds 20% of total unit cost, investigate alternatives or redesign to eliminate it.
- If manual processes constitute more than 30% of assembly time, prioritize automation feasibility assessment.
Cross-Reactivity Validation Protocol for Broad-Spectrum Biosensors
Objective: Efficiently validate detection specificity for biosensors designed to identify multiple related analytes.
Materials:
- Biosensor platform to be validated
- Target analytes (minimum 3 representative species per phylogenetic group or functional category)
- Near-neighbor non-target organisms (minimum 2 per target group)
- Appropriate sample matrix (sterile and non-sterile as applicable)
- Statistical analysis tools
Methodology:
- Representative Selection: Select diverse representatives across the biosensor's claimed detection range, prioritizing phylogenetic diversity and clinical relevance.
- Limit of Detection (LOD) Establishment: Determine LOD for each representative target using standardized protocols.
- Cross-Reactivity Testing: Challenge biosensors with near-neighbor organisms at concentrations 100-fold higher than established LOD for related targets.
- Matrix Interference Testing: Evaluate performance in intended sample matrices with added potential interferents.
- Data Analysis: Calculate sensitivity, specificity, and confidence intervals for identification accuracy.
Troubleshooting Notes:
- If cross-reactivity exceeds 5% for any non-target organism, refine signature database or detection algorithm.
- If LOD varies more than 100-fold across representative targets, reconsider claimed detection breadth.
- If sample matrix reduces sensitivity more than 10-fold, implement sample processing modifications or adjust claimed specifications.
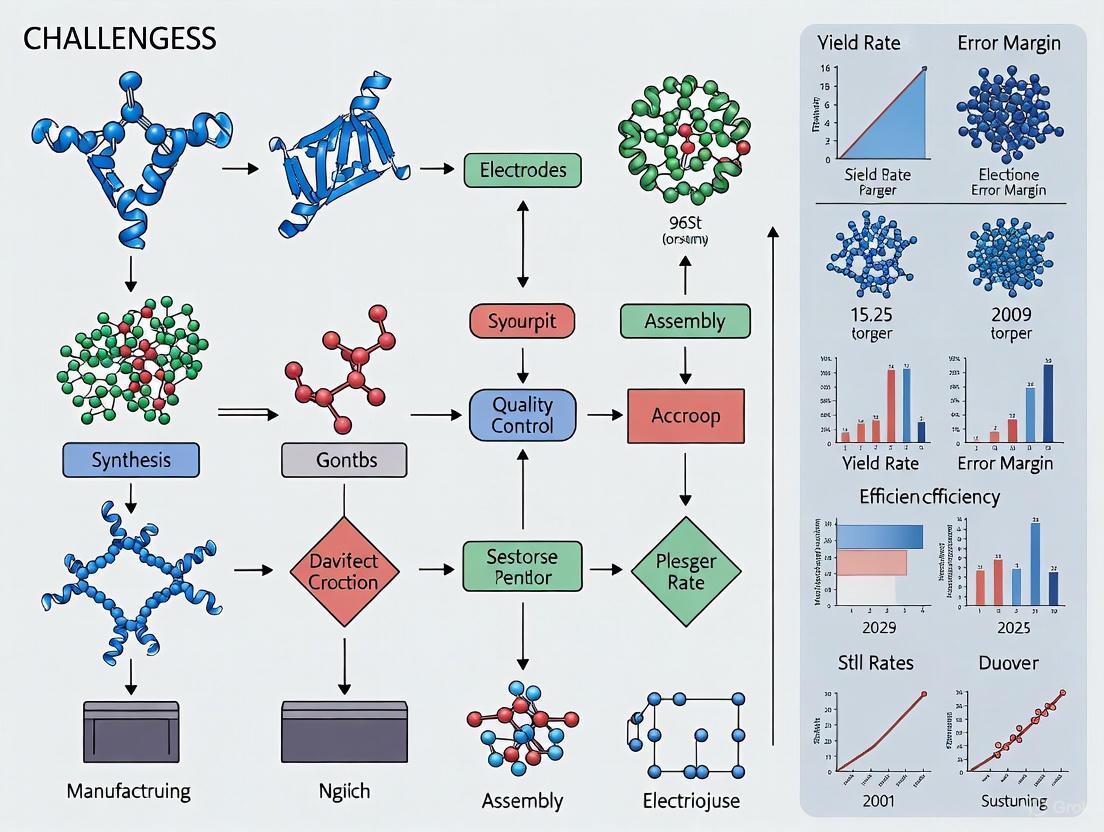
Biosensor Manufacturing Workflow
The journey from concept to mass-produced biosensor involves multiple distinct stages, each with specific cost considerations and validation requirements. The following diagram illustrates this complex workflow:
Diagram 1: Biosensor manufacturing stages with cost-critical phases highlighted.
Biosensor Validation Pathway
The validation pathway for biosensors, particularly broad-spectrum devices, requires a specialized approach that differs significantly from single-analyte systems. The following diagram illustrates this conceptual framework:
Diagram 2: Broad-spectrum biosensor validation pathway using representative testing.
Research Reagent Solutions
Table 4: Essential Research Reagents for Biosensor Development
| Reagent Category | Specific Examples | Function in Development | Cost Considerations |
|---|---|---|---|
| Bioreceptors | Enzymes (glucose oxidase), Antibodies, Nucleic acids (DNA/RNA), Molecularly imprinted polymers (MIPs) | Target recognition elements that provide detection specificity | Production complexity significantly impacts cost; MIPs may offer cost advantage for some applications [15] |
| Transducer Materials | Electrode materials (gold, carbon, platinum), Fluorophores, Piezoelectric crystals | Convert biological recognition events into measurable signals | Material purity and consistency critical; noble metals contribute significantly to cost [15] |
| Immobilization Matrices | Polymers, Sol-gels, Self-assembled monolayers, Hydrogels | Stabilize bioreceptors while maintaining accessibility | Optimization required for each bioreceptor-transducer combination; affects sensor lifespan [15] |
| Reference Materials | Certified analyte standards, Control samples (positive/negative) | Validation and calibration of sensor performance | Requires investment in properly characterized materials; essential for regulatory submissions |
| Signal Amplification Reagents | Enzymes (horseradish peroxidase), Nanoparticles, Dendrimers | Enhance detection sensitivity for low-abundance analytes | Can significantly improve performance but adds complexity and cost to manufacturing [15] |
Signal Noise and Performance Variability at Scale
Troubleshooting Guides
FAQ: Identifying and Characterizing Noise
Q: What are the primary patterns of signal noise I might encounter, and what do they indicate? A: Signal noise in biosensors typically manifests in three main patterns, each pointing to different root causes [16]:
- Constant Noise: Appears as a steady fluctuation in readings and typically indicates power supply ripples, poor grounding, or damaged shielding.
- Intermittent Noise: Shows up sporadically, suggesting loose connections, corroded terminals, or moisture infiltration.
- Event-Triggered Noise: Correlates with specific equipment operations like motor starts and points to electromagnetic interference (EMI) from nearby equipment.
Q: How does signal noise fundamentally impact biosensor performance metrics? A: Noise directly compromises key biosensor performance parameters essential for reliable operation at scale [3] [17]:
- Reduced Limit of Detection (LoD): Noise raises baseline fluctuation, masking low-concentration analyte signals.
- Loss of Precision: Fluctuating baselines result in high coefficient of variation across repeated measurements.
- Increased False Positives/Negatives: Electrical interference or cross-reactivity produces spurious signal changes.
- Extended Processing Overhead: Higher noise levels require sophisticated signal processing or frequent recalibration.
Q: What critical performance parameters should be standardized for assessing biosensor dynamic performance? A: For scalable manufacturing, consistent evaluation of these dynamic performance metrics is essential [3]:
- Dynamic Range: The span between minimal and maximal detectable signals
- Operating Range: The concentration window where the biosensor performs optimally
- Response Time: The speed at which the biosensor reacts to changes
- Signal-to-Noise Ratio: The clarity and reliability of the output signal
FAQ: Noise Source Identification and Mitigation
Q: What are the fundamental sources of noise in electrochemical biosensing systems? A: Biosensor noise originates from multiple domains that must be addressed differently [17]:
| Noise Category | Physical Origin | Impact Scale |
|---|---|---|
| Thermal (Johnson-Nyquist) Noise | Random motion of charge carriers in conductive components | Ultra-low signal detection (e.g., femtomolar) |
| 1/f (Flicker) Noise | Imperfections in electrode materials and interfaces | Low-frequency measurements |
| Environmental EMI | External sources (power lines, wireless devices) | All operating frequencies |
| Biological Cross-Reactivity | Non-specific binding in complex matrices | Specificity in serum, saliva |
Q: What material engineering strategies effectively reduce noise in biosensor platforms? A: Advanced materials approaches address noise at the fundamental level [17]:
- Carbon Nanomaterials: Provide high conductivity with large active surface area, reducing thermal and flicker noise while offering innate antifouling properties.
- Antifouling Coatings: Nanocomposites (e.g., BSA/prGOx/GA) or polyethylene glycol chains reduce non-specific adsorption in complex biological matrices.
- Electrode Engineering: Nanostructured transducers with fewer grain boundaries minimize flicker noise amplification.
Q: How can I systematically isolate noise sources in my experimental setup? A: Follow this diagnostic approach to pinpoint noise origins [16]:
- Single Sensor Issues: Test with known good cables and verify proper termination resistance
- Multiple Sensor Problems: Measure common mode voltage between signal commons and facility ground
- Entire Zone Failures: Monitor power quality during production cycles to identify voltage sags, harmonics, or transients
Quantitative Performance Data
Biosensor Performance Metrics from Experimental Studies
Table 1: Reported Accuracy Metrics for AI-Enhanced Biosensing Platforms [18]
| Physiological Parameter | Reported Accuracy | Precision | Experimental Context |
|---|---|---|---|
| SpO₂ Monitoring | 91.34% | N/R | Biosensor-Student Health Fitness Dataset (n=500) |
| Skin Conductance Detection | N/R | 88.72% | Biosensor-Student Health Fitness Dataset (n=500) |
| Sweat Electrolyte Analysis | 82.64% (correlation) | N/R | Comparison with laboratory assays |
| Non-invasive Cortisol Tracking | 78.65% | N/R | Biosensor-Student Health Fitness Dataset (n=500) |
Table 2: Noise Source Characteristics and Mitigation Approaches [16] [17]
| Noise Source | Frequency Domain | Amplitude Characteristics | Effective Mitigation Strategies |
|---|---|---|---|
| Thermal Noise | Broad spectrum | Proportional to temperature and resistance | Carbon nanomaterials with higher conductivity |
| 1/f Noise | Low frequency | Inverse frequency dependence | Electrode engineering to reduce imperfections |
| Environmental EMI | Discrete frequencies | Variable amplitude | Shielding, separation from power cables (>12 inches) |
| Ground Loops | DC and low frequency | Constant offset | Single-point grounding, signal isolators |
Experimental Protocols
Protocol 1: Systematic Signal Noise Characterization
Purpose: To identify, classify, and quantify signal noise sources in biosensor systems during scale-up manufacturing.
Materials:
- Biosensor test platform with data acquisition capability
- Oscilloscope with FFT capability (minimum 250 Hz sampling rate)
- EMI probe for electromagnetic interference detection
- Environmental chamber for temperature control
- Known analyte solutions at multiple concentrations
Methodology:
- Baseline Characterization:
- Place biosensors in analyte-free solution under controlled conditions (22°C)
- Record signal output for 60 minutes at 250 Hz sampling rate
- Calculate baseline noise floor using standard deviation of normalized signal
Pattern Identification:
- Monitor signals during normal operation cycles
- Document correlation with environmental events (equipment cycling, temperature changes)
- Categorize as constant, intermittent, or event-triggered using established criteria [16]
Source Isolation:
- Implement "wiggle test" on cables and connections while monitoring signal quality
- Measure common mode voltage between signal commons and facility ground
- Use EMI probe to identify interference frequencies during operation cycles
Quantitative Assessment:
- Calculate signal-to-noise ratio for each operating condition
- Determine limit of detection using serial dilutions of known analytes
- Assess precision via coefficient of variation across repeated measurements
Data Analysis:
- Perform fast Fourier transform on raw signals to identify frequency-domain patterns
- Calculate correlation coefficients between noise events and equipment operations
- Map electrical distribution to identify shared transformers affecting sensor circuits
Protocol 2: Dynamic Performance Validation for Manufacturing QC
Purpose: To verify biosensor response characteristics and signal fidelity across production batches.
Materials:
- Standardized analyte solutions across dynamic range
- Reference measurement system (e.g., clinical-grade ELISA for proteins)
- Data acquisition system with time-stamping capability
- Statistical analysis software (e.g., R, Python with SciPy)
Methodology:
- Response Time Assessment:
- Rapidly introduce high-concentration analyte solution to biosensor
- Record time from introduction to 90% maximum signal response
- Repeat across 10 biosensors from same production batch
Dynamic Range Verification:
- Test serial dilutions from below to above expected operating range
- Fit dose-response curve and calculate linear range
- Determine limit of detection (3× standard deviation above baseline)
Signal Stability Evaluation:
- Monitor signal output for 24 hours under constant analyte concentration
- Calculate coefficient of variation and drift rate
- Perform accelerated aging studies if applicable
Validation Metrics:
- Response time consistency across production batch (CV < 15%)
- Dynamic range covering intended clinical or analytical application
- Signal drift < 5% over 24-hour operation period
Signaling Pathways and Workflows
The Scientist's Toolkit: Research Reagent Solutions
Table 3: Essential Materials for Biosensor Noise Investigation and Performance Validation
| Material/Reagent | Function | Application Context |
|---|---|---|
| Silicon Nanowire Sensors | Transduction element combining photoelectric properties with antibody functionalization | Protein concentration measurement (e.g., host cell protein detection) |
| Carbon Nanomaterials (Gii) | High-conductivity electrode material with innate antifouling properties | Electrochemical biosensing in complex biological matrices |
| BioHarness-3TM System | Wireless, wearable multi-sensor with ECG capability | HRV validation in clinical and research settings |
| Kubios HRV Premium Software | Signal processing and artifact correction for biosensor data | Analysis of R-R intervals and frequency domain parameters |
| Antifouling Nanocomposites (BSA/prGOx/GA) | Reduce non-specific adsorption in complex matrices | Improving signal fidelity in blood, saliva, or serum samples |
| ELISA Test Kits | Reference method for protein quantification | Validation of biosensor accuracy in drug development |
| EMI Probes | Identify electromagnetic interference sources | Troubleshooting event-triggered noise in laboratory settings |
| Shielded Twisted Pair Wiring | Minimize capacitive and inductive coupling | Signal integrity preservation in electrically noisy environments |
Material Sourcing and Supply Chain Complexities
Troubleshooting Guides and FAQs
FAQ: Sourcing and Procurement
Q1: What are the key supply chain challenges when sourcing materials for biosensor research and manufacturing?
The primary challenges include high complexity and frequent disruption. Key issues are geopolitical instability, such as new tariffs and international conflicts, which can abruptly increase costs and restrict access to critical materials [19] [20]. There are also significant talent and skill shortages in managing global trade compliance, making it difficult to navigate the complex regulatory landscape [19]. Furthermore, logistical bottlenecks at key global trade chokepoints, such as shipping lanes affected by weather or blockades, cause delays and disruptions [21].
Q2: How can I mitigate risks associated with sourcing critical raw materials?
Adopting a multi-pronged strategy is essential for risk mitigation:
- Supplier Diversification: Build and maintain a diverse portfolio of suppliers across different geographic regions. This allows you to switch to a supplier in a less-impacted region if tensions or disruptions occur elsewhere [20].
- Nearshoring/Onshoring: Consider shifting some production or sourcing to "safer" or closer territories to reduce exposure to long, volatile shipping routes and trade barriers, though this may involve higher short-term costs [20] [21].
- Strategic Inventory Buffers: For critical materials with long lead times or high volatility, increasing inventory buffers can ease production pressure during unexpected disruptions [20].
Q3: Our team struggles with the high cost of protein testing during development. Are there emerging alternatives?
Yes, new technologies are being developed to dramatically lower these costs. For example, one startup has commercialized a silicon nanowire-based protein sensor that can measure protein concentrations in less than 15 minutes at a fraction of the cost of traditional tests like ELISA [22]. These sensors can be mass-produced in semiconductor foundries, promising a more scalable and affordable supply chain for essential testing materials [22].
FAQ: Manufacturing and Quality Control
Q4: During scale-up, our biosensor performance becomes inconsistent. What could be causing this?
A common cause is heterogeneity in biomanufacturing processes. When scaling up from lab to production scale, variability can stem from genetic instability in microbial populations or from physical gradients (e.g., in pH, nutrients, or oxygen) within large bioreactors [23]. These fluctuations can lead to imbalances in metabolic pathways and reduce the yield, titre, and purity of your biological components [3] [23].
Q5: How can we improve the stability and shelf-life of our biosensors?
Stability is a major commercialization hurdle [2]. Solutions involve both material selection and process control:
- Shelf-Stability: This is related to the activity retention of enzymes, proteins, and other sensing elements. The storage environment is a major factor. For single-use, disposable biosensors, this is the key issue [2].
- Operational Stability: For multi-use biosensors, the reusability of the device is critical. The mechanisms of inactivation must be understood and addressed through engineering [2].
- Robust Quality Control: Implement rigorous quality control using control samples specific to your analyte and sample matrix. These controls, when run across the analytical range of your assay, are the most sensitive way to detect stability issues between production runs [24].
Q6: Our HCP (Host Cell Protein) ELISA assays show high variability. How can we ensure quality control?
HCP assays are inherently semi-quantitative, and their quality control requires specific strategies. Do not rely solely on curve fit parameters for quality control [24]. It is recommended to:
- Use control samples made using your source of analyte (e.g., HCPs from your specific process) in the same matrix as your critical samples.
- Establish low, medium, and high controls that are aliquoted for single use and stored at -80°C.
- Statistically establish a range for these controls; they are your most reliable tool for ensuring run-to-run quality and detecting assay problems [24].
Quantitative Data on Biosensor Performance and Market
The tables below summarize key quantitative data relevant to biosensor manufacturing and market dynamics.
Table 1: Key Performance Metrics for Biosensors in Metabolic Engineering [3]
| Metric | Description | Importance in Manufacturing |
|---|---|---|
| Dynamic Range | Span between minimal and maximal detectable signals. | Defines the useful detection window for metabolite concentrations during production. |
| Operating Range | Concentration window for optimal biosensor performance. | Ensures biosensor functions correctly under expected process conditions. |
| Response Time | Speed at which the biosensor reacts to changes. | Critical for real-time process control; slow response hinders controllability. |
| Signal-to-Noise Ratio | Clarity and reliability of the output signal. | High noise can obscure concentration differences, complicating high-throughput screening. |
Table 2: Global Biosensors Market Overview and Projection [25] [26]
| Parameter | 2024 Market Value | Projected 2034 Market Value | Compound Annual Growth Rate (CAGR) |
|---|---|---|---|
| Overall Biosensors Market | USD 32.3 Billion [26] | USD 68.5 Billion [26] | 7.9% [26] |
| Non-Wearable Biosensors Segment | USD 20.7 Billion [26] | - | - |
| Electrochemical Biosensors Segment | USD 13.4 Billion [26] | - | - |
Experimental Protocols for Key Challenges
Protocol 1: Assessing Bioprocess Heterogeneity for Scale-Up
Objective: To identify and quantify gradients (e.g., pH, substrate) in a bioreactor that cause heterogeneity and impact cell factory performance during scale-up.
Materials:
- Bench-scale and pilot-scale bioreactors
- Relevant microbial chassis (e.g., E. coli, yeast)
- Process Analytical Technology (PAT) tools: pH and dissolved oxygen (DO) probes, spectroscopy sensors [23]
- Sampling port and quenching solution
- Analytics: HPLC, mass spectrometry for metabolite quantification [23]
Methodology:
- Instrumentation: Equip the pilot-scale bioreactor with multiple in-line PAT tools at different spatial locations to measure real-time parameters like pH, DO, and temperature [23].
- Fed-Batch Cultivation: Run a fed-batch process with your engineered microbe. Use a defined medium with a target substrate.
- Sampling: Take frequent, spatially-distributed samples from the bioreactor. Immediately quench metabolism to capture a snapshot of metabolite levels.
- Analysis: Quantify key substrate, product, and byproduct concentrations from the samples using analytical methods like HPLC [23].
- Data Integration: Correlate the spatial and temporal data from the PAT tools with the analytical results from the samples. This helps create a map of heterogeneity within the reactor.
- Computational Modeling: Use the data to develop computational tools, such as integrating computational fluid dynamics (CFD) with metabolic modeling, to predict gradients and their effects on cells [23].
Protocol 2: Dynamic Range and Response Time Characterization of a Novel Biosensor
Objective: To fully characterize the input-output response of a new biosensor, essential for its integration into a controlled manufacturing process.
Materials:
- Strain expressing the biosensor (e.g., TF-based, RNA-based)
- Target analyte in pure form
- Microplate reader (for fluorescence-based outputs) or flow cytometer
- Cell culture media and lab consumables
Methodology:
- Culture and Induction: Grow the sensor strain to mid-log phase in a defined medium.
- Dose-Response: Aliquot the culture into a microplate and expose to a wide range of analyte concentrations (e.g., from 0 to a saturating level). Include multiple replicates for each concentration.
- Kinetic Readout: Place the plate in a pre-warmed microplate reader and initiate kinetic measurements of the output signal (e.g., fluorescence) for several hours.
- Data Analysis:
- Dose-Response Curve: At a fixed timepoint (e.g., when the control signal plateaus), plot the output signal against the log of the analyte concentration. Fit a sigmoidal curve to determine the dynamic range and EC50 (sensitivity) [3].
- Response Time: From the kinetic data, determine the time each culture takes to reach 50% or 90% of its maximum output signal for a given concentration. Plot the average response time versus concentration [3].
Research Reagent Solutions
Table 3: Essential Materials for Biosensor Development and Manufacturing Research
| Research Reagent / Material | Function / Application | Example / Note |
|---|---|---|
| Transcription Factors (TFs) | Protein-based biosensors that regulate gene expression in response to specific metabolites [3]. | Used for high-throughput screening of strain libraries [3]. |
| Riboswitches & Toehold Switches | RNA-based biosensors that undergo conformational changes for real-time regulation of gene expression [3]. | Toehold switches are programmable and enable logic-gated control of pathways [3]. |
| Silicon Nanowire Sensors | A novel transducer platform for highly sensitive, rapid, and low-cost detection of proteins and other molecules [22]. | Can be functionalized with antibodies; mass-produced in semiconductor foundries [22]. |
| Affinity-Purified Anti-HCP Antibodies | Critical reagents for detecting Host Cell Proteins (HCPs), a major impurity in biomanufactured products [24]. | Essential for ensuring drug safety; coverage should be validated by 2D Western blot [24]. |
| Process Analytical Technology (PAT) | A category of tools (sensors, spectrometers) for real-time monitoring of bioprocess parameters [23]. | Includes spectroscopy and mass spectrometry for detecting deviations in raw materials and bioreactors [23]. |
Workflow and Relationship Diagrams
Biosensor-Integrated Biomanufacturing Workflow
Material Sourcing Risk Mitigation Logic
From Lab to Fab: Advanced Manufacturing Methods and Material Innovations
Leveraging Microelectronics and Nanotechnology for Miniaturization
Technical Support Center: FAQs & Troubleshooting Guides
This technical support resource addresses common experimental challenges in the miniaturization of biosensors for mass production, providing actionable solutions for researchers and scientists.
Troubleshooting Common Experimental Challenges
FAQ 1: My miniaturized electrochemical biosensor shows inconsistent signal output and high signal noise during high-throughput screening. What could be the cause and how can I resolve it?
Answer: Inconsistent signals in miniaturized electrochemical systems often stem from electrode fouling, non-specific binding, or suboptimal sensor dynamic range.
- Root Causes:
- Biofouling: Accumulation of non-target proteins or cells on the electrode surface, degrading performance [27].
- Non-specific Binding: Interfering substances in complex biological samples (e.g., blood, serum) bind to the sensing element, increasing background noise [3] [28].
- Sensor Operating Range: The target analyte concentration may fall outside the biosensor's optimal operating or dynamic range, leading to non-linear responses [3].
- Protocol for Mitigation:
- Surface Passivation: Incubate the sensor with a blocking agent (e.g., 1% BSA or casein in PBS) for 1 hour at room temperature to minimize non-specific binding.
- Sample Dilution: Dilute your sample matrix (1:10 in buffer) to reduce interference from complex media.
- Dynamic Range Verification: Calibrate the sensor with a standard curve of known analyte concentrations (e.g., 0.1 µM to 100 µM) to confirm the target concentration is within the linear range of the dose-response curve [3].
FAQ 2: I am experiencing poor reproducibility and low yield when fabricating nanomaterial-based biosensors at a larger scale. What are the critical parameters to control?
Answer: Reproducibility challenges in scale-up are frequently due to inconsistencies in nanomaterial synthesis and functionalization.
- Root Causes:
- Inconsistent Nanomaterial Synthesis: Slight variations in temperature, precursor concentration, or reaction time lead to batch-to-batch variations in the size and properties of nanomaterials like gold nanoparticles or graphene [29].
- Non-uniform Functionalization: Inefficient or uneven immobilization of biorecognition elements (e.g., antibodies, DNA probes) across the sensor surface [29].
- Protocol for Improvement:
- Standardized Synthesis: For citrate-capped gold nanoparticles (10 nm), strictly control the boiling temperature (100°C) and sodium citrate concentration (1 mM) with precise stirring speed (500 rpm). Monitor the reaction until the solution reaches a deep red color (~20 minutes).
- Controlled Immobilization: Use a consistent protocol for probe immobilization. For a thiolated DNA probe, incubate a 1 µM solution on gold surfaces for 16 hours at 4°C in a humidified chamber. Follow with a 1-hour incubation in 1 mM 6-mercapto-1-hexanol to create a well-ordered self-assembled monolayer [30].
FAQ 3: The integration of my microfluidic chip with the optical detection system results in high background signal and low sensitivity. How can I optimize this?
Answer: This issue often arises from light scattering, autofluorescence of chip materials, or inefficient fluidic sealing.
- Root Causes:
- Material Autofluorescence: Common polymer substrates (e.g., PDMS) can exhibit high autofluorescence, which interferes with optical signals like fluorescence or chemiluminescence [27].
- Optical Misalignment: Imperfect alignment between the microfluidic channel and the optical detector (e.g., photodiode, LED) leads to signal loss.
- Evaporation: In open-channel digital microfluidic systems using electrowetting-on-dielectric (EWOD), droplet evaporation can alter analyte concentration and signal [27].
- Protocol for Optimization:
- Material Selection: Fabricate chips using low-autofluorescence cyclo-olefin polymer (COP) or quartz instead of standard PDMS for fluorescence-based detection.
- Alignment Jig: Use a 3D-printed alignment jig to fix the positions of the optical fibers and microfluidic chip, ensuring the detection zone is precisely targeted.
- Humidity Control: For EWOD and other open systems, perform experiments in an environmentally controlled chamber with >80% relative humidity to prevent droplet evaporation [27].
FAQ 4: The functionalized biosensor loses stability and signal response after short-term storage. How can I improve its shelf life?
Answer: Loss of stability is typically caused by the degradation of the biological recognition element or desorption from the transducer surface.
- Root Causes:
- Bioreceptor Denaturation: Enzymes or antibodies can lose activity over time due to improper storage conditions [28].
- Desorption: Immobilized probes can detach from the nanomaterial surface.
- Protocol for Stabilization:
- Lyophilization: For protein-based biosensors, lyophilize the functionalized sensor chip with a cryoprotectant sugar solution (e.g., 5% trehalose) and store it under an inert gas (e.g., argon) at -20°C.
- Stability Testing: Conduct an accelerated aging study by storing sensors at 4°C, 25°C, and 37°C, and periodically measuring the signal response to model degradation kinetics and predict shelf life.
Quantitative Data for Experimental Design
Table 1: Key Performance Metrics for Miniaturized Biosensors in Mass Production
| Performance Parameter | Target Value for Mass Production | Common Challenges at Scale | Suggested Characterization Method |
|---|---|---|---|
| Dynamic Range [3] | 3-4 orders of magnitude | Narrowing of range due to fabrication variances | Dose-response curve with standard analytes |
| Response Time [3] | Seconds to minutes | Slow response hinders real-time control | Kinetic measurements upon analyte injection |
| Signal-to-Noise Ratio [3] | >10:1 | Increased noise in complex media | Repeated measurements in control buffer |
| Inter-sensor Reproducibility [29] | <10% Coefficient of Variation (CV) | Inconsistent nanomaterial functionalization | Measure response of 20+ sensors from different batches |
| Shelf Life [28] | >6 months at 4°C | Degradation of biological elements | Accelerated aging studies |
Table 2: Common Nanomaterials and Associated Fabrication Challenges
| Nanomaterial | Key Function in Biosensor | Scale-Up Fabrication Challenge | Potential Solution |
|---|---|---|---|
| Gold Nanoparticles [27] | Signal amplification, electron transfer | Batch-to-batch size inconsistency | Continuous flow synthesis reactors |
| Graphene/Oxide [29] | High surface area, excellent conductivity | Defect density and layer uniformity | Chemical vapor deposition (CVD) optimization |
| Quantum Dots [29] | Fluorescent tags for optical detection | Toxicity and potential leaching | Investing in polymer or silica encapsulation |
| Carbon Nanotubes [29] | Wire-like properties, sensor platform | Achieving uniform dispersion | Functionalization and use of specific surfactants |
Detailed Experimental Protocols
Protocol 1: Fabrication of a Microfluidic Chip Integrated with a Nanostructured Electrode for Cell Metabolite Monitoring
This protocol is adapted from research on sensor chips embedded in cell culture flasks [27].
- Photolithography: Spin-coat a clean silicon wafer with SU-8 photoresist (e.g., SU-8 3050) at 3000 rpm for 30 s to achieve a ~100 µm thick layer. Soft bake, expose to UV light through a microchannel pattern mask, post-exposure bake, and develop to create a master mold.
- PDMS Molding: Mix PDMS elastomer and curing agent (10:1 ratio), degas, and pour onto the master mold. Cure at 65°C for 4 hours, then peel off the PDMS slab containing the microchannels.
- Nanostructured Electrode Fabrication: Sputter a 10 nm chromium adhesion layer followed by a 100 nm gold layer onto a glass substrate. Pattern the electrode using lift-off photolithography.
- Functionalization: Electrodeposit iridium oxide films for pH sensing by cycling the potential (-0.2 V to 0.8 V) in a solution of 1 mM IrCl₄, 40 mM H₂O₂, and 100 mM KCl for 50 cycles [27]. For enzyme immobilization, drop-cast a solution of glucose oxidase (10 mg/mL) in a Nafion membrane onto the working electrode.
- Bonding & Assembly: Treat the PDMS slab and glass substrate with oxygen plasma (100 W, 30 s), align, and bond irreversibly. Insert fluidic connectors.
Protocol 2: High-Throughput Screening of Microbial Strains Using a Transcription Factor-Based Biosensor
This protocol utilizes biosensors for dynamic regulation in metabolic engineering [3].
- Circuit Cloning: Clone a promoter responsive to the target metabolite (e.g., a flavonoid) upstream of a fluorescent reporter gene (e.g., GFP) in a plasmid vector. Transform this genetic construct into your microbial host (e.g., E. coli).
- Culture and Induction: Grow transformed cells in a 96-well deep-well plate with 500 µL of LB medium per well. Incubate at 37°C with shaking. In the mid-exponential phase, induce with a gradient of the target metabolite (e.g., 0 µM to 1000 µM).
- Flow Cytometry Analysis: After 4-6 hours of induction, dilute cells 1:100 in PBS. Analyze using a flow cytometer, measuring fluorescence intensity (e.g., FITC channel for GFP) for a minimum of 50,000 events per sample.
- Data Analysis: Gate the cell population for single, live cells. Plot the geometric mean of fluorescence against the metabolite concentration to generate a dose-response curve and calculate the dynamic range of your biosensor [3].
Workflow and Signaling Pathway Diagrams
Microscale Biosensor Fabrication Workflow
TF-Based Biosensor Signaling Pathway
The Scientist's Toolkit: Research Reagent Solutions
Table 3: Essential Materials for Miniaturized Biosensor Development
| Item | Function/Application | Specific Example |
|---|---|---|
| SU-8 Photoresist [27] | Creating high-resolution master molds for microfluidic channels via photolithography. | SU-8 3050 for ~100 µm channel heights. |
| Polydimethylsiloxane (PDMS) [27] | Fabricating the main body of transparent, gas-permeable microfluidic chips. | Sylgard 184 Elastomer Kit. |
| Gold Sputtering Target [27] | Deposition of thin-film electrodes for electrochemical transducers. | 99.99% purity gold target for sputter coater. |
| Iridium (IV) Chloride [27] | Precursor for electrodeposition of iridium oxide films used in potentiometric pH sensors. | IrCl₄ for use in H₂O₂ and KCl solution. |
| Thiolated DNA Probes [30] | Immobilization of recognition elements on gold surfaces via strong Au-S bonds for genosensors. | 5'-Thiol-modified C6-DNA probe for nucleic acid detection. |
| Transcription Factor Plasmid [3] | Genetic component for building a biosensor circuit that responds to specific small molecules. | Plasmid with a pCoupler backbone for metabolite sensing. |
| BSA (Bovine Serum Albumin) [28] | A common blocking agent to passivate sensor surfaces and reduce non-specific binding. | 1% solution in PBS for 1-hour incubation. |
| Nafion Perfluorinated Resin [27] | A proton-conducting polymer membrane used to entrap enzymes on electrode surfaces. | 5% solution for mixing with glucose oxidase. |
Frequently Asked Questions (FAQs) on Mass Production Challenges
Q1: What are the primary material stability issues hindering the mass production of MXene-based biosensors? MXenes, particularly Ti₃C₂Tₓ, are prone to oxidative degradation, especially in aqueous environments or when exposed to oxygen. This degradation leads to a rapid decline in their exceptional electrical conductivity and electrochemical performance, which are critical for sensor function. Ensuring long-term stability in finished biosensor products is a significant challenge for commercialization [31] [32] [33].
Q2: How does the scalability of nanomaterial synthesis impact biosensor manufacturing? The synthesis of high-quality, uniform nanomaterials at an industrial scale remains a bottleneck. For MXenes, common synthesis routes like etching can be complex and involve harsh chemicals, making it difficult to produce large batches with consistent properties. Similarly, producing graphene with minimal defects and high reproducibility is costly and challenging at scale. Inconsistent material quality directly translates to variable sensor performance [31] [32].
Q3: Why is it difficult to maintain performance when translating nanomaterial-based biosensors from lab prototypes to mass-produced devices? Lab-scale sensors often rely on carefully controlled, manual fabrication processes. Mass production techniques like inkjet printing or roll-to-roll processing must precisely control the deposition of nanomaterial inks to create uniform, high-performance sensing layers. Reproducing the nanoscale architecture and ensuring strong adhesion between nanomaterials and flexible substrates across thousands of devices is highly challenging [31] [34].
Q4: What role do signal amplification strategies play in overcoming sensitivity barriers for mass-produced sensors? Signal amplification is crucial for detecting low-abundance biomarkers in clinical samples. Incorporating enzymatic methods (e.g., using endonuclease or alkaline phosphatase) or nanoparticle-based approaches (e.g., using gold nanoparticles or quantum dots) can dramatically lower the limit of detection. For mass production, these amplification components must be integrated in a stable, reproducible, and cost-effective manner [35].
Q5: How can machine learning (ML) and artificial intelligence (AI) address mass production challenges? ML and AI are being used to optimize biosensor design and manufacturing. ML algorithms can predict the optimal structural parameters of a sensor (e.g., layer thickness) for peak sensitivity, reducing the need for costly and time-consuming iterative experiments. AI-driven quality control can also analyze large-scale imaging data to detect nanomaterial defects and ensure consistency in production batches [36] [34].
Troubleshooting Guides for Experimental Research
Guide 1: Addressing MXene Degradation During Sensor Fabrication
- Problem: Loss of conductivity and electrochemical activity in MXene-based ink or film.
- Background: MXene oxidation is accelerated by water, oxygen, and high temperatures.
- Investigation & Resolution:
- Verify Storage Conditions: Store MXene dispersions in airtight, dark containers under an inert gas (e.g., argon) at low temperatures (-20°C or lower). Avoid storing as aqueous dispersions for extended periods [31] [33].
- Optimize Fabrication Environment: Perform coating and drying steps in a glove box or under a nitrogen atmosphere to minimize oxygen and moisture exposure [32].
- Consider Composite Materials: Formulate MXene composites with polymers or other 2D materials (e.g., graphene) to create a physical barrier that slows down oxidative degradation [31] [33].
Guide 2: Managing Signal-to-Noise Ratio in Electrochemical Biosensors
- Problem: High background noise obscuring the detection signal from the target analyte.
- Background: Non-specific binding of proteins or other molecules to the sensor surface is a common source of noise.
- Investigation & Resolution:
- Improve Surface Passivation: After immobilizing the biorecognition element (e.g., antibody, aptamer), block the remaining sensor surface with inert proteins like bovine serum albumin (BSA) or casein to prevent non-specific adsorption [35] [3].
- Optimize Electrolyte and Washing: Use optimized buffer formulations and stringent washing protocols between steps to remove unbound molecules. Incorporating surfactants like Tween-20 in wash buffers can reduce hydrophobic interactions [35] [37].
- Functionalize Nanomaterials: Ensure proper functionalization of nanomaterials like graphene or MXenes to enhance the specific loading of bioreceptors and improve electron transfer efficiency, which can boost the signal relative to noise [36] [32].
Guide 3: Achieving Reproducibility in Nanomaterial-Based Assays
- Problem: High variability in sensor response between different batches or even within the same batch.
- Background: Inconsistencies often stem from variations in nanomaterial synthesis, functionalization efficiency, or assay conditions.
- Investigation & Resolution:
- Standardize Nanomaterial Characterization: Rigorously characterize every new batch of nanomaterials using Dynamic Light Scattering (DLS) for size, zeta potential for surface charge, and UV-Vis spectroscopy for concentration and quality. Only use batches with near-identical properties [32] [37].
- Control Functionalization Chemistry: Precisely standardize the concentration, reaction time, and temperature for attaching probes (e.g., DNA, antibodies) to nanoparticles. Use quantitative methods to verify the density of surface-bound probes [37].
- Automate Fluidic Handling: For assay steps like washing and reagent addition, use automated liquid handlers instead of manual pipetting to minimize operational variability [3].
Quantitative Performance Data of Advanced Nanomaterials
Table 1: Comparative Analysis of Nanomaterial-Based Biosensors
| Nanomaterial | Target Analyte | Sensor Type | Limit of Detection (LOD) | Linear Range | Key Challenge for Mass Production |
|---|---|---|---|---|---|
| MXene (Ti₃C₂Tₓ) | Various Biomarkers [32] | Electrochemical | Not Quantified (N/Q) in results | N/Q | Susceptibility to oxidative degradation; complex synthesis scaling [31] [32] |
| Graphene | Breast Cancer Biomarkers [36] | Optical (Plasmonic) | N/Q | N/Q | Reproducible, defect-free production at low cost [36] |
| Gold Nanoparticles (Au NPs) | miRNA-155 [37] | Optical (Colorimetric) | 8 pM | 80 pM - 2 μM | Controlling nanoparticle dispersion and aggregation with high uniformity [37] |
| Core-Shell Nanoparticles (PBA@MIP) | Drugs (e.g., Liver Cancer) [34] | Electrochemical | N/Q | N/Q | Scalable printing of stable, molecule-selective nanostructures [34] |
Table 2: Key Performance Metrics for Biosensor Optimization
| Performance Parameter | Definition | Impact on Biosensor Efficacy | Ideal Value/Characteristic |
|---|---|---|---|
| Limit of Detection (LOD) | The lowest concentration of an analyte that can be reliably detected. | Determines the capability for early-stage disease diagnosis when biomarker levels are very low. | As low as possible (e.g., pico-molar range) [37] |
| Dynamic Range | The span of analyte concentrations over which the sensor provides a quantifiable response. | Defines the clinical utility for monitoring diseases across different stages. | Wide, to cover both low and high pathological concentrations [3] [37] |
| Response Time | The speed at which the biosensor generates a signal after exposure to the analyte. | Critical for real-time monitoring and point-of-care applications. | Fast (seconds to minutes) [3] |
| Signal-to-Noise Ratio | The ratio of the power of the meaningful signal to the power of the background noise. | Dictates the accuracy, precision, and reliability of the measurement. | High, to ensure the signal is clearly distinguishable from noise [3] |
Detailed Experimental Protocols
Protocol 1: Fabrication of a Graphene-Based SPR Biosensor for Breast Cancer Detection
This protocol is adapted from a study using a machine learning-optimized, multilayer architecture for enhanced sensitivity [36].
- Substrate Preparation: Begin with a clean glass or silicon substrate. Ensure it is free of dust and organic contaminants via standard cleaning procedures (e.g., piranha solution treatment, followed by rinsing with deionized water and drying under nitrogen stream).
- Deposition of Metal-Insulator-Metal (MIM) Architecture:
- First Ag Layer Deposition: Use thermal evaporation or sputtering to deposit a thin (∼50 nm) silver (Ag) layer onto the substrate. This serves as the bottom metal layer for plasmonic enhancement.
- SiO₂ Insulator Deposition: Deposit a silicon dioxide (SiO₂) layer of optimized thickness (e.g., ∼10-20 nm) onto the Ag layer using plasma-enhanced chemical vapor deposition (PECVD).
- Graphene Transfer: Transfer a single-layer or few-layer graphene sheet onto the SiO₂ surface using a wet transfer technique (e.g., PMMA-assisted transfer).
- Second Ag Layer Patterning: Deposit a second Ag layer and use lithography (e.g., electron-beam or photolithography) to etch and define the specific resonator shape (e.g., nanodisks, gratings) [36].
- Functionalization: Immobilize breast cancer-specific antibodies or aptamers onto the graphene surface. This can be achieved via π-π stacking or by pre-activating graphene with linker molecules to facilitate covalent bonding.
- Machine Learning Optimization: Utilize a trained ML model to iteratively analyze the performance data and refine the structural parameters (e.g., Ag layer thickness, SiO₂ thickness, resonator dimensions) to achieve peak sensitivity [36].
Protocol 2: Label-Free miRNA Detection Using Oppositely Charged Gold Nanoparticles
This protocol details a colorimetric method for detecting miRNA-155, a breast cancer biomarker [37].
- Synthesis of Gold Nanoparticles (Au NPs):
- Citrate-capped Au NPs (Cit-Au NPs): Prepare 20 nm Au NPs by the trisodium citrate reduction method. Heat 40 mL of 0.8 mM HAuCl₄ to boiling under vigorous stirring. Rapidly inject 3 mL of 1% (w/v) trisodium citrate. Continue heating and stirring until the solution turns wine-red. Cool to room temperature [37].
- PEI-capped Au NPs (PEI-Au NPs): Add 200 μL of polyethylenimine (PEI) solution to 6 mL of 1.5 mM HAuCl₄ under stirring. Bring the mixture to a boil. The solution will turn red within 15 minutes, indicating nanoparticle formation. Purify the PEI-Au NPs via dialysis [37].
- Probe Immobilization:
- Incubate 800 μL of the Cit-Au NP solution with 800 μL of 1 μM thiolated DNA capture probe and Tween 20 for 48 hours at room temperature.
- Centrifuge the mixture to pellet the probe-conjugated nanoparticles (Cit-Au NPs/probe). Carefully discard the supernatant and resuspend the red pellet in 400 μL of deionized water [37].
- Detection Assay:
- Mix a fixed volume of the Cit-Au NPs/probe solution with the sample solution (containing target miRNA-155 or a control).
- Allow hybridization to occur for a set time (e.g., 30-60 minutes).
- Add a specific volume of the positively charged PEI-Au NPs to the mixture and observe the color change.
- Positive Result (miRNA present): The solution remains red due to stable hybridization and nanoparticle dispersion.
- Negative Result (miRNA absent): The solution changes from red to blue/purple due to electrostatic aggregation of oppositely charged Au NPs [37].
- Signal Readout: Quantify the result using a UV-Vis spectrophotometer to measure the absorbance shift or a microplate reader for higher throughput. The LOD achieved with this method is approximately 8 pM [37].
Experimental Workflow and Signaling Pathways
Diagram 1: miRNA Detection Workflow
The Scientist's Toolkit: Research Reagent Solutions
Table 3: Essential Materials for Nanomaterial Biosensor Development
| Reagent/Material | Function/Description | Example Use Case |
|---|---|---|
| MXenes (e.g., Ti₃C₂Tₓ) | 2D transition metal carbides/nitrides with high conductivity and surface area; act as efficient transducers. | Electrochemical sensor electrodes for detecting biomarkers like glucose or cancer antigens [32] [33]. |
| Graphene/Graphene Oxide | A 2D carbon lattice with exceptional electrical, mechanical, and optical properties; used as a sensing layer or spacer. | Enhancing sensitivity in Surface Plasmon Resonance (SPR) biosensors for cancer detection [36]. |
| Gold Nanoparticles (Au NPs) | Spherical nanoparticles with tunable Surface Plasmon Resonance (SPR); enable colorimetric detection and signal amplification. | Acting as a colorimetric probe in miRNA detection assays; functionalized with DNA or antibodies [37]. |
| Thiolated DNA Probes | Single-stranded DNA with a terminal thiol (-SH) group; enables covalent attachment to gold surfaces. | Immobilizing capture probes onto Au NPs or gold electrode surfaces for specific target binding [37]. |
| Polyethylenimine (PEI) | A polymer with a high density of amine groups; used to cap nanoparticles, conferring a positive surface charge. | Creating positively charged Au NPs to induce electrostatic-based signal amplification in colorimetric assays [37]. |
| Molecularly Imprinted Polymer (MIP) | A synthetic polymer with cavities complementary to a target molecule; provides selective recognition. | Forming the shell of core-shell nanoparticles to create selective sensing interfaces for specific drugs or molecules [34]. |
High-Throughput Techniques and Directed Evolution for Biosensor Engineering
For researchers and scientists engineering microbial cell factories, genetically encoded biosensors are indispensable tools for high-throughput screening and dynamic pathway control. However, transitioning a successfully engineered biosensor from a laboratory proof-of-concept to a robust, mass-manufacturable product presents distinct challenges. This technical support center addresses these scale-up hurdles, providing troubleshooting guides and detailed protocols to enhance the reliability and manufacturability of your biosensor systems.
▵ Frequently Asked Questions (FAQs)
Q1: Our transcription factor (TF) biosensor shows a high false-positive rate during library screening. How can we improve its fidelity? A high false-positive rate often stems from a poor signal-to-noise ratio or constitutive activity of the biosensor. To address this:
- Tune Biosensor Expression: Use promoter and RBS engineering to optimize the expression levels of the transcription factor itself. An improper expression level can lead to leakage (background signal in the absence of the inducer) [38].
- Employ Negative Selection: Implement a dual selection system. Incorporate a negative selectable marker (e.g., codA encoding cytosine deaminase, which converts 5-fluorocytosine to a toxic compound) under the control of your biosensor. This will kill clones with constitutive activity or undesired ligand cross-reactivity, effectively enriching your library for specific, responsive variants [39].
Q2: The dynamic range of our RNA-based biosensor is insufficient for distinguishing high-producing mutants. What engineering strategies can help? A narrow dynamic range limits screening resolution. You can:
- Engineer the Expression Platform: Modify the sequence surrounding the riboswitch or toehold switch to alter the energetics of the secondary structure formation. Weakening the "off" state structure can enhance the dynamic range [3].
- Leverage Directed Evolution: Subject the biosensor itself to directed evolution. Create a mutant library of your biosensor and use fluorescence-activated cell sorting (FACS) to iteratively select for variants with the highest output signal in the presence of the target metabolite and the lowest in its absence [40] [41].
Q3: During scale-up, our biosensor's performance becomes inconsistent. How can we improve its robustness? Performance drift during scale-up is frequently caused by non-optimal dynamic performance and context effects.
- Characterize Dynamic Performance: Standard characterization often focuses on the dose-response curve. For manufacturing robustness, also quantify the response time (speed to reach maximum output) and signal noise (output variability under constant conditions). Slow response times or high noise can lead to unreliable performance in bioreactor environments [3].
- Insulate the Genetic Circuit: Ensure the biosensor is encoded on a well-characterized plasmid with a consistent copy number. Flank the circuit with transcriptional terminators to prevent interference from the genomic context or downstream genetic parts [38].
Q4: We need to screen a library of >10^8 variants. Which biosensor screening method is most suitable? For libraries of this magnitude, droplet-based microfluidics coupled with FACS is the most suitable high-throughput method. This approach can screen up to 10^9 variants by encapsulating individual cells in microdroplets along with a substrate, allowing for ultra-high-throughput analysis based on fluorescent signals generated by biosensor activity [40].
Troubleshooting Common Experimental Issues
| Problem Area | Specific Symptom | Potential Cause | Recommended Solution |
|---|---|---|---|
| Sensor Performance | Low signal-to-noise ratio | TF leakage, non-optimal TF/RR expression levels, slow response time | Fine-tune promoter/RBS controlling TF expression [38]; employ negative selection [39]; characterize response dynamics [3] |
| Sensor Performance | Narrow dynamic range | Non-optimal biosensor design, ligand-independent "on" state | Engineer riboswitch sequence [3]; use directed evolution on the biosensor [41] |
| Specificity & Cross-Talk | Off-target activation | Promiscuous ligand binding, shared regulatory elements | Use dual selection system to remove cross-reactive variants [39]; ensure circuit orthogonality |
| Library Screening | Low library coverage | Throughput limit of screening method | Choose method matching library size (e.g., FACS/droplets for >10^8) [40] |
| Manufacturing Scale-Up | Performance inconsistency | Genetic instability, context effects, variable response times | Use stable genetic backbones; insulate circuit with terminators; characterize biosensor dynamics [3] |
▵ Quantitative Comparison of Screening Modalities
Selecting the appropriate high-throughput screening method is critical for an efficient directed evolution campaign. The table below summarizes the key characteristics of common platforms.
Table 1: High-Throughput Screening Methods for Biosensor Applications
| Screening Method | Typical Throughput (Variants) | Key Advantages | Primary Limitations | Best Use Cases |
|---|---|---|---|---|
| Agar Plate Screening | 10^2 - 10^4 | Low equipment cost; simple visual selection (color/fluorescence) [40] | Low throughput; subjective analysis; difficult quantification | Initial rounds of screening; simple activity checks [40] |
| Well Plate (Microtiter) | 10^3 - 10^5 | Quantitative data; automated handling [40] | Medium throughput; high reagent consumption | Screening small libraries or secondary validation [40] |
| Fluorescence-Activated Cell Sorting (FACS) | 10^7 - 10^9 | Very high throughput; quantitative, single-cell resolution [40] [38] | Requires intracellular product or proxy; sensor dynamic range is critical [40] | Screening large libraries of intracellular biosensors [40] [42] |
| Droplet Microfluidics | >10^9 | Ultra-high throughput; low reagent volume; assays compartmentalized [40] | Specialized equipment required; complex setup | Largest libraries; assays requiring secreted factors or co-cultures [40] |
▵ Visualizing Biosensor Architecture and Engineering Workflows
Transcription Factor Biosensor Signaling Pathway
This diagram illustrates the standard mechanism of a transcription factor (TF)-based biosensor, a cornerstone of high-throughput metabolic engineering.
Directed Evolution Workflow for Biosensor Engineering
This workflow charts the iterative process of optimizing or re-engineering a biosensor using directed evolution, a powerful strategy to generate manufacturable variants.
▵ Experimental Protocol: Directed Evolution of a Transcription Factor Biosensor
This protocol details the steps to alter the ligand specificity of a transcription factor (TF) using a dual selection system, as exemplified by the engineering of PobR for HPP response [39].
Objective: Evolve a TF-based biosensor to respond to a novel ligand (X) while reducing or eliminating its response to the native ligand.
Materials:
- Strain: E. coli BW25113 ΔcodA (or other appropriate host with endogenous codA knocked out) [39].
- Plasmids:
- Expression Vector: Plasmid for TF mutant library expression (e.g., under a constitutive promoter).
- Reporter Plasmid 1 (Positive Selection): Contains a selectable marker (e.g., chloramphenicol acetyltransferase) under the control of the TF's cognate promoter.
- Reporter Plasmid 2 (Negative Selection): Contains the codA gene (from E. coli) under the control of the same TF cognate promoter [39].
- Reagents: 5-Fluorocytosine (5-FC), the native ligand (e.g., 4-Hydroxybenzoate for PobR), the novel target ligand (X), appropriate antibiotics, growth media.
Procedure:
- Library Construction: Generate a mutant library of your TF gene using error-prone PCR or other random mutagenesis methods. Clone the resulting mutant library into the expression vector.
- Dual Selection Cycle:
- a. Negative Selection: Co-transform the TF mutant library with the codA reporter plasmid into the ΔcodA host. Plate the transformed cells on solid media containing the native ligand and 5-FC. Incubate. Cells expressing TF variants that still recognize the native ligand will activate codA, convert 5-FC to toxic 5-fluorouracil, and die [39].
- b. Positive Selection: Collect the surviving colonies from the negative selection. Transform these cells with the positive selection reporter plasmid. Plate on media containing the novel target ligand (X) and the corresponding antibiotic (e.g., chloramphenicol). Only cells containing TF variants that activate the promoter in response to ligand X will survive [39].
- Characterization of Hits: Isitate the surviving clones and characterize the dose-response of their biosensors to both the novel ligand X and the native ligand. Measure the dynamic range, sensitivity, and specificity.
- Iteration: Use the best-performing variant from the first round as a template for subsequent rounds of mutagenesis and selection to further refine the desired properties.
▵ The Scientist's Toolkit: Key Reagent Solutions
Table 2: Essential Research Reagents for Biosensor Engineering & Screening
| Reagent / Material | Function in Biosensor Engineering | Example & Notes |
|---|---|---|
| Error-Prone PCR Kit | Generates genetic diversity for directed evolution libraries. | Creates random mutations in the gene of interest (e.g., a TF) to produce a vast library of variants [39]. |
| Fluorescent Reporters (GFP, etc.) | Provides a measurable output for biosensor activation. | The gene for Green Fluorescent Protein (GFP) is placed under a biosensor-controlled promoter, allowing quantification via FACS or plate readers [40] [42]. |
| Selection Markers (Antibiotic, codA) | Enables selection for/against biosensor activity. | Antibiotic resistance genes allow positive selection. The codA gene enables negative selection against unwanted biosensor activity when using 5-FC [39]. |
| Two-Component System Parts | Modules for engineering extracellular sensing. | Sensor kinase (SK) and response regulator (RR) pairs can be engineered by swapping their domains to create biosensors for new extracellular signals [38] [3]. |
| Droplet Microfluidics Chip | Platform for ultra-high-throughput screening. | Used to encapsulate single cells from a library in picoliter droplets for assay and sorting, enabling screening of >10^9 variants [40]. |
Microfluidic Integration for Automated Sample Processing
The integration of microfluidic systems for automated sample processing represents a paradigm shift in biosensor manufacturing, enabling precise fluid control, reduced reagent consumption, and high-throughput analysis [43] [44]. However, transitioning these sophisticated lab-scale systems to mass production introduces significant challenges related to material selection, fluidic interfacing, standardization, and system reliability [45] [46]. This technical support center addresses the specific implementation hurdles researchers face when developing automated microfluidic biosensors, providing practical solutions framed within mass production constraints.
Frequently Asked Questions (FAQs)
FAQ 1: What are the primary advantages of integrating microfluidics with biosensors for automated processing? Microfluidic integration transforms biosensor capabilities through miniaturization and automation. Key advantages include: dramatically reduced sample and reagent consumption (from milliliters to nanoliters), which is crucial for expensive reagents or limited clinical samples [45] [47]; significantly faster analysis times due to shortened diffusion paths and rapid mixing [45] [46]; enhanced sensitivity and signal-to-noise ratio from processing small volumes in confined spaces [48]; and potential for high-throughput parallel processing through multiplexed channel designs or droplet microfluidics [46] [47]. These characteristics make microfluidic biosensors particularly suitable for point-of-care diagnostics where speed, cost, and minimal sample volume are critical [49].
FAQ 2: Which material is best suited for mass-produced microfluidic chips? Material selection involves critical trade-offs between performance, manufacturability, and cost, especially at production scale:
- Polydimethylsiloxane (PDMS): Dominates research due to excellent biocompatibility, optical transparency, and gas permeability for cell culture [45] [48]. However, its inherent hydrophobicity, potential for small molecule absorption, and challenges in large-scale, consistent manufacturing make it less ideal for mass production [46].
- Thermoplastics (PMMA, PS, PC): Gaining prominence for mass production via injection molding or hot embossing [48]. They offer good chemical resistance, mechanical stability, and high-throughput manufacturing potential. The key challenge is ensuring surface properties are suitable for specific biological assays, often requiring surface modification [46].
- Paper: Emerging for ultra-low-cost, disposable diagnostic devices for simple assays, leveraging capillary action for fluid movement without external pumps [45] [46]. Its limitations include lower analytical performance and limited capability for complex, multi-step processes.
- Silicon and Glass: Provide excellent chemical resistance and high-resolution etching but involve higher material and processing costs, making them less common for disposable biosensor applications [46].
FAQ 3: How can I minimize air bubbles in my microfluidic system, a common issue that disrupts flow and assays? Air bubbles are a prevalent failure point in microfluidics. A multi-pronged approach is essential:
- Prevention through Degassing: Degas all buffers and samples before introduction into the system using vacuum chambers or sonication under vacuum to remove dissolved gasses [50].
- Proper Priming and Surface Treatment: Prime the entire microfluidic network (tubing and chip) with a compatible fluid (e.g., ethanol or surfactant-containing buffer) to wet the channels thoroughly. For hydrophobic materials like PDMS, a plasma treatment or a flush with 70% ethanol followed by water can make the surfaces hydrophilic and prevent bubble trapping [50].
- System Design and Operation: Incorporate bubble traps into the chip design. Avoid sudden pressure drops in pressure-driven systems, as they can cause dissolved gasses to come out of solution. Ensure all fluidic connections are leak-tight to prevent air from being drawn into the system [50].
FAQ 4: What are the key considerations for connecting external tubing to my microfluidic chip reliably? A robust fluidic interface is critical for automated operation. The choice often depends on the required operating pressure:
- Luer Connectors: User-friendly, press-fit connections suitable for low to medium pressures. They are common in commercial chips but can introduce dead volume and may pop off under high pressure [50].
- Threaded Fittings (e.g., 1/4-28 UNF, M6): Essential for high-pressure applications (e.g., hundreds of psi). They use a screw and ferrule mechanism to create a robust, leak-tight seal, typically with rigid tubing like PEEK [50].
- General Practices: To minimize dead volume (which dilutes samples and slows response times), use the shortest possible tubing lengths with the smallest practical internal diameter. Secure all connections and use strain relief to prevent tubing from stressing or moving the chip [50].
Troubleshooting Guides
Problem 1: Clogging in Microchannels
| Cause | Prevention Strategy | Corrective Action |
|---|---|---|
| Particulate matter in samples or reagents [50]. | Filter all samples and buffers before loading (e.g., using a 0.2 or 0.45 µm filter). | Reverse flow if possible. Flush the system with a strong solvent or detergent solution. |
| Protein adsorption or cell adhesion to channel walls. | Use surface coatings (e.g., Pluronic, BSA, PEG) to passivate channels and reduce non-specific binding [47]. | Flush with a passivating agent or a cleaning solution like sodium hydroxide. |
| Precipitation of reagents. | Ensure solvent compatibility. Avoid creating conditions that lead to on-chip crystallization. | Flush with a solvent that can re-dissolve the precipitate. |
Problem 2: Inconsistent Flow Rates or Droplet Generation
| Cause | Prevention Strategy | Corrective Action |
|---|---|---|
| Air bubbles obstructing flow [50]. | Implement degassing and proper priming protocols as described in the FAQs. | Identify and remove bubbles by tapping the chip, applying quick pressure pulses, or reversing flow. |
| Unstable pumping source (e.g., pulsation from peristaltic pumps) [50]. | For stable, pulseless flow, use syringe pumps or pressure-driven systems with high-quality controllers. | Check the pump for faults. For pressure systems, ensure there are no leaks in the air lines. |
| Channel or orifice degradation or blockage. | Inspect chips before use. Use materials resistant to solvents and pressures. | Inspect the chip under a microscope. If the geometry is damaged, the chip must be replaced. |
Problem 3: High Background Noise in Detection
| Cause | Prevention Strategy | Corrective Action |
|---|---|---|
| Non-specific adsorption (NSA) of reagents or analytes to the chip surface [49] [47]. | Optimize surface passivation protocols specific to your analyte and detection method. | Flush the system with a passivating agent like BSA. Re-optimize washing steps and buffer conditions. |
| Carryover contamination from previous runs. | Implement rigorous cleaning protocols between runs. Use disposable chips where possible. | Establish and validate a cleaning-in-place (CIP) procedure with appropriate solvents. |
| Optical imperfections or contaminants in the chip material. | Use high-quality, optically clear materials. Keep chips clean and dust-free. | Clean the external surfaces of the chip. Ensure the detection zone is free of scratches. |
Research Reagent Solutions & Essential Materials
Table: Key materials and their functions in microfluidic biosensor development.
| Material / Reagent | Primary Function | Key Considerations for Mass Production |
|---|---|---|
| PDMS (Polydimethylsiloxane) | Chip fabrication; favored for prototyping due to ease of molding and oxygen permeability [45] [48]. | Not ideal for high-throughput; batch-to-batch variability; absorbs small molecules. |
| PMMA (Polymethyl methacrylate) | Thermoplastic for chip fabrication; suitable for injection molding [45]. | Enables mass production; good optical clarity; surface modification may be needed for assays. |
| PEEK Tubing | High-pressure fluidic interfacing; chemically inert [50]. | Rigid and reliable for automated systems; requires threaded fittings for high-pressure seals. |
| BSA or Pluronic F-127 | Surface passivation agents to reduce non-specific binding [47]. | Critical for assay sensitivity and reliability; must be integrated into the automated fluidic protocol. |
| FITC (Fluorescein isothiocyanate) | Fluorescent dye for labeling proteins and other biomolecules for optical detection [47]. | On-chip integration of labeling steps can automate and speed up analysis compared to off-chip methods. |
| Gold (Au) Electrodes | Transduction element for electrochemical biosensors [48]. | Provides a stable surface for biomolecule immobilization (e.g., antibodies, aptamers); compatible with microfabrication. |
Experimental Protocols for Key Processes
Protocol 1: On-Chip Fluorescent Labeling and Separation
This protocol is typical for integrated systems analyzing proteins or nucleic acids [47].
- Chip Priming: Flush all channels with running buffer (e.g., borate buffer for protein separation) to remove air and prime the surface.
- On-Chip Mixing and Reaction: Introduce the sample and the fluorescent tag (e.g., FITC) into the chip through separate inlets. Use a dedicated on-chip mixing region (e.g., serpentine channel) or hydrodynamic focusing to combine them. The residence time in the reaction loop or channel is controlled by the flow rate to allow the labeling reaction to proceed to completion.
- Separation: Inject a discrete plug of the labeled mixture into the separation channel. Apply a high voltage for Capillary Electrophoresis (CE), separating analytes based on charge and size.
- Detection: Perform Laser-Induced Fluorescence (LIF) detection at the end of the separation channel. The integrated nature of the system minimizes band broadening and improves detection limits.
Protocol 2: Immobilization of Biological Recognition Elements
Stable surface functionalization is foundational to biosensor performance [44] [48].
- Surface Activation: For glass or PDMS surfaces, perform an oxygen plasma treatment to generate hydroxyl groups. For thermoplastics, chemical pre-treatment or UV/Ozone exposure might be necessary.
- Silanization: Introduce a silane reagent (e.g., (3-Aminopropyl)triethoxysilane, APTES) into the channels and incubate. This forms a self-assembled monolayer with terminal amine groups.
- Cross-Linking: Flush the channels with a cross-linker solution (e.g., glutaraldehyde). The cross-linker reacts with the amine groups on the surface.
- Probe Immobilization: Introduce the biological recognition element (antibodies, enzymes, or DNA aptamers) into the channel. The probe molecules covalently bind to the activated surface. Finally, flush the system with a passivating buffer (e.g., containing BSA) to block any remaining active sites and prevent non-specific binding.
Workflow and System Diagrams
Diagram 1: Systematic Troubleshooting for Microfluidic Flow Issues
This diagram outlines a logical sequence for diagnosing the most common causes of flow problems in microfluidic setups.
Diagram 2: Material Selection for Mass Production
This decision flowchart helps guide the selection of chip materials based on the primary goals of the biosensor application and its production scale.
Troubleshooting Guides
FAQ: How do I troubleshoot inconsistent sensor-to-sensor performance in a foundry production run?
Answer: Inconsistent performance across biosensors from the same production run often stems from variations in the fabrication process. A structured approach to diagnosis is key.
- Step 1: Verify Electrical Baseline: Before biological functionalization, test the bare sensors. Use a standardized assay buffer and measure the current (I) and transconductance (ΔI/ΔVg) for each sensor on the chip. Significant variations at this stage point to issues in the semiconductor manufacturing process, such as inconsistencies in the graphene channel or contact resistance [51].
- Step 2: Inspect Immobilization Layer: If the electrical baseline is stable, the issue may lie in the subsequent biological functionalization. Analyze the uniformity of the immobilized ion-permeable layer (e.g., proteins, PEG, surfactants). Inconsistent layer thickness or density can lead to varying Donnan potential (ΔφD), which directly affects the sensor response according to the device model [51].
- Step 3: Check Liquid Handling: For well-based formats, ensure consistent liquid dispensing across all wells. Variations in droplet volume or placement can cause differences in contact with the integrated electrodes, leading to signal drift or noise [51].
The diagnostic logic for this issue can be summarized in the following workflow:
FAQ: What causes low signal-to-noise ratio in my nanomaterial-based biosensor, and how can I improve it?
Answer: A low signal-to-noise ratio (SNR) compromises detection limits and can originate from both the sensor design and the measurement environment.
- Potential Cause 1: Inadequate Shielding. Electrical interference from other lab equipment can overwhelm weak biosignals.
- Corrective Action: Use a Faraday cage to enclose the measurement setup and ensure all connections are properly shielded [51].
- Potential Cause 2: Non-Optimal Sensor Biasing. Operating the field-effect sensor outside its linear response region increases noise.
- Corrective Action: Characterize the sensor's I-Vg curve to identify the Dirac point and select an operating gate voltage (Vg) that provides a high, stable transconductance (ΔI/ΔVg) [51].
- Potential Cause 3: Contaminated Sensor Surface. Particulates or impurities on the active sensor area create localized charge variations.
FAQ: My biosensor shows poor sensitivity to the target analyte in complex solutions like serum. What steps should I take?
Answer: Performance degradation in complex media is a common challenge due to non-specific binding and ionic screening.
- Root Cause Analysis: The primary factor is the Debye screening effect. In high-ionic-strength solutions (like serum), the electrical double layer is compressed, screening the charge of the target biomarker and reducing the sensor's ability to detect it [51].
- Solution 1: Dilution and Buffer Exchange: If the assay allows, dilute the serum sample in a low-ionic-strength buffer. Alternatively, use buffer exchange columns to transfer the analyte into a more suitable measurement buffer [51].
- Solution 2: Optimize the Bio-interface: Employ advanced surface chemistry to create a dense, anti-fouling layer (e.g., using PEG derivatives) around the capture agent. This layer minimizes non-specific adsorption and can help extend the effective sensing range beyond the Debye length by utilizing the Donnan potential effect within the immobilized layer [51].
Experimental Protocols & Methodologies
Detailed Protocol: Functionalizing a Graphene FET Biosensor for Protein Detection
This protocol details the process of modifying a foundry-fabricated graphene sensor to specifically detect a target protein, based on established methodologies [51].
Principle: The sensor is functionalized with antibodies that bind to specific proteins. When binding occurs, the associated charge changes the local potential, modulating the graphene's conductivity, which is measured as a current shift.
Workflow Overview:
Materials and Reagents:
- Foundry-Fabricated Graphene Sensor Chip: The core transducer, typically with multiple sensing channels and integrated electrodes [51].
- Crosslinker Solution: A bi-functional chemical (e.g., Pyrene-based linkers) that non-covalently anchors to the graphene surface and provides reactive groups for antibody binding [51].
- Target-Specific Antibody Solution: The capture molecule that confers specificity to the assay.
- Blocking Buffer: A solution containing bovine serum albumin (BSA) or polyethylene glycol (PEG) to passivate unused sensor surface areas and prevent non-specific binding [51].
- Assay Buffer: A low-ionic-strength buffer (e.g., 1X PBS) to maintain pH and osmolarity while minimizing Debye screening.
Step-by-Step Procedure:
- Sensor Baseline Check: Place the sensor chip in the measurement system. Apply assay buffer and record the baseline current (I) and its response to a small change in gate voltage (ΔI/ΔVg) for all channels.
- Surface Activation: Incubate the sensor surface with the crosslinker solution for a specified time (e.g., 1 hour). Rinse thoroughly with assay buffer to remove unbound linkers.
- Antibody Immobilization: Apply the solution containing the target-specific antibodies to the sensor surface and incubate (e.g., for 2 hours). The antibodies will covalently bind to the activated linker. Rinse with buffer to remove unbound antibodies.
- Passivation: Apply the blocking buffer for approximately 1 hour to cover any remaining reactive sites on the graphene. Rinse thoroughly.
- Functionalization Validation: Re-measure the sensor's electrical characteristics in the assay buffer. A stable shift in the baseline signal indicates successful functionalization. Test the sensor with a control solution and a solution containing a known concentration of the target protein to confirm a specific response.
Key Research Reagent Solutions
Table 1: Essential materials and their functions in biosensor fabrication and functionalization.
| Item | Function in Experiment | Example & Key Characteristics |
|---|---|---|
| Graphene FET Sensor Chip | Core electronic transducer that detects changes in surface charge. | Commercially produced chip with multiple graphene channels and integrated Pt electrodes [51]. |
| Chemical Crosslinkers | Anchors biological recognition elements (antibodies) to the sensor surface. | Pyrene-based linkers for non-covalent graphene functionalization [51]. |
| Antibodies | Provides specificity by binding to the target analyte (e.g., a protein). | Target-specific IgG antibodies, purified and validated for immunoassays. |
| Blocking Agents (BSA/PEG) | Reduces non-specific binding by passivating unused sensor surface area. | 1% BSA or methoxy-PEG-amine solutions in phosphate buffer [51]. |
| Nanopatterned Substrates | Provides in-vivo-like microenvironment for cell-based drug screening on biosensors. | Self-assembled monolayers (SAMs) with uniform nanogrooves in a 96-well plate format [53]. |
Table 2: Performance characteristics and manufacturing metrics of selected biosensor technologies.
| Sensor Technology / Platform | Key Performance Metric | Value | Manufacturing / Scale Metric | Value |
|---|---|---|---|---|
| Advanced Silicon Group (Si Nanowire) [54] [22] | Protein Test Time | < 15 minutes | Production Volume | ~2,000 sensors per 8-inch wafer line |
| Test Cost & Time Reduction | 15x lower vs. ELISA | |||
| Graphene FEB (Field Effect Biosensing) [51] | Sensitivity (Infectious Disease Biomarker) | 18 ng/mL (in buffer) | Manufacturing Context | Commercial foundry, industrial QC |
| 500 ng/mL (in serum) | ||||
| Nanogroove-Enhanced Impedance Platform [53] | Format | Real-time, label-free | Throughput | 96-well plate standard |
| Application | High-throughput drug screening |
Optimizing for Scale: Strategies for Yield, Cost, and Workflow Efficiency
Tuning Dynamic and Operational Range via Promoter and RBS Engineering
Frequently Asked Questions (FAQs)
Q1: What is the difference between the dynamic range and the operational range of a biosensor? The dynamic range refers to the fold-change between the biosensor's maximum output signal and its minimum, uninduced (leaky) output level. A larger dynamic range provides a clearer signal for distinguishing between different metabolite concentrations [55]. The operational range (or detection range) defines the specific concentrations of the target metabolite over which the biosensor responds, bounded by lower and upper detection limits. Tuning both is essential for applications like high-throughput screening, where the sensor must operate within the expected metabolite concentrations produced by mutant libraries [55].
Q2: Why does my biosensor perform differently when moved from a lab shake flask to a bioreactor? Biosensor performance is highly dependent on the cellular and environmental context. Factors such as the host strain's genetic background, growth medium, carbon source (e.g., glucose vs. glycerol), and cultivation parameters can significantly alter the biosensor's dynamic response. Variations in these conditions affect the cellular resources available, such as RNA polymerases and ribosomes, ultimately changing the effective strength of your biosensor's promoters and RBSs [56]. Implementing a Design-Build-Test-Learn (DBTL) cycle that characterizes the biosensor under conditions mimicking the production environment is crucial for predicting and mitigating these issues [56].
Q3: I've chosen a strong promoter and RBS for my transcription factor, but my biosensor's dynamic range is poor. What could be wrong? Expressing the transcription factor (TF) at very high levels can be detrimental. For an activator-based biosensor, excessive TF can lead to constitutive reporter expression, eliminating the metabolite-dependent response. Conversely, for a repressor-based biosensor, overly high TF levels can permanently silence the reporter. The optimal TF expression level is a delicate balance; it must be high enough to regulate the promoter effectively but low enough to remain sensitive to changes in metabolite concentration. Fine-tuning the TF's expression using medium-strength or weak promoters and RBSs is often necessary to maximize the dynamic range [55] [57].
Troubleshooting Guides
Problem: Low Dynamic Range (Poor Signal-to-Noise Ratio)
| Potential Cause | Recommended Solution | Case Study Example |
|---|---|---|
| Suboptimal Transcription Factor (TF) Expression Level | Fine-tune TF expression by constructing a library of promoters and RBSs with varying strengths. | In a caprolactam biosensor (CL-GESS), combining the weaker J23114 promoter with the weaker B0034 RBS to control NitR expression resulted in the highest fold-change in fluorescence, significantly improving the dynamic range [57]. |
| Inefficient Reporter Protein Production | Optimize the RBS and coding sequence of the reporter gene (e.g., GFP). Switch to a brighter reporter variant. | Replacing enhanced GFP (eGFP) with superfolder GFP (sfGFP) in the CL-GESS biosensor led to higher fluorescence output across all tested inducer concentrations [57]. |
| Non-optimal TF-DNA Binding Affinity | Engineer the operator sequence in the promoter. Use directed evolution or site-directed mutagenesis on the TF's DNA-binding domain. | In an L-carnitine biosensor, directed evolution of the CaiF protein generated a mutant (CaiFY47W/R89A) with a 1000-fold wider operational range and a 3.3-fold higher output signal [58]. |
Problem: Limited Operational Range
| Potential Cause | Recommended Solution | Case Study Example |
|---|---|---|
| Intrinsic TF Ligand Affinity | Engineer the ligand-binding domain (LBD) of the TF through site-saturation mutagenesis or computational design to alter its affinity for the target metabolite. | A primary L-threonine biosensor was improved by creating a mutant TF (CysBT102A) through directed evolution, which resulted in a 5.6-fold increase in fluorescence responsiveness over a 0–4 g/L concentration range [59]. |
| Promoter Saturation at Low Metabolite Concentrations | Weaken the TF operator sites within the promoter or reduce the number of operator sites to increase the metabolite concentration required for activation/repression. | Computational simulation of TF binding and promoter activity can predict how changes to operator number, location, and sequence strength affect the response curve and shift the operational range [60]. |
Experimental Protocols for Key Tuning Strategies
Protocol 1: Fine-tuning Transcription Factor Expression
Objective: To identify the optimal promoter-RBS combination for TF expression to maximize biosensor dynamic range.
Materials:
- A library of constitutive promoters of varying strengths (e.g., the Anderson series: J23100, J23106, J23114).
- A library of RBSs of varying strengths (e.g., B0030, B0034).
- Seamless assembly kit.
- Reporter plasmid containing the TF-dependent promoter driving an easily quantifiable reporter (e.g., sfGFP).
Method:
- Assembly: Assemble the TF coding sequence with different promoter-RBS combinations into your expression vector or a dedicated module.
- Transformation: Co-transform each TF expression construct with the reporter plasmid into your host production strain.
- Cultivation and Induction: Grow cultures in a defined medium and induce with a range of known metabolite concentrations. Include a negative control (no metabolite).
- Measurement and Analysis: After a defined period, measure the output signal (e.g., fluorescence) and cell density (OD600) for all cultures.
- Calculation: For each construct, calculate the dynamic range (Fluorescenceinduced / Fluorescenceuninduced) at each metabolite concentration. The construct that delivers the highest dynamic range across your desired operational range is the optimal choice [57].
Protocol 2: Directed Evolution of a Transcription Factor
Objective: To generate a TF variant with an altered operational range (e.g., higher sensitivity or a shifted detection window).
Materials:
- Plasmid containing the wild-type TF gene.
- Mutagenesis kit (e.g., error-prone PCR kit).
- High-throughput screening system (e.g., FACS).
- Selection media with varying concentrations of the target metabolite.
Method:
- Diversification: Create a library of TF mutants via error-prone PCR or site-saturation mutagenesis of targeted residues in the ligand-binding domain.
- Screening: Clone the mutant library into a biosensor circuit and express it in cells. Use FACS to screen for cells exhibiting the desired fluorescence profile when grown in the presence of a pre-selected metabolite concentration. For example, to select for higher sensitivity, screen for bright fluorescence at a low metabolite concentration [58].
- Isolation and Validation: Isolate the sorted cells, recover the plasmids, and sequence the TF gene. Re-transform the variant and characterize its full dose-response curve to quantify improvements in operational and dynamic range [59] [58].
- Iteration: Use the best-performing variant from one round as the template for subsequent rounds of evolution to accumulate beneficial mutations.
Quantitative Data on Engineered Biosensors
Table 1: Performance Enhancement of Biosensors through Promoter, RBS, and TF Engineering.
| Biosensor Target | Engineering Strategy | Performance Improvement | Reference |
|---|---|---|---|
| L-Threonine | Directed evolution of CysB TF (T102A mutant). | 5.6-fold increase in fluorescence responsiveness over 0-4 g/L. | [59] |
| L-Carnitine | Directed evolution of CaiF TF (Y47W/R89A mutant). | 1000-fold wider operational range (10-4 mM–10 mM); 3.3-fold higher signal output. | [58] |
| ε-Caprolactam | Optimized NitR TF expression with weak promoter (J23114) and weak RBS (B0034). | Highest fold-change in fluorescence response. | [57] |
| Naringenin | DBTL pipeline with combinatorial library of 4 promoters and 5 RBSs for FdeR TF expression. | Enabled prediction of optimal genetic context for desired biosensor specifications under different conditions. | [56] |
Research Reagent Solutions
Table 2: Essential Genetic Components for Biosensor Tuning and Their Functions.
| Reagent / Component | Function in Biosensor Engineering | Example Parts |
|---|---|---|
| Constitutive Promoter Library | Controls the transcriptional level of the Transcription Factor (TF). Varying strength is key for balancing TF expression. | Anderson series (J23100, J23106, J23114). |
| RBS Library | Controls the translational efficiency of the TF or reporter protein. Fine-tunes protein production rates independently of transcription. | B0030, B0034, T7 RBS. |
| Reporter Genes | Generates the measurable output (e.g., fluorescence). The choice affects signal intensity and sensitivity. | sfGFP, eGFP, YFP, RFP. |
| Operator Sequence Variants | The DNA binding site for the TF. Mutations here can alter the TF's binding affinity and the promoter's leakiness. | Wild-type and mutated operator sequences. |
Signaling Pathway and Workflow Diagrams
Biosensor Tuning Engineering Workflow
Core Biosensor Genetic Circuit
Addressing Sensor Calibration Inconsistencies and Inter-batch Variation
Core Concepts: Calibration and Variation
Sensor Calibration is the process of fine-tuning a biosensor to ensure its readings are accurate and consistent against known standards. This is especially critical at ultralow detection levels (parts-per-billion/trillion), where signals can be faint and environmental interference is significant [61].
Inter-batch Variation refers to the performance differences between biosensors produced in different manufacturing lots. This is a major challenge in mass production, as inconsistencies in electrode areas, reagent deposition, or cutting and assembly processes can lead to fluctuating electrical signals and deviating test results [62].
Troubleshooting Guide & FAQs
Frequently Asked Questions
Q1: Our biosensor arrays show high device-to-device signal variation. How can we make the data more reliable for quantitative analysis?
A: A calibration method that correlates the absolute sensor response with the device's gate dependence can suppress this variation. For field-effect transistor (FET) based biosensors, you can calculate a calibrated response by dividing the absolute signal change (ΔI) by the device's transconductance (dI~ds~/dV~g~). This approach has been shown to reduce the coefficient of variance (CV) from 59% (using absolute response) to 25% [63].
Q2: What are the primary challenges when calibrating sensors for trace-level detection, and how can we solve them?
A: Calibration at ultralow concentrations faces several key challenges. The table below summarizes these issues and their solutions [61].
Table: Challenges and Solutions in Ultralow-Level Calibration
| Challenge | Description | Recommended Solutions |
|---|---|---|
| Low Signal-to-Noise Ratio (SNR) | The analyte signal is barely higher than the system's electronic noise [61]. | Use low-noise amplifiers; apply digital signal processing (filtering, averaging); employ redundant sensing [61]. |
| Cross-Interference & Selectivity | Sensors respond to non-target molecules, causing false positives [61]. | Use selective chemical coatings/membranes; optimize sensor parameters; validate with independent lab techniques (e.g., chromatography) [61]. |
| Contamination | Minute contaminants can overwhelm the target analyte [61]. | Use inert materials (e.g., stainless steel, PTFE) in calibration systems; work in cleanrooms; use ultra-high-purity gases and automated sampling [61]. |
| Reference Standard Accuracy | Maintaining purity and stability of trace-level standards is difficult [61]. | Use NIST-traceable standards; employ dynamic dilution systems; perform periodic verification of standards [61]. |
Q3: In a production setting, how can we quickly identify biosensors with deviated electrode areas caused by assembly errors?
A: Integrate an engraved line for identifying cutting deviation into the conductive layer design at the sample contacting end. After cutting, if this engraved line is clearly visible or remains complete on the individual sensor, it indicates a correct cut and a qualified product. If the line is damaged or missing, the electrode area has likely been altered and the sensor should be rejected [62].
Q4: What general steps should I follow to calibrate a biosensor in the lab?
A: A standard calibration procedure involves four key steps [64]:
- Choose a Method: Select external calibration, standard addition, or internal calibration based on your sensor and application.
- Prepare Solutions: Create high-purity calibration standards in a relevant buffer, covering a wide concentration range.
- Perform Calibration: Measure the biosensor's response to the blank and each standard solution. Plot the signal versus concentration to create a calibration curve.
- Validate: Check the calibration quality (e.g., correlation coefficient), test with a known standard, and compare results with another validated method.
Detailed Experimental Protocols
Protocol 1: Calibrating Nanowire Biosensor Response to Suppress Device-to-Device Variation
This protocol is adapted from a study using In~2~O~3~ nanowire biosensors for streptavidin detection [63].
1. Objective: To establish a correlation between the absolute biosensor response (ΔI) and its gate dependence (dI~ds~/dV~g~) for calibrating out device-to-device variations in an array.
2. Key Materials: Table: Research Reagent Solutions for Nanowire Biosensor Calibration
| Item | Function/Description |
|---|---|
| In~2~O~3~ Nanowire FET Biosensors | The core sensing element. Fabricated with interdigitated electrodes to contact multiple nanowires [63]. |
| Biotin Receptors | Biological recognition element immobilized on the nanowire surface to specifically bind the target analyte, streptavidin [63]. |
| Phosphate Buffered Saline (PBS) | A low ionic strength buffer (e.g., 0.01x PBS) used as the measurement solution to enhance sensitivity to surface charge changes [63]. |
| Streptavidin (S-Av) Analyte | The target protein model. Binding introduces a charge change near the nanowire surface [63]. |
| Ag/AgCl Reference Electrode | Serves as the stable liquid gate electrode in the electrochemical measurement setup [63]. |
3. Methodology:
- Setup: Use a liquid gate configuration with an Ag/AgCl reference electrode immersed in a buffer solution (e.g., 0.01x PBS). The biosensor chip is fitted with a Teflon cell [63].
- Measurement:
- Gate Dependence: For each device, obtain the I~ds~-V~g~ characteristic curve by sweeping the liquid gate voltage (V~g~) and measuring the drain-source current (I~ds~). Calculate the transconductance, dI~ds~/dV~g~, from the slope of this curve in its linear region [63].
- Sensor Response: With the gate voltage held constant, introduce the streptavidin analyte (e.g., 100 nM in 0.01x PBS) and monitor I~ds~ over time. Record the absolute change in current (ΔI) upon analyte binding [63].
- Data Analysis:
- Plot the absolute response (ΔI) against the gate dependence (dI~ds~/dV~g~) for multiple devices. A strong linear correlation is expected if electrostatic gating is the dominant sensing mechanism [63].
- For each device, calculate the calibrated response as: ΔI / (dI~ds~/dV~g~). This calibrated value should show significantly reduced variation across different devices in the array [63].
Biosensor Calibration Workflow
Protocol 2: Ensuring Manufacturing Quality with Engraved Identification Lines
This protocol is based on a patent for a biosensor manufacturing method designed to minimize inter-batch variation caused by cutting assembly errors [62].
1. Objective: To implement a quality control check that identifies and screens out individual biosensors with deviated electrode areas due to imprecise cutting during mass production.
2. Key Materials:
- Insulating Substrate: The base material (e.g., plastic).
- Uniform Conductive Layer: A thin, uniform film (e.g., gold, palladium, carbon) deposited on the substrate.
- Laser Ablation System: For precise etching of electrode patterns and engraved lines.
3. Methodology:
- Laser Etching Patterning:
- Design the electrode pattern on a large layout ("semi-finished large card") that contains multiple sensor units.
- Using laser ablation, etch the patterns that divide the conductive layer into individual electrodes (e.g., working, counter, reference).
- Crucial Step: Etch an "engraved line for identifying cutting deviation" at the sample contacting end of each sensor unit. This line should be located between the final edge of the conductive layer and the closest electrode. It can be a straight line parallel to the edge or a more easily identifiable irregular curve [62].
- Assembly: Proceed with standard manufacturing steps: adding reagent, affixing the interlayer and cover to form the sample channel [62].
- Cutting and Quality Control:
- Cut the large card along the preset cutting lines to separate individual biosensors.
- Inspection: Visually inspect the cut edge of each sensor. If the engraved line for identifying cutting deviation is clearly visible and intact, the sensor is qualified. If the line is damaged or missing, the cut has deviated and altered the electrode area, so the sensor must be rejected [62].
Manufacturing Quality Control Check
Integrating AI and Data-Driven Approaches for Process Control
Technical Support Center: Troubleshooting AI-Enhanced Biosensor Manufacturing
This technical support center provides troubleshooting guides and FAQs for researchers integrating AI and data-driven process control into biosensor manufacturing. This content supports thesis research addressing mass production challenges, including scalability, performance reproducibility, and production yield.
Troubleshooting Guides
Issue 1: Poor Model Performance and Inaccurate Predictions in Biosensor Optimization
| Observation | Potential Root Cause | Diagnostic Steps | Corrective Action |
|---|---|---|---|
| High prediction error on new data [65] | Non-representative or low-quality training dataset [65] | 1. Perform statistical analysis (e.g., PCA) to compare training vs. validation set distributions.2. Audit data sources for missing values and sensor drift [66]. | Curate a larger, high-quality dataset that encompasses all expected process variations. Implement automated data validation scripts [65]. |
| Model performance degrades over time (model drift) [66] | Underlying process dynamics have changed, making historical data less relevant [66]. | Monitor model-health dashboards for KPI deviations. Compare live process data against the model's original training window [66]. | Schedule quarterly model-retraining cycles using recent production data to maintain accuracy [66]. |
| Low interpretability of model decisions ("black box" issue) [65] | Use of complex deep learning models without explainability features [65]. | Surface explainability dashboards to review the decision logic with the operations team [66]. | Integrate Interpretable AI (XAI) techniques to make model decisions transparent and build operator trust [65]. |
Issue 2: Data Quality and Integration Constraints in Scale-Up
| Observation | Potential Root Cause | Diagnostic Steps | Corrective Action |
|---|---|---|---|
| Intermittent data tags or missing historian records [66] | Aging instrumentation, unreliable transmitters, or sampling gaps [66]. | Conduct a thorough data audit. Map critical process variables and check historian fidelity [66]. | Add sensor-health monitoring, automate data validation, and schedule rapid repair for faulty instruments [66]. |
| Control actions are inconsistent or lagged [66] | Communication drops between the AI layer and the Distributed Control System (DCS) [66]. | Verify communication protocols and harden the OT/IT network bridge [66]. | Deploy middleware that can buffer and reconcile data to maintain seamless connectivity [66]. |
| High signal-to-noise ratio in biosensor readouts [3] | Biological noise or suboptimal biosensor design affecting signal clarity [3]. | Characterize the biosensor's dose-response curve and signal noise under constant conditions [3]. | Use high-throughput techniques like cell sorting with directed evolution to engineer biosensors for improved specificity [3]. |
Issue 3: System Scalability and Hardware-Software Co-Design
| Observation | Potential Root Cause | Diagnostic Steps | Corrective Action |
|---|---|---|---|
| Successful pilot fails during full-scale production [65] | Challenges in mass production, hardware-software integration, and large-scale data analysis [65]. | Evaluate the unit operation's specific constraints and check hardware compatibility at a larger scale. | Adopt a modular, cloud-connected architecture. Use automated model generation to clone and retrain successful pilot models for new units [66] [65]. |
| Biosensor performance is unstable across large fermentation batches [3] | Static control assumptions unable to handle dynamic bioprocess conditions (e.g., nutrient fluctuations) [3]. | Analyze environmental data (pH, O₂) for correlations with performance drops. | Integrate dynamic regulation circuits (e.g., riboswitches, TFs) that allow the cell to self-regulate in response to changes [3]. |
Frequently Asked Questions (FAQs)
Q1: What are the key performance metrics for biosensors used in AI-driven control loops? Critical metrics include the dynamic range (span between min/max detectable signals), operating range (optimal concentration window), response time (reaction speed), and signal-to-noise ratio (output reliability) [3]. For dynamic control, response speed and signal clarity are paramount to prevent delays and ensure precise regulation [3].
Q2: How can I quantify the economic return (ROI) of implementing Closed-Loop AI Optimization? Start with four baseline KPIs: energy per unit of production, margin per unit, quality giveaway, and sustained production rate [66]. Conservative estimates indicate advanced controls can unlock 2-5% EBITDA improvement [66]. Annualize this value against implementation costs, which typically scale as a fraction of the captured gains, resulting in a payback period of months [66].
Q3: Our operators frequently override AI recommendations. How can we build trust in the system? This indicates a trust deficit or suspected model drift [66]. To restore confidence:
- Engage operators early: Run workshops to walk through the AI's decision logic and co-create KPI challenges [66].
- Use advisory mode first: Deploy the system to recommend adjustments while operators retain manual authority, proving value before closing the loop [66].
- Ensure transparency: Use explainability dashboards that break down the rationale behind each recommended setpoint [66].
Q4: Which machine learning algorithm is best for biosensor-based process control? The optimal choice depends on the application and data type [65]. The table below summarizes common uses:
| Algorithm Category | Typical Use Case in Biosensing | Key Considerations |
|---|---|---|
| Deep Neural Networks (DNNs) [65] | Processing complex data (e.g., microscopic images, spectral data) for high-accuracy classification. | Requires large volumes of training data and significant computational power [65]. |
| Random Forests [65] | Analyzing complex, high-dimensional data from multiple sensor sources for robust predictions. | Provides good performance with smaller datasets and offers higher interpretability [65]. |
| Reinforcement Learning [66] | Real-time optimization of multi-variable processes (e.g., adjusting reactor severity, feed ratios). | Learns optimal policies through interaction with the process environment; used in closed-loop control [66]. |
Q5: What is a practical first step for piloting this technology? Propose a high-impact, low-complexity pilot to generate quick wins. A single-unit control loop, such as optimizing furnace O₂ or a key bioreactor parameter, works well. It delivers measurable results in energy savings or yield and builds momentum for a wider rollout [66].
Experimental Protocol: Developing a Dynamically Regulated Microbial Strain
This methodology details the creation of a microbial cell factory with a biosensor-mediated dynamic control circuit for robust production [3].
1. Objective To engineer a microbial chassis that dynamically regulates a synthetic metabolic pathway in response to a key intermediate metabolite, preventing metabolic burden and improving production titers during scale-up.
2. Materials and Reagents Key research reagent solutions and their functions:
| Reagent / Solution | Function in the Experiment |
|---|---|
| Transcription Factor (TF) [3] | Senses a specific intracellular metabolite and activates/represses the transcription of a downstream genetic actuator. |
| Riboswitch (RNA-based) [3] | Provides rapid, reversible regulation of translation upon ligand binding, ideal for fine-tuning metabolic fluxes. |
| Plasmid Vector System | Carries the genetic circuit (sensor + actuator modules) for expression in the microbial chassis. |
| High-Throughput FACS | Enables screening of large mutant libraries based on biosensor-output fluorescence to identify high-performing variants [3]. |
| Directed Evolution Tools | Used for engineering biosensors with enhanced sensitivity or altered specificity via iterative rounds of mutation and selection [3]. |
3. Procedure
- Step 1: Circuit Design and Assembly. Design a genetic circuit where a promoter, responsive to a chosen TF, drives the expression of a fluorescent reporter (for screening) and a key pathway enzyme (for control). Alternatively, integrate a riboswitch into the 5' UTR of the target gene [3].
- Step 2: Characterization. Transform the circuit into the host chassis. Characterize the biosensor's dose-response in a bench-scale bioreactor to define its dynamic range, sensitivity, and response time [3].
- Step 3: High-Throughput Screening. Use FACS to screen a library of strain variants based on the biosensor's fluorescence signal, isolating top performers for validation [3].
- Step 4: Performance Validation. Ferment the selected strains at a larger scale (e.g., 5L bioreactor). Monitor metabolite levels, biomass, and product titer over time, comparing against a control strain without dynamic regulation [3].
- Step 5: Data Collection for AI Modeling. Collect high-fidelity time-series data on all critical process variables (e.g., pH, O₂, nutrient levels, product titer). This dataset will be used to train AI models for process optimization [66].
Workflow and System Diagrams
Experimental Workflow for AI-Driven Biosensor Manufacturing
Closed-Loop AI Process Control System
Strategies for Reducing False Positives in High-Throughput Screening
Troubleshooting Guides
False positives in High-Throughput Screening (HTS) can arise from various non-biological sources that interfere with assay readouts. Key sources include:
- Inorganic Impurities: Metal ions, such as zinc, are a significant source of interference. These impurities can originate from synthesis steps involving metal catalysts or reagents [67]. For example, zinc contamination has been shown to inhibit targets like Pad4 and Jak3, producing false-positive signals with potencies in the low micromolar range, which are relevant for hit selection [67].
- Organic Impurities: These are known to cause false-positive signals, though they do not account for all such results [67].
- Compound Aggregation: Molecules can form aggregates that non-specifically inhibit enzymes or interfere with the assay system [67].
- Assay Interference: This includes nonspecific binding, interference with the detection method, and redox reactions [67].
FAQ 2: How can I confirm if metal contamination is causing false positives in my screen?
A straightforward method to test for zinc-mediated false positives is to use the chelator TPEN (N,N,N′,N′,-tetrakis(2-pyridylmethyl)ethylenediamine) [67].
Experimental Protocol: TPEN Counter-Screen
- Principle: TPEN is a cell-permeable heavy metal chelator with high selectivity for zinc over calcium and magnesium. A potency shift in the presence of TPEN indicates that the observed activity is likely due to zinc contamination [67].
- Procedure:
- Re-test your HTS hits in your standard assay protocol.
- Run the same assay in parallel, adding a low-micromolar concentration of TPEN (e.g., 10-50 µM) to the reaction mixture.
- Compare the dose-response curves (IC₅₀ values) or single-point activity readings between the two conditions.
- Interpretation: Compounds whose potency is significantly reduced (e.g., a >7-fold shift in IC₅₀) in the presence of TPEN are considered likely to be contaminated with zinc ions [67].
- Notes: Always validate that TPEN itself does not interfere with your assay's readout or target activity at the concentration used.
FAQ 3: What biosensor performance issues can lead to false positives during strain screening?
When using biosensors for high-throughput screening of microbial libraries, several performance parameters can lead to false positives or mask true positives.
Table 1: Biosensor Performance Issues Leading to False Positives
| Performance Issue | Impact on Screening | Potential Consequence |
|---|---|---|
| Non-ideal Dose-Response | Limited sensitivity or dynamic range | Inability to distinguish high-producing strains from medium or low producers [3]. |
| Sluggish Response Dynamics | Slow response time to metabolite changes | False readings if measurements are taken before the signal stabilizes [3]. |
| High Signal Noise | High variability under constant conditions | Obscures subtle differences in metabolite concentration, increasing false positive rates [3]. |
| Limited Orthogonality | Cross-reactivity with non-target compounds | Biosensor activates in response to analytes other than the target, generating false positives [3]. |
FAQ 4: How can biosensor engineering minimize false positives in biomanufacturing QC?
Engineering biosensors for improved performance is critical for reliable screening during the mass production of cell factories. Key strategies include:
- Tuning Dynamic and Operational Range: This can be achieved by exchanging promoters and ribosome binding sites (RBS), or modifying the number and position of operator regions [3].
- Engineering Specificity: Chimeric fusion of DNA and ligand-binding domains can help re-engineer biosensor specificity to reduce off-target activation [3].
- Directed Evolution: Employing high-throughput techniques like cell sorting coupled with directed evolution can selectively improve biosensor sensitivity and specificity, thereby reducing false positives [3].
- Framework Optimization: Using established fluorescent protein frameworks can simplify the development of reliable biosensors. For instance, inserting sensing domains into the mTurquoise2 (mTQ2) fluorescent protein at a specific location (between Tyr-145 and Phe-146) has successfully generated biosensors for ATP, cAMP, citrate, and glucose with good dynamic ranges [68].
Experimental Protocols
Protocol 1: Identifying Metal-Sensitive Assays
Objective: To determine if your HTS assay is susceptible to inhibition by common metal impurities.
Materials:
- Stock solutions of metal chlorides (e.g., ZnCl₂, FeCl₃, CuCl₂, NiCl₂, PdCl₂).
- Assay buffer and components.
- TPEN stock solution.
Method:
- Prepare a dilution series for each metal salt (e.g., from 1 µM to 1 mM).
- Run your standard assay protocol, replacing the test compound with the metal salt solutions.
- Generate dose-response curves and calculate IC₅₀ values for each metal.
- Optional: Confirm the role of a specific metal by repeating the assay in the presence of its chelator (e.g., TPEN for zinc).
Expected Outcome: Assays with IC₅₀ values for zinc in the low micromolar range (e.g., 1-50 µM) are considered highly susceptible to false positives from zinc contamination [67].
Table 2: Example IC₅₀ Values of Metals Against a Target (Pad4) [67]
| Metal | IC₅₀ (µM) |
|---|---|
| Zinc (Zn²⁺) | 1 |
| Iron (Fe³⁺) | 192 |
| Palladium (Pd²⁺) | 231 |
| Nickel (Ni²⁺) | 242 |
| Copper (Cu²⁺) | 279 |
| Magnesium (Mg²⁺) | >1000 |
Protocol 2: Workflow for HTS Hit Triage and Validation
This workflow diagram outlines a logical process to identify and eliminate common false positives.
Protocol 3: Engineering a High-Dynamic-Range FRET Biosensor
Objective: To create a biosensor with a large dynamic range for more reliable high-contrast readouts, reducing classification errors during screening.
Background: Traditional FRET biosensors based on CFP-YFP pairs often suffer from low dynamic ranges and spectral cross-talk. A "chemogenetic" approach using a fluorescent protein (FP) and a fluorescently labeled HaloTag (HT7) can achieve near-quantitative FRET efficiency [69].
Materials:
- Plasmids: ChemoG5 scaffold (eGFP with A206K/T225R mutations fused to HT7 with E143R/E147R/L271E mutations) [69].
- Fluorophores: Silicon Rhodamine (SiR) or other rhodamine-based HaloTag ligands [69].
- Standard molecular biology reagents.
Method:
- Construct Assembly: Clone your sensing domain (e.g., for calcium, ATP, NAD+) into the ChemoG5 scaffold. The domain can be inserted between the FP and HT7 or replace existing domains in validated designs.
- Expression and Labeling: Express the biosensor construct in your host system (e.g., E. coli or mammalian cells). Incubate with the cell-permeable synthetic fluorophore (e.g., SiR) to label the HaloTag.
- Spectral Characterization: Measure the fluorescence emission spectrum of the biosensor in the presence of saturating and zero concentrations of the analyte.
- Calculate Dynamic Range: The dynamic range can be defined as the ratio of the FRET/FP emission ratios (R) at saturating and zero analyte: Rmax / Rmin [69].
Expected Outcome: This method has yielded biosensors for calcium, ATP, and NAD+ with unprecedented dynamic ranges, allowing for clearer distinction between positive and negative signals [69].
The Scientist's Toolkit: Research Reagent Solutions
Table 3: Essential Reagents for Mitigating HTS False Positives
| Reagent / Material | Function / Application | Key Consideration |
|---|---|---|
| TPEN | Selective chelator for counter-screening zinc-mediated false positives [67]. | Confirm it does not interfere with your specific assay system. |
| mTurquoise2 (mTQ2) Scaffold | A versatile fluorescent protein platform for developing single-FP FLIM or intensity-based biosensors [68]. | Enables dual-functionality (lifetime and intensity) for quantitative imaging. |
| ChemoG5 FRET Pair | An engineered scaffold (eGFP-HaloTag) for creating biosensors with near-quantitative FRET efficiency and large dynamic range [69]. | The HaloTag can be labeled with various rhodamine fluorophores for spectral tuning. |
| HaloTag Ligands (e.g., SiR, JF dyes) | Synthetic fluorophores used to label the HaloTag in chemogenetic FRET pairs, allowing spectral tuning [69]. | Choose fluorophores with optimal spectral overlap with your chosen FP donor. |
| Polymer Substrates (e.g., PDMS, PET) | Flexible materials for constructing portable biosensors for point-of-care testing (POCT) [70]. | Properties like flexibility and insulative nature are beneficial for wearable sensors. |
Overcoming Microfluidic Integration and Sample Handling Errors
This technical support center provides targeted troubleshooting guides and FAQs to help researchers address common challenges in biosensor manufacturing. The content is framed within the broader context of scaling these technologies for mass production, where precision and reproducibility are paramount.
Troubleshooting Guides
Guide 1: Addressing Pre-Analytical Sample Handling Errors
Pre-analytical errors are a major source of variability, particularly in high-throughput settings. The table below summarizes common mistakes and their solutions.
Table 1: Common Sample Handling Errors and Corrective Actions
| Error Category | Specific Issue | Impact on Results | Recommended Solution |
|---|---|---|---|
| Sample Labeling | Hand-written labels; delayed labeling [71] [72] | Sample misidentification; incorrect patient data [72] | Use machine-printed barcode/QR code systems; affix labels immediately upon collection [72] |
| Sample Storage | Incorrect temperature; disorganized storage [72] | Sample degradation; compromised integrity [72] | Implement monitored, temperature-controlled storage; clearly label shelves and bins [72] |
| Sample Processing | Unjustified delays; processing STAT samples as routine [71] | Degradation over time; delayed diagnostics [71] [72] | Create standardized processing timelines; use digital queue systems to flag aging samples [72] |
| Cross-Contamination | Equipment reuse without sterilization; improper cleaning [72] | False positives/negatives; compromised test batches [72] | Use sterile equipment; change gloves frequently; clean work surfaces between tasks [72] |
| Data & Documentation | Manual entry errors; missing chain of custody [72] | Loss of traceability; regulatory risks; erroneous data [72] | Implement digital tracking and data capture tools with field validation [72] |
Experimental Protocol for Process Improvement: A quality improvement project at the Riyadh Regional Laboratory successfully reduced pre-analytical errors by 25%. The methodology used is an excellent model for systematic problem-solving [71].
- Plan: Conduct a root cause analysis using a fish-bone (Ishikawa) diagram to identify sources of error related to people, methods, and processes [71].
- Do: Test interventions, such as providing staff with a complete list of tests and codes and assigning a second staff member for quality control checks before sample dispatch [71].
- Study: Analyze results. If errors persist (e.g., due to lack of staff compliance), conclude that training alone is insufficient [71].
- Act: Adapt and roll out successful interventions, such as implementing a system for sharing error types and frequencies with staff to foster accountability and learning [71].
Guide 2: Troubleshooting Microfluidic Biosensor Integration
Integrating biosensors into microfluidic devices presents distinct challenges that can affect sensor performance and yield.
Table 2: Common Microfluidic Integration Challenges and Solutions
| Integration Challenge | Impact on Biosensor Performance | Corrective Action |
|---|---|---|
| Signal Interference | Reduced accuracy and reliability from non-target molecules in complex matrices (e.g., blood) [28] | Optimize sample preparation; use orthogonal detection methods to confirm results; engineer biosensors for higher specificity [3] [28] |
| Material Incompatibility | Non-specific adsorption of proteins (e.g., on PDMS); poor optical properties [73] | Select chip materials (e.g., glass, specific polymers) based on application; use surface coatings to minimize non-specific binding [73] |
| Slow Sensor Response Time | Delays in detection hinder real-time monitoring and controllability [3] | Incorporate faster-acting components like riboswitches; use hybrid system designs that combine stable and rapid elements [3] |
| Non-Reproducible Fabrication | Device-to-device variability, hindering mass production [43] [73] | Standardize fabrication protocols (e.g., soft lithography for PDMS, embossing for paper-based devices); implement rigorous quality control [73] |
| Suboptimal Biosensor Performance | Low signal-to-noise ratio; inadequate dynamic or operational range [3] | Tune biosensor parameters by engineering promoters and ribosome binding sites; use high-throughput screening and directed evolution [3] |
Experimental Protocol for Biosensor Performance Characterization: Before integrating a biosensor into a microfluidic device, its key performance metrics must be quantified [3].
- Dose-Response Curve: Expose the biosensor to a range of known analyte concentrations. Plot the output signal (e.g., fluorescence, current) against the concentration to determine its sensitivity, dynamic range (span between minimal and maximal detectable signals), and operating range (concentration window for optimal performance) [3].
- Response Time Measurement: Rapidly introduce the target analyte and record the time it takes for the output signal to reach a defined percentage (e.g., 90%) of its maximum value. This is critical for applications requiring real-time feedback [3].
- Signal-to-Noise Ratio (SNR) Assessment: Under constant input conditions (including zero analyte), measure the mean output signal and the standard deviation of the signal fluctuations. The SNR is the ratio of the mean signal to the standard deviation. A high SNR is essential for detecting subtle changes [3].
The following workflow diagram outlines a systematic approach for investigating and resolving these integration issues:
Frequently Asked Questions (FAQs)
Q1: What are the most critical factors for ensuring sample integrity in a high-volume lab setting? The most critical factors are robust labeling, storage, and traceability. Implement an automated barcode system for labeling, monitored and access-controlled storage environments, and a digital Laboratory Information Management System (LIMS) to maintain a clear chain of custody [72].
Q2: Our biosensor performance degrades when integrated into a microfluidic device. What should we check first? First, characterize the biosensor's dose-response curve, response time, and signal-to-noise ratio inside the device [3]. Then, verify material compatibility—check for non-specific adsorption on chip walls [73] and ensure the microfluidic environment (e.g., pH, flow rate) does not destabilize the biological recognition element.
Q3: How can we reduce human error in sample processing? While training is necessary, it is not sufficient [71]. Reduce errors by:
- Standardizing workflows with clear, accessible SOPs [72].
- Implementing digital checks and approvals at each process step.
- Establishing a culture of accountability by sharing error data with staff and involving them in developing solutions, as demonstrated successfully with PDSA cycles [71].
Q4: We observe high variability between production batches of our microfluidic biosensors. How can we improve consistency? This is a core mass production challenge. Improve consistency by:
- Standardizing raw materials and fabrication protocols (e.g., precise control over curing times, temperatures) [73].
- Implementing inline quality control to monitor critical parameters during manufacturing.
- Utilizing high-throughput biosensor characterization methods to screen and select only sensors with performance within a tight specification window before integration [3].
Q5: What is the "Table 2 Fallacy" and how can we avoid it in our research? The "Table 2 Fallacy" is the error of interpreting the regression coefficients of confounding variables in a multivariable analysis as having a causal meaning after adjusting for confounding [74]. To avoid it, remember that the primary goal of adjusting for confounders is to obtain an unbiased estimate of the effect of your main variable of interest. The coefficients for the confounders themselves should not be used to make substantive claims about their relationship with the outcome [74].
The Scientist's Toolkit: Key Research Reagent Solutions
The following table details essential materials and their functions in developing and fabricating microfluidic biosensors.
Table 3: Essential Materials for Microfluidic Biosensor Development
| Material / Reagent | Primary Function | Key Considerations for Mass Production |
|---|---|---|
| Polydimethylsiloxane (PDMS) | A common polymer for fabricating microfluidic chips via soft lithography; valued for optical transparency and biocompatibility [73]. | Prone to non-specific protein adsorption; can be costly and complex to scale. Batch-to-batch variation of raw material must be controlled [73]. |
| Polymethylmethacrylate (PMMA) | A thermoplastic polymer for microfluidic chips; offers good optical properties and is suitable for thermoforming [73]. | Manufacturing can be time-consuming and require high temperatures. Cost and production speed are key scalability factors [73]. |
| Paper Substrate (for μPADs) | Serves as a low-cost, porous matrix for paper-based microfluidic devices (μPADs); enables fluid transport via capillary action without external pumps [73]. | High plasticity and simple manufacturing (e.g., embossing, printing). Excellent for disposable, single-use diagnostic sensors. Consistency of paper porosity is critical [73]. |
| Aptamers | Single-stranded DNA or RNA molecules that act as synthetic recognition elements; bind to specific targets (e.g., mycotoxins, proteins) [73]. | Offer high stability and can be produced synthetically, which is advantageous for standardization and scaling compared to antibodies [73]. |
| Antibodies | Natural biological recognition elements that provide high specificity and affinity for targets like biomarkers [73]. | Subject to batch-to-batch variability; production in animals can be challenging to scale and standardize cost-effectively [73]. |
| Molecularly Imprinted Polymers (MIPs) | Synthetic polymers with custom-made cavities that mimic natural recognition sites; serve as stable, abiotic recognition elements [73]. | Offer high physical and chemical stability, making them suitable for harsh conditions and potentially lower-cost production [73]. |
Proving Performance: Validation, Regulatory, and Competitive Analysis
Navigating Stringent Regulatory Approval Processes (FDA, MDR)
For researchers and scientists scaling biosensor manufacturing, navigating the regulatory landscape is a critical production challenge. Regulatory approval is not merely a final hurdle but a strategic consideration that must be integrated from the earliest stages of research and development. Biosensors, particularly those classified as medical devices, must comply with region-specific regulations, primarily the U.S. Food and Drug Administration (FDA) and the European Union's Medical Device Regulation (MDR). The choice of pathway profoundly influences development timelines, clinical evidence requirements, and the overall cost of bringing a product to market. This guide provides a structured overview of these processes, with an emphasis on troubleshooting common issues encountered during the preparation of a regulatory submission, all within the context of overcoming mass production obstacles.
Key Regulatory Frameworks: FDA and MDR at a Glance
The FDA and EU MDR represent two of the most influential regulatory systems globally. While both are risk-based, their structures and emphases differ significantly, as summarized in the table below.
Table 1: Comparison of FDA and EU MDR Key Characteristics
| Feature | U.S. FDA | EU MDR |
|---|---|---|
| Governing Law | U.S. Federal Law [75] | European Legislation [75] |
| Risk Classification | Class I (low), II (moderate), III (high) [75] | Class I (low), IIa, IIb, III (high) [75] |
| Review Body | FDA directly reviews and approves devices [75] | Notified Bodies (independent organizations) conduct conformity assessments [75] |
| Primary Focus | Premarket approval processes and clinical performance [75] | Documentation and post-market surveillance [75] |
| Quality System | QSR (21 CFR Part 820) | ISO 13485 (harmonized) [75] |
| Clinical Evidence | Emphasis on pre-market clinical trials, especially for high-risk devices [75] | Ongoing clinical evaluation throughout the device lifecycle, with focus on post-market clinical follow-up (PMCF) [75] |
Troubleshooting Common Regulatory Submission Issues
FAQ 1: Our 510(k) submission was found "not substantially equivalent." What are the most common reasons for this, and how can we avoid them?
A "not substantially equivalent" (NSE) determination often stems from an inadequate predicate strategy or insufficient performance data.
- Root Cause: An inappropriate or poorly justified predicate device is the most common reason for failure. The predicate must share the same technological characteristics and intended use, or differences must be supported by valid scientific evidence [76].
- Troubleshooting Guide:
- Action 1: Re-evaluate Predicate Selection. Meticulously compare your device's intended use, technological features, and fundamental scientific principles to the proposed predicate. Do not rely on a predicate that is obsolete or has a different intended use.
- Action 2: Strengthen Performance Data. Ensure your bench performance, analytical, and, if applicable, clinical data robustly demonstrate that your device is as safe and effective as the predicate. Any claims of superiority in one area (e.g., speed) cannot come at the cost of equivalence in safety and effectiveness [76].
- Action 3: Leverage the Q-Sub Process. Before re-submission, consider using the FDA's Pre-Submission (Q-Sub) process to get targeted feedback on your new predicate strategy and data package [76].
FAQ 2: We are developing an AI-powered biosensor. What additional documentation and validation are required?
AI/ML-enabled devices, classified as Software as a Medical Device (SaMD), face heightened scrutiny regarding data quality, algorithmic bias, and performance stability.
- Root Cause: Regulators are concerned about the "black box" nature of some algorithms, potential dataset bias leading to performance disparities across patient demographics, and the risk of model "drift" after deployment [77].
- Troubleshooting Guide:
- Action 1: Implement a Rigorous Software Development Lifecycle. Adhere to the IEC 62304 standard for medical device software, which requires thorough documentation, risk management, and verification activities throughout development [78] [79]. Your Software Development Life Cycle (SDLC) documentation will be a key part of the submission.
- Action 2: Conduct Extensive Multi-Site Validation. Validate your algorithm's performance using diverse, independent datasets that represent the target population. Actively test for bias across different ethnicities, genders, and ages. Document the dataset characteristics, including demographics, exhaustively [77].
- Action 3: Develop a Pre-Specified Change Control Plan. The FDA's 2024 guidance encourages a "Predetermined Change Control Plan" for AI/ML devices. This plan should outline how you will manage, validate, and deploy future software modifications while maintaining safety [77].
FAQ 3: How do we correctly classify our software under IEC 62304, and what happens if we get it wrong?
IEC 62304 classifies software based on the potential for harm to a patient or user, which directly dictates the rigor of the development process required.
- Root Cause: Misclassification often occurs from underestimating how a software failure could indirectly lead to patient harm, even if the software does not directly administer therapy [78].
- Troubleshooting Guide:
- Action 1: Perform a Risk-Based Analysis. Systematically identify all hazardous situations. Ask, "If this software function failed, what is the worst-case impact on patient health?" Use a risk management standard like ISO 14971 to guide this analysis [78].
- Action 2: Justify the Classification. Document the rationale for your chosen class (A, B, or C) in a classification report. If justifying a lower class, provide evidence of robust risk control measures [78].
- Action 3: Understand the Impact of Misclassification. Under-classifying (e.g., claiming Class A for a Class C system) can lead to audit failures, regulatory submission rejections, and, most seriously, patient safety incidents if inadequately verified software is released [78].
FAQ 4: We are facing significant delays in FDA review. Is this due to current FDA staffing challenges, and what can we do?
While the FDA's Center for Devices and Radiological Health (CDRH) has maintained review timelines, broader agency instability can cause delays in pre-submission feedback and mid-review communications [76].
- Root Cause: Internal resource constraints and leadership gaps at the FDA can slow down the review ecosystem, making interactions less predictable [76].
- Troubleshooting Guide:
- Action 1: Submit a Flawless Application. The highest-impact action you can take is to submit a complete, high-quality, and exceptionally well-prepared submission. Poorly prepared files are more vulnerable to significant delays as they require more reviewer cycles and follow-up [76].
- Action 2: Build Realistic Timelines. Factor potential regulatory delays into your product launch and business plans. A proactive buffer is more prudent than an optimistic timeline that risks a last-minute slip [76].
- Action 3: Act Decisively, Do Not Wait. Delaying submission in hopes of a "more stable" FDA environment can backfire. A backlog of delayed submissions may form, leading to even longer queues later. Securing a review slot early is advantageous [76].
Decision Framework for Regulatory Strategy Selection
The following workflow diagrams a logical decision process for selecting and preparing a regulatory pathway, incorporating key troubleshooting considerations.
Essential Research Reagent Solutions for Regulatory Compliance
Generating the validation data required for regulatory submissions demands specific, well-characterized materials. The following table details key reagents and their functions in the context of building a regulatory dossier.
Table 2: Key Research Reagents for Biosensor Validation and Regulatory Testing
| Reagent / Material | Function in Development & Validation | Regulatory Consideration |
|---|---|---|
| Clinical Isolates / Biobanked Samples | Used for analytical and clinical validation studies to demonstrate detection of real-world pathogen strains [80]. | Critical for proving claims of inclusivity. Documentation of source, provenance, and ethical procurement is essential. |
| Reference Standards (WHO/NIBSC) | Provide a gold-standard comparator for quantifying analyte concentration and establishing assay accuracy [80]. | Use of internationally recognized standards strengthens the validity of performance data for global submissions. |
| Characterized Panel for Cross-Reactivity | A panel of related and unrelated organisms/analytes to test and prove assay specificity [80]. | Evidence from this testing is a mandatory part of the submission to rule out false positives. |
| Stability Reference Materials | Used in accelerated and real-time stability studies to establish product shelf-life and recommended storage conditions. | Data is required for both pre-market approval and post-market labeling. |
| Functionalized Nanomaterials | Engineered particles (e.g., Au-Ag nanostars, Pt nanoparticles) that enhance signal sensitivity in biosensing platforms [81] [82]. | Manufacturing process and quality control (QC) for consistency (e.g., size, shape, surface chemistry) must be documented to ensure lot-to-lot performance. |
For researchers and scientists working on the industrial-scale production of biosensors, standardizing performance evaluation is a critical step toward ensuring device reliability and reproducibility. Three core metrics—dose-response, response time, and signal-to-noise ratio (SNR)—are universally critical for assessing biosensor performance in both research and development and quality control during manufacturing. Consistent characterization of these parameters allows for direct comparison between different biosensor designs, helps identify manufacturing inconsistencies, and builds confidence in the data biosensors produce for critical applications in drug development and clinical diagnostics [3] [83].
The following table summarizes these key metrics and their significance in a manufacturing context:
| Metric | Definition | Significance in Manufacturing & Research |
|---|---|---|
| Dose-Response | The relationship between analyte concentration and the output signal, characterized by a dose-response curve [3]. | Defines the usable detection window (sensitivity, dynamic range). Inconsistent curves between batches indicate poor manufacturing reproducibility [3] [83]. |
| Response Time | The speed at which a biosensor reacts to a change in analyte concentration and reaches its maximum output signal [3]. | Critical for processes requiring real-time monitoring (e.g., bioreactor control). Slow or variable times can cause delays and control failures in automated production lines [3]. |
| Signal-to-Noise Ratio (SNR) | The ratio of the power of the meaningful output signal (signal amplitude) to the power of the background noise (noise amplitude) [84]. | A high SNR ensures accuracy and reduces false positives/negatives. Low SNR can mask true signals, leading to inaccurate readings during quality control or patient stratification [3] [84]. |
Experimental Protocols for Standardized Evaluation
Protocol 1: Characterizing the Dose-Response Curve
This protocol outlines the steps to generate a dose-response curve, which is fundamental for determining a biosensor's sensitivity and operational range.
Methodology:
- Sample Preparation: Prepare a series of standard solutions with known analyte concentrations that span the expected detection range, from below the anticipated detection limit to above the saturation point.
- Signal Measurement: For each concentration, apply the sample to the biosensor and record the steady-state output signal (e.g., fluorescence intensity, electrical current, voltage change). Ensure consistent sample volume and environmental conditions (temperature, pH) across all measurements.
- Data Analysis: Plot the measured output signal (or normalized response) against the logarithm of the analyte concentration. Fit the data to a sigmoidal curve (e.g., four-parameter logistic equation) to determine key parameters [3]:
- Dynamic Range: The span between the minimal and maximal detectable signals.
- Operating Range: The concentration window where the biosensor performs optimally, often defined as the linear portion of the curve.
- EC50/IC50: The concentration that produces a half-maximal response, indicating sensitivity.
Protocol 2: Measuring Response Time Dynamics
This protocol describes how to quantify how quickly a biosensor responds to a stimulus, which is vital for dynamic process monitoring.
Methodology:
- Experimental Setup: Place the biosensor in a stable baseline condition with no analyte present. Use a system that allows for rapid introduction of a solution containing a saturating concentration of the analyte.
- Rapid Introduction & Continuous Monitoring: Quickly introduce the analyte solution while simultaneously initiating continuous, high-frequency recording of the biosensor's output signal.
- Data Analysis: Analyze the resulting kinetic trace. The response time is typically measured as the time taken for the signal to rise from 10% to 90% of its maximum steady-state value after analyte introduction [3].
Protocol 3: Quantifying Signal-to-Noise Ratio (SNR)
This protocol provides a method for calculating the SNR, a key indicator of signal clarity and detection reliability.
Methodology:
- Signal Acquisition: Under constant conditions (e.g., a fixed analyte concentration or a blank solution), record the biosensor's output signal over a sufficiently long period to capture its inherent noise.
- Calculation of Signal and Noise Amplitudes:
- For a DC signal (e.g., a stable voltage or current reading), the Signal Amplitude is the average of the recorded signal. The Noise Amplitude is the standard deviation of the recorded signal [84].
- For an AC+DC signal (e.g., a pulsatile PPG signal), use frequency-domain filtering to separate the low-frequency signal components from the high-frequency noise [84].
- SNR Calculation: Calculate the SNR using the formula:
- Linear Scale: SNR = (Signal Amplitude) / (Noise Amplitude)
- Decibel (dB) Scale: SNR (dB) = 20 × log₁₀( Signal Amplitude / Noise Amplitude ) [84]
Troubleshooting Guides and FAQs
Frequently Asked Questions
Q1: Our biosensors show a good dynamic range in the lab, but performance drops during pilot-scale production. What could be the cause? A: This is a classic scale-up challenge. Fluctuations in the bioreactor environment (nutrient levels, pH, dissolved oxygen) can affect the stability of your biosensor's biological components (e.g., transcription factors, enzymes) [3]. Implement stricter process control and consider engineering biosensors for greater robustness to environmental variability.
Q2: Why is the response time of our protein-based biosensors too slow for real-time process control? A: Slow response times are often inherent to certain biosensor types that rely on multi-step processes like transcription and translation [3]. To improve controllability, investigate hybrid approaches that combine your stable protein-based system with faster-acting components, such as riboswitches or toehold switches [3].
Q3: We observe a high signal-to-noise ratio in our optical biosensor during testing, but it fails to detect low analyte levels in complex biological samples. Why? A: A high SNR in a clean buffer does not guarantee performance in complex matrices like blood or fermentation broth. Signal interference from non-target molecules (e.g., proteins, lipids) can increase noise and reduce effective sensitivity [83] [28]. Re-evaluate the specificity of your biorecognition element and consider incorporating additional sample purification or separation steps.
Q4: How can we ensure consistent dose-response characteristics across different manufacturing batches? A: Inconsistent dose-response curves often point to batch-to-batch variations in the immobilization of the biological element or the sensor surface fabrication [83]. Statistical frameworks like Design of Experiments (DoE) can be used to efficiently identify and control the critical manufacturing parameters (e.g., reagent concentrations, incubation times) that most significantly impact biosensor performance [85].
Troubleshooting Common Problems
| Problem | Potential Causes | Solutions |
|---|---|---|
| High Background Noise | Non-specific binding, unstable power supply, environmental interference (e.g., ambient light for optical sensors) [84] [83]. | Improve blocking protocols during fabrication; use regulated power sources; shield the sensor from environmental interference [84]. |
| Poor Reproducibility Between Units | Inconsistent surface chemistry, variations in biorecognition element activity, or poor quality control during mass production [83] [28]. | Standardize and rigorously control immobilization protocols; implement more stringent quality control checks on raw materials and final products [85]. |
| Drifting Baseline Signal | Instability of the biological component (denaturation), leaching of the recognition element, or sensor material degradation [86] [28]. | Enhance the stability of biological elements via protein engineering or immobilization techniques; test and select more durable sensor materials. |
| Insufficient Dynamic Range | Suboptimal pairing of biorecognition and transduction elements; poor signal amplification [3] [85]. | Use engineering approaches (e.g., promoter engineering, RBS tuning) or directed evolution to tune the biosensor's genetic circuit or sensing interface [3]. |
The Scientist's Toolkit: Key Research Reagent Solutions
The following table details essential materials and reagents used in the development and evaluation of biosensors.
| Reagent/Material | Function in Biosensor Development & Evaluation |
|---|---|
| Allosteric Transcription Factors (TFs) | The core biological recognition element in many genetically encoded biosensors; it undergoes a conformational change upon binding a target analyte (ligand), which then regulates gene expression [3]. |
| Silicon Nanowires | A nanomaterial used as a highly sensitive transducer in electronic biosensors. Binding of a charged target molecule (e.g., a protein) to its surface changes its electrical conductivity [22]. |
| Genetically-Encoded Fluorescent Biosensors | A single protein that combines a sensing domain with a fluorescent reporter (e.g., GFP). Used for real-time, non-invasive measurement of signaling molecules (e.g., cAMP, Ca²⁺) in live cells [87]. |
| Antibodies | High-specificity biorecognition elements used in immunosensors (e.g., ELISA replacements). They are immobilized on the sensor surface to capture specific target proteins [22] [83]. |
| Gold Nanoparticles (AuNPs) | Nanomaterials used for signal amplification in electrochemical and optical biosensors. They provide a high surface area and can enhance electron transfer or optical properties [88]. |
| Design of Experiments (DoE) | A statistical framework, not a reagent, but a critical "tool" for efficiently exploring complex design spaces (e.g., promoter/operator combinations) to rationally engineer biosensors with tailored performance [85]. |
Biosensor Performance Workflow and Signaling Pathways
The following diagram illustrates the core workflow for evaluating the key performance metrics of a biosensor, from stimulus to signal analysis.
This diagram illustrates the logical relationships in a generalized transcriptional biosensor circuit, such as one based on an Allosteric Transcription Factor (TF).
Biosensors are analytical devices that combine a biological recognition element with a transducer to detect specific substances, playing a critical role in healthcare diagnostics, environmental monitoring, and food safety [28]. The global biosensors market is experiencing significant growth, driven particularly by advancements in healthcare technology and the rising demand for point-of-care testing [89]. However, the transition from laboratory prototypes to mass-produced commercial devices presents substantial challenges, including issues with sensor stability, signal interference, and scalable manufacturing [28]. This technical support guide focuses on the two most prevalent biosensor types—electrochemical and optical—providing a comparative analysis of their characteristics, troubleshooting guidance, and experimental protocols tailored for research and development professionals working to overcome mass production barriers.
Technical Deep Dive: Core Biosensor Modalities
Electrochemical Biosensors
Working Principle: Electrochemical biosensors function by measuring electrical changes—current, potential, or impedance—resulting from the specific interaction between a biological recognition element (enzyme, antibody, aptamer) and the target analyte [90] [28]. This interaction typically generates or consumes electroactive species, producing a measurable electrical signal proportional to the analyte concentration [90].
Key Transduction Methods:
- Amperometric: Measures current generated by redox reactions at a constant working electrode potential [91] [90].
- Potentiometric: Detects changes in potential (voltage) at an electrode surface between working and reference electrodes [90].
- Impedimetric: Monitors changes in the impedance (resistance and capacitance) of the electrode interface, often used for label-free detection of binding events [90].
Optical Biosensors
Working Principle: Optical biosensors detect changes in the properties of light—such as absorbance, fluorescence, chemiluminescence, or refractive index—that occur when the target analyte binds to the biorecognition element immobilized on a transducer surface [91] [92] [28].
Key Transduction Methods:
- Colorimetric/Lateral Flow Immunoassays (LFIAs): Visual color change, often using gold nanoparticles, detected by the naked eye or a reader [91].
- Fluorescence: Measures light emission from a fluorophore label after excitation by a specific wavelength of light [91] [93].
- Surface Plasmon Resonance (SPR): Detects changes in the refractive index near a metal surface, allowing real-time, label-free monitoring of biomolecular interactions [91] [92].
- Surface-Enhanced Raman Spectroscopy (SERS): Uses nanostructured metal surfaces to significantly enhance Raman scattering signals, enabling highly sensitive detection [91] [81].
The diagram below illustrates the core decision-making workflow for selecting a biosensor modality based on application needs.
Comparative Performance & Manufacturing Analysis
The table below summarizes the key characteristics of electrochemical and optical biosensors, with a specific focus on attributes critical for mass production.
Table 1: Quantitative Comparison of Electrochemical and Optical Biosensors for Manufacturing
| Parameter | Electrochemical Biosensors | Optical Biosensors |
|---|---|---|
| Typical Detection Limit | Very High (e.g., ppb, ppt for immunosensors) [90] | Very High (e.g., femtomolar for nanomechanical) [92] |
| Response Time | Rapid (Seconds to minutes) [22] | Variable (Rapid in LFIA to minutes for SPR) [91] |
| Multi-analyte Detection | Challenging, but possible with array designs | Excellent, facilitated by multiple optical channels/imaging [91] |
| Portability & Size | Excellent (Easy miniaturization, handheld systems) [22] [91] | Variable (Smartphone-based systems are portable; SPR benchtop) [91] |
| Robustness to Sample Matrix | Moderate (Can suffer from biofouling & interference) [28] | Lower (Can be affected by sample autofluorescence & turbidity) [91] |
| Ease of Mass Production | High (Leverages established electronics manufacturing; disposable electrodes) [28] | Moderate to Low (Complex optical alignment; nano-patterning can be costly) [92] [28] |
| Scalability | High (Screen-printing allows high-volume, low-cost production) [28] | Moderate (Nano-fabrication of waveguides/plasmic structures can be a bottleneck) [92] |
| Inherent Cost per Unit | Low [91] [28] | High (due to expensive components like lasers, detectors) [28] |
The Scientist's Toolkit: Essential Research Reagents & Materials
Selecting and sourcing the right materials is fundamental to biosensor development. The following table details key reagents and their functions in device fabrication.
Table 2: Key Research Reagent Solutions for Biosensor Development
| Reagent/Material | Function in Biosensor Development | Example Applications |
|---|---|---|
| Silicon Nanowires | Transducer element; changes electrical conductivity upon biomolecule binding [22]. | Highly sensitive detection of proteins (e.g., host cell proteins in bioprocessing) [22]. |
| Gold & Silver Nanostars | Plasmonic substrate for signal enhancement [81]. | SERS-based immunoassays for cancer biomarkers (e.g., α-fetoprotein) [81]. |
| Metal Nanoclusters (Au, Ag, Cu) | Fluorescent probes or catalytic labels; offer high photostability and tunable properties [93]. | Fluorescent and colorimetric detection of pathogenic bacteria and viruses [93]. |
| Polydopamine/Melanin-like Films | Versatile, biocompatible coating for surface functionalization and immobilization of bioreceptors [81]. | Adhesive layer in electrochemical sensors for environmental pollutants [81]. |
| Aptamers | Synthetic single-stranded DNA/RNA recognition elements; high stability and selectivity [90] [93]. | Aptasensors for detecting toxins, pathogens, and small molecules in food and clinical samples [81] [93]. |
Troubleshooting Guides & FAQs
Frequently Asked Questions (FAQs)
Q1: We are developing a low-cost, disposable biosensor for point-of-care cardiac marker testing. Which modality is more suitable, and what are the key manufacturing considerations? A1: Electrochemical biosensors are generally more suitable. Their simplicity, low cost, and easy miniaturization align perfectly with POC requirements [91] [28]. For mass production, prioritize screen-printed electrode (SPE) technology. Key considerations include: ensuring lot-to-lot reproducibility of SPEs, developing stable enzyme/antibody immobilization protocols that survive storage, and integrating a simple, low-power electronic reader [28].
Q2: Our optical biosensor prototype shows excellent sensitivity in buffer but high background noise and signal interference in complex biological samples like blood. What are the primary causes and solutions? A2: This is a common hurdle. The primary causes are:
- Autofluorescence: Native molecules in serum or blood fluoresce under excitation.
- Scattering/ Turbidity: Particles and cells in the sample scatter light, increasing background noise [91].
- Non-specific Binding (NSB): Proteins and other biomolecules adsorb non-specifically to the sensor surface.
Solutions:
- Sample Pre-treatment: Introduce simple filtration or dilution steps to remove particulates and interfering substances.
- Surface Blocking: Optimize your surface chemistry protocol using effective blocking agents (e.g., BSA, casein, commercial blocking buffers) to minimize NSB.
- Wavelength Shift: Utilize near-infrared (NIR) fluorophores, as biological samples have lower autofluorescence in the NIR region [91].
Q3: A major challenge in scaling up our electrochemical aptasensor is the inconsistent stability and shelf-life of the biorecognition layer. How can we improve this? A3: Stability of the biological element is a critical mass production challenge [92] [28].
- Bioreceptor Engineering: Explore the use of aptamers over antibodies, as they are generally more stable and can be chemically synthesized with high batch-to-batch consistency [90] [93].
- Immobilization Chemistry: Move beyond simple physical adsorption to robust covalent immobilization strategies (e.g., using EDC/NHS chemistry on a self-assembled monolayer) to ensure the bioreceptor remains anchored during storage and use [81].
- Lyophilization: Develop a lyophilization (freeze-drying) protocol for the biosensor strip to stabilize the biorecognition element in a dry state, significantly extending shelf-life.
Troubleshooting Flowcharts
The following chart guides the systematic diagnosis and resolution of low signal output in electrochemical biosensors, a common issue in development and manufacturing.
Detailed Experimental Protocols
Protocol: Fabrication of a Silicon Nanowire-based Electrochemical Biosensor
This protocol is adapted from the technology developed by Advanced Silicon Group, which functionalizes silicon nanowires with antibodies for highly sensitive protein detection [22].
1. Objective: To fabricate a functional electrochemical biosensor on a silicon chip for the detection of a specific protein (e.g., a host cell protein contaminant).
2. Materials:
- Silicon wafer with pre-fabricated nanowire field-effect transistor (FET) structures.
- (3-Aminopropyl)triethoxysilane (APTES).
- Glutaraldehyde solution.
- Phosphate Buffered Saline (PBS), pH 7.4.
- Monoclonal antibody specific to the target protein.
- Bovine Serum Albumin (BSA).
- Ethanolamine-HCl.
- Handheld potentiostat reader system.
3. Step-by-Step Methodology: 1. Wafer Cleaning & Activation: Clean the silicon nanowire chip with oxygen plasma to remove organic contaminants and activate the silicon oxide surface with hydroxyl groups. 2. Silane Functionalization: Vapor-deposit or incubate the chip in a solution of APTES in anhydrous toluene. This forms an amine-terminated self-assembled monolayer on the nanowire surface. Rinse thoroughly with toluene and ethanol to remove unbound silane. 3. Cross-linker Attachment: Immerse the chip in a 2.5% glutaraldehyde solution in PBS for 1 hour. Aldehyde groups from glutaraldehyde react with the surface amines. Rinse with PBS to remove excess cross-linker. 4. Antibody Immobilization: Spot or incubate the chip with a solution of the monoclonal antibody (e.g., 50-100 µg/mL in PBS) for 2 hours at room temperature. The antibody's amine groups covalently bind to the free aldehyde groups on the surface. 5. Surface Quenching & Blocking: First, quench unreacted aldehyde groups by incubating with 1M ethanolamine-HCl (pH 8.5) for 30 minutes. Then, block non-specific sites by incubating with 1-3% BSA in PBS for at least 1 hour. 6. Storage: Rinse the functionalized sensor with PBS and store at 4°C in a desiccated environment until use.
4. Measurement:
- Place a small volume (e.g., 10-50 µL) of the sample solution onto the sensor.
- Rinse the sensor gently with buffer to remove unbound molecules.
- Insert the sensor into the handheld reader, which applies a potential and measures the photocurrent change in the silicon nanowires. The binding of the target protein alters the carrier recombination in the silicon, resulting in a measurable change in photocurrent that is proportional to the protein concentration [22].
Protocol: Development of a SERS-based Immunoassay for Biomarker Detection
This protocol outlines the creation of a liquid-phase SERS platform using Au-Ag nanostars, as reported for the detection of α-fetoprotein [81].
1. Objective: To develop a highly sensitive SERS-based optical biosensor for the quantitative detection of a cancer biomarker.
2. Materials:
- Gold-Silver (Au-Ag) core-shell nanostars.
- Raman reporter molecule (e.g., Methylene Blue or Mercaptopropionic Acid).
- Monoclonal anti-target antibody (e.g., anti-AFP).
- EDC and NHS.
- Centrifuge and microcentrifuge tubes.
- Portable or benchtop Raman spectrometer.
3. Step-by-Step Methodology: 1. Nanostar Concentration & Washing: Concentrate the as-synthesized Au-Ag nanostar solution by centrifugation at different durations (e.g., 10, 30, 60 mins) to optimize the particle density for maximum SERS enhancement. Re-suspend in deionized water. 2. Raman Reporter Adsorption: Incubate the concentrated nanostars with the Raman reporter molecule (e.g., 1 mM Methylene Blue) for several hours. The reporter molecules adsorb onto the nanostar surface, particularly at the sharp tips. 3. Antibody Conjugation: * For covalent conjugation, first functionalize the reporter-coated nanostars with a bifunctional linker like mercaptopropionic acid (MPA). * Activate the carboxylic acid groups of MPA with a fresh mixture of EDC and NHS for 15-20 minutes. * Add the monoclonal antibody to the activated nanostars and incubate for 2 hours. The antibody covalently attaches via its primary amines. 4. Purification & Blocking: Centrifuge the antibody-conjugated nanostars to remove excess, unbound antibody. Re-suspend in a suitable buffer (e.g., PBS with BSA) to block any remaining active sites and stabilize the conjugate. 5. Assay Procedure: Incubate the functionalized SERS nanotags with the sample containing the target antigen for a set time (e.g., 30-60 minutes). The immunocomplex formation leads to aggregation or a localized change in the dielectric environment, altering the SERS intensity.
4. Measurement:
- Load the assay mixture into a capillary tube or onto a well-plate.
- Place the sample in the Raman spectrometer.
- Illuminate with a laser at the excitation wavelength and collect the Raman spectrum.
- Quantify the target analyte by measuring the intensity of the characteristic peak of the Raman reporter. The intensity is inversely or directly proportional to the analyte concentration, depending on the assay design (e.g., competitive or sandwich) [81].
Benchmarking Against Incumbent Technologies (e.g., ELISA Tests)
Performance Benchmarking: Biosensors vs. ELISA
The following table summarizes key quantitative performance metrics for emerging biosensor technologies compared to the traditional ELISA method.
| Performance Characteristic | Traditional ELISA | Field-Effect Transistor (FET) Biosensors | Graphene-based Electrochemical Biosensors | Array SPRi Biosensors |
|---|---|---|---|---|
| Typical Limit of Detection (LoD) for Proteins | ~0.1 fM (in buffer and serum) [94] | ~20 zM (in buffer); 250 zM (in serum) [94] | 0.1 ng/mL (for specific biomarkers) [95] | Comparable to ELISA; validated for clinical serum samples [96] |
| Detection Time | Several hours, including incubation steps [97] [95] | Minutes to hours; potential for real-time, continuous monitoring [94] | Minutes [95] | Faster than fluidic SPR; results in minutes after sample preparation [96] |
| Multiplexing Capability | Low (typically single-analyte per well) | High (over 1 million bioFETs demonstrated on a single chip) [94] | Moderate (potential for multi-analyte chips) [95] | High (typically ~100 measuring points per chip) [96] |
| Assay Complexity | Multi-step, requiring washing, incubation, and enzymatic reaction [98] | Label-free, amplification-free detection [94] | Label-free detection [95] | Label-free; biosensor formed ex situ prior to measurement [96] |
Troubleshooting Guide: Common Biosensor Challenges in R&D
This section addresses specific issues researchers might encounter during the development and validation of novel biosensing platforms.
FAQ: What are the primary advantages of biosensors over established techniques like ELISA?
Biosensors offer several key advantages, including significantly higher sensitivity, as FET biosensors can detect proteins at zeptomolar (zM) concentrations, surpassing ELISA's femtomolar (fM) range [94]. They also provide faster analysis times, often delivering results in minutes rather than hours, and enable real-time, continuous monitoring of analytes. Furthermore, their capacity for massive parallelization allows for the detection of numerous biomarkers simultaneously on a single, miniaturized chip [94] [99].
- Insufficient Washing: Unbound reagents or non-specifically bound molecules can remain on the sensor surface. Solution: Increase the number and/or duration of washes; ensure complete drainage of wells or channels between steps [98] [100] [101].
- Non-Specific Binding: Proteins or other molecules may adhere to non-functionalized areas of the sensor. Solution: Optimize the blocking step by increasing the concentration of the blocker (e.g., BSA, Casein) or the blocking time [100].
- Contamination: Trace amounts of detection enzymes (e.g., HRP) in buffers, reagents, or re-used plastics can cause background. Solution: Prepare fresh buffers and use fresh, disposable plastics for each assay step [100] [101].
FAQ: How can I address inconsistent results between sensor production batches?
- Surface Functionalization: Inconsistent immobilization of biorecognition elements (antibodies, aptamers) is a common culprit. Solution: Standardize the coating protocol (concentration, buffer, incubation time and temperature) and use validated, high-purity reagents [96] [101].
- Material Variation: Nanomaterial-based sensors (e.g., graphene, nanowires) can suffer from batch-to-batch variations in channel material properties. Solution: Implement rigorous quality control (QC) checks on raw materials and establish electrical/optical baseline performance metrics for each new batch [94] [95].
- Signal Drift: Environmental fluctuations during incubation or reading can cause drift. Solution: Conduct assays in a temperature-controlled environment and ensure all reagents are at room temperature before use unless otherwise specified [100] [101].
Featured Experimental Protocol: A Diagnostic Biosensor Method (DBM) Using Magnetic Beads
This protocol exemplifies a biosensor method designed for point-of-care (PoC) compatibility, highlighting steps critical for manufacturability [97].
Objective
To detect the presence of specific human IgG antibodies (e.g., anti-pigeon antigen antibodies, APAA) in a patient's serum sample using functionalized magnetic beads in a microfluidic chip format.
Materials and Reagents
| Research Reagent Solution | Function in the Experiment |
|---|---|
| Magnetic Beads | Solid support for immobilizing antigens; enables contactless manipulation via magnets within microfluidic channels. |
| Pigeon Sera (PS) / Antigen | The biorecognition element immobilized on the beads to specifically capture target antibodies from the sample. |
| Patient Serum Sample | The test sample containing the analyte of interest (APAA). |
| Fluorescent-conjugated Anti-human IgG | The detection antibody that binds to captured human IgG, generating a measurable optical signal. |
| Blocking Buffer (e.g., PBS with BSA) | Blocks unoccupied binding sites on the beads and chip surface to minimize non-specific binding. |
| Microfluidic Chip | The miniaturized platform that houses the reaction, reduces reagent volumes, and facilitates automation. |
Step-by-Step Workflow
- Bead Functionalization: Covalently couple the pigeon antigen (PS) to the surface of the magnetic beads.
- Blocking: Incubate the functionalized beads with a blocking buffer to passivate any remaining reactive sites.
- Antibody Capture: Mix the functionalized beads with the patient's serum sample. Any specific APAA present will bind to the antigens on the beads.
- Washing: Apply a magnetic field to retain the beads while washing away unbound serum components.
- Detection: Incubate the beads with the fluorescent-conjugated anti-human IgG antibody.
- Final Washing: Apply a magnetic field again to wash away any unbound detection antibody.
- Signal Measurement: Introduce the beads into a detection chamber in the microfluidic chip and measure the fluorescence intensity using a portable optical detector.
Diagram of the Diagnostic Biosensor Method (DBM) workflow.
Mass Production Considerations for this Protocol
- Bead Consistency: Sourcing magnetic beads with uniform size and surface chemistry is critical for assay reproducibility across millions of units.
- Chip Fabrication: The microfluidic chip must be designed for high-volume, low-cost manufacturing (e.g., injection molding) and integrate reliably with the bead manipulation system.
- Automation: The washing and transfer steps reliant on magnetic actuation must be highly reliable and easily automated for scalable production.
The Scientist's Toolkit: Essential Reagents for Biosensor R&D
| Item | Function |
|---|---|
| Biorecognition Elements (Antibodies, Aptamers, Enzymes) | Provides specificity by binding to the target analyte. The choice impacts sensor selectivity, stability, and cost [94] [102]. |
| Nanomaterials (Graphene, Silicon Nanowires, CNTs) | Used in the transducer element to enhance sensitivity and surface-to-volume ratio, improving the limit of detection [94] [95]. |
| Magnetic Beads | Serve as a mobile solid phase for immobilization, enabling efficient mixing and simplified washing in microfluidic systems [97]. |
| Fluorescent Dyes / Enzyme Labels (e.g., HRP) | Generate a measurable signal (optical or electrochemical) upon analyte binding. Essential for detection in many sensor formats [97]. |
| Specialized Substrates & Chips (e.g., Au/Ag chips, SiC wafers) | The physical platform for sensor construction. Material choice (e.g., gold for SPR, silicon carbide for graphene growth) dictates performance and manufacturability [96] [95]. |
Ensuring Cybersecurity and Data Integrity in Connected Biosensor Ecosystems
In the research and development of mass-produced connected biosensors, maintaining robust cybersecurity and uncompromised data integrity is paramount. These systems, which integrate biological components with electronic sensors to transmit vital data wirelessly, face unique vulnerabilities. Challenges stem from the inherent constraints of biosensor devices—such as limited processing power and energy resources—coupled with the stringent accuracy and reliability demands of clinical and research data [2] [29]. A single security breach or data corruption event can invalidate experimental results, compromise patient safety in clinical trials, and derail the commercial viability of a biosensor product. This guide provides actionable troubleshooting and FAQs to help researchers proactively address these critical issues within their experimental setups and manufacturing processes.
Understanding Threats and Data Integrity
Common Cybersecurity Threats
Researchers must be aware of the specific threat landscape facing connected biosensor ecosystems. The following table summarizes key threats and their potential impact on research and development.
Table 1: Common Cybersecurity Threats to Biosensor Ecosystems
| Threat Category | Description | Potential Impact on R&D |
|---|---|---|
| Man-in-the-Middle (MITM) Attacks [103] | Interception of unsecured communication (e.g., via Bluetooth Low Energy) between a biosensor and its paired app or cloud backend. | Real-time data exfiltration or manipulation, leading to corrupted datasets and invalid experimental conclusions. |
| Firmware/Software Exploits [103] | Exploitation of vulnerabilities in device firmware or software, often through insecure Over-The-Air (OTA) update mechanisms. | Unauthorized remote control of devices, alteration of sensing algorithms, or rendering device batches unusable. |
| Ransomware [103] | Malware that encrypts files or halts operations on integrated medical IoT systems, often entering through a compromised device. | Can halt critical research operations, lock access to historical experimental data, and cause significant delays. |
| Spoofing & Data Alteration [104] | Falsification of biometric signals (e.g., heart rate, glucose levels) or device identity to deceive the system. | Generates false positive results during testing, masks true sensor performance issues, and compromises safety. |
| Insider Threats & Misconfiguration [103] | Inadequate access controls or accidental misconfiguration of cloud platforms or internal networks by authorized personnel. | Unintentional exposure of sensitive intellectual property or pre-publication data, violating protocol. |
The Critical Link to Data Integrity
Cybersecurity incidents directly compromise data integrity, which is the assurance of data accuracy and consistency over its lifecycle. For biosensors destined for mass production, key integrity concerns include:
- Authenticity and Freshness of Data: Ensuring that vital information originates from a legitimate sensor and is current. Attacks on data freshness can replay old data, masking real-time physiological changes [105].
- Data Falsification: As highlighted in intrusion detection research, spoofing attacks that alter biomedical features like temperature can directly manipulate the core measurements of an experiment [104].
- Impact of Security on Performance: Security protocols must be designed to not interfere with key biosensor performance metrics, such as dynamic range, operating range, response time, and signal-to-noise ratio [3]. A poorly implemented encryption routine could, for instance, slow down data transmission unacceptably.
Troubleshooting Guides
Connectivity and Data Synchronization Issues
Problem: Biosensor fails to maintain a stable connection with the gateway device (e.g., smartphone, router), or transmitted data is incomplete/latent.
| Step | Action & Description | Underlying Principle / Rationale |
|---|---|---|
| 1 | Verify Physical & Environmental Factors: Ensure the biosensor is properly positioned and within the effective range of the receiver. Check for physical obstructions or sources of radio frequency interference. | BLE and Wi-Fi signals are susceptible to attenuation from distance, walls, and other electronic devices, which is a primary cause of packet loss. |
| 2 | Confirm Power & Sensor Status: Check that the biosensor is adequately charged and that the indicator LEDs or logs confirm it is in an active data transmission state. | Low power is a common failure point that can cause intermittent connectivity or force the device into a low-power sleep mode. |
| 3 | Inspect Receiver Settings: On the paired device (phone/tablet), ensure Bluetooth/Wi-Fi is enabled, the associated app has the necessary permissions, and the device is not already connected to multiple other sensors. | Mobile operating systems may restrict background app activity, and BLE hubs have a finite number of concurrent connection slots. |
| 4 | Review Data Logs: Examine the raw data logs on the receiver device or cloud platform for patterns of failure (e.g., drops at specific time intervals or data volumes). | Systematic dropouts can indicate firmware bugs, buffer overflows, or conflicts with the communication protocol's timing. |
| 5 | Validate Protocol & Firmware: Ensure the sensor's firmware and the receiver's API/software development kit (SDK) are compatible and updated to versions that have passed connectivity testing. | Firmware updates often patch known bugs in the communication stack that cause synchronization failures and latency. |
Suspected Data Inconsistency or Anomalies
Problem: Data received from the biosensor shows unexpected drift, noise, or values that are physiologically or chemically implausible.
| Step | Action & Description | Underlying Principle / Rationale |
|---|---|---|
| 1 | Conduct Cross-Validation: Compare the biosensor's output against a validated reference method (e.g., a clinical-grade lab analyzer or a different, trusted sensor) using the same sample. | This is the gold standard for identifying accuracy drift or calibration issues, a common challenge in biosensor commercialization [2]. |
| 2 | Check for Environmental Contamination: Inspect the biosensor's membrane or sensing surface for contamination, biofouling, or damage. For wearable patches, ensure skin preparations did not leave residues. | Lotions, oils, or other contaminants can significantly alter the sensor's interaction with the target analyte, increasing noise and bias. |
| 3 | Verify Calibration & Storage: Confirm the sensor was calibrated according to protocol and that its storage conditions (temperature, humidity) and shelf-life have been adhered to. | The activity of enzymes, proteins, and other biological sensing elements degrades over time and with improper storage, affecting stability [2]. |
| 4 | Perform Signal Analysis: Use software tools to analyze the raw signal for elevated noise levels, sudden baseline shifts, or loss of expected signal patterns. | High signal-to-noise ratio or slow response times can indicate a failing sensor component or interference, key performance metrics in biosensor engineering [3]. |
| 5 | Rule Out Cybersecurity Events: Isolate the device from the network and analyze network traffic logs for signs of unusual data flows or connections that could indicate a spoofing or data alteration attack [104]. | Unexplained data anomalies, especially in wireless systems, may be a sign of malicious intervention rather than sensor failure. |
Frequently Asked Questions (FAQs)
Q1: How can we ensure the long-term stability and reproducibility of biosensors during mass production? A: This is a primary grand challenge in the field [29]. Key strategies include:
- Rigorous Quality Control: Implement strict controls on the source and quality of biorecognition elements (e.g., enzymes, antibodies) to minimize batch-to-batch variability.
- Standardized Manufacturing Protocols: Develop and adhere to highly detailed and automated protocols for applying sensing layers and assembling components to ensure consistency.
- Accelerated Aging Studies: Conduct studies to predict shelf-life and stability, focusing on preserving the activity of biological components over time [2].
Q2: Our biosensor data is accurate in controlled buffers but performs poorly in complex, real-world samples like blood. What could be the cause? A: This is a common hurdle. The issue is often matrix effects or a lack of specificity.
- Cross-Reactivity: The biosensor may be interacting with non-target molecules in the complex sample. Re-evaluate the specificity of your biorecognition element and consider additional sample preparation steps or membrane filters.
- Biofouling: Proteins or other compounds may adsorb to the sensor surface, degrading its performance. Research anti-fouling coatings or surface treatments to improve robustness [2].
Q3: What are the essential security features we must implement for a connected biosensor to meet FDA pre-market requirements? A: While not exhaustive, the FDA's pre-market guidance emphasizes a "security-by-design" approach [103]. Your device should, at a minimum, incorporate:
- End-to-End Data Encryption: Protect data both in transit and at rest.
- Secure Identity and Authentication: Ensure only authorized devices and users can access the system.
- Secure and Authenticated OTA Update Mechanism: Allow for patching of vulnerabilities discovered post-deployment.
- Comprehensive Threat Modeling and Risk Assessment: Document potential threats and the controls put in place to mitigate them.
Q4: How can we detect if a biosensor in our research network has been compromised by a spoofing attack? A: Advanced detection strategies involve:
- Network Traffic Monitoring: Use Intrusion Detection Systems (IDS) to analyze network traffic for anomalies [104].
- Biomedical Feature Analysis: As research shows, incorporate the biosensor's own data (e.g., heart rate, temperature) into security models. A spoofed device may generate physiologically impossible or inconsistent signals, which machine learning models can flag [104].
- Cross-Validation with Other Sensors: In a multi-sensor setup, implausible data from one sensor that is not corroborated by others can indicate a spoof.
Q5: What is the biggest oversight when academic researchers try to commercialize a biosensor? A: A significant gap lies in transitioning from a lab-scale prototype to a mass-producible, robust, and reliable device [2] [29]. Researchers often focus on sensitivity and novelty but overlook critical manufacturing aspects like:
- Scalability of Fabrication: Can the sensitive layer be applied uniformly and reliably thousands of times?
- Cost-Effectiveness: Is the device affordable to manufacture at scale?
- Long-Term Stability: Does the device perform consistently over its stated shelf-life and operational period?
Experimental Protocols for Validation
Protocol: Validating Data Integrity Under Cyber-Physical Attack Scenarios
Aim: To assess the resilience of a connected biosensor system against data spoofing and manipulation attacks.
Materials:
- Device Under Test (DUT): The connected biosensor system (sensor, gateway, cloud database).
- Reference equipment: A trusted device to measure the same analyte/physiological parameter.
- Attack simulation platform: A device (e.g., a programmable microcontroller) capable of injecting spoofed data into the communication channel.
- Network analyzer: Software (e.g., Wireshark) to monitor network traffic.
Methodology:
- Baseline Establishment: In a controlled environment, simultaneously collect data from the DUT and the reference equipment for a set period. Establish a baseline correlation between the two datasets.
- Attack Simulation: Introduce the attack platform into the network. Execute a spoofing attack where the platform injects fabricated data mimicking legitimate biosensor readings into the data stream headed for the cloud backend.
- Data Collection & Comparison: Continue data collection from both the DUT's cloud output and the reference equipment. Record all network traffic.
- Analysis:
- Compare the cloud data during the attack period with the reference data to quantify the success of the data alteration.
- Analyze network logs to identify the source and signature of the malicious data packets.
- Test the effectiveness of any built-in IDS or anomaly detection in flagging the attack.
Protocol: Assessing Biosensor Performance Under Manufacturing-Scale Reproducibility
Aim: To evaluate the performance consistency across a batch of biosensors from a pilot production run.
Materials:
- A sample set (e.g., n=50) of biosensors from the same production batch.
- Standardized analyte solutions at low, medium, and high concentrations within the sensor's dynamic range.
- Automated fluid handling system (if available) for consistent testing.
- Data acquisition system.
Methodology:
- Calibration: Calibrate each sensor individually according to the manufacturer's protocol using the standardized solutions.
- Performance Metric Measurement: For each sensor, measure and record:
- Sensitivity: The change in output signal per unit change in analyte concentration.
- Dynamic Range: The span between the minimal and maximal detectable signals [3].
- Response Time: The time taken to reach 90% of the final steady-state signal after exposure to the analyte [3].
- Signal-to-Noise Ratio: The ratio of the mean signal of a sample to the standard deviation of a blank [3].
- Data Analysis: Calculate the mean, standard deviation, and coefficient of variation (CV) for each performance metric across the entire sample set. A low CV indicates high reproducibility, which is critical for successful mass production [2].
Essential Research Reagent Solutions
Table 2: Key Research Reagents and Materials for Biosensor Development
| Reagent / Material | Function in Development & Troubleshooting |
|---|---|
| Stabilized Enzymes (e.g., Glucose Oxidase) | Serves as the biorecognition element. Used to optimize the sensing layer, test shelf-life, and ensure consistent activity across production batches, which was key to the success of commercial glucose meters [2]. |
| High-Purity Analytic Standards | Used for accurate sensor calibration, determination of sensitivity, and cross-reactivity studies to ensure specificity in complex matrices. |
| Blocking Agents (e.g., BSA, Casein) | Prevents non-specific binding of proteins or other interferents to the sensor surface, a critical step in reducing noise and false positives in immuno- and genosensors [2]. |
| Nafion & Other Perm-Selective Membranes | Coated onto electrode surfaces to repel interfering anions (e.g., ascorbate, urate) in electrochemical biosensors, improving selectivity. |
| Cross-Linkers (e.g., Glutaraldehyde) | Immobilizes biological recognition elements onto transducer surfaces, a key step in creating a stable and reusable biosensor. |
Security and Experimental Workflow Diagrams
Defense-in-Depth Security Framework
Biosensor Data Integrity Validation Workflow
Conclusion
The path to overcoming mass production challenges in biosensor manufacturing requires a concerted, interdisciplinary effort that bridges advanced materials science, microengineering, and data analytics. Key takeaways include the non-negotiable need for enhanced sensor stability and manufacturing standardization, the transformative potential of nanomaterials and AI-driven optimization, and the critical importance of designing for regulatory compliance from the outset. Future progress will be driven by sustainable manufacturing practices, the maturation of hybrid sensing modalities, and strategic partnerships that accelerate the transition from lab-scale innovation to robust, commercially viable products. For biomedical research and drug development, successfully scaling biosensor production promises to democratize access to precision diagnostics, reduce the cost and time of therapeutic development, and ultimately usher in a new era of personalized medicine and real-time health monitoring.
References
- 1. Stability in biosensors derived from domain map analysis of ... [https://pmc.ncbi.nlm.nih.gov/articles/PMC11077358/]
- 2. The Example of Blood Glucose Meters [https://www.mdpi.com/2227-9040/13/8/300]
- 3. Challenges and Opportunities in Smart Biosensing for ... [https://pmc.ncbi.nlm.nih.gov/articles/PMC12455640/]
- 4. 7 Crucial Steps for Biosensor Development Success in Med Device [https://intricon.com/7-steps-for-biosensor-success/]
- 5. An overview of stability and lifetime of electrochemical ... [https://www.sciencedirect.com/science/article/abs/pii/B9780443153341000225]
- 6. Perspectives on systematic optimization of ultrasensitive biosensors ... [https://pubs.rsc.org/en/content/articlelanding/2024/tc/d4tc02131b]
- 7. Guide to Selecting a Biorecognition for Element - PMC Biosensors [https://pmc.ncbi.nlm.nih.gov/articles/PMC6416154/]
- 8. Design and Optimization of a Biosensor Surface ... [https://pmc.ncbi.nlm.nih.gov/articles/PMC8399133/]
- 9. Troubleshooting Guides [https://www.creative-biolabs.com/bioconjugation/troubleshooting-guides.htm]
- 10. Perspectives on systematic optimization of ultrasensitive ... [https://pubs.rsc.org/en/content/articlehtml/2024/tc/d4tc02131b]
- 11. Antibody Conjugation Troubleshooting [https://www.bio-techne.com/resources/protocols-troubleshooting/antibody-conjugation-troubleshooting]
- 12. Stages in biosensor manufacturing [https://www.zimmerpeacock.com/2019/12/12/stages-in-biosensor-manufacturing/]
- 13. Market Size and Economics for Biosensors - PMC [https://pmc.ncbi.nlm.nih.gov/articles/PMC7152385/]
- 14. The value and validation of broad spectrum biosensors for diagnosis... [https://pmc.ncbi.nlm.nih.gov/articles/PMC3925709/]
- 15. Advancements in food quality monitoring: integrating biosensors for... [https://pubs.rsc.org/en/content/articlehtml/2024/fb/d4fb00094c]
- 16. Troubleshooting Signal Noise in Sensor and PLC ... [https://gesrepair.com/troubleshooting-signal-noise-in-sensor-and-plc-connections/]
- 17. A guide to reducing noise and increasing sensitivity in ... [https://blog.igii.uk/a-guide-to-reducing-noise-and-increasing-sensitivity-in-biosensors]
- 18. Beyond raw data: AI-driven biosensor fusion for enhancing ... [https://www.sciencedirect.com/science/article/pii/S2590005625000451]
- 19. ’s 2025 challenge: Global trade disruption supply chain [https://tax.thomsonreuters.com/blog/2025s-supply-chain-challenge-confronting-complexity-and-disruption-in-global-trade-tri/]
- 20. The Biggest Global Supply Risks of Chain 2025 [https://www.xeneta.com/blog/the-biggest-global-supply-chain-risks-of-2025]
- 21. in 2025 : A retrospective supply chains [https://blueyonder.com/blog/2025/2025-in-supply-chains-a-retrospective]
- 22. Startup's biosensor makes drug development and ... [https://news.mit.edu/2025/startup-biosensor-makes-drug-development-and-manufacturing-cheaper-0615]
- 23. CHALLENGE PROGRAMME 2025 – Heterogeneity in ... [https://novonordiskfonden.dk/en/grant/challenge-programme-2025-heterogeneity-in-biomanufacturing/]
- 24. Troubleshooting & FAQs [https://www.cygnustechnologies.com/resources/faqs/?srsltid=AfmBOoodj6s1o0sJsms_di2eCq3JQJxtWf8G2CVSN-HX9SeeSl4_K_8-]
- 25. Biosensors Market: Comprehensive Analysis and Forecast ... [https://www.pharmiweb.com/press-release/2025-02-13/biosensors-market-comprehensive-analysis-and-forecast-2025-2035]
- 26. Biosensors Industry Forecast Report 2025-2034 - The U.S. [https://www.globenewswire.com/news-release/2025/06/17/3100408/28124/en/Biosensors-Industry-Forecast-Report-2025-2034-The-U-S-Biosensors-Market-Thrives-Amid-Regulatory-Challenges-with-Innovation-and-Partnerships-Fuelling-Expansion.html]
- 27. Microscale and Nanoscale Biosensors - PMC [https://pmc.ncbi.nlm.nih.gov/articles/PMC6164539/]
- 28. The Rising Role of Biosensors in Modern Technology [https://www.delveinsight.com/blog/rising-role-of-biosensors]
- 29. Specialty Grand Challenges in Biosensors [https://www.frontiersin.org/journals/sensors/articles/10.3389/fsens.2020.00003/full]
- 30. A Short Review on Miniaturized Biosensors for the ... [https://www.mdpi.com/2079-6374/13/3/412]
- 31. Progress towards efficient MXene sensors [https://www.nature.com/articles/s43246-025-00907-y]
- 32. Recent advances in MXene-based electrochemical ... [https://www.sciencedirect.com/science/article/abs/pii/S016599362500144X]
- 33. Recent advances in biosensors based on the electrochemical ... [https://pubs.rsc.org/en/content/articlehtml/2025/an/d5an00235d]
- 34. Top 5 Emerging Trends in Nanotechnology for [https://www.azonano.com/article.aspx?ArticleID=6865]
- 35. Signal Amplification to Improve Electrochemical ... [https://pubmed.ncbi.nlm.nih.gov/40836603/]
- 36. Enhancement and optimization of a graphene-based ... [https://www.nature.com/articles/s41598-025-20570-0]
- 37. Label-free optical detection of miRNA using electrostatic ... [https://pubs.rsc.org/en/content/articlehtml/2025/sd/d5sd00129c]
- 38. Genetically Encoded Biosensor Engineering for ... [https://pmc.ncbi.nlm.nih.gov/articles/PMC10619561/]
- 39. Directed Evolution of 4-Hydroxyphenylpyruvate Biosensors ... [https://www.mdpi.com/1422-0067/25/3/1533]
- 40. Effective use of biosensors for high-throughput library ... [https://pmc.ncbi.nlm.nih.gov/articles/PMC8788864/]
- 41. Directed evolution of biofuel-responsive biosensors for ... [https://www.sciencedirect.com/science/article/pii/S1096717621001713]
- 42. Transcription Factor-Based Biosensors in High-Throughput ... [https://pubmed.ncbi.nlm.nih.gov/29485214/]
- 43. Sensor integration into microfluidic systems: trends and ... [https://www.sciencedirect.com/science/article/pii/S0958166923000885]
- 44. Microfluidics Integrated Biosensors: A Leading Technology ... [https://pmc.ncbi.nlm.nih.gov/articles/PMC4721704/]
- 45. Advancements and Future Perspectives of Microfluidic ... [https://pmc.ncbi.nlm.nih.gov/articles/PMC12442622/]
- 46. Emerging Trends in Microfluidics [https://elveflow.com/microfluidic-reviews/emerging-trends-in-microfluidics/]
- 47. Integrated Multi-process Microfluidic Systems for ... [https://pmc.ncbi.nlm.nih.gov/articles/PMC2877209/]
- 48. Integration of microfluidic chips with biosensors [https://link.springer.com/article/10.1007/s42452-024-06103-w]
- 49. Microfluidic-based biosensors toward point-of-care ... [https://pmc.ncbi.nlm.nih.gov/articles/PMC7087901/]
- 50. Integrating Microfluidic Chips into Your Laboratory Workflow [https://conductscience.com/integrating-microfluidic-chips-into-your-laboratory-workflow/?srsltid=AfmBOopav1jG-yQR3Ibc9pYMPcbAgd2FBsu-hPfj4C_-jjYyDjfNYFvT]
- 51. Digital Biosensing by Foundry-Fabricated Graphene Sensors [https://www.nature.com/articles/s41598-019-38700-w]
- 52. Troubleshooting Common SMIF System Failures [https://www.fortrend.com/technical-blog/troubleshooting-common-smif-system-failures-causes-and-diagnostic-logic.html]
- 53. High-Throughput 96-Well Nanogroove-Enhanced Electrical ... [https://pubmed.ncbi.nlm.nih.gov/40534247/]
- 54. Startup's biosensor makes drug development and ... [https://www.eecs.mit.edu/startups-biosensor-makes-drug-development-and-manufacturing-cheaper/]
- 55. Applications and Tuning Strategies for Transcription Factor ... [https://pmc.ncbi.nlm.nih.gov/articles/PMC10136082/]
- 56. Context-Aware Biosensor Design Through Biology-Guided ... [https://pmc.ncbi.nlm.nih.gov/articles/PMC12186671/]
- 57. A synthetic microbial biosensor for high-throughput ... [https://www.nature.com/articles/s41467-018-07488-0]
- 58. Extending dynamic and operational range of the biosensor ... [https://www.sciencedirect.com/science/article/pii/S2405805X25000596]
- 59. Combining biosensor and metabolic network optimization ... [https://pmc.ncbi.nlm.nih.gov/articles/PMC11938683/]
- 60. Effect of Promoter Architecture on the Cell-to-Cell Variability in ... [https://pmc.ncbi.nlm.nih.gov/articles/PMC3048382/]
- 61. Sensor Calibration at Ultralow Levels: Challenges and Solutions [https://www.environics.com/2025/07/07/sensor-calibration-at-ultralow-levels-challenges-and-solutions/]
- 62. biosensor and manufacturing method therefor [https://patents.justia.com/patent/20250258126]
- 63. A Calibration Method for Nanowire Biosensors to Suppress ... [https://pmc.ncbi.nlm.nih.gov/articles/PMC2805439/]
- 64. How to Calibrate a Biosensor for Environmental Monitoring [https://www.linkedin.com/advice/0/how-can-you-calibrate-biosensor-environmental-monitoring-1lzhc]
- 65. Influence of machine learning technology on the ... [https://www.sciencedirect.com/science/article/abs/pii/S0026265X25027559]
- 66. AI Manufacturing Process Control: Closed Loop ... [https://imubit.com/article/manufacturing-process-control/]
- 67. Metal Impurities Cause False Positives in High-Throughput ... [https://pmc.ncbi.nlm.nih.gov/articles/PMC4027514/]
- 68. Development of fluorescence lifetime biosensors for ATP ... [https://www.sciencedirect.com/science/article/pii/S2667237524002923]
- 69. A general method for the development of multicolor ... [https://www.nature.com/articles/s41589-023-01350-1]
- 70. Flexible Biosensors Based on Colorimetry, Fluorescence ... [https://pmc.ncbi.nlm.nih.gov/articles/PMC8505690/]
- 71. Reducing the occurrence of errors in a laboratory's ... [https://pmc.ncbi.nlm.nih.gov/articles/PMC5051380/]
- 72. Mistakes in Lab Sample Handling and How to Avoid Them - QIA [https://www.qi-a.com/learning-center/mistakes-in-lab-sample-handling/]
- 73. a promising analytical tool for on-site detection of mycotoxins [https://www.nature.com/articles/s41538-025-00444-5]
- 74. A Very Short List of Common Pitfalls in Research Design, ... [https://journals.stfm.org/primer/2022/van-smeden-2022-0059/]
- 75. EU MDR vs FDA: what are the main differences and ... [https://spyro-soft.com/blog/healthcare/eu-mdr-vs-fda-what-are-the-main-differences-and-similarities]
- 76. What FDA Staffing Challenges Mean for Your 510(k) in 2025 [https://www.thefdagroup.com/blog/510k-submissions-fda-changes]
- 77. AI Medical Devices: 2025 Status, Regulation & Challenges [https://intuitionlabs.ai/articles/ai-medical-devices-regulation-2025]
- 78. What You need to know about IEC 62304: Medical ... [https://www.securitycompass.com/blog/iec-62304-medical-software-lifecycle/]
- 79. Understanding IEC/ISO 62304 and FDA Requirements ... [https://www.orielstat.com/blog/medical-device-sdlc/]
- 80. Advances in Point-of-Care Infectious Disease Diagnostics [https://pmc.ncbi.nlm.nih.gov/articles/PMC12651474/]
- 81. Biosensors, Volume 15, Issue 9 (September 2025) [https://www.mdpi.com/2079-6374/15/9]
- 82. Next-generation biosensors for infectious disease ... [https://www.sciencedirect.com/science/article/abs/pii/S1877117325000766]
- 83. The Challenges of Developing Biosensors for Clinical ... [https://www.mdpi.com/2227-9040/9/11/299]
- 84. Signal-to-Noise Ratio as a Quantitative Measure for Optical ... [https://www.analog.com/en/resources/design-notes/signaltonoise-ratio-as-a-quantitative-measure-for-optical-biosensors.html]
- 85. Tuning the performance of a TphR-based terephthalate ... [https://www.sciencedirect.com/science/article/pii/S2214030124000191]
- 86. Recent advances in biosensors: structure, principles ... [https://www.sciencedirect.com/science/article/abs/pii/S1046202325001665]
- 87. Biosensor Assays for Measuring the Kinetics of G-Protein and ... [https://www.ncbi.nlm.nih.gov/books/NBK574243/]
- 88. Smartphone-Based Biosensors: Current Trends ... [https://www.mdpi.com/2673-4591/106/1/10]
- 89. Top 10 Biosensors Manufacturers 2025: Key Drivers & ... [https://www.polarismarketresearch.com/blog/top-10-biosensors-manufacturers-in-global-market-2025:-key-driving-factors-futuristic-sense]
- 90. Electrochemical Biosensors in Food Safety: Challenges ... [https://www.mdpi.com/1420-3049/26/10/2940]
- 91. Electrochemical vs. Optical Biosensors for Point-of-Care ... [https://www.mdpi.com/2227-9040/11/10/546]
- 92. Optical Biosensors: A Revolution Towards Quantum ... [https://pmc.ncbi.nlm.nih.gov/articles/PMC3205924/]
- 93. Optical and Electrochemical Biosensors for Detection of ... [https://pmc.ncbi.nlm.nih.gov/articles/PMC12293134/]
- 94. Advances in field-effect biosensors towards point-of-use - PMC [https://pmc.ncbi.nlm.nih.gov/articles/PMC10523595/]
- 95. Graphene Biosensor Is Faster and More Sensitive Than ELISA [https://spectrum.ieee.org/graphene-biosensor-is-faster-and-more-sensitive-than-elisa]
- 96. A Comparison of Various Chips Used for the Manufacture ... [https://pmc.ncbi.nlm.nih.gov/articles/PMC8773720/]
- 97. Development of a Diagnostic Biosensor Method ... [https://www.mdpi.com/2079-6374/11/6/196]
- 98. ELISA Troubleshooting Guide [https://www.thermofisher.com/us/en/home/life-science/protein-biology/protein-biology-learning-center/protein-biology-resource-library/pierce-protein-methods/overview-elisa/elisa-troubleshooting-guide.html]
- 99. Bacterial Biosensors : The Future of Analyte Detection [https://asm.org/articles/2023/september/bacterial-biosensors-the-future-of-analyte-detecti]
- 100. ELISA Troubleshooting Guide [https://www.bio-techne.com/resources/protocols-troubleshooting/elisa-troubleshooting]
- 101. Troubleshooting Guide: ELISA [https://www.rndsystems.com/resources/troubleshooting-guide-elisa-development]
- 102. Advances in biosensor technologies for infectious diseases ... [https://www.sciencedirect.com/science/article/pii/S016599362400462X]
- 103. Ensuring Data Privacy and Security in Connected Medical... | Medium [https://medium.com/@sequenex/ensuring-data-privacy-and-security-in-connected-medical-devices-7d0e8d8ba18e]
- 104. On the Performance of Cyber -Biomedical Features for Intrusion... [https://arxiv.org/html/2506.17329v1]
- 105. Solution For Security InWireless Data Networks Integrity BioSensor [https://www.academia.edu/4737230/Security_Solution_For_Data_Integrity_InWireless_BioSensor_Networks]