Smart and Affordable: Implementing Cost-Effective Biosensor Solutions for Small-Scale Fermentation
This article provides a comprehensive guide for researchers and drug development professionals on implementing cost-effective biosensor technologies in small-scale fermentation processes.
Smart and Affordable: Implementing Cost-Effective Biosensor Solutions for Small-Scale Fermentation
Abstract
This article provides a comprehensive guide for researchers and drug development professionals on implementing cost-effective biosensor technologies in small-scale fermentation processes. It explores the foundational principles of smart fermentation, details practical methodologies for integrating real-time monitoring tools, addresses common operational challenges with targeted troubleshooting strategies, and offers a framework for validating and comparing biosensor performance. By synthesizing recent advances in nanotechnology, AI, and IoT, this resource aims to democratize access to precision fermentation control, enhancing research reproducibility and accelerating therapeutic development while managing costs.
The Principles and Economic Drivers of Smart Fermentation Biosensors
Defining Smart Fermentation Technologies and Biosensor Components
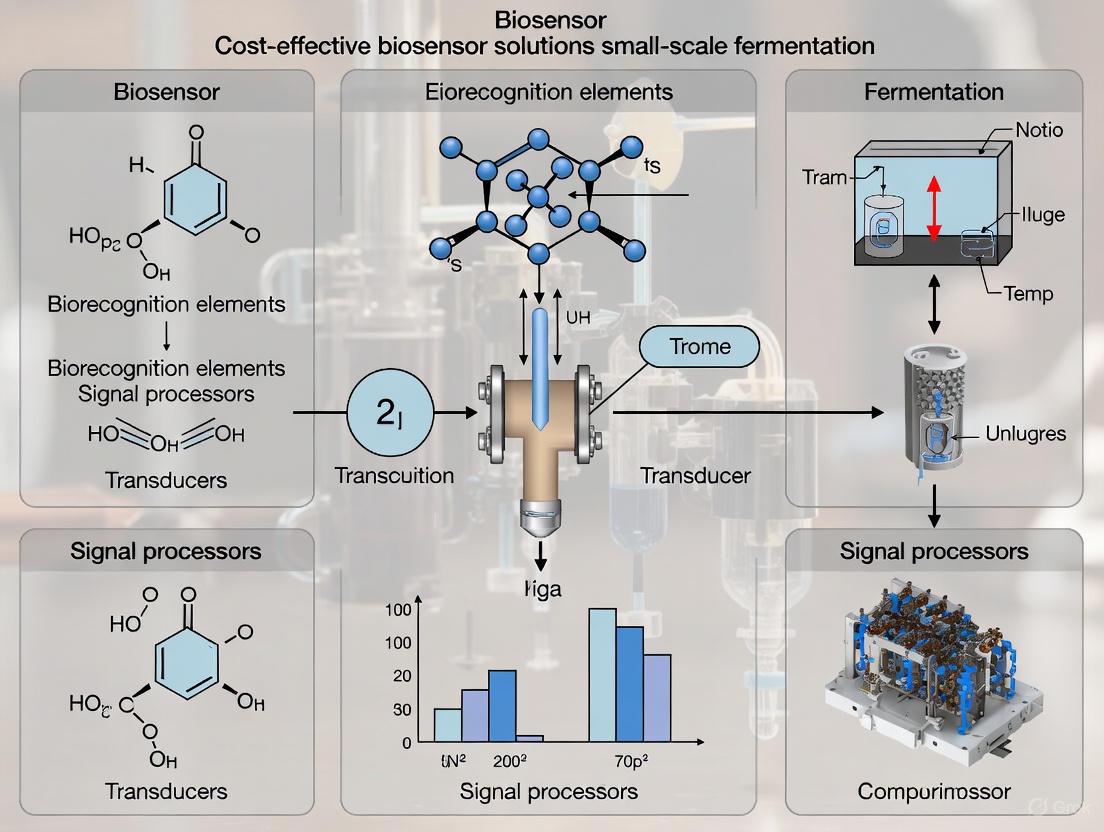
What are the core components of a biosensor?
A biosensor is an analytical device that integrates a biological recognition element with a physicochemical transducer to detect a specific analyte. Its core function is to produce a measurable signal proportional to the concentration of the target substance [1].
The following table outlines the essential components and their functions:
| Component | Function | Examples |
|---|---|---|
| Biological Recognition Element | Selectively interacts with the target analyte to initiate a response. | Enzymes (e.g., Glucose Oxidase, L-Amino Acid Oxidase), Antibodies, Whole Cells (e.g., yeast, bacteria), Nucleic Acids (Aptamers) [2] [1]. |
| Transducer | Converts the biological response into a measurable electrical, optical, or thermal signal. | Electrochemical (Electrode), Optical (Photodetector), Thermal (Thermistor) [1]. |
| Signal Processor | Amplifies, processes, and displays the transducer's signal into a user-interpretable output (e.g., concentration). | Potentiostat, Microprocessor, Readout/Display System [1]. |
Biosensors are broadly categorized based on their transducer principle and biological element. Common biosensor types include electrochemical (most prevalent), optical, thermal, and piezoelectric [1].
What defines a "Smart Fermentation" technology?
Smart Fermentation refers to the application of advanced, data-driven technologies to monitor, control, and optimize microbial fermentation processes autonomously. It represents a bridge between traditional fermentation craftsmanship and Industry 4.0 principles [3].
These systems are defined by their integration of:
- Real-time Monitoring: Using inline sensors (e.g., pH, dissolved oxygen, biosensors) to continuously track critical process parameters and metabolite levels [3] [4].
- Data Connectivity: Employing the Internet of Things (IoT) to collect and transmit process data from the bioreactor to a centralized system [3].
- Advanced Analytics: Utilizing Artificial Intelligence (AI) and Machine Learning (ML) models to predict process outcomes, identify inefficiencies, and recommend optimizations [3] [5].
- Automated Control: Enabling dynamic adjustments of process parameters (like temperature or nutrient feed) based on sensor data and predictive models to maintain optimal conditions and ensure consistent product quality [3].
Troubleshooting Common Biosensor and Fermentation Issues
Biosensor Performance Issues
| Problem | Possible Causes | Troubleshooting Steps |
|---|---|---|
| Drifting or Inaccurate Readings | Sensor drift, fouling, improper calibration, or degraded biological element [1] [6]. | 1. Recalibrate the sensor with fresh standard solutions [6].2. Clean the sensing surface according to manufacturer protocols to remove debris or biofilm.3. Check the storage conditions and age of the biological recognition element; replace if expired. |
| Low Sensitivity or Signal Response | Loss of activity in the biological element (e.g., enzyme denaturation), non-optimal transducer settings, or passivation of the electrode surface [2] [1]. | 1. Verify the activity of enzymes or cells used in the biosensor.2. Optimize the applied potential (for amperometric sensors) or other transducer parameters.3. Ensure the transducer surface is clean and properly modified. |
| High Signal Noise | Electrical interference, unstable environmental conditions (e.g., temperature fluctuations), or a failing transducer component [2]. | 1. Use proper shielding on cables and ensure all connections are secure.2. Operate the biosensor in a controlled, stable environment.3. Perform diagnostic checks on the transducer and signal processor as per the equipment manual. |
General Fermentation Process Issues
| Problem | Possible Causes | Troubleshooting Steps |
|---|---|---|
| Slow or Stalled Fermentation | Incorrect temperature, incorrect pH, nutrient deficiency, or low viability of the inoculum [7] [8]. | 1. Verify and adjust the temperature to the optimal range for the production organism [7].2. Measure and adjust pH to the optimal range using small amounts of acid or base [6].3. Check nutrient levels (e.g., carbon, nitrogen) and supplement if necessary.4. Ensure the inoculum is healthy, viable, and added at an adequate concentration [8]. |
| Contamination | Non-sterile equipment, contaminated inoculum, faulty sterilization cycles, or leaks in the bioreactor [8]. | 1. Discard the contaminated batch immediately. Do not attempt to salvage it.2. Strictly adhere to aseptic techniques during inoculation and sampling.3. Thoroughly clean and sterilize all equipment, and check the integrity of O-rings, seals, and filters [8].4. Use an antimicrobial agent in the coolant if a heat exchanger leak is suspected [8]. |
| Unexpected Metabolite or Product Profile | Shift in microbial population or metabolism, suboptimal process parameters (pH, dissolved oxygen), or precursor limitation [9]. | 1. Analyze the microbial community to confirm the identity and purity of the culture.2. Review historical data for process parameters like pH and dissolved oxygen to identify deviations [4] [9].3. Ensure a consistent and adequate supply of key precursors in the growth medium. |
What are the key performance metrics for evaluating biosensors?
When selecting or developing a biosensor for fermentation monitoring, several performance parameters must be characterized to ensure reliability and accuracy [2].
| Metric | Definition | Importance in Fermentation |
|---|---|---|
| Sensitivity | The magnitude of the output signal change per unit change in analyte concentration. | Determines the ability to detect small but critical fluctuations in metabolite levels (e.g., glucose, lactate). |
| Selectivity / Specificity | The ability of the biosensor to distinguish the target analyte from other interfering substances in the sample matrix. | Crucial for accurate readings in complex fermentation broths containing various nutrients, metabolites, and cells [5]. |
| Dynamic Range | The span of analyte concentrations over which the sensor provides a measurable and linear response. | Must cover the expected concentration range of the target analyte from low to high cell density phases. |
| Response Time | The time required for the sensor to reach a stable output (e.g., 95% of final value) after a change in analyte concentration. | A fast response is vital for real-time process control and rapid feedback adjustments [2]. |
| Stability & Operational Lifetime | The ability to maintain performance over time and multiple uses, often limited by the degradation of the biological element. | Affects cost-effectiveness and practicality for long-term fermentations; a key challenge for widespread adoption [5]. |
Experimental Protocol: Calibration of a pH Sensor for Fermentation
Principle: pH sensors measure the hydrogen ion activity in a solution, generating a millivolt signal that correlates to the pH value. Regular calibration is essential for accurate real-time monitoring [6].
Materials:
- pH sensor (electrode) and compatible meter/transmitter
- Temperature sensor (often integrated)
- At least two pH buffer standard solutions (e.g., pH 4.01, 7.00, and 10.01)
- Clean beakers (100-250 mL)
- Deionized or ultrapure water
- Magnetic stirrer and stir bar (optional, for some sensors)
- Soft tissue and appropriate cleaning solution if needed
Procedure:
- Preparation: Rinse the pH sensor bulb thoroughly with deionized water into a waste beaker. Gently blot dry with a soft, lint-free tissue. Do not wipe the bulb, as this can generate static electricity.
- First Calibration Point: Immerse the sensor in the first buffer solution (e.g., pH 7.00). Gently stir or swirl the solution to ensure homogeneity. Allow the reading to stabilize.
- Slope Calibration: On the meter, enter the calibration mode and input the pH value of the first buffer. The meter records the first point and calculates the initial slope.
- Second Calibration Point: Rinse the sensor with deionized water and blot dry. Place it in the second buffer (e.g., pH 4.01). After the reading stabilizes, input the buffer value into the meter.
- Verification (Critical): Rinse and place the sensor in a third buffer of a different pH (e.g., pH 10.01). The measured value should be within the manufacturer's specified accuracy (e.g., ±0.1 pH units). If not, repeat the calibration procedure or inspect the sensor for damage.
- Installation: Once calibrated, install the sensor into the pre-sterilized bioreactor following aseptic procedures.
Troubleshooting Tip: If the sensor shows slow response or inaccurate readings during calibration, it may be fouled or aged. Consult manufacturer guidelines for cleaning or rehydration. Replace the sensor if performance does not improve [6].
Diagram: Workflow for a Smart Fermentation Monitoring System
The following diagram illustrates the logical flow of information and control in a smart fermentation system that integrates biosensors and AI/ML.
Research Reagent Solutions for Biosensor Development
This table details key materials and reagents essential for constructing and testing electrochemical biosensors in a research setting.
| Reagent / Material | Function in Biosensor Development |
|---|---|
| Enzymes (e.g., Glucose Oxidase, L-Amino Acid Oxidase) | Serve as the primary biological recognition element, providing high specificity for the target analyte (e.g., glucose, amino acids) [1]. |
| Nafion Polymer | A perfluorosulfonated ionomer used to coat electrode surfaces. It improves selectivity by repelling negatively charged interferents (e.g., ascorbate, urate) commonly found in fermentation broths [1]. |
| Cross-linking Reagents (e.g., Glutaraldehyde) | Used to create covalent bonds between enzyme molecules and between the enzyme and the transducer surface, leading to stable, immobilized biorecognition layers [1]. |
| Redox Mediators (e.g., Ferrocene derivatives, Potassium Ferricyanide) | Shuttle electrons between the active site of the enzyme and the electrode surface. This enables operation at lower potentials, reducing interference and improving sensitivity [1]. |
| Buffer Solutions (e.g., Phosphate Buffer Saline - PBS) | Maintain a constant pH during biosensor testing and operation, which is critical for preserving enzyme activity and ensuring consistent sensor performance [1] [6]. |
| Nanocomposites (e.g., Graphene Oxide, Carbon Nanotubes) | Used to modify the transducer surface to increase the electroactive surface area, enhance electron transfer kinetics, and improve overall sensor sensitivity and signal-to-noise ratio [1]. |
For researchers in drug development and scientific research, traditional small-scale fermentation presents a significant paradox: how to harness the power of complex microbial processes while achieving the reproducibility demanded by rigorous scientific inquiry. The very nature of traditional fermentation—often relying on environmental inocula and experiential control—leads to inherent microbial variability that directly impacts product consistency, process efficiency, and ultimately, experimental validity [3]. This variability manifests as fluctuations in key metabolic outputs, growth rates, and final product quality, creating substantial obstacles for research and development.
Simultaneously, maintaining effective quality control at small scales presents unique challenges. Without the sophisticated monitoring infrastructure of industrial bioprocessing, researchers often depend on offline sampling and manual measurements, which can introduce delays in detecting process deviations [3]. The integration of cost-effective biosensor solutions offers a promising pathway to bridge this technological gap, providing the real-time, data-driven control needed to enhance experimental reproducibility without prohibitive investment [10] [1]. This technical support center addresses these core challenges through targeted troubleshooting guides and strategic implementation of modern monitoring technologies.
Troubleshooting Guide: Common Fermentation Issues & Solutions
Contamination Identification and Eradication
Q: What are the primary signs of contamination in my bioreactor, and how should I respond?
Contamination is one of the most frequent and detrimental issues in fermentation research. Early detection is critical to minimizing losses.
- Visual Indicators: Look for unexpected changes in culture appearance. These include unusual turbidity (cloudiness), color changes, or abnormal cell morphology when observed under a microscope. In cell cultures containing phenol red dye, a rapid color change from pink to yellow indicates acid production by potential contaminants [8].
- Performance Anomalies: Monitor for biochemical process deviations such as unexpected pH shifts, abnormal substrate consumption rates, or atypical product formation profiles. Growth occurring earlier than expected can also indicate microbial contamination outcompeting your target culture [8].
- Immediate Action Protocol: If contamination is suspected:
- Immediately isolate the affected bioreactor and all associated samples to prevent cross-contamination.
- Take a sample for confirmatory testing (e.g., Gram staining, plating on enrichment media).
- Terminate the run and thoroughly clean and sterilize the entire system.
- Identify the contamination source by auditing sterilization protocols, aseptic techniques, and inoculum quality [11] [8].
Q: My fermentations keep getting contaminated. How can I systematically find the source?
Persistent contamination requires a methodical investigation. The following protocol helps identify common failure points:
Preventive Maintenance Checklist:
- O-ring Inspection: Replace O-rings on vessels, ports, and sensors every 10-20 sterilization cycles. Check for flattening, tears, or poor fit [8].
- Sterilization Validation: Use biological indicators (e.g., spore strips) to validate that your autoclave cycle reaches and maintains 121°C for the required time. Ensure steam can penetrate all items by avoiding tight packing [8].
- Filter Integrity: Check exit gas filters for wetting, which can allow microbial grow-through. Ensure gas flow rates do not exceed 1.5 Vessel Volumes per Minute (VVM) to prevent droplet entrainment [8].
Process Parameter Control
Q: How can I stabilize temperature fluctuations in my bench-top fermenter?
Temperature instability directly impacts microbial growth kinetics and metabolic activity.
- Root Causes: Inadequate insulation, faulty heating/cooling systems, improper PID controller settings, or incorrect calibration of temperature sensors [11].
- Stabilization Protocol:
- Verify Calibration: Calibrate your temperature sensor against a certified reference thermometer.
- Check Insulation: Ensure the vessel is properly insulated to minimize ambient temperature effects.
- Inspect Systems: Regularly maintain and check the condition of Peltier devices, heating jackets, and cooling water circulation systems.
- Monitor Closely: Use data logging to track temperature throughout the process, not just at set points [11].
Q: My fermentation produces excessive foam, leading to overflow. What controls can I implement?
Foaming is a common challenge, particularly with high-cell-density cultures or certain media compositions.
- Immediate Mitigation: Reduce agitation speed slightly if process tolerates it. Add antifoaming agents (e.g., silicone-based compounds) suitable for your biological system [11].
- Engineering Controls: For recurrent issues, install foam sensors with automated antifoam dosing systems. These detect rising foam and trigger pump activation for real-time control [11].
- Process Design: Ensure adequate vessel headspace for foam expansion. For new processes, consider media formulation adjustments to reduce surface-active compounds that drive foam formation [11].
Quantitative Analysis of Critical Process Parameters
Precise monitoring and control of biochemical parameters is fundamental to reproducible fermentation. The following table summarizes optimal ranges and monitoring solutions for key variables.
Table 1: Critical Process Parameters in Small-Scale Fermentation
| Parameter | Optimal Range (General Guide) | Impact of Deviation | Cost-Effective Monitoring Solution |
|---|---|---|---|
| pH | Wine: 3.0-4.0; Beer: 4.0-5.0 [12] | Low: Inhibited yeast activity, stalled fermentation.High: Microbial instability, spoilage risk. | Inline or handheld pH electrodes with regular calibration [12]. |
| Dissolved Oxygen | Varies by microbe; ~20-40% air saturation for many aerobes. | Low: Reduced cell growth, shift to anaerobic metabolism.High: Potential oxidative stress in some cultures. | Amperometric dissolved oxygen probes (polarographic or optical). |
| Temperature | Organism-specific (e.g., 30°C for E. coli, 28°C for S. cerevisiae). | Fluctuations: Disrupted growth, altered metabolic rates, reduced yield. | Redundant PT100 sensors with independent logging. |
| Substrate (e.g., Glucose) | Maintain above growth-limiting level; typically 0.5-5 g/L. | Excess: Potential catabolite repression.Deficiency: Growth arrest, cell death. | Glucose biosensors based on glucose oxidase enzyme [10] [1]. |
Integrating Biosensors for Enhanced Process Control
Biosensor Applications in Fermentation Monitoring
Q: What key metabolites can biosensors detect to improve my fermentation control?
Biosensors provide specific, real-time data on critical process variables, enabling proactive control strategies.
Table 2: Biosensor Applications for Metabolite Monitoring
| Target Analyte | Biosensor Type | Biological Recognition Element | Research Application |
|---|---|---|---|
| Glucose | Amperometric | Glucose Oxidase (GOx) [1] | Feed rate optimization in fed-batch processes; substrate consumption studies [10]. |
| L-Glutamate | Amperometric | Glutamate Oxidase (GLOD) [1] | Monitoring amino acid metabolism; product quantification in specialty fermentations. |
| L-Lactate | Amperometric | Lactate Oxidase (LOx) | Determining metabolic shift between aerobic and anaerobic respiration. |
| Ethanol | Amperometric | Alcohol Oxidase (AOx) | Process yield optimization in bioethanol or beverage research. |
| General L-Amino Acids | Amperometric | L-Amino Acid Oxidase (L-AAOx) [1] | Tracking protein hydrolysis or nitrogen metabolism. |
Experimental Protocol: Integrating a Glucose Biosensor
Objective: To incorporate a commercial glucose biosensor for real-time monitoring and control of a laboratory-scale S. cerevisiae fermentation.
Materials:
- Benchtop bioreactor system (2-5 L)
- Commercial glucose biosensor probe or flow-injection analysis (FIA) system [13]
- Sterile calibration standards (e.g., 2, 5, 10 g/L glucose)
- Data acquisition software
Methodology:
- Pre-sterilization Calibration: Aseptically calibrate the biosensor in a separate sterile chamber using the glucose standards, following manufacturer guidelines.
- Sterilization: For in-situ sensors, ensure the probe is compatible with autoclaving (121°C, 20 min). Alternatively, integrate a pre-sterilized, flow-through FIA system with a microdialysis probe for sample collection [13].
- In-process Monitoring: Initiate fermentation. The biosensor will generate a continuous current signal (amperometric) proportional to glucose concentration via the reaction: Glucose + O₂ → Gluconolactone + H₂O₂ [1].
- Data Integration: Stream the sensor output to your process control software. Set alarms for critical low/high glucose levels.
- Validation: Periodically validate biosensor readings against offline reference methods (e.g., HPLC).
Data Interpretation: A sudden rise in glucose may indicate stalled metabolism. A rapid drop below the critical level (e.g., <0.5 g/L) signals the need for nutrient feeding to prevent growth arrest.
The Scientist's Toolkit: Essential Research Reagent Solutions
Selecting the appropriate reagents and materials is critical for successful fermentation research. The following table details key solutions for troubleshooting and process optimization.
Table 3: Essential Research Reagents for Fermentation Troubleshooting
| Reagent / Material | Function | Application Example | Technical Notes |
|---|---|---|---|
| Antifoaming Agents | Controls foam to prevent overflow and contamination risk. | Added prophylactically to foamy media; used as needed in response to foam sensors [11]. | Select silicone or non-silicone based agents compatible with downstream analysis. |
| Acid/Base Solutions | Adjusts and stabilizes fermentation pH. | Automated addition via peristaltic pump controlled by pH sensor feedback [12]. | 1-2M NaOH or HCl; ensure sterility for in-process addition. |
| Selective Agar Plates | Detects and identifies microbial contaminants. | Plating inoculum or process samples to check for bacterial/fungal contamination [8]. | Use general (LB, YPD) and selective media to isolate specific contaminants. |
| Enzyme Kits | Offline validation of key metabolites (e.g., glucose). | Verifying and calibrating online biosensor readings [10]. | Provides high-precision reference data for process validation. |
| Buffer Standards | Calibrates pH and biosensor probes. | Pre-run and post-run calibration of electrochemical sensors [12]. | Use certified standards (e.g., pH 4.01, 7.00, 10.01) for accurate calibration. |
FAQ: Addressing Common Researcher Concerns
Q: Are biosensors cost-effective for a typical academic research lab?
Yes, the landscape is changing. While historically expensive, the growing market for electrochemical biosensors has driven down costs, making them increasingly accessible [1]. The key is a clear cost-benefit analysis: the investment in sensors for critical parameters like glucose can be offset by preventing just one failed batch due to substrate exhaustion or by significantly reducing the time needed for process optimization. Furthermore, open-source platforms and modular solutions are emerging, further lowering the barrier to entry for small-scale research applications [3].
Q: How can I maintain a stable pH without an expensive automated dosing system?
For preliminary research or low-budget setups, a well-buffered medium is the most effective strategy. Incorporate biological buffers (e.g., phosphate, MOPS) or leverage the natural buffering capacity of media components like peptones. For active control, a simple peristaltic pump system triggered by a standalone pH controller can be a cost-effective alternative to full bioreactor integration.
Q: What is the simplest way to improve reproducibility in my small-scale fermentations?
The single most impactful step is to standardize your inoculum. Inconsistency in the starting culture is a major source of batch-to-batch variation. Implement a rigorous seed train protocol with defined media, precise incubation times, and standardized cell density for inoculation. This controls a key source of microbial variability before the fermentation even begins [3] [8].
Q: Can I use biosensors for high-temperature or sterile fermentations?
Yes, but selection is critical. For in-situ sterilization, specify sensors rated for repeated steam sterilization cycles (typically 121°C). The great majority of modern sensors are integrated into flow-injection analysis (FIA) systems, where a sterile microdialysis probe is inserted into the vessel, and the sample is aseptically pumped to an external, non-sterile sensor. This setup protects the biosensitive element from both high temperature and contamination [13].
Frequently Asked Questions (FAQs)
Q1: What are the primary cost drivers when running ELISA tests in a research setting? The primary costs include reagents and kits, specialized equipment (plate readers, washers, incubators), and labor for the multi-step, time-consuming procedures. Furthermore, the need for frequent testing to monitor dynamic processes like fermentation exacerbates these expenses, as single-use ELISA plates and reagents contribute significantly to per-test costs [14] [15].
Q2: Beyond cost, what are the key operational limitations of ELISA for fermentation monitoring? The most significant limitation is the long turnaround time, which can take several hours and is incompatible with the rapid feedback required for optimal fermentation control [14] [15]. ELISA is also labor-intensive, requires trained personnel, and is generally performed in centralized laboratories, making it unsuitable for real-time, on-line monitoring in a fermentation environment [16] [15].
Q3: My ELISA results show high background noise. What could be causing this? High background is often due to insufficient washing, which fails to remove unbound reagents, or non-specific binding due to inadequate blocking. Other causes include using reagents that are exposed to light or have been stored improperly, and exceeding the recommended incubation times [17] [18].
Q4: How do biosensors address the limitations of ELISA? Biosensors are designed to be rapid, providing results in minutes instead of hours. They are often portable and suitable for on-site or point-of-care testing, require small sample volumes, and can be integrated into systems for continuous, real-time monitoring, which is ideal for tracking fermentation parameters like glucose levels [14] [16] [15].
Q5: Are biosensors as sensitive and reliable as ELISA? While traditionally ELISA may have been seen as more established, modern biosensors can achieve comparable or even superior sensitivity and specificity [19] [20]. The reliability of a biosensor is highly dependent on the stability of its biorecognition element (e.g., antibody, enzyme) and the precision of its transducer. Ongoing advancements are continuously improving their performance and robustness for complex applications [21] [22].
ELISA Troubleshooting Guide
This guide helps diagnose and resolve common ELISA issues to ensure data reliability.
Weak or No Signal
| Possible Cause | Solution |
|---|---|
| Reagents not at room temperature | Allow all reagents to sit for 15-20 minutes at room temperature before starting the assay [17]. |
| Incorrect reagent storage or expiration | Double-check storage conditions (often 2-8°C) and confirm all reagents are within their expiration dates [17]. |
| Insufficient antibody concentration | Increase the concentration of the primary or secondary antibody; consider an overnight incubation at 4°C [18]. |
| Capture antibody failed to bind plate | Ensure you are using an ELISA plate (not a tissue culture plate) and that the coating procedure (buffer, incubation time) was followed correctly [17] [18]. |
Excessive Signal or High Background
| Possible Cause | Solution |
|---|---|
| Insufficient washing | Increase the number and/or duration of wash steps. Ensure the plate is drained thoroughly after each wash [17] [18]. |
| Inadequate blocking | Increase the concentration of the blocking agent (e.g., BSA, Casein) or the duration of the blocking step [18]. |
| Contaminated reagents or equipment | Prepare fresh buffers and use fresh pipette tips and plastics to avoid carry-over contamination, especially from HRP [18]. |
| Longer incubation times than recommended | Adhere strictly to the protocol's specified incubation times [17]. |
High Variability Between Replicates
| Possible Cause | Solution |
|---|---|
| Inconsistent pipetting | Calibrate pipettes and ensure thorough mixing of all solutions before addition to the plate [18]. |
| Inadequate or inconsistent washing | Ensure consistent and complete washing across all wells. Use an automated plate washer if available [17] [18]. |
| Bubbles in wells during reading | Centrifuge the plate briefly before reading to remove bubbles [18]. |
| Edge effects (evaporation) | Use a plate sealer during all incubation steps to prevent evaporation and ensure even temperature [17] [18]. |
Quantitative Comparison: ELISA vs. Emerging Biosensors
The table below summarizes key performance and cost metrics that highlight the limitations of conventional ELISA and the potential advantages of biosensors for research applications like fermentation monitoring.
| Parameter | Conventional ELISA | Conductometric Biosensor [19] | Electrochemical Biosensor (e.g., Glucose) [15] |
|---|---|---|---|
| Approximate Analysis Time | Several hours [14] | ~2 minutes [19] | <5 minutes [15] |
| Detection Limit (Example) | Varies; ~10³-10⁵ CFU/mL for pathogens [14] | Comparable to commercial ELISA (Kappa=0.41) [19] | Up to 150 mM glucose in fermentation broth [15] |
| Equipment Needs | Plate reader, washer, incubator [14] | Portable ohmmeter [19] | Portable potentiostat, flow-cell [15] |
| Suitability for On-line Monitoring | No | Potential for on-site use [19] | Yes, demonstrated for fermentation [15] |
| Key Cost Drivers | Recurring cost of kits/reagents, labor, equipment maintenance [14] | Lower cost per test, reduced labor | Reduced resource consumption vs. HPLC [15] |
Experimental Protocol: Comparing a Conductometric Biosensor to ELISA
This protocol is adapted from a study evaluating a biosensor for Johne's disease, illustrating a direct comparison methodology applicable to other targets [19].
Objective
To optimize and compare the performance of a conductometric biosensor against a commercially available ELISA for the detection of a specific antibody (e.g., against Mycobacterium avium subsp. paratuberculosis, MAP) in bovine serum samples.
Materials and Reagents
- Biosensor Assembly Kit: Hi-Flow Plus Assembly Kit (e.g., Millipore), including sample application, conjugate, capture, and absorption membranes.
- Conductive Polymer: 0.001% Polyantiline (Pani) in 0.1 M PBS.
- Biorecognition Elements: Purified monoclonal anti-bovine IgG; purified MAP antigen (MAPPD).
- Detection Instrument: Ohmmeter.
- Comparison Assay: Commercial MAP antibody ELISA kit (e.g., PARACHEK).
- Sample Set: Serum samples from infected and non-infected animals, negative control (PBS).
Procedure
Step 1: Biosensor Fabrication and Optimization
- Screen-print silver electrodes onto the capture membrane to create a uniform 1 mm-wide immunomigration channel.
- Prepare the Pani-antibody conjugate by adding anti-bovine IgG to the Pani solution at varying concentrations (e.g., 0.046 mg/mL, 0.0115 mg/mL, 0.0046 mg/mL). Incubate for 1 hour at 27°C.
- Immobilize the conjugate by saturating the conjugate membrane with the Pani-antibody solution, then air-dry.
- Assemble the immunosensor strips by layering the application, conjugate, capture, and absorption membranes. Cut into 5 mm-wide strips.
- Connect the electrodes to an ohmmeter using a conductive pen and copper wafers.
Step 2: Sample Testing and Data Collection
- Apply 100 μL of sample to the application membrane. Capillary action pulls the sample through the strip.
- Record resistance value (kΩ) from the ohmmeter at 2 minutes post-application. Perform triplicate measurements for each sample.
- Test the same samples using the commercial ELISA kit according to the manufacturer's instructions, measuring the optical density (OD).
- Analyze the agreement between the two assays using statistical methods like Cohen's Kappa coefficient.
Workflow Visualization
The Scientist's Toolkit: Key Research Reagent Solutions
This table details essential materials and their functions for developing and working with diagnostic assays like ELISA and biosensors.
| Item | Function & Application | Notes |
|---|---|---|
| Monoclonal Antibodies (mAbs) | Primary biorecognition element; binds specifically to a single epitope on the target analyte, providing high specificity [20]. | Offer superior consistency over polyclonal antibodies but are more costly and time-consuming to produce [20]. |
| Polyclonal Antibodies (pAbs) | A mixture of antibodies that recognize multiple epitopes on the same target antigen [20]. | Faster and less expensive to produce than mAbs, but can have higher batch-to-batch variability [20]. |
| Immunomagnetic Beads | Magnetic beads coated with antibodies for targeted capture and separation of specific cells or molecules from complex samples (e.g., fermentation broth) [23] [20]. | Enables sample pre-concentration and purification, significantly improving detection sensitivity in complex matrices [20]. |
| Polyaniline (Pani) | A conductive polymer used in conductometric biosensors. Acts as a transducer, relaying antigen-antibody binding events as a measurable change in electrical conductance [19]. | Key to converting a biological event into an electronic signal for simple, rapid detection [19]. |
| Gold Leaf Electrodes | Low-cost electrode material fabricated using gold leaf lamination and laser ablation for electrochemical biosensors [23]. | Provides excellent conductivity and biocompatibility at a fraction of the cost of traditionally fabricated gold electrodes [23]. |
| Enzymes (e.g., HRP, GOx) | Signal generators. HRP is used in ELISA for colorimetric detection. GOx is the bioreceptor in many electrochemical glucose biosensors [15] [22]. | Enzyme stability is critical for assay reliability. Sodium azide must be avoided in buffers as it inhibits HRP [18]. |
Troubleshooting Guides and FAQs
Electrochemical Biosensors
Q1: My electrochemical biosensor shows a decreasing signal over time. What could be the cause?
A decrease in signal is frequently caused by electrode fouling, where biomolecules like proteins non-specifically adsorb to the electrode surface, blocking the active sites [24]. In complex biological environments, this is a common challenge.
- Prevention and Solutions:
- Use Anti-fouling Materials: Modify the electrode surface with highly hydrophilic or negatively charged materials. Effective options mentioned in research include Nafion, zwitterionic polymers, silica nanoporous membranes (SNM), and polydopamine (PDA) [24].
- Surface Regeneration: Implement a gentle cleaning protocol between measurements. This could involve rinsing with a suitable buffer or applying a specific electrochemical potential to desorb contaminants without damaging the biorecognition element.
- Check the Reference Electrode: For long-term measurements, the stability and biocompatibility of the reference electrode are critical. Signal drift can occur if the reference electrode is contaminated or fails [24].
Q2: How can I improve the selectivity of my sensor when detecting a specific neurotransmitter in a complex mixture?
The complex brain environment, with its many electroactive substances possessing similar formal potentials, presents a major selectivity challenge [24].
- Strategies for Enhancement:
- Employ Specific Biorecognition Elements: Immobilize enzymes, nucleic acid aptamers, or molecular probes on the electrode surface that are highly specific for your target analyte [24].
- Tailor Functional Surfaces: Use modified electrodes or specific electrochemical techniques that can separate overlapping redox peaks. For example, carbon-based electrodes like carbon fiber microelectrodes are widely used for their excellent spatio-temporal resolution in neurochemical sensing [24].
- Leverage Advanced Techniques: Fast-scan cyclic voltammetry (FSCV) or differential pulse voltammetry (DPV) can help distinguish between molecules with similar redox potentials [24].
Optical Biosensors
Q3: The signal from my optical biosensor is weak or noisy. What initial checks should I perform?
Before assuming a complex failure, conduct these basic checks.
- Troubleshooting Steps:
- Inspect and Clean the Lens: Dust, dirt, or residue on the optical components is a primary cause of signal reduction. Gently clean the lens according to the manufacturer's instructions [25].
- Verify All Connections: Ensure all fiber optic cables or electrical connections are secure and intact. A loose cable can significantly impair performance [25].
- Check the Light Source: Confirm that the light source (e.g., LED, laser) is operating at the correct intensity and has not degraded.
- Minimize External Covers: If the application does not require waterproof or dustproof protection, avoid adding external covers to the lens, as they can interfere with light reflection and transmission [25].
Microbial Fuel Cell (MFC)-Based Biosensors
Q4: The current output of my MFC biosensor has dropped after switching from synthetic to real wastewater. Is this normal?
Yes, this is a common observation. A reduction in maximum current density when feeding real urban wastewater (RWW) compared to sterile synthetic wastewater (SWW) is typical [26].
- Primary Reasons and Mitigation:
- Competition from Native Microbes: RWW contains native planktonic microorganisms that compete with your established electroactive biofilm for the organic substrate, reducing Coulombic efficiency and current [26].
- Complex Substrate Composition: The organic matter in real wastewater is more complex and may be metabolized less efficiently than the simple compounds (e.g., acetate) often used in synthetic media [26].
- Resilience of Biofilm: Despite the initial drop, studies show that anodic biofilms are resilient. The biosensor can be recalibrated for the new feedstock and will maintain consistent sensitivity, though the baseline current might be lower [26].
Q5: What are the key operational factors that affect the performance and stability of my MFC biosensor?
MFC performance is influenced by a range of interconnected factors [27].
- Critical Operational Factors:
- Electrode Material: The material's conductivity, surface area, and biocompatibility directly impact bacterial adhesion and electron transfer efficiency [27].
- Substrate Type and Concentration: The type and concentration of organic matter (the fuel) directly determine the current output and are the basis for BOD sensing [26].
- pH and Temperature: These must be kept within an optimal range for the electroactive microbes to function efficiently [27].
- External Resistance: This controls the circuit's current flow and can be optimized to match the internal resistance of the MFC for maximum power output [27].
Detailed Methodology: Calibrating an MFC Biosensor for BOD
This protocol is adapted from research on using MFCs for biochemical oxygen demand (BOD) monitoring [26].
- Biosensor Setup: Use a single-chamber MFC design with an anode containing a mixed-culture electroactive biofilm and an air-diffusion cathode.
- Baseline Operation: Feed the MFC with a baseline substrate (e.g., acetate-based artificial media) until a stable and repeatable current output is achieved.
- Calibration Samples: Prepare standard solutions with known BOD concentrations. For synthetic calibration, use a complex artificial wastewater. For real-world application, use urban wastewater with BOD determined by the standard BOD₅ test.
- Measurement Cycle:
- Replace the anolyte in the MFC with a standard solution.
- Monitor the current density generated across an external resistor (e.g., 1 kΩ) until it peaks and then declines as the substrate is consumed.
- Record the maximum current density for each standard.
- Data Analysis: Plot the maximum current density against the known BOD concentration to create a calibration curve. This curve is used to determine the BOD of unknown samples.
Quantitative Performance Data
Table 1: Performance Comparison of Biosensor Types for Fermentation Monitoring
| Biosensor Type | Typical Applications | Key Advantages | Reported Sensitivity / LOD | Common Challenges |
|---|---|---|---|---|
| Electrochemical | Neurotransmitter detection [24], Pathogen detection [28] [29], Metabolite monitoring (e.g., glucose, lactate) [30] | Rapid response, high sensitivity, easy miniaturization, cost-effective [28] [30] | LOD for neurotransmitters at nanomolar levels [24]; LOD for atrazine pesticide: 0.3 ppm [30] | Electrode fouling, interference from electroactive species, reference electrode stability [24] |
| MFC-Based | Real-time BOD monitoring [26] | Long-term operational stability (5+ years), minimal maintenance, self-sustaining [27] [26] | Sensitivity: 0.64 - 0.78 mA L mg⁻¹ m⁻²; LOD: 44 - 49 mg L⁻¹ BOD [26] | Low power output, delayed start-up, signal variation with complex feedstocks [27] [26] |
| Optical | Immunoglobulin detection in serum [30], Salivary urea testing [31] | High sensitivity for specific assays, suitability for multiplexing | LOD for IgG/anti-IgG in human serum: very low (specific value not listed) [30]; Salivary urea: 1 μL sample volume [31] | Susceptible to environmental light interference, component fouling, can require complex optics [25] |
Table 2: Essential Research Reagent Solutions for Biosensor Development
| Item | Function / Application | Key Considerations |
|---|---|---|
| Carbon Fiber Electrodes | Working electrode for in vivo neurochemical sensing [24] | Provides excellent spatio-temporal resolution and small subcellular size. |
| Anti-fouling Polymers (e.g., Nafion, Zwitterionic polymers) | Coating to resist non-specific protein adsorption on electrode surfaces [24] | Improves stability and longevity of electrochemical sensors in complex biological fluids. |
| Biorecognition Elements (Antibodies, Aptamers, Enzymes) | Provides specificity to the target analyte [29] [30] | Choice depends on target availability, required specificity, and assay format (e.g., catalytic vs. affinity biosensors). |
| Lab-on-PCB Substrates | Low-cost, scalable platform for integrating microfluidics and electronics [31] | Enables mass production of disposable or low-cost sensor cartridges. |
| Prussian Blue Nanoparticles | Electrode modifier for catalytic detection of H₂O₂ in enzyme-based biosensors [30] | Used in biosensors for metabolites like glucose and cholesterol. |
Workflow and Signaling Diagrams
Biosensor Troubleshooting Logic Flow
MFC Biosensor Setup and Operation
The Role of AI, IoT, and Machine Learning in Enhancing Data Utility and Process Control
Technical Support Center: Troubleshooting for AI-Enhanced Biosensors
This support center provides targeted troubleshooting and FAQs for researchers using AI and IoT-enhanced biosensors in small-scale fermentation. The guidance is framed within a thesis focused on developing cost-effective biosensing solutions.
Troubleshooting Guides
Data Accuracy and Sensor Performance Issues
| Symptom | Possible Cause | Troubleshooting Steps | Reference Protocol |
|---|---|---|---|
| Drifting calibration or inaccurate readings over time. | Biofouling from fermentation media; degradation of biorecognition element (e.g., enzyme, aptamer); environmental factors (pH, temperature). | 1. Recalibrate sensor using fresh standard solutions. 2. Inspect and clean sensor probe with a soft cloth and isopropyl alcohol if applicable. 3. Verify storage conditions for biorecognition elements. 4. For electrochemical sensors, perform Cyclic Voltammetry in a clean buffer to check electrode integrity [23]. | Standard buffer calibration; Electrode characterization via CV [23]. |
| High signal noise or erratic data. | Electromagnetic interference (EMI) from pumps/stirrers; poor electrode connections; power fluctuations. | 1. Relocate sensor or EMI source; use shielded cables. 2. Check and secure all physical connections. 3. Use a multimeter to verify stable power supply to the sensor. 4. In software, apply a moving average filter to smooth data [32]. | Signal conditioning and filtering protocols [32]. |
| False positives/negatives in AI-biosensor detection. | Nonspecific binding; algorithmic bias due to limited training data; sensor cross-sensitivity to interferents. | 1. Review and curate the AI model's training dataset for representativeness. 2. Incorporate control experiments to account for nonspecific binding. 3. Re-train the ML model with data that includes common interferents [21]. | AI model validation and control sample testing [21]. |
IoT Connectivity and Data Transmission Issues
| Symptom | Possible Cause | Troubleshooting Steps | Reference Protocol |
|---|---|---|---|
| Sensor not reporting data to the central system. | Network connectivity loss; incorrect gateway configuration; depleted battery. | 1. Ping the device's IP address from a connected computer. 2. Check firewall settings and ensure the IoT gateway is online. 3. For battery-operated sensors, verify and replace batteries. 4. Restart the sensor and gateway [32]. | IoT device onboarding and network verification [32] [33]. |
| Intermittent data drops. | Weak wireless signal; network congestion; faulty hardware. | 1. Check signal strength on the IoT dashboard. 2. Relocate the sensor or gateway to improve signal. 3. Update sensor and gateway firmware to the latest version. 4. Inspect hardware for damage [33]. | Firmware update and network diagnostic procedures [32] [33]. |
AI/ML Model and Analysis Issues
| Symptom | Possible Cause | Troubleshooting Steps | Reference Protocol |
|---|---|---|---|
| AI model performance degrades over time (model drift). | Changes in fermentation process or raw materials not reflected in training data. | 1. Implement continuous learning pipelines to periodically re-train the model with new data. 2. Monitor for data drift and concept drift. 3. Validate model predictions against offline analytical methods regularly [34]. | MLOps (Machine Learning Operations) lifecycle management [34]. |
| Model predictions are inaccurate or unreliable. | Insufficient or poor-quality training data; overfitting; inappropriate model selection. | 1. Audit and expand the training dataset, ensuring it covers all expected process conditions. 2. Simplify the model or increase regularization to combat overfitting. 3. Test different machine learning algorithms for your specific data type [35] [36]. | Model selection and hyperparameter tuning frameworks [35] [36]. |
Frequently Asked Questions (FAQs)
Q1: What are the most cost-effective electrode fabrication methods for prototyping biosensors in a research setting? A1: For low-batch prototyping, laser ablation of laminated gold leaves on adhesive PVC sheets is a rapid and cost-effective alternative to expensive methods like physical vapor deposition (PVD) [23]. This approach allows for customizable electrode geometries with micro-scale resolution suitable for fermentation monitoring [23].
Q2: How can I improve the specificity of my biosensor in a complex fermentation broth? A2: Integrating magnetic beads (MBs) as a sample preparation step can enhance specificity. MBs functionalized with specific biorecognition elements (e.g., aptamers) can selectively capture and concentrate the target analyte from the broth, separating it from potential interferents before detection [23].
Q3: Our AI model works well in simulation but fails in real-time fermentation control. What could be wrong? A3: This is often a data synchronization or latency issue. Ensure your AI system is deployed on an edge computing platform to process sensor data with low latency, enabling real-time decisions instead of relying on slower cloud-based processing [34]. Also, verify that the training data accurately represents the real-time sensor environment.
Q4: What are the critical data privacy considerations when using cloud-based AI for biosensor data? A4: For sensitive research data, implement end-to-end encryption for data in transit and at rest. Use strong authentication protocols for system access and ensure your setup is compliant with relevant data regulations. Where possible, process data locally on-edge devices to minimize data transfer [33].
Q5: Why is predictive maintenance important for my fermentation monitoring system? A5: Predictive maintenance uses AI to analyze sensor data (e.g., vibration, temperature) from your bioreactor and supporting equipment to forecast potential failures before they occur [37] [34]. This minimizes unplanned downtime, which is critical for maintaining the integrity of long-term fermentation processes.
Experimental Protocols for Cost-Effective Biosensor Development
Objective: To create customizable, low-cost electrochemical transducers for biosensing applications.
Materials:
- 24-karat gold leaves
- Polyvinyl chloride (PVC) adhesive sheets
- Laser ablation system
- Laminator
Methodology:
- Lamination: Carefully laminate a gold leaf onto the adhesive surface of a PVC sheet using a laminator, ensuring a smooth, wrinkle-free conductive layer.
- Laser Patterning: Design the desired electrode geometry (e.g., working, counter, and reference electrodes) in computer-aided design (CAD) software. Use a laser ablation system to precisely etch the design, removing excess gold and defining the functional electrodes.
- Characterization: Characterize the fabricated electrodes using:
- Cyclic Voltammetry (CV): Perform CV in a solution containing a redox couple (e.g., 10 mM ferri/ferrocyanide) to assess electron transfer efficiency and electrode cleanliness.
- Electrochemical Impedance Spectroscopy (EIS): Use EIS to evaluate the interfacial properties of the electrode.
- Scanning Electron Microscopy (SEM): Image the electrode surface to examine the morphology and quality of the gold layer.
Protocol 2: Developing an AI-Powered Predictive Model for Metabolite Concentration
Objective: To train a machine learning model that predicts metabolite levels from real-time biosensor data.
Materials:
- Time-series dataset from biosensors (e.g., current, potential, impedance)
- Reference measurements of metabolite concentration (e.g., from HPLC)
- Machine learning software environment (e.g., Python with scikit-learn)
Methodology:
- Data Collection: Synchronize biosensor output with offline reference measurements of the target metabolite to create a labeled dataset covering various fermentation stages.
- Feature Engineering: Extract relevant features from the raw sensor data, such as moving averages, rate of change, peak values, or Fast Fourier Transform (FFT) components.
- Model Training: Split the data into training and testing sets. Train a regression model (e.g., Random Forest, Gradient Boosting, or a simple Neural Network) to map the sensor features to the reference metabolite concentration.
- Validation and Deployment: Validate model performance on the held-out test set. Once satisfactory accuracy is achieved, deploy the model to operate on live sensor data for real-time prediction.
System Workflow and Signaling Pathways
The following diagram illustrates the integrated workflow of an AI and IoT-enhanced biosensor system for fermentation monitoring.
The Scientist's Toolkit: Research Reagent Solutions
This table details key materials and their functions for developing and using cost-effective biosensors in fermentation research.
| Item | Function/Brief Explanation | Key Consideration for Cost-Effective Research |
|---|---|---|
| Gold Leaf & PVC Sheets [23] | Low-cost substrate for fabricating custom electrochemical electrodes via lamination and laser ablation. | Drastically reduces cost compared to sputtered gold electrodes; ideal for prototyping. |
| Magnetic Beads (MBs) [23] | Functionalized with biorecognition elements to selectively capture, separate, and preconcentrate target analytes from complex broth. | Improves sensor sensitivity and specificity, reducing false signals from media components. |
| Aptamers [35] | Synthetic nucleic acid-based biorecognition elements selected for high affinity to specific targets (e.g., metabolites, proteins). | Often more stable and cheaper to produce than antibodies; can be selected for novel targets. |
| Redox Probes (e.g., Ferri/Ferrocyanide) [23] | A molecule that undergoes reversible oxidation/reduction reactions, used in electrochemical sensors to generate a measurable current signal. | Essential for characterizing electrode performance and for use in many common biosensing designs. |
| Phytochemical-synthesized Nanoparticles [38] | Eco-friendly (green-synthesized) nanoparticles that can act as transducers, catalysts (nanozymes), or signal amplifiers in biosensors. | Uses plant extracts as reducing agents, offering a sustainable and non-toxic alternative to chemical synthesis. |
Implementing Practical Biosensor Systems for Real-Time Process Monitoring
Biosensor Comparison Tables
Core Characteristics and Applications
The table below compares the fundamental principles, advantages, and typical uses of three major biosensor types in a fermentation research context.
| Biosensor Type | Transduction Principle | Key Advantages | Common Fermentation Analytes | Best Suited For |
|---|---|---|---|---|
| Electrochemical [39] [40] | Measures electrical changes (current, potential, impedance) from bio-recognition events [40]. | Cost-effective, easy to miniaturize, robust, works with turbid samples, short response time [39] [40]. | Glucose, lactate, ethanol, oxygen, carbon dioxide [40]. | Real-time, in-line monitoring of metabolites and gases; low-budget labs. |
| Optical (SPR/LSPR) [41] | Detects changes in refractive index (SPR) or local environment (LSPR) near a sensor surface [41]. | Label-free, real-time, high specificity, provides kinetic binding data [41]. | Antibodies, recombinant proteins, viral particles, toxins [41]. | Detailed study of biomolecular interactions (e.g., substrate-enzyme); off-line analysis. |
| MFC-based [42] [43] | Uses microbial metabolism to generate a current proportional to organic load [42]. | Self-powered, measures "bioready" organics, can use very low-cost materials [42] [43]. | Biochemical Oxygen Demand (BOD), toxicants in feedstocks [42] [43]. | Overall culture health and organic content monitoring of inlet/outlet streams. |
Performance and Cost-Effectiveness
This table provides a detailed comparison of performance metrics and cost considerations, which are critical for selecting a biosensor for small-scale, cost-conscious research.
| Parameter | Electrochemical | Optical (SPR) | MFC-based |
|---|---|---|---|
| Limit of Detection (LOD) [39] [41] | Good (μM to nM) [39] | Excellent (pM to nM) [41] | Moderate (mg/L range for BOD) [43] |
| Sensitivity | High | Very High | Moderate |
| Assay Time [43] [40] | Short (seconds to minutes) [40] | Fast (real-time, minutes) [41] | Medium (minutes to hours) [43] |
| Approx. Setup Cost [42] [44] | Low to Medium [44] | High | Very Low [42] |
| Per-Cost [42] [44] | Low (disposable electrodes) [44] | High (proprietary sensor chips) | Very Low (e.g., eggshell membranes) [42] |
| Ease of Miniaturization [39] [40] | Excellent [39] [40] | Good (complex optics) | Good |
| Multi-analyte Capability | Good (sensor arrays) | Excellent (SPR imaging) [41] | Limited (non-specific) |
Troubleshooting Guides & FAQs
Electrochemical Biosensor Troubleshooting
Q: My electrochemical sensor shows a noisy or unstable signal. What could be wrong? [45]
- A: This is a common issue with multiple potential causes:
- Electrode Connection: Check for poor electrical contact, especially if using a rotating working electrode. Ensure the connection point is clean and secure [45].
- Reference Electrode Stability: A blocked frit in a standard reference electrode (e.g., Ag/AgCl) or an unstable pseudo-reference can cause signal drift and noise. Ensure the reference electrode is functioning correctly [45].
- Surface Contamination: The working electrode surface might be contaminated. For metal electrodes, ensure any protective hydrocarbon coating from the factory is thoroughly removed with a solvent like acetone before use [45].
- Oil Film Blockage: In fermentation broths with oils, a film can block the electrode-electrolyte interface. Ensure electrodes are clean and consider hardware configuration changes [45].
Q: Can I reuse my electrochemical sensor's working electrode? [45]
- A: It is not advisable. The working electrode, especially in corrosion or harsh bio-process monitoring, can be corroded or fouled. Its surface area and properties change after use, which critically affects the accuracy of subsequent measurements. For consistent results, use a fresh, properly prepared electrode for each experiment [45].
Optical SPR Biosensor Troubleshooting
Q: I suspect non-specific binding is interfering with my SPR data. How can I resolve this? [46]
- A: Non-specific binding makes interactions seem stronger than they are. You can minimize it by:
- Buffer Additives: Supplement your running buffer with additives like a surfactant (e.g., Tween 20), bovine serum albumin (BSA), dextran, or polyethylene glycol (PEG) [46].
- Reference Channel: Use a well-designed reference channel with a non-interacting compound coupled to the surface to subtract background signals [46].
- Sensor Chip Type: Changing the type of sensor chip surface chemistry can sometimes reduce non-specific interactions [46].
Q: My sensor surface does not regenerate properly for the next sample injection. What should I do? [46]
- A: Successful regeneration requires removing the bound analyte while keeping the immobilized ligand active. Since binding forces differ, you may need to experiment with different regeneration solutions:
- Acidic Solutions: Try 10 mM glycine (pH 2.0) or 10 mM phosphoric acid.
- Basic Solutions: Try 10 mM NaOH.
- High-Salt Solutions: Try 2 M NaCl.
- Adding 10% glycerol to the solution can sometimes help maintain target stability during this harsh process [46].
MFC-based Biosensor Troubleshooting
Q: The power output and sensitivity of my MFC sensor are lower than expected. How can I improve them? [42]
- A: The performance of an MFC sensor is highly dependent on its design and materials.
- Electrode Spacing: The distance between the anode and cathode significantly impacts power output. The optimal spacing depends on the membrane material. For natural polymer membranes (e.g., eggshell) or membrane-less devices, a larger electrode spacing often yields better power [42].
- Membrane Material: The proton exchange membrane is a key cost and performance factor. While Nafion is a common control, low-cost alternatives like synthetic polydimethylsiloxane (PDMS) can achieve similar power density. Natural polymers like an eggshell membrane can offer the lowest internal resistance and highest sensitivity, though they may be less stable [42].
Experimental Protocols
Protocol: Fabricating a Low-Cost Electrochemical Biosensor
This protocol outlines a cleanroom-free method for creating a microfluidic electrochemical biosensor, ideal for prototyping in resource-limited settings [44].
1. Design and Fabricate Microfluidic Channel: - Method: Use xurography, a method using a craft cutter and adhesive vinyl films. - Steps: Design the channel pattern on a computer. Use the craft cutter to cut the pattern into a vinyl sheet. Peel away the channel areas to create a master mold. - Alternative: Use a desktop 3D printer to print the channel master directly [44].
2. Fabricate Planar Electrodes: - Method: Screen-printing is a low-cost and scalable method. - Steps: Create a stencil with the electrode pattern. Use a squeegee to push conductive ink (e.g., carbon or Ag/AgCl) through the stencil onto a flexible plastic substrate. This can define working, counter, and reference electrodes simultaneously [44].
3. Assemble and Bond: - Steps: Align the microfluidic channel layer (from Step 1) with the electrode layer (from Step 2). Use a pressure-sensitive adhesive or thermal bonding to seal the layers together, ensuring fluidic ports align with the electrode chamber [44].
4. Surface Functionalization: - Steps: Introduce reagents into the microchannel to modify the working electrode surface. This involves immobilizing the biorecognition element (e.g., an enzyme, antibody, or DNA probe) specific to your target analyte to create the biosensor [44].
The workflow for this fabrication process is summarized in the diagram below.
Protocol: Measuring Biomolecular Interactions with an SPR Biosensor
This protocol describes a standard procedure for characterizing a ligand-analyte interaction using Surface Plasmon Resonance [41].
1. Sensor Chip Preparation: - Steps: Select an appropriate sensor chip (e.g., carboxymethylated dextran). Activate the surface chemistry (e.g., using NHS/EDC). Immobilize your ligand (e.g., a protein or antibody) onto the activated surface. Deactivate any remaining reactive groups [41].
2. Establish a Stable Baseline: - Steps: Flow a continuous buffer (the "running buffer") over the sensor chip until a stable baseline is achieved. This ensures any signal change is due to binding, not environmental drift [41].
3. Analyze Binding Kinetics: - Association Phase: Inject your analyte at a known concentration over the ligand surface and monitor the binding in real-time. - Dissociation Phase: Switch back to running buffer to monitor the dissociation of the bound complex. - Steps: Repeat these injections for a range of analyte concentrations [41].
4. Surface Regeneration: - Steps: Inject a regeneration solution (see Troubleshooting section 2.2) to remove all bound analyte from the immobilized ligand, readying the surface for the next sample [41].
5. Data Analysis:
- Steps: Subtract the signal from a reference flow cell to account for bulk refractive index changes and non-specific binding. Fit the resulting sensorgram data to a binding model (e.g., 1:1 Langmuir model) to calculate the association rate (k_on), dissociation rate (k_off), and equilibrium dissociation constant (K_D) [41].
The following diagram illustrates the key stages of an SPR experiment and the resulting data.
The Scientist's Toolkit: Research Reagent Solutions
The table below lists key materials and reagents essential for developing and operating the biosensors discussed.
| Item Name | Function / Application | Key Considerations |
|---|---|---|
| Screen-Printed Electrodes (SPEs) [44] | Disposable, low-cost platforms for electrochemical detection. | Ideal for prototyping; available with carbon, gold, or custom Ag/AgCl reference electrodes. |
| Nafion & PDMS Membranes [42] | Proton exchange membranes for MFCs. | Nafion is a performance benchmark but costly; PDMS is a low-cost synthetic alternative with similar power [42]. |
| SPR Sensor Chip (CM5 type) [41] | Gold surface with a carboxymethylated dextran matrix for ligand immobilization. | The standard for many label-free interaction studies; compatible with NHS/EDC amine coupling chemistry. |
| NHS/EDC Coupling Kit [41] | Chemical cross-linkers for covalent immobilization of proteins/ligands on sensor surfaces. | Essential for preparing most SPR and many electrochemical biosensor surfaces. |
| Glycine-HCl (pH 2.0) [46] | A common, mild acidic solution for regenerating SPR sensor surfaces. | Effectively dissociates many antibody-antigen complexes without damaging the immobilized ligand. |
| Potassium Ferricyanide | A redox probe for characterizing and validating the performance of electrochemical sensors. | Used in cyclic voltammetry to test electrode activity and active surface area. |
Step-by-Step Integration of Biosensors into Small-Scale Fermenters
Biosensors are analytical devices that combine a biological recognition element (such as an enzyme, antibody, or whole cell) with a physicochemical transducer to convert a biological response into a quantifiable electrical signal [10]. For small-scale fermentation research, they provide a route to selective, real-time quantification of critical process parameters like glucose, lactate, and amino acids, moving beyond the limited standard measurements of pH, temperature, and dissolved oxygen [47] [48]. Their integration is key to implementing advanced, data-driven control strategies, optimizing reactor efficiency, maximizing productivity, and fully exploring the genetic potential of engineered strains in a cost-effective manner [49] [48].
Biosensor Selection and Design
Types of Biosensors for Fermentation
Biosensors can be classified by their biorecognition element or their transduction method. The choice depends on the target analyte, required sensitivity, and the complexity of the fermentation matrix [10] [50].
Classification by Biorecognition Element:
- Enzyme-based sensors: Utilize enzymes like glucose oxidase for specific substrate detection. These are the most mature and commercially available biosensors [1] [10].
- Immunosensors: Rely on antibody-antigen recognition, useful for detecting specific pathogens or proteins [10].
- Whole-cell sensors: Employ engineered microorganisms to detect the presence of specific analytes or stress conditions, such as the bacterial system developed to detect cobalt in food products [51].
- DNA/aptamer biosensors: Use nucleic acid interactions for detecting genetic markers or specific sequences [10].
Classification by Transducer:
- Electrochemical: Dominant in process monitoring due to their simplicity, sensitivity, and cost-effectiveness [1] [50]. They are further divided into:
- Optical: Based on changes in light properties (absorbance, fluorescence, chemiluminescence). They offer high sensitivity and potential for multiplexing but can be more complex and expensive [1] [52]. Recent advances include FRET-based biosensors with large dynamic ranges and multicolor capabilities [52].
- Thermal: Detect heat released or absorbed by biochemical reactions [1] [10].
- Piezoelectric: Measure mass changes on a crystal surface [10].
Performance Criteria for Small-Scale Fermenters
When selecting a biosensor for a lab-scale bioreactor, consider the following key parameters, summarized in the table below.
Table 1: Key Performance Criteria for Biosensor Selection
| Criterion | Ideal Specification for Small-Scale Use | Importance |
|---|---|---|
| Detection Range | Must cover expected analyte concentration (e.g., glucose sensors up to 150 mM are available) [48] | Prevents saturation and ensures readings are within the quantitative linear range. |
| Sensitivity | High enough to detect physiologically relevant changes | Allows for precise control of metabolic pathways. |
| Response Time | < 1-5 minutes [48] | Compatible with the dynamics of microbial growth and enables real-time control. |
| Selectivity | High specificity for the target analyte in a complex broth [48] | Minimizes interference from other media components, metabolites, or electroactive species. |
| Stability & Lifetime | Stable for the duration of a typical fermentation run (days to weeks) | Ensures data consistency and reduces the need for mid-experiment recalibration. |
| Ruggedness | Tolerant to sterilization (e.g., steam sterilisable) and resistant to fouling [47] | Withstands the harsh bioreactor environment and ensures operational reliability. |
| Calibration | Simple and fast calibration procedure | Saves time and resources while improving measurement accuracy. |
Step-by-Step Integration Protocol
Pre-Integration Planning
- Define Analytical Needs: Identify the key analyte (e.g., glucose, glutamate, lactate) critical for process understanding and control.
- Select Biosensor Platform: Choose an appropriate biosensor based on Section 2. Commercially available flow-through-cell platforms with integrated electrochemical biosensors are a robust starting point [48].
- Assemble Hardware: Ensure you have the biosensor chip, a potentiostat, tubing, a peristaltic pump, and data acquisition software. For on-line integration, you will need a method for aseptic sampling from the bioreactor [48].
Experimental Workflow: At-Line vs. On-Line Monitoring
The integration of a biosensor can be achieved in two primary configurations: at-line and on-line. The workflow for both is outlined in the diagram below.
At-Line Monitoring Protocol: This method involves manually taking samples from the fermenter for rapid analysis.
- Aseptic Sampling: Draw a small sample (1-2 mL) from the fermentation broth via a designated sampling port.
- Sample Preparation: Centrifuge or filter the sample to obtain a cell-free supernatant. This is critical to prevent clogging the biosensor flow cell and interference from cells [48].
- Biosensor Operation: a. Connect the biosensor flow cell to the potentiostat and pump. b. Flush the system with a buffer or clean medium to establish a stable baseline. c. Inject the cell-free sample into the flow stream. d. The biosensor measures the analyte concentration, generating an electrical signal.
- Data Recording: The signal is processed by the software, which outputs the analyte concentration, typically in under 5 minutes [48].
On-Line Monitoring Protocol: This method provides continuous, real-time data by integrating the biosensor directly into the fermenter loop.
- System Integration: Connect an automated, aseptic sampling module (e.g., a flow injection analysis system) to the bioreactor. This module automatically withdraws and pre-treats (e.g., filters) the broth [47].
- Continuous Flow: The cell-free permeate is continuously pumped through the biosensor flow cell [48].
- Automated Measurement & Control: The biosensor takes measurements at set intervals. The data can be fed directly into the bioreactor's control system to automatically adjust feeding pumps or other parameters, enabling advanced control strategies like glucose feed control [48].
The Scientist's Toolkit: Essential Research Reagent Solutions
Table 2: Key Reagents and Materials for Biosensor Integration
| Item | Function/Description | Example/Note |
|---|---|---|
| Flow-Through Biosensor Chip | Miniaturized cell housing the working, counter, and reference electrodes. | e.g., B.LV5 chip with integrated Pt electrodes [48]. |
| Enzyme (Biorecognition Element) | Provides specificity for the target analyte. | Glucose oxidase (GOx) for glucose sensors; Glutamate oxidase for glutamate sensors [1] [48]. |
| Potentiostat | Instrument that applies a potential and measures the resulting current. | Essential for amperometric and other electrochemical measurements [48]. |
| Immobilization Matrix | A material or method to securely attach the biorecognition element to the transducer. | Photocrosslinkable polymers, Nafion membranes, or cross-linking reagents like glutaraldehyde [1] [50]. |
| Calibration Standards | Solutions of known analyte concentration. | Used to construct a calibration curve before and during fermentation runs. |
| Buffer Solutions | Maintain a stable pH for the biosensor's optimal operation. | e.g., Phosphate buffer saline (PBS). Operational pH range is typically 5-9 [48]. |
| Tubing & Peristaltic Pump | For fluid handling in at-line or on-line setups. | Connects the sampler to the biosensor cell and enables flow. |
| Sterile Filtration Units | For preparing cell-free samples in at-line mode. | 0.22 μm syringe filters. |
Troubleshooting Guide & FAQs
FAQ 1: The biosensor signal is drifting or unstable during a long fermentation.
- Potential Causes:
- Solutions:
- Incorporate an antifouling coating (e.g., a hydrogel or zwitterionic polymer) on the sensor surface.
- Schedule periodic recalibration using standard solutions drawn from the fermentation broth if possible (to account for matrix effects).
- Use more stable enzyme mutants or consider mediator-based (2nd generation) designs for improved longevity [21].
FAQ 2: The measured glucose concentration does not match my off-line HPLC reference data.
- Potential Causes:
- Matrix Interference: The complex fermentation broth contains electroactive species (e.g., ascorbic acid, uric acid) that interfere with the measurement [50] [48].
- Oxygen Limitation: First-generation enzyme biosensors (using oxidases) are dependent on oxygen as a co-substrate. In oxygen-limited broths, the signal becomes non-linear and inaccurate [48].
- Improper Calibration: Calibration was performed in a simple buffer, but the sample has a different pH or ionic strength.
- Solutions:
- Use biosensors with built-in blank (non-enzyme) electrodes to subtract background interference [48].
- Confirm dissolved oxygen levels in the broth are sufficient. For critical low-oxygen processes, consider 2nd generation biosensors that use artificial mediators instead of oxygen [21].
- Calibrate the sensor using a matrix-matched standard (e.g., spent medium spiked with analyte) to improve accuracy.
FAQ 3: The biosensor flow cell is frequently getting clogged.
- Potential Causes:
- Solutions:
- Ensure the sampling system has an effective in-line filter (e.g., a cross-flow filtration module) before the biosensor.
- For at-line measurements, confirm that centrifugation or filtration is thorough before injecting the sample.
FAQ 4: The sensor fails after steam sterilization.
- Potential Causes:
- Thermal Degradation: The biological element (enzyme) or electronic components are not designed to withstand autoclaving temperatures [47].
- Solutions:
- Check the manufacturer's specifications. Most biosensors cannot be sterilized in-place. Instead, use aseptic connections and pre-sterilize the flow cell chemically (e.g., with ethanol). Integrate the biosensor as an ex-situ, at-line device rather than an in-situ probe.
The integration of biosensors into small-scale fermenters represents a significant leap toward sophisticated, data-driven bioprocess development. By following the structured selection, integration, and troubleshooting guidelines outlined in this technical support document, researchers can overcome common practical challenges and reliably harness the power of biosensors. This enables real-time monitoring of key metabolites, leading to deeper process understanding, optimized feeding strategies, and ultimately, more efficient and productive fermentation processes for applications from drug development to bioenergy.
This technical support center is designed for researchers developing low-cost nano-biosensors for small-scale fermentation research. It provides targeted troubleshooting guides, detailed protocols, and FAQs to address common experimental challenges in fabricating phytochemical-based nanosensors and applying them for real-time metabolite monitoring.
Frequently Asked Questions (FAQs)
Q1: What are the primary advantages of using plant-based synthesis for metallic nanoparticles in biosensors? Plant-based green synthesis uses phytochemicals as reducing and capping agents, replacing toxic chemicals. This approach is cost-effective, eco-friendly, and enhances biocompatibility. The resulting nanoparticles often have unique properties ideal for biosensing, such as high catalytic activity and ease of functionalization [53] [54].
Q2: Which metallic nanoparticles are most commonly used in these low-cost electrochemical biosensors? Silver (Ag), gold (Au), zinc oxide (ZnO), and nickel oxide (NiO) nanoparticles are frequently synthesized via plant extracts for biosensors. Silver nanoparticles, in particular, are popular due to their exceptional antibacterial, catalytic, and electronic properties [53].
Q3: How can I improve the sensitivity of my phytochemical-based nano-biosensor? Optimize the surface area and shape of the nanoparticles to enhance interactions with the target analyte. Furthermore, ensure precise functionalization of the nanoparticle surface with the appropriate biorecognition element (e.g., enzyme, antibody) to maintain its bioactivity and improve specificity [53].
Q4: What are the main challenges in commercializing these bio-based nanosensors? Key challenges include ensuring batch-to-batch consistency during nanoparticle synthesis, comprehensively evaluating nanoparticle toxicity and biocompatibility, and navigating the current lack of clear regulatory frameworks for these new materials [38].
Q5: Can these biosensors be integrated into fermentation monitoring systems? Yes. The integration of artificial intelligence (AI) and the Internet of Things (IoT) with biosensing platforms enables real-time data analysis and remote monitoring, making them highly suitable for tracking parameters like glucose, lactate, and ethanol in fermentation processes [38] [10].
Troubleshooting Guide for Common Experimental Issues
Table 1: Troubleshooting Common Problems in Nano-Biosensor Fabrication and Use
| Problem | Possible Cause | Solution |
|---|---|---|
| Low Signal Output | Inefficient electron transfer; Poor immobilization of biorecognition element. | Ensure NPs are properly synthesized and purified; Optimize immobilization protocol (e.g., use cross-linkers); Check electrical connections [53] [55]. |
| High Background Noise | Non-specific binding; Contaminated reagents or electrodes. | Include blocking agents (e.g., BSA) in the assay buffer; Use high-purity reagents; Thoroughly clean electrodes before use [55]. |
| Poor Reproducibility | Inconsistent NP synthesis (size/shape); Variability in bioreceptor immobilization. | Standardize plant extract preparation and NP synthesis conditions (time, temperature); Automate immobilization steps where possible [38] [53]. |
| Short Biosensor Lifespan | Instability of the biorecognition element (enzyme denaturation); Nanoparticle aggregation or leaching. | Store biosensors at recommended temperatures and pH; Use stable enzymes or antibodies; Apply protective membranes (e.g., Nafion) [10]. |
| No Signal / Sensor Failure | Incorrect circuit assembly; Denatured biological component; Dead nanoparticles. | Verify all electrical connections and transducer function; Prepare fresh solutions of biological elements; Confirm NP activity with control experiments [55]. |
Table 2: Troubleshooting Phytochemical-Mediated Nanoparticle Synthesis
| Problem | Possible Cause | Solution |
|---|---|---|
| Rapid NP Aggregation | Inadequate capping by phytochemicals; High ion concentration. | Optimize phytochemical-to-metal salt ratio; Use a diluter solution or add stabilizing agents; Apply gentle sonication to re-disperse [53] [54]. |
| Broad Size Distribution | Uneven reduction rate; Impurities in plant extract. | Filter plant extract before use; Control reaction temperature and stirring speed rigorously; Consider gradual addition of metal salt [54]. |
| Low Synthesis Yield | Low concentration of reducing phytochemicals; Suboptimal reaction conditions. | Use a more concentrated plant extract; Adjust pH of the reaction mixture; Increase reaction time or temperature within limits [53]. |
| Unexpected Color (Indicating Wrong NP Size/Shape) | Contamination; Incorrect reactant ratios. | Use high-purity precursors; standardize the plant species and part used (leaves, roots) to ensure consistent phytochemical profile [54]. |
Experimental Protocols
Protocol 1: Green Synthesis of Silver Nanoparticles (AgNPs) Using Plant Extract for Biosensing
This protocol is adapted for fabricating transducer elements in electrochemical biosensors [53] [54].
1. Materials and Reagents
- Plant leaf material (e.g., Azadirachta indica, Cymbopogon citratus)
- Silver nitrate (AgNO₃) solution (1-10 mM)
- Deionized water
- Ethanol (for cleaning)
- Filter paper or sterile syringe filter (0.2-0.45 µm)
- Magnetic stirrer with hotplate
- Centrifuge
2. Step-by-Step Procedure a) Plant Extract Preparation:
- Wash 20 g of fresh plant leaves thoroughly with deionized water to remove dust.
- Dry and finely chop or grind the leaves.
- Boil the leaves in 200 mL of deionized water for 10-15 minutes.
- Filter the resulting solution through filter paper or a 0.2 µm syringe filter. The clear filtrate is the plant extract and should be used fresh or stored at 4°C.
b) Nanoparticle Synthesis:
- Add 90 mL of 1 mM AgNO₃ aqueous solution to a 250 mL Erlenmeyer flask.
- Under constant stirring (300-500 rpm) on a magnetic stirrer, slowly add 10 mL of the plant extract to the AgNO₃ solution.
- Continue stirring the mixture at room temperature (or at an optimized temperature of 60-80°C) for 1-2 hours. A color change (e.g., to yellowish-brown for AgNPs) indicates nanoparticle formation.
- Purify the synthesized AgNPs by centrifugation at 12,000 rpm for 20 minutes. Discard the supernatant and re-disperse the pellet in deionized water. Repeat this process twice.
CRITICAL STEP: The ratio of plant extract to metal salt, pH, temperature, and reaction time must be standardized and kept consistent for reproducible results [53].
Protocol 2: Fabrication of a Glucose Nano-Biosensor for Fermentation Monitoring
This protocol details the construction of an enzymatic electrochemical biosensor, a common need in fermentation process control [10] [55].
1. Materials and Reagents
- Synthesized AgNPs or other metallic NPs (from Protocol 1)
- Screen-printed carbon electrode (SPCE)
- Enzyme: Glucose Oxidase (GOD)
- Cross-linking agent: Glutaraldehyde or 1-Ethyl-3-(3-dimethylaminopropyl)carbodiimide (EDC)
- Stabilizing matrix: Nafion solution or chitosan
- Phosphate buffer saline (PBS, 0.1 M, pH 7.4)
2. Step-by-Step Procedure a) Electrode Modification:
- Deposit 5-10 µL of the synthesized NP suspension onto the working area of the SPCE.
- Allow the electrode to dry completely at room temperature.
b) Enzyme Immobilization:
- Prepare an enzyme solution by dissolving 2 mg of GOD in 1 mL of PBS (pH 7.4).
- Mix 5 µL of this enzyme solution with 5 µL of a Nafion solution (e.g., 0.5% w/v).
- Carefully drop-cast 5 µL of the GOD-Nafion mixture onto the NP-modified working electrode.
- Let the biosensor dry gently for 1-2 hours. For stronger covalent binding, a cross-linker like glutaraldehyde vapor can be used.
c) Biosensor Storage and Use:
- Store the finished biosensor at 4°C when not in use.
- For glucose detection, calibrate the biosensor by measuring the amperometric response in standard glucose solutions. The biosensor can then be used to monitor glucose levels in fermented samples [10] [55].
The Scientist's Toolkit: Essential Research Reagents
Table 3: Key Reagent Solutions for Nano-Biosensor Fabrication
| Reagent / Material | Function in Nano-Biosensor Development |
|---|---|
| Plant Extracts | Serve as reducing and capping agents for the green synthesis of metallic nanoparticles, replacing hazardous chemicals [53] [54]. |
| Metal Salts (e.g., AgNO₃, HAuCl₄, ZnAc₂) | Precursors for the formation of metallic nanoparticles (Ag, Au, ZnO) during synthesis [53]. |
| Screen-Printed Electrodes (SPEs) | Low-cost, disposable, and miniaturized platforms that serve as the electrochemical transducer in biosensors [10]. |
| Biorecognition Elements (e.g., Glucose Oxidase, Antibodies, DNA) | Provide specificity by interacting with the target analyte (e.g., glucose, pathogen, gene); the core of the biosensor's selectivity [38] [10]. |
| Cross-linking Agents (e.g., Glutaraldehyde, EDC-NHS) | Immobilize and stabilize biorecognition elements onto the nanoparticle-modified transducer surface [55]. |
| Stabilizing Matrices (e.g., Nafion, Chitosan) | Entrap biological elements and prevent leakage, while also sometimes reducing interference from other molecules in complex samples like fermentation broth [10]. |
Workflow and Pathway Visualizations
Real-time Biomarker and Metabolite Monitoring (e.g., BOD, Protein Concentration)
Troubleshooting Guides
Signal Drift and Inconsistent Readings
Problem: Biosensor readings are unstable or drift over time during fermentation monitoring.
- Potential Cause 1: Biofouling or sensor surface contamination from complex fermentation media.
- Potential Cause 2: Environmental fluctuations (e.g., temperature, pH) affecting sensor sensitivity.
- Potential Cause 3: Enzyme degradation or instability in the biosensor.
Loss of Sensitivity or Low Signal
Problem: The biosensor signal is weaker than expected, failing to detect meaningful concentration changes.
- Potential Cause 1: Deactivation of the biological recognition element (enzyme, antibody).
- Solution: Check storage conditions and shelf life. For enzyme-based sensors, verify the activity of the enzyme stock solution before immobilization. Consider using more stable recognition elements like molecularly imprinted polymers (MIPs) for cost-effective, long-term use [58].
- Potential Cause 2: Sample matrix effects interfering with the detection mechanism.
- Potential Cause 3: The target metabolite is unstable and degrades during sampling.
- Solution: Optimize the quenching and extraction protocol. For intracellular metabolites, use fast filtration and immediate extraction with cold, acidic solvents (e.g., acidic acetonitrile:methanol:water) to rapidly halt metabolic activity [57].
High Crosstalk in Multi-analyte Detection
Problem: Signal interference between different biomarkers when monitoring multiple targets simultaneously.
- Potential Cause: Lack of specificity in the biorecognition element or overlapping electrochemical signals.
- Solution: Select enzymes or aptamers with high specificity for the target analyte. Employ spatial separation of working electrodes or use differential measurement techniques to isolate specific signals [59].
Frequently Asked Questions (FAQs)
Q1: What are the most cost-effective biosensor types for monitoring common fermentation metabolites like glucose and lactate? Electrochemical biosensors, particularly amperometric ones, are often the most cost-effective. They offer high sensitivity, rapid response, and are amenable to miniaturization and inexpensive mass production. Platforms using 3D-structured electrodes (e.g., nickel foam) provide enhanced sensitivity at a relatively low cost, which is ideal for research budgets [59] [56].
Q2: How can I accurately measure protein concentration in my fermented samples, which often contain various interfering compounds? The table below compares common methods to help select the right assay based on your sample composition [60].
| Assay | Compatible Samples | Beware of Interference From | Dynamic Range |
|---|---|---|---|
| BCA Assay | Samples with compatible detergents | Reducing agents (e.g., DTT), metal ions (Cu²⁺, Fe³⁺) | 20–2000 µg/mL |
| Bradford Assay | Samples without reducing agents | Detergents (SDS, Triton), common buffers (Tris, EDTA) | 1–100 µg/mL (varies) |
| UV-Vis (A280) | Purified proteins in simple buffers | Nucleic acids, free amino acids, phenols, detergents | ~1–100 µg/mL (less sensitive) |
Q3: My metabolite measurements vary significantly between batches. How can I improve reproducibility? The key is rapid and consistent quenching of metabolism. For cellular samples, avoid slow methods like centrifugation. Instead, use fast filtration and immediately submerge the sample in a cold, acidic organic quenching solvent (e.g., containing 0.1 M formic acid) to instantly halt enzyme activity. Always use the same, optimized quenching and extraction protocol across all batches [57].
Q4: Can I use sweat-based biosensors for sedentary fermentation research? While sweat sensors are advanced for human metabolites, they are not directly applicable to fermentation broths. However, the underlying technology is relevant. For fermentation, you would use the sensor directly in the culture medium. Innovations like iontophoresis-induced "sweat" are not needed; instead, focus on ensuring the sensor is sensitive and selective within the specific chemical environment of your fermentation vessel [58].
Experimental Protocols & Data
Protocol: Calibration of an Electrochemical Metabolite Biosensor
This protocol is adapted for a general enzyme-based biosensor for targets like glucose or lactate [59] [57].
- Preparation of Standard Solutions: Prepare a series of standard solutions of the target analyte (e.g., glucose, lactate) in a buffer that closely matches the pH and ionic strength of your fermentation medium. This accounts for basic matrix effects.
- Sensor Stabilization: Immerse the biosensor in the baseline buffer and apply the operating potential until a stable baseline current is achieved.
- Standard Measurement: Sequentially expose the biosensor to standard solutions of increasing concentration. Record the steady-state current for each concentration.
- Calibration Curve: Plot the recorded current (or change in current) against the known concentration of the standard solutions. Fit a linear regression to the data within the linear range to obtain the calibration curve (Signal = Slope × [Concentration] + Intercept).
- Validation: Validate the calibration by measuring a standard of known concentration not used in creating the curve.
Performance Specifications for a 3D-Structured Biosensor
The table below summarizes performance data from a peer-reviewed study on a wearable biosensor, serving as a benchmark for what advanced, cost-effective sensors can achieve [59].
| Analyte | Linear Range | Sensitivity | Application Context |
|---|---|---|---|
| Lactate | 400–1,400 µM | 460.5 µA/(mM·cm²) | In vivo animal studies, interstitial fluid |
| Glucose | 0.1–8 mM | 283.09 µA/(mM·cm²) | In vivo animal studies, interstitial fluid |
Workflow for Reliable Metabolite Measurement in Fermentation
This diagram outlines the critical steps for obtaining accurate data, from sample collection to data analysis.
Integrated Biosensor System for Multi-analyte Monitoring
This diagram shows the architecture of a multi-analyte biosensor system that shares components to reduce cost and complexity.
The Scientist's Toolkit: Research Reagent Solutions
| Item | Function | Cost-Effectiveness & Notes |
|---|---|---|
| 3D-Structured Electrodes (e.g., Nickel Foam) | Provides high surface area for enzyme immobilization, significantly boosting sensor sensitivity [59]. | A cost-effective substrate that enhances performance without requiring expensive noble metals. |
| Molecularly Imprinted Polymers (MIPs) | Synthetic receptors that mimic antibodies for specific analyte binding [58]. | More stable and cheaper to produce than biological antibodies, ideal for long-term or one-time use sensors. |
| Acidic Acetonitrile:Methanol:Water Quenching Solvent | Rapidly halts metabolic activity during sampling to preserve in vivo metabolite levels [57]. | An essential, low-cost mixture to ensure data accuracy; prevents metabolite interconversion post-sampling. |
| Enzyme-based Recognition Elements (e.g., Glucose Oxidase) | Provides high specificity for the target metabolite in the biosensor [59]. | Readily available and highly effective, though stability over very long periods can be a limitation. |
| Iontophoresis Module | Stimulates fluid (e.g., sweat) production for consistent sampling in wearable devices [58]. | Not always needed in fermentation, but the principle of active sampling is relevant for process control. |
Rapid Contamination and Biotoxicity Detection
Frequently Asked Questions (FAQs)
FAQ 1: What are the main advantages of using biosensors for detecting contamination in small-scale fermentation?
Biosensors offer several key advantages that make them ideal for small-scale, cost-sensitive research environments. They provide rapid, real-time results, often within minutes, compared to traditional methods like culture-based techniques or HPLC which can take hours or days [16] [61]. Their simplicity and potential for on-site use eliminate the need for central laboratories and highly trained technicians [16]. Furthermore, many biosensor platforms are designed to be low-cost and user-friendly, making them particularly suitable for resource-limited settings [16]. Cell-based biosensors have the additional advantage of revealing functional, physiologically relevant information about toxic potency and mechanism of action, rather than just confirming the presence of a contaminant [62].
FAQ 2: How do I choose between an optical, electrochemical, or cell-based biosensor for my toxicity assays?
The choice depends on your primary research objective and required trade-off between specificity and broad-range detection.
- Optical Biosensors (e.g., Fluorescent, Colorimetric, SERS): Best for achieving high sensitivity and specificity, often used for detecting specific, known toxins like marine biotoxins [63]. They can detect concentrations as low as picomoles per liter [63].
- Electrochemical Biosensors: Excel in easy handling, fast response time, and low-cost potential. They are well-suited for measuring metabolic activity changes in microbes or cells exposed to toxicants [64]. They are highly adaptable for miniaturized systems [64].
- Cell-Based Biosensors (CBBs): The best choice when the goal is a broad-spectrum screening for unknown toxicants or when information on the functional toxicological outcome (e.g., neurotoxicity, cytotoxicity) is needed. CBBs respond in a manner related to the actual physiologic responses of vulnerable subjects [62].
FAQ 3: My electrochemical biosensor shows signal drift over time. What could be the cause?
Signal drift in electrochemical biosensors can stem from several factors. Common issues and their solutions are detailed in the troubleshooting guide below (See Troubleshooting Guide, Issue 2). Primary causes include:
- Instability of Biological Element: Degradation of the immobilized enzymes, antibodies, or living cells on the sensor platform [61].
- Mediator Leakage: Loss of the redox mediator molecules that shuttle electrons between the biological element and the electrode [65].
- Environmental Fluctuations: Changes in operational factors such as temperature, pH, or salinity, which can disturb the metabolic activity of electricigens or the sensing cells [65] [64].
- Fouling of the Electrode: Accumulation of proteins or other substances from the fermentation broth on the electrode surface, impairing electron transfer [65].
FAQ 4: Can biosensors detect multiple contaminants simultaneously in a complex fermentation broth?
Yes, the development of multiplexed biosensors is an active and advancing area of research. Array-based formats and the integration of artificial intelligence (AI) are key to achieving this. For instance, array biosensors using planar waveguides have been demonstrated to simultaneously detect multiple mycotoxins, including deoxynivalenol, ochratoxin A, and aflatoxin B1 [61]. The future direction of the field is focused on exploring the synergy of different sensing technologies to develop integrated, multiplexed sensors for rapid detection [16] [38].
Troubleshooting Guides
Issue 1: Low or No Signal from a Cell-Based Biosensor This problem indicates that the living sensing cells are not producing a measurable response upon exposure.
| Possible Cause | Investigation & Solution |
|---|---|
| Loss of Cell Viability | Check cell health and viability prior to the assay. Ensure storage conditions and nutrient supply maintain cells in a metabolically active state [62]. |
| Incorrect Mediator or Concentration | Test a panel of redox mediators (e.g., duroquinone, potassium ferricyanide) to identify the one that yields the highest and most stable current signal for your specific cell type [64]. |
| Insufficient Incubation Time | Allow adequate time for the toxin to interact with the cells and elicit a physiological response. The time can vary based on the toxin's mechanism of action [62]. |
Issue 2: Signal Drift and Poor Reproducibility in Electrochemical Measurements A stable baseline is crucial for reliable quantification.
| Possible Cause | Investigation & Solution |
|---|---|
| Unstable Immobilization | Ensure the biological recognition element (enzyme, cells) is securely immobilized on the electrode surface to prevent leaching. Optimize your cross-linking or entrapment protocol [61]. |
| Fluctuating Environmental Conditions | Strictly control and monitor temperature and pH throughout the experiment, as these greatly impact microbial metabolic activity and electron generation in the sensor [65]. |
| Electrode Fouling | Clean or polish the electrode according to manufacturer protocols. Consider using electrode materials with anti-fouling properties or implementing a membrane to protect the surface from the complex fermentation matrix [65]. |
Issue 3: Poor Specificity in Toxin Detection The sensor is triggering responses from non-target compounds.
| Possible Cause | Investigation & Solution |
|---|---|
| Non-Specific Binding | Include blocking agents (e.g., BSA, casein) in your assay buffer to minimize non-specific interactions on the sensor surface [63]. |
| Cross-Reactive Recognition Elements | Use antibodies or aptamers with high affinity and specificity for your target analyte. For cell-based sensors, utilize cells with a specific receptor or pathway to narrow the response profile [62] [63]. |
| Sample Matrix Interference | Implement a sample pre-treatment step such as filtration, dilution, or extraction to remove interfering substances from the fermentation broth before analysis [61]. |
Experimental Protocols
Protocol 1: Electrochemical Detection of Metabolic Inhibition
This protocol is adapted from methods used to detect toxic effects on algae and cyanobacteria, and can be applied to monitor fermentation microbes [64].
Principle: The metabolic activity of living cells reduces a redox mediator, which is then re-oxidized at the working electrode, producing a measurable current. Toxic compounds inhibit metabolism, leading to a drop in current.
Workflow:
Detailed Methodology:
- Sensor Preparation: Immobilize your sensing cells (e.g., yeast, bacteria, or specialized eukaryotic cells) on the working electrode surface. This can be done by mixing a cell suspension with a redox mediator (e.g., 0.5 mM duroquinone was found effective for photosynthetic organisms [64]) and a polymer like alginate or agarose to form a gel matrix.
- Baseline Acquisition: Place the prepared sensor in a buffer or clean growth medium. Using a potentiostat, perform a potentiostatic measurement (e.g., at +0.3 V vs. Ag/AgCl) and record the current until a stable baseline is established. This current corresponds to the normal metabolic activity.
- Toxicant Exposure: Introduce the sample from your fermentation broth (centrifuged or filtered if necessary) to the measurement cell.
- Signal Recording: Continuously monitor the current-time curve. A toxic effect will manifest as a decrease in the current signal.
- Data Calculation: Calculate the percentage of inhibition (I%) using the formula derived from Michaelis-Menten kinetics [65]:
I(%) = |CY_nor - CY_tox| / CY_nor × 100WhereCYis the Coulombic yield (integral of electrical output over time),CY_noris the yield for normal medium, andCY_toxis the yield for the sample.
Protocol 2: Cell-Based Biosensor Assay for Functional Toxicity
This protocol utilizes mammalian cells to detect functional toxins, such as pore-forming toxins or neurotoxins, that may be produced by contaminating microbes [62].
Principle: Viable mammalian cells are exposed to a sample. Toxins with specific modes of action (e.g., membrane disruption, ion channel blocking, protein synthesis inhibition) will trigger a detectable cellular response, such as cell death, morphological changes, or the release of enzymes.
Workflow:
Detailed Methodology:
- Cell Culture: Select an appropriate cell line based on the suspected contaminant. For example, Ped-2E9 hybridoma B-lymphocyte cells can detect hemolysin and cytolysins [62]. Culture cells to form a confluent monolayer in a multi-well plate.
- Sample Preparation and Application: Centrifuge the fermentation sample to remove particulates. Apply the supernatant to the cell monolayer.
- Incubation: Incubate the cells with the sample for a predetermined time (e.g., 1-4 hours) at 37°C to allow the toxin to act.
- Response Detection: Detect the cellular response using an appropriate endpoint.
- Cytotoxicity: Measure the release of lactate dehydrogenase (LDH) or uptake of dyes like trypan blue.
- Viability/Metabolism: Use colorimetric assays like MTT or Alamar Blue.
- Morphology: Observe changes under a microscope.
- Data Interpretation: Compare the response to controls. The pattern of response (e.g., rapid cell lysis vs. slow metabolic decline) can provide insight into the toxin's functional class (e.g., pore-forming vs. metabolic inhibitor) [62].
Research Reagent Solutions
Essential materials and their functions for establishing biosensor-based detection assays in a research setting.
| Reagent / Material | Function / Explanation |
|---|---|
| Screen-Printed Electrodes (SPEs) | Disposable, low-cost electrochemical cells that integrate working, reference, and counter electrodes. Ideal for single-use, high-throughput, or field-deployable sensors [61]. |
| Redox Mediators (e.g., Duroquinone, Ferricyanide) | Electron shuttles that carry electrons from the metabolic processes of living cells to the surface of the electrode, enabling the amperometric detection of metabolic activity [64]. |
| Alginate & Agarose Polymers | Biocompatible gels used for the entrapment and immobilization of living cells (bacteria, yeast, mammalian cells) on biosensor platforms, maintaining their viability and proximity to the transducer [64] [63]. |
| Cell Lines (e.g., Ped-2E9, Vero, Neuro2a) | Specialized mammalian cells serving as sensing elements. They provide physiologically relevant responses to functional toxins, such as cytolysins or neurotoxins, that simpler systems might miss [62]. |
| Electrochemically Active Microbes (e.g., Shewanella, Geobacter) | Bacterial strains capable of direct extracellular electron transfer to an electrode. They are the core of microbial fuel cell (MFC)-based biosensors for measuring biological oxygen demand (BOD) or toxicity [65]. |
The Advanced Silicon Group (ASG) Nanoswift biosensor is a silicon nanowire-based platform designed to quantify protein concentrations in solution. This technology addresses a critical bottleneck in biomanufacturing and drug development: the slow speed and high cost of traditional protein analytics like the Enzyme-Linked Immunosorbent Assay (ELISA) [66].
Core Operating Principle
The sensor functionalizes silicon nanowires with antibodies specific to target proteins [66] [67]. When light illuminates the chip, the nanowires generate a photocurrent [67]. The binding of a target protein to its antibody alters the local electric field at the nanowire surface, which in turn induces a measurable change in the photocurrent [66] [67]. This change is proportional to the concentration of the bound protein, enabling precise quantification [68] [67].
Key Advantages for Small-Scale Research
For small-scale fermentation research, this technology offers distinct benefits:
- Multiplexing: A single chip contains multiple, isolated subsensors, allowing for the simultaneous measurement of many different proteins or analytes from one small sample volume [68] [69].
- Miniaturization and Simplicity: The system uses a small, handheld reader, making it suitable for lab benches or at-line bioprocessing monitoring without the need for large, dedicated instrumentation [66] [67].
Quantitative Performance Data
The following table summarizes the performance advantages of the ASG biosensor compared to the traditional ELISA method, which are critical for reducing development costs and timelines.
Table 1: Performance Comparison: ASG Biosensor vs. Traditional ELISA
| Performance Metric | ASG Nanoswift Biosensor | Traditional ELISA |
|---|---|---|
| Assay Time | < 15 minutes [66] [69] | Several hours [66] |
| Cost per Test | 15x lower (projected) [69] | High (cost of reagents, lab labor, equipment) [66] |
| Detection Capability | Picogram/milliliter (pg/mL) range [68] | Picogram/milliliter (pg/mL) range [66] |
| Multiplexing | Yes. Multiple tests on a single chip [68] [69] | Typically limited to single-plex assays |
| Ease of Use | 3-step process: apply sample, rinse, insert into reader [69] | Multi-step, labor-intensive protocol requiring trained technicians [66] |
Experimental Protocol: Protein Concentration Monitoring in a Fermentation Broth
This protocol details the procedure for using the ASG biosensor to monitor a target protein (e.g., a recombinant therapeutic) in a small-scale bioreactor.
Objective
To quantitatively measure the concentration of a specific recombinant protein in a harvested fermentation broth sample at various time points during a small-scale fermentation process.
Workflow
The experimental workflow involves sample preparation, sensor preparation, measurement, and data analysis as shown below.
Materials and Equipment
- ASG Nanoswift biosensor chip functionalized for your target protein
- ASG handheld reader unit and compatible computer with software
- Small-scale bioreactor system
- Microcentrifuge tubes
- Pipettes and appropriate tips
- Buffer solution (as specified by ASG protocol)
- Ice bucket for sample storage
Step-by-Step Procedure
Sample Collection & Preparation: Aseptically collect a 1 mL sample from your bioreactor at the desired time point.
- Transfer the sample to a microcentrifuge tube and centrifuge at high speed (e.g., 10,000-14,000 RPM) for 5-10 minutes to pellet cells and insoluble debris.
- Carefully pipette the clarified supernatant into a new, clean tube. Keep on ice if not used immediately.
- Perform any necessary dilutions using the recommended buffer to ensure the protein concentration falls within the sensor's detection range.
Sensor Preparation & Measurement:
- Pipette a small volume (e.g., 10-50 µL) of the prepared supernatant directly onto the active surface of the ASG biosensor chip.
- Allow the sample to incubate on the sensor for the binding reaction to occur. This is the longest step but is typically completed within 15 minutes [66].
- After incubation, gently rinse the sensor surface with the provided buffer to wash away any unbound molecules.
- Insert the sensor chip into the handheld reader. The reader will communicate with the computer software to initiate the measurement.
Data Acquisition:
Troubleshooting Guide & FAQs
Q1: My sensor is giving a consistently low or no signal. What could be wrong?
- Cause 1: Sample Concentration Too Low. The target protein concentration may be below the sensor's detection limit.
- Solution: Concentrate your sample or reduce the dilution factor. Ensure your fermentation is producing the protein as expected.
- Cause 2: Sensor Not Functionalized Correctly. The antibodies on the sensor may have degraded or been improperly stored.
- Solution: Check the expiration date on the sensor and ensure it has been stored according to manufacturer specifications. Use a new sensor from a different batch if possible.
- Cause 3: Incomplete Binding or Rinse Error. The binding time was too short, or the rinse step was too aggressive.
- Solution: Strictly adhere to the recommended incubation time. Ensure the rinse buffer is applied gently but thoroughly.
Q2: The signal reading is unstable or noisy. How can I improve it?
- Cause 1: Non-Specific Binding. Other components in the fermentation broth are adhering to the sensor surface.
- Solution: Improve sample preparation. Ensure centrifugation is sufficient to remove all particulates. Consider using a different buffer for dilution or adding a blocking agent to the protocol (if compatible with the sensor).
- Cause 2: Environmental Interference. Electrical noise or unstable lighting conditions can affect the photocurrent measurement [70].
- Solution: Operate the reader in a stable environment, away from strong AC magnetic fields or flickering lights. Ensure all connections are secure.
Q3: Can I use this sensor to measure multiple proteins from my fermentation broth simultaneously?
- Answer: Yes, this is a key feature. The ASG biosensor can be fabricated with an array of subsensors, each functionalized with a different antibody [68] [69]. You must purchase or request a multiplexed chip configured for your specific panel of target proteins (e.g., a therapeutic protein, common host cell protein contaminants, and a metabolic enzyme).
Q4: How does this sensor reduce costs in my small-scale fermentation research?
- Answer: Cost reduction is achieved through several factors:
- Time Savings: A 15-minute test replaces a multi-hour ELISA, allowing for more rapid process iteration and decision-making [66] [69].
- Lower Consumable Cost: The silicon-based sensors are designed to be low-cost to produce [68] [66].
- Labor Efficiency: The simple three-step process requires less hands-on time from highly trained staff [69].
- Informed Decision-Making: Faster feedback on protein levels enables quicker optimization of fermentation parameters, saving valuable materials and bioreactor time [66] [67].
The Scientist's Toolkit: Essential Research Reagent Solutions
Table 2: Key Materials for Biosensor-Based Fermentation Monitoring
| Item | Function/Description | Key Consideration for Small-Scale Research |
|---|---|---|
| Functionalized Biosensor Chips | The core sensing element; silicon nanowire chips coated with target-specific antibodies [66] [67]. | Order chips specific to your analytes (e.g., recombinant product, host cell proteins). Confirm availability for your targets. |
| Calibration Standards | Known concentrations of purified target protein used to generate a standard curve. | Essential for quantitative accuracy. Use highly pure, characterized standards for reliable results. |
| Dilution/Binding Buffer | A solution used to dilute samples and facilitate specific binding to the sensor. | Prevents non-specific binding. Use the buffer specified in the sensor's protocol for optimal performance. |
| Rinse Buffer | A solution used to wash away unbound material after sample incubation. | Critical for reducing background noise. Must be compatible with the sensor's surface chemistry. |
| Clarified Fermentation Broth | The sample matrix containing the target protein after removal of cells and debris. | Consistent and thorough sample preparation is the most critical step for obtaining reliable data. |
Solving Operational Challenges and Optimizing Biosensor Performance
Technical Support Center
Welcome to the Technical Support Center. This resource provides troubleshooting guidance for common fermentation issues, leveraging cost-effective biosensor technology for small-scale research applications.
Troubleshooting Guide: Contamination
Q1: My microbial biosensor indicates a sudden, unexpected spike in ATP concentration. Does this always mean my culture is contaminated? A1: Not necessarily. While a rapid ATP spike is a primary indicator of microbial contamination (e.g., bacteria or yeast in a mammalian cell culture), it can also signal significant cell lysis. To confirm:
- Correlate with pH: Check if your pH biosensor shows an anomalous, rapid shift inconsistent with your expected metabolic profile.
- Perform Gram Stain: Immediately take a small sample for a quick Gram stain to visually confirm the presence of contaminant morphology.
- Validate with Plating: Plate a sample on non-selective media to check for foreign colony growth.
Q2: What are the most common sources of contamination identified via biosensor alerts in small-scale bioreactors? A2: Biosensor data logs often pinpoint these entry points when cross-referenced with procedural timelines:
| Common Source | Biosensor Indicator | Corrective Action |
|---|---|---|
| Inadequate Sterilization | Contamination detected in initial hours (<12h) | Validate autoclave cycles; implement spore test strips. |
| Faulty Seals/Gaskets | Gradual contamination onset over time | Schedule regular gasket replacement; perform pressure hold tests. |
| Aerosols during Sampling | Spike in ATP immediately post-sampling | Train on aseptic sampling technique; use closed-system sampling ports. |
Troubleshooting Guide: pH Imbalance
Q3: The pH biosensor shows the culture is becoming too acidic too quickly. What are the primary causes? A3: In microbial fermentations, this typically indicates overproduction of organic acids (e.g., lactic acid, acetic acid).
- Cause 1: Excess carbon source (e.g., glucose). This causes overflow metabolism.
- Action: Implement a fed-batch protocol using the biosensor feedback to control carbon feed rate, preventing accumulation.
- Cause 2: Insufficient oxygenation, leading to fermentative metabolism instead of aerobic respiration.
- Action: Correlate with dissolved oxygen (DO) biosensor readings and increase agitation or aeration.
Q4: How can I calibrate a low-cost optical pH biosensor for high accuracy? A4: Use a multi-point calibration protocol with standard NIST-traceable buffers.
Experimental Protocol: pH Biosensor Calibration
- Materials: Optical pH sensor spot (e.g., based on HPTS dye), fiber-optic reader, pH buffers (4.01, 7.00, 10.01), temperature probe.
- Method: a. Immerse the sensor in pH 7.00 buffer at your fermentation temperature (e.g., 37°C). b. Record the fluorescence ratio (e.g., 450nm/500nm excitation, 510nm emission). Wait for signal stability. c. Rinse and repeat for pH 4.01 and 10.01 buffers. d. Input the three ratio values and their corresponding pH values into the sensor's reader software to generate a calibration curve.
- Validation: Measure an unknown buffer (e.g., pH 6.86) to verify accuracy within ±0.1 pH units.
Diagram: pH Sensor Calibration Workflow
Troubleshooting Guide: Oxygenation
Q5: My dissolved oxygen (DO) biosensor reading is consistently at 0% despite increasing agitation. What is wrong? A5: This is a classic sign of oxygen demand outstripping supply.
- Check Cell Density: An overly high cell density is the most common cause. Measure optical density (OD600). If it's beyond the linear range for your organism, perform a dilution to confirm.
- Inspect Sensor: A faulty sensor can also read 0%. Perform an "oxygen span" test:
- Expose the sensor to air-saturated water (100% value).
- Expose it to a zero-oxygen solution (e.g., sodium sulfite). The reading should drop to 0%.
- Review Antifoam: Excessive silicone-based antifoam can coat the DO probe membrane, severely dampening its response. Use antifoam sparingly.
Q6: What is the critical DO level for my E. coli fermentation, and how can I maintain it cost-effectively? A6: The critical DO level for E. coli is typically 20-30% air saturation. Below this, growth becomes oxygen-limited. A feedback control loop is the most cost-effective solution for small bioreactors.
Experimental Protocol: DO-Linked Cascade Control
- Objective: Maintain DO above 30% by automatically adjusting stir speed and air flow.
- Setup: Connect your DO biosensor output to a bioreactor controller.
- Cascade Logic: a. If DO falls below 30%, the controller first increases the agitator speed to its maximum. b. If DO remains below 30%, the controller then progressively increases the air flow rate. c. If DO rises above 50%, the process reverses.
Diagram: DO Cascade Control Logic
The Scientist's Toolkit: Research Reagent Solutions
| Item | Function | Cost-Effective Consideration |
|---|---|---|
| Hydrogel-Immobilized Enzyme | Used in biosensor construction for substrate specificity (e.g., Glucose Oxidase for glucose detection). | Source from bulk suppliers; immobilize in-house using chitosan or alginate beads. |
| Fluorescent Reporter Dye (e.g., HPTS) | The pH-sensitive component of optical pH sensors. | Purchase in larger, concentrated quantities and aliquot for multiple sensor fabrication batches. |
| Oxygen-Quenched Phosphor | The active element in optical DO sensors; its luminescence lifetime is inversely related to O₂. | Compare pre-made sensor spots vs. spin-coating your own membranes on cheap substrates. |
| ATP Bioluminescence Assay Kit | For validating and calibrating contamination biosensors. | Use the kit only for validation; rely on the continuous biosensor for routine monitoring to save reagents. |
| NIST Traceable Buffer Pods | For accurate pH sensor calibration. | Essential for accuracy; do not substitute with lab-made buffers for the final calibration. |
Data Presentation: Key Biosensor Performance Metrics
| Biosensor Type | Target Analytic | Typical Response Time | Operational Stability | Approx. Cost per Unit (Small Scale) |
|---|---|---|---|---|
| Amperometric | Dissolved Oxygen | < 30 seconds | 6-12 months | $150 - $400 |
| Fluorometric | pH | < 60 seconds | 3-6 months | $50 - $200 |
| Bioluminescent | ATP (Contamination) | 2-5 minutes | Single-use or 48h | $5 - $20 per test |
| Potentiometric | NH₄⁺ (Metabolite) | 1-3 minutes | 1-2 months | $100 - $300 |
This guide provides targeted troubleshooting advice for researchers developing cost-effective biosensor solutions for small-scale fermentation research. It addresses common challenges in sensitivity, signal stability, and reproducibility.
Frequently Asked Questions (FAQs)
1. What are the most effective strategies to enhance biosensor sensitivity without expensive equipment? Strategies include chemical signal amplification using enzymes or polymerization reactions, physical techniques to improve analyte-sensor contact (e.g., fluid mixing), and geometric optimization of sensor electrodes. Employing polymer brush layers can also enhance sensitivity in complex solutions [71] [72] [73].
2. How can I minimize signal drift in my electrochemical biosensor during long fermentation runs? Mitigate drift by using stable polymer coatings, ensuring consistent passivation, employing a stable electrical testing configuration, and using infrequent DC sweeps instead of static measurements. Proper buffer selection and sensor surface preconditioning are also critical [72] [74].
3. Why are my biosensor results inconsistent between batches or different samples? Poor reproducibility often stems from variations in sensor surface preparation, immobilization density, sample impurities, or environmental factors. Ensure consistent surface activation, use control samples, and standardize immobilization protocols and storage conditions [74] [75].
Troubleshooting Guides
Low Sensitivity
Low sensitivity results in an inability to detect low analyte concentrations.
| Potential Cause | Explanation | Solution |
|---|---|---|
| Suboptimal Electrode Geometry | The sensor's signal strength is highly dependent on the physical dimensions of its electrodes [73]. | Optimize interdigitated electrode (IDE) design; reduce the gap between electrodes to as low as 3 μm to maximize sensitivity [73]. |
| Charge Screening (Debye Length) | In high ionic strength solutions (e.g., fermentation broth), an electrical double layer forms, screening charges from large biomolecules [72]. | Immobilize a non-fouling polymer layer like POEGMA above the transducer to increase the effective sensing distance [72]. |
| Insufficient Signal Amplification | The intrinsic signal from a single binding event is too weak to detect. | Integrate chemical amplification strategies, such as enzyme-linked reactions or polymerization-based amplification, to multiply the signal per binding event [71]. |
| Low Ligand Density | Too few capture molecules (e.g., antibodies) are immobilized on the sensor surface. | Optimize immobilization conditions (pH, concentration) to achieve a higher density of active capture molecules [74]. |
Signal Drift and Instability
Signal drift is a gradual, non-specific change in the baseline signal over time.
| Potential Cause | Explanation | Solution |
|---|---|---|
| Ion Diffusion & Electrolytic Effects | Ions from the solution slowly diffuse into the sensing region, altering capacitance and threshold voltage [72]. | Use a stable testing configuration with a robust pseudo-reference electrode and characterize drift before biosensing experiments [72]. |
| Surface Regeneration Issues | Inefficient cleaning between runs leaves residual analyte, causing a buildup of material and baseline shift [74]. | Implement rigorous regeneration protocols using appropriate buffers that thoroughly clean the surface without damaging the immobilized ligand [74]. |
| Buffer Incompatibility | Certain buffer components can destabilize the sensor surface. | Check buffer compatibility; use recommended formulations and avoid high concentrations of salts or detergents that cause instability [74]. |
| Poor Surface Passivation | Unprotected areas of the sensor are susceptible to non-specific binding and biofouling. | Ensure complete and uniform passivation of the sensor surface alongside the biorecognition layer [72]. |
Poor Reproducibility
Poor reproducibility refers to high variability in results across different sensor chips, batches, or experimental runs.
| Potential Cause | Explanation | Solution |
|---|---|---|
| Inconsistent Immobilization | Variations in ligand density, orientation, or activity during surface functionalization. | Standardize the immobilization procedure with careful control of time, temperature, pH, and concentration. Use quality-controlled reagents [74]. |
| Sample Impurities | Aggregates or contaminants in the sample cause non-specific binding or clogging. | Purify and characterize samples (e.g., via filtration) before analysis to ensure only the target analyte is present [74]. |
| Inadequate Controls | Failure to account for non-specific binding or system noise. | Always include negative controls (e.g., a sensor without capture ligand) to validate the specificity of the signal [72] [74]. |
| Environmental Fluctuations | Uncontrolled changes in temperature or humidity affect biomolecular interactions and sensor performance. | Perform experiments in a temperature-controlled environment and use equipment that regulates environmental factors [74]. |
Experimental Protocols for Key Experiments
Protocol 1: Optimizing Interdigitated Electrode (IDE) Sensitivity
This protocol is for developers fabricating or using electrochemical impedance biosensors.
- Sensor Fabrication: Design and fabricate IDE chips with varying electrode gaps (e.g., 3 μm, 4 μm, 5 μm) while keeping other parameters constant [73].
- Functionalization: Immobilize the capture probe (e.g., SARS-CoV-2 spike protein) uniformly across all chip surfaces using a standardized covalent coupling method (e.g., EDC/NHS chemistry) [74].
- Assay Execution:
- Expose all functionalized chips to the same series of analyte concentrations (e.g., monoclonal antibody from 50 ng/mL to 500 ng/mL).
- Use a consistent buffer (e.g., 1X PBS) and amplification strategy (e.g., Protein G conjugation) for all tests [73].
- Data Analysis: Measure the impedance shift for each concentration and chip design. The design with the lowest detectable concentration and largest signal change (e.g., the 3 μm gap) is the most sensitive [73].
Protocol 2: Mitigating Signal Drift in Solution-Gated BioFETs
This protocol is for users of transistor-based biosensors operating in ionic solutions.
- Surface Coating: Grow or deposit a polymer brush layer (e.g., POEGMA) on the transducer channel. This layer extends the Debye length and provides a non-fouling background [72].
- Passivation and Encapsulation: Implement a robust passivation layer around the active sensing area to prevent leakage currents from the solution into the device [72].
- Stable Measurement:
- Use a stable, integrated pseudo-reference electrode (e.g., Pd) to avoid drift from bulky Ag/AgCl electrodes.
- Collect data using infrequent DC voltage sweeps rather than continuous static measurements or AC measurements to minimize system disturbance [72].
- Validation: Include an on-chip control device (lacking the capture antibody) subjected to the same conditions. A stable signal in the control confirms that drift has been mitigated [72].
Protocol 3: Standardizing Immobilization for Reproducibility
This protocol ensures consistent and active ligand coating on sensor surfaces.
- Surface Cleaning/Pre-conditioning: Clean the sensor chip (e.g., gold surface for SPR) according to manufacturer guidelines. Perform multiple cycles of buffer flow to stabilize the surface [74].
- Controlled Activation & Coupling:
- For covalent immobilization, activate the surface with a fresh mixture of EDC/NHS for a fixed duration (e.g., 7 minutes).
- Dilute the ligand to a standard concentration in a suitable immobilization buffer (e.g., sodium acetate, pH 5.0).
- Inject the ligand for a precise time to control surface density. Aim for an optimal density that avoids steric hindrance [74].
- Blocking: Deactivate any remaining active esters by injecting a blocking agent like ethanolamine [74].
- Quality Control: After immobilization, run a buffer-only baseline to check for stability. A stable baseline indicates a well-prepared surface. Document the final immobilization level (Response Units) for every sensor chip [74] [76].
The Scientist's Toolkit: Research Reagent Solutions
| Item | Function | Example in Context |
|---|---|---|
| POEGMA Polymer Brush | A non-fouling coating that extends the Debye length in ionic solutions, enabling detection of large biomolecules in physiologically relevant buffers [72]. | Coated on a CNT-based BioFET to enable antibody sensing in 1X PBS [72]. |
| CM5 Sensor Chip | A widely used SPR sensor chip with a carboxymethylated dextran matrix for covalent immobilization of proteins via amine coupling [74]. | Used for immobilizing capture antibodies in kinetic studies of protein-protein interactions [74]. |
| EDC/NHS Chemistry | A common crosslinking chemistry for activating carboxyl groups on sensor surfaces to form stable amide bonds with primary amines in proteins [74]. | Standard protocol for covalently immobilizing antibodies or antigens onto CM5 chips [74]. |
| Polymerization Reagents | Monomers and initiators used for signal amplification; the growing polymer chain dramatically increases the signal per binding event [71]. | Conjugated to a probe DNA; polymerization of HEMA creates an opaque film for visual or SPR detection [71]. |
| Anti-Idiotype Molecules | Specialized antibodies that bind to the unique antigen-binding site (idiotype) of another antibody, allowing for highly specific detection of therapeutic antibodies [77]. | Used as a capture ligand in a biosensor for therapeutic drug monitoring of specific monoclonal antibodies [77]. |
Experimental Workflow and Signaling Pathways
Biosensor Development Workflow
Signal Amplification Pathways
Optimizing Biofilm Properties in Microbial Biosensors for Enhanced Sensitivity
Technical Support Center: FAQs & Troubleshooting Guides
Frequently Asked Questions (FAQs)
Q1: Why has the sensitivity of my microbial biosensor decreased over time? A decrease in biosensor sensitivity is often linked to changes in the electroactive biofilm. Shifts in the microbial community composition or the presence of competing, non-electroactive native microorganisms from your sample can reduce current output [78]. The biofilm's metabolic pathways may also change in response to the specific feedstock, impacting electron transfer efficiency to the electrode [78].
Q2: My biosensor's signal is unstable. Could this be due to the biofilm? Yes, signal instability is a known challenge with mixed-culture biofilms, as the diversity of feedstocks can profoundly affect the biofilm's structure and metabolism [78]. Ensuring a consistent and controlled flow of nutrients using dynamic methods, such as microfluidic systems, can help stabilize growth conditions and lead to a more consistent signal output [79].
Q3: How can I make my biosensor more resistant to matrix effects from complex fermentation broths? Building a resilient, multi-species electroactive biofilm is key. While single-species biofilms offer consistency, mixed-species cultures provide broader substrate degradation capabilities and enhanced adaptability to environmental changes [78]. Furthermore, using biosensors with a multi-array design that includes blank (non-enzyme coated) electrodes can help correct for interference from electroactive species in the broth [15].
Q4: Is it necessary to sterilize my wastewater or fermentation samples before analysis? Not necessarily. Recent studies show that MFC-based biosensors with robust anodic biofilms can be effectively recalibrated for diverse wastewaters without pre-sterilization, conductivity adjustments, or nitrogen purging [78]. However, be aware that the presence of native aerobic microorganisms might affect the current output [78].
Q5: What is the key advantage of electrochemical biofilm-based biosensors? A major advantage is their ability to provide real-time, non-destructive monitoring of biofilm dynamics and metabolic activity [79]. They directly tap into the natural electrochemical activity of the electroactive biofilm, providing a proxy for the biological processes you wish to measure [80].
Troubleshooting Guide for Common Experimental Issues
Issue 1: Low Current Output or Signal Strength
- Potential Causes:
- Biofilm Immaturity: The electroactive biofilm is not fully developed or acclimated to the substrate.
- Substrate Competition: Native planktonic cells in the sample are consuming the substrate before the anodic biofilm can utilize it [78].
- Oxygen Limitation: For 1st generation amperometric biosensors, oxygen depletion in the sample can limit the enzymatic reaction and signal generation [15].
- Incorrect Applied Potential: The potentiostat may be set to an unsuitable voltage for the specific electron mediators involved.
- Solutions:
- Acclimatize Biofilm: Allow a longer period for the biofilm to mature and stabilize with your specific feedstock. Research indicates biofilms can maintain stability for over five years [78].
- Monitor Planktonic Growth: Check the optical density (OD600) of the anolyte to gauge the growth of competing planktonic cells [78].
- Ensure Oxygen Supply: For oxygen-dependent biosensors, verify that samples are adequately aerated or that the flow-through cell is not oxygen-depleted [15].
- Verify Potentiostat Settings: Confirm that the applied potential is optimized for your system, for example, +450 mV vs. an Ag/AgCl reference electrode is common for glucose oxidase-based sensors [15].
Issue 2: High Signal Variability or Noise
- Potential Causes:
- Inconsistent Flow Rate: Fluctuations in the delivery of nutrients/substrate to the biofilm in flow-through systems.
- Fluctuating Temperature: Temperature variations impact microbial metabolic rates and enzyme activity.
- Heterogeneous Biofilm: The biofilm has an uneven, heterogeneous architecture, leading to inconsistent mass transfer and current production [81].
- Solutions:
- Calibrate Pumps: Regularly check and calibrate peristaltic or syringe pumps to ensure a consistent flow rate.
- Implement Temperature Control: Use water jackets or incubators to maintain a stable temperature.
- Characterize Biofilm Structure: Use advanced imaging techniques to understand the biofilm's 3D structure. Wrinkles and channels can boost mass transfer, and this heterogeneity must be accounted for in your data interpretation [81].
Issue 3: Slow Response Time
- Potential Causes:
- Diffusion Limitation: A thick, dense biofilm matrix hinders the rapid diffusion of the substrate to the cells and electrons to the electrode.
- Long Genetic Circuitry: If using engineered biosensors that rely on transcriptional cascades, the time to express a reporter protein can be slow (up to 30 minutes) [82].
- Solutions:
- Optimize Biofilm Thickness: Encourage a robust but not overly thick biofilm by controlling nutrient supply and shear forces.
- Use Post-Translational Biosensors: Consider designing biosensors that use a synthetic electron transport chain, generating an electrical signal in 1 minute or less, bypassing slower genetic circuits [82].
Issue 4: Poor Selectivity in Complex Media
- Potential Causes:
- Non-Specific Binding: Interfering compounds in the fermentation broth are adhering to the sensor surface or biofilm.
- Broad Substrate Specificity: The microbial consortium in the biofilm metabolizes a range of similar compounds.
- Solutions:
- Use Blank Electrodes: Integrate blank electrodes into a multi-sensor array to measure and subtract background current from interfering species [15].
- Leverage Natural Specificity: Capitalize on the high specificity of natural bacterial signaling pathways, which can finely distinguish between very similar molecules [82].
Experimental Protocols for Biofilm Optimization
Protocol 1: Recalibrating a Biosensor for a New Feedstock
Objective: To adapt an existing microbial fuel cell (MFC) biosensor, initially cultivated on a synthetic medium, for use with non-sterile, complex urban wastewater or fermentation broth while maintaining sensitivity [78].
Materials:
- Established MFC biosensor with anodic biofilm
- New target feedstock (e.g., urban wastewater, fermentation broth)
- Standard BOD solution (for reference)
- Potentiostat/data acquisition system
- External resistor (e.g., 1 kΩ)
Methodology:
- Baseline Recording: Begin by operating the MFC with its original, sterile synthetic wastewater (SWW) at a known BOD concentration. Record the stable maximum current density.
- Introduce New Feedstock: Replace the anolyte with the new, non-sterile feedstock (e.g., Real Urban Wastewater, RWW) at a comparable BOD concentration. Note: Pre-sterilization, nitrogen purging, or conductivity adjustments are not required [78].
- Monitor Current Output: Record the current generated across the external resistor. Expect a noticeable reduction in maximum current compared to SWW due to the presence of complex substrates and native microorganisms [78].
- Assess Biofilm Adaptation: Continue batch cycles with the new feedstock. The current output should stabilize as the anodic biofilm adapts to the new chemical and microbiological composition.
- Recalibrate: Once stabilized, measure the current response at multiple, known BOD concentrations of the new feedstock to establish a new calibration curve (current density vs. BOD).
- Validate Performance: Compare the BOD measurements of unknown samples against a standard method (e.g., BOD5 test) to determine the relative error of the recalibrated biosensor.
Expected Outcome: A resilient electroactive biofilm will maintain consistent sensitivity and a low limit of detection despite variations in its microbial composition, allowing for accurate BOD monitoring of the new feedstock [78].
Protocol 2: Integrating a Flow-Cell Electrochemical Biosensor for Fermentation Monitoring
Objective: To implement a commercial flow-through-cell electrochemical biosensor for at-line or on-line monitoring of glucose in a yeast fermentation process [15].
Materials:
- Commercial biosensor chip (e.g., B.LV5 with integrated 1st generation glucose biosensors)
- Potentiostat with customized connection (e.g., SIX transmitter)
- Peristaltic pump and appropriate tubing
- Fermentation bioreactor
- Sample loop or bypass stream
Methodology:
- System Setup: Integrate the biosensor chip into the fermentation setup by connecting the inlet and outlet tubing. A pump should be connected to the inlet to facilitate a continuous or semi-continuous flow of the fermentation broth through the 1 μL flow-through-cell [15].
- Sensor Operation: Perform chronoamperometric measurements at a fixed voltage (e.g., +450 mV vs. the internal Ag/AgCl pseudo-reference electrode) [15].
- Data Acquisition: The biosensor platform automatically measures samples in duplicate using two Pt-working electrodes. The current from blank (non-enzyme coated) electrodes is subtracted from the signal of the active electrodes to correct for interference [15].
- At-line Measurement: For at-line analysis, manually or automatically divert a sample from the bioreactor through the biosensor flow-cell.
- On-line Measurement: For continuous monitoring, a small, continuous bypass stream from the bioreactor can be directed through the biosensor. Note: The biosensor has demonstrated the ability to handle cell-containing samples and glucose concentrations up to 150 mM [15].
- Data Correlation: Correlate the measured current with glucose concentration using a pre-established calibration curve. The system provides results in less than 5 minutes, offering a significant advantage over HPLC analysis [15].
Expected Outcome: Reliable, rapid quantification of glucose concentration in the complex fermentation broth, enabling real-time process control of feeding strategies.
The table below summarizes key performance metrics from recent studies on biofilm-based biosensors, providing benchmarks for optimization targets.
Table 1: Performance Metrics of Biofilm-Based Biosensors
| Biosensor Type / Application | Key Performance Metric | Reported Value | Context & Conditions |
|---|---|---|---|
| MFC-based BOD Biosensor [78] | Sensitivity | 0.64 ± 0.10 mA L mg⁻¹ m⁻² (SWW)0.78 ± 0.13 mA L mg⁻¹ m⁻² (RWW) | 3D-printed MFCs with mixed-culture anodic biofilm. |
| Limit of Detection (LOD) | 49 ± 8 mg L⁻¹ (SWW)44 ± 7 mg L⁻¹ (RWW) | Consistent LOD despite different wastewater types. | |
| Electrochemical Glucose Biosensor [15] | Linear Detection Range | Up to 150 mM (≈27 g/L) | Applied in yeast fermentation broth; significantly higher than typical clinical sensors (~25 mM). |
| Measurement Time | < 5 minutes | Per measurement, much faster than HPLC. | |
| Rapid Bacterial Biosensor [82] | Response Time | ~1 minute | Post-translational biosensor for thiosulfate, vs. ~30 min for transcription-based sensors. |
Biosensor Signaling and Workflow Diagrams
Biofilm-Electrode Electron Transfer
Flow-Cell Biosensor Integration
The Scientist's Toolkit: Research Reagent Solutions
Table 2: Essential Materials for Biosensor Development and Optimization
| Item | Function / Role in Experiment | Key Considerations |
|---|---|---|
| Mixed-Culture Inoculum | Source of diverse electroactive microorganisms to form a resilient anodic biofilm. | Pre-acclimation to a target substrate (e.g., acetate) can establish a robust starting community [78]. |
| Electrochemical Biosensor Chip | The transducer that converts biofilm metabolic activity into a quantifiable electrical signal. | Select chips with multi-electrode arrays that include blank electrodes for interference correction [15]. |
| Potentiostat/Galvanostat | Instrument for applying a controlled potential/current and measuring the resulting electrochemical signal. | Must be compatible with your sensor chip and software for real-time data acquisition. |
| Microfluidic Flow Cell | Provides a controlled, dynamic environment for biofilm growth and reproducible sample delivery. | Enables the application of defined shear forces and prevents nutrient stagnation [79]. |
| Enzymes (e.g., Glycosidases, Proteases) | Used as tools to experimentally degrade specific components of the biofilm matrix (EPS) to study its structure and function [83]. | Helps in understanding the role of EPS in electron transfer and barrier formation. |
| Quorum Sensing Molecules | Chemical signals that regulate biofilm formation and collective behaviors. | Can be used to manipulate and study biofilm development and dispersal mechanisms [83]. |
Technical Support Hub: AI-Enhanced Biosensors for Fermentation Research
This support center provides troubleshooting and guidance for researchers implementing AI-driven data management systems in small-scale fermentation using cost-effective biosensors.
Frequently Asked Questions (FAQs)
Q1: What are the most suitable AI models for analyzing biosensor data from small-scale fermenters?
A: For biosensor data, which often involves complex, multi-dimensional signals, a combination of models is often most effective. The table below summarizes suitable models for different data types.
| AI Model | Best For | Key Advantage | Considerations for Small-Scale Research |
|---|---|---|---|
| Support Vector Machines (SVM) [84] | Classifying fermentation states (e.g., growth phase, contamination). | Effective in high-dimensional spaces and with complex, non-linear data. | Works well with smaller datasets; ideal for proof-of-concept studies. |
| Random Forests (RF) [84] | Identifying critical process parameters from multiple sensor inputs. | Reduces overfitting by aggregating multiple decision trees. | Provides feature importance, helping you identify which sensor data matters most. |
| k-Nearest Neighbors (k-NN) [84] | Real-time anomaly detection (e.g., sudden pH or metabolite shift). | Simple, intuitive, and requires no model training time. | Computational cost increases with data volume; best for smaller datasets. |
| Convolutional Neural Networks (CNN) [85] [84] | Interpreting complex patterns from optical or spectral biosensors. | Automatically learns hierarchical features from raw, complex data. | Requires larger datasets for training; can be prone to overfitting with limited data. |
Q2: How can I improve the accuracy of my AI model when biosensor signals are noisy?
A: Signal noise is a common challenge, especially in complex media like fermentation broths. You can employ several strategies:
- AI-Powered Noise Filtering: Implement AI not just for analysis, but for pre-processing. Machine learning algorithms can be trained to identify and filter out high-frequency noise and baseline drift, significantly improving the signal-to-noise ratio for more accurate analysis [84].
- Data Fusion: Combine data from multiple, low-cost biosensors (e.g., pH, impedance, optical). AI models like Random Forests can integrate these signals to create a more robust picture of the process state, making the system less reliant on any single, potentially noisy, sensor [85].
- Increase Sampling Frequency: For time-series data, a higher sampling rate provides the AI model with more data points to distinguish true patterns from random noise.
Q3: Our research budget is limited. How can we build an effective AI-powered monitoring system?
A: A cost-effective approach leverages modern, scalable technologies.
- Focus on "Balance of Plant" Assets: Start by monitoring the most critical parameters with a few key biosensors. You don't need to instrument everything at once [86].
- Use Low-Cost IIoT Sensors: Deploy relatively inexpensive, battery-powered Industrial Internet of Things (IIoT) sensors. This avoids the high installation costs of traditional wired systems and allows for flexible, scalable monitoring [86].
- Leverage Open-Source Tools: Utilize open-source libraries (e.g., Python's Scikit-learn, TensorFlow) for AI model development and data processing [84]. For project management, open-source tools like GanttProject can help manage your development timeline at no cost [87].
Q4: What is the best way to structure a data pipeline from biosensors to AI-driven insights?
A: A structured, multi-layered pipeline is crucial for success. The following workflow outlines the key stages from data collection to actionable process control.
Troubleshooting Guides
Issue: Model Predictions Are Inaccurate or Drifting Over Time
This occurs when the AI model's outputs no longer reliably reflect the actual state of your fermentation process.
| Potential Cause | Diagnostic Steps | Solution |
|---|---|---|
| Sensor Calibration Drift [85] | Compare biosensor readings against gold-standard lab measurements (e.g., HPLC for metabolite concentration). | Implement a regular calibration schedule. Use AI to detect subtle drift patterns and flag the need for re-calibration. |
| Changing Background Matrix [85] | Check if changes in media composition or cell density correlate with a drop in model accuracy. | Retrain your AI model with new data that reflects the changed conditions. Incorporate the interfering factor as a new input feature for the model. |
| Overfitting on Limited Training Data [84] | The model performs well on training data but poorly on new, unseen data. | Use simpler models (e.g., SVM) or ensemble methods (e.g., Random Forests). Apply cross-validation during training and ensure your dataset is large and varied enough. |
Issue: Data Integration and Workflow is Cumbersome and Manual
This slows down research and increases the risk of human error.
| Potential Cause | Diagnostic Steps | Solution |
|---|---|---|
| Lack of a Centralized Platform [88] | Data is stored in separate files (spreadsheets, individual sensor logs). | Implement a centralized sensor data management platform to automatically aggregate, validate, and visualize data from all your biosensors [88]. |
| Manual Data Transfer | Audit the time spent manually collating and formatting data for analysis. | Use APIs and IIoT protocols to establish automatic data flow from sensors to your analysis software [86]. |
| Unclear Project Timeline | Key tasks and dependencies in building your AI-biosensor system are not defined. | Use a Gantt chart to visualize the project timeline, break it into smaller tasks, and identify dependencies to streamline development [87]. |
The Scientist's Toolkit: Research Reagent Solutions
The following materials are essential for developing and validating cost-effective biosensor systems for fermentation monitoring.
| Item | Function in Experiment |
|---|---|
| Aptamer-based Biorecognition Elements [85] [84] | These single-stranded DNA or RNA molecules serve as the biosensor's capture element. They bind specifically to target analytes (e.g., a key metabolite like lactate) and are often more stable and cost-effective than antibodies. |
| Electrochemical Transducer Chips [85] | These form the physical basis of many cost-effective biosensors. They convert the biological binding event (e.g., aptamer-target interaction) into a measurable electrical signal (current, impedance). |
| Nanomaterials (e.g., Graphene, Metal NPs) [84] | Used to modify the transducer surface to enhance signal strength, improve sensitivity, and lower the detection limit, which is crucial for detecting low analyte concentrations in small volumes. |
| Standard Reference Solutions [85] | Certified solutions with known concentrations of your target analyte (e.g., glucose, ethanol). Essential for calibrating your biosensor and validating the accuracy of your AI model's predictions. |
| Cell Culture Media & Reagents | For growing the microbial or cellular subjects of the fermentation study and for preparing samples that simulate fermentation broth for biosensor testing. |
Preventative Maintenance and Calibration Protocols for Long-Term Stability
For researchers pursuing cost-effective biosensor solutions in small-scale fermentation, achieving long-term stability is a cornerstone of reliable data. Preventative maintenance and calibration are not merely operational tasks; they are fundamental scientific practices that ensure the accuracy, reproducibility, and validity of your experimental results. In the dynamic and often harsh environment of a fermenter, factors like microbial activity, pH shifts, and protein accumulation can degrade sensor performance. A proactive approach to sensor care mitigates these issues, preventing costly batch failures and ensuring that your research progresses on a foundation of trustworthy data. This guide provides actionable, detailed protocols to help you maintain and calibrate your biosensors, maximizing their lifespan and performance within the constraints of a typical research budget.
Troubleshooting Common Biosensor Issues
Frequently Asked Questions (FAQs)
Q1: My biosensor readings are drifting over time, even in a fresh calibration solution. What could be the cause? A: Drift is often a sign of biofouling, where proteins, cells, or other biological materials accumulate on the sensor's active surface [89] [90]. This layer physically blocks the sensor's interaction with the analyte and causes a gradual signal change. Other causes include sensor aging or damage to the sensing membrane. To address this, implement a strict post-use cleaning protocol and ensure the sensor is stored according to the manufacturer's guidelines.
Q2: How often should I calibrate my fermentation biosensors? A: The calibration frequency depends on the sensor type, the fermentation media's harshness, and the required data accuracy. A general rule is to calibrate before the start of each new fermentation batch. For long-term fermentations, performing a midpoint validation against an offline sample is advisable. Always consult your sensor's manual, and increase frequency if you notice data deviating from offline measurements [91] [92].
Q3: My sensor seems to work fine in standard solutions, but fails during the actual fermentation. Why? A: This is a common issue often related to matrix effects. The complex fermentation broth, which can differ in viscosity, ionic strength, and chemical composition from your calibration standards, can interfere with the sensor's response [3]. To combat this, always calibrate using a matrix that matches your fermentation media as closely as possible (e.g., a spent media base). Using sensors with specialized anti-fouling coatings can also greatly improve in-situ performance [90].
Q4: What is the difference between a one-point and a two-point calibration? A: A one-point calibration only checks the sensor's "zero" or baseline point and applies a single offset correction. A two-point calibration checks both a "zero" and a "span" point (a known high value), correcting for both offset and gain (sensitivity) errors [92]. For most quantitative fermentation biosensors, a two-point calibration is essential for accurate measurements across the expected concentration range.
Troubleshooting Guide Table
The following table outlines common biosensor problems, their potential causes, and solutions.
Table 1: Biosensor Troubleshooting Guide for Fermentation Applications
| Problem | Potential Causes | Recommended Solutions |
|---|---|---|
| Erratic or Noisy Readings | Electrical interference; Loose connections; Poor grounding. | Use shielded cables; Ensure all connections are secure; Check and improve system grounding [92]. |
| Slow Response Time | Biofouling; Clogged membrane (for certain sensors). | Clean the sensor surface; Replace the membrane if applicable; Verify that stirring is adequate during measurement [89]. |
| Inaccurate Readings (Despite Calibration) | Improper calibration technique; Sensor drift; Matrix effects. | Re-calibrate using a two-point method with fresh standards; Calibrate in a matrix similar to the sample; Check for biofouling [3] [92]. |
| Complete Sensor Failure | Physical damage; Sensing membrane failure; Electronics failure. | Visually inspect for cracks or corrosion; Contact manufacturer for diagnostic support [11]. |
| Reading Drift | Biofouling; Sensor aging; Changing temperature. | Implement a cleaning protocol; Allow sufficient time for sensor stabilization; Use temperature compensation if available [89] [90]. |
Preventative Maintenance Schedules and Procedures
A proactive maintenance schedule is the most cost-effective strategy for ensuring biosensor longevity. Adhering to a routine prevents the majority of common failure modes.
Maintenance Schedule
Table 2: Preventative Maintenance Schedule for Fermentation Biosensors
| Frequency | Task | Details & Purpose |
|---|---|---|
| Before Each Use | Visual Inspection | Check for cracks, corrosion, or damage to the sensor body and membrane. |
| Functional Check | Verify the sensor produces a stable baseline in a known solution. | |
| Calibration | Perform a two-point calibration to ensure measurement accuracy [92]. | |
| After Each Use | Thorough Cleaning | Rinse with an appropriate solvent (e.g., deionized water, mild acid/cleaner) to remove fermentation residue and prevent biofouling [11]. |
| Weekly (or after 5 batches) | Deep Cleaning | Perform a more rigorous cleaning protocol as per manufacturer instructions (e.g., enzymatic cleaning, protease treatment). |
| Storage Validation | Ensure sensors are stored in proper, often humid, conditions to prevent membrane dehydration. | |
| Monthly (or per 20 batches) | Performance Verification | Test sensor against a certified standard not used for routine calibration. |
| Check Connectors & Cables | Inspect for wear and tear that could cause signal issues. | |
| Annually | Professional Servicing | Send to manufacturer or qualified technician for full diagnostic and potential membrane replacement. |
Core Principles of Calibration
Proper calibration is the heart of measurement accuracy. Follow these core principles:
- Traceability: Ensure your calibration standards are traceable to national or international standards (e.g., NIST). This creates an unbroken chain of comparisons that validates your measurements [91].
- Two-Point Calibration: Always use at least two standard solutions that bracket your expected measurement range. This corrects for both offset and sensitivity errors in the sensor's output [92].
- Matrix-Matched Calibration: Whenever possible, calibrate using a solution that has a similar chemical background (matrix) to your fermentation sample. This compensates for matrix effects that can skew readings [3].
- Documentation: Keep a detailed log of every calibration, including date, standards used, "as-found" and "as-left" values, and the technician's name. This is crucial for data integrity and troubleshooting [91].
The following diagram illustrates the logical workflow for a robust calibration and maintenance process, from setup to data validation.
The Scientist's Toolkit: Essential Research Reagent Solutions
Building a reliable biosensor setup requires more than just the sensor itself. The following table details key reagents and materials crucial for maintenance, calibration, and troubleshooting.
Table 3: Essential Research Reagent Solutions for Biosensor Maintenance
| Item | Function / Purpose | Cost-Effective Considerations |
|---|---|---|
| Certified Calibration Standards | Provides the known reference for calibrating sensors, ensuring measurement traceability and accuracy. | Purchase in larger quantities; Dilute from higher-concentration stocks; Verify stability over time. |
| Matrix-Matched Blank Solution | A solution with a similar chemical background to the fermentation broth, used for calibration to minimize matrix effects. | Prepare in-lab using spent fermentation media (after cell removal) as a base for calibration standards [3]. |
| Sensor Cleaning Solutions | Removes biofouling and residue from the sensor membrane to restore performance and prevent drift. | Use lab-prepared buffers and mild cleaners (e.g., pepsin/HCl solution for protein removal) where appropriate and validated. |
| Storage Solutions | Prevents the sensor membrane from drying out and degrading during storage, extending its usable life. | Always use the manufacturer-recommended solution. Sub-optimal storage is a false economy that leads to premature sensor failure. |
| Validation Standards | A separate set of standards, not used for routine calibration, to independently verify sensor performance post-calibration. | Can be a different lot of the same standard or a cross-check with another validated analytical method (e.g., HPLC). |
Advanced Protocols: Implementing a Robust Calibration Methodology
For researchers requiring high-precision data, following a detailed, methodical protocol is non-negotiable.
Detailed Two-Point Calibration Protocol
Objective: To accurately calibrate a biosensor by correcting for zero offset and span/gain error, ensuring linear response across the measurement range.
Materials:
- Biosensor and associated readout unit.
- Two certified standard solutions (e.g., "Low" and "High").
- Matrix-matching blank solution.
- Clean beakers and stir bars.
- Laboratory notebook for documentation.
Methodology:
- Preparation: Turn on the readout unit and allow the biosensor to stabilize in the blank solution for the recommended time (e.g., 15-30 minutes).
- "As-Found" Data (Diagnostic): Immerse the sensor in the "Low" standard. Once the reading stabilizes, record the value. Repeat with the "High" standard. Note: If these initial "as-found" values are wildly out of specification, the sensor may be faulty and require cleaning or replacement.
- Zero Calibration: Place the sensor in the "Low" standard. On the readout unit, initiate the calibration sequence and input the known value of the standard. The instrument will internally adjust the reading to match the standard.
- Span Calibration: Rinse the sensor and place it in the "High" standard. Initiate the span calibration and input the known high value. The instrument will adjust its gain/slope.
- Verification: Rinse the sensor and place it back in the "Low" standard, then the "High" standard, to verify the calibration was successful. The readings should now be close to the known values.
- Documentation: Record the date, standards used (including batch numbers), "as-found" and "as-left" values, and any observations. This is a critical step for Good Laboratory Practice (GLP) [91].
The relationship between proper calibration and long-term sensor performance, and the consequences of neglecting it, can be visualized as a decision tree leading to success or failure.
Validating Sensor Data and Comparing Commercial Viability
Why is validating my biosensor against a gold-standard method like ELISA necessary? Validation against an established method such as Enzyme-Linked Immunosorbent Assay (ELISA) is a critical step to ensure that your cost-effective biosensor provides accurate, reliable, and trustworthy data. For small-scale fermentation research, where resources are limited, this process confirms that your simplified biosensor performs adequately against the laboratory gold standard, enabling you to have confidence in your results when monitoring metabolites, biomarkers, or pathogens [10] [93]. Correlation studies help identify and quantify any systematic bias or random error in your biosensor, forming the foundation for its credibility [93].
Core Experimental Protocol: Conducting a Correlation Study
This section provides a detailed methodology for comparing your biosensor's performance with a reference ELISA.
Sample Preparation and Experimental Design
- Sample Selection: Randomly select a sufficient number of samples from your fermentation study that cover the entire range of expected analyte concentrations (e.g., low, medium, and high) [94]. For instance, in a study monitoring a specific protein, 196 plasma samples were used to ensure a robust comparison [94].
- Sample Storage: If not used immediately, archive samples at -80°C to preserve analyte integrity until analysis [94].
- Replication: Always run all samples, standards, and controls in duplicate or triplicate on both the biosensor and the ELISA. This provides essential data for assessing the precision and repeatability of both methods [95].
Parallel Analysis with ELISA and the Biosensor
- Reference ELISA Protocol: Follow the manufacturer's instructions or a published, certified protocol meticulously for the ELISA. Key steps are summarized below [96]:
- Coating: Incubate the microplate with a capture antibody specific to your target analyte.
- Blocking: Add a blocking buffer (e.g., 1% dried skimmed milk powder) to prevent non-specific binding.
- Sample Incubation: Add your standards and samples to the wells. The analyte binds to the capture antibody.
- Detection Antibody Incubation: Add an enzyme-linked detection antibody that binds to the captured analyte.
- Substrate Addition: Add an enzyme substrate (e.g., TMB) that produces a color change.
- Stop Solution: Add an acid (e.g., H₂SO₄) to stop the reaction.
- Reading: Measure the optical density (OD) at a specified wavelength (e.g., 450 nm) using a microplate reader [96] [94].
- Biosensor Protocol: Execute your biosensor's measurement protocol according to its established procedure. This will vary depending on the biosensor type (e.g., photonic crystal, electrochemical) but often involves incubating the sample on a functionalized sensor surface and measuring a signal shift (e.g., wavelength, current) [93].
Data Analysis and Statistical Correlation
- ELISA Data Reduction:
- Average the duplicate or triplicate OD readings for each standard and sample [95].
- Generate a standard curve by plotting the mean absorbance (y-axis) against the known concentration of the standards (x-axis). Use a 4- or 5-parameter logistic (4PL/5PL) curve fit for the best model [95].
- Use the standard curve equation to interpolate the concentration of your unknown samples.
- Precision Check: Calculate the Coefficient of Variation (CV) for your sample duplicates. The CV should generally be ≤ 20% to be considered acceptable. CV is calculated as (Standard Deviation / Mean) × 100% [95].
- Correlation Statistics:
- Perform a Deming regression (or similar model that accounts for error in both methods) between the concentrations obtained from the biosensor (y-values) and the ELISA (x-values) [94].
- Calculate the correlation coefficient (r) to assess the strength and direction of the linear relationship. A value close to 1 indicates strong agreement [94].
- Use Bland-Altman analysis to visualize the agreement between the two methods by plotting the difference between the measurements against their average. This helps identify any systematic bias [94].
The following workflow diagrams the key steps for sample analysis and data processing in a biosensor validation study:
Troubleshooting Common Experimental Issues
FAQ 1: The correlation between my biosensor and ELISA is weak (low r-value). What could be the cause? A weak correlation often points to fundamental issues with assay specificity or sample integrity.
- Potential Cause 1: Matrix Effects. Components in the complex fermentation broth (e.g., proteins, lipids, salts) may be interfering with the biosensor's detection mechanism but not the ELISA, or vice versa [93].
- Solution: Dilute your samples and re-assay. If the correlation improves, a matrix effect is likely. You may need to develop a sample pre-treatment step (e.g., extraction, filtration) for the biosensor [93].
- Potential Cause 2: Differing Specificity. The antibodies or biorecognition elements used in your biosensor might be detecting different epitopes or isoforms of the analyte than the ELISA kit [94].
- Solution: Verify the specifications of the antibodies/bioreceptors used in both systems. If possible, use identical or highly similar biological elements in both assays.
FAQ 2: The biosensor consistently over- or under-estimates values compared to ELISA. How do I address this bias? A consistent bias indicates a systematic error.
- Potential Cause 1: Calibration Differences. The standard curves for the two methods are not aligned. The reference materials or calibrators may differ [94].
- Potential Cause 2: Cross-reactivity. The biosensor's bioreceptor may be cross-reacting with structurally similar compounds in the fermentation sample.
- Solution: Test the cross-reactivity of your biosensor against likely interfering substances present in your fermentation matrix.
FAQ 3: The duplicate readings on my biosensor are unacceptably variable (high CV). What should I check? High imprecision often stems from operational or hardware inconsistencies.
- Potential Cause 1: Inconsistent Washing. Inadequate or uneven washing during the biosensor assay can lead to variable non-specific binding.
- Solution: Standardize the washing procedure rigorously. Ensure washing buffer volumes, incubation times, and the number of wash cycles are consistent for every sample.
- Potential Cause 2: Sensor Surface Inhomogeneity. The functionalized surface of the biosensor may not be uniform from one spot to another.
- Solution: Ensure consistent and reproducible surface modification/functionalization protocols. If using a commercial biosensor plate, check for any physical damage.
Performance Metrics and Data Interpretation
The table below summarizes key performance metrics and their acceptable criteria, based on a validation study of a photonic crystal biosensor versus ELISA for ferritin and sTfR detection [93].
Table 1: Key Performance Metrics from a Biosensor vs. ELISA Validation Study
| Performance Metric | Description | Example Findings (Ferritin) | Interpretation & Goal |
|---|---|---|---|
| Correlation Coefficient (r) | Strength of linear relationship. | r > 0.94 [94] | Value should be close to 1.0, indicating strong agreement. |
| Total Calculated Error (TE~calc~) | Sum of systematic and random error. | Exceeded Total Allowable Error (TE~a~) for ferritin [93] | TE~calc~ should be less than the established TE~a~ for the biomarker. |
| Inherent Imprecision | Random error of the measurement. | Higher on PC biosensor for ferritin vs. ELISA [93] | Should be minimized. Can be indicated by a high CV (>20%) between duplicates [95]. |
| Diagnostic Ability | Ability to correctly classify samples. | Unaffected despite high TE~calc~ [93] | The biosensor may still be useful for its intended purpose (e.g., identifying low iron stores) even if total error is high. |
This data analysis and interpretation process is visualized in the following pathway:
The Scientist's Toolkit: Essential Research Reagents and Materials
Table 2: Key Reagents and Materials for Biosensor Validation Experiments
| Item | Function/Description | Example from Literature |
|---|---|---|
| Capture & Detection Antibodies | Biological elements that specifically bind the target analyte. Monoclonal antibodies are often preferred for high specificity. | Mouse anti-human capture and detection antibodies for sTfR assay [93]. |
| International Reference Standards | Certified materials used to create a standard curve, ensuring quantification is traceable to a global standard. | WHO ferritin and sTfR reference standards [93]. |
| Functionalized Sensor Surface | The modified surface of the biosensor where the biorecognition event occurs. | Epoxy-silanized photonic crystal surface [93]. |
| Blocking Buffer | A solution (e.g., BSA, skim milk) used to cover unused binding sites on the sensor surface to minimize non-specific binding. | 1% dried skimmed milk powder in PBS-T [94]. |
| Wash Buffer | A buffered solution (e.g., PBS with Tween 20) used to remove unbound materials between assay steps, reducing background signal. | Phosphate-buffered saline with 0.05% Tween 20 (PBS-T) [96] [94]. |
| Enzyme-Substrate System | In ELISA, this generates a measurable colorimetric signal. HRP-TMB is a common combination. | Horseradish peroxidase (HRP) with Tetramethylbenzidine (TMB) substrate [96]. |
For researchers focused on small-scale fermentation, selecting the appropriate biosensor is critical for obtaining accurate, reproducible data while managing limited budgets. Biosensors are analytical devices that combine a biological recognition element with a transducer to produce a signal proportional to the concentration of a target analyte [97]. In fermentation research, these tools enable real-time monitoring of key metabolites, biomass, and process contaminants, facilitating rapid optimization of biological reactors [10].
This technical support center provides a comprehensive framework for evaluating biosensor performance based on the core metrics of sensitivity, specificity, and cost. The guidance is specifically tailored to the constraints and requirements of academic and industrial small-scale fermentation research, where resources are often limited and the need for reliable, cost-effective solutions is paramount.
Performance Metrics Comparison Table
The following table summarizes the key performance characteristics of major biosensor types relevant to fermentation monitoring, based on current technological capabilities and market data.
| Biosensor Type | Sensitivity | Specificity | Cost | Key Strengths | Limitations |
|---|---|---|---|---|---|
| Electrochemical | High [98] | High (via enzyme selectivity) [10] | Low [99] [98] | Cost-effective, portable, simple instrumentation [10] [98] | May require sample preparation in complex media |
| Optical | Very High [100] | Very High (label-free) [100] | High [100] | Real-time, label-free detection [100] | Higher instrument cost, complex setup |
| Thermal (Calorimetric) | Moderate | Moderate | Moderate | Measures heat change from reactions [10] | Susceptible to ambient temperature fluctuations |
| Piezoelectric | High (mass-based) [10] | High | Moderate | Detects changes in mass/viscosity [97] | Sensitive to environmental vibrations |
Market Dominance Note: Electrochemical biosensors hold a dominant revenue share of 71.1% in the biosensors market, largely due to their proven accuracy, scalability, and cost-effectiveness, making them particularly suitable for high-volume settings like fermentation monitoring [99]. Optical biosensors are also a significant segment, valued for their high sensitivity and real-time capabilities [100].
Troubleshooting Guides & FAQs
This section addresses common practical challenges encountered when using biosensors in a research setting.
Frequently Asked Questions
Q1: What is the most cost-effective biosensor type for routine monitoring of glucose in fermentation broth? A: Electrochemical biosensors, particularly amperometric glucose biosensors, are the most cost-effective and widely adopted solution. They offer a favorable balance of high sensitivity, specificity through enzyme selectivity, and low cost, dominating the market for metabolic monitoring [99] [10] [98].
Q2: My biosensor readings are inconsistent across different fermentation batches. What could be causing this? A: Inconsistent readings can stem from several factors:
- Analyte Interference: Complex fermentation broth may contain interfering substances that affect the biosensor's specificity.
- Sensor Fouling: Biomaterial buildup on the sensor surface can degrade performance over time, requiring regular calibration or cleaning.
- Environmental Fluctuations: Factors like variable pH or temperature can impact the stability and reproducibility of some biosensors [99] [10].
Q3: I need to detect very low concentrations of a specific protein biomarker in my sample. Which biosensor should I consider? A: For maximum sensitivity and specificity in detecting macromolecules like proteins, optical biosensors such as Surface Plasmon Resonance (SPR) are highly recommended. They provide label-free, real-time, and highly sensitive detection of biological interactions [100] [97].
Troubleshooting Common Problems
Problem: Signal Drift or Inaccurate Readings
- Potential Cause: Biofouling of the sensor membrane or electrode.
- Solution: Implement a regular cleaning and recalibration protocol. For reusable sensors, use the manufacturer-recommended cleaning solutions. Validate readings against a standard reference method periodically [10].
Problem: Low Sensitivity or Poor Limit of Detection
- Potential Cause: The transducer's inherent design or degradation of the biological recognition element (e.g., denatured enzyme).
- Solution: Ensure proper storage conditions for biosensor components. For new experiments, select a biosensor type with a specified detection limit (LOD) an order of magnitude below your target analyte's expected concentration. Explore biosensors incorporating nanomaterials like graphene or carbon nanotubes, which can enhance sensitivity [98].
Problem: Lack of Specificity in Complex Media
- Potential Cause: Non-specific binding of other compounds in the fermentation broth.
- Solution: Optimize sample preparation to remove common interferents. Investigate biosensors that use high-affinity recognition elements like antibodies or aptamers for your specific target to improve specificity [10] [101].
Experimental Protocols
Protocol for Monitoring Glucose in a Fermentation Process Using an Electrochemical Biosensor
Principle: This protocol utilizes an enzyme-based electrochemical biosensor, where glucose oxidase catalyzes the oxidation of glucose. The reaction produces electrons, generating a current that is proportional to the glucose concentration [10] [97].
Workflow Diagram:
Materials & Reagents:
- Electrochemical biosensor with glucose oxidase immobilization [10]
- Potentiostat or integrated readout device
- Sterile fermentation broth sample
- Standard glucose solutions for calibration (e.g., 0, 50, 100, 200 mg/dL)
- Phosphate buffer saline (PBS), pH 7.4
- Micro-pipettes and sterile tips
Step-by-Step Procedure:
- Biosensor Calibration:
- Turn on the biosensor and associated data acquisition system.
- Introduce a series of standard glucose solutions in PBS to the sensor.
- Record the steady-state current output for each standard.
- Generate a calibration curve (current vs. glucose concentration).
Sample Preparation:
- Aseptically withdraw a small volume (e.g., 1-5 mL) from the fermentation bioreactor.
- Centrifuge the sample to remove cellular debris (if necessary).
- Dilute the supernatant with PBS if the glucose concentration is expected to exceed the sensor's linear range.
Measurement:
- Introduce the prepared sample into the sensor's flow cell or measurement chamber.
- Allow the signal to stabilize (typically 15-60 seconds).
- Record the generated electrical current.
Data Analysis:
- Use the calibration curve to convert the measured current into a glucose concentration (mg/dL or mM).
- Account for any dilution factor in the final calculation.
Protocol for Detecting Bacterial Contamination Using an Optical Biosensor
Principle: This method uses an optical biosensor, such as a fiber-optic or SPR-based sensor, functionalized with antibodies specific to the target bacterial strain. Binding of bacteria to the antibodies alters the optical properties at the sensor surface (e.g., refractive index), producing a measurable signal [16] [97].
Workflow Diagram:
Materials & Reagents:
- Optical biosensor system (e.g., SPR, fiber-optic)
- Specific antibodies against the target pathogen (e.g., E. coli)
- Blocking buffer (e.g., BSA in PBS)
- Fermentation sample
- Washing buffer (e.g., PBS with Tween)
Step-by-Step Procedure:
- Sensor Functionalization:
- Immobilize the capture antibodies onto the biosensor's surface according to the manufacturer's protocol (e.g., via amine coupling).
Surface Blocking:
- Passivate the sensor surface with a blocking buffer to minimize non-specific binding of other components in the sample. Rinse with washing buffer.
Sample Introduction and Measurement:
- Introduce the processed fermentation sample over the sensor surface.
- Continuously monitor the optical signal (e.g., resonance angle shift in SPR).
- The rate and magnitude of signal change are proportional to the pathogen concentration in the sample.
Regeneration:
- After measurement, regenerate the sensor surface using a mild acidic or basic solution to dissociate the bound bacteria, preparing the sensor for the next sample.
The Scientist's Toolkit: Essential Research Reagents & Materials
The following table lists key materials required for implementing biosensor-based experiments in fermentation research.
| Item | Function/Benefit | Example Application |
|---|---|---|
| Enzymes (e.g., Glucose Oxidase) | Biological recognition element; provides high specificity for the target analyte. | Catalyzes reaction for electrochemical glucose detection [10]. |
| Specific Antibodies | Biological recognition element; provides high affinity for specific antigens/pathogens. | Immobilized on sensor surface for optical detection of bacterial contaminants [16]. |
| Aptamers | Synthetic nucleic acid-based recognition elements; offer high stability and specificity. | Can be selected to bind various small molecules or proteins in fermentation broth [101]. |
| Nanomaterials (Graphene, CNTs) | Enhance signal transduction; improve sensitivity and lower detection limits. | Used in electrode modification to amplify electrical signals in electrochemical biosensors [98]. |
| Microfluidic Chips | Miniaturize and automate fluid handling; reduce reagent consumption and enable high-throughput analysis. | Integrated with biosensors for automated, continuous monitoring of fermentation parameters [97]. |
| Buffer Solutions (PBS, etc.) | Maintain stable pH and ionic strength; crucial for preserving biological element activity and measurement consistency. | Used for sample dilution, sensor calibration, and washing steps [10]. |
Assessing Scalability and Cost-Benefit for Small-Scale vs. Pilot-Scale Operations
Scaling fermentation processes that use biosensors from small-scale research to pilot-scale operations is a critical step in bioprocess development. This transition is not merely an increase in volume but involves fundamental changes in process dynamics, monitoring capabilities, and economic considerations. For researchers and drug development professionals, successfully navigating this scaling process requires understanding both the technical challenges and cost-benefit implications. This technical support center provides targeted troubleshooting guides and FAQs to address the specific issues you might encounter when scaling your biosensor-integrated fermentation experiments, with a focus on cost-effective solutions for small-scale research environments.
Key Differences: Small-Scale vs. Pilot-Scale Operations
Understanding the fundamental differences between operational scales is crucial for effective experimental planning and troubleshooting. The table below summarizes the core distinctions that impact both technical implementation and economic considerations.
Table 1: Comparison of Small-Scale and Pilot-Scale Fermentation Operations
| Parameter | Small-Scale Operations | Pilot-Scale Operations |
|---|---|---|
| Volume Range | Microtiter plates (µL-mL), microfluidic devices (pL) [102] | Laboratory-scale bioreactors (L) |
| Primary Objective | Fundamental research, proof-of-concept, strain screening [102] | Process optimization, scalability assessment, limited production |
| Process Control | Limited parameters (often temperature, agitation only) | Comprehensive control (pH, DO, feeding, etc.) |
| Monitoring Capability | End-point sampling, limited real-time monitoring [102] | Extensive real-time monitoring, advanced analytics |
| Biosensor Integration | Often optical methods, fluorescent sensors [102] [10] | Diverse options including electrochemical, thermal, piezoelectric [10] |
| Cost Structure | Lower absolute cost, higher cost per unit [103] | Higher absolute cost, lower cost per unit [103] |
| Data Output | High-throughput, single-parameter focus | Integrated multi-parameter datasets |
| Risk Profile | Low financial risk, high technical uncertainty | Moderate financial risk, reduced technical uncertainty |
Troubleshooting Guides
Scaling-Related Inconsistencies in Fermentation Performance
Table 2: Troubleshooting Fermentation Performance During Scaling
| Problem | Potential Causes | Solutions | Cost-Effective Alternatives |
|---|---|---|---|
| Different product yields between scales | Population heterogeneity [102], variations in microenvironment | Implement real-time monitoring, characterize population heterogeneity at small scale [102] | Use fluorescent-based biosensors for metabolic monitoring [102] |
| Altered growth kinetics | Mass transfer limitations, mixing inefficiencies | Conduct computational fluid dynamics simulations, optimize impeller design | Use chemical assays with optical readout integrated into cultivation devices [102] |
| Increased batch-to-batch variability | Inoculum preparation differences, media inconsistency | Standardize seed train protocols, implement quality control on raw materials | Develop enzymatic assays for extracellular metabolites [102] |
| Biosensor signal inconsistency | Different fluid dynamics, fouling at larger scales | Re-calibrate biosensors for new environment, implement cleaning protocols | Utilize genetically encoded biosensors for in vivo monitoring [10] |
Biosensor Performance Issues During Scale-Up
Table 3: Troubleshooting Biosensor Performance During Scaling
| Problem | Potential Causes | Solutions | Preventive Measures |
|---|---|---|---|
| Signal drift over time | Sensor fouling, enzyme degradation in biosensors [10] | Implement regular calibration schedules, use stabilization matrices | Explore robust biorecognition elements (e.g., whole cells, DNA-based sensors) [10] |
| Reduced sensitivity at pilot scale | Matrix effects, interferents in complex media | Sample pretreatment, use of selective membranes | Employ affinity-based biosensors (immunosensors, DNA biosensors) [10] |
| Connectivity/issues with data acquisition | Electromagnetic interference, compatibility issues | Shielded cables, proper grounding, protocol standardization | Implement optical biosensors where feasible [10] |
| Calibration challenges | Environmental parameter differences (pH, temperature) | Multi-point calibration under actual process conditions | Use self-referencing biosensor designs with internal standards |
Frequently Asked Questions (FAQs)
Scaling and Process Design
Q: What is the primary value of conducting a pilot study before full-scale implementation? A: The value of a pilot study comes from being a relatively modest investment that serves as a testing ground to innovate, adapt, learn, and provide proof of concept [103]. While a pilot may improve outcomes for a small, one-time cohort, its principal value is the learning that contributes to a sustainable, scalable approach. This learning is valuable even if the pilot itself doesn't show a positive ROI, as it prevents costly mistakes at full scale [103].
Q: Why can't I directly extrapolate ROI from small-scale to pilot-scale operations? A: ROI of a pilot is not a valid indicator of potential ROI at scale [103]. Small-scale operations differ fundamentally in their cost structures, implementation approaches, operating structures, and participant characteristics. Economies of scale, ramping up effects, and different implementers all contribute to making direct extrapolation misleading [103].
Q: How do I determine the appropriate scale-up factor between small and pilot scale? A: Scale-up should follow a systematic approach rather than a simple multiplication factor. Begin with characterizing your small-scale process using dimensionless numbers (Reynolds, Power), then identify the critical process parameters most likely to change. A scale-up factor of 10-100x is common, but this depends on your system complexity and risk tolerance. Always include computational modeling where possible to predict scale-up effects [49].
Biosensor Implementation
Q: What types of biosensors are most suitable for monitoring fermentation processes during scale-up? A: The optimal biosensor choice depends on your target analyte and process requirements. Enzyme-based biosensors are widely used for metabolites like glucose, lactate, and ethanol [10]. Optical biosensors using fluorescent probes are valuable for intracellular measurements [102]. Genetically encoded biosensors enable real-time monitoring of cellular metabolism [10]. For pilot-scale operations, consider robustness, calibration requirements, and compatibility with sterilization procedures.
Q: How can I address the high cost of commercial biosensors in small-scale research? A: Several cost-saving approaches include: developing in-house biosensors using published protocols, utilizing cell-based biosensors which can be more cost-effective for certain applications [10], implementing shared-use arrangements for expensive equipment, and employing biosensor recycling protocols where validation permits. Open-source hardware platforms are also emerging as viable alternatives for certain monitoring applications.
Q: What are the common reasons for biosensor failure during extended fermentation runs? A: Common failure modes include: biofouling from proteins/cells, enzyme inactivation due to process conditions, membrane degradation, electronic component failure, and calibration drift. Mitigation strategies include: implementing protective membranes, regular calibration checks, using more robust biorecognition elements (e.g., DNA-based sensors) [10], and designing redundant measurement systems for critical parameters.
Experimental Protocols for Scaling Studies
Protocol for Systematic Scale-Up Experiments
Objective: To systematically evaluate fermentation process performance and biosensor functionality across scales.
Materials:
- Microbial strain of interest
- Small-scale cultivation system (microtiter plates, microfluidic devices)
- Pilot-scale bioreactor (1-10L)
- Relevant biosensors (e.g., for glucose, lactate, product formation)
- Analytical methods for validation (HPLC, MS)
Methodology:
- Establish Baseline: Conduct triplicate runs at small scale to establish baseline performance metrics including growth rate, product yield, and biosensor functionality [104].
- Design Scale-Up Experiment: Identify critical process parameters to monitor during scale-up, focusing on those most likely to change (e.g., oxygen transfer, mixing time).
- Parallel Operation: Run small-scale and pilot-scale operations in parallel using identical inoculum and media [104].
- Intensive Monitoring: Implement frequent sampling and real-time monitoring at both scales, comparing biosensor readings with reference analytics.
- Data Analysis: Compare key performance indicators between scales, identifying significant deviations and their potential causes.
Troubleshooting Note: If significant differences emerge between scales, conduct additional experiments to isolate individual factors (e.g., mass transfer effects) before proceeding to further scale-up.
Protocol for Biosensor Validation During Scale-Up
Objective: To validate biosensor performance across different scales and process conditions.
Materials:
- Biosensors for target analytes
- Reference analytical equipment (HPLC, spectrophotometer)
- Standard solutions for calibration
- Fermentation samples from different scales
Methodology:
- Pre-calibration: Calibrate biosensors using standard solutions under controlled laboratory conditions.
- In-process Comparison: Collect parallel samples from both small-scale and pilot-scale fermentations for simultaneous biosensor measurement and reference analytics.
- Statistical Analysis: Perform correlation analysis between biosensor readings and reference analytics using Bland-Altman plots and linear regression.
- Environmental Testing: Specifically test biosensor performance under different process conditions that may vary between scales (e.g., different mixing intensities, gas sparging rates).
- Long-term Stability Assessment: Monitor biosensor performance over extended operation to identify drift or degradation issues.
Visualizing Scaling Pathways and Biosensor Integration
The following diagrams illustrate key workflows and relationships in scaling biosensor-integrated fermentation processes.
Scaling Decision Pathway for Biosensor-Integrated Processes
Biosensor Technology Components and Options
Research Reagent Solutions and Essential Materials
Table 4: Key Research Reagents and Materials for Biosensor-Integrated Fermentation
| Category | Specific Examples | Function/Application | Cost-Saving Considerations |
|---|---|---|---|
| Biorecognition Elements | Glucose oxidase, Lactate oxidase, Urease, Antibodies, DNA probes [10] | Target analyte recognition | Express and purify in-house where possible; use cell-free expression systems |
| Transducer Materials | Screen-printed electrodes, Optical fibers, Piezoelectric crystals, Thermistors [10] | Signal conversion from biological to electrical/optical | Explore open-source hardware designs; reuse support materials where validation permits |
| Immobilization Matrices | Alginate, Chitosan, Polyacrylamide, Sol-gels, Photocrosslinkable polymers [102] [10] | Stabilize biological components on transducer surface | Optimize matrix thickness to minimize material use while maintaining function |
| Reference Analytics | HPLC standards, Enzyme assay kits, Molecular biology reagents | Biosensor validation and calibration | Implement shared equipment arrangements; optimize sample throughput |
| Fermentation Media Components | Defined media salts, Complex nutrients, Selective antibiotics, Inducer molecules | Support microbial growth and production | Prepare concentrated stock solutions; optimize media formulations for cost |
| Signal Amplification Reagents | Enzymatic substrates, Nanoparticles, Fluorogenic compounds [10] | Enhance detection sensitivity | Develop in-house amplification systems; optimize reagent concentrations |
Regulatory Considerations and Path to Commercialization for Biosensor-Integrated Processes
A biosensor is an analytical device that combines a biological recognition element (bioreceptor) with a physicochemical transducer to detect a specific analyte [105]. The core components include the analyte (substance to be detected), bioreceptor (molecule that specifically recognizes the analyte), transducer (converts the biological response into a measurable signal), electronics (processes the signal), and display (presents the results) [105]. In fermentation research, these components work together to monitor key parameters like glucose, lactate, CO₂, and cell viability in real-time, enabling more precise process control.
For small-scale fermentation research, the integration of biosensors addresses the critical need for cost-effective, real-time monitoring solutions that can replace expensive, bulky analytical equipment. Recent manufacturing advances, such as using gold leaf lamination with laser ablation to create electrodes, have significantly reduced production costs while maintaining high sensitivity for detecting food-borne pathogens and other analytes [23]. Similarly, non-optical CO₂ sensing systems have been developed specifically for fermentation and cell culture applications at minimal cost [106]. These innovations make sophisticated monitoring accessible to research laboratories with limited budgets.
Regulatory Framework and Compliance
Key Regulatory Bodies and Classification
Navigating the regulatory landscape is essential for commercializing biosensor-integrated processes. The primary regulatory bodies include the U.S. Food and Drug Administration (FDA), the European Medicines Agency (EMA) with its Medical Device Regulation (MDR), and China's National Medical Products Administration (NMPA) [107]. These agencies classify biosensors based on risk, intended use, and functionality.
Table 1: Medical Device Classification by Risk Level
| Class | Risk Level | Regulatory Control | Examples |
|---|---|---|---|
| Class I | Low risk | General controls | Non-invasive fitness trackers |
| Class II | Moderate risk | General controls + special controls | Continuous glucose monitors |
| Class III | High risk | General controls + pre-market approval | Implantable cardiac sensors |
The classification of your biosensor significantly impacts the regulatory pathway. Devices making general wellness claims typically face less stringent requirements than those making specific medical claims. For research applications, understanding this distinction early can guide development toward the appropriate regulatory category.
Compliance Requirements
Successful commercialization requires adherence to multiple compliance frameworks:
- Quality Management Systems: Implementation of ISO 13485 for medical devices ensures consistent design, production, and installation [107].
- Technical Performance Standards: Demonstration of measurement precision, reliability, sensitivity, and specificity across various environmental conditions [107].
- Biocompatibility: For sensors contacting skin or tissues, ISO 10993 standards require testing for toxicity, irritation, and sensitization [107].
- Data Privacy and Security: Compliance with HIPAA (U.S.), GDPR (Europe), and other regional data protection laws governing health information collection and transmission [107].
The FDA's Digital Health Innovation Action Plan provides expedited pathways for certain digital health technologies, though approval timelines typically range from 18-24 months [107]. Early engagement with regulatory bodies through pre-submission meetings can help align development activities with expectations.
Commercialization Pathway
The global biosensors market, valued at approximately $30-32 billion in 2024-2025, is projected to reach $68-69 billion by 2034, growing at a compound annual growth rate (CAGR) of 8.6-8.7% [108] [109]. This growth is driven by increasing demand for point-of-care diagnostics, personalized medicine, and remote patient monitoring.
Table 2: Biosensors Market Analysis by Segment (2024-2034)
| Segment | Market Share (2024) | Projected CAGR | Key Drivers |
|---|---|---|---|
| Electrochemical Biosensors | ~71.7% | 8.7% | Cost-effectiveness, portability, high sensitivity |
| Optical Biosensors | Growing segment | Significant growth | Miniaturization, non-invasive detection |
| Medical Applications | ~66.8% | Stable growth | Chronic disease management, drug discovery |
| Point-of-Care Testing | 48.0% | Strong growth | Rapid results, home healthcare trends |
| Agriculture Applications | Emerging segment | 9.8% (Fastest) | Precision farming, pathogen detection |
For small-scale fermentation research, the most promising commercialization opportunities lie in developing specialized sensors for bioprocess monitoring, metabolite tracking, and cell culture optimization. The trend toward miniaturization and cost reduction in sensor fabrication aligns perfectly with the needs of research laboratories [23].
Stages of Commercialization
The path from concept to commercial biosensor product involves several distinct stages:
- Research and Development: Focus on demonstrating analytical validity, specificity, and reproducibility. Incorporate design controls early to ease regulatory submission later.
- Prototyping and Validation: Develop prototypes for laboratory testing and initial performance validation. Document all design iterations and performance characteristics thoroughly.
- Regulatory Submission: Prepare and submit the appropriate regulatory application based on device classification (510(k), Pre-Market Approval, CE Marking).
- Manufacturing Scale-Up: Implement Quality System Regulation requirements and establish supply chains for consistent production.
- Market Launch and Post-Market Surveillance: Monitor product performance in the field and report any adverse events as required.
Technical Support Center
Troubleshooting Guides
Q1: What are the common causes of signal drift in electrochemical biosensors during long-term fermentation monitoring?
Signal drift in electrochemical biosensors can result from multiple factors:
- Biofouling: Accumulation of proteins, cells, or other biological materials on the sensor surface. Solution: Implement protective membranes or periodic cleaning protocols.
- Reference Electrode Instability: KCl leakage or clogging in reference electrodes. Solution: Use double-junction reference electrodes or solid-state reference systems.
- Enzyme Degradation: Loss of biorecognition element activity over time. Solution: Optimize immobilization techniques and storage conditions.
- Temperature Fluctuations: Fermentation processes often experience temperature variations. Solution: Incorporate temperature compensation algorithms or use integrated temperature sensors.
- Electrode Passivation: Buildup of oxidation products on working electrodes. Solution: Apply appropriate electrode cleaning pulses between measurements.
Preventative measures include regular calibration checks, implementing automated baseline correction in software, and using pulsed amperometric detection techniques to clean electrodes periodically.
Q2: How can I improve the reproducibility of my custom-fabricated biosensors?
Improving reproducibility requires attention to several manufacturing and operational factors:
- Material Consistency: Use materials from consistent suppliers and batches. Gold leaf electrodes fabricated via lamination and laser ablation have demonstrated good reproducibility for pathogen detection [23].
- Surface Preparation: Standardize cleaning and activation procedures for electrode surfaces. Document exact concentrations, times, and conditions for all surface modification steps.
- Bioreceptor Immobilization: Control pH, temperature, and concentration during immobilization. Use quality control measures to verify consistency of bioreceptor batches.
- Calibration Protocol: Establish standardized calibration procedures using fresh reference standards. Implement internal standards where possible.
- Documentation: Maintain detailed records of all fabrication parameters, including environmental conditions (humidity, temperature) that might affect sensor performance.
Statistical process control methods can help identify variations in manufacturing parameters before they significantly impact sensor performance.
Q3: What validation protocols are required for regulatory approval of fermentation monitoring biosensors?
Validation requirements depend on the claimed intended use and regulatory classification:
- Analytical Performance Validation: Demonstrate accuracy, precision, sensitivity, specificity, and limit of detection using established reference methods.
- Repeatability and Reproducibility Studies: Conduct tests across multiple days, operators, and sensor lots to establish performance consistency.
- Stability Studies: Evaluate shelf-life under various storage conditions and operational stability under simulated use conditions.
- Interference Testing: Test potential interferents present in fermentation media that might affect sensor performance.
- Reference Method Correlation: Compare biosensor results against gold standard analytical methods (HPLC, mass spectrometry) using appropriate statistical methods.
For non-medical fermentation sensors, adherence to general quality standards like ISO 9001 may be sufficient, while sensors used in pharmaceutical production may require compliance with more stringent standards.
Frequently Asked Questions
Q1: What are the cost-effective alternatives to commercial biosensors for small-scale fermentation research?
Recent advances in manufacturing have enabled several low-cost approaches:
- Gold Leaf Electrodes: Combining 24-karat gold leaves with PVC adhesive sheets and laser ablation creates high-quality electrodes at a fraction of commercial costs [23].
- Screen-Printed Electrodes: While commercial options exist, in-house printing using conductive inks can further reduce costs for disposable sensors.
- Open-Source Platforms: Several academic groups have developed open-source biosensor platforms that can be assembled with minimal specialized equipment.
- Non-Optical CO₂ Sensors: Low-cost systems using sensing patches and simple optics have been developed specifically for fermentation monitoring [106].
The choice among these options depends on the required analytical performance, available fabrication facilities, and measurement frequency.
Q2: How can artificial intelligence enhance biosensor performance in fermentation monitoring?
AI and machine learning algorithms can significantly improve biosensor capabilities:
- Signal Processing: ML algorithms can filter noise, identify drift patterns, and extract meaningful signals from complex data [84].
- Multiparameter Analysis: AI can integrate data from multiple sensors to predict fermentation outcomes or detect contamination earlier.
- Predictive Maintenance: Algorithms can identify patterns preceding sensor failure, enabling proactive replacement or recalibration.
- Adaptive Calibration: Self-learning systems can adjust calibration based on changing fermentation conditions.
Implementation requires appropriate training datasets and computational resources, but open-source ML libraries have made these techniques more accessible.
Q3: What are the key considerations when integrating biosensors with existing fermentation equipment?
Successful integration requires attention to several technical aspects:
- Compatibility: Ensure sensors are compatible with fermentation media, temperature, pH, and sterilization procedures.
- Data Integration: Establish standardized communication protocols (e.g., IEEE 11073 for personal health devices) for seamless data transfer to existing systems [107].
- Real-time Capability: Verify that sensor response times are adequate for process control decisions.
- Placement and Sampling: Consider optimal sensor placement for representative measurements, particularly for heterogeneous fermentation broths.
Start with a pilot integration testing all interfaces before full implementation.
Experimental Protocols and Methodologies
Cost-Effective Electrode Fabrication Using Gold Leaf
Based on recent research, here is a detailed protocol for fabricating low-cost electrochemical biosensors [23]:
Materials Required:
- 24-karat gold leaves
- Polyvinyl chloride (PVC) adhesive sheets
- Laser ablation system (e.g., CO₂ laser)
- Substrate material (glass, PET, or other stable surfaces)
- Electrochemical characterization equipment (potentiostat)
Procedure:
- Surface Preparation: Clean the substrate thoroughly with ethanol and deionized water. Dry under nitrogen stream.
- Gold Lamination: Apply PVC adhesive sheet to the substrate. Carefully place the gold leaf on the adhesive surface, ensuring uniform coverage without wrinkles.
- Laser Patterning: Use laser ablation to create the desired electrode geometry (working, reference, and counter electrodes). Optimize laser power and speed to cleanly remove gold without damaging the substrate.
- Electrochemical Activation: Perform cyclic voltammetry in 0.5 M H₂SO₄ from 0 to 1.5 V (vs. pseudo-reference) until stable voltammograms are obtained.
- Characterization: Validate electrode performance using standard redox probes (e.g., ferricyanide/ferrocyanide) via cyclic voltammetry and electrochemical impedance spectroscopy.
This approach enables rapid fabrication of electrodes with customizable geometries at significantly lower cost than traditional thin-film deposition methods.
Biosensor Functionalization for Pathogen Detection
For detection of fermentation contaminants like Salmonella typhimurium or Listeria monocytogenes [23]:
Materials:
- Fabricated gold electrodes
- Magnetic beads with appropriate surface functionalization
- Specific antibodies or aptamers for target pathogen
- Blocking agents (BSA, casein)
- Washing buffers (PBS with Tween-20)
Immobilization Procedure:
- Surface Modification: Incubate electrodes with thiolated capture probes overnight at 4°C.
- Blocking: Treat with 1% BSA for 1 hour to minimize non-specific binding.
- Assay Assembly: Incubate with sample containing target pathogen and functionalized magnetic beads.
- Magnetic Separation: Apply magnetic field to concentrate beads at electrode surface.
- Detection: Perform electrochemical measurements (amperometric, impedimetric) to quantify bound targets.
This protocol can be adapted for various targets relevant to fermentation monitoring, including microbial contaminants or specific metabolite-producing enzymes.
Research Reagent Solutions
Table 3: Essential Materials for Biosensor Fabrication and Application
| Material/Reagent | Function | Application Notes |
|---|---|---|
| Gold Leaf (24-karat) | Electrode material | Cost-effective alternative to deposited gold films [23] |
| PVC Adhesive Sheets | Substrate for electrode fabrication | Provides stable surface for gold lamination |
| Magnetic Beads (functionalized) | Target capture and concentration | Enable separation and signal amplification [23] |
| Thiolated DNA/Aptamers | Biorecognition elements | Form self-assembled monolayers on gold surfaces |
| Potassium Ferricyanide/Ferrocyanide | Redox probe for electrode characterization | Standard for evaluating electrode performance |
| BSA or Casein | Blocking agent | Reduces non-specific binding |
| Nafton or PDMS | Protective membranes | Extend sensor lifetime in complex media |
Visualization of Biosensor Integration Workflow
Biosensor Commercialization Pathway
This workflow illustrates the key stages in developing and commercializing biosensor-integrated processes, highlighting the transition from research activities to regulatory compliance and finally to market implementation.
The successful integration of biosensors into small-scale fermentation processes requires careful attention to both technical and regulatory considerations. By leveraging recent advances in cost-effective fabrication methods and understanding the regulatory pathway early in development, researchers can accelerate the translation of laboratory biosensors into reliable tools for fermentation monitoring. The troubleshooting guides and experimental protocols provided here address common challenges in biosensor implementation, while the market analysis highlights promising directions for commercialization. As biosensor technology continues to evolve, particularly with the integration of artificial intelligence, these systems will become increasingly accessible and valuable for fermentation research across diverse applications.
Technical Support & Troubleshooting Hub
This section provides targeted solutions for common technical challenges in developing wearable biosensors and 3D-printed platforms for fermentation research.
Wearable Biosensor Troubleshooting Guide
| Problem Area | Specific Issue | Potential Causes | Recommended Solutions & Validation Methods |
|---|---|---|---|
| Signal Accuracy [110] [111] | Poor correlation between sweat and blood analyte levels (e.g., glucose). | - Variable sweat rate affecting analyte concentration. [111] - Sensor placement on body is inconsistent. [110] - Contamination from skin surface residues. [112] | - Solution: Develop a calibration model that accounts for individual sweat rate and pH. [112] - Validation: Conduct a controlled clinical study with paired blood draws for correlation analysis. [111] |
| Skin-Contact & Placement [110] | Inconsistent electrical signal for EKG/EMG/EEG. | - Poor electrode-to-skin contact. [110] - Dry skin reducing electrical conductivity. [110] - Device placement inaccurate by a few millimeters. [110] | - Solution: Use hydrogel-based electrode pads or ensure skin is slightly moist. [110] - Validation: Use a known signal generator to verify signal integrity across different contact conditions. |
| Sensor Longevity & Fouling [112] | Signal drift or degradation over continuous use. | - Biofouling from proteins in sweat. [112] - Enzyme instability in enzymatic sensors. [112] - Material degradation of flexible substrates. | - Solution: Incorporate fouling-resistant coatings (e.g., Nafion) on electrodes. [112] - Validation: Perform continuous operation testing in artificial sweat, monitoring signal stability over 24+ hours. |
3D-Printing Troubleshooting Guide for Sensor Platforms
| Problem Area | Specific Issue | Potential Causes | Recommended Solutions & Validation Methods |
|---|---|---|---|
| Print Quality [113] [114] | Stringing or oozing between parts. | - Nozzle temperature too high. [114] - Incorrect retraction settings (distance/speed). [114] - Filament absorbed moisture. [115] | - Solution: Optimize retraction settings and lower nozzle temperature by 5-10°C. [114] - Validation: Print a retraction test model and inspect for stringing. |
| Structural Integrity [114] | Layer separation or splitting. | - Layer height too large for nozzle diameter. [114] - Printing temperature too low, inhibiting layer bonding. [114] | - Solution: Set layer height to ~20% smaller than nozzle diameter and increase print temperature. [114] - Validation: Print a tall, thin test model and apply mechanical stress to check for delamination. |
| Dimensional Accuracy [114] | Warping or curling of corners. | - Rapid, uneven cooling of material. [114] - Poor adhesion to the print bed. [114] | - Solution: Use a heated print bed, apply adhesives (e.g., glue stick), and use an enclosed chamber. [114] - Validation: Print a large, flat test object and measure flatness with a profilometer. |
Frequently Asked Questions (FAQs)
Q1: What is the most significant challenge in using sweat glucose biosensors for reliable fermentation monitoring? A1: The primary challenge is achieving a consistent and accurate correlation between sweat glucose concentrations and the actual blood (or fermentation broth) glucose levels. Sweat rate, pH, and individual physiological variations can significantly impact readings, making calibration difficult. [111] [112] For fermentation, this translates to unreliable data for process control.
Q2: Are non-enzymatic glucose sensors a viable alternative for wearable fermentation monitors? A2: Currently, enzymatic sensors are more viable due to their superior selectivity. Non-enzymatic sensors often struggle with slow glucose oxidation kinetics, poor selectivity against other biological fluid constituents, and electrode fouling, which makes them commercially less viable for reliable, long-term monitoring. [112]
Q3: Why are my 3D-printed microfluidic channels for sample handling leaking or clogged? A3: Leaking is often due to gaps between layers (under-extrusion) or incorrect nozzle height. Clogging can be caused by printing temperature being too low, small nozzle diameters, or particulate matter in the filament. Ensure proper extrusion calibration, use high-quality filament, and consider slightly increasing nozzle diameter for microfluidic features. [114]
Quantitative Data on Wearable Biosensor Trends
The tables below summarize key market and performance data to inform research and development planning.
| Segment | 2024/2025 Market Size (USD Billion) | 2030 Projected Market Size (USD Billion) | CAGR (2025-2030) | Key Growth Drivers |
|---|---|---|---|---|
| Global Biosensors Market | 34.5 [116] | 54.4 [116] | 9.5% [116] | Chronic disease monitoring, home diagnostics, technological advancements. [116] |
| Wearable Biosensors Segment | N/A | 15.0 (by 2030) [117] | ~14.1% [117] | Remote patient monitoring, consumer health awareness, AI integration. [118] |
| Regional Growth (APAC) | N/A | N/A | Highest Growth Rate [116] | Large population base, rising lifestyle diseases, healthcare investments. [116] |
| Technology | Primary Function | Key Advantages | Limitations / Challenges | Relevance to Fermentation Research |
|---|---|---|---|---|
| Electrochemical | Measures chemical reactions via electric signals. | - Inexpensive [117] - Suitable for mass production. [117] - Direct transduction. [117] | - Can suffer from biofouling. [112] - Enzyme stability issues. [112] | High; ideal for continuous monitoring of metabolites like glucose, lactate. |
| Optical | Uses light to detect biomolecular interactions. | - Label-free, real-time analysis. [116] - High sensitivity. [117] | - Cost and integration hurdles. [117] - Can be bulky. | Medium; potential for inline broth analysis with miniaturization. |
| Thermal | Measures changes in metabolic heat. | - Useful for metabolic activity profiling. [117] | - Limited to applications where heat is a key parameter. | Medium; could monitor microbial metabolic heat in real-time. |
Experimental Protocols for Biosensor Validation
This section provides a detailed methodology for a key experiment in developing sweat-based biosensors.
Protocol: In-Vitro Characterization and Calibration of an Enzymatic Glucose Biosensor
1. Objective: To determine the sensitivity, linear range, and limit of detection (LOD) of a glucose biosensor in a simulated sweat buffer.
2. Materials & Reagents:
- Biosensor: Fabricated electrochemical (amperometric) glucose biosensor.
- Analyte: D-(+)-Glucose standard solution.
- Buffer: Artificial sweat buffer (pH 5.5-6.5, containing key electrolytes like Na+, K+, Cl-). [112]
- Instrumentation: Potentiostat for electrochemical measurements.
3. Methodology: 1. Sensor Preparation: Condition the sensor by placing it in the artificial sweat buffer under stirring for 15-30 minutes. 2. Calibration Curve: - Prepare a series of glucose standard solutions in artificial sweat buffer (e.g., 0, 10, 50, 100, 200 μM). These concentrations represent the expected physiological range in sweat. [112] - Immerse the sensor in the lowest concentration solution (0 μM) and apply the working potential. - Record the steady-state amperometric current. - Rinse the sensor gently with buffer between measurements. - Repeat the current measurement for each increasing standard concentration. 3. Data Analysis: - Plot the steady-state current (μA) against glucose concentration (μM). - Perform linear regression analysis on the data points. The slope of the line represents the sensor's sensitivity (μA/μM). - Calculate the Limit of Detection (LOD) using the formula: LOD = 3.3 * (Standard Error of the regression / Slope).
4. Validation in a Fermentation-Relevant Setup: - Integrate the calibrated sensor into a custom 3D-printed flow cell that simulates a miniature fermentation bioreactor. - Pump artificial sweat spiked with known concentrations of glucose through the system. - Compare the sensor's output with the known concentrations to validate accuracy in a dynamic flow environment.
Workflow Visualization for Research and Development
The following diagram illustrates the integrated development cycle for creating a 3D-printed, wearable biosensor platform for fermentation monitoring.
The Scientist's Toolkit: Essential Research Reagents & Materials
This table lists key materials and their functions for developing biosensor platforms in a research setting.
| Item | Primary Function / Description | Application Note |
|---|---|---|
| Glucose Oxidase (GOx) | The core enzyme for enzymatic glucose biosensors; catalyzes the oxidation of glucose. [112] | Stability is a key challenge. Requires immobilization on the electrode surface (e.g., in a polymer matrix like Nafion or chitosan). [112] |
| Nafion | A perfluorosulfonate ionomer used as a protective membrane. | Coated over the electrode to repel negatively charged interferents (e.g., ascorbate, urate) found in biofluids, improving selectivity. [112] |
| Flexible Polymer Substrates (e.g., PET, PI) | The base material for flexible and wearable biosensors. | Provides mechanical flexibility and comfort for wearable devices. Compatible with printing and microfabrication techniques. |
| Conductive Inks (e.g., Carbon, Ag/AgCl) | Used for screen-printing electrodes on flexible substrates. | Enable mass production of low-cost, disposable sensor strips. Carbon for working/counter electrodes, Ag/AgCl for reference electrodes. |
| PLA / ABS Filament | Common thermoplastics for Fused Deposition Modeling (FDM) 3D printing. | PLA is easier to print, ABS offers higher chemical resistance. Used for printing sensor housings, microfluidic chips, and custom lab equipment. [114] [115] |
Conclusion
The integration of cost-effective biosensors represents a paradigm shift for small-scale fermentation, bridging the gap between traditional artisanal methods and the precision of Industry 4.0. By enabling real-time, data-driven control over critical process parameters like metabolite levels and contamination, these technologies directly address the core challenges of microbial variability and high analytical costs. The convergence of sustainable nano-biosensors, AI analytics, and modular IoT platforms promises to democratize advanced process control, making it accessible to researchers and small-batch producers. Future advancements will likely focus on multi-analyte detection, disposable sensor formats, and open-source platforms, further driving down costs and accelerating innovation in drug development and personalized medicine. Embracing these tools is not merely a technical upgrade but a strategic move towards more reproducible, efficient, and agile biomanufacturing.
References
- 1. Biosensors in Fermentation Applications [https://www.intechopen.com/chapters/52219]
- 2. Challenges and Opportunities in Smart Biosensing for ... [https://pmc.ncbi.nlm.nih.gov/articles/PMC12455640/]
- 3. Microbial Process Control in Traditional Fermented Foods [https://www.mdpi.com/2311-5637/11/6/323]
- 4. Monitoring and control in fermentation of fermenters [https://www.bjholves.com/faq/2023/0511/127.html]
- 5. Progress of machine learning-based biosensors for the ... [https://www.sciencedirect.com/science/article/abs/pii/S0956566324007887]
- 6. How pH Sensors Improve Fermentation Control in Brewing ... [https://sensorex.com/ph-sensors-fermentation-brewing-winemaking/?srsltid=AfmBOormYpIv49Qh1uuODyoE0dnIK-reYQPBr98_k8LVXO7NgVEHD2Mk]
- 7. Comprehensive Troubleshooting Guide for Fermentation [https://wiki.fermenthings.be/how-to/comprehensive-guide-to-troubleshooting-guide-for-fermentation/]
- 8. How to troubleshoot bioreactor contamination [https://infors-ht.com/en/blog/how-to-troubleshoot-bioreactor-contamination]
- 9. Fermentation Monitoring - an overview [https://www.sciencedirect.com/topics/medicine-and-dentistry/fermentation-monitoring]
- 10. Biosensors and their applications – A review - PMC [https://pmc.ncbi.nlm.nih.gov/articles/PMC4862100/]
- 11. Biological Fermenter: Troubleshooting Common Issues [https://www.filter-dryer.com/a-news-biological-fermenter-troubleshooting-common-issues.html]
- 12. How pH Sensors Improve Fermentation Control in Brewing ... [https://sensorex.com/ph-sensors-fermentation-brewing-winemaking/?srsltid=AfmBOoqJl-oCWZ5VvRwxry7efSe8xeC5BY8HwSxCaVpwRUfwl8iG_Gqs]
- 13. Biosensors for fermentation control [https://www.sciencedirect.com/science/article/abs/pii/095816699390122D]
- 14. Advances, applications, and limitations of portable and rapid ... [https://pmc.ncbi.nlm.nih.gov/articles/PMC9760820/]
- 15. Automated Electrochemical Glucose Biosensor Platform as ... [https://pmc.ncbi.nlm.nih.gov/articles/PMC7253623/]
- 16. Biosensors for rapid detection of bacterial pathogens in ... [https://www.sciencedirect.com/science/article/pii/S0160412022002847]
- 17. ELISA Troubleshooting Guide [https://www.thermofisher.com/us/en/home/life-science/protein-biology/protein-biology-learning-center/protein-biology-resource-library/pierce-protein-methods/overview-elisa/elisa-troubleshooting-guide.html]
- 18. ELISA Troubleshooting Guide [https://www.bio-techne.com/resources/protocols-troubleshooting/elisa-troubleshooting]
- 19. Comparison between a Conductometric Biosensor and ... [https://www.mdpi.com/1424-8220/14/10/19128]
- 20. Recognition Element-Based Strategies for Rapid Detection ... [https://www.mdpi.com/2079-6374/15/11/717]
- 21. Biosensors, Artificial Intelligence Biosensors, False Results ... [https://pmc.ncbi.nlm.nih.gov/articles/PMC12025796/]
- 22. Emerging applications of biorecognition elements-based ... [https://link.springer.com/article/10.1007/s44397-025-00003-3]
- 23. A Cost-Effective and Rapid Manufacturing Approach for ... [https://www.mdpi.com/2072-666X/16/3/343]
- 24. Challenges and strategies faced in the electrochemical ... [https://www.sciencedirect.com/science/article/abs/pii/S0039914023006847]
- 25. Troubleshooting Inefficient Optical Sensors with Logic [https://www.linkedin.com/advice/0/what-do-you-your-optical-sensors-operating-9yfuf]
- 26. Resilience of anodic biofilm in microbial fuel cell biosensor ... [https://www.nature.com/articles/s41545-024-00350-5]
- 27. Recent Applications, Challenges, and Future Prospects of ... [https://pmc.ncbi.nlm.nih.gov/articles/PMC12065106/]
- 28. Recent advances and challenges in electrochemical ... [https://pmc.ncbi.nlm.nih.gov/articles/PMC7446658/]
- 29. Electrochemical biosensors for pathogen detection - PMC [https://pmc.ncbi.nlm.nih.gov/articles/PMC7152911/]
- 30. Recent Advances in Electrochemical Biosensors [https://www.mdpi.com/2079-6374/11/9/336]
- 31. Recent advances in bio-microsystem integration and Lab- ... [https://www.nature.com/articles/s41378-025-00940-4]
- 32. Essential Guide to Troubleshooting Common Sensor Issues in ... [https://www.nexisense.com/industry/Essential-Guide-to-Troubleshooting-Common-Sensor-Issues-in-IoT-Systems.html]
- 33. IoT Sensors: Everything You Need to Know [https://halodetect.com/blog/iot-sensors/]
- 34. Top AI in Industrial Automation (2025 Trending Edition) [https://gem-corp.tech/tech-blogs/top-ai-in-industrial-automation/]
- 35. Artificial Intelligence in Point-of-Care Biosensing [https://www.mdpi.com/2075-4418/14/11/1100]
- 36. Artificial intelligence−powered electrochemical sensor [https://www.sciencedirect.com/science/article/pii/S2405844024139953]
- 37. New IDC study shows AIoT driving efficiency, security, and ... [https://industrialcyber.co/critical-infrastructure/new-idc-study-shows-aiot-driving-efficiency-security-and-smarter-decisions-in-manufacturing-and-energy/]
- 38. Sustainable and smart nano-biosensors: Integrated ... [https://www.sciencedirect.com/science/article/pii/S0926669025008830]
- 39. Electrochemical sensors: Types, applications, and the ... [https://www.sciencedirect.com/science/article/pii/S0956566324011060]
- 40. Electrochemical Biosensors - Sensor Principles and ... [https://pmc.ncbi.nlm.nih.gov/articles/PMC3663003/]
- 41. Optical biosensors - PMC [https://pmc.ncbi.nlm.nih.gov/articles/PMC4986466/]
- 42. Exploring the use of cost-effective membrane materials for ... [https://www.sciencedirect.com/science/article/pii/S0013468617302475]
- 43. A review of biosensor for environmental monitoring [https://pmc.ncbi.nlm.nih.gov/articles/PMC10308875/]
- 44. Low-cost and cleanroom-free prototyping of microfluidic and ... [https://pmc.ncbi.nlm.nih.gov/articles/PMC8577868/]
- 45. Troubleshooting LPR Experiments [https://pineresearch.com/support-article/troubleshooting-lpr-experiments/]
- 46. Surface Plasmon Resonance Troubleshooting - SPR ... [https://bitesizebio.com/31665/spr-instrument-troubleshooting-surface-plasmon-resonance-assay-technology/]
- 47. Fermentation Monitoring - an overview | ScienceDirect Topics [https://www.sciencedirect.com/topics/biochemistry-genetics-and-molecular-biology/fermentation-monitoring]
- 48. Automated Electrochemical Glucose Biosensor Platform as ... [https://www.frontiersin.org/journals/bioengineering-and-biotechnology/articles/10.3389/fbioe.2020.00436/full]
- 49. Fermentation design and process optimization strategy ... [https://www.sciencedirect.com/science/article/pii/S2693125725000032]
- 50. A Closer Look at Biosensors: A Practical Tutorial for ... [https://www.spectroscopyonline.com/view/a-closer-look-at-biosensors-a-practical-tutorial-for-spectroscopists]
- 51. Biosensors, Volume 15, Issue 11 (November 2025) [https://www.mdpi.com/2079-6374/15/11]
- 52. A general method for the development of multicolor ... [https://www.nature.com/articles/s41589-023-01350-1]
- 53. Low-Cost Plant-Based Metal and Metal Oxide Nanoparticle ... [https://pmc.ncbi.nlm.nih.gov/articles/PMC10741781/]
- 54. Green synthesis of nanomaterials from sustainable ... [https://www.sciencedirect.com/science/article/pii/S2666351122000110]
- 55. Nanobiosensor - A Brief Overview [https://juniperpublishers.com/gjpps/GJPPS.MS.ID.555762.php]
- 56. Advances and challenges in biosensor-based diagnosis of ... [https://pmc.ncbi.nlm.nih.gov/articles/PMC4104499/]
- 57. Metabolite Measurement: Pitfalls to Avoid and Practices to ... [https://pmc.ncbi.nlm.nih.gov/articles/PMC5734093/]
- 58. Wearable electrochemical biosensor for metabolic monitoring [https://elveflow.com/blog/a-wearable-electrochemical-biosensor-for-the-monitoring-of-metabolites-and-nutrients/]
- 59. Continuous monitoring of multiple biomarkers with an ... [https://pmc.ncbi.nlm.nih.gov/articles/PMC10545935/]
- 60. Common Protein Concentration Assays: Pros & Cons [https://fluidic.com/insight/choosing-the-right-protein-concentration-assay-pros-and-cons-of-common-techniques/]
- 61. Sensors and Biosensors for the Determination of Small ... [https://pmc.ncbi.nlm.nih.gov/articles/PMC3705547/]
- 62. Biotoxin Detection Using Cell-Based Sensors - PMC [https://pmc.ncbi.nlm.nih.gov/articles/PMC3873691/]
- 63. Advances in Biosensors for the Rapid Detection of Marine ... [https://pmc.ncbi.nlm.nih.gov/articles/PMC11048312/]
- 64. Innovative electrochemical biosensor for toxicological ... [https://www.sciencedirect.com/science/article/abs/pii/S1567539421001894]
- 65. Microbial Fuels Cell-Based Biosensor for Toxicity Detection [https://pmc.ncbi.nlm.nih.gov/articles/PMC5677232/]
- 66. Startup's biosensor makes drug development and ... [https://news.mit.edu/2025/startup-biosensor-makes-drug-development-and-manufacturing-cheaper-0615]
- 67. Silicon Nanowire Sensor: Fast Protein Detection by ASG [https://www.azosensors.com/news.aspx?newsID=16529]
- 68. Biosensors [https://advancedsilicongroup.com/biosensors]
- 69. Advanced Silicon Group [https://advancedsilicongroup.com/]
- 70. Silicon-Based Biosensors: A Critical Review of ... [https://www.mdpi.com/2079-6374/15/2/119]
- 71. Sensitivity-Enhancing Strategies in Optical Biosensing - PMC [https://pmc.ncbi.nlm.nih.gov/articles/PMC7884068/]
- 72. Addressing Signal Drift and Screening for Detection of ... [https://pmc.ncbi.nlm.nih.gov/articles/PMC12327215/]
- 73. Sensitivity studies and optimization of an impedance- ... [https://www.sciencedirect.com/science/article/pii/S2590137024000438]
- 74. Troubleshooting and Optimization Tips for SPR Experiments [https://www.creative-proteomics.com/resource/troubleshooting-optimization-tips-for-spr-experiments.htm]
- 75. The Example of Blood Glucose Meters [https://www.mdpi.com/2227-9040/13/8/300]
- 76. Improving standards in the reporting of optical biosensor ... [https://www.sciencedirect.com/science/article/pii/S2472555224000546]
- 77. Challenges in realizing therapeutic antibody biosensing [https://www.sciencedirect.com/science/article/pii/S0167779925002641]
- 78. Resilience of anodic biofilm in microbial fuel cell biosensor for BOD... [https://www.nature.com/articles/s41545-024-00350-5?error=cookies_not_supported&code=1c9d9f85-851f-45a7-999e-65f588e547e9]
- 79. Frontiers | Electrochemical biosensors on microfluidic chips as... [https://www.frontiersin.org/journals/cellular-and-infection-microbiology/articles/10.3389/fcimb.2024.1419570/full]
- 80. FAQs [https://www.alvimcleantech.com/cms/en/biofilmsensors/faqs]
- 81. Key issues in biofilm reactors and AI-driven performance ... [https://www.sciencedirect.com/science/article/pii/S2666498424000942]
- 82. Bacterial Biosensors : The Future of Analyte Detection [https://asm.org/articles/2023/september/bacterial-biosensors-the-future-of-analyte-detecti]
- 83. enzymes as powerful natural anti- Microbial candidates biofilm [https://microbialcellfactories.biomedcentral.com/articles/10.1186/s12934-024-02610-y]
- 84. The Role of Artificial Intelligence in Advancing Biosensor ... [https://pmc.ncbi.nlm.nih.gov/articles/PMC12392873/]
- 85. Integration of Artificial Intelligence in Biosensors for ... [https://www.mdpi.com/2079-6374/15/10/690]
- 86. Predictive Maintenance Tools: The 2025 Tech Stack Playbook [https://f7i.ai/blog/the-predictive-maintenance-tools-playbook-for-2025-building-your-complete-tech-stack]
- 87. 8 Best Gantt Charts for Machine Learning Project (Free & ... [https://friday.app/p/gantt-software-machine-learning-project]
- 88. sensemetrics: Sensor Data Management & Insight [https://www.bentley.com/software/sensemetrics/]
- 89. Implantable biosensors: Advancements and applications [https://www.sciencedirect.com/science/article/pii/S1877117325000870]
- 90. Biosensors, Volume 15, Issue 3 (March 2025) – 72 articles [https://www.mdpi.com/2079-6374/15/3]
- 91. Equipment Calibration: The Ultimate Guide for Managers (2025) [https://f7i.ai/blog/equipment-calibration-isnt-a-chore-its-your-competitive-edge-the-strategic-guide-for-2025]
- 92. What Is Sensor Calibration And Why It Matters [https://www.botasys.com/post/sensor-calibration]
- 93. Comparison of Methods Study between a Photonic Crystal ... [https://pmc.ncbi.nlm.nih.gov/articles/PMC5677296/]
- 94. Correlations between three ELISA protocols ... [https://pmc.ncbi.nlm.nih.gov/articles/PMC10204981/]
- 95. How to Read and Analyze ELISA Data [https://www.rndsystems.com/resources/how-to-analyze-elisa-data]
- 96. An overview of ELISA: a review and update on best laboratory ... [https://pmc.ncbi.nlm.nih.gov/articles/PMC11808753/]
- 97. Biosensor - an overview [https://www.sciencedirect.com/topics/engineering/biosensor]
- 98. Biosensors Market Projected to Reach USD 68.72 Billion ... [https://www.towardshealthcare.com/insights/biosensors-market-sizing]
- 99. Biosensors Market Size & Demand Forecast 2025-2035 [https://www.futuremarketinsights.com/reports/biosensors-market]
- 100. Global Biosensors Market Size [https://www.rootsanalysis.com/reports/global-biosensors-market.html]
- 101. Blueprints for Biosensors: Design, Limitations, and ... [https://pmc.ncbi.nlm.nih.gov/articles/PMC6115959/]
- 102. towards scalability in microbial bioprocess development [https://www.sciencedirect.com/science/article/abs/pii/S0958166917302525]
- 103. Scaling return on investment [https://juliankingnz.substack.com/p/scaling-return-on-investment]
- 104. Pilot Study Design: How to Structure Your Improvement Test ... [https://lean6sigmahub.com/pilot-study-design-how-to-structure-your-improvement-test-for-success/]
- 105. Introduction to biosensors - PMC [https://pmc.ncbi.nlm.nih.gov/articles/PMC4986445/]
- 106. Low-cost noninvasive optical CO2 sensing system for ... [https://pubmed.ncbi.nlm.nih.gov/15625676/]
- 107. What Are the Latest Standards in Wearable Biosensor ... [https://eureka.patsnap.com/report-latest-standards-in-wearable-biosensor-regulation]
- 108. Biosensors Market Size Expected to Reach USD 68.72 ... [https://www.globenewswire.com/news-release/2025/08/22/3137896/0/en/Biosensors-Market-Size-Expected-to-Reach-USD-68-72-Billion-by-2034.html]
- 109. Biosensors Market Size to Reach USD 69.67 Billion By 2034 [https://www.biospace.com/press-releases/biosensors-market-size-to-reach-usd-69-67-billion-by-2034]
- 110. How to Avoid Biosensors' Common Errors [https://www.volersystems.com/blog/biosensors-avoiding-errors-measuring-physiological-functions]
- 111. “Please learn from my mistakes”: the acute need for an ... [https://www.frontiersin.org/journals/sensors/articles/10.3389/fsens.2024.1408158/full]
- 112. Challenges and Strategies in Developing an Enzymatic ... [https://pmc.ncbi.nlm.nih.gov/articles/PMC8781831/]
- 113. 3D Printing Troubleshooting Guide: 30 Common Problems ... [https://all3dp.com/1/common-3d-printing-problems-troubleshooting-3d-printer-issues/]
- 114. 7 Common 3D Printing Problems With Solutions [https://www.additive-x.com/blog/7-common-3d-printing-problems-with-solutions?srsltid=AfmBOopeBoJOt0kn3A9HDk6kxm-NoxXL9VnUmWn6_XY8eNO2F-YN51R9]
- 115. 14 Common 3D Printing Problems and Solutions [https://www.eufymake.com/blogs/maintenance-guides/3d-printing-problems?srsltid=AfmBOorQTpHF6PJSSZ3YIzUNB5mhbVlWVX6jCkChU2bOk2pfAvvBCPXP]
- 116. Biosensors Market Size, Share & Trends Report 2030 [https://www.marketsandmarkets.com/Market-Reports/biosensors-market-798.html]
- 117. Biosensors Market Size, Trends & Growth Drivers 2030 [https://www.mordorintelligence.com/industry-reports/biosensors-market]
- 118. Wearable Biosensors Market: Trends and Future Growth ... [https://www.manchesterprofessionals.co.uk/article/information-technology/121890/wearable-biosensors-market-trends-and-future-growth-analysis-by-2032]