Strategies for Optimizing Biosensor Fabrication to Minimize Signal Drift: From Materials to Machine Learning
Signal drift remains a critical bottleneck in the development of reliable biosensors for clinical and point-of-care applications, undermining long-term accuracy and stability.
Strategies for Optimizing Biosensor Fabrication to Minimize Signal Drift: From Materials to Machine Learning
Abstract
Signal drift remains a critical bottleneck in the development of reliable biosensors for clinical and point-of-care applications, undermining long-term accuracy and stability. This article provides a comprehensive analysis of drift mitigation strategies, exploring its fundamental causes in biofouling, material instability, and environmental factors. We systematically examine advanced fabrication techniques, including the use of stable polymer interfaces, optimized immobilization chemistries, and innovative in-situ correction methods. Furthermore, we evaluate the growing role of machine learning in predictive modeling and calibration, alongside a comparative assessment of biosensor designs. This resource is tailored for researchers and drug development professionals seeking to enhance biosensor performance for robust biomedical diagnostics.
Understanding and Diagnosing the Root Causes of Biosensor Signal Drift
Technical Support & Troubleshooting Hub
This section provides targeted guidance for researchers investigating signal drift in biosensors, focusing on troubleshooting specific issues encountered during experimentation.
Frequently Asked Questions (FAQs)
Q1: My electrochemical biosensor signal decreases exponentially within the first few hours in whole blood. What is the likely cause and how can I address it?
A: This initial exponential signal loss is typically dominated by biological fouling, where blood components like proteins and cells adsorb to the sensor surface, physically obstructing electron transfer [1].
- Actionable Steps:
- Confirm Fouling: Test sensor stability in a controlled buffer like PBS at 37°C. If the exponential phase is abolished, it confirms a blood-specific biological mechanism [1].
- Surface Regeneration: Try washing the electrode with a solubilizing agent like concentrated urea, which has been shown to recover at least 80% of the initial signal by removing foulants without disrupting sensor function [1].
- Optimize SAM Chemistry: Investigate different alkane-thiolate self-assembled monolayer (SAM) formulations to create a more fouling-resistant surface [1].
Q2: My sensor shows a steady, linear signal decline over time, even in buffer solutions. What mechanism is responsible?
A: A linear signal decrease under these conditions points toward electrochemically driven desorption of the self-assembled monolayer (SAM) from the electrode surface [1].
- Actionable Steps:
- Adjust Electrochemical Protocol: Narrow the potential window of your square-wave voltammetry scan. Signal loss remains low when the positive potential is kept at or below 0.0 V and the negative potential at or above -0.4 V [1].
- Pause Interrogation: Perform a control experiment where you pause the electrochemical interrogation. If the drift also stops, it confirms an electrochemistry-driven mechanism [1].
- Select Stable Redox Reporters: Choose redox reporters with potentials that fall within the narrow window of SAM stability. Methylene blue is more stable because its potential avoids regions that promote destructive desorption [1].
Q3: How does the position of the redox reporter on the DNA strand affect signal stability?
A: The rate and magnitude of the exponential drift phase are strongly dependent on the reporter's position. The drift is more rapid and severe when the reporter is placed closer to the electrode surface, as fouling has a greater impact on its ability to transfer electrons [1].
- Actionable Steps:
- Systematic Screening: Characterize the drift of a series of equal-length DNA strands with the redox reporter placed at different internal positions.
- Optimize Position: Select the reporter position that offers the best compromise between signal strength and stability for your specific application [1].
Q4: I am developing a sensor for long-term implantation. What are the key stability challenges?
A: The primary challenges for long-term stability are the combined effects of SAM desorption and biological fouling, which gradually degrade the signal-to-noise ratio until accurate measurement becomes impossible [1]. Furthermore, the harsh in vivo environment can lead to enzymatic degradation of biomolecular recognition elements like DNA [1].
- Actionable Steps:
- Use Enzyme-Resistant Backbones: Employ non-natural oligonucleotides, such as 2'O-methyl RNA, which show significantly higher resistance to nucleases [1].
- Enhanced Biocompatibility: Explore coatings and surface modifications that improve biocompatibility and reduce biofouling and immune responses [2].
Quantitative Data on Signal Drift Mechanisms
The table below summarizes key experimental findings on the sources of signal drift, providing a reference for diagnosing and quantifying this issue.
Table 1: Experimental Characterization of Signal Drift Mechanisms
| Drift Phase | Primary Mechanism | Experimental Evidence | Impact on Signal | Remediation Strategy |
|---|---|---|---|---|
| Exponential (Initial 1.5 hours) | Biological Fouling [1] | Signal loss is pronounced in whole blood but abolished in PBS; Urea wash recovers >80% signal [1]. | Up to 3x decrease in electron transfer rate [1] | Optimize SAM chemistry; use fouling-resistant coatings; surface regeneration washes [1]. |
| Linear (Long-term) | Electrochemical SAM Desorption [1] | Drift persists in PBS; Strongly dependent on applied potential window; pauses when scanning stops [1]. | Steady, linear decrease over time [1] | Narrow electrochemical potential window; optimize SAM formation and composition [1]. |
| N/A (General) | Enzymatic Degradation | Signal loss is reduced when using nuclease-resistant oligonucleotides (e.g., 2'O-methyl RNA) [1]. | Irreversible signal loss [1] | Employ engineered, enzyme-resistant bioreceptor backbones [1]. |
Experimental Protocols for Drift Analysis
Protocol 1: Differentiating Drift Mechanisms in Complex Fluids
Objective: To determine the relative contributions of fouling and electrochemical desorption to overall signal drift.
- Sensor Preparation: Fabricate EAB-like proxy sensors using thiol-on-gold chemistry and a methylene blue-modified, unstructured DNA sequence [1].
- Challenge in Whole Blood: Place sensors in undiluted whole blood at 37°C and perform continuous square-wave voltammetry (SWV). Record the signal over 6-8 hours. Observe the characteristic biphasic (exponential then linear) signal loss [1].
- Control in PBS: Repeat the identical SWV protocol with new sensors in phosphate buffered saline (PBS) at 37°C.
- Data Analysis:
- Fouling Recovery Test: After 2.5 hours in blood (using a narrow potential window to minimize electrochemical drift), wash sensors with concentrated urea. Recovery of signal suggests reversible fouling is a major contributor [1].
Protocol 2: Optimizing Electrochemical Stability via Potential Window
Objective: To identify an electrochemical interrogation protocol that minimizes SAM desorption.
- Sensor Preparation: Prepare sensors as in Protocol 1.
- Define Potential Windows: Set up a series of SWV scans with different potential windows:
- Window A (Broad): -0.5 V to +0.3 V
- Window B (Moderate): -0.4 V to +0.0 V
- Window C (Narrow): -0.4 V to -0.2 V [1]
- Stability Testing: Run each SWV protocol for 1500 scans in PBS at 37°C.
- Analysis: Plot normalized signal versus scan number. The protocol that results in minimal signal loss (e.g., <5% over 1500 scans for Window C) identifies the stable operating window for your specific sensor configuration [1].
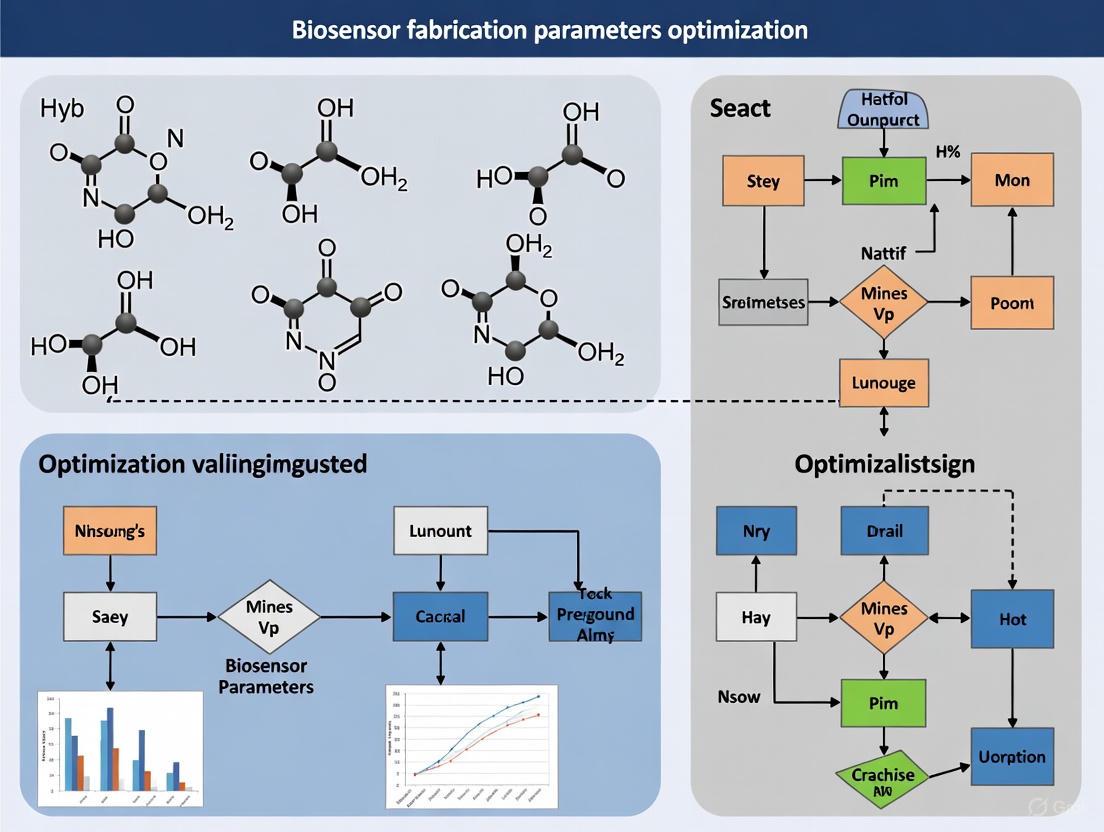
Visualizing Drift Mechanisms and Optimization
The following diagrams illustrate the core concepts and workflows related to signal drift.
Diagram 1: Diagnostic logic for identifying primary signal drift mechanisms, based on testing in different biological fluids [1].
Diagram 2: A systematic workflow for optimizing biosensor fabrication to minimize drift, using Design of Experiments (DoE) [3].
The Scientist's Toolkit: Key Research Reagents & Materials
This table lists essential materials used in drift-related research, as cited in the literature.
Table 2: Essential Research Reagents for Investigating Biosensor Signal Drift
| Item | Function in Research | Application Example |
|---|---|---|
| Alkane-thiolates | Forms the Self-Assembled Monolayer (SAM) on gold electrodes, providing a foundation for bioreceptor attachment and reducing non-specific binding [1]. | Creating a stable, organized surface on the electrode to mitigate nonspecific adsorption and SAM desorption [1]. |
| Methylene Blue | A redox reporter molecule used in electrochemical aptamer-based (EAB) sensors. Its favorable redox potential contributes to superior sensor stability [1]. | Acting as the signal-generating moiety in EAB sensors; its stability is compared to other reporters like ferrocene [1]. |
| 2'O-methyl RNA | An enzyme-resistant, non-natural oligonucleotide backbone used in the bioreceptor strand [1]. | Replacing DNA in sensor constructs to isolate and reduce signal loss contributions from enzymatic degradation [1]. |
| Urea | A solubilizing and denaturing agent used to remove adsorbed biomolecules from the sensor surface [1]. | Testing the reversibility of fouling and regenerating sensor surfaces after exposure to complex fluids like blood [1]. |
| Fractional Polynomials | A mathematical parameterization used in logistic models to create dynamic calibration curves that can capture complex, nonlinear miscalibration [4]. | Modeling and monitoring the evolution of calibration drift in predictive models over time [4]. |
Troubleshooting Guide: Debye Length Screening
FAQ: Why does my biosensor's sensitivity drop dramatically when I test in physiological solutions (e.g., serum, 1X PBS)?
This is a classic symptom of the Debye screening effect. In high ionic strength solutions, the electrical double layer (EDL) that forms at the sensor surface is compressed, resulting in a very short Debye length. This screens the charge of your target biomolecule, preventing it from being detected by the underlying transducer [5] [6].
- The Core Problem: The Debye length (λD) is the distance over which an electrical charge can exert an influence in a solution. It is inversely proportional to the square root of the ionic strength of the solution [7].
- Quantitative Impact: In a standard physiological solution like 1X PBS, the Debye length is only about 0.7 nm [5] [6]. Since a typical IgG antibody is 10-15 nm in size and many protein targets are of similar scale, their charge is effectively invisible to the sensor [7].
Solutions and Methodologies
Researchers have developed several strategies to overcome this fundamental limitation. The table below summarizes the key approaches.
Table 1: Strategies to Overcome the Debye Screening Effect
| Strategy | Principle | Key Experimental Materials/Reagents | Reported Outcome |
|---|---|---|---|
| Polymer Brush Interface [5] | Uses a polymer layer (e.g., POEGMA) to establish a Donnan potential, effectively extending the Debye length within the brush. | Poly(oligo(ethylene glycol) methyl ether methacrylate) (POEGMA) | Enabled sub-femtomolar detection in 1X PBS [5]. |
| Sample Desalting [7] | Physically removes salt ions from the sample before analysis, directly increasing the Debye length of the test solution. | Miniature blood dialyzer (10,000 Dalton membrane) | Successfully detected tumor markers (e.g., CEA, AFP) in dialyzed human serum [7]. |
| Electric-Double-Layer (EDL) FET Design [6] | A novel FET design with a separated gate electrode. Uses a short-pulse bias measurement to exploit the EDL's properties, bypassing traditional screening limits. | AlGaN/GaN High Electron Mobility Transistor (HEMT) | Direct detection of proteins (e.g., CRP, NT-proBNP) in human serum and 1X PBS with no dilution [6]. |
| Meta-Nano-Channel (MNC) BioFET [8] | A CMOS-fabricated sensor that electrostatically decouples the double layer from the conducting channel, allowing tuning of the screening length. | Complementary-metal-oxide-silicon (CMOS) processed chip | Increased sensing signal for PSA from 70 mV to 133 mV in high ionic strength solution [8]. |
Detailed Experimental Protocol: Implementing a POEGMA Polymer Brush
The following workflow, based on the D4-TFT biosensor, details the integration of a POEGMA polymer brush to mitigate Debye screening [5].
Procedure:
- Surface Preparation: Start with a fabricated CNT thin-film transistor (TFT). Ensure the surface is clean and functionalized for polymer grafting.
- POEGMA Grafting: Grow or immobilize a layer of poly(oligo(ethylene glycol) methyl ether methacrylate) (POEGMA) above the CNT channel. This polymer brush acts as a hydrated, non-fouling layer.
- Antibody Immobilization: Inkjet-print or spot your specific capture antibodies (cAb) into the POEGMA matrix.
- Control Spotting: As a critical control, leave a section of the POEGMA-coated channel without antibodies to account for nonspecific binding and signal drift.
- Assay Execution: Dispense the sample (in 1X PBS) containing the target analyte. The polymer brush creates a local environment where the Debye length is effectively extended, allowing the charge from the antibody-analyte sandwich complex to influence the CNT channel.
- Signal Measurement: Record the drain current (Id). A measurable shift in Id upon target binding confirms successful detection despite the high ionic strength.
Troubleshooting Guide: Biofouling
FAQ: Why does my sensor show unstable baseline readings and nonspecific signal in complex biofluids?
This is typically caused by biofouling—the nonspecific adsorption of proteins, cells, or other biomolecules onto your sensor's active surface. This contamination can alter the surface charge, block binding sites, and lead to significant signal drift and false positives [9].
Solutions and Methodologies
Preventing the initial adsorption of proteins is key to mitigating biofouling. The following table compares advanced antifouling strategies.
Table 2: Advanced Antifouling Strategies for Biosensors
| Strategy | Mechanism | Key Experimental Materials/Reagents | Advantages |
|---|---|---|---|
| Macrocyclic Stapled Peptides [10] | Uses engineered cyclic peptides to reduce proteolytic susceptibility and create a low-fouling surface. | Stapled Peptide (SP) from EKEKEK sequence with R8 and S5 amino acids | High resistance to protease hydrolysis; achieved 0.49 pg/mL LOD for CEA in serum [10]. |
| Zwitterionic & PEG-like Polymers [5] [9] | Creates a hydrated, neutral surface that is thermodynamically unfavorable for protein adhesion. | Poly(oligo(ethylene glycol) methyl ether methacrylate) (POEGMA) [5]; Zwitterionic materials [9] | Well-established chemistry; highly effective at repelling a broad range of proteins. |
| Nitric Oxide (NO) Releasing Materials [9] | Releases nitric oxide, a natural bactericidal agent that disperses and kills microbes, preventing biofilm formation. | NO donors (e.g., S-nitroso-N-acetylpenicilamine - SNAP) | Actively germicidal; can disperse pre-formed biofilms [9]. |
| Biomimetic Micropatterning [9] | Physically patterns the surface with microstructures (inspired by shark skin or lotus leaves) to prevent organism settlement. | Polydimethylsiloxane (PDMS) with etched patterns | Physical (non-chemical) method; can be superhydrophobic or superhydrophilic [9]. |
Detailed Experimental Protocol: Applying a Stapled Peptide Antifouling Layer
This protocol is inspired by the development of a stapled peptide-based electrochemical biosensor for reliable detection in human serum [10].
Procedure:
- Peptide Synthesis: Design and synthesize a linear peptide (LP) based on a known low-fouling sequence (e.g., EKEKEK).
- Stapling (Macrocyclization): Introduce two non-natural amino acids (e.g., R8 and S5) into the sequence to enable a "head-to-tail" cyclization, creating the stapled peptide (SP). This structure protects the terminal amino acids from proteases.
- Surface Immobilization: Covalently immobilize the engineered SP onto your sensor's transducer surface (e.g., gold electrode) using standard coupling chemistry.
- Validation:
- Fluorescence Imaging: Expose the SP-coated sensor and an LP-coated control to a fluorescently-tagged protein solution (e.g., serum). The SP surface should show significantly less fluorescence, indicating reduced nonspecific adsorption.
- Electrochemical Testing: Perform electrochemical impedance spectroscopy (EIS) in serum to confirm stable baseline performance.
- Target Detection: Use the SP-coated sensor to detect your specific target (e.g., carcinoembryonic antigen) in undiluted human serum. The sensor should maintain high sensitivity and correlate well with standard clinical methods.
The following diagram illustrates the strategic approach to selecting an antifouling method based on your primary challenge.
Troubleshooting Guide: Material Aging & Signal Drift
FAQ: My biosensor's output signal steadily drifts over time, even in the absence of the target. How can I stabilize it?
This is signal drift, often resulting from the slow, time-dependent degradation or interaction of the sensor materials with the electrolyte solution. This can include ion diffusion into passivation layers, electrochemical corrosion, or unstable reference electrodes [5].
Solutions and Methodologies
A multi-pronged approach is essential to achieve long-term signal stability.
Table 3: Strategies to Mitigate Signal Drift in Biosensors
| Strategy | Implementation | Mechanism | Key Materials |
|---|---|---|---|
| Rigorous Measurement Methodology [5] | Use infrequent DC sweeps instead of continuous static (DC) or AC measurements. | Minimizes the total time the sensor is under bias, reducing ion diffusion and electrochemical side reactions. | Automated data acquisition system. |
| Stable Material Platforms [6] | Use chemically inert semiconductors like GaN instead of Si/SiO₂. | GaN is highly resistant to ion diffusion from the electrolyte, preventing the formation of an internal field that causes drift. | AlGaN/GaN High Electron Mobility Transistors (HEMTs) [6]. |
| Effective Device Passivation [5] | Apply a robust, hermetic passivation layer everywhere except the active sensing area. | Preents leakage currents and protects sensitive components and interconnects from the solution. | Silicon Nitride (SiNₓ) [5] [6]. |
| Stable Pseudo-Reference Electrodes [5] | Use thin-film metal electrodes (e.g., Pd) instead of bulky, liquid-filled Ag/AgCl references. | Creates a more robust and miniaturizable reference system suitable for point-of-care devices. | Palladium (Pd) thin-film electrode [5]. |
Detailed Experimental Protocol: Implementing a Drift-Robust Measurement Scheme
This protocol is based on the methodology that enabled stable performance in the D4-TFT [5].
Procedure:
- Stable Biasing Configuration: Ensure your measurement setup is optimized for stability. This includes using a stable pseudo-reference electrode (e.g., Pd) and a well-passivated device.
- Avoid Continuous Biasing: Do not operate the sensor with a constant (static) gate voltage applied for extended periods.
- Implement Infrequent DC Sweeps:
- Program your source meter to apply a drain-source voltage (Vds) sweep.
- Between measurements, turn the gate and drain biases completely off.
- Only apply a brief gate voltage pulse during the actual measurement sweep. For example, take a reading only once every few minutes.
- Data Analysis: Monitor the drain current at a specific gate voltage (e.g., the on-current, Ion) from each sweep over time. A stable baseline before analyte introduction indicates successful drift mitigation.
The Scientist's Toolkit: Key Research Reagent Solutions
Table 4: Essential Materials for Optimizing Biosensor Performance and Minimizing Drift
| Reagent / Material | Function in Experimentation |
|---|---|
| POEGMA Polymer Brush [5] | Serves a dual function: extends the effective Debye length via the Donnan potential and provides a robust antifouling layer to minimize nonspecific binding. |
| Stapled Peptides (SP) [10] | Engineered antifouling probes that offer superior stability against proteolysis in serum compared to linear peptides, ensuring long-term sensor functionality. |
| AlGaN/GaN HEMT [6] | A stable transducer material that is chemically inert and highly resistant to ion diffusion, making it ideal for minimizing signal drift in liquid environments. |
| Miniature Blood Dialyzer [7] | A sample pre-treatment tool that physically desalts clinical samples (like serum) to directly increase the Debye length, overcoming screening for standard SiNW-FETs. |
| Palladium (Pd) Pseudo-Reference Electrode [5] | Provides a stable reference potential in a miniaturized, solid-state form factor, crucial for developing point-of-care devices without bulky Ag/AgCl electrodes. |
| Silicon Nitride (SiNₓ) Passivation [5] [6] | A critical dielectric layer used to encapsulate and protect the sensor's active components and interconnects from the solution, preventing electrical leakage and drift. |
Troubleshooting Guides
Signal Drift in Electrical Biosensors (BioFETs)
Problem: Researchers observe unstable baseline signals and continuous drift when operating carbon nanotube (CNT)-based BioFETs in biologically relevant ionic strength solutions (e.g., 1X PBS), making accurate biomarker quantification difficult [5].
Explanation: This drift originates from two primary material-centric sources: (1) slow electrolytic ion diffusion into the sensing region, which alters gate capacitance and threshold voltage over time; and (2) insufficient Debye length in high ionic strength solutions, which screens the charge of target biomarkers beyond a few nanometers [5].
Solution: Implement a multi-faceted approach to enhance interfacial stability:
- Maximize Sensitivity through Passivation: Use appropriate passivation layers alongside polymer brush coatings to protect the nanomaterial surface [5].
- Employ a Stable Electrical Testing Configuration: Use a stable testing setup and a rigorous methodology that relies on infrequent DC sweeps rather than static or AC measurements [5].
- Extend the Sensing Distance: Mitigate charge screening by grafting a non-fouling polymer brush, like poly(oligo(ethylene glycol) methyl ether methacrylate) (POEGMA), above the CNT channel. This layer establishes a Donnan equilibrium potential, effectively increasing the Debye length and allowing detection of larger antibodies beyond the native screening distance [5].
Verification Protocol:
- Simultaneously test a control device with no antibodies printed over the CNT channel.
- Confirm successful detection via a specific on-current shift caused by antibody sandwich formation, which should be absent in the control [5].
- Validate performance by detecting sub-femtomolar biomarker concentrations repeatedly and stably in 1X PBS [5].
Inconsistent Performance of Gold Nanomaterial-Based Sensing Surfaces
Problem: Biosensors utilizing gold nanoparticles (AuNPs) exhibit a lack of robustness, inconsistent concentration on the sensor surface, and poor reproducibility, leading to variable performance and unreliable data [11].
Explanation: Conventional AuNP modification techniques are not particularly robust. Nanoparticles can detach, and aggregation during immobilization leads to variability in nanoparticle density, size, and morphology on the sensing surface [11].
Solution: Utilize a gold nanoislands (AuNis) structure as a sensing membrane.
- Fabrication Method: Deposit a thin Au film (e.g., 2 nm) via e-beam evaporation, followed by a brief annealing process (e.g., 400 °C for 60 sec in N₂) to form the AuNis [11].
- Advantages: This provides a cost-effective, simple fabrication process. The island structure offers more surface-active sites and high adsorption capacity, enhancing sensitivity and stability. The direct formation on the substrate improves robustness compared to immobilized nanoparticles [11].
Verification Protocol:
- Use field emission scanning electron microscopy (FESEM) and atomic force microscopy (AFM) to investigate surface morphology and confirm consistent AuNis formation [11].
- Perform pH sensing as a proof-of-concept to verify excellent sensing capability and stability [11].
- Test reproducibility across multiple sensors, aiming for a high correlation coefficient (e.g., R² ≥ 0.950), and demonstrate > 98% signal recovery after regeneration cycles [11].
Calibration Drift in Implantable and Continuous Monitoring Biosensors
Problem: Implanted biosensors and continuous glucose monitors (CGMs) suffer from calibration drift over time, affecting long-term accuracy and reliability for metabolic monitoring [12] [13].
Explanation: Drift in chronic applications stems from complex material-biology interactions. These include biofouling (non-specific protein adsorption on the nanomaterial surface), inflammation, encapsulation by scar tissue, and the intrinsic material instability of some nanomaterials (e.g., MXene's proneness to oxidation) [12] [14] [13].
Solution:
- Surface Functionalization: Apply antifouling coatings, such as polyethylene glycol (PEG) or its derivatives, to minimize non-specific binding [14].
- Material Selection and Composite Techniques: Use flexible, biodegradable materials or conductive polymers to improve biocompatibility and reduce mechanical mismatch with soft tissues. Functionalization modifications of nanomaterials enhance selectivity and long-term stability in complex biological environments [12] [14].
- Data-Driven Calibration: Leverage machine learning (ML) algorithms to model and correct for signal drift. ML can compensate for nonlinear relationships between sensor output and actual analyte concentration under varying environmental conditions [15].
Verification Protocol:
- For CGMs, focus on directional trends in glucose values before and after meals rather than absolute baseline readings, as readings from interstitial fluid are inherently less accurate than blood [13].
- For implantable sensors, conduct long-term stability studies in vivo, monitoring signal fidelity and the degree of inflammatory response or biofouling post-explantation [12] [14].
Frequently Asked Questions (FAQs)
Q1: How can I qualify that modifications to my biosensor protocol effectively reduce drift without compromising other performance parameters? If you change a protocol (e.g., sample volume, incubation times, surface modification), it is necessary to qualify that those changes achieve acceptable accuracy, specificity, and precision. The most effective quality control is to use laboratory-specific control samples made using your source of analyte in your sample matrices. These controls, ideally low, medium, and high concentrations across the analytical range, should be made in bulk, aliquoted, and frozen at -80°C. Establish a statistically valid range for these controls; they are a more sensitive and specific tool for quality control than curve-fit parameters alone [16].
Q2: What are the key material properties to consider when selecting a nanomaterial for a stable biosensor? The key properties are electrical conductivity, specific surface area, biocompatibility, and catalytic activity [14]. However, for drift minimization, long-term stability in the operational environment is critical. Evaluate properties such as:
- Chemical Inertness: For example, GaN is chosen for its chemical inertness, making it suitable for harsh environments [11].
- Propensity for Oxidation: Some materials, like MXenes, exhibit lower stability and are prone to oxidation, hindering long-term recording [14].
- Biocompatibility and Anti-fouling Characteristics: Materials like graphene and functionalized CNTs offer favorable biocompatibility, while polymer brushes like POEGMA prevent biofouling [5] [14].
Q3: Our HCP (Host Cell Protein) ELISA shows drift in absolute quantitation between lots. Is this expected? Yes, some drift in absolute values is expected. HCP assays are semi-quantitative at best. The absolute quantitation is exceedingly difficult due to the lack of a recognized reference preparation and the fact that the array of HCPs in your final product is likely different from the HCPs in the ELISA standards. The potential error in reporting an HCP level in a sample with a different array of HCPs from the standards can be as high as 4-fold. The most important criteria are objective validation parameters like specificity, accuracy (demonstrated by sample dilution linearity and spike recovery), and precision [16].
Q4: How can machine learning help mitigate biosensor drift? Machine learning offers a data-driven approach to combat drift. ML algorithms, including artificial neural networks (ANNs), Random Forests, and Gaussian Process Regression (GPR), can model the complex, nonlinear relationships between biosensor fabrication parameters (e.g., enzyme amount, crosslinker concentration, pH) and sensor response. These models can predict optimal fabrication parameters to enhance stability and can be used for advanced signal processing, calibration, and noise reduction, effectively compensating for time-based signal drift [15].
Table 1: Performance Data of Drift-Reduction Strategies for Nanomaterial-Based Biosensors
| Nanomaterial Platform | Drift Mitigation Strategy | Key Performance Metric | Result | Reference |
|---|---|---|---|---|
| CNT-based BioFET (D4-TFT) | POEGMA polymer brush & stable DC sweep protocol | Detection stability in 1X PBS | Repeated, stable attomolar-level detection | [5] |
| AuNis on AlGaN/GaN HEMT | Annealed gold nanoislands sensing membrane | Reproducibility (Correlation Coeff. R²) | R² ≥ 0.950 across multiple sensors | [11] |
| AuNis on AlGaN/GaN HEMT | Annealed gold nanoislands sensing membrane | Signal Recovery after Regeneration | > 98% | [11] |
| General Electrochemical Biosensors | Machine Learning (Stacked Ensemble Model) | Predictive Accuracy for Optimization (R²) | R² = 0.943 (superior to linear models) | [15] |
Table 2: Key Research Reagent Solutions for Drift Minimization
| Reagent / Material | Function in Biosensor Fabrication | Role in Mitigating Drift |
|---|---|---|
| POEGMA (Poly(oligo(ethylene glycol) methyl ether methacrylate)) | Non-fouling polymer brush interface grafted above the transducer [5]. | Extends Debye length in ionic solutions via Donnan potential, reduces charge screening & biofouling [5]. |
| Gold Nanoislands (AuNis) | Robust sensing membrane formed by annealing a thin Au film [11]. | Provides consistent, high-surface-area morphology for stable bioreceptor immobilization, enhancing reproducibility [11]. |
| Glutaraldehyde | Crosslinker for biomolecule immobilization [15]. | Excessive use can negatively impact sensor signal. Optimization is required to minimize its destabilizing effect [15]. |
| GST-PAK1-GBD Fusion Protein | Bioreceptor for detecting active small Rho GTPases (e.g., in leukemia cell lysate) [11]. | High-specificity domain ensures selective target binding, reducing non-specific signals that contribute to drift [11]. |
| PEDOT:PSS | Conductive polymer for flexible electrodes [14]. | Mitigates interfacial impedance, improving signal stability, though long-term stability can be a challenge [14]. |
Experimental Protocols
Protocol: Fabrication of a Stable CNT-based BioFET (D4-TFT) with POEGMA Brush
Objective: To construct a carbon nanotube thin-film transistor biosensor capable of ultrasensitive and stable detection in physiological ionic strength solutions by mitigating Debye length screening and signal drift [5].
Materials:
- Semiconducting carbon nanotubes (CNTs)
- Poly(oligo(ethylene glycol) methyl ether methacrylate) (POEGMA)
- Capture and detection antibodies
- Palladium (Pd) pseudo-reference electrode
- Passivation materials
- Trehalose excipient layer
Workflow:
Procedure:
- Device Fabrication: Fabricate a CNT thin-film transistor and incorporate a Pd pseudo-reference electrode to avoid bulky Ag/AgCl electrodes [5].
- Interface Engineering: Graft a POEGMA polymer brush layer above the CNT channel. This brush serves as a non-fouling interface and a Debye length extender [5].
- Bioreceptor Immobilization: Inkjet-print capture antibodies (cAb) into the POEGMA matrix [5].
- Assay Assembly: Print fluorescently-tagged detection antibodies (dAb) on a readily dissolvable trehalose excipient layer positioned above the sensor [5].
- D4 Assay Operation:
- Dispense: Apply the liquid sample to the device.
- Dissolve: The trehalose layer dissolves, releasing the detection antibodies.
- Diffuse: The target analyte and detection antibodies diffuse to the sensor surface, forming a sandwich complex (cAb-analyte-dAb) within the POEGMA brush.
- Detect: Measure the electrical signal using infrequent DC sweeps to monitor the current shift, avoiding continuous measurements that are prone to drift [5].
Protocol: Forming a Robust Gold Nanoislands (AuNis) Sensing Membrane
Objective: To create a highly sensitive and reproducible gold sensing surface on a HEMT biosensor to minimize performance variability caused by inconsistent nanoparticle immobilization [11].
Materials:
- AlGaN/GaN HEMT substrate
- Gold target for e-beam evaporation
- Rapid Thermal Processing (RTP) system
- Nitrogen gas
- Glutathione (GSH) for bioreceptor linking
Workflow:
Procedure:
- Substrate Preparation: Begin with a fabricated AlGaN/GaN HEMT structure with source and drain ohmic contacts formed [11].
- Gold Deposition: Use electron beam evaporation to deposit a thin Au film with a precise thickness of 2 nm onto the exposed sensing area between the source and drain [11].
- Annealing for Nanoislands Formation: Thermally treat the device using Rapid Thermal Processing (RTP) at 400 °C for approximately 60 seconds in a nitrogen (N₂) environment. This process causes the thin, continuous Au film to aggregate and form discrete, stable AuNis [11].
- Characterization: Investigate the surface morphology of the formed AuNis using Field Emission Scanning Electron Microscopy (FESEM) and Atomic Force Microscopy (AFM) to verify island size, distribution, and consistency [11].
- Biofunctionalization: Use a linker molecule like Glutathione (GSH) to immobilize the bioreceptor (e.g., GST-tagged protein) onto the AuNis surface [11].
- Validation: Perform pH sensing as a proof-of-concept to verify the high sensitivity and stability of the AuNis sensing membrane before proceeding with specific biosensing assays [11].
Signaling Pathways and Conceptual Frameworks
Troubleshooting Guide: Addressing Environmental Stressors in Biosensing
This guide helps researchers diagnose and correct for signal inaccuracies caused by common environmental variables.
Symptom: Signal Drift or Instability at Different Temperatures
| Potential Cause | Underlying Mechanism | Corrective Action |
|---|---|---|
| Temperature-Sensitive Assay Kinetics | Binding thermodynamics (e.g., aptamer folding, antibody-antigen affinity) and electron transfer rates are inherently temperature-dependent [17]. | Implement temperature correction. Calibrate the sensor at multiple temperatures and apply a post-measurement correction algorithm based on a concurrent temperature reading [17]. |
| Polymer Swelling/Shrinking | Hydrogel-based or polymer-coated sensors can undergo volumetric changes, altering diffusion paths and effective bioreceptor density. | Use temperature-stable immobilization matrices. Select polymers with low thermal expansion coefficients or covalently crosslink the sensing layer to minimize swelling effects. |
| Reference Electrode Potential Shift | The standard potential of reference electrodes (e.g., Ag/AgCl) is sensitive to temperature fluctuations. | Use a robust, thermostable reference electrode or integrate an internal reference redox probe to compensate for potential shifts. |
Symptom: Calibration Curve Shift with pH Variation
| Potential Cause | Underlying Mechanism | Corrective Action |
|---|---|---|
| Altered Bioreceptor Charge/Conformation | The charge state of proteins, enzymes, and aptamers is pH-dependent, which can impact their binding affinity and stability [17]. | Immobilize bioreceptors within a buffered microenvironment. Use hydrogels or layered structures with high buffering capacity to maintain a stable local pH [18]. |
| Proton Interference in Signal Transduction | H+ ions can compete with or influence electrochemical reactions, or change the surface charge of nanomaterial-based transducers. | Employ a ratiometric sensing design. Use a pH-insensitive reference signal alongside the pH-sensitive active signal to internally correct for pH variations [18]. |
| Suboptimal Operating pH | The sensor is used outside the optimal pH window for the immobilized biorecognition element. | Characterize the full pH profile of the fabricated biosensor and define its safe operating range during validation. |
Symptom: Reduced Sensitivity in High Ionic Strength Solutions
| Potential Cause | Underlying Mechanism | Corrective Action |
|---|---|---|
| Debye Screening | High ion concentrations compress the electrical double layer (Debye length), screening the charge of the target analyte and reducing the signal in field-effect or electrochemical sensors [19]. | Dilute samples to a standardized ionic strength or use sensors with nanostructured surfaces that can preconcentrate analytes to overcome screening effects. |
| Non-Specific Binding | Ionic strength can modulate electrostatic interactions, sometimes increasing the adhesion of interferents to the sensor surface. | Optimize the surface passivation layer (e.g., with PEG, BSA) and include control sensors to measure and subtract non-specific binding signals. |
| Altered Bioreceptor Activity | High salt concentrations can disrupt hydrogen bonding and cause conformational changes in some biological recognition elements. | Screen for and select salt-tolerant bioreceptors (e.g., certain aptamers or engineered antibodies) during the probe development phase. |
Frequently Asked Questions (FAQs)
Q1: My biosensor works perfectly in buffer, but performance degrades in biological fluids like serum or sweat. What are the primary environmental factors to investigate first?
A: The most critical factors are ionic strength/composition, pH, and temperature [19] [17]. Biological fluids have complex and variable matrices. Start by spiking your target analyte into a simplified buffer that matches the baseline ionic strength and pH of your target fluid (e.g., ~150 mM ionic strength, pH 7.4 for plasma). Then, systematically vary each parameter to isolate its effect. This will help you identify the main source of interference and develop an appropriate correction strategy.
Q2: Are certain types of biosensors more susceptible to environmental drift than others?
A: Yes, the transduction mechanism influences susceptibility. Electrochemical biosensors, particularly field-effect transistors (FETs), are highly sensitive to ionic strength due to Debye screening effects [19]. In contrast, optical biosensors like those based on surface plasmon resonance (PCF-SPR) can be less affected by ionic strength but may be sensitive to temperature-induced refractive index changes [20] [21]. Understanding your sensor's principle is key to anticipating drift sources.
Q3: How can Machine Learning (ML) help mitigate the impact of environmental stressors?
A: ML models can learn the complex, non-linear relationships between environmental parameters (inputs) and sensor output (response). Once trained, they can predict and correct for drift in real-time [15] [20]. For example, an ML model can use inputs from a miniaturized temperature and pH sensor to provide a corrected, more accurate concentration reading, significantly enhancing reliability in fluctuating environments [22].
Q4: We observed that physiologically normal variations in cations (Na+, K+, Ca2+, Mg2+) and pH have a minimal impact on our sensor's accuracy. Is this expected?
A: For many sensors, especially those tested in a controlled physiological range, this is a positive and expected finding. Research on electrochemical aptamer-based (EAB) sensors has demonstrated that the relatively tight homeostatic control of these parameters in the body means their normal variation does not always lead to clinically significant errors [17]. However, this must be empirically verified for each specific biosensor design.
Quantitative Data on Environmental Effects
The following table summarizes experimental data on how physiological-scale environmental changes affect biosensor performance, providing a benchmark for your own results.
Table 1: Impact of Physiological-Scale Environmental Variations on Biosensor Accuracy (Based on EAB Sensor Data) [17]
| Environmental Stressor | Tested Range | Observed Impact on Mean Relative Error (MRE) | Clinical Significance |
|---|---|---|---|
| Cation Composition & Ionic Strength | Low (152 mM) to High (167 mM) | Minimal to no significant increase in MRE. | Not a major impediment for clinical application under normal physiological conditions. |
| pH | 7.35 to 7.45 | Minimal to no significant increase in MRE. | Not a major impediment for clinical application under normal physiological conditions. |
| Temperature | 33°C to 41°C | Induced substantial measurement errors. | Critical. Requires monitoring and correction for accurate readings. |
Experimental Protocol: Systematically Characterizing Environmental Effects
Objective: To quantitatively determine the individual and combined effects of temperature, pH, and ionic strength on the calibration curve and signal output of a fabricated biosensor.
1. Reagent and Sensor Preparation:
- Prepare a stock solution of your target analyte at a high concentration.
- Prepare a series of buffers:
- For pH testing: A set of buffers with a fixed ionic strength but varying pH (e.g., from 6.5 to 8.0 in 0.5 increments).
- For ionic strength testing: A set of buffers with a fixed pH but varying salt concentration (e.g., NaCl from 50 mM to 200 mM).
- Fabricate/calibrate multiple biosensors from the same batch to ensure consistency.
2. Data Acquisition:
- Temperature Titration: Place the sensor in a thermostated cell with standard buffer (e.g., pH 7.4, 150 mM ionic strength). Measure the sensor's response to a fixed analyte concentration across a temperature range (e.g., 25°C to 45°C). Then, perform full calibration curves (from low to high analyte concentration) at key temperatures (e.g., 33°C, 37°C, 41°C) [17].
- pH Titration: At a constant temperature (e.g., 37°C) and standard ionic strength, measure the sensor's response to a fixed analyte concentration across the pH range. Perform full calibration curves at the lower, middle, and upper pH limits of your intended application.
- Ionic Strength Titration: At constant temperature and pH, measure the sensor's response to a fixed analyte concentration while increasing the ionic strength. Perform full calibration curves at low, medium, and high ionic strength.
3. Data Analysis:
- Plot the sensor's response (e.g., current, wavelength shift) against analyte concentration for each condition.
- Extract key performance metrics (sensitivity, limit of detection, dynamic range) for each calibration curve.
- Use the data to build a model (e.g., a simple linear correction or an ML model) that can predict the true analyte concentration based on the raw signal and the measured environmental parameters [15].
The workflow for this systematic characterization is outlined below.
Research Reagent Solutions
This table lists key materials used in advanced biosensor research to mitigate environmental drift, as cited in the literature.
Table 2: Essential Research Reagents for Stable Biosensor Fabrication
| Reagent / Material | Function / Application | Key Property / Rationale |
|---|---|---|
| Organic-inorganic hybrid lipids (Cerasomes) | Matrix for fluorescent dye encapsulation in optical pH sensors [18]. | Enhances photostability and biocompatibility while providing a stable silica shell to protect against environmental perturbations. |
| 2D Nanomaterials (e.g., Graphene, MXenes) | Transducer material for electrochemical and FET biosensors [15] [23]. | High surface-to-volume ratio and excellent electrical conductivity, which can be engineered to improve sensitivity and selectivity. |
| HEPES Buffer | Buffer system for ex vivo sensor calibration and testing [17]. | Effective buffering capacity in the physiological pH range (7.2-7.6), helping to maintain a stable pH during experiments. |
| Bovine Serum Albumin (BSA) | Surface passivation agent [17]. | Used to block non-specific binding sites on the sensor surface, reducing signal noise and drift caused by interferents in complex samples. |
| Specific Aptamers | Biorecognition element [19] [17]. | Oligonucleotides that can be selected for stability and function under specific environmental conditions (e.g., specific pH or ion tolerance). |
Visual Guide: The Environmental Stressor Optimization Workflow
A holistic approach is required to design biosensors resilient to environmental stressors. The following diagram integrates material selection, fabrication, characterization, and data-driven correction into a single workflow.
Advanced Fabrication and Material Engineering for Drift-Resistant Biosensors
Within the framework of optimizing biosensor fabrication to minimize signal drift, interface engineering emerges as a critical frontier. A primary source of instability in biosensors, especially those operating in complex biological fluids like blood serum or cell lysate, is biofouling—the non-specific adsorption of proteins, lipids, and other biomolecules onto the sensor surface [24] [5]. This fouling layer can severely compromise biosensor function by causing uncontrolled signal drift, obscuring the specific signal from the target analyte, and reducing the sensor's lifespan and reproducibility [5] [25]. To address this, researchers have turned to anti-fouling polymer brushes. These are ultrathin, densely packed coatings of polymer chains tethered by one end to the sensor surface, creating a physical and energetic barrier that repels non-specific interactions [25] [26].
Two of the most advanced classes of these materials are poly(oligo(ethylene glycol) methyl ether methacrylate) (POEGMA) brushes and zwitterionic polymer brushes, such as those based on poly(carboxybetaine acrylamide) (pCBAA) [24] [25] [26]. POEGMA brushes exert their antifouling effect through steric repulsion and the formation of a protective hydration layer, while zwitterionic brushes achieve ultra-low fouling via their strong hydration capacity and near-neutral net charge [27] [26]. Integrating these brushes into the biosensor fabrication workflow is not trivial, and researchers often face challenges related to synthesis, stability, and performance. This technical support guide is designed to address these specific issues, providing troubleshooting and best practices to enhance the stability of your biosensing platform.
Troubleshooting Guide: Common Issues and Solutions
The following table outlines frequent problems encountered during the development and application of anti-fouling polymer brush coatings, along with their potential causes and evidence-based solutions.
Table 1: Troubleshooting Guide for Anti-fouling Polymer Brush Experiments
| Problem | Potential Causes | Recommended Solutions & References |
|---|---|---|
| Poor Antifouling Performance | • Insufficient polymer brush chain density or thickness.• Incomplete surface coverage during initiator attachment.• Incorrect brush chemistry for the specific biofluid. | • For POEGMA, ensure a sufficient degree of polymerization (e.g., 30-mers showed ~82% protein repellency vs. shorter brushes) [24].• For zwitterionic brushes, use surface-initiated ATRP to achieve high-density "brush" architecture [25] [26].• Consider switching to or incorporating zwitterionic monomers (e.g., carboxybetaine) for superior performance in undiluted blood plasma [25] [26]. |
| Brush Detachment or Instability | • Weak anchor linkage between the brush and substrate.• Osmotic stress during hydration/dehydration cycles, leading to chain rupture. | • Optimize the initiator immobilization protocol (e.g., use of silane-based initiators for oxides or thiols for gold) [25].• For long-term stability, store brushes in a dry state. Studies show pCBAA brushes retain properties for over 43 days when stored dry at -20°C or 6°C [26]. |
| Low Loading of Biorecognition Elements | • Lack of functional groups on the brush surface.• Steric hindrance from densely packed brushes. | • Use carboxybetaine-based brushes (pCBAA), which offer carboxyl groups for straightforward covalent functionalization with antibodies or other probes via EDC/NHS chemistry [25] [26].• Ensure the brush thickness and density allow for adequate probe penetration and mobility. |
| Electrical Signal Drift in Electronic Biosensors | • Biofouling on the sensing interface.• Ion diffusion into the semiconductor channel.• Unstable reference electrode. | • Graft POEGMA or zwitterionic brushes to create a non-fouling interface, mitigating one major source of drift [5].• Employ a stable electrical testing configuration (e.g., infrequent DC sweeps over static measurements) and use a Pd pseudo-reference electrode to minimize drift contributions [5].• Combine brush coatings with appropriate device passivation [5]. |
| Poor Reproducibility Between Sensor Batches | • Inconsistent polymer brush grafting.• Variable density of immobilized biorecognition elements. | • Strictly control SI-ATRP conditions: monomer concentration, catalyst purity, temperature, and reaction time [24] [28].• Use optimized nanomaterial surfaces like gold nanoislands (AuNis) which provide a consistent, high-surface-area platform for functionalization, improving reproducibility (R² ≥ 0.950) [11]. |
Frequently Asked Questions (FAQs)
Q1: What is the fundamental difference between POEGMA and zwitterionic (e.g., pCBAA) antifouling brushes? Both are highly effective, but their mechanisms differ. POEGMA brushes primarily rely on the hydration layer formed by their ethylene glycol side chains and steric repulsion to prevent fouling [24] [28]. Zwitterionic brushes (pCBAA) possess both positive and negative charges in a single monomer unit, creating an even stronger hydration layer via electrostatic interactions, which often translates to superior antifouling performance in the most challenging media like undiluted blood plasma [25] [26].
Q2: How can I functionalize my antifouling brush with antibodies without compromising its fouling resistance? Zwitterionic brushes like pCBAA are ideal for this. Their carboxyl groups (-COOH) can be activated with standard carbodiimide chemistry (e.g., EDC/NHS) to form stable amide bonds with the primary amines in antibodies. This covalent attachment localizes the biorecognition element within the brush layer while the surrounding brush matrix continues to repel non-specific adsorption [25] [26]. The key is to control the density of immobilized antibodies to avoid creating defects in the brush layer.
Q3: I am working with a conductive polymer-based biointerface (e.g., PEDOT). How can I integrate an antifouling brush? A successful strategy involves a multi-step process. First, an ATRP initiator must be introduced onto the conductive polymer surface. This can be achieved by electro-polymerizing a copolymer of your standard monomer (e.g., EDOT) and a functional monomer bearing the ATRP initiator group (e.g., EDOTBr) [24] [28]. Once the initiator-modified surface is prepared, standard SI-ATRP can be performed to grow the POEGMA brushes directly from the conductive substrate [24].
Q4: What are the best practices for storing my polymer brush-coated sensor chips? For long-term stability, storing the chips in a dry state is recommended. A comprehensive study on pCBAA brushes showed that storage for 43 days in a dry state at -20°C or 6°C successfully preserved the brush's physicochemical properties, antifouling performance, and antibody loading capacity. Storage in aqueous solutions like PBS can lead to degradation over time [26].
Q5: Besides biorecognition, how else do polymer brushes enhance stability in FET biosensors? Polymer brushes, particularly POEGMA, can help overcome the Debye screening effect in high ionic strength solutions (e.g., 1x PBS) [5]. They establish a Donnan potential equilibrium that effectively extends the sensing distance (Debye length) beyond the electrical double layer, allowing for the detection of larger biomolecules like antibodies without diluting the test solution. This enables stable and sensitive detection in physiologically relevant conditions [5].
Detailed Experimental Protocols
Protocol 1: Grafting POEGMA Brushes from a Conducting Polymer Substrate via SI-ATRP
This protocol is adapted from the work on creating conductive, antifouling electrospun fibre mats [24] [28].
- Objective: To grow POEGMA brushes from a PEDOT-infused sulfonated SEBS (sSEBS-PEDOT) fibre mat to create a conductive and antifouling biointerface.
- Materials:
- Substrate: sSEBS-PEDOT fibre mat.
- Monomers: EDOT, synthesized EDOTBr initiator monomer [28].
- SI-ATRP reagents: Oligoethylene glycol methyl ether methacrylate (OEGMA), Copper(I) Bromide (CuBr), 2,2'-Bipyridine (Bpy).
- Solvents: Anhydrous acetonitrile, Milli-Q water.
- Step-by-Step Method:
- Surface Initiation: Electropolymerize a thin copolymer film of P(EDOT-co-EDOTBr) onto the sSEBS-PEDOT fibre mat. This step anchors the ATRP initiator sites (the bromine from EDOTBr) to the conductive surface.
- SI-ATRP Setup: Place the initiator-functionalized substrate in a dry Schlenk flask. Seal the flask and cycle between vacuum and inert gas (e.g., N₂ or Ar) several times to remove oxygen, which inhibits the ATRP reaction.
- Prepare Monomer/Catalyst Solution: In a separate vial, dissolve the OEGMA monomer, CuBr catalyst, and Bpy ligand in a degassed mixture of acetonitrile and water. This forms the active ATRP complex.
- Polymerization: Using a cannula, transfer the degassed monomer/catalyst solution to the Schlenk flask containing your substrate. Let the reaction proceed at room temperature for a defined period (e.g., 1-4 hours) to control brush length.
- Termination and Cleaning: Open the flask to air to terminate the polymerization. Thoroughly rinse the resulting sSEBS-PEDOT/P(EDOT-co-EDOTBr)-g-POEGMA substrate with copious amounts of ethanol and water to remove any physisorbed catalyst and monomer.
Table 2: Key Research Reagent Solutions
| Reagent | Function in the Experiment | Key Consideration |
|---|---|---|
| EDOTBr Monomer | Provides the ATRP initiator site (alkyl bromide) covalently linked to the electro-polymerized film. | Must be synthesized from (2,3-dihydrothieno[3,4-b][1,4]dioxin-2-yl)methanol and 2-bromopropionyl bromide [28]. |
| OEGMA Monomer | The building block of the POEGMA brush. Its side chain length defines the hydration and steric repulsion properties. | Use a consistent source and chain length (e.g., average Mn = 300 g/mol) for reproducible results [24]. |
| Copper(I) Bromide (CuBr) / 2,2'-Bipyridine (Bpy) | Catalyst system for ATRP. CuBr is the metal center, and Bpy is the ligand that solubilizes it and modulates its reactivity. | The system is highly oxygen-sensitive. All reagents and solvents must be meticulously degassed. |
Protocol 2: Functionalizing a Zwitterionic Brush-Coated LPG Optical Fibre for Biosensing
This protocol is based on the modification of optical fibre long-period gratings (LPG) with an antifouling terpolymer brush (ATB) [25].
- Objective: To synthesize a zwitterionic brush on an LPG sensor and conjugate it with antibodies for specific detection in complex media.
- Materials:
- Substrate: LPG optical fibre.
- Initiator: Bromo-silane for oxide surfaces (e.g., fibre cladding).
- Monomers: Carboxybetaine methacrylamide (CBMAA), Sulfobetaine methacrylamide (SBMAA), N-(2-hydroxypropyl)methacrylamide (HPMAA).
- Conjugation Reagents: EDC, NHS.
- Biorecognition Element: Target-specific antibody (e.g., anti-IgG).
- Step-by-Step Method:
- Surface Priming: Clean the LPG fibre and functionalize its sensitive region with the bromo-silane initiator to create a uniform monolayer.
- Terpolymer Brush Synthesis: Employ SI-ATRP using a degassed aqueous solution containing the three monomers (CBMAA, SBMAA, HPMAA) and the CuCl/CuCl₂/Me₄Cyclam catalyst system. The HPMAA comonomer enhances the stability and loading capacity of the brush.
- Antibody Immobilization: After polymerization and cleaning, activate the carboxyl groups on the CBMAA units of the brush using a fresh solution of EDC and NHS.
- Probe Conjugation: Incubate the activated brush-coated fibre with a solution of the capture antibody (e.g., anti-IgG). The antibody will covalently attach to the brush via its primary amine groups.
- Quenching and Storage: Block any remaining activated esters with a small amine-containing molecule (e.g., ethanolamine). Rinse and store the biofunctionalized sensor dry at 4°C or -20°C until use [26].
Workflow and Signaling Pathway Diagrams
The following diagrams visualize the core experimental workflow and the signaling pathway relevant to the described biosensing applications.
Diagram 1: General Workflow for Biosensor Interface Engineering. This flowchart outlines the key steps for creating a stable, biofunctionalized sensor surface, from substrate preparation to final validation.
Diagram 2: Antifouling Mechanism and Target Signaling Pathway. This diagram illustrates how the polymer brush selectively repels fouling agents while allowing the target analyte to bind to its specific probe. The example of detecting activated small Rho GTPases via the GST-PAK1-GBD domain in a T-cell lysate is shown [11].
FAQs: Core Concepts in Immobilization Chemistry
Q1: What is the primary advantage of covalent immobilization over physical methods like adsorption?
Covalent immobilization creates strong, stable bonds between the enzyme and the support matrix. This method offers superior stability, preventing enzyme leakage into the solution and enabling repeated reuse of the biocatalyst. Unlike physical adsorption, which relies on weak forces (e.g., hydrophobic, van der Waals, ionic bonds) and is prone to enzyme desorption under changing pH or ionic strength, covalent bonds ensure the enzyme remains firmly attached, which is critical for long-term operational stability in biosensors [29] [30].
Q2: How does enzyme orientation during immobilization impact biosensor performance?
Achieving optimal enzyme orientation is critical for developing a stable, highly active, and reproducible biosensor. Uncontrolled orientation can block the enzyme's active site or induce unfavorable conformational changes, reducing catalytic activity and selectivity. Proper orientation ensures the active site remains accessible to the substrate, maximizing the biosensor's signal response and sensitivity [29] [31].
Q3: Which crosslinkers are most common for covalent enzyme attachment, and what functional groups do they target?
The two most common covalent bond techniques are carbodiimide chemistry and Schiff base reactions [29]. These reactions target functional groups commonly found on the enzyme surface, primarily amino groups (–NH₂ from lysine) and carboxylic groups (–COOH from aspartic or glutamic acids) [30]. Glutaraldehyde is another widely used crosslinker that acts as a linker molecule, forming a bridge between the carrier and the enzyme [30].
Q4: Why is minimizing signal drift a key goal when optimizing immobilization for biosensors?
Signal drift, a gradual change in the biosensor's baseline signal over time, can obscure actual biomarker detection and convolute results, leading to inaccurate readings. In transistor-based biosensors (BioFETs), drift can be caused by ions from the solution slowly diffusing into the sensing region, altering capacitance and threshold voltage. Optimizing immobilization protocols enhances enzyme stability and minimizes these unpredictable temporal effects, which is vital for the reliability and accuracy of point-of-care diagnostic devices [5] [32].
Troubleshooting Guide: Common Immobilization Issues
| Problem | Potential Causes | Recommended Solutions |
|---|---|---|
| Low Immobilization Yield/Activity Loss | Denaturation during chemical modification; active site involvement in bond formation; unfavorable conformational changes [30]. | - Avoid functional groups critical for catalysis in the binding process.- Use site-specific immobilization strategies to control orientation [31].- Optimize crosslinker concentration and reaction time to minimize harsh conditions [15]. |
| Enzyme Leaching | Reliance on weak physical interactions (adsorption); insufficient covalent bond formation; support matrix degradation [31] [30]. | - Switch from adsorption to covalent bonding methods.- Ensure proper support surface activation (e.g., with glutaraldehyde or carbodiimide) [30].- Consider multipoint covalent attachment for enhanced stability [30]. |
| Mass Transfer Limitations | Dense or thick polymer matrix in entrapment/encapsulation; pore size too small for efficient substrate diffusion [31]. | - Use supports with larger, more open pore structures.- Optimize the polymer density during entrapment.- Consider membrane-based immobilization to improve diffusion [31]. |
| High Signal Drift & Poor Stability | Uncontrolled enzyme-support interactions; insufficient passivation of the sensor surface; diffusion of ionic species in solution [5] [32]. | - Implement a rigorous testing methodology with infrequent DC sweeps [5].- Use stable polymer brush interfaces (e.g., POEGMA) to mitigate drift and biofouling [5].- Apply a combined stabilization approach using protein engineering before immobilization [31]. |
Data Presentation: Crosslinker and Matrix Properties
Table 1: Comparison of Common Immobilization Crosslinkers
| Crosslinker | Target Functional Groups | Mechanism | Advantages | Considerations |
|---|---|---|---|---|
| Glutaraldehyde | -NH₂ (Amino groups) | Forms Schiff base bonds; creates a self-assembled monolayer (SAM) on the carrier [30]. | - Strong, stable attachment- Well-established protocol | - Risk of over-crosslinking and activity loss- Can lead to enzyme rigidity [30]. |
| Carbodiimide (e.g., EDC) | -COOH & -NH₂ | Activates carboxyl groups to form amide bonds; typically requires NHS for stability [29]. | - Direct amide bond formation- High bond stability | - Requires a two-step process (activation then coupling)- Potential for low activity retention if not optimized [15]. |
Table 2: Characteristics of Immobilization Matrices
| Matrix Type | Examples | Immobilization Methods | Key Benefits | Key Limitations |
|---|---|---|---|---|
| Natural Polymers | Chitosan, alginate, cellulose [30]. | Adsorption, covalent binding, entrapment, ionotropic gelation [31] [30]. | - Biocompatible, biodegradable- Cost-effective- Possess multiple functional groups [30]. | - Susceptible to microbial degradation- Variable mechanical strength [30]. |
| Inorganic Carriers | Silicas, mesoporous silica nanoparticles (MSNs), titania, porous glass [30]. | Adsorption, covalent binding [30]. | - High mechanical and thermal stability- Tunable pore size and high surface area [30]. | - Often more expensive- Can require complex surface functionalization [30]. |
| Synthetic Polymers | Polyacrylamide, Poly(oligo(ethylene glycol) methyl ether methacrylate) (POEGMA) [5] [30]. | Covalent binding, entrapment, polymer brush grafting [5] [31]. | - Consistent and tunable properties- POEGMA resists biofouling and can extend Debye length [5]. | - May not be biodegradable- Some monomers can be toxic [31]. |
Experimental Protocols
Protocol 1: Covalent Immobilization via Glutaraldehyde Crosslinking
Objective: To covalently immobilize an enzyme onto an aminated support matrix using glutaraldehyde as a crosslinker.
Materials:
- Aminated support (e.g., aminated silica, chitosan)
- Glutaraldehyde solution (e.g., 2.5% v/v in buffer)
- Enzyme solution in appropriate buffer (avoiding Tris or other buffers with primary amines)
- Washing buffer (e.g., phosphate buffer saline, PBS)
Methodology:
- Support Activation: Suspend the aminated support in a glutaraldehyde solution. Incubate for 1-2 hours at room temperature with gentle agitation.
- Washing: Thoroughly wash the activated support with buffer to remove any unbound glutaraldehyde.
- Enzyme Coupling: Add the enzyme solution to the activated support. Incubate for 2-4 hours at room temperature or overnight at 4°C with gentle agitation.
- Washing and Storage: Wash the immobilized enzyme preparation extensively with buffer to remove any unbound enzyme. The prepared biocatalyst can be stored in buffer at 4°C until use [30].
Protocol 2: Drift Testing for Biosensor Stability
Objective: To evaluate the long-term signal stability of a biosensor and account for drift effects.
Materials:
- Fabricated biosensor
- Stable reference electrode (e.g., Pd pseudo-reference or Ag/AgCl)
- Electrolyte solution at biologically relevant ionic strength (e.g., 1X PBS)
- Data acquisition system
Methodology:
- Stable Configuration: Use a stable electrical testing configuration, including appropriate passivation layers and a stable pseudo-reference electrode to bypass bulky components [5].
- Rigorous Testing: Employ a testing methodology that relies on infrequent DC sweeps rather than continuous static or AC measurements to distinguish true biomarker signals from temporal drift [5].
- Long-Term Data Collection: Conduct measurements over an extended period (e.g., 12 months) under controlled experimental conditions. Include triplicate measurements of analytes and controls (e.g., devices with no immobilized antibody) to isolate drift-related signal changes from specific binding events [5] [32].
- Data Analysis: Analyze both raw time-series data and pre-extracted features to monitor changes in baseline signal, threshold voltage, and response amplitude over time [32].
Visualization Diagrams
Covalent Immobilization Workflow
Drift Testing Logic
The Scientist's Toolkit: Research Reagent Solutions
Table 3: Essential Materials for Immobilization and Drift Mitigation
| Item | Function/Benefit | Application Context |
|---|---|---|
| Chitosan | A natural, low-cost polymer with multiple functional groups for covalent or ionic enzyme attachment [30]. | Used as a biocompatible and biodegradable support matrix for immobilization. |
| POEGMA (Poly(oligo(ethylene glycol) methyl ether methacrylate)) | A non-fouling polymer brush interface that helps overcome Debye length screening and mitigates signal drift and biofouling [5]. | Grafted above the sensor channel in BioFETs to enable sensing in undiluted physiological fluids. |
| Mesoporous Silica Nanoparticles (MSNs) | Inorganic carriers with high surface area and tunable pore size, ideal for adsorption and covalent immobilization [30]. | Provide a high enzyme loading capacity and are well-suited for biocatalysis in energy applications. |
| Carbodiimide (EDC) & N-Hydroxysuccinimide (NHS) | A common crosslinking system for forming stable amide bonds between carboxyl and amine groups [29]. | Used for covalent immobilization of enzymes on surfaces functionalized with appropriate groups. |
| Glutaraldehyde | A bifunctional crosslinker that reacts with amine groups to form stable Schiff base linkages [30]. | Used for activating aminated supports and for crosslinking enzymes, creating robust immobilized preparations. |
For researchers and scientists focused on optimizing biosensor fabrication, signal drift is a critical challenge that compromises data reliability and clinical applicability. This technical support guide addresses the specific experimental issues encountered when developing robust nanocomposite electrodes. By integrating the unique properties of graphene, Metal-Organic Frameworks (MOFs), and conductive polymers (CPs), it is possible to create sensing platforms with enhanced stability, sensitivity, and minimized drift. The following sections provide targeted troubleshooting and methodologies to help you navigate the complexities of material integration and fabrication.
Fundamental Concepts: Material Properties and Selection
Core Material Functions in Nanocomposite Electrodes
| Material | Key Properties | Primary Role in Nanocomposite | Impact on Sensor Drift |
|---|---|---|---|
| Graphene (Gr) | Extremely high electrical conductivity, high intrinsic charge carrier mobility, large specific surface area (~2630 m²/g), exceptional mechanical flexibility [33]. | Provides the primary conductive network, enhances electron transfer kinetics, increases active surface area for immobilization. | Reduces electrical noise and baseline drift; mechanical flexibility minimizes performance degradation under strain. |
| Graphene Oxide (GO) | Abundant oxygen-containing functional groups, hydrophilic, dispersible in aqueous solutions [34]. | Promotes biocompatibility, enables dense covalent immobilization of bioreceptors (enzymes, aptamers), improves substrate wetting. | Functional groups can lead to unwanted electrostatic interactions; improper reduction can cause chemical instability. |
| Reduced Graphene Oxide (rGO) | Intermediate conductivity between Gr and GO, residual oxygen groups allow for functionalization [34]. | Balances conductivity and bioreceptor loading capacity; often used as a compromise for practical electrode fabrication. | More stable than GO, but residual functional groups can still be a source of slow electrochemical drift. |
| Metal-Organic Frameworks (MOFs) | Ultrahigh surface area, tunable pore size, crystalline nature, abundant coordinatively unsaturated sites (CUSs) [35] [36]. | Acts as a molecular sieve for selective analyte access, provides high surface area for enzyme/bio-receptor loading, enhances selectivity. | Poor intrinsic electrical conductivity can lead to sluggish electron transfer; instability in aqueous/acidic media can cause structural drift. |
| Conductive Polymers (CPs) | Reversible doping/dedoping chemistry, biocompatibility, ability to form regular nanostructures (e.g., nanotubes, nanowires) [37]. | Facilitates charge transport, provides a 3D matrix for embedding nanomaterials, can be functionalized for specific biorecognition. | Swelling/contraction during redox cycling (in aqueous electrolytes) causes mechanical stress and receptor leaching, a major drift source. |
Properties of Complementary 2D Nanomaterials
| Material | Structure | Electronic Properties | Suitability for Biosensing |
|---|---|---|---|
| MXenes | Layered transition metal carbides/nitrides with surface terminations (–O, –OH, –F) [34]. | Metallic conductivity, tunable surface chemistry, excellent charge transfer [34]. | Excellent for enzymatic and wearable electrochemical sensors; though stability in aqueous media can be a challenge [34]. |
| Silicene | Buckled honeycomb lattice of silicon atoms [34]. | Small tunable bandgap, high carrier mobility [34]. | Early-stage research; promising for sensitive doped nanoribbons; limited by ambient oxidation [34]. |
| Biochar | Amorphous/graphitic porous carbon from biomass pyrolysis [34]. | Moderate and variable conductivity; rich in surface O/N groups [34]. | Low-cost biosensors for antioxidants, glucose, dopamine; suffers from structural heterogeneity and lower uniformity [34]. |
Troubleshooting Guide: Common Experimental Issues and Solutions
FAQ 1: Why does my MOF-incorporated composite electrode have poor electrical conductivity and slow electron transfer?
- Problem: The pristine MOF particles, while highly porous, are electrical insulators, creating barriers within the conductive matrix of your electrode.
- Solutions:
- Pre-form a conductive composite: Synthesize the MOF in the presence of conductive additives. For example, grow the MOF directly on pre-dispersed graphene oxide or carbon nanotubes (CNTs). This creates a connected conductive pathway throughout the MOF structure [35].
- Use MOF-derived carbons: Pyrolyze (carbonize) the MOF at high temperatures (800–1000 °C) in an inert atmosphere. This converts the organic ligands into a highly conductive, porous carbon structure that retains the high surface area and morphology of the original MOF [35]. For instance, ZIF-8 can be converted to nitrogen-doped porous carbon.
- Integrate conductive polymers: Electropolymerize a CP like polyaniline or PEDOT within the MOF pores, creating a hybrid material that combines the porosity of the MOF with the conductivity of the polymer [37].
FAQ 2: How can I prevent the agglomeration of graphene and MOF particles within the polymer matrix during electrode fabrication?
- Problem: Nanomaterials tend to aggregate due to van der Waals forces, leading to inhomogeneous composites, inconsistent active sites, and unreliable sensor performance.
- Solutions:
- Surface functionalization: Chemically modify the surface of the nanomaterials to improve compatibility with the dispersion solvent and polymer matrix. For graphene oxide, use its native carboxyl groups for coupling reactions. For MOFs, use surfactants or ligands that improve interfacial compatibility with the polymer [36].
- Utilize GO as a dispersant: Leverage the hydrophilic nature of GO to achieve stable aqueous dispersions. You can then mix MOF precursors into this dispersion to synthesize MOF/GO hybrids in-situ, preventing agglomeration of both components [36].
- Hierarchical integration: Employ a multi-dimensional strategy. For example, use 1D CNTs as a scaffold to separate 2D graphene sheets, and then decorate this hybrid with 0D MOF particles. This creates a more open structure that mitigates stacking and agglomeration [36].
FAQ 3: My biosensor signal decreases significantly over multiple measurement cycles. What causes this signal drift and instability?
- Problem: Signal drift can stem from bioreceptor leaching, material degradation, or fouling in complex biological samples.
- Solutions:
- Enhance Bioreceptor Immobilization: Use the high surface area and functional groups of MOFs and GO for robust immobilization. Covalent bonding or encapsulation within MOF pores can prevent enzyme or aptamer leaching [35] [38].
- Improve Interfacial Stability: Ensure strong interfacial bonding between different nanocomponents. For MOF-polymer interfaces, surface modification with coupling agents can create strong chemical bonds, preventing delamination and micro-degradation during electrochemical cycling [36].
- Apply a Protective Layer: A thin, permeable Nafion membrane or a similar permselective layer can be cast on the electrode surface to reduce biofouling by proteins and other macromolecules present in real samples like serum [37].
FAQ 4: How can I achieve high selectivity for my target analyte in a complex matrix like blood or serum?
- Problem: Non-specific adsorption of interfering molecules (e.g., ascorbic acid, uric acid) onto the high-surface-area nanocomposite can generate false signals.
- Solutions:
- Leverage MOF as a Molecular Sieve: Exploit the tunable pore size of MOFs. Precisely engineer the MOF's pore aperture to be large enough to admit your target analyte but small enough to exclude larger interferents [35] [39].
- Integrate Molecularly Imprinted Polymers (MIPs): Combine the selectivity of MIPs with the conductivity of your nanocomposite. Electropolymerize the CP around your target molecule (template) on the electrode. After removing the template, cavities are left that are complementary in size, shape, and functionality to the target, providing excellent selectivity [40] [37].
- Use MOFs with Open Metal Sites (OMS): MOFs with OMS exhibit strong and selective interactions with specific biomolecules. These sites can be functionalized to enhance selectivity for particular targets like glucose, pathogens, or cancer biomarkers in optical and electrochemical biosensors [38].
Experimental Protocols: Detailed Methodologies
Protocol: Synthesis of a ZIF-8-derived Nitrogen-Doped Porous Carbon (NPC)
This protocol is for creating a highly conductive and porous carbon material from a MOF precursor, ideal for enhancing electrode conductivity and stability [35].
- Precursors: Prepare solutions of 2-methylimidazole (2-MeIM, the organic ligand) and zinc nitrate hexahydrate (Zn(NO₃)₂·6H₂O, the metal source) in methanol.
- Reaction: Rapidly mix the two solutions at room temperature and stir for a specified period (e.g., 5-24 hours). The formation of a white precipitate indicates the synthesis of ZIF-8 crystals.
- Centrifugation and Washing: Collect the white precipitate by centrifugation and wash several times with methanol to remove unreacted precursors.
- Drying: Dry the resulting ZIF-8 powder in an oven at 60-80 °C overnight.
- Carbonization: Place the dry ZIF-8 powder in a tubular furnace. Heat to 800–1000 °C under a continuous flow of inert gas (e.g., nitrogen or argon) and maintain for 1-3 hours.
- Acid Washing: To remove residual zinc metal, treat the carbonized black powder with an aqueous HCl solution (e.g., 1 M) under stirring for several hours.
- Final Washing and Drying: Wash the resulting material thoroughly with deionized water until neutral pH is achieved, and dry again to obtain the final NPC.
Protocol: Fabrication of an Electrochemical Sensor using a Graphene/MIP Nanocomposite
This protocol details the creation of a highly selective sensor, such as for caffeine detection, by combining graphene's conductivity with the selectivity of MIPs [40] [37].
- Electrode Preparation: Polish a glassy carbon electrode (GCE) with alumina slurry to a mirror finish and clean it ultrasonically in water and ethanol.
- Nanocomposite Dispersion: Disperse functionalized graphene (e.g., rGO) in a suitable solvent (e.g., DMF) to create a homogeneous ink.
- Electrode Modification: Drop-cast a measured volume of the graphene ink onto the clean GCE surface and allow it to dry, forming a conductive base layer.
- Electropolymerization of MIP: Immerse the modified electrode in an electrochemical cell containing the monomer (e.g., o-phenylenediamine), the target molecule (template, e.g., caffeine), and a supporting electrolyte.
- Polymerization Cycles: Run multiple cyclic voltammetry (CV) scans (e.g., 10-20 cycles) within a defined potential window to electropolymerize the monomer and entrap the template molecules.
- Template Removal: Soak the polymer-coated electrode in a suitable solvent (e.g., methanol/acetic acid mixture) to gently extract the template molecules, leaving behind specific recognition cavities.
- Sensor Validation: Characterize the sensor using CV and Electrochemical Impedance Spectroscopy (EIS) in a redox probe like [Fe(CN)₆]³⁻/⁴⁻ to confirm the successful creation and removal of the template.
Workflow: Integrated Fabrication of a Robust Nanocomposite Electrode
The following diagram visualizes the logical workflow for fabricating a drift-resistant nanocomposite electrode, integrating the key troubleshooting solutions.
Integrated Workflow for Drift-Resistant Electrode Fabrication
The Scientist's Toolkit: Essential Research Reagent Solutions
| Research Reagent | Function in Nanocomposite Electrode | Key Consideration for Minimizing Drift |
|---|---|---|
| Zeolitic Imidazolate Framework-8 (ZIF-8) | A MOF template for deriving N-doped porous carbon; provides high surface area and molecular sieving properties [35]. | Pyrolysis converts insulating ZIF-8 to conductive carbon, eliminating a major source of electrical instability. |
| Graphene Oxide (GO) Dispersion | A 2D nanomaterial platform for in-situ MOF growth and bioreceptor immobilization via its functional groups [34]. | Ensures uniform dispersion of components, preventing agglomeration-induced drift. Must be partially reduced (to rGO) for optimal conductivity. |
| Poly(3,4-ethylenedioxythiophene) Polystyrene sulfonate (PEDOT:PSS) | A conductive polymer hydrogel that provides a soft, biocompatible, and conductive 3D matrix for embedding nanomaterials [37]. | Its aqueous stability and mixed ionic-electronic conductivity can lead to more stable cycling compared to other CPs like polyaniline. |
| p-Aminothiophenol (pATP) functionalized Gold Nanoparticles (AuNPs) | Used for surface functionalization and as a platform for electropolymerizing MIPs; enhances electron transfer and provides anchoring sites [40]. | The strong Au-S bond creates a stable, self-assembled monolayer, providing a robust and reproducible interface for subsequent modifications. |
| Nafion Perfluorinated Resin Solution | A cation-exchange polymer used as a permselective membrane coating to block interferents and reduce biofouling [37]. | Critical for stabilizing the electrode performance in complex biological fluids (e.g., serum, urine), directly countering drift from fouling. |
| 2-Methylimidazole (2-MeIM) | A common nitrogen-containing organic ligand for synthesizing ZIF-type MOFs [35]. | The type of ligand determines the MOF's structure and stability. 2-MeIM produces robust ZIF structures suitable for subsequent carbonization. |
FAQs and Troubleshooting Guides
CNT-based BioFETs (Carbon Nanotube Field-Effect Transistors)
Q1: Our CNT-FET biosensors exhibit significant signal drift over time, making stable measurements difficult. What are the primary causes and solutions?
A: Signal drift in CNT-FETs often originates from unstable receptor biomolecule attachment and non-specific binding. Key optimization strategies include:
- Controlled Receptor Orientation: Utilize site-specific attachment strategies, such as genetic code reprogramming to incorporate non-canonical amino acids (e.g., 4-azido-L-phenylalanine or azF), enabling defined covalent linkage to the CNT surface. This prevents random orientations that lead to heterogeneous and unstable signals [41].
- Electrochemical Pre-Conditioning: Condition the carbon electrode surface before biomolecule immobilization. Apply a triangular waveform (e.g., -0.4 V to +1.4 V at 400 V/sec) to etch and oxidize the carbon surface, which increases hydrophilicity and improves the stability of subsequent layers. This has been shown to increase electrodeposition success rates to 100% [42].
- Optimized Electrodeposition: For hydrogel-based entrapment of enzymes or receptors, use a linear potential sweep (e.g., from 0 V to -3.25 V at 25 mV/s) instead of a direct potential step. This gradual potential change minimizes vigorous hydrogen gas evolution that can create membrane defects, significantly improving the quality and reproducibility of the deposited layer [42].
Q2: How can I improve the reproducibility and sensitivity of my CNT-FET biosensors?
A: Enhancing reproducibility requires control over both the CNT interface and the biorecognition layer.
- Debye Length Considerations: Model and design your receptor attachment so that the analyte binding event occurs within the Debye length of the solution (typically a few nanometers). Analyte binding beyond this distance will not effectively gate the CNT channel [41].
- Functionalization with Linkers: Use PBASE (1-pyrenebutyric acid N-hydroxysuccinimide ester) linker chemistry. The pyrene group adsorbs strongly onto the CNT surface via π-π stacking, while the NHS ester end allows for stable covalent immobilization of biomolecules containing primary amines, creating a more uniform and robust recognition layer [43].
- Nanomaterial Decoration: Decorating CNTs with metal nanoparticles like gold (Au-NPs) can enhance electron transport and provide localized surface plasmon resonance effects, amplifying the signal and improving sensitivity [43].
Solid-Phase Electrochemiluminescence (ECL) Systems
Q3: The ECL signal in my solid-phase sensor is unstable or decreases rapidly during measurement. How can I enhance signal stability?
A: Instability often arises from the leaching of the ECL emitter (e.g., Ru(bpy)₃²⁺) from the electrode surface.
- Bipolar Nanochannel Array (bp-SNA) Confinement: Immobilize the ECL emitter within a bipolar silica nanochannel array film. The inner negatively charged layer (n-SNA) electrostatically attracts and concentrates the positively charged Ru(bpy)₃²⁺, while the outer positively charged layer (p-SNA) creates an electrostatic barrier that prevents the emitter from leaching out, forming a stable "electrostatic cage" [44].
- Covalent Enzyme Immobilization: For glucose oxidase (GOx) or similar enzymes, use covalent immobilization on the functionalized electrode surface instead of physical adsorption. This prevents enzyme leaching and deactivation, ensuring a stable generation of the enzymatic product (H₂O₂) that is crucial for the ECL reaction. This approach significantly enhances operational durability and allows for sensor reuse [44].
Q4: How can I minimize non-specific binding and interference from complex samples in my ECL biosensor?
A: Employ size-exclusion and charge-selective barriers.
- Size-Exclusion Nanochannels: The ~2-3 nm nanochannels in a silica nanochannel array (SNA) film can physically block large molecules like proteins, organelles, and other matrix components from reaching the electrode surface, thereby reducing fouling and non-specific signals [44].
- Charge-Selective Layers: The charged properties of the SNA layers can be tailored to repel interferents based on their charge, adding another layer of selectivity to the sensing interface [44].
Table 1: Troubleshooting Common Biosensor Fabrication Issues
| Problem | Potential Cause | Recommended Solution |
|---|---|---|
| High signal drift (CNT-FET) | Unstable receptor attachment; random orientation [41] | Use site-specific covalent immobilization (e.g., via azF) [41]. |
| Low sensitivity (CNT-FET) | Analyte binding outside Debye length [41] | Model attachment site to ensure binding occurs within 1-3 nm of CNT surface [41]. |
| Poor fabrication reproducibility (CNT-FET) | Violent hydrogen evolution during electrodeposition [42] | Use linear potential sweep (0 V to -3.25 V at 25 mV/s) instead of a potential step [42]. |
| Unstable ECL signal | Leaching of ECL emitter from electrode [44] | Confine emitter using a bipolar SNA (bp-SNA) film [44]. |
| Enzyme sensor degradation | Enzyme leaching or deactivation [44] | Covalently immobilize enzymes on a functionalized surface [44]. |
Experimental Protocols for Optimized Fabrication
Protocol: Optimized Hydrogel Electrodeposition for Carbon-Fiber/CNT Microelectrodes
This protocol details an improved method for creating stable, defect-free chitosan hydrogels for enzyme entrapment, crucial for minimizing drift in microbiosensors [42].
Key Materials:
- Chitosan from shrimp shells (≥95% deacetylated)
- Glucose Oxidase (GOx) from Aspergillus niger
- Acetic acid (glacial, ≥99.8%)
- Carbon-fiber microelectrodes or CNT-coated electrodes
Methodology:
- Preparation of Electrodeposition Solution: Dissolve chitosan in a 1% v/v acetic acid solution to a final concentration of 0.5-1.0% w/v. Add GOx to this solution to a final concentration of 5-10 mg/mL.
- Electrochemical Pre-Conditioning: Pre-condition the carbon-based electrode by applying a triangular waveform from -0.4 V to +1.4 V (vs. Ag/AgCl) at a scan rate of 400 V/s for 5 minutes at 60 Hz, followed by 5 minutes at 10 Hz. This oxidizes the surface and enhances subsequent hydrogel adhesion [42].
- Linear-Sweep Electrodeposition: Immerse the pre-conditioned electrode in the chitosan/GOx solution. Apply a linear potential sweep from 0 V to -3.25 V at a scan rate of 25 mV/s. This controlled sweep minimizes hydrogen bubble formation, leading to a uniform, defect-free hydrogel membrane [42].
- Rinsing and Storage: Gently rinse the modified electrode with a neutral pH buffer (e.g., 0.1 M PBS, pH 7.4) to remove unbound chitosan and enzyme. Store in PBS at 4°C when not in use.
Protocol: Fabrication of a Solid-Phase ECL Glucose Sensor with bp-SNA
This protocol describes the construction of a stable ECL sensor with an immobilized emitter and covalently bound enzyme for low-drift glucose detection [44].
Key Materials:
- Indium Tin Oxide (ITO) coated glass slides
- Tetraethyl orthosilicate (TEOS, 98%)
- (3-Aminopropyl)triethoxysilane (APTES)
- Tris(2,2'-bipyridyl)ruthenium(II) chloride (Ru(bpy)₃²⁺)
- Glucose Oxidase (GOx)
- Cetyltrimethylammonium bromide (CTAB)
Methodology:
- Fabrication of Bipolar SNA (bp-SNA) on ITO:
- Inner n-SNA Layer: Use an electrochemical-assisted self-assembly (EASA) method. Prepare a precursor solution containing TEOS and CTAB template. Apply a constant current (e.g., -0.04 mA/mm² for 10-30 s) to the ITO electrode in this solution to catalyze the formation of a vertically aligned, negatively charged n-SNA.
- Outer p-SNA Layer: Functionalize the surface of the n-SNA/ITO with APTES to create a positively charged silica layer, resulting in the bp-SNA structure.
- Immobilization of ECL Emitter: Immerse the bp-SNA/ITO electrode in a solution of Ru(bpy)₃²⁺. The cationic emitter is electrostatically attracted into the inner n-SNA layer and confined by the outer p-SNA barrier.
- Covalent Enzyme Immobilization:
- Surface Aldehyde Activation: Treat the amino-functionalized outer p-SNA layer with glutaraldehyde to introduce aldehyde groups.
- Enzyme Coupling: Incubate the activated electrode with a solution of GOx. The aldehyde groups form covalent Schiff base linkages with primary amine groups on the enzyme, permanently immobilizing it.
- ECL Measurement: Perform ECL measurements in a solution containing tripropylamine (TPA) as a co-reactant. The presence of glucose leads to the enzymatic generation of H₂O₂, which quenches the ECL signal of Ru(bpy)₃²⁺, allowing for quantitative detection.
Signaling Pathways and Workflow Diagrams
CNT-FET Hydrogel Fabrication Workflow
Solid-Phase ECL Sensor Assembly Process
The Scientist's Toolkit: Research Reagent Solutions
Table 2: Essential Materials for Optimized Biosensor Fabrication
| Reagent/Material | Function in Fabrication | Key Benefit for Minimizing Drift |
|---|---|---|
| 4-azido-L-phenylalanine (azF) | Non-canonical amino acid for site-specific protein attachment to CNTs [41]. | Enables defined receptor orientation, reducing heterogeneous signals and drift [41]. |
| PBASE Linker | Connects biomolecules to CNT surface via pyrene adsorption and NHS ester chemistry [43]. | Creates a stable, covalent biorecognition layer less prone to detachment [43]. |
| Chitosan | Biopolymer for forming hydrogels via electrodeposition to entrap enzymes [42]. | Provides a biocompatible matrix that stabilizes encapsulated enzymes [42]. |
| Bipolar SNA Film | Silica nanochannel film with opposing charges to confine ECL emitters [44]. | Prevents leaching of the ECL reporter, ensuring long-term signal stability [44]. |
| Glutaraldehyde | Crosslinker for covalent immobilization of enzymes on functionalized surfaces [44]. | Prevents enzyme leaching, a major source of signal decay in enzymatic biosensors [44]. |
Data-Driven Drift Mitigation: Machine Learning and In-Situ Correction Protocols
Frequently Asked Questions (FAQs)
1. What is the main advantage of using machine learning over traditional methods for optimizing biosensor fabrication?
Traditional optimization uses a one-variable-at-a-time approach, which is time-consuming, costly, and often misses interactions between parameters [45]. Machine learning models can analyze complex, multidimensional data to predict optimal fabrication parameters, significantly reducing the required experimental effort. They can model non-linear relationships and parameter interactions that are difficult to capture with conventional methods, leading to a more efficient and systematic optimization process [15] [45].
2. My biosensor signal is unstable and shows high drift. How can regression algorithms help address this?
Signal instability and calibration drift are major challenges in biosensor development [15]. Machine learning, particularly regression algorithms, can be used to build robust calibration models that compensate for these effects. For instance, Support Vector Regression (SVR) has been successfully implemented to correct for temperature drift in biosensor outputs, reducing the root mean square error (RMSE) compared to traditional polynomial calibration [15]. Furthermore, algorithms like Gaussian Process Regression (GPR) provide probabilistic uncertainty estimates, allowing researchers to understand and account for the confidence in predictions, which is crucial for managing signal instability [15].
3. Which machine learning regression algorithms are most effective for biosensor optimization?
A comprehensive evaluation of 26 regression algorithms identified several top performers for predicting biosensor responses [15]. The best-performing models often include:
- Stacked Ensemble Models: Combining the predictions of multiple models (e.g., GPR, XGBoost, and ANN) often yields the highest accuracy and robustness [15].
- Gaussian Process Regression (GPR): Excellent for providing uncertainty estimates alongside predictions [15].
- Tree-Based Models: Such as XGBoost and Random Forests, which are robust against noise and can model complex, non-linear relationships [15].
- Artificial Neural Networks (ANNs): Particularly effective for capturing intricate, non-linear patterns in the data [15].
4. How do I prepare my experimental data for a machine learning model?
Systematic data collection is crucial. Instead of using historical "happenstance data," a Design of Experiments (DoE) approach is recommended [45] [3]. This involves:
- Identifying Key Factors: Determine all fabrication parameters that may influence the sensor's response (e.g., enzyme amount, crosslinker concentration, pH, nanomaterial thickness) [15] [46].
- Defining Experimental Ranges: Set the minimum and maximum values for each parameter.
- Structuring Experiments: Use a structured design (e.g., full factorial or central composite design) to efficiently explore the entire experimental domain with a minimal number of experiments. This ensures the data is causal and suitable for building a reliable model [45] [3].
5. Can I use machine learning if I don't have a large dataset?
While more data is generally beneficial, structured approaches like DoE are designed to extract maximum information from a minimal set of experiments [45] [3]. For smaller datasets, simpler models like Linear Regression or Ridge Regression can be a good starting point. Alternatively, Gaussian Process Regression can be effective with limited data and provides valuable uncertainty quantification [15].
Troubleshooting Guides
Problem: Poor Model Accuracy and High Prediction Error
Symptoms: Your regression model performs poorly on unseen data, with high RMSE or low R² values during cross-validation.
| Checkpoint | Action & Recommendation |
|---|---|
| Data Quality & Quantity | Ensure your dataset is sufficient and generated via a structured DoE. Check for and remove outliers. |
| Feature Selection | Use model interpretation tools (e.g., SHAP, Permutation Importance) to identify and remove non-influential parameters, simplifying the model [15]. |
| Model Selection | Benchmark multiple algorithms. Start with robust models like Random Forest or XGBoost before moving to ANNs. Consider using a stacked ensemble for maximum performance [15]. |
| Hyperparameter Tuning | Systematically tune hyperparameters (e.g., learning rate, tree depth, number of layers) using grid or random search. |
Problem: Model is a "Black Box" and Lacks Interpretability
Symptoms: The model makes accurate predictions, but you cannot understand how the fabrication parameters are influencing the outcome, limiting its scientific value.
| Checkpoint | Action & Recommendation |
|---|---|
| Use Interpretable Models | Begin with inherently interpretable models like Decision Trees or Linear Regression to establish a baseline understanding. |
| Apply Explainable AI (XAI) Tools | For complex models (ANNs, ensembles), use techniques like SHAP (SHapley Additive exPlanations) and PDPs (Partial Dependence Plots). These provide global and local interpretations of how each parameter affects the biosensor's response [15]. |
| Analyze Interaction Effects | Use tools like SHAP interaction values to discover and quantify how pairs of parameters (e.g., enzyme amount and pH) interact to influence the sensor signal [15]. |
Problem: Biosensor Performance Drift Over Time
Symptoms: The fabricated biosensors exhibit signal decay or changing sensitivity after initial optimization and calibration.
| Checkpoint | Action & Recommendation |
|---|---|
| Incorporate Drift Compensation | Use ML models like Extreme Learning Machines (ELM) or Transfer Learning techniques specifically designed to compensate for sensor drift, adapting the calibration over time [47]. |
| Include Stability Metrics in Model | During data collection, include performance metrics over time (e.g., signal decay after multiple cycles) as a target variable for your regression model to predict and optimize against [48]. |
| Optimize for Robustness | Use the ML model to find a "sweet spot" in the fabrication parameter space where performance is less sensitive to small, unavoidable variations in manufacturing, enhancing reproducibility [15]. |
Experimental Protocols
Protocol 1: Systematic Data Acquisition Using Design of Experiments (DoE)
This protocol outlines a method for generating high-quality data for training machine learning models, using a two-factor design as an example [45] [3].
Key Research Reagent Solutions
| Item | Function in Experiment |
|---|---|
| Biolayer Components | Enzymes, antibodies, or aptamers that provide specificity. The immobilization amount is a key parameter [15] [46]. |
| Crosslinker (e.g., Glutaraldehyde) | Used to immobilize the biorecognition element onto the transducer surface. Its concentration significantly affects sensor performance [15]. |
| Conductive Inks / Nanomaterials | Materials like carbon nanoparticles, silver nanoparticles, or graphene oxide used to modify the working electrode and enhance electron transfer [48] [46]. |
| Buffer Solutions | To control the pH environment during measurement, a critical factor for bioreceptor activity and signal stability [15]. |
Methodology:
- Define Factors and Ranges: Select the fabrication parameters (factors) to optimize. For an enzymatic glucose biosensor, this could be enzyme amount (e.g., 0.5-2.0 mg/mL) and crosslinker concentration (e.g., 0.1-2.5% v/v) [15].
- Choose a DoE Matrix: A 2² full factorial design is a efficient starting point. It requires 4 experiments (2^k) and allows for the estimation of main effects and one interaction effect.
- Execute Experiments: Fabricate biosensors according to the experimental matrix below, randomizing the run order to minimize systematic bias.
- Measure Response: For each fabricated biosensor, measure the key performance metric, such as peak current (µA) in cyclic voltammetry.
Table: Example 2² Full Factorial Design Matrix
| Experiment No. | Enzyme (X₁) | Crosslinker (X₂) | Measured Response (Current, µA) |
|---|---|---|---|
| 1 | -1 (0.5 mg/mL) | -1 (0.1%) | ... |
| 2 | +1 (2.0 mg/mL) | -1 (0.1%) | ... |
| 3 | -1 (0.5 mg/mL) | +1 (2.5%) | ... |
| 4 | +1 (2.0 mg/mL) | +1 (2.5%) | ... |
Protocol 2: Building and Validating a Stacked Ensemble Regression Model
This protocol details the process of creating a high-performance predictive model for biosensor optimization [15].
Methodology:
- Data Preprocessing: Clean the data and split it into training and test sets. Standardize or normalize the feature values (fabrication parameters).
- Train Base Models: Train a diverse set of regression algorithms on the training data. Recommended base models include:
- Gaussian Process Regression (GPR)
- XGBoost
- Artificial Neural Network (ANN)
- Support Vector Regression (SVR)
- Generate Predictions: Use each trained base model to make predictions on the training data (via cross-validation) and on the hold-out test set.
- Train Meta-Model: Use the predictions from the base models as new input features to train a final "meta-model" (often a linear model) on the training predictions.
- Model Validation & Interpretation:
- Evaluate the final stacked model on the test set using metrics like R², RMSE, and MAE.
- Use SHAP analysis to interpret the model and understand the global importance of each fabrication parameter and their interaction effects [15].
Workflow and Relationship Diagrams
ML-Driven Biosensor Optimization Workflow
Performance Data and Algorithm Comparison
Table: Comparison of Regression Algorithm Performance for Biosensor Signal Prediction (Based on a 10-fold cross-validation study) [15]
| Algorithm Family | Example Algorithms | Key Strengths | Typical Use Case in Biosensor Optimization |
|---|---|---|---|
| Tree-Based | XGBoost, Random Forest | High accuracy, robust to noise, handles non-linear relationships. | General-purpose optimization of fabrication parameters. |
| Kernel-Based | Support Vector Regression (SVR) | Effective in high-dimensional spaces; good for drift compensation. | Calibration in the presence of environmental interference (e.g., temperature). |
| Gaussian Process | Gaussian Process Regression (GPR) | Provides uncertainty estimates for predictions. | Quantifying reliability of optimization and identifying experimental risks. |
| Neural Networks | Artificial Neural Networks (ANNs) | Captures extremely complex, non-linear relationships. | Modeling highly complex biosensor systems with many interacting parameters. |
| Stacked Ensemble | GPR + XGBoost + ANN | Often achieves the highest predictive accuracy and robustness. | Final-stage optimization where maximum performance is critical. |
FAQs: Core Concepts and Problem Definition
Q1: What is signal drift in biosensors and why is it a critical problem in my research? Signal drift is an undesirable, slow change in a biosensor's output signal over time, even when the target analyte concentration remains constant. It is often caused by factors such as sensor aging, biofouling (the accumulation of biological material on the sensor surface), or environmental fluctuations like temperature and humidity [2] [22]. In the context of optimizing biosensor fabrication, this is critical because drift can obscure the true relationship between your fabrication parameters (e.g., enzyme loading, crosslinker concentration) and the sensor's performance. It can lead to inaccurate conclusions during optimization and render a sensor unreliable for long-term monitoring, which is essential for applications in drug development and continuous health monitoring [2] [15].
Q2: How do Machine Learning (ML) techniques like ANN, SVR, and GPR help with real-time data correction? Traditional calibration methods often struggle with the nonlinear relationships between drift, environmental factors, and the sensor's signal. ML models excel here:
- ANN (Artificial Neural Networks): Can model complex, non-linear relationships between your input features (e.g., raw sensor signal, temperature, time) and the desired corrected output [15].
- SVR (Support Vector Regression): Effective for high-dimensional spaces and can find a function that deviates from the observed data by a value no greater than a specified margin, making it robust to noise and drift [15].
- GPR (Gaussian Process Regression): Provides not only a prediction for the corrected signal but also a measure of uncertainty (the variance) for each prediction. This is invaluable for assessing the reliability of your corrected data in real-time [15].
Q3: What are the limitations of classical signal processing methods like the Short-Time Fourier Transform (STFT) for biosensor data? Classical methods like STFT have an intrinsic limitation known as the time-bandwidth product theorem, which creates a fixed trade-off between time and frequency resolution. A narrow window gives good time resolution but poor frequency resolution, and vice-versa [49]. Biosensor signals are often non-stationary (their statistical properties change over time) and contain rapid, transient events. The rigid window size of STFT makes it suboptimal for analyzing such signals, leading to a loss of critical information that ML methods are better equipped to handle [49] [15].
Troubleshooting Guides
Issue 1: Poor Model Performance and Low Predictive Accuracy
Problem: Your trained ANN, SVR, or GPR model is not accurately predicting or correcting the biosensor signal.
Solution:
- Check Feature Selection: Ensure you are using relevant input features. Beyond the raw sensor signal, include contextual data like time-since-calibration, environmental temperature, and humidity, which are known drift factors [22].
- Increase Data Quality and Quantity: ML models require substantial, clean data for training. Ensure your dataset is large enough and that outliers are properly handled. A systematic, multi-model evaluation study found that model performance is highly dependent on the quality of the training data [15].
- Hyperparameter Tuning: Do not use default model parameters. Systematically tune hyperparameters. For example, the performance of SVR is highly sensitive to the choice of the kernel and the regularization parameter [15].
- Try Ensemble Methods: If a single model performs poorly, consider using a stacked ensemble framework. Research has shown that an ensemble combining GPR, XGBoost, and ANN can deliver superior predictive accuracy for biosensor signal optimization [15].
Issue 2: Model Fails to Generalize to New Data
Problem: The model performs well on the training data but fails on new, unseen test data.
Solution:
- Apply Cross-Validation: Always use techniques like 10-fold cross-validation during model training. This provides a more reliable estimate of model performance on unseen data and helps prevent overfitting [15].
- Review Data Splitting: Ensure your training and test datasets are statistically representative of the same underlying process. If the test set was collected under different environmental conditions (e.g., different temperature), the model will likely fail. Incorporate these drift factors into your model [22].
- Use Simpler Models or Regularization: Overly complex models like very deep ANNs can overfit to noise in the training data. Simplify the model architecture or increase regularization parameters to encourage generalization.
Issue 3: Handling the Debye Length Screening Effect in BioFETs
Problem: For field-effect transistor-based biosensors (BioFETs), the electrical double layer in high ionic strength solutions (like blood or PBS) screens the charge from biomarkers, making detection beyond a few nanometers impossible [5].
Solution:
- Extend the Debye Length: This can be achieved by immobilizing a non-fouling polymer layer, such as poly(oligo(ethylene glycol) methyl ether methacrylate) (POEGMA), above the sensor. This polymer brush establishes a Donnan potential that effectively increases the sensing distance, allowing for the detection of larger biomarkers like antibodies in physiologically relevant solutions [5].
- Rigorous Testing Methodology: Mitigate signal drift by using a stable electrical testing configuration, appropriate passivation layers, and relying on infrequent DC sweeps rather than continuous measurements to minimize drift artifacts [5].
Experimental Protocols & Data
Detailed Methodology for ML-Based Biosensor Optimization
The following workflow, derived from a comprehensive ML study, outlines the key steps for developing a drift-correction model [15]:
Dataset Construction: Compile a dataset from biosensor fabrication and testing. Key features should include:
- Fabrication Parameters: Enzyme amount, crosslinker (e.g., glutaraldehyde) amount, number of scans for conducting polymer (CP) deposition.
- Measurement Conditions: Analyte concentration (e.g., glucose), pH, temperature.
- Target Variable: The electrochemical current response.
Data Preprocessing: Normalize or standardize all features to a common scale to ensure no single feature dominates the model training due to its unit of measurement.
Model Training and Validation:
- Split the dataset into training and test sets (e.g., 80/20).
- Train multiple regression algorithms (e.g., Linear Regression, Random Forest, SVR, GPR, ANN) using 10-fold cross-validation on the training set.
- Tune hyperparameters for each model using techniques like grid search or Bayesian optimization.
Model Evaluation:
- Evaluate the best-performing models on the held-out test set.
- Use metrics like Root Mean Square Error (RMSE), Mean Absolute Error (MAE), and the Coefficient of Determination (R²) to compare performance.
Interpretation and Insight Generation:
- Use explainable AI techniques like SHAP (SHapley Additive exPlanations) to interpret the model.
- Identify which fabrication parameters (e.g., enzyme amount, pH) have the greatest impact on the sensor's signal and stability, providing actionable guidance for optimization [15].
Quantitative Performance of ML Algorithms for Biosensor Signal Prediction
The table below summarizes the typical performance of various ML algorithm families, based on a systematic study that used 10-fold cross-validation to predict electrochemical biosensor responses [15].
| Algorithm Family | Example Models | Key Strengths | Typical Performance (Relative) |
|---|---|---|---|
| Tree-Based | Random Forest, XGBoost | Handles non-linear data well; good with mixed data types. | High predictive accuracy, robust performance. |
| Kernel-Based | Support Vector Regression (SVR) | Effective in high-dimensional spaces; robust. | Good performance, particularly with tuned kernels. |
| Gaussian Process (GPR) | Gaussian Process Regression | Provides uncertainty estimates with predictions. | Very good performance, valuable for probabilistic insight. |
| Artificial Neural Networks (ANN) | Multilayer Perceptron (MLP) | Can model extremely complex, non-linear relationships. | High accuracy with sufficient data and tuning; can overfit. |
| Linear Models | Linear/Poly Regression | Simple, fast, and highly interpretable. | Lower accuracy for complex, non-linear sensor data. |
| Stacked Ensemble | GPR + XGBoost + ANN | Combines strengths of multiple models; can capture complex parameter interactions. | Among the highest predictive accuracy and robustness [15]. |
Essential Research Reagent Solutions
This table details key materials used in the fabrication and signal processing of enzymatic electrochemical biosensors, as referenced in the studies [2] [5] [15].
| Reagent/Material | Function in Biosensor Research | Key Considerations |
|---|---|---|
| Glucose Oxidase | A common model enzyme; catalyzes the oxidation of glucose, producing a measurable electrical signal. | The amount immobilized is a critical optimization parameter that directly affects sensitivity and stability [15]. |
| Conducting Polymers (CPs) | e.g., Polypyrrole, PEDOT; form a 3D matrix on the electrode for efficient enzyme immobilization and electron transfer. | The number of deposition scans during electropolymerization affects film thickness and conductivity [15]. |
| Crosslinkers (e.g., Glutaraldehyde) | Forms stable covalent bonds to immobilize biomolecules (enzymes, antibodies) onto the sensor surface. | High concentrations can reduce sensor activity; minimization is often a goal of optimization [15]. |
| POEGMA Polymer Brush | A non-fouling polymer layer used in BioFETs to extend the Debye length, enabling detection in physiological fluids [5]. | Crucial for overcoming charge screening in high ionic strength solutions like blood or PBS. |
| Carbon Nanotubes (CNTs) | Nanomaterial used to enhance the surface area and electrical sensitivity of transistor-based biosensors (BioFETs) [5]. | High mobility and chemical inertness make them ideal for sensitive, low-cost biosensors. |
Signaling Pathway & Workflow Diagrams
ML Drift Correction Workflow
Drift Problem and ML Solution Logic
This technical support center provides troubleshooting guides and FAQs to assist researchers in addressing drift and calibration challenges in biosensor applications. The content is framed within the broader thesis of optimizing biosensor fabrication parameters to enhance signal stability and measurement accuracy.
Frequently Asked Questions (FAQs)
Q1: What are the primary causes of signal drift in electrochemical biosensors? Signal drift can be caused by multiple factors, including the aging of sensor components, contamination of the sensing surface (biofouling), fluctuations in environmental conditions (e.g., temperature, pH), and undesirable reactions with interfering ions present in the sample matrix [50] [51]. Over time, these factors can lead to a gradual change in the baseline signal and a decrease in sensor sensitivity.
Q2: How does in-situ calibration improve the accuracy of long-term biosensor measurements? In-situ calibration involves periodically introducing one or more standard solutions to the sensor while it is immersed in the sample environment. This process accounts for changes in the sensor's performance within its actual operating context, including the sample matrix's specific composition. It allows for updating the calibration function, leading to more accurate concentration readings over time and compensating for signal drift [52] [53].
Q3: What is the difference between "calibration-free" sensing and traditional methods? Some advanced biosensor platforms, such as certain electrochemical aptamer-based (E-AB) sensors, are designed to operate without requiring end-user calibration. This is achieved through a specific sensor architecture and data processing that makes the signal independent of the absolute sensor response, relying instead on reproducible, relative signal changes. In contrast, traditional methods require frequent calibration with standard solutions to maintain accuracy [54].
Q4: Can machine learning (ML) models effectively compensate for sensor drift? Yes, machine learning is a powerful tool for drift compensation. ML models can be trained to recognize complex, non-linear drift patterns from historical sensor data. Once trained, these models can predict and correct for drift in new sensor signals. A notable method involves using a calibration feature vector (a "prompt") that informs the model about the current drift state, enabling accurate concentration estimation without the need for continuous model fine-tuning [51].
Q5: How does surface functionalization of a gate oxide layer help minimize drift in ISFET biosensors? Chemically modifying the gate oxide layer (e.g., with APTES and succinic anhydride) creates a stable, functionalized surface for specific biomolecule immobilization (e.g., antibodies). This specific binding layer helps reduce non-specific binding and minimizes undesirable ion reactions from the sample solution, which are significant sources of signal drift and error [50].
Troubleshooting Guides
Guide 1: Addressing Significant Signal Drift in Ion-Sensitive Field-Effect Transistor (ISFET) Biosensors
Problem: Unstable sensing voltage and significant signal drift are observed in ISFET biosensors, especially in complex sample matrices like phosphate buffered saline (PBS).
Investigation & Solution: This issue often stems from non-specific binding and undesirable ion reactions on the gate oxide layer (GOL). Implementing a precise surface treatment protocol can significantly improve stability.
Protocol: Surface Treatment of Gate Oxide Layer [50]:
- Plasma Treatment: Treat the fabricated GOL with oxygen plasma to form hydroxyl (OH) functional groups on its surface.
- Silanization: Quickly add a 5% solution of 3-aminopropyltriethoxysilane (APTES) to the GOL surface to form amine (NH₂) functional groups. Seal the sensor in a dark environment for 1 hour for the reaction to complete.
- Washing: Sonicate the sensing gate in ethanol for 1 minute and dry with N₂ gas. Bake on a hot plate at 120°C.
- Carboxylation: Add a 5% solution of succinic anhydride in dimethyl formamide (DMF) to the surface. Incubate at 37°C overnight to form carboxyl (COOH) functional groups.
- Final Wash: Wash the treated GOL with DMF and deionized water.
- Antibody Immobilization: Use EDC/NHS chemistry to immobilize specific antibodies onto the functionalized surface. This is followed by blocking with ethanolamine and Bovine Serum Albumin (BSA) to prevent non-specific binding.
Expected Outcome: This procedure creates a stable, bio-specific surface. Experiments have shown this can reduce sensing voltage drift error significantly—for example, from 21.5 mV/5 min for a bare GOL to 2.3 mV/5 min for a surface-treated GOL in 0.01× PBS [50].
Guide 2: Implementing a Machine Learning-Based Drift Compensation Framework
Problem: A deep learning model, initially trained to estimate gas concentrations from sensor array data, experiences degraded accuracy over time due to sensor drift.
Investigation & Solution: Instead of frequent and computationally expensive model fine-tuning, a drift compensation method using a masked autoencoder to generate a "prompt" can be implemented.
Protocol: Drift Compensation with a Calibration Feature Encoder (CFE) [51]:
- Data Collection: Gather a large dataset of sensor responses over a long period, including data from different drift states (batches). This dataset should include "transfer samples"—known concentrations measured at later times to capture drift information.
- Train the Calibration Feature Encoder (CFE):
- The CFE is a masked-autoencoder-based module. Train it using past transfer samples.
- The model learns to compress the sensor signal from a transfer sample into a compact "calibration feature vector" that encapsulates the current drift state.
- Train the Concentration Estimation Model:
- Instead of training the model only on raw sensor data, concatenate the raw sensor data with the calibration feature vector generated by the CFE.
- Train the neural network to estimate gas concentration using this combined input. The model learns to associate the drift information in the prompt with the corresponding sensor signal to output a corrected concentration.
- Deployment: For new data from a drifted environment, obtain a new transfer sample, generate its calibration feature vector using the pre-trained CFE, and input this vector alongside the new sensor data into the concentration estimation model.
Expected Outcome: This method allows a single model to remain accurate across different drift states without fine-tuning. It has demonstrated superior performance compared to other models, including a fine-tuned network, on a 3-year gas sensor array drift dataset [51].
Guide 3: Performing In-Situ Calibration for Implanted Neurotransmitter Biosensors
Problem: Converting electrochemical signals from implanted biosensors to accurate neurotransmitter concentrations is challenging for chronic recordings due to signal degradation in the biological environment.
Investigation & Solution: Utilizing a probe with an integrated microfluidic channel for on-demand, in-situ calibration.
Protocol: In-Situ Calibration of a Brain-Implantable Biosensor [53]:
- Probe Design: Use a silicon probe that integrates ultra-microelectrodes (UMEs) for detection and a built-in microfluidic channel.
- Enzyme Immobilization: Optimize the concentration and spotting of enzymes (e.g., Glutamate Oxidase for glutamate detection) onto the specific UMEs. Apply a size-exclusion layer (e.g., m-phenylenediamine) to reject interfering molecules.
- In-Situ Calibration Procedure:
- At defined intervals during in vivo recording, inject a standard solution of known analyte concentration (e.g., glutamate) through the integrated microfluidic channel to the sensor sites.
- Record the sensor's current response to the standard.
- Use this response to recalibrate the sensor's sensitivity in its actual operating environment, accounting for any signal loss or change.
Expected Outcome: This method provides a more accurate conversion of current to concentration during long-term experiments, significantly improving the reliability of data correlating neurotransmitter dynamics with animal behavior [53].
The table below summarizes key performance metrics from various drift compensation techniques documented in the research.
Table 1: Performance Comparison of Drift Compensation Techniques
| Technique / Sensor Type | Key Performance Metric | Reported Outcome | Source |
|---|---|---|---|
| Surface Treatment (ISFET) | Sensing Voltage Drift Error (ΔVdf) in 0.01x PBS | Reduced from 21.5 mV/5 min (bare GOL) to 2.3 mV/5 min (treated GOL) | [50] |
| ML with Prompt (E-nose) | Performance on 3-year drift dataset | Outperformed other models, including a network with fine-tuning, in concentration estimation | [51] |
| Calibration-Free (E-AB Sensor) | Measurement Accuracy in vivo | Achieved better than ±30% accuracy for ATP/Kanamycin in live rats without calibration | [54] |
| PCF-SPR Biosensor Optimized with ML/XAI | Wavelength Sensitivity / Amplitude Sensitivity | Up to 125,000 nm/RIU / -1422.34 RIU⁻¹ | [20] |
Experimental Protocols for Key Methodologies
Objective: To create a stable ISFET biosensor gate with minimized signal drift. Materials:
- ITO glass substrate
- SnO₂ target for sputtering
- RF magnetron sputtering system
- Polydimethylsiloxane (PDMS) kit
- 3-aminopropyltriethoxysilane (APTES)
- Succinic anhydride
- Dimethyl formamide (DMF)
- EDC, NHS, ethanolamine, BSA
- Specific antibodies
Methodology:
- Gate Fabrication: Deposit an 80 nm SnO₂ thin film on ITO glass using RF sputtering (50 W, 2×10⁻⁶ Torr base pressure).
- Reservoir Creation: Fabricate a PDMS block with reservoir holes and bond it to the GOL using O₂ plasma treatment.
- Surface Functionalization: Follow the step-by-step chemical treatment protocol outlined in Troubleshooting Guide 1 above.
- Validation: Measure the sensing voltage drift (ΔVdf) in PBS solutions over time and compare with an untreated GOL.
Objective: To train a neural network that is robust to sensor drift without requiring fine-tuning. Materials:
- Historical sensor array dataset with drift (e.g., a dataset spanning multiple batches/years).
- Computing resources with deep learning framework (e.g., Python, TensorFlow/PyTorch).
Methodology:
- Data Preprocessing: Structure the dataset chronologically into "past" (for training) and "future" (for testing) batches. Normalize all data.
- CFE Training: Train the masked-autoencoder-based CFE on past transfer samples to learn a mapping from a sensor signal to a compact calibration feature vector.
- Model Training: For the concentration estimation model, modify the input layer to accept
[sensor_data, calibration_feature_vector]. Train this model using the past data and corresponding feature vectors. - Testing: Evaluate the model on future batches by generating new feature vectors for new transfer samples and passing them to the model. Compare its performance to a baseline model and a fine-tuned model.
The Scientist's Toolkit: Essential Research Reagents & Materials
Table 2: Key Reagents and Materials for Biosensor Fabrication and Calibration
| Item | Function / Application | Example Use Case |
|---|---|---|
| APTES ((3-Aminopropyl)triethoxysilane) | Silane coupling agent used to introduce amine (-NH₂) groups onto oxide surfaces. | Functionalizing the gate oxide layer (e.g., SnO₂) in ISFET biosensors to enable further biomolecule immobilization [50]. |
| EDC / NHS Chemistry | Crosslinking system for activating carboxyl groups to form stable amide bonds with amines. | Immobilizing antibodies or other probe molecules onto functionalized sensor surfaces [50] [53]. |
| Bovine Serum Albumin (BSA) | Non-specific blocking agent. | Used to cover unreacted sites on the sensor surface after probe immobilization, minimizing non-specific binding of interferents [50]. |
| Glutaraldehyde | Homobifunctional crosslinker. | Can be used for biomolecule immobilization. Note that ML-based optimization studies suggest minimizing its amount to improve biosensor signal [15]. |
| m-Phenylenediamine (mPD) | Electropolymerizable size-exclusion layer. | Forms a permselective membrane on microelectrodes, blocking larger interfering molecules (e.g., ascorbic acid) while allowing H₂O₂ to pass for neurotransmitter detection [53]. |
| Standard Solutions / Calibrants | Solutions with precisely known analyte concentrations. | Used for initial sensor calibration and for periodic in-situ calibration during experiments to correct for signal drift [52] [53]. |
Experimental Workflow and System Diagrams
ML Drift Compensation Workflow
In-Situ Microfluidic Calibration
Framing the Problem: For researchers focused on minimizing drift in biosensors, a systematic optimization workflow is not merely beneficial—it is essential. Biosensor drift, the undesirable change in output signal over time under constant conditions, often originates from subtle, interacting fabrication and operational parameters. Traditional "one-variable-at-a-time" (OVAT) optimization approaches are insufficient because they fail to capture these critical interaction effects and can lead to locally optimal but globally unstable conditions, ultimately exacerbating drift issues [45]. A workflow that integrates high-throughput screening (HTS) with rigorous, statistically grounded testing methodologies provides a powerful framework to identify a robust operational window, thereby enhancing sensor stability, reproducibility, and reliability for both point-of-care diagnostics and drug development applications [45] [55].
This guide outlines a structured workflow to troubleshoot and optimize biosensor fabrication, with a specific focus on methodologies that mitigate drift.
Frequently Asked Questions (FAQs)
Q1: Why is my OVAT optimization leading to inconsistent biosensor performance and high drift? A1: OVAT approaches fail to account for interaction effects between variables. For instance, an ideal pH for bioreceptor immobilization might shift depending on the selected incubation temperature. Ignoring these interactions means your identified "optimum" is fragile; minor fluctuations in uncontrolled variables during scale-up or long-term use can lead to significant performance drift and signal instability [45].
Q2: How can high-throughput screening truly help in reducing biosensor drift? A2: HTS allows you to rapidly assay vast libraries of fabrication conditions (e.g., monomer ratios, cross-linker concentrations) or mutant bioreceptor strains. By screening for both initial sensitivity and signal stability over a short period, you can identify lead candidates inherently predisposed to lower drift. Technologies like the Mother Yeast Cell Membrane Sensor (MOMS) can screen over 10^7 single cells in minutes, quickly pinpointing stable, high-performing variants [56].
Q3: What are the most critical parameters to monitor for ensuring fabrication reproducibility? A3: The key is to implement real-time, non-destructive Quality Control (QC) during fabrication. Critical parameters include:
- Electrochemical Signal of Embedded Probes: Monitoring the current intensity of a redox probe like Prussian Blue during electropolymerization provides a real-time fingerprint of the film's properties [55].
- Film Thickness and Morphology: Inconsistent film thickness is a major contributor to variable performance and drift [55].
- Template Extraction Efficiency: Incomplete removal of template molecules in Molecularly Imprinted Polymer (MIP) biosensors creates unreliable recognition sites and baseline drift. QC steps can verify extraction completion [55].
Q4: Can machine learning assist in optimizing biosensors for lower drift? A4: Absolutely. ML regression models (e.g., Random Forest, Gradient Boosting) can predict complex relationships between fabrication inputs (e.g., reactant concentrations, curing time) and critical outputs like sensitivity and signal stability. Furthermore, Explainable AI (XAI) methods like SHAP analysis can identify which parameters most significantly influence performance and drift, providing a data-driven roadmap for optimization [20].
Troubleshooting Guides
Poor Reproducibility and High Batch-to-Batch Drift
Problem: Biosensors fabricated in different batches show wide performance variations and inconsistent signal drift patterns.
| Possible Cause | Diagnostic Steps | Solution |
|---|---|---|
| Uncontrolled Electrode Surface Properties [55] | Perform cyclic voltammetry (CV) with a standard redox probe like ferricyanide on bare electrodes from different batches. Look for variations in peak current and separation. | Implement a QC protocol for incoming bare electrodes. Establish acceptance criteria for electrochemical surface area and conductivity [55]. |
| Inconsistent Polymer Film Formation [55] | Embed a redox probe (e.g., Prussian Blue) during electropolymerization and monitor its SWV current intensity. A high RSD (>5%) indicates unstable film growth. | Adopt a controlled electrofabrication strategy with in-situ monitoring. Use the embedded probe's signal to define pass/fail criteria for each sensor [55]. |
| Variable Template Extraction (for MIPs) [55] | Use EIS to track charge transfer resistance (Rct) before and after extraction. An insignificant change suggests incomplete removal. | Standardize the extraction protocol (solvent, time, method). Use electrochemical monitoring (QC step) to confirm complete template removal for each sensor [55]. |
Experimental Protocol: QC-Focused MIP Biosensor Fabrication This protocol integrates troubleshooting for reproducibility directly into the fabrication process [55].
- QC1 - Electrode Pre-screening: Characterize bare screen-printed electrodes using EIS and CV in a standard solution. Discard any electrodes with electroactive surface area or charge transfer resistance (Rct) values outside 2 standard deviations from the mean.
- Electrodeposition of Redox Probe: Electrodeposit Prussian Blue nanoparticles (PB NPs) onto the working electrode.
- QC2 - Redox Probe Validation: Characterize the PB NPs using SWV. Measure the oxidation current intensity. Discard electrodes with a current RSD > 2% from the batch mean. This ensures a uniform starting signal.
- Electropolymerization: Co-polymerize the functional monomer (e.g., pyrrole) and the template molecule to form the MIP film on the PB-modified electrode.
- QC3 - Polymerization Monitoring: Run SWV again. A significant drop in the PB current indicates successful polymer deposition. Set a threshold for the current drop to ensure consistent film thickness.
- Template Extraction: Remove the template molecules using either an optimized solvent incubation or an electrochemical "cleaning" method.
- QC4 - Extraction Verification: Run EIS and SWV. A significant increase in Rct and a stable, low PB signal confirm successful extraction. Sensors not meeting these criteria should be rejected.
Low Sensitivity and Slow Response Time in HTS
Problem: During high-throughput screening, the signal-to-noise ratio is too low to reliably distinguish high-performing variants, or the response is too slow for rapid sorting.
| Possible Cause | Diagnostic Steps | Solution |
|---|---|---|
| Low Sensor Density or Affinity [56] | Perform a calibration curve with known analyte concentrations to determine the Limit of Detection (LOD) and dynamic range of your assay. | Increase the density of molecular recognition elements (e.g., aptamers, enzymes) on the sensor surface. For cell-based sensors, use dense, selective coatings like the MOMS platform [56]. |
| Slow Assay Kinetics [57] | Measure the time from analyte introduction to 95% of maximum signal output. Compare this to your required throughput speed. | Optimize incubation times, temperature, and mixing. For metabolic sensors, consider faster-acting components like riboswitches in combination with stable transcription factors to improve response speed without sacrificing stability [57]. |
| Limited Throughput of Platform [56] | Calculate the number of cells or sensors you can process per second. If it's below 1,000 cells/second, it becomes a bottleneck. | Transition to higher-throughput platforms. For single-cell secretion analysis, the MOMS platform can process ~3.0 × 10³ cells/second, a significant boost over droplet-based systems [56]. |
Experimental Protocol: Optimizing a Biosensor's Dynamic Range This protocol is useful for tuning biosensors, whether for HTS or as the final analytical tool [57].
- Define the Operating Range: Determine the physiologically or industrially relevant concentration range of your target analyte.
- Characterize the Dose-Response: Expose your biosensor to a wide range of analyte concentrations and measure the output (e.g., fluorescence, current). Perform each measurement in replicate.
- Plot and Fit the Curve: Plot the response vs. the logarithm of the concentration. Fit a sigmoidal curve (e.g., Hill equation) to determine the linear range, EC50, and saturation points.
- Tune the Biosensor: If the dynamic range does not align with your needs, use genetic or protein engineering:
- To Increase Sensitivity: Modify promoter strength or ribosome binding sites upstream of the reporter gene. Employ directed evolution to improve bioreceptor affinity [57].
- To Shift the Operating Range: Chimeric fusion of ligand-binding domains or mutation of the binding pocket can alter the biosensor's sensitivity threshold [57].
- Validate Performance: Re-characterize the dose-response of the engineered biosensor to confirm the dynamic range is now suitable for your application.
Data Presentation
Table 1: Comparison of Biosensor Optimization and HTS Methodologies
| Method | Key Features | Optimal Use Case | Throughput | Key Performance Metrics |
|---|---|---|---|---|
| Factorial Design (DoE) [45] | Systematically explores factor interactions; builds a predictive model; highly efficient. | Optimizing a limited number (e.g., 3-6) of critical fabrication or operational parameters. | Medium (Requires 2^k experiments) | P-value of factors, model R², prediction error |
| Mother Yeast Membrane Sensor (MOMS) [56] | Aptamer-based; sensors confined to mother cells; label-free detection of secretions. | Ultra-high-throughput screening of single yeast cells for metabolic secretion analysis. | Very High (>10⁷ cells/run) | Detection Limit (e.g., 100 nM), Sorting Speed (e.g., 3.0 × 10³ cells/s) |
| Machine Learning (ML) & XAI [20] | Data-driven optimization; identifies non-intuitive parameter relationships; uses SHAP for interpretability. | Optimizing complex biosensor designs with many interdependent parameters (e.g., PCF-SPR sensors). | Varies (Depends on data) | Model R², MAE, MSE, SHAP value magnitude |
| Quality-Controlled Electrofabrication [55] | Uses embedded redox probe (Prussian Blue) for real-time, non-destructive monitoring of each fabrication step. | Ensuring reproducibility and minimizing drift in electrophymerized biosensors (e.g., MIPs). | Low (Focus on reproducibility) | Relative Standard Deviation (RSD) between batches (e.g., <2%) |
Table 2: Key Performance Metrics for Biosensor Characterization and Drift Assessment
| Metric | Definition | Formula / Description | Importance for Drift Mitigation |
|---|---|---|---|
| Limit of Detection (LOD) | The lowest analyte concentration that can be reliably distinguished from background noise. | 3.3 × (Standard Deviation of Blank / Slope of Calibration Curve) | A stable LOD over time indicates robust recognition element attachment and low baseline drift. |
| Dynamic Range [57] | The span of analyte concentrations over which the biosensor provides a quantifiable response. | From the lowest quantifiable concentration to the point of signal saturation. | A wide, stable dynamic range ensures accurate quantification despite minor signal fluctuations. |
| Signal-to-Noise Ratio [57] | The ratio of the power of the meaningful signal to the power of the background noise. | Signalamplitude / Noiseamplitude | A high SNR is crucial in HTS to correctly identify true positives and monitor subtle drift-related changes. |
| Response Time [57] | The time required for the biosensor output to reach a defined percentage (e.g., 90%) of its maximum response after analyte exposure. | Measured in seconds or minutes. | A slow or variable response time can be misinterpreted as signal drift and complicates kinetic assays. |
| Relative Standard Deviation (RSD) [55] | A measure of reproducibility, expressed as the percentage ratio of standard deviation to the mean. | (Standard Deviation / Mean) × 100% | A low RSD (%):indicates high reproducibility between fabrication batches, which is foundational for controlling drift. |
The Scientist's Toolkit: Research Reagent Solutions
Table 3: Essential Materials for Biosensor Fabrication and Optimization
| Item | Function | Example Application in Optimization |
|---|---|---|
| Prussian Blue (PB) Nanoparticles [55] | Serves as an embedded redox probe for real-time, non-destructive quality control during electrofabrication. | Monitoring the consistency of polymer film growth and template extraction efficiency in MIP biosensors. |
| Screen-Printed Electrodes (SPEs) [55] | Provide a disposable, consistent, and miniaturized platform for electrochemical biosensors. | Used as the foundational substrate; pre-screening batches of SPEs is a critical first QC step. |
| Biotin-Streptavidin System [56] | Provides a strong, specific non-covalent interaction for immobilizing biorecognition elements (e.g., aptamers, antibodies). | Creating dense, oriented monolayers of aptamers on yeast cell surfaces (MOMS) or electrode surfaces for improved sensitivity. |
| Molecularly Imprinted Polymers (MIPs) [55] | Synthetic polymers with tailor-made recognition sites for a specific target molecule, offering high stability. | Used as robust, biomimetic receptors to create stable biosensors for metabolites or proteins where biological receptors are unstable. |
| DNA Aptamers [56] | Short, single-stranded DNA/RNA molecules that bind to a specific target with high affinity; highly designable. | Employed as the recognition element in HTS platforms like MOMS and in various electrochemical and optical biosensors. |
Workflow Visualization
Systematic Optimization Workflow
HTS to Rigorous Testing Pathway
Benchmarking Performance: Analytical Validation and Comparative Design Analysis
This technical support center provides troubleshooting guides and FAQs to help researchers address the critical challenge of signal drift in biosensor development, directly supporting the optimization of fabrication parameters for enhanced stability.
Frequently Asked Questions (FAQs)
1. What is signal drift and why is it a major problem in biosensors? Signal drift refers to the undesired change in a biosensor's output signal over time when the target analyte concentration remains constant. It is a major problem because it introduces inaccuracies, reduces reliability, and can lead to false positives or negatives, ultimately limiting a biosensor's clinical or commercial deployment. Drift is often caused by factors such as the slow diffusion of ions from the electrolyte into the sensor's sensing region, changes in gate capacitance, or sensor aging [5].
2. How can I determine if my biosensor's signal change is due to actual target binding or just drift? The most robust method is to use a reference (negative control) probe on the same sensor chip. By subtracting the signal from the reference channel, which experiences the same environmental drift but not the specific binding, you can isolate the true specific binding signal. The choice of an optimal reference control (e.g., an isotype-matched antibody or BSA) is critical and should be validated for your specific assay [58].
3. What are the best strategies to minimize signal drift during biosensor operation? Several strategies can mitigate drift:
- Stable Electrical Configuration: Use a stable testing setup, which may include appropriate passivation layers to protect sensitive components [5].
- Rigorous Testing Methodology: Rely on infrequent DC sweeps rather than continuous static or AC measurements to reduce drift accumulation during data acquisition [5].
- Polymer Coatings: Implement non-fouling polymer brush interfaces (e.g., POEGMA) that can enhance stability and also help address charge screening [5].
- Mathematical Compensation: Employ feature optimization and machine learning models in data processing to computationally identify and correct for drift patterns [22].
4. My biosensor works well in buffer but drifts in complex media like serum. What can I do? This is a common challenge caused by nonspecific binding (NSB) of matrix constituents (e.g., serum proteins) to the sensor surface. To address this:
- Optimize Reference Probe: Systematically test and select a reference probe that best corrects for NSB in your specific complex media [58].
- Surface Functionalization: Use blocking agents or advanced polymer brushes (like POEGMA) to create a non-fouling surface that minimizes the adsorption of non-target molecules [58] [5].
Troubleshooting Guide: Common Drift-Related Issues
| Problem | Possible Cause | Solution |
|---|---|---|
| Consistent signal increase over time in control experiments | Signal drift from environmental factors or electrode instability | Implement a reference control channel for subtraction; use a stable pseudo-reference electrode (e.g., Pd); enforce a testing protocol with infrequent DC sweeps [58] [5]. |
| Poor reproducibility between sensor batches | Inconsistencies in fabrication parameters (e.g., bioreceptor density, nanomaterial thickness) | Adopt a machine learning framework to model and identify optimal fabrication parameters. Use characterization techniques (e.g., SEM, Raman spectroscopy) to ensure batch-to-batch consistency [15] [59]. |
| Signal degradation over repeated uses | Sensor aging, fouling, or incomplete regeneration | Integrate a robust regeneration protocol. Functionalize the sensor with stable, fouling-resistant materials like graphene or PEG-based polymers [59] [5]. |
| High signal noise obscuring low-concentration detection | Charge screening in high ionic strength solutions, unstable electrical readout | Extend the Debye length using a polymer brush (e.g., POEGMA); improve passivation and shielding of electronic components [5]. |
Standardized Metrics for Quantifying Drift
The following table outlines key quantitative metrics essential for a comprehensive drift assessment protocol.
| Metric | Description | Experimental Measurement Protocol |
|---|---|---|
| Long-term Signal Stability | Measures the change in baseline or calibration signal over an extended period under operating conditions. | 1. Immerse the biosensor in a relevant buffer (e.g., PBS) or matrix without the target analyte.2. Record the output signal (e.g., current, wavelength shift) at regular intervals over a defined period (e.g., 1-24 hours).3. Calculate the coefficient of variation (CV) of the baseline signal or the rate of signal change per hour (e.g., %/hour) [5]. |
| Limit of Detection (LOD) Drift | Assesses the change in the sensor's lowest detectable analyte concentration over time or usage cycles. | 1. Perform a calibration curve with standard analyte concentrations on Day 0.2. Calculate the initial LOD (typically 3.3 × standard deviation of the blank / slope of the curve).3. Repeat the calibration procedure at regular time intervals or after a set number of uses.4. Monitor the change in the calculated LOD value [15] [5]. |
| Reproducibility (Inter-/Intra-assay CV) | Evaluates the precision of the sensor response across multiple devices (inter-assay) or multiple measurements on the same device (intra-assay). | 1. Intra-assay: Measure the same analyte concentration repeatedly (n ≥ 3) with the same sensor in one session. Calculate the CV%.2. Inter-assay: Measure the same analyte concentration with multiple sensors (n ≥ 3) from the same production batch. Calculate the CV% [15] [60]. |
| Signal Drift Rate | Quantifies the steady, time-dependent change in signal, often distinct from the initial response. | 1. After introducing the target analyte and the signal stabilizes, monitor the signal over a defined period (e.g., 10-30 minutes).2. Fit the signal-time data to a linear or exponential model. The slope of the linear fit (e.g., pA/min or nm/min) is the drift rate [5] [22]. |
Experimental Protocols for Key Drift Assessment Tests
Protocol 1: Systematic Optimization of Reference Controls for Nonspecific Binding (NSB) Correction
- Objective: To identify the optimal reference (negative control) probe for accurate signal subtraction in complex media [58].
- Materials: Biosensor chips (e.g., photonic microring resonators, SPR chips), panel of candidate control proteins (e.g., BSA, isotype control antibodies, anti-FITC, cytochrome c), target capture antibody, assay diluent (e.g., buffer with serum).
- Methodology:
- Functionalize multiple sensors on a single chip with your target capture antibody (e.g., anti-IL-17A).
- Functionalize adjacent sensors with different candidate control proteins from your panel.
- Run assays with your target analyte spiked into the complex media (e.g., serum) across a range of concentrations.
- For each control protein, subtract its signal from the capture antibody signal to obtain the "corrected" specific binding response.
- Evaluate the performance (linearity, accuracy, selectivity) of the calibration curves generated with each corrected response.
- Interpretation: The control probe that yields the corrected calibration curve with the highest linearity (R²), accuracy (% recovery), and selectivity is the optimal choice for your assay [58].
Protocol 2: Machine Learning-Based Drift Compensation in Feature Optimization
- Objective: To reduce the influence of environmental drift factors (e.g., temperature, humidity) on the feature optimization process itself [22].
- Materials: Electronic nose or biosensor array, dataset collected under varying drift conditions (e.g., different temperatures/humidities), data processing software (e.g., JMP, Python/R with scikit-learn).
- Methodology:
- Data Collection: Collect sensor response data for your target analytes across a range of controlled drift conditions.
- Primary Feature Optimization: Perform initial feature selection/sensor weighting using a model (e.g., Random Forest) on data from a "standard" condition.
- Drift Compensation: Apply a mathematical compensation model (e.g., domain adaptation, transfer learning) to the full dataset to correct for drift effects.
- Secondary Feature Optimization: Conduct a second round of feature optimization on the drift-compensated data.
- Validation: Compare the classification accuracy of models built using features from the primary optimization versus the secondary (quadratic) optimization on a hold-out test set collected under different drift conditions.
- Interpretation: The quadratic feature optimization method should yield a model with higher classification accuracy on the drifted test data, confirming its effectiveness in improving drift resistance [22].
Research Reagent Solutions
This table details key reagents mentioned in the protocols and literature for fabricating stable, drift-resistant biosensors.
| Item | Function in Drift Minimization | Example Use Case |
|---|---|---|
| Isotype-Matched Control Antibody | Serves as an optimal reference probe; its NSB profile closely matches the capture antibody, enabling precise signal subtraction [58]. | Correcting for matrix effects in immunosensors for cytokine (e.g., IL-17A) detection in serum [58]. |
| POEGMA (Poly(oligo(ethylene glycol) methyl ether methacrylate)) | A non-fouling polymer brush that extends the Debye length (reducing charge screening) and mitigates biofouling, a key source of drift [5]. | Coating on CNT-based BioFETs for stable, attomolar-level detection in undiluted PBS [5]. |
| Graphene & Derivatives (GO, rGO) | Provides a high-surface-area, conductive, and biocompatible substrate; enables stable immobilization of bioreceptors, improving signal-to-noise ratio and reproducibility [59]. | Used as the channel material in FET biosensors or as a nanocoating on electrochemical electrodes [15] [59]. |
| Crosslinkers (e.g., Glutaraldehyde) | Immobilizes biorecognition elements (enzymes, antibodies) onto the sensor surface. Optimization of its concentration is critical, as excess can increase non-specific binding and drift [15]. | Fabricating enzymatic glucose biosensors with conducting polymer-decorated nanofibers [15]. |
Workflow for Comprehensive Drift Assessment and Mitigation
This diagram illustrates a systematic workflow for assessing and mitigating drift in biosensors, integrating experimental and computational approaches.
Performance Comparison: POx vs. GlOx Biosensors
The selection of a biorecognition element is a critical parameter in biosensor fabrication, directly influencing analytical performance and signal stability. The table below summarizes key characteristics of Pyruvate Oxidase (POx) and Glutamate Oxidase (GlOx) based biosensors for metabolite detection [61].
| Parameter | POx-Based Biosensor | GlOx-Based Biosensor |
|---|---|---|
| Linear Range | 1–500 U/L | 5–500 U/L |
| Limit of Detection (LOD) | 1 U/L | 1 U/L |
| Sensitivity (at 100 U/L ALT) | 0.75 nA/min | 0.49 nA/min |
| Key Advantage | Higher sensitivity, wider linear range | Greater stability in complex solutions, lower cost |
| Immobilization Method | Entrapment in PVA-SbQ polymer | Covalent crosslinking with Glutaraldehyde (GA) |
| Optimal Immobilization pH | pH 7.4 | pH 6.5 |
| Enzyme Loading | 1.62 U/µL | 2.67% |
Detailed Experimental Protocols
Electrode Preparation and Modification
A stable electrode interface is foundational for minimizing baseline drift.
- Materials: Platinum disc working electrodes, Ag/AgCl reference electrode, phosphate buffer, ethanol, meta-phenylenediamine (m-PD) [61].
- Procedure:
- Polish platinum working electrodes to a mirror finish and clean with ethanol [61].
- Immerse the electrodes in a solution of 5 mM meta-phenylenediamine in 10 mM phosphate buffer (pH 6.5).
- Perform electrochemical polymerization using cyclic voltammetry (0–0.9 V, step 0.005 V, scan rate 0.02 V/s, starting at 0 V) for 10-20 cycles until a stable voltammogram indicates complete surface coverage [61]. This creates a semi-permeable membrane that blocks interferents like ascorbic acid while allowing H₂O₂ diffusion [61].
Enzyme Immobilization: POx Entrapment Method
This protocol immobilizes Pyruvate Oxidase to maximize loading and activity.
- Materials: Pyruvate Oxidase (POx), PVA-SbQ photopolymer, Glycerol, Bovine Serum Albumin (BSA), HEPES buffer (pH 7.4), UV lamp (365 nm) [61].
- Procedure:
- Prepare an enzyme gel containing 10% glycerol, 5% BSA, and 4.86 U/µL POx in 25 mM HEPES buffer (pH 7.4) [61].
- Mix this gel with a 19.8% PVA-SbQ photopolymer solution in a 1:2 ratio. The final mixture should contain 1.62 U/µL POx and 13.2% PVA-SbQ [61].
- Apply 0.15 µL of the mixture to the surface of the pre-modified working electrode.
- Photopolymerize the layer under UV light (365 nm) until an energy dose of 2.4 J (approximately 8 minutes) is reached [61].
- Rinse the biosensor 2-3 times with working buffer before measurements [61].
Enzyme Immobilization: GlOx Crosslinking Method
This protocol immobilizes Glutamate Oxidase for robust, stable performance.
- Materials: Glutamate Oxidase (GlOx), Glutaraldehyde (GA), Glycerol, BSA, Phosphate buffer (pH 6.5) [61].
- Procedure:
- Prepare a gel in 100 mM phosphate buffer (pH 6.5) containing 10% glycerol, 4% BSA, and 8% GlOx [61].
- Mix this gel with a 0.5% Glutaraldehyde solution in a 1:2 ratio. The final mixture should contain 2.67% GlOx and 0.3% GA [61].
- Apply 0.05 µL of the mixture to the surface of the pre-modified working electrode.
- Air-dry the sensor for 35 minutes at room temperature to complete the crosslinking process [61].
- Rinse the biosensor with working buffer to remove any unbound molecules [61].
Standardized Measurement of ALT Activity
A consistent measurement methodology is essential for reproducible results and drift assessment.
- Materials: Stirred electrochemical cell, potentiostat, HEPES buffer, L-alanine, α-ketoglutarate, Mg²⁺, Thiamine Pyrophosphate (TPP), Pyridoxal Phosphate (PLP) [61].
- Procedure:
- Conduct measurements in a 2 mL stirred cell at room temperature [61].
- Apply a constant potential of +0.6 V vs. Ag/AgCl to the working electrode [61].
- Use a working buffer that contains necessary co-factors for the ALT reaction, such as Mg²⁺, TPP, and PLP [61].
- Monitor the amperometric current change over time, which is proportional to the H₂O₂ generated and thus the ALT activity in the sample [61].
Frequently Asked Questions (FAQs)
Q1: Our POx-based biosensor shows significant signal decay over repeated measurements. What could be the cause? A1: Signal decay is often linked to enzyme leaching or inactivation. Ensure your entrapment matrix is optimized—verify the concentration of PVA-SbQ (optimal is 13.2%) and confirm that UV polymerization is complete [61]. Also, check that the storage conditions between measurements are consistent (e.g., dry at 8°C) [61].
Q2: The GlOx biosensor produces inaccurately high readings in serum samples. How can this be resolved? A2: This is a classic issue of cross-reactivity. The GlOx-based biosensor can be influenced by aspartate aminotransferase (AST) activity in the sample, as AST also produces glutamate [61]. For serum analysis, the POx-based system is more specific for ALT. Alternatively, you can adapt your calibration for complex matrices or use sample pre-treatment.
Q3: What is the best way to establish a stable baseline and differentiate true signal from drift? A3: Implement a rigorous testing methodology. Maximize sensitivity through appropriate passivation and use a stable electrical testing configuration [5]. For characterization, rely on infrequent DC sweeps rather than static or continuous measurements to clearly distinguish analyte binding from time-based signal drift [5]. Always run a control experiment with a blank solution to quantify baseline drift.
Q4: How can I improve the selectivity of my biosensor against electroactive interferents? A4: The semi-permeable poly(m-PD) membrane is highly effective [61]. Confirm the quality of this layer by ensuring a sufficient number of polymerization cycles during electrode modification. The membrane's pore size allows H₂O₂ to diffuse to the electrode while blocking larger molecules like ascorbic acid, dopamine, and acetaminophen [61].
Q5: Why is the sensitivity of my GlOx biosensor lower than expected? A5: First, verify the activity of your GlOx stock solution. Second, confirm the parameters for covalent immobilization: the pH of the gel should be 6.5, and the final concentration of glutaraldehyde should be 0.3%. Too high a crosslinker concentration can reduce enzyme activity by creating diffusion barriers or distorting the enzyme's active site [61] [62].
The Scientist's Toolkit: Essential Research Reagents
The table below lists key reagents and their critical functions in developing and optimizing these enzymatic biosensors.
| Reagent | Function / Role |
|---|---|
| Pyruvate Oxidase (POx) | Biorecognition element; catalyzes the oxidation of pyruvate (product of ALT reaction) to produce H₂O₂ [61]. |
| Glutamate Oxidase (GlOx) | Biorecognition element; catalyzes the oxidation of glutamate (product of ALT reaction) to produce H₂O₂ [61]. |
| PVA-SbQ Polymer | Photo-crosslinkable polymer used for entrapment immobilization of POx; provides a stable, porous matrix [61]. |
| Glutaraldehyde (GA) | Crosslinking agent for covalent immobilization of GlOx; creates stable bonds between enzyme molecules and the electrode surface [61]. |
| meta-Phenylenediamine (m-PD) | Monomer for electropolymerization to create an anti-fouling membrane; blocks interferents for enhanced selectivity [61]. |
| Thiamine Pyrophosphate (TPP) | Essential cofactor for the POx enzyme; required for proper catalytic activity [61]. |
| Pyridoxal Phosphate (PLP) | Essential cofactor for the ALT enzyme; required for the transamination reaction [61]. |
Biosensor Signaling Pathways
ALT Detection via Pyruvate Oxidase (POx) The pathway illustrates the signal generation cascade for a POx-based biosensor. The target ALT enzyme generates pyruvate, which is oxidized by the immobilized POx, producing hydrogen peroxide (H₂O₂). The electrochemical oxidation of H₂O₂ at the electrode surface generates the measurable electrical signal [61].
ALT Detection via Glutamate Oxidase (GlOx) This diagram shows the signaling pathway for a GlOx-based biosensor. Here, the ALT reaction produces glutamate, which is oxidized by GlOx to generate H₂O₂. The subsequent oxidation of H₂O₂ is then transduced into an electrical current [61]. Note that this pathway is susceptible to interference from other sources of glutamate in a sample.
Experimental Workflow for Biosensor Fabrication
Biosensor Fabrication and Testing This workflow outlines the key steps in fabricating and testing either a POx or GlOx-based biosensor. The critical branch point is the choice of enzyme system, which dictates the subsequent immobilization method (entrapment for POx vs. crosslinking for GlOx). Proper rinsing and storage are essential for maintaining sensor stability and minimizing initial drift [61].
Troubleshooting Guides
Guide 1: Addressing Electrical Signal Drift
Problem: Unstable baseline signal (drift) in the D4-TFT device during testing in biological solutions (e.g., 1X PBS), making it difficult to distinguish true biomarker detection from time-based artifacts [5].
Solutions:
- Maximize Sensitivity via Passivation: Ensure the CNT channel is properly passivated alongside the POEGMA polymer brush coating. This enhances signal stability and device sensitivity [5].
- Implement Stable Electrical Testing: Use a stable electrical testing configuration. The D4-TFT employs a palladium (Pd) pseudo-reference electrode to avoid bulky, conventional Ag/AgCl electrodes, contributing to a more stable point-of-care setup [5].
- Enforce Rigorous Testing Methodology: Rely on infrequent DC voltage sweeps for measurement instead of continuous static (DC) or AC measurements. This methodology minimizes the impact of slow ionic diffusion that causes drift [5].
- Inspect and Isolate the Device: Perform a visual inspection of the device and electrical connections. Test the electronics independently of the sensor if possible to rule out instrument-level issues [63] [64].
- Analyze the Signal: Use specialized tools like oscilloscopes to visualize the signal and check for noise or anomalies that could indicate external interference or device malfunction [64].
Guide 2: Overcoming Debye Length Screening
Problem: No measurable signal change upon target binding because the antibody-analyte interaction occurs at a distance beyond the Debye length in high ionic strength solutions like 1X PBS [5].
Solutions:
- Utilize a Polymer Brush Interface: Immobilize a non-fouling polymer layer, specifically poly(oligo(ethylene glycol) methyl ether methacrylate) (POEGMA), above the CNT channel. This layer acts as a "Debye length extender" by establishing a Donnan equilibrium potential, allowing detection of larger biomolecules in physiological solutions [5].
- Include a Control Device: Simultaneously test a control device on the same chip where no antibodies are printed over the CNT channel. A signal shift in the experimental but not the control device confirms successful target detection, validating that the POEGMA interface is functioning correctly [5].
Guide 3: Ensuring Ultra-Sensitive Detection
Problem: The biosensor fails to achieve the expected attomolar (aM) to sub-femtomolar (fM) level sensitivity [5].
Solutions:
- Verify Polymer Brush Functionalization: Confirm the successful growth and immobilization of the POEGMA polymer brush on the device's high-κ dielectric surface. This interface is critical for overcoming biofouling and extending the sensing distance [5].
- Confirm Antibody Printing: Ensure capture antibodies (cAb) are correctly printed into the POEGMA matrix to form a complete sandwich immunoassay structure with the target analyte and detection antibodies (dAb) [5].
- Check Solution Integrity: Avoid buffer dilution. The D4-TFT is designed to operate in undiluted 1X PBS. Using diluted buffers invalidates the core innovation and may not reflect the device's true capability [5].
Frequently Asked Questions (FAQs)
Q1: The D4-TFT platform was developed to overcome key limitations of traditional BioFETs. What are these limitations? A1: The D4-TFT specifically addresses two major challenges:
- Debye Length Screening: In high ionic strength solutions, the electrical double layer is very thin, screening the charge of biomarkers that bind beyond this short distance [5].
- Signal Drift: The slow diffusion of ions into the sensing region over time alters gate capacitance and threshold voltage, creating a false signal that can obscure actual biomarker detection [5].
Q2: What are the core operational steps of the D4-TFT immunoassay? A2: The assay operates in four sequential steps [5]:
- Dispense: A sample is dispensed onto the device.
- Dissolve: A readily-dissolvable trehalose layer, containing fluorescently-tagged detection antibodies, dissolves.
- Diffuse: The target analyte and detection antibodies diffuse towards the capture antibodies immobilized in the POEGMA layer on the sensor.
- Detect: The formation of an antibody-analyte "sandwich" structure is detected electrically as a shift in the CNT channel's on-current.
Q3: How can I confirm that a measured signal is from biomarker binding and not from electrical drift or noise? A3: Follow these steps [5] [64]:
- Use On-Chip Controls: Always run a control device (with no antibodies) in parallel. A true positive signal will only appear in the functional device.
- Analyze Signal Shape: In the rigorous testing methodology, rely on shifts from DC sweeps. A consistent, step-like shift correlated with binding events is more reliable than a continuous drift.
- Implement Quality Controls: Establish control samples with known analyte concentrations to monitor assay performance and precision across runs [65].
Q4: What is the function of the POEGMA layer in the D4-TFT? A4: The POEGMA polymer brush serves a dual purpose [5]:
- It acts as a non-fouling surface to minimize non-specific binding.
- It extends the effective Debye length within the polymer matrix via the Donnan potential effect, enabling the detection of antibody-binding events that occur several nanometers away from the transistor surface in physiological ionic strength solutions.
Experimental Protocols & Data
Key Experimental Methodology for D4-TFT Fabrication and Testing
The following workflow outlines the critical steps for creating and operating the D4-TFT biosensor.
D4-TFT Performance Metrics
Table 1: Key performance characteristics and parameters of the D4-TFT biosensor platform [5].
| Parameter | Achieved Performance | Significance / Method |
|---|---|---|
| Detection Sensitivity | Sub-femtomolar to attomolar (aM) levels | Among the highest sensitivities reported for an antibody-based BioFET. |
| Testing Solution | 1X PBS (undiluted) | Biologically relevant ionic strength, overcoming a major limitation for point-of-care use. |
| Signal Transduction | Shift in on-current (I~on~) | Measured from the semiconducting carbon nanotube (CNT) channel. |
| Key Innovation | POEGMA polymer brush | Extends Debye length via Donnan potential, enabling detection in high ionic strength solutions. |
| Drift Mitigation | Combination of passivation, stable Pd electrode, and infrequent DC sweeps | Enables stable, repeated measurements and reliable data interpretation. |
Research Reagent Solutions
Table 2: Essential materials and reagents for the D4-TFT biosensor platform and their functions [5].
| Research Reagent / Material | Function in the D4-TFT Platform |
|---|---|
| Semiconducting Carbon Nanotubes (CNTs) | Forms the highly sensitive channel of the thin-film transistor (TFT) for electrical signal transduction. |
| Poly(oligo(ethylene glycol) methyl ether methacrylate) (POEGMA) | A polymer brush layer that extends the Debye length and provides a non-fouling surface for biorecognition. |
| Capture & Detection Antibodies (cAb, dAb) | Biorecognition elements that form a sandwich immunoassay structure with the target biomarker. |
| Trehalose | A dissolvable excipient layer that stores detection antibodies (dAb) and releases them upon sample dispensing. |
| Palladium (Pd) Pseudo-Reference Electrode | Provides a stable gate potential in a point-of-care form factor, replacing bulky Ag/AgCl electrodes. |
| High-κ Dielectrics | The insulating layer on which the POEGMA is grown, crucial for transistor operation and sensitivity. |
Technical Support Center: FAQs and Troubleshooting Guides
This technical support center provides solutions for common challenges in biosensor development and validation, specifically framed within the context of optimizing fabrication parameters to minimize signal drift.
Fabrication and Optimization
Q: How can I reduce signal drift in my solution-gated BioFETs? A: Signal drift can be mitigated through a multi-pronged approach:
- Passivation and Stable Configuration: Ensure proper passivation of your device alongside polymer brush coatings (e.g., POEGMA) to maximize sensitivity and stability [5].
- Rigorous Testing Methodology: Rely on infrequent DC sweeps for measurement rather than static or alternating current (AC) measurements, as this reduces the impact of temporal drift on your data [5].
- Stable Electrodes: Use stable pseudo-reference electrodes, such as Palladium (Pd), to bypass the need for bulky Ag/AgCl electrodes, enhancing point-of-care suitability [5].
Q: What strategies can overcome charge screening (Debye length limitations) in physiological solutions? A: To detect biomolecules in high-ionic-strength solutions like 1X PBS:
- Polymer Brush Interface: Immobilize a non-fouling polymer layer, such as poly(oligo(ethylene glycol) methyl ether methacrylate) (POEGMA), above the device channel. This layer establishes a Donnan equilibrium potential, effectively increasing the sensing distance (Debye length) in the solution [5].
- Antibody Printing: Print capture antibodies into this polymer brush layer. The extended Debye length enables the detection of antibody-analyte interactions that would otherwise be screened out in a standard ionic environment [5].
Q: How can I optimize fabrication parameters without exhaustive experimental trials? A: Employ machine learning (ML) frameworks to model the relationship between fabrication parameters and sensor response.
- ML Regression Models: Use a systematic, multi-model evaluation of regression algorithms (e.g., Gaussian Process Regression (GPR), XGBoost, Artificial Neural Networks (ANNs)) to predict biosensor performance [15].
- Interpretability Tools: Leverage tools like SHAP (SHapley Additive exPlanations) and PDPs (Partial Dependence Plots) to interpret the ML model's outputs. This provides actionable insights, such as identifying enzyme loading thresholds or optimal pH windows, thereby reducing the experimental burden [15].
Validation and Clinical Translation
Q: What does a staged clinical validation protocol for a biosensor entail? A: A convincing validation strategy for investors and regulators follows an evidence ladder [66]:
- Analytical Validation (Bench): Determine Limit of Detection (LOD), linearity, drift, and repeatability under controlled lab conditions (2–8 weeks) [66].
- Controlled Clinical Accuracy: Test the device against an appropriate gold standard (e.g., 12-lead ECG for arrhythmia) using samples collected under ideal conditions [66].
- Prospective Clinical Validation: Conduct a study within the intended-use population under real-world conditions (motion, heat, different skin tones) with pre-specified endpoints [66].
- Real-World Performance & Utility: Deploy the device to assess its impact on clinical decisions, health economics, and patient outcomes [66].
Q: What are the key statistical considerations for clinical validation? A:
- Primary Endpoints: Select clear endpoints tied to clinical use, such as sensitivity/specificity for a condition or Mean Absolute Error (MAE) for a physiological parameter [66].
- Sample Size: Justify your sample size with calculations. For example, to demonstrate a sensitivity of ≥0.95, you may need over 200 positive cases, which could require enrolling over 4,000 participants for a condition with 5% prevalence [66].
- Analysis Plan: Pre-specify statistical methods, including Bland-Altman plots for continuous measures, sensitivity/specificity with confidence intervals, and subgroup analyses by skin tone, age, or BMI [66].
Q: How can I address performance variations across diverse user populations? A: Proactively conduct usability and equity testing.
- Skin Tone: Test the device's performance across the Fitzpatrick scale or measured reflectance categories to identify and mitigate biases, a known issue with optical sensors like pulse oximeters [66].
- Real-World Context: Test under various motion levels, environmental conditions (heat, humidity), and with typical clothing to ensure robust operation [66].
- Operator Training: If healthcare workers are involved, assess real-user training time, task success rates, and error rates [66].
General Troubleshooting
Q: My biosensor reader has communication issues; how can I diagnose this? A:
- Internal Sensor Check: A basic test is to read the internal temperature sensor of your reader's chip (e.g., LMP91000). If this fails, it confirms a fundamental communication issue with the hardware [63].
- Schematic Review: Have your electronic schematics reviewed by an experienced engineer to identify unnecessary connections or potential noise sources [63].
- Independent Electronics Test: Test your electronics independently of the sensor by using resistors to simulate a sensor load and applying a series of bias voltages to check for sensible output [63].
Q: Why is there a gap in my continuous biosensor data? A: Data gaps can result from:
- Signal Loss: This occurs when your smartphone or receiver temporarily stops receiving data from the biosensor, often due to Bluetooth connectivity issues. Ensuring the devices are within range and restarting the app can help [67].
- Session Ended Early: The system may automatically end a session if it determines the biosensor can no longer provide valid readings [67].
- Environmental Alerts: The sensor may pause operation if it encounters extreme temperatures, triggering "Biosensor Too Hot" or "Biosensor Too Cold" messages [68].
Experimental Protocols for Drift Minimization and Validation
Protocol 1: Fabrication of a Low-Drift CNT-Based BioFET (D4-TFT)
This protocol outlines the creation of an ultrasensitive, stable carbon nanotube (CNT) BioFET for use in physiological solutions [5].
1. Device Fabrication and Passivation:
- Fabricate a thin-film transistor (TFT) using semiconducting carbon nanotubes (CNTs) as the channel material.
- Implement a robust encapsulation and passivation strategy around the CNT channel to mitigate current leakage and enhance operational stability [5].
2. Surface Functionalization to Extend Debye Length:
- Grow a poly(oligo(ethylene glycol) methyl ether methacrylate) (POEGMA) polymer brush layer on the device's sensing surface. This non-fouling coating increases the effective Debye length in high-ionic-strength solutions via the Donnan potential effect [5].
- Immobilize capture antibodies (cAb) by printing them directly into the POEGMA matrix above the CNT channel [5].
3. Stable Measurement Configuration:
- Use a stable Pd pseudo-reference electrode instead of a conventional Ag/AgCl reference electrode to facilitate a point-of-care form factor [5].
- Employ a stable electrical testing configuration, minimizing the exposure of the gate to electrolytic ions that cause drift.
4. Drift-Mitigating Data Acquisition:
- Enforce a testing methodology that uses infrequent DC voltage sweeps to characterize device performance. Avoid continuous static measurements or complex AC measurements that are more susceptible to drift artifacts [5].
- Always run a control device (with no antibodies printed over the CNT channel) concurrently to confirm that signal shifts are due to specific binding and not drift [5].
The workflow for this protocol is summarized in the diagram below.
Protocol 2: ML-Driven Optimization of Biosensor Fabrication Parameters
This protocol uses machine learning to model and optimize the relationship between fabrication parameters and sensor output, reducing experimental time and cost [15].
1. Data Preparation:
- Feature Selection: Define key fabrication parameters as model features. For an enzymatic glucose biosensor, these may include enzyme amount, crosslinker (e.g., glutaraldehyde, GA) amount, scan number of the conducting polymer, pH, and temperature [15].
- Target Variable: Use the electrochemical current response as the target variable for the regression model [15].
2. Model Training and Evaluation:
- Algorithm Selection: Systematically evaluate a wide range of regression algorithms from different families (e.g., Linear, Tree-based, Kernel-based, Gaussian Process Regression (GPR), Artificial Neural Networks (ANNs)) [15].
- Validation: Employ a 10-fold cross-validation strategy to ensure the model's performance is statistically reliable and not due to overfitting [15].
- Performance Metrics: Assess models using multiple metrics, including Root Mean Square Error (RMSE), Mean Absolute Error (MAE), and the Coefficient of Determination (R²) [15].
3. Model Interpretation and Insight Generation:
- Global Explanations: Use SHAP (SHapley Additive exPlanations) summary plots to determine the overall importance of each fabrication parameter on the sensor's signal [15].
- Local Explanations: Apply SHAP force plots to understand how different parameters contribute to the prediction for a single, specific sensor fabrication instance [15].
- Parameter Tuning: Derive actionable guidelines from the model, such as optimal pH windows or thresholds for crosslinker usage, to guide future experimental designs [15].
The logical flow of this ML framework is illustrated below.
The Scientist's Toolkit: Research Reagent Solutions
The following table details key materials used in advanced biosensor fabrication, as featured in the cited research.
| Item | Function in Biosensor Fabrication | Example from Research |
|---|---|---|
| Semiconducting CNTs | Serves as the highly sensitive channel material in a field-effect transistor (FET) due to high charge carrier mobility and large surface-to-volume ratio [5]. | Used as the channel material in the D4-TFT BioFET for attomolar-level detection [5]. |
| POEGMA Polymer Brush | A non-fouling polymer layer grafted onto the sensor surface that extends the Debye length in physiological solutions via the Donnan potential, enabling detection in high-ionic-strength environments [5]. | Coated above the CNT channel to overcome charge screening, allowing detection in 1X PBS [5]. |
| Gold Nanoislands (AuNis) | Nanostructured sensing membrane that provides a large surface area with abundant binding sites, enhancing sensitivity and signal stability. Superior to nanoparticles for reproducibility [11]. | Utilized as a sensing membrane on an AlGaN/GaN HEMT biosensor for ultra-sensitive detection of small Rho GTPases [11]. |
| GST-PAK1-GBD Fusion Protein | Acts as a bioreceptor that specifically binds to activated (GTP-bound) small Rho GTPases (Rac1, Cdc42), used for detecting dysregulated signaling in cancer cells [11]. | Immobilized on the AuNis HEMT sensor for selective detection of active small Rho GTPases in Jurkat T-cell lysate [11]. |
| Glutaraldehyde (GA) | A common crosslinking agent used to covalently immobilize biomolecules (e.g., enzymes) onto the sensor surface to enhance stability [15]. | Listed as a key parameter ("crosslinker amount") to be optimized in the machine learning framework for biosensor fabrication [15]. |
Quantitative Data for Biosensor Performance Comparison
The table below summarizes performance metrics from various biosensor technologies discussed in the search results, providing a benchmark for comparison.
| Biosensor Platform | Target Analyte | Limit of Detection (LOD) | Key Performance Metrics | Reference |
|---|---|---|---|---|
| CNT-based D4-TFT (BioFET) | Protein Biomarkers | Sub-femtomolar (aM) | Detection in 1X PBS; high stability with mitigated drift [5]. | [5] |
| AuNis AlGaN/GaN HEMT | Small Rho GTPases (in cell lysate) | 3 × 10⁻¹⁶ g/mL | Wide detection range (3×10⁻¹⁶ to 3×10⁻⁷ g/mL); >98% signal recovery after regeneration [11]. | [11] |
| SERS Immunoassay (Au-Ag Nanostars) | α-Fetoprotein (AFP) | 16.73 ng/mL | Detection range: 0-500 ng/mL; uses intrinsic biomarker vibrations, no external reporter [69]. | [69] |
| Enzyme-free Glucose Sensor | Glucose | High Sensitivity: 95.12 ± 2.54 µA mM⁻¹ cm⁻² | High stability in interstitial fluid; based on porous gold/polyaniline/Pt nanoparticles [69]. | [69] |
Signaling Pathway for a Specific Cancer Biomarker Assay
The following diagram illustrates the specific molecular interaction targeted by the AuNis HEMT biosensor described in the research for detecting activated small Rho GTPases in leukemia (Jurkat T-cell) lysate [11].
Conclusion
Minimizing biosensor drift is an interdisciplinary challenge that requires a holistic strategy, integrating stable material interfaces, refined fabrication protocols, and intelligent data analysis. The convergence of advanced nanomaterials like anti-fouling polymers with machine learning for predictive optimization and calibration presents a powerful pathway toward achieving the stability required for clinical deployment. Future efforts must focus on standardizing validation protocols, developing robust in-situ calibration systems for long-term monitoring, and creating scalable fabrication processes. Success in this arena will directly translate to more reliable point-of-care diagnostics, personalized health monitoring, and accelerated drug development, ultimately bridging the critical gap between innovative laboratory prototypes and real-world clinical impact.
References
- 1. Elucidating the Mechanisms Underlying the Signal Drift of ... [https://pmc.ncbi.nlm.nih.gov/articles/PMC12038169/]
- 2. Recent Advances in Micro- and Nano-Enhanced Intravascular ... [https://pmc.ncbi.nlm.nih.gov/articles/PMC12349352/]
- 3. Perspectives on systematic optimization of ultrasensitive ... [https://pubs.rsc.org/en/content/articlehtml/2024/tc/d4tc02131b]
- 4. Detection of Calibration Drift in Clinical Prediction Models ... [https://pmc.ncbi.nlm.nih.gov/articles/PMC8627243/]
- 5. Addressing Signal Drift and Screening for Detection of ... [https://pmc.ncbi.nlm.nih.gov/articles/PMC12327215/]
- 6. Beyond the Debye length in high ionic strength solution [https://www.nature.com/articles/s41598-017-05426-6]
- 7. A new biosensor detection system to overcome the Debye ... [https://www.dovepress.com/a-new-biosensor-detection-system-to-overcome-the-debye-screening-effec-peer-reviewed-fulltext-article-IJN]
- 8. A new approach towards the Debye length challenge for ... [https://pubs.rsc.org/en/content/articlelanding/2022/nr/d1nr08468b]
- 9. Bio-inspired strategies for designing antifouling biomaterials [https://biomaterialsres.biomedcentral.com/articles/10.1186/s40824-016-0064-4]
- 10. Electrochemical Biosensor Utilizing Low-Susceptibility Macrocyclic... [https://pubmed.ncbi.nlm.nih.gov/40138705/]
- 11. AuNis modified AlGaN/GaN HEMT biosensor for reliable ... [https://www.nature.com/articles/s41598-025-18072-0]
- 12. Green nanotechnology for implantable biosensors [https://www.sciencedirect.com/science/article/pii/S2590137025001050]
- 13. 10 common questions about CGMs answered [https://www.levels.com/blog/10-common-questions-about-cgms-answered]
- 14. Functional Nanomaterials for Advanced Bioelectrode ... [https://www.mdpi.com/1424-8220/25/14/4412]
- 15. Machine learning-based prediction and interpretation of ... [https://www.sciencedirect.com/science/article/abs/pii/S0026265X25030048]
- 16. Troubleshooting & FAQs [https://www.cygnustechnologies.com/resources/faqs/?srsltid=AfmBOoqLw7ppyHwLCxf5qCRkfQUx8XSYS6bp3RwiI3KrI4H_lIx6MJAy]
- 17. Effects of Physiological-Scale Variation in Cations, pH, and ... [https://pmc.ncbi.nlm.nih.gov/articles/PMC11855119/]
- 18. A Ratiometric Fluorescence Nano pH Biosensor for Live-Cell ... [https://pmc.ncbi.nlm.nih.gov/articles/PMC11852597/]
- 19. Field effect transistor based wearable biosensors for ... [https://jnanobiotechnology.biomedcentral.com/articles/10.1186/s12951-023-02153-1]
- 20. Design optimization of high-sensitivity PCF-SPR biosensor ... [https://journals.plos.org/plosone/article?id=10.1371/journal.pone.0330944]
- 21. Design optimization of high-sensitivity PCF-SPR biosensor ... [https://pmc.ncbi.nlm.nih.gov/articles/PMC12435684/]
- 22. A Study on the Effect of Drift Factor on Feature Optimization ... [https://www.mdpi.com/2076-3417/14/23/11366]
- 23. Unlocking the potential of 2D nanomaterial-based biosensors ... [https://pubs.rsc.org/en/content/articlehtml/2025/ma/d4ma00546e]
- 24. Conducting Polymer-Infused Electrospun Fibre Mat ... [https://pubmed.ncbi.nlm.nih.gov/36551110/]
- 25. Optical fibre long-period grating sensors modified with ... [https://pubs.rsc.org/en/content/articlehtml/2025/bm/d4bm01447b]
- 26. Long-term stability of antifouling poly(carboxybetaine ... [https://www.sciencedirect.com/science/article/abs/pii/S030094402300783X]
- 27. Polymers for anti-fouling applications: a review - RSC Publishing [https://pubs.rsc.org/en/content/articlehtml/2025/va/d5va00034c]
- 28. Conducting Polymer-Infused Electrospun Fibre Mat ... [https://www.mdpi.com/2079-6374/12/12/1143]
- 29. Covalent immobilization: A review from an enzyme ... [https://www.sciencedirect.com/science/article/pii/S1385894724095457]
- 30. Review of research progress in immobilization and ... [https://pmc.ncbi.nlm.nih.gov/articles/PMC12273361/]
- 31. A Comprehensive Guide to Enzyme Immobilization: All You ... [https://pmc.ncbi.nlm.nih.gov/articles/PMC11857967/]
- 32. Long-term drift behavior in metal oxide gas sensor arrays [https://www.nature.com/articles/s41597-025-05993-8]
- 33. Innovations in graphene-based electrochemical biosensors in ... [https://pmc.ncbi.nlm.nih.gov/articles/PMC11982133/]
- 34. A Review of Graphene-Integrated Biosensors for Non-Invasive ... [https://pmc.ncbi.nlm.nih.gov/articles/PMC12608150/]
- 35. Recent Advances in MOF-Based Materials for Biosensing ... [https://www.mdpi.com/1424-8220/25/8/2473]
- 36. MOF-based nanocomposites in polymer matrix [https://link.springer.com/article/10.1007/s42114-025-01435-6]
- 37. Conductive polymer nanocomposites: recent advances in ... [https://www.sciencedirect.com/org/science/article/pii/S2635099824000244]
- 38. Opportunities in functionalized metal-organic frameworks ... [https://www.sciencedirect.com/science/article/pii/S000186862500209X]
- 39. 2D MOF structure, electrochemical biosensing in ... [https://www.nature.com/articles/s41699-025-00603-y]
- 40. Biosensors, Volume 15, Issue 10 (October 2025) – 73 articles [https://www.mdpi.com/2079-6374/15/10]
- 41. Optimising CNT-FET biosensor design through modelling ... [https://www.nature.com/articles/s41467-024-51325-6]
- 42. Optimized Fabrication of Carbon-Fiber Microbiosensors for ... [https://pmc.ncbi.nlm.nih.gov/articles/PMC12199714/]
- 43. Carbon Nanotube-Based Field-Effect Transistor Biosensors ... [https://pmc.ncbi.nlm.nih.gov/articles/PMC12109531/]
- 44. Enzyme-Based Solid-Phase Electrochemiluminescence ... [https://pmc.ncbi.nlm.nih.gov/articles/PMC12109801/]
- 45. Perspectives on systematic optimization of ultrasensitive ... [https://pmc.ncbi.nlm.nih.gov/articles/PMC11403992/]
- 46. Controlling parameters and characteristics of ... [https://www.nature.com/articles/s41598-019-43680-y]
- 47. Machine Learning Enhances the Performance of Bioreceptor ... [https://pmc.ncbi.nlm.nih.gov/articles/PMC8401027/]
- 48. Selection of optimal fabrication parameters of an innovative ... [https://www.nature.com/articles/s41598-025-17724-5]
- 49. Integrating short-time linear canonical transform and joint ... [https://www.nature.com/articles/s41598-025-06795-z]
- 50. A strategy to minimize the sensing voltage drift error in ... [https://pmc.ncbi.nlm.nih.gov/articles/PMC5396965/]
- 51. A Sensor Drift Compensation Method with a Masked ... [https://www.mdpi.com/2076-3417/14/6/2604]
- 52. DE19715441C1 - In - situ of immersed... - Google Patents calibration [https://patents.google.com/patent/DE19715441C1/en]
- 53. Brain-Implantable Multifunctional Probe for Simultaneous Detection of... [https://pmc.ncbi.nlm.nih.gov/articles/PMC9316119/]
- 54. High frequency, calibration -free molecular measurements in in... situ [https://pubs.rsc.org/en/content/articlelanding/2019/sc/c9sc04434e]
- 55. A novel strategy for controllable electrofabrication of molecularly imprinted polymer biosensors utilizing embedded Prussian blue nanoparticles | Scientific Reports [https://www.nature.com/articles/s41598-025-93025-1]
- 56. Sensitive, high-throughput, metabolic analysis by ... [https://www.nature.com/articles/s41467-025-63964-4]
- 57. Challenges and Opportunities in Smart Biosensing for ... [https://pmc.ncbi.nlm.nih.gov/articles/PMC12455640/]
- 58. Everything's under Control: Maximizing Biosensor ... [https://pmc.ncbi.nlm.nih.gov/articles/PMC11840803/]
- 59. A comprehensive review of graphene-based biosensors [https://pmc.ncbi.nlm.nih.gov/articles/PMC12448920/]
- 60. Wearable Biosensor Standardization: How to Make Them ... [https://www.mdpi.com/2305-6703/2/3/25]
- 61. Development and Comparative Evaluation of Two Enzyme ... [https://pmc.ncbi.nlm.nih.gov/articles/PMC12566202/]
- 62. Recent Advances in Electrochemical Enzyme-Based ... [https://www.mdpi.com/2304-8158/12/18/3355]
- 63. LMP 91000 trouble shooting for biosensor readers [https://www.zimmerpeacocktech.com/knowledge-base/faq/lmp91000-trouble-shooting/]
- 64. Master Fast Bioelectronics Troubleshooting: A Step-by- ... [https://dev.housing.arizona.edu/how-to-fix-biomedical-devices-fast-troubleshooting-guide]
- 65. Troubleshooting & FAQs [https://www.cygnustechnologies.com/resources/faqs/?srsltid=AfmBOorv-kjGaYLwEy_2PmourIKCSjKT2VvzhdCsKL0GVwBRZ3RCwP0W]
- 66. Clinical Validation of Biosensors: Protocols That Investors ... [https://medstartups.org/clinical-validation-biosensors-protocols-investors-expect]
- 67. Troubleshooting Stelo Glucose Biosensor | Stelo by Dexcom [https://www.stelo.com/en-us/support/faqs/troubleshooting?srsltid=AfmBOoqFwxGwum4kvanLL1uQWaYGrcpRv6Wl8IXsfvgC54yNCgLTHO0G]
- 68. Technical Support [https://support.hellolingo.com/hc/en-us/categories/9920442144919-Technical-Support]
- 69. Biosensors, Volume 15, Issue 9 (September 2025) [https://www.mdpi.com/2079-6374/15/9]