Strategies for Troubleshooting and Minimizing High Background Signal in SPR Biosensing
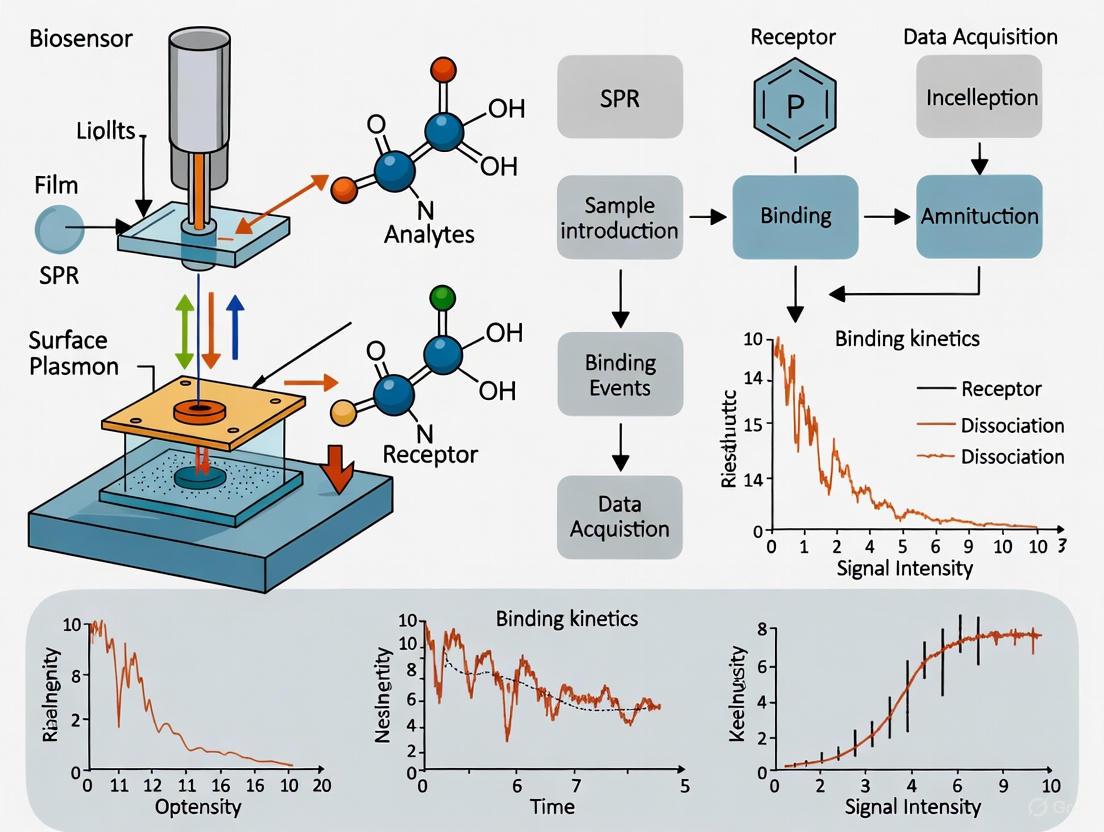
High background signal is a prevalent challenge in Surface Plasmon Resonance (SPR) biosensing that can compromise data reliability, particularly in complex clinical samples.
Strategies for Troubleshooting and Minimizing High Background Signal in SPR Biosensing
Abstract
High background signal is a prevalent challenge in Surface Plasmon Resonance (SPR) biosensing that can compromise data reliability, particularly in complex clinical samples. This article provides a comprehensive guide for researchers and drug development professionals on diagnosing and resolving high background. It covers the fundamental origins of non-specific signals, explores advanced material and assay design methodologies for signal suppression, details systematic troubleshooting and optimization protocols, and outlines validation strategies to confirm assay specificity. By integrating foundational principles with practical applications, this resource aims to enhance the quality and interpretability of SPR data for biomedical research.
Understanding the Roots of Noise: Fundamental Causes of High Background in SPR
In Surface Plasmon Resonance (SPR) biosensing research, accurately distinguishing a specific binding signal from non-specific interference is a fundamental challenge that directly impacts data reliability and interpretation. High background signals can obscure true biomolecular interactions, leading to inaccurate kinetic calculations and affinity measurements. This technical support guide provides researchers, scientists, and drug development professionals with comprehensive troubleshooting methodologies and experimental protocols to identify, mitigate, and resolve the various sources of high background in SPR experiments, enabling more precise and reproducible results in molecular interaction studies.
Troubleshooting Guide: High Background Signals
Systematic Diagnosis and Resolution
When facing high background signals in SPR experiments, a systematic approach to diagnosis and resolution is essential. The table below outlines common issues, their potential causes, and recommended solutions.
Table 1: Troubleshooting High Background Signals in SPR
| Issue Manifestation | Potential Causes | Recommended Solutions |
|---|---|---|
| Baseline drift or instability [1] | Improperly degassed buffer; fluidic system leaks; contaminated buffer; temperature fluctuations. | Degas buffer thoroughly; check for air bubbles or leaks in fluidic system; use fresh, filtered buffer; maintain stable environmental conditions. [1] |
| High non-specific binding (NSB) [2] | Analyte binding to sensor surface instead of target; improper surface chemistry; buffer composition issues. | Use blocking agents (BSA, casein, ethanolamine); add surfactants (e.g., Tween-20) to running buffer; optimize surface chemistry; use a reference channel with coupled non-binder. [2] [3] |
| No signal change upon analyte injection [1] | Inactive target protein; low ligand immobilization level; incompatible analyte/ligand pair. | Check protein activity and stability; optimize ligand immobilization density; verify expected interaction between analyte and ligand. [1] [2] |
| Negative binding signals [2] | Buffer mismatch between sample and running buffer; volume exclusion; issues with reference channel. | Ensure buffer matching; test reference channel suitability by injecting high analyte concentration over different surfaces. [2] |
| Regeneration problems & carryover [1] [2] | Incomplete removal of bound analyte; suboptimal regeneration solution. | Optimize regeneration conditions (pH, ionic strength); test different solutions (e.g., 10 mM Glycine pH 2.0, 10 mM NaOH, 2 M NaCl); increase flow rate or regeneration time. [1] [2] |
| Poor reproducibility [3] | Inconsistent chip handling; variation in ligand immobilization; environmental factors. | Standardize immobilization protocols; use consistent sample handling; include negative controls; precondition sensor chips; control temperature and humidity. [3] |
Experimental Protocols for Background Reduction
Surface Preparation and Blocking Protocol
Effective surface preparation is critical for minimizing non-specific binding. Follow this detailed protocol after ligand immobilization:
- Prepare Blocking Solution: Commonly used agents include 1 M ethanolamine (for amine coupling), 1% (w/v) Bovine Serum Albumin (BSA), or 0.5% casein in running buffer. [4] [3]
- Block Remaining Active Sites: Inject blocking solution over the sensor surface for 5-7 minutes at a flow rate of 5-10 μL/min. [3]
- Wash Surface: Rinse extensively with running buffer to remove unbound blocking agent.
- Validate Surface: Perform a control injection of a non-interacting analyte to confirm reduction of NSB before proceeding with experimental samples.
Running Buffer Optimization Protocol
The composition of your running buffer significantly influences background levels:
- Standard Buffer Formulation: Start with HBS-EP (10 mM HEPES, 150 mM NaCl, 3 mM EDTA, 0.05% surfactant P20) at pH 7.4. [3]
- Additives for NSB Reduction: Incorporate detergents like Tween-20 (0.005-0.01%), BSA (0.1 mg/mL), or carboxymethyl dextran (for carboxylated surfaces). [2] [3]
- Buffer Matching: Ensure all samples are in the same buffer composition as the running buffer, using dialysis or desalting columns if necessary to prevent buffer mismatch artifacts. [2]
- Pre-Screening: Test different buffer formulations in preliminary experiments to identify optimal conditions for your specific molecular system.
Frequently Asked Questions (FAQs)
Q1: My analyte consistently binds to both the target and reference surfaces. What are my options? A: This indicates significant non-specific binding. First, try increasing the stringency of your running buffer by adding mild detergents like Tween-20 (0.005-0.05%) or increasing ionic strength with NaCl (up to 500 mM). If this fails, reconsider your surface chemistry—switch to a sensor chip with different properties (e.g., from carboxymethyl dextran to a flat hydrophobic surface) or employ a different immobilization strategy such as capture coupling to better orient your ligand. [2] [3]
Q2: How can I determine if my target protein has become inactive, causing low or no binding signal? A: First, verify protein integrity and activity using complementary techniques such as SDS-PAGE, circular dichroism, or functional assays independent of SPR. In SPR, test binding with a known positive control analyte. If the positive control shows reduced binding, the target has likely lost activity. To prevent this, ensure proper protein storage conditions, include stabilizing agents like glycerol in buffers, and minimize freeze-thaw cycles. [1] [2]
Q3: What is the most effective approach for developing a regeneration strategy? A: Regeneration development requires empirical testing. Begin with mild conditions and progressively increase stringency. Test short pulses (15-30 seconds) of these solutions in order: 10 mM Glycine pH 2.0 > 10 mM Glycine pH 3.0 > 10 mM NaOH > 2 M NaCl. Monitor sensorgram responses for complete return to baseline and preservation of ligand activity across multiple cycles. For difficult regenerations, 10% glycerol added to regeneration solutions can help maintain target stability. [4] [2]
Q4: My baseline is consistently noisy with high fluctuations. How can I stabilize it? A: Noisy baselines often originate from environmental or buffer-related issues. Ensure the instrument is on a stable, vibration-free surface and in a temperature-controlled environment. Degas all buffers thoroughly before use and filter through 0.22μm membranes. Check for air bubbles in the fluidic system and verify the integrity of your reference channel. If electrical noise is suspected, ensure proper instrument grounding. [1]
The Scientist's Toolkit: Essential Research Reagents
Table 2: Key Reagent Solutions for SPR Background Reduction
| Reagent/Chip Type | Primary Function | Application Context |
|---|---|---|
| CM5 Sensor Chip [3] | Carboxymethylated dextran matrix for covalent immobilization | General-purpose protein-protein interaction studies; amine coupling chemistry |
| BSA (Bovine Serum Albumin) [2] | Blocking agent to reduce non-specific binding | Added to running buffer (0.1-1.0 mg/mL) or used for surface blocking after immobilization |
| Tween-20 [3] | Non-ionic surfactant to minimize hydrophobic interactions | Typically used at 0.005-0.05% in running buffer to reduce NSB |
| HBS-EP Buffer [3] | Standard running buffer with surfactant | Provides consistent ionic strength and pH with built-in NSB reduction (10 mM HEPES, 150 mM NaCl, 3 mM EDTA, 0.05% P20) |
| Ethanolamine [4] [3] | Blocking agent for amine coupling | Deactivates remaining NHS-esters after ligand immobilization (typically 1 M, pH 8.5) |
| Glycine Solution [2] | Low-pH regeneration solution | Elutes bound analyte from ligand (10-100 mM, pH 2.0-3.0) |
| NTA Sensor Chip [3] | Immobilization via His-tag capture | Specific orientation capture of His-tagged proteins, often reducing non-specific binding |
Workflow Visualization: Systematic Approach to High Background
Experimental Workflow: SPR Assay with Background Controls
Non-Specific Binding (NSB) is a pervasive challenge in Surface Plasmon Resonance (SPR) biosensing, often leading to elevated background signals, inaccurate data interpretation, and compromised analytical results. NSB occurs when molecules interact with the sensor surface or other assay components through non-targeted, functional interactions, rather than the specific biorecognition event being studied. This article provides a detailed troubleshooting guide to help researchers identify, understand, and mitigate NSB to ensure the generation of high-quality, reliable SPR data.
What is Non-Specific Binding and How Does It Impact SPR Data?
Answer: Non-Specific Binding (NSB) refers to the adsorption of analyte molecules or other sample components to non-target sites on the sensor surface, the immobilized ligand itself, or the sensor matrix. Unlike specific binding, which is functional and reproducible, NSB is characterized by non-functional interactions that can severely skew experimental results [5] [6].
The impact of NSB on SPR data is twofold [6]:
- Signal Inflation: The signal from non-specifically adsorbed molecules adds to the specific binding signal, leading to an overestimation of binding response (Response Units, RU), which in turn results in inaccurate calculations of kinetic parameters (association rate constant, kₐ; dissociation rate constant, kₑ; and equilibrium constant, KD) [7] [5].
- Signal Masking and False Negatives: In severe cases, NSB can passivate the sensor surface, sterically blocking the specific binding site and reducing the specific signal. This can lead to false negatives, particularly at low analyte concentrations [6].
The diagram below illustrates how NSB contributes to the overall SPR signal, complicating the interpretation of specific binding events.
What are the Primary Mechanisms Causing NSB?
Answer: NSB is primarily driven by physicochemical interactions between molecules in the sample and the biosensor interface. The main mechanisms involved are [6]:
- Electrostatic Interactions: Oppositely charged surfaces and molecules attract each other. For example, a positively charged analyte (high isoelectric point, pI) will non-specifically interact with a negatively charged sensor surface (e.g., carboxylated dextran) [7] [5].
- Hydrophobic Interactions: Hydrophobic patches on proteins or other analytes can interact with hydrophobic regions on the sensor surface or immobilized ligand. This is a common cause of NSB in assays involving membrane proteins or lipophilic molecules [7] [5].
- Hydrogen Bonding and Van der Waals Forces: These weaker, non-covalent forces can contribute to the accumulation of foulant molecules on the sensing interface over time [6].
The following table summarizes these mechanisms and the molecular properties involved.
Table 1: Key Mechanisms of Non-Specific Binding
| Mechanism | Description | Common in Molecules With... |
|---|---|---|
| Electrostatic Interactions | Attraction between oppositely charged groups on the analyte and sensor surface. | High or low isoelectric point (pI); charged surface residues [7] [5]. |
| Hydrophobic Interactions | Interaction between non-polar, water-insoluble regions. | Hydrophobic surface patches; lipid chains; aromatic rings [7] [5]. |
| Hydrogen Bonding & Van der Waals | Weaker, non-covalent dipole-dipole and induced dipole interactions. | Polar groups; potential for transient dipole formation [6]. |
How Can I Detect NSB in My SPR Experiment?
Answer: Detecting NSB is a critical first step in troubleshooting. The following experimental protocol is widely used to diagnose and quantify NSB.
Experimental Protocol: Diagnosing NSB
- Prepare a Control Surface: Create a reference flow cell or sensor that does not have the specific ligand immobilized. This can be a surface that has been activated and then blocked (e.g., with ethanolamine), a surface coated with a non-related protein (e.g., BSA), or a bare sensor chip [7] [2].
- Inject the Analyte: Run your analyte dilution series over both the ligand surface and the control surface under identical experimental conditions.
- Analyze the Sensorgrams: Observe the response on the control surface. A significant response (typically >10% of the signal on the ligand surface) indicates substantial NSB to the sensor matrix or the blocking agent [7]. A sensorgram showing ideal specific binding versus a scenario with significant NSB is illustrated below.
What are the Most Effective Strategies to Mitigate NSB?
Answer: Mitigating NSB requires a systematic approach that addresses its underlying mechanisms. The following table outlines common sources of NSB and their corresponding solutions.
Table 2: Troubleshooting Guide for Non-Specific Binding
| Source of NSB | Symptoms | Recommended Solution |
|---|---|---|
| Electrostatic Attraction | High NSB on a negatively charged dextran surface with a high-pI analyte. | Adjust buffer pH to neutralize charges; increase ionic strength with salt (e.g., 150-500 mM NaCl) to shield charges [7] [2] [3]. |
| Hydrophobic Interaction | NSB persists even at high salt concentrations. | Add non-ionic surfactants (e.g., 0.005%-0.05% Tween 20) [7] [2] [3]; use protein blockers like BSA (0.1-1%) [7] [2]. |
| Ligand or Analyte Properties | The molecule itself is "sticky" or prone to aggregation. | Change assay orientation (immobilize the other binding partner); switch to a different sensor chemistry (e.g., from carboxyl to a lipophilic or blocked surface) [7] [2] [5]. |
| Surface Chemistry | NSB is high on one sensor type but low on another. | Select a sensor chip with surface properties that minimize interaction with your analyte (e.g., switch from CM5 to a C1 or Pioneer chip) [7] [3]. |
A strategic workflow for applying these mitigators is highly recommended. Start with the simplest buffer additives before moving to more complex changes like sensor or assay redesign.
The Scientist's Toolkit: Key Reagents for Combating NSB
Table 3: Research Reagent Solutions for NSB Mitigation
| Reagent | Function | Typical Working Concentration |
|---|---|---|
| Bovine Serum Albumin (BSA) | A protein-based blocker that shields the surface from hydrophobic and ionic interactions by occupying non-specific binding sites [7] [2] [5]. | 0.1% - 1.0% |
| Tween 20 (Polysorbate 20) | A non-ionic surfactant that disrupts hydrophobic interactions between the analyte and the sensor surface [7] [2] [3]. | 0.005% - 0.05% |
| Sodium Chloride (NaCl) | Salt ions shield charged groups on proteins and the sensor surface, reducing electrostatic-based NSB [7] [2]. | 150 - 500 mM |
| Commercial Kinetics Buffer | A pre-optimized buffer containing a combination of blockers and surfactants (often BSA and Tween 20) designed to minimize NSB in biosensor assays [5]. | 1X concentration |
| Casein / Fish Gelatin | Alternative protein-based blocking agents used similarly to BSA to passivate the sensor surface [5]. | As per manufacturer protocol |
| Ethanolamine | Commonly used to block unreacted ester groups on carboxylated sensor chips after ligand immobilization, preventing non-specific attachment via these groups [3]. | 1.0 M, pH 8.5 |
Can a Design of Experiments (DOE) Approach Help Reduce NSB?
Answer: Yes, a Design of Experiments (DOE) approach is highly effective for systematically screening multiple mitigation conditions to quickly identify the optimal buffer and surface combination for minimizing NSB [5].
Experimental Protocol: DOE for NSB Screening
- Define Factors and Ranges: Identify the factors you want to test (e.g., concentrations of BSA, Tween 20, and NaCl) and their experimental ranges (e.g., BSA: 0.1%-1%, Tween 20: 0.001%-0.01%).
- Use DOE Software: Input these factors and your desired responses (e.g., maximization of specific signal, minimization of NSB signal) into DOE software like MODDE.
- Run the Experimental Design: The software will generate a list of specific buffer conditions to test. Each condition can be assigned to a different sensor or flow cell in a single Octet or SPR run.
- Analyze and Model Results: Input the resulting specific and NSB response data back into the software. The DOE tool will generate models (e.g., contour plots) that show how each factor influences NSB, allowing you to pinpoint the ideal buffer composition for your specific assay [5]. This method is far more efficient than testing one variable at a time.
In Surface Plasmon Resonance (SPR) biosensing, the precision of ligand immobilization is not merely a procedural step but a fundamental determinant of data quality. Improper immobilization chemistry directly contributes to high background signals, a pervasive issue that compromises the accuracy of kinetic and affinity measurements. Background interference, or noise, often stems from non-specific binding (NSB) and surface heterogeneity, where unintended interactions occur between analytes, contaminants, and the sensor surface. These failures in surface chemistry can obscure true binding events, leading to false positives, inaccurate kinetic parameters, and reduced experimental reproducibility. This guide details the mechanisms of these failures and provides targeted troubleshooting protocols to help researchers achieve clean, interpretable data.
FAQ: Troubleshooting Immobilization and Background Issues
1. What are the primary surface chemistry failures that lead to high background? High background signals predominantly result from two key surface chemistry failures:
- Non-specific binding (NSB): This occurs when impurities in the analyte sample or the analyte itself interacts non-specifically with the sensor chip surface or the immobilization matrix, rather than solely with the target ligand. This is often caused by improper surface blocking or the use of a sensor chip with unsuitable surface chemistry [8] [1].
- Improper Ligand Orientation: Random or denatured immobilization of the ligand can block its active binding site. This not only reduces the specific signal but can also expose hydrophobic patches that promote NSB, thereby increasing background noise [9] [3].
2. How can I optimize ligand immobilization to minimize background? Achieving a homogeneous, correctly oriented ligand layer is crucial. Key strategies include:
- Use Site-Specific Immobilization: Favor capture methods (e.g., using anti-tag antibodies, streptavidin-biotin, or His-tag/NTA) over random covalent coupling. This ensures a uniform orientation, preserving ligand activity and minimizing non-functional surface occupancy that contributes to background [9].
- Optimize Ligand Density: Excessively high ligand density can cause steric hindrance and mass transport limitations, which artificially distort binding kinetics and increase the signal baseline. Titrate your ligand to find the density that provides a strong specific signal without these artifacts [3].
- Ensure Ligand Purity: Impurities in the ligand preparation can co-immobilize on the surface, creating sites for non-specific analyte binding. Always use highly purified ligands [3].
3. My baseline is unstable and drifts. Could this be related to immobilization? Yes, baseline drift is a common symptom of an improperly prepared surface. Causes and solutions include:
- Incomplete Surface Blocking: After ligand immobilization, any remaining activated groups on the chip surface must be "capped" with a blocking agent like ethanolamine. Incomplete blocking leaves charged groups that can slowly interact with the running buffer, causing a drifting baseline [10].
- Poor Surface Regeneration: Harsh or incomplete regeneration between analysis cycles can leave residual analyte or damage the ligand layer, leading to a changing baseline over time. Optimize your regeneration buffer and contact time to fully remove analyte without damaging the immobilized ligand [1].
- Buffer Incompatibility: Ensure your running buffer and sample buffer are perfectly matched. Even small differences in composition, pH, or ionic strength can cause bulk refractive index shifts and baseline instability when the sample is injected [11].
4. I observe a significant signal, but my negative control is also high. What should I do? A high signal in your negative control flow cell is a clear indicator of NSB. To address this:
- Improve Surface Blocking: Use effective blocking agents like BSA, casein, or specialized commercial blockers to passivate any remaining reactive sites on the sensor surface [1] [3].
- Modify Running Buffer: Introduce mild detergents (e.g., Tween-20 at 0.005-0.01%) or increase the ionic strength to shield electrostatic NSB [1] [3].
- Re-evaluate Sensor Chip Choice: If NSB persists, switch to a sensor chip designed to minimize NSB, such as those with hydrophilic PEG-based coatings or zwitterionic surfaces [9].
5. The immobilization level is low, leading to a weak signal. How can I improve it? Low immobilization can stem from several factors:
- Suboptimal Coupling Chemistry: For covalent amine coupling, the quality of EDC/NHS is critical. Use fresh, high-purity reagents, as degraded EDC is a common cause of coupling failure [9].
- Incorrect Ligand pH: During amine coupling, the ligand must carry a net positive charge to be attracted to the negatively charged pre-activated surface. Use a coupling buffer with a pH below the ligand's isoelectric point (pI) to ensure this electrostatic pre-concentration [10].
- Low Ligand Activity: Ensure the ligand is fresh, properly folded, and functional. Denatured or aggregated proteins will not immobilize efficiently or generate a valid signal.
Table 1: Common Sensor Chips and Their Role in Managing Background
| Chip Type | Immobilization Chemistry | Advantages | Background-Related Risks |
|---|---|---|---|
| Carboxyl (e.g., CM5) | Amine coupling via EDC/NHS | High stability, versatile | Risk of random orientation and NSB if not properly blocked [8] |
| NTA | Captures His-tagged ligands | Site-specific, reversible | Nickel ions can cause NSB with histidine-rich analytes; baseline drift [9] |
| Streptavidin | Captures biotinylated ligands | Highly specific, excellent orientation | Biotinylation can sometimes impair ligand function; streptavidin can bind non-specifically [9] |
| PEG-based | Various low-fouling chemistries | Extremely low NSB | May have lower binding capacity for some ligands [9] |
Experimental Protocols for Diagnosis and Optimization
Protocol 1: Systematic Immobilization for Minimal Background
This protocol outlines a method to achieve a stable, low-background ligand surface.
Key Reagents:
- Sensor chip (selected from Table 1)
- HBS-EP or PBS running buffer (filtered and degassed)
- High-purity EDC and NHS for amine coupling
- Ligand in appropriate coupling buffer (e.g., 10 mM sodium acetate, pH 4.0-5.5)
- Blocking solution (e.g., 1 M ethanolamine-HCl, pH 8.5)
- Regeneration solution (e.g., 10 mM glycine-HCl, pH 1.5-3.0)
Methodology:
- Surface Activation: Dock the sensor chip and prime the system with running buffer. Inject a 1:1 mixture of EDC and NHS for 7 minutes at a flow rate of 5-10 µL/min to activate the carboxyl groups on the chip surface [10].
- Ligand Immobilization: Inject the purified ligand (typically 10-50 µg/mL in a low-salt buffer at a pH 1.0 unit below its pI) using a manual injection. Monitor the sensorgram in real-time and stop the injection once the desired immobilization level (Response Units, RU) is achieved.
- Surface Blocking: Inject the ethanolamine blocking solution for 5-7 minutes to deactivate any remaining activated ester groups. This critical step passivates the surface and drastically reduces baseline drift and NSB [10].
- Surface Validation: Inject a non-binding negative control protein and a known positive control analyte to confirm the absence of NSB and the presence of specific binding, respectively.
Protocol 2: Diagnostic Run for NSB Identification
Use this protocol when troubleshooting high background to identify the source of the problem.
Methodology:
- Prepare Analyte Samples: Dilute your analyte in running buffer at the working concentration. Also, prepare a sample of a non-interacting negative control protein at a similar concentration.
- Establish a Baseline: Allow the buffer to flow over the ligand and reference surfaces until a stable baseline is achieved.
- Inject Controls: In sequence, inject the negative control sample, followed by your analyte sample. Use the same injection time and flow rate for both.
- Analyze Results: A significant response during the negative control injection indicates pervasive NSB. A response only during the analyte injection that does not return to baseline suggests very high-affinity binding or NSB to the ligand itself. A response that returns to baseline indicates specific, reversible binding.
Table 2: Troubleshooting Guide for Common Immobilization Failures
| Problem | Possible Cause | Recommended Solution | Expected Outcome |
|---|---|---|---|
| High NSB | Incomplete blocking; hydrophobic/charge interactions. | Optimize blocking with BSA/casein; add detergent to buffer; switch to low-fouling chip [1] [3]. | Reduced signal in reference/control flow cell. |
| Low Immobilization | Poor EDC/NHS quality; incorrect pH for coupling. | Use fresh, ultrapure EDC/NHS; scout for optimal ligand pH [9] [10]. | Increased final immobilization level (RU). |
| Rapid Signal Loss | Unstable coupling; ligand denaturation. | Use gentler capture coupling (e.g., Streptavidin); check ligand stability. | Stable baseline and consistent binding over multiple cycles. |
| Baseline Drift | Buffer mismatch; slow ligand leaching. | Match buffer in all solutions; use more stable covalent chemistry. | Flat, stable baseline during buffer flow. |
Visualizing the Impact of Immobilization on Background
The diagram below illustrates how improper immobilization strategies lead to high background signals and how proper strategies mitigate them.
The Scientist's Toolkit: Essential Reagents for Success
Table 3: Key Research Reagent Solutions for SPR Immobilization
| Reagent / Material | Function | Key Consideration |
|---|---|---|
| Ultrapure EDC/NHS | Activates carboxylated surfaces for covalent amine coupling. | Essential for consistent, high-yield immobilization. Lower purity grades are a major cause of failure [9]. |
| Streptavidin Sensor Chips | Captures biotinylated ligands with precise orientation. | Maximizes ligand activity and minimizes NSB from random coupling [9]. |
| Low-Fouling Sensor Chips (e.g., PEG) | Hydrophilic surface chemistry that resists protein adsorption. | Directly reduces NSB from complex samples like serum or cell lysates [9]. |
| Ethanolamine | Blocks remaining activated esters after coupling. | Critical for stabilizing the baseline and reducing charge-based NSB [10]. |
| HBS-EP Buffer | Standard running buffer (HEPES, Saline, EDTA, Surfactant P20). | The surfactant (Tween-20) reduces hydrophobic interactions and NSB [3]. |
FAQs: Troubleshooting Buffer-Related High Background in SPR
1. Why does my sensorgram show a large, square-shaped "jump" at the start and end of analyte injection?
This is typically a bulk shift (or solvent effect), not a binding signal. It occurs when the refractive index (RI) of your analyte solution does not match the RI of your running buffer [7]. This RI difference is detected by the SPR instrument and appears as an instantaneous shift. While reference subtraction can partially correct this, it is best practice to match the buffer composition of your analyte sample and running buffer as closely as possible [7].
2. I see a negative binding response after reference subtraction. What does this mean?
A negative response after reference subtraction indicates that the signal from the reference flow cell (with an inactive ligand like BSA) is higher than from the active ligand surface [12]. This is most commonly caused by:
- Buffer Mismatch: A difference in ionic strength or composition between the analyte solution and running buffer can cause a larger RI shift on the reference surface than on the ligand-coated surface [12].
- Non-Specific Binding (NSB) to Reference: Your analyte may be binding more strongly to the surface chemistry of your reference channel [12].
- Volume Exclusion: The ligand immobilized on the active surface occupies physical space (volume) within the sensor chip matrix (e.g., dextran). This can make the active surface react differently to buffer changes compared to the reference surface, leading to an apparent negative signal after subtraction [12].
3. How can I reduce non-specific binding (NSB) that contributes to high background?
NSB occurs when your analyte interacts with the sensor chip surface itself rather than your specific ligand. Several additives can be used in your running buffer to minimize this [2] [13]:
- Salts (e.g., NaCl): Use concentrations up to 500 mM to shield charge-based interactions [13].
- Non-ionic Surfactants (e.g., Tween-20): Add at 0.005%-0.1% to disrupt hydrophobic interactions [13].
- Proteins (e.g., BSA): Add at 0.1-1 mg/ml to block non-specific sites on the surface [2] [12]. Note: Do not use BSA during ligand immobilization, only during analyte runs [7].
- Carboxymethyl Dextran: For dextran-based chips, adding 0.1-1 mg/ml CM-dextran can compete for non-specific binding sites [12].
Quantitative Guide to Buffer Components and Bulk Effects
The following table summarizes common buffer components known to cause bulk shifts and recommended strategies to mitigate their impact [7].
Table 1: Common Buffer Components and Mitigation Strategies for Bulk Shifts
| Buffer Component | Common Purpose | Impact on SPR Signal | Recommended Mitigation Strategy |
|---|---|---|---|
| Glycerol | Protein stabilizer | High positive bulk shift | Use at the lowest possible concentration; ensure identical concentration in running buffer. |
| DMSO | Solubilize small molecules | High positive bulk shift | Use at the lowest possible concentration; ensure identical concentration in running buffer. |
| High Salt | Modulate ionic strength | Large positive bulk shift | Use at the lowest necessary concentration; ensure identical concentration in running buffer. |
| Low Salt | Modulate ionic strength | Negative bulk shift | Adjust salt content to match running buffer; dialyze samples if possible. |
Experimental Protocol: Diagnosing and Resolving Buffer Incompatibility
This protocol provides a systematic method to identify the source of buffer-related background signals and to develop an optimized running buffer.
Objective: To identify and eliminate sources of high background signal caused by buffer mismatch and non-specific binding.
Materials:
- SPR instrument and compatible sensor chip.
- Running buffer (e.g., HBS-EP: 10 mM HEPES, 150 mM NaCl, 3 mM EDTA, 0.05% v/v Surfactant P20, pH 7.4).
- Analyte samples, prepared in running buffer (for ideal conditions) or in their storage buffer (to test for mismatch).
- Ligand and a suitable protein for the reference surface (e.g., BSA, non-related IgG).
Method:
Surface Preparation: Immobilize your ligand on one flow cell. Immobilize a similar density of your reference protein (e.g., BSA) on another flow cell [12] [7].
Initial Test for NSB:
- Dilute your analyte to the highest concentration used in your assay in your running buffer.
- Inject this sample over both the ligand and reference surfaces.
- Observation: If you observe binding to the reference surface, non-specific binding is present and must be addressed before proceeding [7].
Test for Buffer Mismatch:
- Dilute your analyte to the highest concentration in its original storage buffer.
- Inject this sample over both the ligand and reference surfaces.
- Observation: A large, square-shaped response on both surfaces that returns to baseline immediately after injection ends indicates a significant buffer mismatch (bulk shift) [7].
Buffer Optimization (Additive Screening):
- If NSB is detected (Step 2), prepare a new running buffer containing one or more additives (see Table 1 and NSB FAQs above). A common starting point is HBS-EP buffer, which already contains a surfactant and salt [13].
- Repeat Step 2 using the new running buffer to prepare and dilute your analyte.
- Iterate this process, adjusting additive type and concentration, until the signal on the reference surface is minimized.
Sample Buffer Matching (Final Check):
- Once NSB is minimized, the analyte must be in a buffer that matches the optimized running buffer. This can be achieved by:
- Dialysis: The most effective method [12].
- Desalting columns: A faster, though less precise, alternative.
- After buffer exchange, repeat the injection. The bulk shift should be dramatically reduced, revealing the true binding signal.
- Once NSB is minimized, the analyte must be in a buffer that matches the optimized running buffer. This can be achieved by:
This logical workflow for diagnosing buffer issues can be summarized in the following diagram:
The Scientist's Toolkit: Research Reagent Solutions
Table 2: Essential Reagents for Troubleshooting SPR Buffer Effects
| Reagent | Function in SPR | Key Consideration |
|---|---|---|
| HEPES Buffered Saline (HBS-EP) | A standard running buffer; provides ionic strength and pH stability, contains EDTA and surfactant to minimize NSB. | An excellent starting buffer for most experiments; surfactant concentration may need optimization [3]. |
| Bovine Serum Albumin (BSA) | A blocking agent added to running buffer (0.1-1 mg/ml) to occupy non-specific sites on the sensor surface. | Do not use during ligand immobilization to avoid coating the chip with BSA. Use during analyte runs only [7]. |
| Non-ionic Surfactant (Tween-20) | Disrupts hydrophobic interactions that cause NSB. Typical concentration: 0.005% - 0.1% [13]. | Higher concentrations can potentially disrupt weak biological interactions. |
| Sodium Chloride (NaCl) | Shields charge-based non-specific interactions between a charged analyte and the sensor surface. Used from 150 mM up to 500 mM [13]. | Very high salt concentrations can cause protein precipitation or salting-out effects. |
| Glycine-HCl (pH 1.5-3.0) | A common, low-pH regeneration solution to remove tightly bound analyte from the ligand without permanently damaging it [2] [7]. | Always start with the mildest possible conditions. Adding 5-10% glycerol can help protect ligand activity [13]. |
| Sodium Hydroxide (NaOH) | A common, high-pH regeneration solution. A typical concentration is 10-50 mM [2] [7]. | Can denature some sensitive proteins. Scouting is required to find the optimal pH and contact time. |
FAQs: Diagnosing Surface Degradation
Q1: How can I tell if my sensor surface is degrading? A: Sensor surface degradation often manifests as an unstable or drifting baseline, a gradual decrease in binding response (response units) over multiple analyte injections, or inconsistent data between replicate experiments [1] [14]. If your regeneration step fails to return the baseline to its original level, or if the baseline drops progressively, it indicates surface damage or build-up of foulants [14].
Q2: What is the difference between surface fouling and regeneration problems? A: Surface fouling (or non-specific adsorption) is the unwanted accumulation of molecules on the sensor surface, which increases background signal and noise [1] [6]. Regeneration problems occur when the chosen method fails to completely remove the bound analyte between cycles, leaving residual material that compromises subsequent measurements [13] [2]. Fouling can cause regeneration problems, and poor regeneration can accelerate surface fouling.
Q3: My ligand seems to be losing activity. What is the likely cause? A: A common cause is the use of a regeneration buffer that is too harsh, which denatures the immobilized ligand [13] [15]. This is often observed when the response signal for the same analyte concentration steadily decreases with each injection cycle [14]. Alternatively, the ligand could have been inactivated during the initial immobilization process, particularly if amine coupling at low pH was used [13] [2].
Troubleshooting Guide: Recognizing and Addressing Common Issues
Problem Diagnosis Workflow
Use the following diagram to systematically diagnose issues related to regeneration and surface fouling.
Quantitative Guide to Common Regeneration Solutions
Table 1: Common regeneration buffers and their typical applications. Always start with the mildest condition and increase intensity as needed [14].
| Regeneration Type | Common Compositions | Typical Applications | Considerations |
|---|---|---|---|
| Acid | 10-150 mM Glycine-HCl, pH 2.0-3.0; 10-100 mM Phosphoric acid [14] [2] [15] | Antibodies, Proteins [14] | Can denature sensitive ligands. Adding 5-10% glycerol can help preserve activity [13] [15]. |
| Base | 10-50 mM NaOH [14] [2] | Nucleic acids, Stable proteins [14] | Effective for removing tightly bound biomolecules. |
| High Salt | 1-4 M MgCl₂, 2-5 M NaCl [2] | Interactions reliant on ionic bonding [14] | Can promote aggregation for some proteins. |
| Detergent | 0.01-0.5% SDS [14] | Peptides, Proteins/Nucleic acids [14] | Requires extensive washing to remove from system. |
| Chaotropic | 1-6 M Guanidine-HCl [1] | Very strong interactions | Harsh; high potential for ligand denaturation. |
Experimental Protocol: Scouting for an Optimal Regeneration Buffer
Objective: To identify a regeneration solution that completely removes the analyte without damaging the ligand activity.
- Initial Surface Preparation: Immobilize your ligand on the sensor chip using your standard protocol [7].
- Conditioning: Perform 1-3 injections of a mild regeneration buffer (e.g., low salt or mild acid) to condition the surface [14].
- Baseline Establishment: Inject running buffer to establish a stable baseline.
- Analyte Binding: Inject a single, medium concentration of analyte to achieve a robust binding response.
- Dissociation: Allow analyte to dissociate in running buffer for a short period (e.g., 60-120 seconds).
- First Regeneration Test: Inject a candidate regeneration solution for 15-60 seconds at a moderate flow rate (e.g., 100 µL/min) [14].
- Evaluate: Monitor if the baseline returns to within ±1-2 RU of its pre-injection level [14].
- If the baseline returns completely: The regeneration may be sufficient. Proceed to step 8 to test for ligand activity.
- If the baseline does not return completely: The regeneration is too weak. Repeat steps 3-6 with a slightly harsher solution (e.g., lower pH, higher salt, or adding a mild detergent).
- If the baseline drops significantly: The regeneration is too harsh and is removing the ligand itself. Use a milder condition.
- Ligand Integrity Test: Re-inject the same medium concentration of analyte. The maximum response (Rmax) should be identical (≥90%) to the first injection [14]. A decreasing signal indicates ligand denaturation.
- Cycling Test: Repeat the bind-regenerate cycle at least 5-10 times with the promising candidate. A stable baseline and consistent analyte response confirm a robust regeneration protocol [14].
Strategies to Mitigate Surface Fouling (Non-Specific Binding)
Table 2: Common sources of non-specific binding (NSB) and their solutions [1] [7] [2].
| Source of NSB | Symptoms | Recommended Solutions |
|---|---|---|
| Electrostatic Interactions | NSB with positively charged analytes on negatively charged dextran chips. | Adjust buffer pH to analyte's pI; Add NaCl (50-500 mM); Block surface with ethylenediamine instead of ethanolamine [13] [7]. |
| Hydrophobic Interactions | NSB with hydrophobic protein patches. | Add non-ionic surfactants (e.g., Tween-20 at 0.005-0.1%) to running buffer [13] [7]. |
| Surface Stickiness | High background on reference and active flow cells. | Add a blocking protein like BSA (0.5-2 mg/mL) or carboxymethyl dextran (1 mg/mL) to running buffer [13] [7]. |
| Inadequate Reference Surface | Ineffective bulk effect subtraction. | Couple a non-binding protein or molecule to the reference channel to mimic the surface of the active flow cell [13] [2]. |
| Wrong Sensor Chip | Persistent NSB despite buffer optimization. | Switch to a sensor chip with a different surface chemistry (e.g., from dextran to a planar surface) [13] [7]. |
The Scientist's Toolkit: Key Research Reagent Solutions
Table 3: Essential reagents for tackling sensor surface degradation and fouling.
| Reagent / Material | Function | Key Considerations |
|---|---|---|
| Glycerol | A regeneration buffer additive that helps stabilize protein ligands against denaturation during harsh regeneration [13] [15]. | Effective at 5-10% (v/v) concentration. A 9:1 glycine:glycerol solution is a known example [15]. |
| Bovine Serum Albumin (BSA) | A blocking agent used to occupy non-specific binding sites on the sensor surface, reducing fouling [13] [7]. | Typical concentration of 0.5-2 mg/mL. Use in running buffer during analyte injections only, not during immobilization [13] [7]. |
| Tween-20 | A non-ionic surfactant that disrupts hydrophobic interactions, thereby reducing non-specific binding [13] [7]. | Use at low concentrations (0.005%-0.1%) to avoid damaging the fluidic system or interfering with specific binding [13] [7]. |
| Ethylenediamine | A blocking agent for amine-coupled surfaces; can be used instead of ethanolamine to reduce negative surface charge [13]. | Particularly useful when analyzing positively charged analytes to minimize electrostatic fouling [13]. |
| NTA Sensor Chip | Allows for capture of His-tagged ligands. The entire complex (ligand and bound analyte) can be removed and refreshed with each cycle, avoiding harsh regeneration [13] [7]. | Prevents ligand denaturation from repeated exposure to regeneration buffers. Requires re-capture of ligand for each cycle [13]. |
Building a Clean Assay: Proactive Methodologies to Suppress Background
Understanding the Core Problem: Why High Background Occurs
What is fouling in SPR biosensing? Surface fouling is the non-specific adsorption of molecules (like proteins, lipids, or cells) from your sample onto the SPR sensor chip surface. This undesirable adsorption causes a change in the refractive index that is not due to the specific binding you are trying to measure, leading to a high background signal, increased noise, and a reduced signal-to-noise ratio. This can obscure the detection of low-abundance analytes and sometimes produce false positive results [16].
What are the primary mechanisms behind fouling? Fouling is primarily driven by two factors:
- Hydrophobic Interactions: Non-polar regions on proteins or other molecules interact with non-polar areas on the sensor surface.
- Electrostatic Interactions: Oppositely charged regions on the analyte and the sensor surface attract each other, leading to non-specific binding [3] [2].
How do anti-fouling surfaces work? Advanced anti-fouling interfaces are designed to create a physical and energetic barrier that prevents these non-specific interactions. The two most accepted theories are:
- Surface Hydration: Creating a tightly bound layer of water molecules at the interface. This hydration layer forms a physical energy barrier that proteins and other contaminants must disrupt to adsorb, which is energetically unfavorable [16].
- Steric Hindrance: Using polymer brushes or hydrogels to create a dense, repulsive layer that physically prevents large fouling molecules from reaching the sensor surface [16].
The following diagram illustrates how these molecular mechanisms work together to protect the sensor surface.
Troubleshooting Guide: FAQs on High Background and Non-Specific Binding
This section directly addresses the most common questions and problems researchers face regarding high background signals in SPR.
FAQ 1: My sensorgrams show a significant signal on the reference surface. How do I reduce this non-specific binding (NSB)?
A signal on the reference channel is a clear indicator of NSB. This occurs when your analyte interacts with the sensor surface itself, rather than only with your immobilized ligand [7].
Troubleshooting Steps:
- Confirm NSB: Always run a preliminary test by injecting a high concentration of your analyte over a bare sensor with no immobilized ligand. Any response indicates NSB [7].
- Optimize Buffer Conditions: The composition of your running buffer is your first and most powerful tool against NSB.
- Use a Blocking Agent: After ligand immobilization, block any remaining active sites on the sensor surface with a suitable agent like Bovine Serum Albumin (BSA) or ethanolamine [1] [3].
- Re-evaluate Surface Chemistry: If NSB persists, consider switching to a sensor chip with a different surface chemistry that is less likely to interact with your specific analyte (e.g., switch from a carboxylated to a neutral surface) [7] [2].
Table: Common Buffer Additives to Mitigate Non-Specific Binding
| Additive | Recommended Concentration | Mechanism of Action | Best For Countering |
|---|---|---|---|
| Bovine Serum Albumin (BSA) | 0.1% - 1% [7] | Shields the surface with a globular protein that has domains of varying charge densities [7]. | General protein adsorption; a standard first choice. |
| Tween 20 | 0.005% - 0.05% [3] | A non-ionic surfactant that disrupts hydrophobic interactions [7]. | NSB due to hydrophobic effects. |
| Sodium Chloride (NaCl) | 150 - 500 mM [7] | Increases ionic strength to shield charged groups and reduce electrostatic interactions [7]. | NSB due to attractive charges between analyte and surface. |
| Dextran or Polyethylene Glycol (PEG) | Varies | Adds steric hindrance and increases surface hydration [2]. | Preventing access of large fouling molecules. |
FAQ 2: My baseline is unstable and drifting. Could this be related to fouling?
Yes, baseline drift is often a sign of a poorly equilibrated sensor surface or slow, ongoing fouling. A perfectly equilibrated surface should yield a stable, flat baseline [11] [1].
Troubleshooting Steps:
- Equilibrate Thoroughly: It is sometimes necessary to run the flow buffer overnight to fully equilibrate the sensor surface. Several buffer injections before the actual experiment can also minimize drift [11].
- Degas Your Buffer: Ensure your buffer is properly degassed to eliminate microbubbles, which can cause significant baseline noise and drift [1].
- Match Your Buffers: Avoid bulk shifts and drift by precisely matching the composition of your flow buffer and analyte buffer. Even small differences can cause shifts [11].
- Inspect the Fluidic System: Check for leaks in the fluidic system that may introduce air or cause fluctuations [1].
FAQ 3: I see a sudden, sharp spike at the start of my analyte injection. What does this mean?
Sudden spikes at the beginning of an injection often point to issues with carryover or sample dispersion [11].
Troubleshooting Steps:
- Address Carryover: Add extra wash steps for the injection needle between samples to prevent contamination from a previous, high-concentration sample [11].
- Check Sample Separation: Most SPR instruments have routines to separate the flow buffer from the sample plug. Ensure these are properly configured. Sample dispersion mixes your analyte with the flow buffer, effectively lowering the concentration and creating artifacts [11].
- System Suitability Test: Inject an elevated NaCl solution (e.g., 0.5 M). It should give a sharp rise and fall with a flat steady state. A flow buffer injection should give an almost flat line [11].
FAQ 4: How do I know if my anti-fouling surface is working in a complex sample like blood serum?
Testing in complex matrices is the ultimate validation for an anti-fouling surface. The high concentration of proteins and other components in serum provides a stringent challenge [16].
Experimental Protocol for Validation:
- Prepare a Negative Control Surface: Create a sensor chip coated with your anti-fouling material but with no specific capture ligand immobilized.
- Inject Complex Sample: Flow undiluted or minimally diluted serum, plasma, or other complex medium over both your active and negative control surfaces.
- Measure the Response: A well-designed anti-fouling surface will show a very low response (ideally < 5% of the response from a non-protected surface) on the negative control channel. This residual signal represents the non-specific fouling that your surface successfully repelled [16].
- Compare to a Standard: Compare the fouling level against a known standard, such as a carboxymethyl dextran surface, to quantify the improvement.
Experimental Protocols: Designing and Validating Anti-Fouling Surfaces
Protocol 1: Creating a Zwitterionic-Based Anti-Fouling Surface
Zwitterionic materials, such as poly(carboxybetaine) or poly(sulfobetaine), possess both positive and negative charges, resulting in a neutral, super-hydrophilic surface that strongly binds water molecules. This creates an exceptionally effective hydration layer for repelling fouling [16].
Procedure:
- Surface Activation: Clean the gold sensor chip using an oxygen plasma treatment or by immersion in a fresh piranha solution (Caution: extremely corrosive) to remove organic contaminants and create a clean, reactive surface [17].
- Form a Self-Assembled Monolayer (SAM): Immerse the activated gold chip in a 1 mM ethanol solution of a thiolated zwitterionic compound (e.g., carboxybetaine thiol or sulfobetaine thiol) for 12-24 hours to form a dense, ordered monolayer [17].
- Rinse and Dry: Thoroughly rinse the chip with pure ethanol and water to remove physically adsorbed molecules, and dry under a stream of nitrogen gas.
- Functionalization (Optional): If the surface needs to later immobilize a specific ligand, the terminal groups of the zwitterionic layer (e.g., carboxyl groups) can be activated using standard EDC/NHS chemistry for covalent coupling [17].
Protocol 2: Signal Enhancement and Fouling Reduction Using Nanomaterials
Nanocomposite coatings can both enhance the SPR signal and provide anti-fouling properties, improving sensitivity in complex media [17].
Procedure:
- Prepare a Nanocomposite Suspension: Disperse 2D nanomaterials (e.g., graphene oxide) or magnetic nanoparticles in a suitable solvent (e.g., deionized water) using sonication to create a stable, homogeneous suspension.
- Modify the Sensor Surface: Deposit the nanomaterial onto a pre-functionalized gold surface (e.g., one coated with a SAM containing amine groups) using techniques like drop-casting, spin-coating, or electrochemical deposition.
- Cross-linking: Use a cross-linker like glutaraldehyde to covalently attach the nanomaterial layer to the functionalized sensor surface, ensuring stability during experiments.
- Apply an Anti-Fouling Topcoat: To further reduce fouling on the nanomaterial, graft a dense layer of a hydrophilic polymer like polyethylene glycol (PEG) or a zwitterionic polymer onto the nanomaterial surface.
The following workflow summarizes the key decision points and steps involved in designing and implementing an effective anti-fouling strategy for your SPR experiments.
The Scientist's Toolkit: Essential Reagents and Materials
Table: Key Research Reagent Solutions for Anti-Fouling SPR
| Item / Reagent | Function / Application | Key Considerations |
|---|---|---|
| Zwitterionic Thiols (e.g., Carboxybetaine thiol) | Forming self-assembled monolayers (SAMs) on gold that create a super-hydrophilic, anti-fouling interface via a strong hydration layer [16] [17]. | Requires 12-24 hours for SAM formation. Terminal group can be chosen for subsequent ligand coupling. |
| PEG-based Reagents (e.g., mPEG-Thiol) | Grafting polyethylene glycol polymers to sensor surfaces to create steric hindrance and resist protein adsorption [16]. | Molecular weight and grafting density are critical for performance. Can be less effective than zwitterions in undiluted serum. |
| Bovine Serum Albumin (BSA) | A common blocking agent used to occupy remaining non-specific binding sites on the sensor surface after ligand immobilization [7] [3]. | Inexpensive and effective. Ensure it does not interfere with the specific interaction being studied. |
| Non-ionic Surfactants (e.g., Tween 20) | Added to running and sample buffers to disrupt hydrophobic interactions that cause non-specific binding [7] [3]. | Use low concentrations (0.005%-0.05%); higher concentrations can interfere with biological interactions. |
| EDC / NHS Cross-linkers | Standard chemistry for activating carboxyl groups on sensor surfaces for the covalent immobilization of ligands containing primary amines [17]. | Fresh preparation is critical for efficient activation. |
| NTA Sensor Chips | For capturing His-tagged proteins, ensuring a uniform and oriented immobilization which can minimize non-specific binding by presenting the ligand correctly [7] [3]. | Requires a divalent cation like Ni²⁺ or Co²⁺. Regeneration with imidazole can be gentle on the ligand. |
This technical support center provides troubleshooting guides and FAQs to help researchers resolve the common challenge of high background signal caused by non-specific binding (NSB) in Surface Plasmon Resonance (SPR) and other biosensing experiments.
Troubleshooting Guide: Diagnosing and Resolving NSB
High background signal undermining your data? Follow this systematic guide to identify and correct the source of non-specific binding.
Diagnosing NSB Sources: The first and most critical troubleshooting step is to run a control experiment by flowing your analyte over a bare sensor surface without any immobilized ligand. A significant response in this control indicates problematic NSB that must be addressed before collecting experimental data. [18]
▣ Experimental Protocols: Key Methodologies
Protocol 1: Systematic NSB Reduction in SPR
This protocol outlines a step-by-step method for identifying and minimizing NSB in SPR experiments. [18]
- Preliminary NSB Test: Dilute your analyte in running buffer and inject it over a bare, non-functionalized sensor surface. Monitor the response units (RU).
- Interpret Result: A significant change in RU indicates NSB. Proceed with the following optimization steps.
- Buffer Optimization:
- pH Adjustment: Adjust the pH of your running buffer to the isoelectric point (pI) of your analyte to neutralize its overall charge. This reduces electrostatic interactions with the charged sensor surface. [18]
- Salt Addition: Introduce NaCl to the buffer at concentrations typically between 150-250 mM. The ions shield charged groups, disrupting charge-based interactions. [18]
- Additive Screening:
- Protein Blockers: Add Bovine Serum Albumin (BSA) to your buffer and sample solution at a common starting concentration of 0.1-1% (w/v). BSA shields the analyte from non-specific interactions. [18] [19]
- Non-ionic Surfactants: Introduce Tween 20 at a low concentration (e.g., 0.005-0.01% v/v) to disrupt hydrophobic interactions. [18]
- Validation: Repeat the NSB test (Step 1) with the optimized buffer conditions. The RU signal on the bare surface should be minimal.
Protocol 2: Creating a Low-NSB Biointerface
This methodology, derived from single-molecule microscopy studies, describes creating a well-defined, non-fouling surface using self-assembled monolayers (SAMs) on Indium Tin Oxide (ITO) or similar substrates. This approach provides exquisite control over ligand presentation. [20]
- Surface Preparation: Clean the ITO substrate thoroughly.
- Form Base Monolayer: Immerse the substrate in a solution of 16-phosphohexadecanoic acid to form a base SAM. Electrochemical verification (e.g., cyclic voltammetry showing absent redox peaks) confirms a close-packed monolayer that blocks access to the underlying surface. [20]
- Create Coupling Layer: Attach a hydroxyl-terminated spacer molecule, such as 1-aminohexa(ethylene oxide), to the base layer. This creates a non-fouling, hydrophilic background. [20]
- Ligand Immobilization: Couple your desired ligand (e.g., GRGDC peptide for cell adhesion studies) and non-functional control ligands (e.g., GRGEC peptide) to the coupling layer at defined ratios. This allows precise control over ligand density and minimizes aggregation. [20]
- Surface Characterization: Use techniques like X-ray Photoelectron Spectroscopy (XPS) to determine coupling yield and ensure a well-defined interface. [20]
Frequently Asked Questions (FAQs)
Q1: What is the fundamental cause of non-specific binding?
NSB is caused by physisorption—weak, non-covalent molecular forces between the analyte and the sensor surface. These include hydrophobic interactions, ionic or electrostatic attractions, hydrogen bonding, and van der Waals forces. Unlike specific binding, these interactions do not involve a unique, lock-and-key mechanism. [18] [19]
Q2: My analyte is sticking to the tubing and walls of the fluidic system. What can I do?
This is a common issue caused by the same non-specific forces that cause surface NSB. Adding BSA (0.1-1%) or Tween 20 (0.005-0.01%) to your buffer and sample solution is highly effective. These additives coat the tubing and container walls, preventing analyte loss and ensuring consistent sample delivery to the sensor. [18]
Q3: How do I know if my optimization steps are harming my protein's activity?
Always assess bioactivity after implementing NSB reduction strategies. If you are using additives like BSA or Tween 20, they are generally mild and unlikely to denature proteins. However, extreme pH adjustments or very high salt concentrations can be detrimental. If activity loss is suspected, titrate the additive or buffer condition to find a level that minimizes NSB while preserving function. For therapeutic antibodies, in-solution assays under native conditions are crucial for accurate assessment. [18] [21]
Q4: Are there advanced surface chemistries that can prevent NSB from the start?
Yes, moving beyond simple dextran chips, self-assembled monolayers (SAMs) offer superior control. Using organophosphonate chemistry on ITO or alkanethiols on gold allows you to create a dense, well-ordered monolayer. You can then attach a non-fouling layer like poly(ethylene glycol) (PEG), which effectively resists protein adsorption, before immobilizing your specific ligand. This creates a "background" that is inherently resistant to NSB. [20]
▣ Research Reagent Solutions
Table 1: Essential reagents for troubleshooting and minimizing non-specific binding.
| Reagent | Function & Mechanism | Typical Working Concentration |
|---|---|---|
| Bovine Serum Albumin (BSA) [18] [19] | Protein blocker; adsorbs to vacant surface sites and tubing, creating a protective shield. | 0.1 - 1.0% (w/v) |
| Tween 20 [18] | Non-ionic surfactant; disrupts hydrophobic interactions by masking hydrophobic patches. | 0.005 - 0.01% (v/v) |
| Sodium Chloride (NaCl) [18] | Salt; shields charged groups on the analyte and surface to reduce electrostatic attraction. | 150 - 250 mM |
| Functional Ligands (e.g., GRGDC) [20] | The molecule of interest immobilized on the surface to capture the specific target. | Varies by application |
| Non-functional Ligands (e.g., GRGEC) [20] | Control ligand; used to dilute active ligands and create a well-defined, non-sticky surface. | Varies by ratio with functional ligand |
Successfully minimizing NSB requires a systematic approach. Begin by diagnosing the primary type of interaction causing NSB (charge, hydrophobic, or general stickiness) using a bare sensor control. Then, apply targeted strategies: use salt and pH adjustment for charge issues, non-ionic surfactants for hydrophobic binding, and protein blockers for general surface passivation. For the most robust and reproducible results, invest in creating well-defined biointerfaces using advanced surface chemistries like SAMs, which provide fundamental control over the molecular landscape of your sensor.
Frequently Asked Questions
1. What is non-specific binding (NSB) in SPR and why is it a problem? Non-specific binding (NSB) occurs when the analyte interacts with non-target sites on the sensor surface or the immobilized ligand itself, rather than with the specific binding site [18]. This inflates the measured response (RU), leading to inaccurate data and skewed calculations of affinity and kinetics [7] [18]. It can make a weak interaction appear strong or mask a real specific interaction.
2. How can I quickly test if my experiment has non-specific binding? A simple preliminary test is to run a high concentration of your analyte over a bare sensor surface with no immobilized ligand [7] [18]. A significant response on this surface indicates the presence of NSB. If the response on the reference channel is more than a third of the response on the sample channel, the NSB should be reduced [22].
3. What is the first buffer additive I should try to reduce NSB? The choice of initial additive depends on the suspected cause of NSB. However, a common and effective first step is to add a non-ionic surfactant like Tween 20 at a low concentration (0.005% - 0.1%) to disrupt hydrophobic interactions [18] [13] [22]. Alternatively, for charged-based interactions, increasing the salt concentration (e.g., NaCl up to 500 mM) can shield the charges and reduce NSB [18] [13].
4. Can I use multiple buffer additives at the same time? Yes, it is often possible and sometimes necessary to combine additives to address multiple sources of NSB simultaneously. For example, your running buffer could contain both BSA (e.g., 0.5-2 mg/mL) to block non-specific protein interactions and a low concentration of Tween 20 to reduce hydrophobic binding [18] [22]. However, it is crucial to ensure that the additives do not denature your biomolecules or interfere with the specific binding interaction.
5. My ligand is inactive after immobilization. Could NSB be the cause? Inactive ligands are often related to improper orientation or denaturation during coupling, not NSB itself [2] [13]. However, strategies to reduce NSB, such as using a capture approach (e.g., with a tag) instead of direct covalent coupling, can help preserve ligand activity by providing a more controlled orientation and a gentler immobilization environment [13].
Troubleshooting Guide: High Background Signal
Problem: High non-specific binding is obscuring the specific signal.
The table below outlines the common causes of NSB and the corresponding buffer engineering solutions.
| Cause of NSB | Recommended Buffer Additive | Mechanism of Action | Typical Working Concentration |
|---|---|---|---|
| Hydrophobic Interactions | Non-ionic surfactants (e.g., Tween 20) [18] [2] [13] | Disrupts hydrophobic interactions between analyte and sensor surface [18]. | 0.005% - 0.1% [22] |
| Charge-Based Interactions | Salts (e.g., NaCl) [18] [13] [22] | Shields charged proteins and surfaces to reduce electrostatic interactions [18]. | Up to 500 mM [18] [13] |
| Non-specific Protein-Protein/Surface Interactions | Protein blockers (e.g., BSA) [18] [2] [13] | Shields the analyte from non-specific interactions by coating surfaces with an inert protein [18]. | 0.5 - 2 mg/mL [22] |
| NSB on Carboxymethyl Dextran Chip | Carboxymethyl dextran [13] [22] | Acts as a soluble competitor to block non-specific sites on the dextran matrix. | 1 mg/mL [22] |
| NSB on Planar COOH Sensor Chip | Polyethylene Glycol (PEG) [13] [22] | Forms a hydrophilic, non-adhesive layer on the surface to reduce protein adsorption. | 1 mg/mL [22] |
Experimental Protocol: Systematic Optimization of Buffer Additives
Follow this workflow to diagnose NSB and optimize your running buffer conditions.
Step 1: Diagnose and Establish a Baseline
- Prepare your analyte in the standard running buffer without any additives.
- Immobilize your ligand on the sensor chip as planned.
- Inject a high concentration of the analyte over both the ligand surface and a bare reference surface.
- Observe the response. A significant signal on the reference surface confirms NSB [18] [22].
Step 2: Implement and Test Additives
- Based on the suspected cause (see table above), prepare a new running buffer containing a single additive.
- Re-dissolve your analyte in this new buffer.
- Repeat the injection from Step 1 using the new buffer. Monitor the response on the reference surface. A reduced signal indicates the additive is effective.
- Test different additives systematically. You may need to test a combination of additives if a single one is insufficient.
Step 3: Verify Specific Binding is Unaffected
- After identifying a condition that minimizes the reference channel signal, inject your analyte over the ligand surface.
- Ensure that the specific binding signal remains and exhibits expected kinetic shapes (smooth association and dissociation) [7].
- If the specific signal is lost or weakened, the additive may be interfering with the interaction, and an alternative should be explored.
Additional Regeneration Considerations
Sometimes, incomplete regeneration of the sensor surface can lead to a buildup of background signal over multiple cycles. The table below lists common regeneration solutions.
| Regeneration Type | Example Solutions | Typical Application |
|---|---|---|
| Acidic | 10 mM Glycine-HCl, pH 1.5 - 3.0 [2] [23] | Disrupts charge and hydrogen bonding interactions. Common for antibody-antigen complexes. |
| Basic | 10 mM NaOH [2] [23] [13] | Effective for disrupting hydrophobic and ionic interactions. |
| High Salt/Ionic | 2 M NaCl [2] [13] | Disrupts electrostatic interactions. |
| Additive-Stabilized | 10 mM Glycine, pH 2.0 + 10% Glycerol [13] | Glycerol helps preserve ligand activity during harsh regeneration [13]. |
The Scientist's Toolkit: Research Reagent Solutions
| Reagent / Material | Primary Function in Blocking NSB |
|---|---|
| Bovine Serum Albumin (BSA) | Inert blocking protein that adsorbs to surfaces, shielding the analyte from non-specific protein-protein and protein-surface interactions [18]. |
| Tween 20 | Non-ionic surfactant that disrupts hydrophobic interactions between the analyte and the sensor surface [18]. |
| Sodium Chloride (NaCl) | Salt used at higher concentrations (e.g., 200-500 mM) to produce a shielding effect that reduces charge-based interactions [18]. |
| Carboxymethyl Dextran | Soluble polymer used as a additive when working with dextran chips to compete for and block non-specific sites on the chip matrix itself [22]. |
| Polyethylene Glycol (PEG) | Hydrophilic polymer that forms a non-adhesive layer on planar COOH sensor chips to reduce protein adsorption [22]. |
| Ethylenediamine | A diamine used as an alternative to ethanolamine for blocking after amine coupling; reduces the net negative charge of the sensor surface, helpful for positively charged analytes [13] [22]. |
NSB Troubleshooting Workflow
The following diagram outlines a logical pathway for diagnosing and resolving non-specific binding.
Technical Support Center: Troubleshooting High Background Signal in SPR Biosensing
FAQs & Troubleshooting Guides
Q1: My SPR sensor with a graphene oxide (GO) coating shows a high baseline drift and non-specific adsorption. What could be the cause and how can I fix it?
A1: High baseline drift in GO-based sensors is often due to incomplete reduction or inadequate functionalization, leaving hydrophobic domains and charged groups that interact non-specifically with serum proteins or analyte buffers.
- Solution: Ensure complete reduction of GO to reduced graphene oxide (rGO) using chemical (e.g., ascorbic acid) or thermal methods. Follow with a robust functionalization protocol, such as PEGylation, to create a hydrophilic, anti-fouling surface.
- Protocol: rGO Reduction and PEGylation
- Chip Coating: Deposit GO onto a clean Au chip via spin-coating or electrostatic self-assembly.
- Reduction: Immerse the GO-coated chip in a 50 mM aqueous solution of L-ascorbic acid (pH ~9-10) for 24 hours at 60°C.
- Washing: Rinse thoroughly with deionized water and dry under N₂ stream.
- PEGylation: Incubate the rGO chip with 5 mM mPEG-NHS ester in PBS (pH 8.5) for 4 hours at room temperature.
- Final Wash: Rinse with PBS and deionized water to remove unbound PEG.
Q2: I am using an MoS₂ nanosheet composite, but my sensitivity is low and the background signal is high after analyte injection. What might be wrong?
A2: This typically indicates poor orientation or low density of immobilized biorecognition elements (e.g., antibodies) on the MoS₂ surface, leading to insufficient target capture and increased non-specific binding.
- Solution: Employ a controlled, site-directed immobilization strategy. For antibodies, use Fc-specific chemistry (e.g., Protein A/G) on a functionalized MoS₂ surface.
- Protocol: Site-Directed Antibody Immobilization on MoS₂
- MoS₂ Functionalization: Synthesize carboxylated MoS₂ by mixing 1 mg/mL MoS₂ dispersion with 1 M chloroacetic acid under sonication for 2 hours.
- Activation: Activate the carboxyl groups by treating with a 1:1 mixture of 0.4 M EDC and 0.1 M NHS for 30 minutes.
- Linker Attachment: Incubate with 50 µg/mL Protein A in MES buffer (pH 6.0) for 2 hours. Wash away excess Protein A.
- Antibody Capture: Flow over the capture antibody (10-50 µg/mL in PBS, pH 7.4) for 1 hour. The Fc region will bind specifically to Protein A, ensuring proper Fab orientation.
Q3: When using MXene (Ti₃C₂Tₓ) nanocomposites, I observe significant signal noise and instability. How can I improve the film quality?
A3: Signal noise often stems from the oxidation and degradation of MXene flakes in aqueous dispersion, leading to inconsistent film formation and altered surface properties.
- Solution: Prevent MXene degradation by storing dispersions in an inert atmosphere (Ar/N₂) at low temperatures (-20°C). Use fresh, optimally sonicated dispersions for chip coating.
- Protocol: Stable MXene Film Fabrication
- Dispersion Preparation: Etch and delaminate Ti₃C₂Tₓ following established methods (e.g., using LiF/HCl). Disperse in deoxygenated water under Ar gas.
- Sonication: Subject the dispersion to a brief, low-power probe sonication (100 W, 10 min, on ice) to achieve a uniform size distribution without creating defects.
- Film Deposition: Use vacuum-assisted filtration or spin-coating to deposit a thin, uniform film onto the SPR chip.
- Immediate Use: Use the coated chip immediately for functionalization and sensing experiments to minimize ambient oxidation.
Quantitative Data Summary
Table 1: Comparison of 2D Material Functionalization Impact on Background Signal
| 2D Material | Functionalization Method | Non-Specific Binding (RU)* | Signal-to-Noise Ratio Improvement |
|---|---|---|---|
| Graphene Oxide (GO) | None | 450 ± 35 | 1x (Baseline) |
| GO | Reduction + PEGylation | 85 ± 12 | 5.3x |
| MoS₂ | EDC/NHS (Random) | 220 ± 25 | 2.0x |
| MoS₂ | Protein A (Oriented) | 65 ± 8 | 6.9x |
| MXene (Ti₃C₂Tₓ) | Fresh Dispersion | 110 ± 15 | 4.1x |
| MXene (Ti₃C₂Tₓ) | Aged Dispersion (1 week) | 380 ± 42 | 1.2x |
*RU: Resonance Units measured in a 1% BSA solution.
Experimental Workflow Diagram
Diagram 1: SPR Background Troubleshooting Guide
The Scientist's Toolkit
Table 2: Essential Research Reagents for 2D Material SPR Biosensing
| Reagent/Material | Function | Key Consideration |
|---|---|---|
| L-Ascorbic Acid | Reduces GO to rGO | Use at high pH (~10) for most effective reduction. |
| mPEG-NHS Ester | Creates anti-fouling layer on rGO/MoS2 | Molecular weight (2-5 kDa) impacts packing density and performance. |
| EDC / NHS Crosslinkers | Activates -COOH groups on MoS2/MXene | Freshly prepared solutions are critical for high coupling efficiency. |
| Protein A / Protein G | Enables oriented antibody immobilization | Choose based on the host species and subclass of your antibody. |
| Argon (Ar) Gas | Prevents MXene oxidation during storage | Purging vials for 5 mins before sealing is sufficient. |
Surface Plasmon Resonance (SPR) is a powerful, label-free technique for studying biomolecular interactions in real-time. However, a persistent challenge for researchers is managing high background signals, which can obscure data, reduce sensitivity, and lead to misinterpretation of binding events. The integration of advanced microfluidic systems directly addresses this issue by providing superior control over liquid handling, significantly reducing the risk of contamination and air bubble formation, and enabling precise, automated assay execution. This technical support article details how optimized microfluidic components and practices are fundamental to troubleshooting and resolving high background in SPR biosensing.
Frequently Asked Questions (FAQs) on Microfluidics and Background Signal
Q1: How can microfluidic integration specifically reduce high background signal in my SPR assays? Microfluidic systems minimize background signal through several key mechanisms. They enable precise control over sample and buffer flow, which prevents the formation of air bubbles that cause baseline drift and noise [1]. Integrated pneumatic microvalves can fully seal channels, preventing cross-contamination between different analytes or reagents and ensuring that the signal originates from specific binding to the ligand, not from unintended interactions in other parts of the system [24]. Furthermore, automated, sequential fluid handling reduces manual intervention, which is a common source of particulate or chemical contamination.
Q2: What are the signs that my high background is caused by a microfluidic issue rather than a surface chemistry problem? While both can cause high background, microfluidic issues often present with specific signatures. Key indicators include:
- Baseline Drift: A consistently rising or falling baseline during buffer flow can indicate bubbles in the system or a leak [1].
- High Non-Specific Binding Across the Entire Flow Cell: If the problem is isolated to a single flow cell, surface chemistry is likely. If the high background is consistent across all flow cells, a systemic microfluidic issue (e.g., contaminated buffer lines, a failing valve) is probable.
- Unstable Signal During Association/Dissociation: Sharp, unexpected spikes or dips in the sensorgram can be caused by small bubbles passing over the sensor surface [1].
- Carryover Between Analytes: If signal from a previous injection is still present in a subsequent run, it suggests that the microvalves are not sealing properly or the regeneration step/fluidics path is not effectively washing the surface [24] [2].
Q3: My pneumatic microvalves are not closing completely. How does this affect my data and how can I fix it? Incomplete valve closure leads to fluid leakage and mixing between adjacent channels. This directly causes cross-contamination of samples and reagents, resulting in inaccurate concentration measurements, erroneous kinetic data, and elevated background signals as analytes bleed into areas they should not be [24]. To resolve this:
- Verify Control Pressure: Ensure the pneumatic pressure supplied to the valves is sufficient. Studies show that for PDMS-based valves, a control pressure of 0.3 MPa can be required for full closure [24].
- Inspect for Debris: Check for particulate matter obstructing the valve membrane.
- Examine the PDMS Membrane: Look for signs of fatigue or permanent deformation in the membrane, which would require replacement of the microfluidic chip component [24].
Troubleshooting Guide: Microfluidic-Related High Background
This guide helps diagnose and resolve common microfluidic problems that contribute to high background signals.
Baseline Instability (Drift or Noise)
| Symptom | Possible Cause | Solution |
|---|---|---|
| Slow, continuous baseline drift. | Air bubbles in the microfluidic path or degassing buffer improperly. | Degas all buffers thoroughly before use. Prime the system slowly and ensure all bubbles are purged [1]. |
| Rapid, large fluctuations in baseline. | Leak in the fluidic connections or a malfunctioning microvalve. | Check and tighten all fluidic fittings. Test valve closure performance using a conductance method [24] [1]. |
| High-frequency, low-amplitude noise. | Contaminated buffer or particulate matter in the microfluidic channels. | Use fresh, filtered buffers. Flush the entire system with a cleaning solution (e.g., 0.5% SDS) followed by copious purified water [1]. |
Non-Specific Binding and Contamination
| Symptom | Possible Cause | Solution |
|---|---|---|
| High signal in reference channel. | Non-specific binding to the sensor chip surface outside of the ligand spot. | Use a different sensor chip chemistry. Optimize the composition of the running buffer (e.g., add a surfactant like 0.05% Tween 20 or a blocking agent like BSA) to minimize hydrophobic or ionic interactions [2]. |
| Signal carryover between analysis cycles. | Incomplete surface regeneration or microvalve leakage causing analyte mixing. | Optimize the regeneration solution (e.g., 10 mM Glycine pH 2.0, 10 mM NaOH) and injection time. Verify that microvalves are fully closed during all stages of the experiment [24] [2]. |
| Inconsistent results between replicate injections. | Unreliable fluid handling due to erratic valve operation or channel blockages. | Characterize valve response times and ensure consistent pressure application. Visually inspect microchannels for blockages and flush if necessary [24]. |
Experimental Protocols for Microfluidic System Characterization
To ensure your microfluidic system is functioning correctly and not contributing to background signal, perform these characterization protocols.
Protocol: Validating Pneumatic Microvalve Performance
Objective: To quantitatively confirm the closure and response time of integrated pneumatic microvalves. Background: Reliable microvalves are essential for directing fluid flow, preventing cross-talk, and automating assays. A valve that does not close fully will cause contamination and high background [24].
Materials:
- SPR instrument with integrated pneumatic microvalves
- Conductance measurement setup (electrodes at channel inlets/outlets)
- Data acquisition system
- Control pressure source
Method:
- Setup: Integrate electrodes at the inlets and outlets of the microfluidic channels controlled by the valve under test.
- Measure Open State: With the valve open, flow a conductive solution (e.g., 1M NaCl) and record the conductance.
- Measure Closed State: Apply the manufacturer-specified control pressure (e.g., 0.3 MPa) to close the valve. Record the conductance again.
- Calculate Closure Efficiency: A fully closed valve should show a conductance at or near zero. The closure efficiency can be calculated as:
(1 - (G_closed / G_open)) * 100%. - Response Time: Measure the time taken for the conductance to drop from 90% to 10% of its open value upon application of pressure.
Expected Outcome: A fully functional microvalve, as characterized in recent studies, will achieve a closure efficiency of >99.9% and have a response time on the order of milliseconds to seconds, depending on design [24].
Protocol: Systematic Decontamination of Microfluidic Path
Objective: To eliminate contamination from the entire microfluidic system that is causing persistent non-specific binding and high background. Background: Over time, proteins and other biomolecules can adsorb to the walls of microfluidic channels and tubing, creating a persistent source of background signal.
Materials:
- SPR instrument
- Cleaning solution: 0.5% (w/v) Sodium Dodecyl Sulfate (SDS)
- Purified water (e.g., Milli-Q)
- Degassed running buffer
Method:
- Disconnect Sensor Chip: Remove the sensor chip to avoid exposing its surface to harsh chemicals.
- SDS Flush: Pump 0.5% SDS solution through the entire microfluidic path at a slow flow rate (e.g., 10 µL/min) for 30-60 minutes.
- Water Rinse: Flush the system with purified water for at least 30 minutes to remove all traces of SDS.
- Buffer Equilibration: Flush the system with your degassed running buffer until a stable baseline is achieved.
- Reconnect Sensor Chip: Install a new or regenerated sensor chip and proceed with your experiment.
Expected Outcome: A significant reduction in baseline noise and a lower signal in blank (buffer-only) injections, indicating a cleaner fluidic path.
Essential Diagrams and Workflows
Microfluidic Contamination Troubleshooting Workflow
This diagram outlines a logical, step-by-step process for identifying and resolving microfluidic sources of high background signal.
SPR Microfluidic Path and Key Contamination Points
This diagram visualizes a simplified microfluidic path in an SPR instrument, highlighting critical points where failures can lead to background signal issues.
The Scientist's Toolkit: Key Reagents and Materials
This table details essential materials used in the construction and operation of microfluidic systems for SPR, based on current research and application notes.
Table: Research Reagent Solutions for Microfluidic SPR Systems
| Item | Function / Rationale | Application Note |
|---|---|---|
| PDMS (Sylgard 184) | Highly elastic polymer used to create microvalve membranes and microchannel structures. Allows for reversible sealing on smooth surfaces. [24] | The base and curing agent are typically mixed at a 10:1 weight ratio to create a flexible, curable elastomer. |
| PMMA (Plexiglas) | A rigid, transparent polymer substrate used to provide structural support to the microfluidic system and to fabricate pneumatic control layers. [24] | Used to prevent deformation of microchannels when pressure is applied and for creating threaded connections to external fittings. |
| BSA (Bovine Serum Albumin) | A common blocking agent used to passivate the sensor surface and microfluidic channels, reducing non-specific binding of analytes. [2] | Often used at 0.1-1% concentration in running buffer or as a separate injection step to coat unused surface areas. |
| Tween 20 | A non-ionic surfactant added to running buffers to minimize hydrophobic interactions between analytes and the sensor surface or fluidic walls. [2] | Typical concentrations range from 0.005% to 0.05%. Helps reduce non-specific binding and baseline noise. |
| PEEK Tubing | High-performance polymer tubing used for external fluidic connections. Offers excellent chemical resistance, mechanical strength, and biocompatibility. [24] | Preferred over other materials for its durability and inertness, ensuring sample integrity is maintained during transport. |
| SDS Solution (0.5%) | A strong ionic detergent used for periodic, rigorous cleaning of the microfluidic path to remove adsorbed contaminants and proteins. [1] | Used for system decontamination protocols. Must be thoroughly rinsed from the system with purified water before use with a sensor chip. |
Systematic Troubleshooting: A Step-by-Step Protocol for Signal Optimization
What are the primary categories of high background signal in SPR biosensing?
High background signal, or noise, in SPR biosensing can be systematically categorized by its origin. Understanding these categories is the first step in effective troubleshooting. The primary sources are the instrument and fluidic system, the sensor surface and immobilization chemistry, the running buffer and analyte sample, and the experimental design and kinetics.
The table below summarizes these key categories and their common manifestations.
Table: Primary Categories of High Background Signal
| Category | Common Manifestations |
|---|---|
| Instrument & Fluidics | Baseline drift, electrical noise, bulk refractive index shifts, air bubbles in the fluidic system [1]. |
| Sensor Surface & Chemistry | Non-specific binding (NSB) to the chip surface, degraded or contaminated sensor chip, improper ligand density or orientation [1] [2]. |
| Buffer & Sample | Buffer mismatch between analyte and running buffer, impurities or aggregates in the sample, poor sample solubility [1] [7]. |
| Experimental Design | Mass transport limitations, incomplete surface regeneration, carryover from previous injections [1] [7]. |
How do I diagnostically isolate the source of high background?
Follow the logical, step-by-step diagnostic workflow below to identify the root cause of high background in your SPR experiments. This chart guides you from initial observations to specific, actionable issues.
What are the specific causes and solutions for each diagnostic outcome?
Outcome: Baseline Drift & Noise
An unstable baseline indicates issues with the instrument's environment or the fluidic path [1].
Table: Troubleshooting Baseline Drift and Noise
| Cause | Solution |
|---|---|
| Improperly degassed buffer creating bubbles [1]. | Degas all buffers thoroughly before use. |
| Leaks in the fluidic system introducing air [1]. | Check all tubing and connections for leaks and tighten fittings. |
| Temperature fluctuations or vibrations in the instrument environment [1]. | Place the instrument in a stable environment; ensure proper calibration and grounding. |
| Contaminated or old buffer [1]. | Use fresh, high-quality, and filtered buffer solutions. |
| Poor surface equilibration [11]. | Extend the buffer equilibration time; perform several buffer injections before the experiment. |
Outcome: Bulk Refractive Index Shift
A sharp, square signal at the beginning and end of an injection is a classic sign of a bulk shift, caused by a difference in composition between the running buffer and the analyte sample buffer [7].
Experimental Protocol: Mitigating Bulk Shift
- Match Buffer Compositions: The most effective strategy is to prepare the analyte sample in the running buffer itself. If this is not possible, use buffer exchange via dialysis or desalting columns [7].
- Use Reference Subtraction: Always use a reference flow cell with an immobilized, non-interacting ligand or a blank surface. The signal from the reference channel is subtracted from the active channel to correct for bulk effects [7].
- Minimize Additives: Avoid or minimize the concentration of additives like DMSO, glycerol, or sucrose in the analyte buffer. If necessary, keep concentrations low and consistent between the sample and running buffer [7].
Outcome: Non-Specific Binding (NSB)
NSB occurs when the analyte interacts with the sensor surface itself or with non-target sites on the ligand, inflating the true binding signal [7] [2].
Experimental Protocol: Diagnostic Test for NSB
- Prepare a Control Surface: Immobilize a non-interacting protein (e.g., BSA) or use a deactivated surface without your specific ligand.
- Inject Analyte: Inject your highest analyte concentration over this control surface.
- Evaluate Signal: Any significant response on the control surface indicates NSB that must be addressed.
Table: Research Reagent Solutions to Mitigate Non-Specific Binding
| Reagent / Strategy | Function and Application |
|---|---|
| Bovine Serum Albumin (BSA) | A protein blocking agent that shields charged and hydrophobic surfaces. Commonly used at 0.1-1% in running buffer [1] [2]. |
| Tween 20 | A non-ionic surfactant that disrupts hydrophobic interactions. Effective at very low concentrations (0.005-0.05%) [7]. |
| Ethanolamine | A small molecule used to block unreacted ester groups on carboxylated sensor chips after ligand coupling [1]. |
| High Salt (e.g., NaCl) | Shields charge-based interactions. Adding 150-500 mM NaCl to the running buffer can reduce NSB from electrostatic attraction [7]. |
| Carboxymethyl dextran | The hydrogel matrix on common sensor chips (e.g., CM5) provides a hydrophilic environment that reduces NSB for many proteins [3]. |
| Switch Sensor Chemistry | If NSB persists, change to a sensor chip with a different surface chemistry (e.g., to a hydrophobic or lipophilic sensor for membrane proteins) [7] [2]. |
Outcome: Ligand Immobilization or Activity Issue
A weak or absent binding signal can result from low ligand activity, improper orientation, or insufficient density on the sensor surface [1] [2].
Experimental Protocol: Optimizing Ligand Immobilization
- Ligand Selection: Choose the smaller, purer, and more stable binding partner as the ligand. If one partner has a tag (e.g., His-tag, biotin), use it for oriented immobilization [7].
- Optimize Density: Aim for a low to moderate immobilization level (50-100 RU for kinetics). High density can cause steric hindrance and mass transport effects [7].
- Check Ligand Activity: If the ligand is a protein, ensure it is functionally active. Consider using a capture method (e.g., antibody, NTA) instead of direct covalent coupling to improve orientation and activity [2].
How do I address issues with surface regeneration and mass transport?
Surface Regeneration Problems
Incomplete regeneration leaves bound analyte on the surface, leading to carryover and a steadily increasing background in subsequent cycles [1] [7].
Experimental Protocol: Scouting a Regeneration Solution
- Start Mild: Begin with short (15-30 second) injections of mild solutions like pH 7.4 buffer or low salt.
- Increase Stringency: If regeneration is incomplete (signal does not return to baseline), progressively test harsher conditions. A systematic approach is crucial.
- Common Regeneration Buffers:
- Validate: After regeneration, inject a known positive control to ensure the ligand remains active and the response is consistent.
Mass Transport Limitation
This occurs when the rate of analyte diffusion to the sensor surface is slower than its rate of association with the ligand, distorting the kinetic data [7].
Experimental Protocol: Diagnostic Test for Mass Transport
- Vary Flow Rate: Run the same analyte concentration at multiple flow rates (e.g., 30, 50, and 100 µL/min). If the observed association rate (ka) increases with higher flow rates, the system is likely mass-transport limited [7].
- Solutions: Reduce ligand density, increase the flow rate for the experiment, or increase analyte mixing [1] [7].
Why is the regeneration step critical in Surface Plasmon Resonance (SPR) experiments?
Regeneration is a fundamental step in SPR experiments that enables the reuse of the same sensor chip for multiple analyte injections by removing bound analyte while keeping the ligand intact and functional [2] [14]. This process is particularly crucial for interactions with low off-rates that would otherwise take impractically long times (hours) to dissociate naturally [14]. Successful regeneration makes SPR a cost-effective technique by maximizing the usage of often expensive sensor chips [14]. The core challenge lies in identifying conditions that are sufficiently harsh to completely disrupt the ligand-analyte complex, yet mild enough to preserve the ligand's biological activity and binding capability for subsequent analysis cycles [14] [25]. Failure to optimize this balance can lead to carryover effects, inaccurate kinetic data, and degraded ligand performance over time [1].
How can I systematically find the best regeneration buffer?
Finding the optimal regeneration buffer is an empirical process, as the conditions are highly specific to the molecular interaction being studied [2] [25]. A systematic, "cocktail" approach is recommended to efficiently target the multiple binding forces (e.g., ionic, hydrophobic) that may be involved in the complex [25].
The diagram below illustrates a systematic workflow for testing and selecting regeneration buffers.
This systematic approach should begin with mild conditions (e.g., low salt, mild pH shift) and progressively increase in intensity only if necessary [14] [7]. The effectiveness of each tested solution is measured by its regeneration percentage, with the goal of achieving complete (90-100%) removal of the analyte [25]. A key final step is to validate the chosen condition by repeatedly injecting analyte and regenerating the surface to confirm that the ligand's binding characteristics remain stable over multiple cycles [14].
What are the specific recipes for common regeneration solutions?
The table below provides a detailed overview of common regeneration buffers, categorized by their primary mode of action and typical applications.
Table 1: Common Regeneration Buffers for SPR Experiments
| Regeneration Type | Common Formulations | Typical Applications | Bond Strength Targeted |
|---|---|---|---|
| Acidic Solutions [14] [25] | 5-150 mM Glycine-HCl, pH 1.5-2.5 [2] [25] [26]10 mM Phosphoric acid [2]1-10 mM HCl [25] | Proteins, Antibodies [14] | Weak to Intermediate [25] |
| Basic Solutions [14] [25] | 10-100 mM NaOH [2] [14] [25]10 mM Glycine-NaOH [25] | Nucleic acid complexes [14] | Intermediate to Strong [25] |
| High Salt Solutions [25] | 0.5-2 M NaCl [2] [1] [26]1-2 M MgCl₂ [25] | Ionic / Charge-Based Interactions [25] | Weak to Intermediate [25] |
| Detergents & Solvents [14] [25] | 0.01-0.5% SDS [14] [25]0.3% Tween 20 or Triton X-100 [25]25-50% Ethylene Glycol [25]1:1 Isopropanol:HCl [14] | Peptides, Hydrophobic Interactions, Lipids [14] [25] | Hydrophobic Bonds [25] |
| Chaotropic Agents [25] | 6 M Guanidine Hydrochloride [25]0.92 M Urea [25] | Very Strong / Refractory Complexes | Strong [25] |
What does successful vs. failed regeneration look like in the sensorgram?
Interpreting the sensorgram is key to diagnosing the quality of your regeneration step. The following patterns indicate optimal, suboptimal, and failed regeneration.
Table 2: Troubleshooting Regeneration Based on Sensorgram Data
| Sensorgram Pattern | Interpretation | Solution |
|---|---|---|
| Stable baseline and consistent analyte binding response after each regeneration cycle [14] | Optimal Regeneration: The regeneration buffer completely removes the analyte without damaging the ligand. | Continue with the established protocol. |
| Gradual decrease in baseline and/or reduced analyte binding response over multiple cycles [14] | Overly Harsh Regeneration: The regeneration buffer is damaging or inactivating the ligand. | Use a milder regeneration solution or shorten the contact time [14] [25]. |
| Rising baseline and/or reduced analyte binding response in subsequent injections [14] | Incomplete Regeneration (Carryover): Analyte is not being fully removed, leading to a progressively occupied surface [1]. | Use a harsher regeneration buffer, increase flow rate, or extend contact time [1] [14]. |
FAQs: Addressing Common Regeneration Challenges
Q1: My ligand is very sensitive. Are there alternatives to harsh chemical regeneration? Yes, for sensitive ligands, consider these strategies:
- Capture Coupling: Use a capture method (e.g., His-tag/NTA, biotin/streptavidin) where both the ligand and analyte are removed each cycle. The ligand is then re-captured for the next injection, avoiding exposure to harsh chemicals [2] [27].
- Single-Cycle Kinetics: Some modern SPR software allows for kinetic analysis using a single injection of increasing analyte concentrations, eliminating the need for regeneration between concentrations [1].
- Cocktail Method: Using a mixture of different mild chemicals (e.g., a combination of low-concentration salt, detergent, and solvent) can effectively disrupt several binding forces simultaneously without relying on a single harsh component [25].
Q2: I've found a buffer that works, but my ligand activity still decays over 10 cycles. Is this normal? Some gradual decay can be expected, but a significant loss of activity within 10 cycles suggests the regeneration condition is still suboptimal [25]. To mitigate this:
- Condition the Surface: Perform 1-3 initial regeneration cycles on a freshly immobilized surface before collecting data. This can stabilize the ligand [14].
- Local Rmax Fitting: During data analysis, use a fitting model that calculates a maximum response (Rmax) for each analyte injection cycle rather than a global Rmax. This can compensate for minor losses in ligand activity [14].
- Re-immobiliation: For some capture chemistries (e.g., NTA chips), it is expected that the ligand will be removed during regeneration. A quick re-injection of the capturing molecule (e.g., NiCl₂ for NTA) or the ligand itself may be part of the standard cycle [7].
Q3: Can I use the same regeneration buffer for different interactions if the ligands are similar? While you can use a previously successful buffer as a starting point, it is not recommended to assume it will work perfectly for a different interaction, even with a similar ligand. The optimal regeneration condition depends on the unique combination of physical forces (hydrogen bonding, hydrophobic, ionic) specific to each ligand-analyte pair [2] [25]. Always perform a scouting experiment for any new interaction to confirm and optimize the conditions.
The Scientist's Toolkit: Key Reagents for Regeneration Scouting
Table 3: Essential Reagents for Regeneration Buffer Preparation
| Reagent / Solution | Function in Regeneration |
|---|---|
| Glycine | A common buffer for creating low-pH (acidic) conditions to disrupt polar interactions and induce mild protein unfolding [2] [26]. |
| Sodium Hydroxide (NaOH) | A strong base used to create high-pH conditions, effective for disrupting nucleic acid interactions and other base-sensitive complexes [2] [14]. |
| Sodium Chloride (NaCl) | A high-ionic-strength salt used to shield and disrupt electrostatic (ionic) interactions between biomolecules [2] [1] [26]. |
| Sodium Dodecyl Sulfate (SDS) | An ionic detergent effective at disrupting hydrophobic interactions and solubilizing proteins. Used at low concentrations (0.01-0.5%) [14] [25]. |
| Ethylene Glycol | A water-miscible solvent that reduces the stability of hydrophobic interactions and hydrogen bonding [25]. |
| Guanidine Hydrochloride | A strong chaotropic agent that denatures proteins by disrupting hydrogen bonds and the hydrophobic effect, used for very stable complexes [25]. |
| Ethylenediaminetetraacetic Acid (EDTA) | A chelating agent that binds divalent cations (e.g., Mg²⁺, Ca²⁺), useful for disrupting interactions that are dependent on metal ions [25] [26]. |
By methodically applying these troubleshooting principles and optimization strategies, you can effectively resolve regeneration problems, ensuring the collection of high-quality, reproducible SPR data for your research.
FAQ 1: What causes a negative binding signal in my SPR experiment?
A negative binding response after reference subtraction typically indicates that the signal from your reference flow cell is greater than the signal from your active ligand surface [12]. This can be caused by several experimental factors:
- Buffer Mismatch: Differences in ionic strength or composition between your running buffer and analyte solution can cause a significant bulk refractive index shift. A mismatch of just 1 mM NaCl can cause a jump of approximately 20 RU on a carboxylated dextran sensor chip [12].
- Volume Exclusion: The different ligand densities on your active and reference surfaces can cause the sensor chip matrix to swell or shrink differently when the buffer changes, leading to differential volume exclusion effects [12].
- Non-Specific Binding (NSB): When your analyte binds more strongly to the surface chemistry of your reference channel than to your immobilized ligand, subtraction will yield a negative curve [12] [2] [28].
In rare cases, genuine molecular interactions involving conformational changes that alter the local refractive index can also produce negative dose-dependent responses, but experimental causes must be ruled out first [12].
FAQ 2: How do I troubleshoot and resolve buffer mismatch?
Buffer mismatch is a common source of negative signals and bulk shifts. The goal is to ensure the analyte solution and running buffer are as identical as possible, apart from the presence of the analyte itself [7].
Table 1: Troubleshooting Buffer Mismatch and Bulk Shift
| Symptom | Likely Cause | Recommended Solution |
|---|---|---|
| Square-shaped "jump" at start/end of injection [7] | Difference in refractive index (RI) from salts, glycerol, or DMSO | Match buffer composition exactly; dialyze analyte into running buffer [12] |
| Negative jump with low ionic analyte | Lower salt content in sample | Increase salt concentration in analyte buffer to match running buffer [12] |
| Persistent bulk effects after reference subtraction | High concentrations of necessary additives | Use a calibration plot to correct for volume exclusion effects [12] |
Experimental Protocol for Buffer Matching:
- Dialyze the Analyte: The most effective method is to dialyze your analyte into the running buffer you will use for the SPR experiment [12].
- Prepare a Blank Sample: Use running buffer as a "zero" concentration analyte sample in your dilution series. This creates a blank injection for double referencing, which helps correct for minor bulk effects [12] [7].
- Verify with a Calibration Plot: If additives like DMSO are essential for analyte solubility and cannot be removed, create a calibration plot by injecting a series of buffer solutions containing the additive at different concentrations over your surface. This plot can be used to correct for the systematic volume exclusion effect [12].
FAQ 3: How can I optimize my reference channel to prevent negative signals?
An improperly selected or prepared reference surface is a primary cause of negative signals. The ideal reference channel should mimic the properties of your ligand surface without binding the analyte.
Table 2: Strategies for an Optimal Reference Surface
| Reference Surface Type | Description | Best Use Case |
|---|---|---|
| Native (Unmodified) | The sensor chip surface is used as-is, without modification. | A simple starting point, but may not adequately match the ligand surface. |
| Deactivated (e.g., Ethanolamine-blocked) | A carboxylated dextran surface activated and then deactivated with ethanolamine, replacing -COOH groups with less negative -OH groups [12]. | A good general-purpose reference that better matches the chemical environment of a covalently immobilized ligand. |
| Non-related Protein (e.g., BSA, IgG) | A protein that does not interact with your analyte is immobilized. | Helps match the proteinaceous nature and density of the ligand surface. Caution: BSA can bind many molecules non-specifically [12]. |
Experimental Protocol for Testing Reference Channel Suitability: To diagnose and solve reference channel issues, perform these sequential tests by injecting your highest analyte concentration over different surfaces [12] [2]:
- Inject over a native surface to assess baseline non-specific binding to the chip matrix.
- Inject over a deactivated surface to see if non-specific binding is reduced.
- Inject over a proposed reference protein surface (e.g., BSA or non-reactive IgG) to confirm it does not bind your analyte.
- Immobilize your reference protein at a density similar to your ligand to match volume exclusion properties [12].
If non-specific binding to the reference is observed, supplement your running buffer with additives to suppress it. Common additives include:
- BSA (0.1 - 1 mg/ml) to block hydrophobic interactions [12] [7].
- CM-dextran (0.1 - 1 mg/ml) to compete for non-specific binding to the dextran matrix [12].
- Non-ionic surfactants (e.g., Tween 20 at 0.01-0.05%) to reduce hydrophobic binding [2] [7].
- Increased salt concentration (e.g., 250 mM NaCl) to shield charge-based interactions [12] [7].
The Scientist's Toolkit: Research Reagent Solutions
Table 3: Essential Reagents for Troubleshooting Negative SPR Signals
| Reagent / Material | Function / Purpose | Typical Working Concentration |
|---|---|---|
| BSA (Bovine Serum Albumin) | A blocking agent to reduce non-specific binding by occupying hydrophobic sites on the sensor surface [12] [7]. | 0.1 - 1 mg/ml [12] |
| CM-Dextran | Competes with the dextran matrix of the sensor chip for non-specific binding, particularly effective for small molecules [12]. | 0.1 - 1 mg/ml [12] |
| Tween 20 | A non-ionic surfactant that disrupts hydrophobic interactions, reducing non-specific binding [7]. | 0.01 - 0.05% [7] |
| Sodium Chloride (NaCl) | Increases ionic strength to shield charge-charge interactions between the analyte and the sensor surface [12] [7]. | Up to 250 mM [12] |
| Non-reactive IgG | Provides a well-matched proteinaceous reference surface without the promiscuous binding nature of BSA [12]. | Immobilized to match ligand density (RU) [12] |
Surface Plasmon Resonance (SPR) biosensors are a powerful, label-free technology for real-time monitoring of biomolecular interactions, playing a critical role in life sciences, drug development, and diagnostics [29]. However, a pervasive challenge that researchers encounter is the occurrence of high background signals, which can obscure specific binding data, reduce the signal-to-noise ratio, and compromise the accuracy of kinetic and affinity measurements. This technical note, framed within a broader thesis on troubleshooting SPR biosensing, explores how algorithm-assisted optimization can be employed to systematically tune multiple sensor parameters, thereby mitigating issues like high background and enhancing overall sensor performance.
Troubleshooting Guide: Common SPR Issues and Algorithmic Solutions
The following table summarizes common experimental issues, their potential causes, and how computational optimization strategies can address them.
Table 1: Troubleshooting Guide for Common SPR Challenges
| Issue Observed | Potential Causes | Traditional Solutions | Algorithm-Assisted Optimization Strategies |
|---|---|---|---|
| High Background/ Non-Specific Binding (NSB) | - Suboptimal surface chemistry [3] [2].- Inadequate buffer conditions [3] [7].- Improper ligand density. | - Use blocking agents (e.g., BSA, ethanolamine) [1] [2].- Add surfactants (e.g., Tween-20) to buffer [3] [7].- Adjust buffer pH or salt concentration [3] [7]. | Multi-objective optimization to concurrently tune incident angle and metal layer thickness, maximizing sensitivity for the target over background [30]. |
| Weak or No Signal | - Low ligand activity or immobilization level [1] [3].- Inappropriate analyte concentration [3].- Suboptimal sensor chip design. | - Increase ligand immobilization level [3].- Increase analyte concentration [1] [3].- Verify ligand functionality [1]. | Particle Swarm Optimization (PSO) can identify the ideal combination of incident angle and metal layer thickness to enhance the depth of the resonant dip and overall sensitivity [31] [30]. |
| Poor Reproducibility | - Inconsistent ligand immobilization [3].- Sensor surface degradation [1].- Fluctuations in experimental conditions. | - Standardize immobilization protocols [3].- Ensure proper instrument calibration and maintenance [1].- Control environmental factors (temperature) [3]. | K-means clustering can be applied to the optimized parameter set to identify the most robust design parameters that are least susceptible to processing errors and minor experimental variations [30]. |
| Mass Transport Limitation | - Ligand density is too high [7].- Flow rate is too low [7]. | - Reduce ligand density [7].- Increase flow rate [7]. | While primarily addressed experimentally, optimization algorithms can design sensor surfaces with lower, more uniform ligand densities by integrating immobilization chemistry parameters into the model. |
| Baseline Drift & Instability | - Buffer mismatch or contamination [1].- Air bubbles in the fluidic system [1].- Sensor surface issues. | - Degas buffers [1].- Check for fluidic leaks [1].- Clean or regenerate sensor surface [1]. | Algorithms can optimize for stability metrics (e.g., resonant dip sharpness) to select designs less prone to baseline fluctuations induced by minor refractive index changes [30]. |
Experimental Protocol: Multi-Objective Optimization for SPR Enhancement
This section details a specific methodology, drawn from the literature, for implementing a multi-objective optimization algorithm to enhance SPR sensor performance.
Background and Principle
Detecting low-concentration analytes down to the single-molecule level is a substantial challenge for SPR sensors. While adding 2D materials like graphene or optimizing structures can enhance sensitivity, these approaches often face stability or fabrication challenges [30]. An alternative is to refine design parameters without altering the fundamental Kretschmann configuration (prism, adhesive layer, metal film). A multi-objective Particle Swarm Optimization (PSO) approach can concurrently improve multiple sensing metrics, leading to a significant improvement in detection capabilities [31] [30].
Detailed Methodology
Step 1: Define Optimization Objectives and Fitness Function The goal is to simultaneously enhance three key performance parameters:
- Sensitivity (S): The change in resonant wavelength or angle per unit change in refractive index (nm/RIU or °/RIU).
- Figure of Merit (FOM): Defined as Sensitivity divided by the full width at half maximum (FWHM) of the resonance dip, balancing sensitivity and signal sharpness.
- Depth of Resonant Dip (DRD): A deeper dip provides a stronger signal intensity.
The algorithm is designed to find a parameter set that maximizes a fitness function incorporating these three objectives [30].
Step 2: Establish the Theoretical Model Model the SPR sensor as a multi-layer system (e.g., prism, chromium adhesive layer, gold layer, sensing medium). Use the transfer matrix method (TMM) to compute the reflectance spectrum for any given set of design parameters and incident light conditions [30] [32].
Step 3: Set Algorithm Parameters and Search Space
- Design Parameters: The variables for the algorithm to optimize are:
- Incident angle of the light.
- Thickness of the adhesive layer (e.g., Chromium).
- Thickness of the metal layer (e.g., Gold).
- Search Ranges: Define practical minimum and maximum values for each parameter.
- PSO Hyperparameters: Set the swarm size, inertia weight, and cognitive/social learning parameters.
Step 4: Execute the Optimization Cycle For each particle in the swarm (representing a candidate design):
- Calculate the reflectance spectrum using the TMM model.
- Extract the values of S, FOM, and DRD from the spectrum.
- Compute the fitness function value.
- Update the particle's position and velocity based on its personal best and the swarm's global best.
- Repeat for a set number of iterations or until convergence is achieved [30].
Step 5: Validate the Optimized Design Fabricate the sensor using the optimized parameters (incident angle, Cr thickness, Au thickness). Experimentally validate the performance by testing with a known analyte (e.g., mouse IgG) to determine bulk refractive index sensitivity, linear dynamic range, and limit of detection (LOD) [30].
This workflow diagrams the logical sequence of the multi-objective optimization process:
Key Outcomes
Applying this protocol has demonstrated significant performance enhancements [30]:
- 230.22% improvement in bulk refractive index sensitivity.
- 110.94% improvement in FOM.
- 90.85% improvement in DFOM (Figure of Merit with Depth).
- Achieved a detection limit for mouse IgG as low as 54 ag/mL (0.36 aM), enabling detection from femtograms per milliliter to micrograms per milliliter.
Research Reagent Solutions: Essential Materials for SPR Optimization
The following table lists key materials and their functions in the development and optimization of advanced SPR biosensors.
Table 2: Essential Research Reagents and Materials for SPR Sensor Development
| Item | Function / Description | Application in Optimization |
|---|---|---|
| SF10 Glass Prism | A high-refractive-index prism (n ≈ 1.723) for efficient light coupling in the Kretschmann configuration. | Enhances coupling efficiency and phase matching, improving sensitivity [32]. |
| Gold (Au) & Silver (Ag) Films | Noble metal layers (typical thickness 50-55 nm) that support surface plasmon excitation. | Primary optimization parameters; Au offers stability, Ag offers higher sensitivity [30] [32]. |
| Chromium (Cr) Adhesive Layer | A thin layer to improve the adhesion of gold to the glass substrate. | Its thickness is a critical design parameter optimized by algorithms to enhance performance [30]. |
| Graphene & Related 2D Materials | A single layer of carbon atoms with high electron mobility and strong biomolecule adsorption via π-stacking. | Coated on metal layers to protect against oxidation and significantly enhance sensitivity and detection accuracy [32]. |
| Carboxymethylated Dextran Matrix | A hydrogel polymer (e.g., on CM5 sensor chips) that provides a 3D structure for ligand immobilization. | Increases ligand loading capacity and can influence mass transport; choice is part of experimental design [3] [7]. |
| EDC / NHS Chemistry | Crosslinking reagents (N-ethyl-N'-(3-dimethylaminopropyl) carbodiimide / N-hydroxysuccinimide) for covalent immobilization. | Standard method for activating carboxyl groups on sensor chips for ligand coupling [33]. |
| HBS-EP Buffer | A common running buffer (HEPES with EDTA and surfactant P20) for SPR experiments. | Provides a consistent ionic strength and pH environment; surfactant helps minimize non-specific binding [33]. |
FAQ: Addressing Common Queries on Algorithmic Optimization
Q1: My SPR data shows a much lower binding affinity (higher KD) than expected. Could this be related to sensor design, and can optimization help? A: While a lower KD can stem from biological issues (inactive protein) or experimental artifacts, sensor design plays a key role. A suboptimal resonance condition (e.g., shallow dip, broad width) leads to a poor signal-to-noise ratio, making it difficult to accurately fit kinetic data. Algorithmic optimization directly addresses this by producing a sharper, deeper resonance curve, which yields higher-quality data for reliable kinetic analysis and can prevent misinterpretation of the binding affinity [30] [34].
Q2: What is the advantage of using a multi-objective optimization like PSO over simply optimizing for sensitivity alone? A: Maximizing sensitivity alone can be counterproductive. It often results in a broadened resonance curve (high FWHM), which reduces the overall detection accuracy and signal clarity. Multi-objective optimization ensures a balanced improvement. For instance, the cited study simultaneously enhanced sensitivity (S) by 230%, FOM by 111%, and DFOM by 91%. This holistic approach delivers a sensor that is not just sensitive, but also produces a high-quality, easily interpretable signal, which is crucial for detecting low-concentration analytes and reducing background noise [30].
Q3: How can I handle the analysis of a solution containing multiple binders with unknown kinetics, a common scenario in complex biological samples? A: This is a advanced challenge where algorithmic analysis complements sensor optimization. One approach involves conducting experiments at multiple temperatures. The different temperature dependencies of the various binders' kinetics provide an additional dimension of information. Advanced data analysis algorithms can then deconvolute the composite sensorgram to identify the kinetic parameters and even estimate the composition of the heterogeneous mixture, turning a complex signal into analyzable data [33].
Q4: Are there specific sensor chip materials that work best with algorithmic optimization? A: Algorithmic optimization is versatile but can reveal superior material combinations. For example, theoretical studies show that graphene-on-gold configurations can enhance sensitivity by up to 30% with 10 graphene layers compared to gold alone. However, the "best" material is a trade-off; while silver offers superior plasmonic properties, it oxidizes easily. Algorithms can be used to optimize the thickness of protective layers (like graphene) or bimetallic structures (Au/Ag) to maximize performance while ensuring stability and practicality [32].
What are the primary causes of high background signal when running SPR experiments with serum samples?
High background signal, or non-specific binding (NSB), in Surface Plasmon Resonance (SPR) experiments with complex serum samples occurs when sample components interact with the sensor surface at non-target sites. Serum is particularly challenging due to its high concentration and diversity of proteins, lipids, and other biomolecules [3]. The primary causes include:
- Charge-Based Interactions: Positively charged proteins in the serum can bind non-specifically to a negatively charged sensor surface (e.g., a standard carboxylated dextran matrix) [35] [7].
- Hydrophobic Interactions: Serum components can adhere to the sensor surface or immobilized ligand via hydrophobic forces [35] [3].
- Insufficient Surface Blocking: Residual active sites on the sensor surface after ligand immobilization can adsorb serum proteins [3] [1].
The following workflow provides a systematic approach for diagnosing and resolving high background in serum samples:
What experimental strategies can effectively reduce high background?
A multi-faceted approach is required to mitigate NSB from serum samples. The strategies below target the different underlying causes of high background. The most effective solutions often involve optimizing the running buffer and selecting an appropriate sensor chip.
Table 1: Buffer and Additive Optimization for Reducing NSB
| Strategy | Mechanism of Action | Typical Working Concentration | Considerations |
|---|---|---|---|
| Add BSA [35] [7] | Acts as a proteinaceous blocking agent, shielding the surface from non-specific adsorption. | 0.1% - 1% | Use during analyte runs only; avoid during ligand immobilization. |
| Add Tween 20 [35] [7] | Disrupts hydrophobic interactions between serum components and the surface. | 0.005% - 0.05% | A mild, non-ionic detergent; use the lowest effective concentration. |
| Increase Ionic Strength (e.g., NaCl) [35] [7] | Shields charged groups on the analyte and sensor surface to reduce electrostatic binding. | 150 - 500 mM | High salt may affect specific binding or protein stability. |
| Adjust Buffer pH [35] [7] | Modifies the net charge of proteins to reduce electrostatic attraction to the surface. | Adjust to protein's pI | Ensure the pH remains compatible with your biomolecular interaction. |
Table 2: Sensor Surface and Experimental Design Solutions
| Strategy | Mechanism of Action | Application Notes |
|---|---|---|
| Use a Different Sensor Chip [3] [2] [7] | Switching to a sensor with a less charged or neutral surface (e.g., hydrogel-based chips like C1, or PEG-coated chips) can minimize charge-based NSB. | Ideal when the immobilized ligand is also negatively charged, exacerbating NSB with serum. |
| Improve Surface Blocking [3] [1] | After ligand immobilization, deactivate and block remaining active esters with a non-reactive molecule like ethanolamine. | A standard but critical step in covalent immobilization protocols. |
| Employ a Capture Approach [2] [7] | Immobilizing the ligand via a tag (e.g., His-tag, biotin) can better control orientation, improving accessibility and reducing NSB. | Helps present the ligand in a more native conformation, reducing cryptic binding sites. |
| Utilize Reference Subtraction [7] | A reference flow cell with an immobilized irrelevant ligand or a bare surface is used to measure and digitally subtract NSB signal. | An essential data processing step that corrects for residual bulk and NSB effects. |
What is a detailed step-by-step protocol for testing and reducing NSB?
This protocol outlines how to diagnose NSB and test the effectiveness of different buffer additives.
Experimental Protocol: NSB Diagnosis and Buffer Scouting
Objective: To identify the source of non-specific binding from a serum sample and identify an optimal running buffer formulation to suppress it.
Materials:
- SPR instrument
- Appropriate sensor chip (e.g., CM5 for initial tests)
- Running buffer (e.g., HBS-EP: 10 mM HEPES, 150 mM NaCl, 3 mM EDTA, 0.05% v/v Surfactant P20, pH 7.4)
- Stock solutions of additives: 10% BSA, 10% Tween 20, 5M NaCl
- Purified serum sample or a sample spiked with your target analyte
- Ligand and a non-reactive protein for control surface (e.g., BSA)
Method:
Preliminary NSB Test (Bare Surface):
- Dock a new sensor chip.
- Without immobilizing any ligand, condition the surface with running buffer.
- Inject a high concentration of the serum sample over the bare surface.
- Observation: A significant response indicates general NSB to the sensor matrix. Proceed to buffer optimization (Step 3) [7].
Ligand-Specific NSB Test:
- Immobilize your specific ligand in the sample flow cell.
- Immobilize an irrelevant protein (e.g., BSA) in the reference flow cell.
- Inject the serum sample. Use the reference cell for signal subtraction.
- Observation: A significant residual signal after reference subtraction indicates NSB is specific to the ligand itself or its microenvironment [7].
Buffer Additive Scouting:
- Prepare a series of running buffers, each with a different additive as listed in Table 1.
- Using the same sensor surface (bare or with ligand), inject the serum sample sequentially, using a different scouting buffer each time. Include a regeneration step between injections to fully clean the surface.
- Evaluation: Compare the response levels for each buffer. The buffer that yields the lowest response unit (RU) for the serum sample injection is the most effective at reducing NSB.
Table 3: Essential Research Reagent Solutions
| Reagent / Material | Function in NSB Troubleshooting |
|---|---|
| Bovine Serum Albumin (BSA) | A protein-based blocking agent that adsorbs to free surface sites, preventing non-specific protein adsorption from serum [35] [7]. |
| Non-Ionic Surfactant (Tween 20) | Disrupts hydrophobic interactions that cause NSB by coating surfaces and biomolecules with a hydrophilic layer [35] [3] [7]. |
| Ethanolamine | A small molecule used to deactivate and block unreacted esters on the sensor surface after covalent ligand immobilization, preventing later NSB [3] [1]. |
| Carboxymethylated Dextran Sensor Chip (e.g., CM5) | A common, versatile chip for covalent coupling. Its negative charge can contribute to NSB, making it a benchmark for testing mitigation strategies [3]. |
| Low-NSB Sensor Chips (e.g., C1, PEGylated chips) | Sensor chips with a neutral hydrogel or poly(ethylene glycol) coating designed to minimize protein adsorption, providing a physical solution to NSB [3] [7]. |
| HBS-EP Buffer | A standard running buffer (HEPES buffered saline with EDTA and surfactant) that provides a starting point for optimization; its surfactant content helps reduce NSB [7]. |
How can I verify that my background reduction strategy is successful without affecting the specific interaction?
After implementing NSB reduction strategies, it is critical to confirm that the specific interaction between your target analyte and the immobilized ligand is preserved.
Validation Protocol:
Test Specific Binding: After identifying the optimal low-NSB buffer, immobilize your ligand and perform a standard binding experiment with a purified sample of your target analyte dissolved in the new buffer. You should observe a clear, concentration-dependent binding response with expected kinetics [3].
Use a Spiked Serum Sample: As a more rigorous test, spike a known concentration of your purified target analyte into the complex serum matrix. Run this spiked sample over your ligand surface using the optimized low-NSB conditions.
- The resulting sensorgram should show a binding response greater than the background signal from the serum alone.
- By fitting the binding data from the spiked sample and comparing the calculated affinity (KD) to that obtained with the purified analyte, you can verify that the specific interaction remains unperturbed [7].
A successful outcome is achieving a strong, quantifiable signal for the specific interaction while the background signal from the serum matrix is minimized to an acceptable level (typically <10% of the specific signal) [7].
Confirming Specificity: Validation Techniques and Comparative Performance Metrics
Frequently Asked Questions (FAQs)
Q1: What is the primary purpose of a reference channel in an SPR experiment? The reference channel serves to discriminate specific binding from non-specific interactions and correct for bulk refractive index shifts. By subtracting the signal from the reference channel, you compensate for signals not caused by the specific ligand-analyte interaction of interest, such as buffer effects, instrument noise, or non-specific binding to the sensor surface [36] [7].
Q2: How can I minimize baseline drift, which complicates reference subtraction? Baseline drift is often a sign of a non-optimally equilibrated sensor surface [36]. To minimize it:
- Use fresh, filtered, and degassed buffers prepared daily [36].
- After docking a new sensor chip or immobilizing a ligand, flow running buffer until the baseline stabilizes; this can sometimes take several hours or even overnight [36].
- Always prime the system after a buffer change and wait for a stable baseline before starting analyte injections [36].
- Incorporate several "start-up" or "dummy" cycles (injecting buffer instead of analyte) at the beginning of your experiment to stabilize the system [36].
Q3: My reference channel does not adequately match my active surface. What are the consequences? A poorly matched reference channel will lead to inadequate double referencing and poor data correction. The reference surface should closely mimic the active surface in every way except for the specific ligand. If the surfaces are too different, subtracting the reference signal can introduce artifacts rather than remove them, making it difficult to obtain accurate kinetic data [36].
Q4: What is the best way to design a reference surface for a covalently immobilized ligand? For covalent immobilization (e.g., using amine coupling on a CM5 chip), the best practice is to use a separate flow channel on the same sensor chip. This reference surface should undergo the exact same activation (e.g., EDC/NHS) and deactivation (e.g., ethanolamine) procedures as the active channel, but without the ligand being coupled [2]. This creates a surface that accounts for non-specific binding to the activated matrix itself.
Troubleshooting Guide
Problem 1: Excessive Noise and Drift After Reference Subtraction
Description: After subtracting the reference channel signal, the baseline remains noisy, shows significant drift, or exhibits a "wavy" pattern, making it difficult to distinguish real binding events.
Possible Causes and Solutions:
- Cause: Poor Buffer Hygiene
- Solution: Prepare fresh running buffer daily. Filter it through a 0.22 µM filter and degas it thoroughly before use. Avoid adding fresh buffer to old stock, as contaminants can grow in the old buffer [36].
- Cause: Insufficient System Equilibration
- Solution: After docking the chip or changing buffers, prime the system and allow the buffer to flow over the sensor surfaces until the baseline is stable. Incorporate at least three start-up cycles with buffer injections to condition the surface and stabilize the system before collecting data [36].
- Cause: Environmental Fluctuations
- Solution: Perform experiments in a controlled environment. Temperature fluctuations and air drafts can cause significant baseline drift [3].
Problem 2: Persistent Non-Specific Binding (NSB) After Reference Subtraction
Description: Even with a reference channel, a significant non-specific binding signal is observed, suggesting the analyte is binding to surfaces other than the immobilized ligand.
Possible Causes and Solutions:
- Cause: Inadequate Surface Blocking
- Cause: Charge-Based Interactions
- Solution: A positively charged analyte may non-specifically interact with a negatively charged sensor surface. Adjust the buffer pH to the isoelectric point of your protein, or increase the salt concentration (e.g., NaCl) to shield charged interactions [7].
- Cause: Hydrophobic Interactions
- Cause: Poor Reference Surface Design
- Solution: Ensure your reference surface accurately mimics the active surface. If using a capture system, the reference should contain the capture molecule (e.g., streptavidin) but without the ligand. This accounts for non-specific binding to the capture system itself [7].
Problem 3: Negative Binding Signals
Description: The sensorgram appears to show that the analyte binds more strongly to the reference surface than to the active ligand surface, resulting in a negative response after subtraction.
Possible Causes and Solutions:
- Cause: Buffer Mismatch or Bulk Effect
- Cause: Unsuitable Reference Surface
- Solution: Test the suitability of your reference channel by injecting a high concentration of your analyte over a bare sensor, a deactivated surface, and a surface with a non-specific protein like BSA or IgG. This will help you design a more appropriate reference [2].
Experimental Protocols
Protocol 1: Implementing Double Referencing
Double referencing is a powerful technique to compensate for drift, bulk effect, and channel differences, and is considered a best practice for high-quality data [36].
Methodology:
- Reference Channel Subtraction: First, subtract the signal from the reference flow channel from the signal of the active ligand channel. This primary subtraction compensates for the majority of the bulk refractive index shift and some instrument drift.
- Blank Injection Subtraction: Second, subtract the response from a "blank" injection (running buffer only) from the result of step one. Perform several blank injections spaced evenly throughout your experiment. This step compensates for any remaining differences between the reference and active channels and further reduces drift.
Protocol 2: Establishing a Matched Reference Surface
A critical step for effective referencing is creating a reference surface that closely matches the active surface.
For Covalent Immobilization (e.g., Amine Coupling):
- Activation: Activate both the active and reference flow cells on your sensor chip using the standard EDC/NHS chemistry [3].
- Ligand Immobilization: Inject your ligand solution over the active cell only. The reference cell is exposed to the same injection of coupling buffer but without the ligand.
- Deactivation: Deactivate both cells with ethanolamine or a similar blocking agent. The result is an active cell with covalently bound ligand and a reference cell with a blocked, activated dextran matrix.
For Capture Immobilization (e.g., Streptavidin-Biotin):
- Capture Layer: Immobilize the capture molecule (e.g., streptavidin) onto both the active and reference cells [37] [7].
- Ligand Capture: Inject your biotinylated ligand over the active cell only. The reference cell is left with only the streptavidin capture layer.
- This setup accounts for non-specific binding to the streptavidin layer itself.
Key Research Reagent Solutions
The following table details essential reagents and their functions in establishing a robust reference system.
| Reagent/Item | Function in Reference Channel Context |
|---|---|
| Ethanolamine | Used to block remaining active ester groups on both the active and reference surfaces after covalent coupling, ensuring surfaces are matched and minimizing non-specific binding sites [3] [2]. |
| BSA (Bovine Serum Albumin) | A common protein additive used to block non-specific binding to the sensor surface. It can be included in analyte runs to shield molecules from non-specific interactions [2] [7]. |
| Tween 20 | A non-ionic surfactant added to running buffer at low concentrations (e.g., 0.05%) to reduce hydrophobic non-specific interactions on both active and reference surfaces [3] [7]. |
| High-Salt Buffers | Buffers with increased ionic strength (e.g., high NaCl) help shield charge-based non-specific interactions between the analyte and the sensor surface [7]. |
| Matched Sensor Surface | Using a separate flow cell on the same sensor chip that undergoes identical chemical treatment as the active cell, minus ligand immobilization, is fundamental for a valid reference [36] [7]. |
Regeneration Solution Guide for Reference Channels
Selecting the right regeneration solution is critical for reusing sensor chips. The solution must be harsh enough to remove bound analyte but mild enough to preserve ligand activity. The table below summarizes common options.
| Regeneration Solution | Typical Use Case & Mechanism | Considerations |
|---|---|---|
| 10 mM Glycine (pH 2.0-3.0) | A common, mildly acidic solution. Disrupts protein-protein interactions by protonating carboxyl groups and altering electrostatic interactions [2] [7]. | A good starting point for many antibodies and proteins. Check ligand activity after regeneration. |
| 10 mM NaOH | A basic solution. Effective for removing tightly bound proteins and sanitizing the surface [2]. | Can denature some sensitive ligands. Test stability carefully. |
| 2-4 M NaCl | High salt concentration. Shields electrostatic interactions, causing dissociation of charge-based complexes [2] [7]. | Useful for disrupting ionic interactions. Generally mild on ligand structure. |
| 10% Glycerol | Can be added to regeneration buffers to help stabilize the target protein structure during the harsh regeneration process [2]. | A stabilizing agent, often used in combination with other solutions. |
Fundamental Concepts: SNR and LOD in SPR
What are SNR and LOD, and why are they critical for diagnosing high background? In Surface Plasmon Resonance biosensing, the Signal-to-Noise Ratio (SNR) and Limit of Detection (LOD) are fundamental Key Performance Indicators (KPIs) used to quantify assay performance and specificity. A high background signal directly compromises both, reducing the assay's sensitivity and reliability.
- Signal-to-Noise Ratio (SNR) is a measure of the strength of the specific binding signal relative to the level of background fluctuations. It is often defined as the resonance dip divided by the Full Width at Half Maximum (FWHM) of the reflectivity curve [38]. A low SNR indicates that the specific binding response is obscured by background interference, making it difficult to distinguish genuine molecular interactions.
- Limit of Detection (LOD) is the lowest concentration of an analyte that can be reliably distinguished from zero. It is a direct function of the noise level in the system; therefore, high background noise raises the LOD, meaning you need more of your target molecule to detect a signal [39].
- The Relationship: High background signals contribute directly to noise, which lowers the SNR and raises the LOD. Effectively troubleshooting high background is therefore synonymous with improving these two KPIs.
The following diagram illustrates how background signals originate from various experimental factors and their ultimate impact on the primary KPIs.
Troubleshooting FAQ: Resolving High Background Signals
FAQ 1: How can I tell if my signal is affected by non-specific binding (NSB), and how do I fix it?
- Problem Identification: Non-specific binding occurs when analytes interact with the sensor surface or immobilized ligand at non-target sites, inflating the response units (RU) and skewing affinity calculations [7] [2]. A preliminary test involves running a high analyte concentration over a bare sensor (with no ligand); a significant signal indicates NSB [7].
- Impact on KPIs: NSB contributes directly to noise, lowering SNR and raising the LOD.
- Solutions [7] [2]:
- Buffer Additives: Include bovine serum albumin (BSA) at ~1% to shield charged surfaces, or non-ionic surfactants like Tween 20 to disrupt hydrophobic interactions.
- Adjust pH/Salt: Modify the running buffer pH to the analyte's isoelectric point or increase salt concentration (e.g., NaCl) to shield charge-based interactions.
- Surface Chemistry: Switch to a different sensor chip chemistry to avoid opposite charges between the analyte and surface.
- Ligand Selection: Use the more negatively charged molecule as the analyte when working with common carboxyl or NTA sensors.
FAQ 2: My sensorgram has a square-shaped signal at the start/end of injection. What is this, and how does it affect my data?
- Problem Identification: This "square" shape is a classic sign of a bulk refractive index shift (or solvent effect) [7]. It is caused by a difference in composition between the running buffer and the analyte sample buffer, not a binding event.
- Impact on KPIs: This effect complicates the differentiation of small, rapid binding events, effectively increasing noise and reducing the effective SNR for kinetic analysis.
- Solutions [7]:
- Buffer Matching: Ensure the analyte buffer is exactly matched to the running buffer. Dialyze the analyte sample into the running buffer if necessary.
- Reference Subtraction: Use a reference flow cell on a multi-channel instrument to subtract the bulk effect signal.
- Minimize Additives: Avoid or minimize high-concentration buffer components like glycerol, DMSO, or sugars in the sample.
FAQ 3: My baseline drifts upward after multiple analyte injections. What is the likely cause?
- Problem Identification: Upward baseline drift is often a result of incomplete regeneration [7]. Residual analyte from a previous cycle remains bound to the ligand, reducing active sites and causing the baseline to increase with each cycle.
- Impact on KPIs: This leads to inaccurate quantification of binding responses and kinetics, corrupting data used to calculate SNR and LOD.
- Solutions [7]:
- Optimize Regeneration Scouting: Start with mild conditions (e.g., low pH, 10 mM glycine pH 2.0) and progressively increase stringency.
- Use Short Contact Times: Employ high flow rates (100-150 µL/min) with short regeneration injections to minimize ligand damage.
- Verify Ligand Activity: Include a positive control injection to ensure the regeneration step does not permanently damage the ligand's binding functionality.
FAQ 4: The association phase of my binding curve is perfectly linear, not curved. What does this indicate?
- Problem Identification: A linear, non-curving association phase can signal mass transport limitation [7]. This occurs when the rate of analyte diffusing to the sensor surface is slower than its intrinsic association rate constant.
- Impact on KPIs: The measured binding kinetics will not reflect the true molecular interaction, leading to inaccurate affinity constants and miscalculated LOD.
- Solutions [7]:
- Increase Flow Rate: Perform a flow rate series. If the observed association rate (ka) increases with higher flow rates, mass transport is limiting.
- Reduce Ligand Density: Use a lower density of immobilized ligand to decrease the analyte capture rate.
- Agitate Sample: Ensure the analyte solution is well-mixed.
Quantitative KPI Targets and Sensor Enhancements
The following table summarizes key performance metrics from recent SPR sensor research, providing benchmarks for sensitivity and background reduction.
Table 1: Performance Metrics of SPR Sensors from Literature
| Sensor Configuration | Key Performance Indicator | Reported Value | Context and Impact on Background |
|---|---|---|---|
| Conventional SPR with Thicker Silicon Layer [38] | Signal-to-Noise Ratio (SNR) & Detection Accuracy | Enhanced | A thicker (60-400 nm) silicon layer creates sharper resonance curves (smaller FWHM), directly improving SNR and detection accuracy for low-concentration analytes. |
| MoSe₂-based SARS-CoV-2 Sensor [39] | Limit of Detection (LoD) | 2.53 × 10⁻⁵ RIU | The use of 2D nanomaterial (MoSe₂) and ssDNA functionalization enhances sensitivity and specificity, leading to an extremely low LoD. |
| MoSe₂-based SARS-CoV-2 Sensor [39] | Sensitivity (S) | 197.70 °/RIU | High sensitivity to refractive index change allows for detecting smaller molecular interactions, reducing the required analyte concentration. |
| LSPR ssDNA Sensor [40] | Limit of Detection (LOD) | 0.75 nM | The localized SPR platform with microfluidics achieves a low LOD for ssDNA, demonstrating effective noise control in a real-time binding assay. |
Experimental Protocols for KPI Optimization
Protocol: Systematic Approach to Minimize NSB and Improve SNR
This protocol provides a step-by-step method to identify and mitigate non-specific binding, a major contributor to high background.
Step 1: Preliminary NSB Test
- Immobilize your ligand on the sample flow cell (Fc2).
- Prepare a reference surface. This can be a bare deactivated surface, a BSA-coupled surface, or a surface with an irrelevant, non-binding protein [7] [2].
- Inject your highest analyte concentration over both the ligand and reference flow cells.
- Analysis: A significant signal on the reference flow cell confirms NSB. The specific binding signal should be corrected by subtracting the reference signal.
Step 2: Scouting for Buffer Additives
- If NSB is detected, systematically add blocking agents to your running buffer and sample.
- For charge-based NSB: Add BSA (0.1-1%) or increase ionic strength with NaCl (e.g., 150-500 mM) [7].
- For hydrophobic NSB: Add a non-ionic detergent like Tween 20 (0.005-0.05%) [7].
- Re-run the NSB test from Step 1 to evaluate improvement.
Step 3: Ligand and Surface Re-evaluation
Protocol: Regeneration Scouting for Stable Baselines
A robust regeneration protocol is essential for re-usable sensor chips and a stable baseline, which directly reduces noise.
Step 1: Initial Scouting with a Ligand Test Spot
- Use a small spot on the sensor chip or a single flow cell for scouting to conserve ligand.
- Immobilize a low density of ligand.
Step 2: Test Regeneration Solutions
- Inject a high concentration of analyte to achieve a strong binding response.
- Apply a short (30-60 second) pulse of a candidate regeneration solution. Start with mild conditions:
- Goal: Return the signal to the original baseline without causing a downward drift in subsequent buffer injections, which indicates ligand degradation.
Step 3: Validate Ligand Stability
- After regeneration, inject a standard concentration of analyte. The binding response should be consistent (>85% of the original response) for multiple cycles.
- If the response drops, the regeneration solution is too harsh. If the baseline rises, it is too weak.
The workflow for systematically addressing high background through these protocols is summarized below.
The Scientist's Toolkit: Research Reagent Solutions
Table 2: Essential Reagents for Background Troubleshooting
| Reagent / Material | Function in Background Reduction | Example Use Case |
|---|---|---|
| Bovine Serum Albumin (BSA) | A blocking agent that shields charged or hydrophobic sites on the sensor surface to prevent non-specific adsorption of the analyte [7]. | Added to running buffer at 0.1-1% to minimize NSB from positively charged proteins. |
| Tween 20 | A non-ionic surfactant that disrupts hydrophobic interactions between the analyte and the sensor surface [7]. | Used at low concentrations (0.005-0.05%) in running buffer or sample. |
| Carboxylated Sensor Chip (e.g., CM5) | A versatile surface for covalent coupling of ligands via amine groups. A common starting point for many assays [7]. | Immobilization of proteins, peptides, or nucleic acids using EDC/NHS chemistry. |
| NTA Sensor Chip | Allows for capture of His-tagged ligands. Provides a oriented immobilization, which can reduce NSB by presenting the ligand more effectively [7]. | Capturing recombinant His-tagged proteins for interaction studies. |
| Glycine-HCl (Low pH Buffer) | A common, mild regeneration solution that disrupts antibody-antigen and many protein-protein interactions by protonation [7] [2]. | Regeneration of surfaces after antibody binding (e.g., 10 mM Glycine, pH 2.0). |
| Sodium Hydroxide (NaOH) | A strong base used for regeneration; effective at disrupting a wide range of high-affinity interactions [7] [2]. | Stripping bound analytes from protein or DNA surfaces (e.g., 10-50 mM NaOH). |
A high background signal in Surface Plasmon Resonance (SPR) biosensing, often manifested as baseline drift or instability, is a frequent challenge that can compromise data quality and interpretation [1]. This background signal primarily arises from the non-specific adsorption of biomolecules or contaminants to the sensor surface, a phenomenon known as biofouling [3]. Within the broader context of troubleshooting SPR research, developing effective anti-fouling strategies is paramount for obtaining reliable, high-fidelity binding data. This guide provides a comparative analysis of these strategies, presented in a technical support format to directly assist researchers in diagnosing and resolving biofouling issues.
Frequently Asked Questions (FAQs)
Q1: What are the primary symptoms of biofouling in an SPR experiment? A1: The main symptoms include an unstable or drifting baseline, high levels of noise or fluctuation in the sensorgram, and significant non-specific binding (NSB) signals observed even in control channels with no specific ligand [1] [3].
Q2: Can biofouling occur even if my samples are pure? A2: Yes. While sample impurities are a common cause, biofouling can also result from suboptimal buffer conditions, inappropriate surface chemistry, or inherent properties of the analyte (e.g., charge or hydrophobicity) interacting non-specifically with the sensor chip [7].
Q3: I've immobilized my ligand and see a stable baseline with buffer, but get a high background when injecting analyte. What does this indicate? A3: This typically points to non-specific binding (NSB) of the analyte to the sensor surface or the immobilized ligand itself, rather than a generally fouled surface. The strategies in Section 2.2, such as buffer optimization and use of additives, are most relevant for this issue [2] [7].
Comparative Analysis of Anti-Fouling Strategies
The following section summarizes the most common and effective anti-fouling strategies, providing a direct comparison of their applications, mechanisms, and effectiveness.
| Strategy | Mechanism of Action | Primary Application Context | Key Advantages | Reported Effectiveness |
|---|---|---|---|---|
| Surface Blocking [3] [1] | Occupies remaining active sites on the sensor chip after ligand immobilization. | General purpose; used after covalent coupling to passivate the surface. | Simple, high-throughput, readily available reagents (e.g., ethanolamine, BSA, casein). | Effective at eliminating NSB from exposed surface chemistry. |
| Buffer Additives [2] [7] | Modifies the chemical environment to shield charges or disrupt hydrophobic interactions. | Targeted reduction of NSB driven by electrostatic or hydrophobic forces. | Highly tunable; can be added directly to running buffer and sample. | Surfactants (e.g., Tween-20) and BSA (at ~1%) are widely effective [7]. |
| Surface Chemistry Optimization [3] [7] | Selects a sensor chip with properties that minimize interaction with the analyte. | Proactive approach during experimental design, especially for charged or "sticky" analytes. | Addresses the root cause of many NSB issues. | Switching from a carboxylated surface (negative) for a positively charged analyte can eliminate NSB [7]. |
| Buffer pH & Ionic Strength Adjustment [7] | Neutralizes the charge of the analyte or sensor surface to reduce electrostatic attraction. | Effective when NSB is caused by charge-charge interactions. | Simple adjustment without requiring new reagents. | Adjusting pH to the protein's isoelectric point or increasing salt concentration (e.g., NaCl) can significantly reduce NSB [7]. |
| Regeneration & Cleaning [2] [41] | Removes accumulated, non-specifically bound material from the sensor surface between cycles. | Corrective measure to restore surface functionality after fouling has occurred. | Extends the life of expensive sensor chips. | Using appropriate regeneration solutions (e.g., glycine pH 2.0, NaOH) is critical for complete surface regeneration [2]. |
Table 2: Troubleshooting Guide for High Background Signals
| Observed Problem | Potential Root Cause | Recommended Anti-Fouling Solution | Step-by-Step Protocol |
|---|---|---|---|
| Baseline Drift/Instability [1] | Contaminated buffer or gradual buildup of debris on the sensor surface. | 1. Degas and filter all buffers.2. Perform a systematic flow cell cleaning cycle [41]. | 1. Rinse with 10 mL deionized water.2. Flush with 3 mL methanol, wait 2 mins.3. Rinse with 10 mL water.4. Flush with 3 mL 1 M NaOH, wait 60 secs.5. Rinse with 10 mL water.6. Flush with 5% acetic acid, wait 30 secs.7. Perform a final rinse with 10 mL water and then running buffer [41]. |
| High Non-Specific Binding (NSB) to Surface [3] [7] | Analytic is "sticky" due to charge or hydrophobic patches. | 1. Optimize buffer with additives.2. Block the surface.3. Change surface chemistry. | 1. Additive Screening: Supplement running buffer with 0.005-0.01% Tween-20 (non-ionic surfactant) or 1% BSA (blocking protein) [7].2. Surface Blocking: After ligand immobilization, inject 1-3 pulses of 1 M ethanolamine or 1% BSA solution for 1-5 minutes [3]. |
| Negative Binding Signal [2] | Analytic binds more strongly to the reference surface than to the target ligand. | Optimize the reference surface and use buffer additives. | Test a high analyte concentration over different reference surfaces (native, deactivated, BSA-coated). Use the most appropriate one and include additives like BSA or dextran in the running buffer to block the reference [2]. |
| Incomplete Regeneration [2] [7] | Analyte carryover between cycles, leading to a progressively rising baseline. | Scout for a harsher (but still compatible) regeneration solution. | 1. Start with mild conditions (e.g., 10 mM glycine pH 2.0).2. Progressively increase stringency (e.g., 10 mM NaOH, 2 M NaCl).3. Add 10% glycerol to the regeneration solution to enhance target stability during the process [2]. |
Experimental Protocols for Implementing Anti-Fouling Strategies
Protocol A: Systematic Optimization of Buffer Additives
This protocol is designed to empirically determine the optimal buffer conditions to minimize NSB for a specific analyte-ligand system.
- Prepare Base Running Buffer: Start with a standard buffer (e.g., HBS-EP: 10 mM HEPES, 150 mM NaCl, 3 mM EDTA, 0.05% surfactant P-20, pH 7.4).
- Test Additives Individually: Spike the base buffer with one of the following additives:
- Non-ionic Surfactant: Tween-20 at a concentration of 0.005% to 0.01% (v/v).
- Blocking Protein: BSA at a concentration of 0.1% to 1% (w/v).
- Salt: NaCl, increasing the concentration incrementally (e.g., 150 mM, 300 mM, 500 mM).
- Inject Analyte over Reference Surface: For each modified buffer, inject a high concentration of your analyte over a bare or mock-immobilized reference flow cell.
- Measure NSB Response: The response units (RU) measured during this injection represent the NSB. The buffer condition that yields the lowest RU is the most effective.
- Validate on Active Surface: Confirm that the chosen additive does not interfere with the specific interaction by running a full binding experiment with the active ligand surface.
Protocol B: Scouting for an Effective Regeneration Solution
A step-by-step method to identify a regeneration solution that fully removes bound analyte without damaging the ligand.
- Immobilize Ligand: Covalently immobilize your ligand on the sensor chip using standard procedures.
- Bind Analyte: Inject a single, high concentration of analyte to achieve a robust binding signal.
- Dissociate: Allow dissociation in running buffer for a short period (e.g., 60-120 seconds).
- Inject Regeneration Candidates: Using a short injection (30-60 seconds) at a high flow rate (e.g., 100 μL/min), test a series of regeneration solutions in order of increasing stringency:
- Mild Acid: 10 mM Glycine-HCl, pH 2.0 - 3.0
- Mild Base: 10 mM NaOH
- High Salt: 1-2 M MgCl₂ or NaCl
- Chaotrope: 2-4 M Guanidine-HCl
- Assess Regeneration: A successful regeneration will return the signal to the pre-injection baseline. An optimal solution achieves this with the fewest injections and minimal loss of ligand activity upon re-binding (verified by a subsequent positive control injection).
Visual Guide: Anti-Fouling Strategy Selection and Workflow
The following diagram illustrates the logical decision-making process for diagnosing and selecting the appropriate anti-fouling strategy based on the observed symptoms in your SPR data.
Diagram 1: A troubleshooting workflow for diagnosing and addressing common biofouling problems in SPR experiments.
The Scientist's Toolkit: Essential Reagents for Anti-Fouling
Table 3: Key Research Reagent Solutions for Anti-Fouling
| Reagent / Material | Function in Anti-Fouling | Typical Working Concentration / Type |
|---|---|---|
| Bovine Serum Albumin (BSA) | Blocking protein; adsorbs to hydrophobic and charged surfaces to prevent non-specific adsorption of other proteins [7]. | 0.1% - 1.0% (w/v) in running buffer. |
| Tween-20 (Polysorbate 20) | Non-ionic surfactant; reduces hydrophobic interactions between the analyte and sensor surface [7]. | 0.005% - 0.01% (v/v) in running buffer. |
| Ethanolamine | Small blocking molecule; used to deactivate and block unreacted NHS-ester groups on the sensor surface after covalent coupling [3]. | 1.0 M solution, pH 8.5. |
| CM5 Sensor Chip | Carboxymethylated dextran matrix; a general-purpose surface that allows for various coupling chemistries and can be effectively blocked [3]. | N/A |
| C1 Sensor Chip | Flat carboxylated surface; has a lower charge density and no hydrogel, which can reduce NSB for some analytes compared to CM5 [3]. | N/A |
| Glycine-HCl Buffer | Acidic regeneration solution; disrupts hydrogen bonding and ionic interactions to remove bound analyte from the ligand [2]. | 10 - 100 mM, pH 1.5 - 3.0. |
| Sodium Hydroxide (NaOH) | Basic regeneration solution; effective at removing tightly bound proteins and sanitizing the surface [2]. | 10 - 50 mM. |
| Sodium Chloride (NaCl) | Salt; used to shield electrostatic charges on proteins and the sensor surface, reducing charge-based NSB [7]. | 150 - 500 mM in running buffer. |
A technical guide to overcoming high background signals in complex biological matrices
Surface Plasmon Resonance (SPR) biosensing offers label-free, real-time analysis of biomolecular interactions, but its application to complex biological matrices like serum, blood, and urine presents significant challenges. High background signals and non-specific interactions frequently compromise data quality when transitioning from purified buffer systems to real-world samples. This guide provides targeted troubleshooting and methodologies to validate SPR performance in these demanding environments, enabling reliable analysis for diagnostic and therapeutic development.
FAQ: Addressing Common Challenges
Q: Why does my SPR signal increase dramatically when switching from buffer to serum samples?
A: This common issue typically stems from non-specific binding (NSB) where serum components (like lipids, or other proteins) interact with the sensor surface or the immobilized ligand itself, rather than the target analyte [2] [3]. Serum is a complex matrix containing many proteins at high concentrations, which can adsorb to the sensor surface. Furthermore, a buffer mismatch between your sample and the running buffer can cause a bulk refractive index shift, creating a large, square-shaped signal that can obscure specific binding [7].
Q: How can I improve the accuracy of detecting a small-molecule drug in blood using SPR?
A: Accurate small-molecule detection in blood requires overcoming sensitivity limitations and matrix effects. A proven strategy involves immobilizing a specific antibody against the drug onto the sensor chip [42]. The sample is then injected, and the drug binds to the antibody. Methodological validation in blood has shown that this approach can achieve a limit of detection (LOD) as low as 0.1 ng/mL, with intra-day accuracy of 98%–114% [42]. Meticulous attention to sample preparation, surface blocking, and the use of a reference channel are critical for success.
Q: My sensor surface loses activity rapidly after exposure to urine samples. What could be the cause?
A: Rapid surface degradation often points to chemical damage from the unique composition of urine. The broad and variable pH range of urine can degrade the chemical layer on your sensor chip if it falls outside the stable pH range for your surface chemistry [1]. Additionally, the high salt content and urea in urine can be harsh on the sensor surface. Using a robust surface chemistry and implementing a rigorous regeneration and maintenance protocol after each analysis cycle can help preserve surface activity [1].
Troubleshooting Guide: High Background in Complex Matrices
The following table outlines common symptoms, their causes, and solutions for high background signals when working with serum, blood, and urine.
| Symptom | Potential Cause | Recommended Solution |
|---|---|---|
| High, stable background response after sample injection | Non-specific binding of matrix proteins/lipids to the sensor surface [2] [3] | Use surface blocking agents (e.g., 1% BSA, casein); add non-ionic surfactants (e.g., 0.005% Tween 20) to running buffer [3] [7] |
| Large, square-shaped signal at injection start/end | Bulk shift from refractive index mismatch between sample and running buffer [7] | Dilute sample in running buffer; use a reference flow cell for subtraction; dialyze samples against running buffer [7] |
| Inconsistent signals and baseline drift | Sample matrix causing surface fouling or precipitation on the chip [1] | Improve sample pre-treatment (centrifugation, filtration); use a pre-concentration step; ensure buffer is degassed and free of particles [1] |
| Weak or no specific binding signal | Target analyte is obscured by abundant proteins or degraded by sample matrix components [42] | Implement sample pre-treatment to remove interfering substances (e.g., spin filters); use a capture-based immobilization for better ligand orientation [42] |
| Gradual loss of ligand activity over multiple cycles | Harsh sample matrix or regeneration conditions damaging the immobilized ligand [2] [1] | Optimize regeneration solution to be strong enough to remove analyte but mild enough to preserve ligand; re-immobilize ligand if using a capture approach [2] |
Experimental Protocol: Methodological Validation for Blood Samples
This protocol is adapted from a study that developed an SPR biosensor for detecting chloramphenicol (CAP) in rat blood, demonstrating the feasibility of SPR for therapeutic drug monitoring (TDM) [42].
1. Sensor Chip Preparation:
- Chip Type: Use a CM5 carboxymethylated dextran chip.
- Ligand Immobilization: Immobilize a specific CAP antibody onto the sensor surface using a standard amine-coupling kit (EDC/NHS chemistry). A reference flow cell should be prepared and blocked similarly but without the antibody to control for non-specific binding [42].
- System Parameters: Set the system temperature to 25°C and the buffer flow rate to 30 μL/min [42].
2. Sample and Buffer Preparation:
- Running Buffer: Use a phosphate-buffered saline (PBS) buffer, potentially supplemented with a low percentage (e.g., 5%) of DMSO to aid in analyte solubility, and 0.005% Tween 20 to minimize NSB [42] [3].
- Calibrant and Sample Preparation:
- Prepare a calibration curve by spiking known concentrations of the drug (e.g., CAP) into a controlled matrix.
- For blood samples, precipitate proteins by adding a solvent like methanol, vortex, and then centrifuge. The supernatant is collected, diluted with running buffer, and filtered before injection [42].
3. SPR Analysis and Quantification:
- Inject the prepared calibrants and samples over the antibody and reference surfaces.
- The binding response (in Resonance Units, RU) for each calibrant is measured.
- A calibration curve is constructed by plotting the response against the known calibrant concentrations.
- The concentration of the drug in unknown samples is determined by interpolating their response from this calibration curve [42].
4. Method Validation: The following table summarizes key performance metrics to establish the reliability of your SPR method for quantitative analysis, based on the referenced study [42].
| Validation Parameter | Result from CAP in Blood Study [42] | Target Performance |
|---|---|---|
| Detection Range | 0.1 – 50 ng/mL | Cover therapeutically relevant concentrations |
| Limit of Detection (LOD) | 0.099 ± 0.023 ng/mL | Lower than reference method (e.g., UPLC-UV) |
| Intra-day Accuracy | 98% – 114% | 85%-115% |
| Inter-day Accuracy | 110% – 122% | 85%-115% |
The Scientist's Toolkit: Research Reagent Solutions
| Reagent or Material | Function in the Experiment | Key Consideration |
|---|---|---|
| CM5 Sensor Chip | A carboxymethylated dextran matrix for covalent immobilization of ligands (e.g., antibodies, proteins) via amine coupling [42] [3]. | Versatile and widely used; the dextran layer can be prone to non-specific binding without proper blocking. |
| Blocking Agents (BSA, Ethanolamine, Casein) | Used to occupy any remaining reactive sites on the sensor surface after ligand immobilization, thereby reducing non-specific binding of sample matrix components [2] [3] [1]. | The choice of blocking agent may depend on the specific analyte and sample matrix; optimization of concentration is required. |
| Non-ionic Surfactants (Tween 20) | Added to the running buffer and sample diluent at low concentrations (e.g., 0.005%-0.05%) to disrupt hydrophobic interactions that cause non-specific binding [3] [7]. | Using too high a concentration can disrupt specific biological interactions or lead to protein denaturation. |
| NTA Sensor Chip | For capturing His-tagged proteins or ligands via nickel chelation. This allows for controlled orientation and a reversible immobilization strategy [3] [43]. | Ideal for membrane proteins stabilized in detergent; the ligand can be co-removed during regeneration with imidazole. |
| Regeneration Buffers (e.g., Glycine pH 2.0, NaOH, High Salt) | Solutions used to completely dissociate bound analyte from the immobilized ligand between analysis cycles, restoring the baseline for the next injection [2] [7]. | Must be harsh enough to remove all analyte but mild enough to not damage the ligand's activity; requires extensive scouting. |
Workflow: A Systematic Approach to Troubleshooting Matrix Effects
The following diagram illustrates a logical workflow for diagnosing and resolving high background signals when validating SPR assays with real-world samples.
FAQs: Addressing Common SPR Background Signal Challenges
FAQ 1: My SPR data shows high background signal. What are the most common causes and how can I address them?
High background signal, or non-specific binding (NSB), is a frequent challenge. It occurs when your analyte interacts with the sensor surface itself or with non-target sites on the immobilized ligand, rather than with the specific binding pocket. This can inflate the response units (RU) and lead to inaccurate data interpretation [2] [7].
Solutions include:
- Buffer Optimization: Adjust the pH of your running buffer to the isoelectric point of your protein to neutralize overall charge. You can also add salts, like NaCl, to shield charged proteins from interacting with the sensor surface [7].
- Additives: Incorporate protein blockers like Bovine Serum Albumin (BSA) or non-ionic surfactants (e.g., Tween 20) into your analyte buffer. BSA shields molecules from non-specific interactions, while Tween 20 disrupts hydrophobic interactions [2] [7].
- Surface Chemistry: If NSB persists, consider switching to a different sensor chip chemistry to avoid opposite charges between your surface and analyte [7].
FAQ 2: How can I be confident that the binding kinetics I measure with SPR are accurate?
Correlating your SPR-derived kinetics with data from orthogonal (alternative) methods is the gold standard for validation. A strong correlation between techniques confirms that your SPR data is reliable and not skewed by assay-specific artifacts.
For instance, a 2025 study demonstrated an excellent correlation between SPR and conventional methods like intact protein mass spectrometry and time-dependent enzymatic assays for characterizing covalent inhibitors. This cross-validation highlights SPR as an efficient and accurate method for determining key kinetic parameters [44].
FAQ 3: What does a "bulk shift" look like in an SPR sensorgram, and how can I correct for it?
A bulk shift, or solvent effect, creates a characteristic 'square' shape in your sensorgram due to a large, rapid response change at the very start and end of the injection. This is caused by a difference in the refractive index (RI) between your analyte solution and the running buffer [7].
- Mitigation: While reference subtraction can help, the most effective strategy is to match the components of your analyte buffer to your running buffer as closely as possible. Avoid or minimize buffer components that cause a high RI, such as glycerol or DMSO [7].
Troubleshooting Guide: Step-by-Step Protocols
Protocol 1: Systematic Approach to Diagnosing High Background Signal
Follow this workflow to identify and resolve the source of non-specific binding in your SPR experiments.
Protocol 2: Benchmarking SPR Kinetics with an Orthogonal Method (e.g., Enzymatic Assay)
This protocol provides a methodology for validating SPR-derived affinity ((KD)) and kinetics ((ka), (k_d)) using a functional enzymatic assay.
Principle: Compare the inhibitory potency ((IC{50})) and inactivation efficiency ((k{inact}/KI)) of compounds from an enzymatic assay with the binding affinity ((KD)) and kinetics from SPR. A strong positive correlation validates both methods.
Experimental Workflow:
SPR Analysis:
- Immobilize the target enzyme onto an appropriate SPR sensor chip.
- Perform kinetic characterization of your compounds using a minimum of 5 concentrations, ideally spanning 0.1 to 10 times the expected (K_D) [7].
- Analyze sensorgrams using a suitable model (e.g., 1:1 Langmuir binding) to extract (ka), (kd), and (KD) ((kd/k_a)).
Enzymatic Assay:
- Incubate the enzyme with a dilution series of each compound for a predetermined time.
- Initiate the enzymatic reaction by adding substrate and measure the initial reaction velocity.
- Plot the remaining enzyme activity versus inhibitor concentration to determine the (IC_{50}) value for each compound.
- For covalent inhibitors, perform a time-dependent pre-incubation experiment to determine the second-order inactivation efficiency rate constant, (k{inact}/KI) [44].
Data Correlation:
- Plot the (pIC{50}) (-log(IC{50})) values from the enzymatic assay against the (pKD) (-log(KD)) values from SPR.
- Alternatively, for covalent inhibitors, plot (k{inact}/KI) from the enzymatic assay against the same parameter obtained from SPR analysis.
- Perform linear regression analysis. A strong correlation (e.g., R² > 0.8) indicates excellent agreement between the label-free binding data and the functional activity data.
Data Presentation: Quantitative Comparisons
Table 1: Orthogonal Methods for Correlating and Validating SPR Data
This table summarizes alternative techniques that can be used to benchmark SPR data, along with their key applications and considerations.
| Method | Key Measured Parameters | Correlation with SPR Data | Key Considerations |
|---|---|---|---|
| Intact Protein Mass Spectrometry | Direct observation of covalent bond formation; inactivation efficiency ((k{inact}/KI)) [44]. | Excellent correlation for covalent inhibitor profiling [44]. | Requires high protein concentration; can be lower throughput without specialized systems. |
| Time-Dependent Enzymatic Assays | Inhibitory potency ((IC{50})); inactivation efficiency ((k{inact}/K_I)) [44]. | Strong correlation for both affinity and kinetic parameters [44]. | Requires a functional assay; may not be feasible for non-enzymatic targets. |
| Flow Cytometry | Cell surface binding affinity; specificity in a cellular context [45] [46]. | Complements SPR by verifying biological relevance of interactions. | Provides semi-quantitative affinity data; measures binding in a complex environment. |
Table 2: Research Reagent Solutions for SPR Troubleshooting
A list of essential materials and reagents to address common SPR issues, particularly high background signal.
| Reagent | Function in SPR | Example Application |
|---|---|---|
| Bovine Serum Albumin (BSA) | Protein blocking additive. Shields molecules from non-specific interactions with the sensor surface [7]. | Typically used at 1% concentration in running buffer or sample solutions during analyte runs. |
| Non-Ionic Surfactants (e.g., Tween 20) | Disrupts hydrophobic interactions between the analyte and sensor surface, reducing NSB [2] [7]. | Used at low concentrations (e.g., 0.005-0.05%) in running buffer. |
| Regeneration Buffers | Solutions that remove bound analyte from the immobilized ligand without damaging it, allowing chip re-use [2]. | Common types: Acidic (e.g., 10 mM Glycine, pH 2.0), Basic (e.g., 10 mM NaOH), High-Salt (e.g., 2 M NaCl) [2]. |
| Carboxymethyl Dextran Sensor Chip | A common sensor surface chemistry that provides a hydrogel matrix for ligand immobilization with high capacity [47]. | Standard choice for covalent coupling of proteins via amine groups. Can contribute to NSB for positively charged analytes [7]. |
| NTA Sensor Chip | For capturing histidine-tagged ligands. Allows for oriented immobilization and easy surface regeneration [7]. | Used with a regenerable biotin–SwitchAvidin–biotin bridging system for high-throughput studies of covalent binders [44]. |
Conclusion
Effectively managing high background signal is not a single fix but a holistic strategy that integrates thoughtful assay design, proactive surface engineering, and systematic troubleshooting. By understanding the foundational causes of non-specific binding, implementing advanced methodological controls like anti-fouling interfaces and optimized buffer systems, and rigorously validating results, researchers can significantly enhance the sensitivity and reliability of SPR biosensing. The future of clinical SPR lies in the continued development of robust, user-friendly platforms that integrate machine learning for optimization and novel nanomaterials for superior specificity, ultimately enabling the detection of ultra-low abundance biomarkers for early disease diagnosis and accelerated drug development.
References
- 1. Surface Plasmon Resonance (SPR) Troubleshooting Guide [https://knowledge.kactusbio.com/trouble-shooting-guide-for-surface-plasmon-resonance-spr]
- 2. - Surface Assay Advice Plasmon Resonance Troubleshooting SPR [https://bitesizebio.com/31665/spr-instrument-troubleshooting-surface-plasmon-resonance-assay-technology/]
- 3. Troubleshooting and Optimization Tips for SPR Experiments [https://www.creative-proteomics.com/resource/troubleshooting-optimization-tips-for-spr-experiments.htm]
- 4. Surface Plasmon Resonance Protocol & Troubleshooting [https://www.creativebiolabs.net/surface-plasmon-resonance.htm]
- 5. Binding Specificity Challenges in Biosensor- Based Platforms [https://www.linkedin.com/pulse/binding-specificity-challenges-biosensor--ndqse]
- 6. Promising Solutions to Address the Non-Specific ... [https://www.mdpi.com/2227-9040/13/3/92]
- 7. Top 10 tips for high quality SPR data | SPR Guide [https://nicoyalife.com/blog/spr-tips/top-10-tips-for-high-quality-spr-data/]
- 8. BLI and SPR Protocol FAQs: Your Essential Guide [https://www.alpha-lifetech.com/bli-and-spr-protocol-and-faqs/]
- 9. Whitepapers/Literature [https://www.xantec.com/news/index.html]
- 10. Problems with immobilisation [https://www.sprpages.nl/forum/general-discussion/116-problems-with-immobilisation]
- 11. Troubleshooting [https://www.sprpages.nl/troubleshooting]
- 12. Negative curves [https://www.sprpages.nl/troubleshooting/negative-curves]
- 13. Biggest Challenges Encountered When Doing SPR Experiments [https://www.drugdiscoverytrends.com/biggest-challenges-encountered-when-doing-spr-experiments/]
- 14. Master the Art of Regeneration in SPR Experiments [https://nicoyalife.com/blog/regeneration-buffer-spr-experiment/]
- 15. Overcoming Regeneration Problems [https://www.reichertspr.com/insights/blog-posts/overcoming-regeneration-problems]
- 16. Design and mechanisms of antifouling materials for surface ... [https://www.sciencedirect.com/science/article/abs/pii/S1742706116300782]
- 17. Strategies for Surface Design in Surface Plasmon ... [https://pmc.ncbi.nlm.nih.gov/articles/PMC10136606/]
- 18. 4 Ways to Reduce Non-Specific Binding in SPR Experiments [https://nicoyalife.com/blog/4-ways-reduce-non-specific-binding-spr/]
- 19. Non-Specific Adsorption Reduction Methods in Biosensing [https://pmc.ncbi.nlm.nih.gov/articles/PMC6603772/]
- 20. Monolayer surface chemistry enables 2-colour single ... [https://www.nature.com/articles/s41467-018-05837-7]
- 21. Surface patches induce nonspecific binding and phase ... [https://pmc.ncbi.nlm.nih.gov/articles/PMC10104583/]
- 22. Reducing Non-Specific Binding - Surface Plasmon Resonance [https://www.reichertspr.com/insights/blog-posts/reducing-non-specific-binding]
- 23. Surface Plasmon Resonance (SPR) Analysis of Binding ... [https://pmc.ncbi.nlm.nih.gov/articles/PMC2864718/]
- 24. Experimental Study on SPR Array Sensing Chip Integrated ... [https://pmc.ncbi.nlm.nih.gov/articles/PMC11054027/]
- 25. Regeneration [https://www.sprpages.nl/kinetics/regeneration]
- 26. Use of Surface Plasmon Resonance (SPR) to Determine ... [https://pmc.ncbi.nlm.nih.gov/articles/PMC8489108/]
- 27. Explained: Sensor Chips for Surface Plasmon Resonance ... [https://bitesizebio.com/34644/biosensor-chips-surface-plasmon-resonance/]
- 28. Troubleshooting SPR [https://www.genengnews.com/insights/troubleshooting-spr/]
- 29. Surface plasmon resonance technology: Recent advances ... [https://www.sciencedirect.com/science/article/pii/S0165993623001668]
- 30. Algorithm assisted comprehensive optimization of SPR ... [https://www.sciencedirect.com/science/article/abs/pii/S0956566325007225]
- 31. Algorithm assisted comprehensive optimization of SPR ... [https://pubmed.ncbi.nlm.nih.gov/40812130]
- 32. The Tunable Parameters of Graphene-Based Biosensors [https://pmc.ncbi.nlm.nih.gov/articles/PMC11314989/]
- 33. Multi-temperature experiments to ease analysis of ... [https://www.nature.com/articles/s41598-022-18450-y]
- 34. Lower Binding Affinity than Expected - How to Troubleshoot [https://www.sprpages.nl/forum/new-forum/654-lower-binding-affinity-than-expected-how-to-troubleshoot]
- 35. Improving SPR Data Quality: Controls, Design and ... [https://nicoyalife.com/blog/improving-spr-data-quality/]
- 36. Baseline drift [https://www.sprpages.nl/troubleshooting/baseline-drift]
- 37. Biosensor-surface plasmon resonance: A strategy to help ... [https://pmc.ncbi.nlm.nih.gov/articles/PMC6756987/]
- 38. Enhanced detection accuracy and signal-to-noise ratio of ... [https://www.sciencedirect.com/science/article/abs/pii/S0925346723004342]
- 39. Mathematical modeling of a MoSe₂-based SPR biosensor for ... [https://pmc.ncbi.nlm.nih.gov/articles/PMC11907102/]
- 40. Real-time monitoring of ssDNA binding using a fiber optic ... [https://www.sciencedirect.com/science/article/pii/S2590137025000408]
- 41. How to clean a quartz flow cell [https://www.malvernpanalytical.com/en/learn/knowledge-center/insights/how-to-clean-a-quartz-flow-cell]
- 42. Development of a surface plasmon resonance biosensor ... [https://pmc.ncbi.nlm.nih.gov/articles/PMC9805936/]
- 43. Real Time Measurements of Membrane Protein:Receptor ... [https://pmc.ncbi.nlm.nih.gov/articles/PMC4354417/]
- 44. Application and Cross-Validation of a High-Throughput ... [https://pmc.ncbi.nlm.nih.gov/articles/PMC12268728/]
- 45. Flow cytometry and surface plasmon resonance analyses ... [https://www.sciencedirect.com/science/article/pii/S0014579399009722]
- 46. Molecular interaction analysis: SPR and flow cytometry [https://www.immun.lth.se/infrastructure/molecular-interaction-analysis-spr-and-flow-cytometry/]
- 47. Surface Plasmon Resonance: A Versatile Technique for ... [https://pmc.ncbi.nlm.nih.gov/articles/PMC4481982/]